LG LGT320G.APRNTL Manuel utilisateur
- Catégorie
- Téléphones portables
- Taper
- Manuel utilisateur
Ce manuel convient également à

User Guide
E N G L I S H
FRANÇAIS
www.lg.com/ca
LG-T320g
P/N :
MFL67084001 (1.0)

Bluetooth QD ID B016856

LG-T320g User Guide
-
English
Some of the contents in this manual
may differ from your phone depending
on the software of the phone or your
service provider.

2
Installing the SIM card and the
handset battery ....................4
Installing the SIM Card .........4
Illustrations ..........................4
Phone Components ...............5
Using your touch screen .......6
Touch screen tips .................6
Control the touch screen ......6
Your home screen .................7
Your menu screen .................8
Calls ......................................9
Making a Call .......................9
Making a call from your
contacts ..............................9
Changing the common call
setting .................................9
Contacts ..............................10
Searching for a contact ......10
Adding a new contact .........10
Changing your contact
settings .............................11
Messaging ..........................11
Entering Text ......................12
Handwriting recognition ......12
Changing your text message
settings ............................12
Changing your multimedia
message settings ...............13
Social network services
(SNS).................................13
Facebook (Continued SNS)..14
Camera ...............................14
Taking a quick photo ..........14
After taking a photo ............14
Using the advanced settings 15
Video camera ......................16
Making a quick video .........16
After making a video ..........16
Using the advanced settings .17
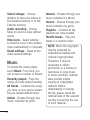
Music ..................................18
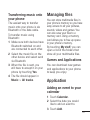
Transferring music onto your
phone ...............................19
Managing files ....................19
Games and Applications ....19
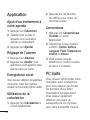
Application ..........................19
Adding an event to your
calendar ............................19
Setting your alarm ..............20
Contents

3
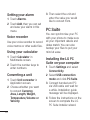
Voice recorder ...................20
Using your calculator ..........20
Converting a unit ................20
PC Suite ..............................20
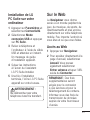
Installing the LG PC Suite on
your computer ..................20
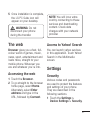
The web ..............................21
Accessing the web .............21
Access to Yahoo! Search ....21
Settings ..............................21
Security .............................21
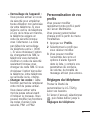
Personalising your profiles ..23
Changing your phone
settings .............................23
Using memory manager .....23
Changing your connectivity
settings .............................23
Sending and receiving your
files using Bluetooth ...........23
Pairing with another Bluetooth
device ...............................24
Software Upgrade ..............25
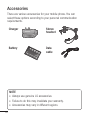
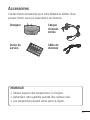
Accessories ........................26
Technical data.....................27
For Your Safety ...................28
Safety Guidelines ................35

4
1 2 3
4 5 6
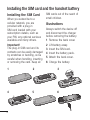
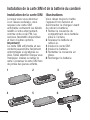
Installing the SIM card and the handset battery
Installing the SIM Card
When you subscribe to a
cellular network, you are
provided with a plug-in
SIM card loaded with your
subscription details, such as
your PIN, any optional services
available and many others.
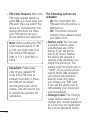
Important!
The plug-in SIM card and its
contacts can be easily damaged
by scratches or bending, so be
careful when handling, inserting
or removing the card. Keep all
SIM cards out of the reach of
small children.
Illustrations
Always switch the device off
and disconnect the charger
before removing the battery.
1 Remove the back cover.
2 Lift battery away.
3 Insert the SIM card.
4 Insert the battery pack.
5 Attach the back cover.
6 Charge the battery.

5
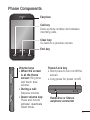
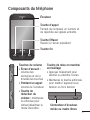
Earpiece
Call key
Dials a phone number and answers
incoming calls.
End key
Volume keys
• When the screen
is at the Home
screen: Ring tone
and touch tone
volume.
• During a call:
Earpiece volume.
• Down volume key:
Press and hold to
activate/ deactivate
Silent mode.
Clear key
Go back to a previous screen.
Handsfree or Stereo
earphone connector
Power/Lock key
• Short press to turn on/off the
screen.
• Long press for power on/off.
Phone Components

6
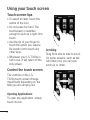
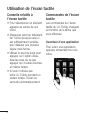
Using your touch screen
Touch screen tips
• To select an item, touch the
centre of the icon.
• Do not press too hard. The
touchscreen is sensitive
enough to pick up a light, firm
touch.
• Use the tip of your finger to
touch the option you require.
Be careful not to touch any
other keys.
• Whenever your LG-T320g is
not in use, it will return to the
lock screen.
Control the touch screen
The controls on the LG-
T320g touch screen change
dynamically depending on the
task you are carrying out.
Opening Applications
To open any application, simply
touch its icon.
Scrolling
Drag from side to side to scroll.
On some screens, such as the
call history list, you can also
scroll up or down.

7
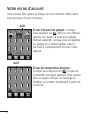
You can drag and click what you need right away in all home
screen types.
Your home screen
Widget home screen - When you touch
on the bottom left of the screen, the
mobile widget panel appears. When you
register widget by dragging it, the widget is
created in the spot.
Active
Speed dial home screen - When you
touch , the speed dial list appears.
You can call, send a message or edit the
contact directly in this home screen.
Active

8
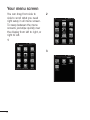
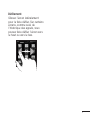
Your menu screen
You can drag from side to
side to scroll what you need
right away in all menu screen.
To swap between the menu
screens just wipe quickly over
the display from left to right, or
right to left.
1
2
3

9
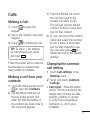
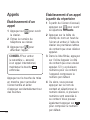
Calls
Making a Call
1 Touch to open the
keypad.
2 Key in the number using the
keypad.
3 Touch to initiate the call.
TIP! To enter + for making
an international call, press
and hold
0
+
.
Press the power key to lock the
touchscreen to prevent calls
being made by mistake.
Making a call from your
contacts
1 From the home screen touch
to open the Contacts.
2 Tap the Name field box on
the top of the screen and
enter the first few letters of
the contact you would like to
call using the keypad.
3 From the filtered list, touch
the Call icon next to the
contact you want to call.
The call will use the default
number if there is more than
one for that contact.
4 Or, you can touch the contact
name and select the number
to use if there is more than
one for that contact to use.
You can also press to
initiate the call to the default
number.
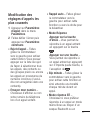
Changing the common
call setting
1 Touch Call settings in the
Settings menu.
2 Scroll and touch Common
settings.
• Call reject - Slide the switch
left for ON. You can touch the
Reject list to choose all calls,
specific contacts or groups
or calls from unregistered
numbers (i.e. not in your
contacts).

10
• Send my number - Choose
whether to display your
number on an outgoing call.
• Auto-redial - Slide the switch
left for ON or right for OFF.
• Answer mode
Press send key: Allows you
to only answer an incoming
call by pressing the key.
Press any key: Allows you to
answer an incoming call by
pressing any key, except the
key.
• Minute minder - Slide the
switch left to ON to hear a
tone every minute during
a call.
• BT answer mode - Select
Handsfree to be able to
answer a call using a
Bluetooth headset, or select
Handset to press a handset
key to answer a call.
• Save new number - Select
ON or OFF to save a new
number.
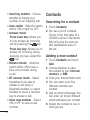
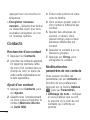
Contacts
Searching for a contact
1 Touch Contacts.
2 You see a list of contacts.
Typing in the first letter of a
contact’s name in the Name
field will jump the menu to
that alphabetical area of
the list.
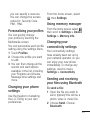
Adding a new contact
1 Touch Contacts and touch
Add.
2 Choose whether to save
the contact to your Internal
memory or SIM.
3 Enter your first and last name.
4 You can enter up to five
different numbers per
contact.
5 Add an email addresses. You
can enter up to two different
email addresses per contact.
6 Assign the contact to one or
more groups.

11
7 Touch Save to save the
contact.
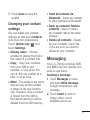
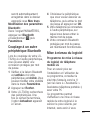
Changing your contact
settings
You can adapt your contact
settings so that your Contacts
suits your own preferences.
Touch Options key and
touch Settings.
• Display name - Choose
whether to display the first or
last name of a contact first.
• Copy - Copy your contacts
from your SIM to your
handset, or vice versa. You
can do this one contact at a
time, or all at once.
•
Move - This works in the same
way as Copy, but the contact
is stored at the new location
only. Therefore, once a contact
is moved from the SIM to
the Internal memory it will be
deleted from the SIM memory.
• Send all contacts via
Bluetooth - Sends all contacts
to other handset via Bluetooth.
• Back up contacts/ Restore
contacts - Save or restore
the contacts data to the other
storage.
• Delete all contacts - Delete
all your contacts. Touch Yes
if you are sure you want to
delete all your contacts.
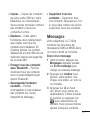
Messaging
Your LG-T320g combines SMS
and MMS into one intuitive and
easy-to-use menu.
Sending a message
1
Touch Messages in menu.
And touch Write message
to begin composing a new
message.
2 Touch Insert to add an
image, video, sound,
template and so on.

12
3 Touch To at the top of
the screen to enter the
recipients. Then enter the
number or touch to
select a contact. You can
even add multiple contacts.
4 Touch Send when ready.
WARNING: If an
image, video or sound is
added to an SMS it will be
automatically converted to
an MMS and you will be
charged accordingly.
Entering Text
You can choose your input
method by tapping and
Input method.
Touch to turn on T9 mode.
This icon is only shown when
you choose Keypad as the
input method. Touch toto
change between numbers,
symbols and text input.
U
se Shift key to change between
capital or lowercase input.
Handwriting recognition
In Handwriting mode you simply
write on the screen and your
LG-T320g will convert your
handwriting into your message.
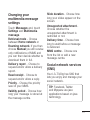
Changing your text
message settings
Touch Messages and
touch Settings. Select Text
message.
Delivery report - Slide
the switch left to receive
confirmation that your
messages have been delivered.
Character encoding - Choose
how your characters are
encoded. This impacts the size
of your messages and therefore
data charges.
Send long text as - Choose
to send long messages as
Multiple SMS or as an MMS.

13
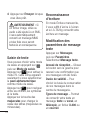
Changing your
multimedia message
settings
Touch Messages and, touch
Settings and Multimedia
message.
Retrieval mode - Choose
between Home network or
Roaming network. If you then
choose Manual you will receive
only notifications of MMS and
you can then decide whether to
download them in full.
Delivery report - Choose to
request and/or allow a delivery
report.
Read receipt - Choose to
request and/or allow a reply.
Priority - Choose the priority
level of your MMS.
Validity period - Choose how
long your message is stored at
the message centre.
Slide duration - Choose how
long your slides appear on the
screen.
Unsupported attachment -
Choose whether the
unsupported attachment is
restricted or not.
Delivery time - Choose how
long to wait before a message
is delivered.
MMS centre - Choose one
from the list or add a new
message centre.
Social network services
(SNS)
Your LG-T320g has SNS that
lets you enjoy and manage your
social network.
TIP: Facebook, Twitter
and Myspace are java
applications based on java
technology.

14
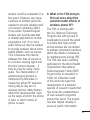
NOTE: SNS feature is a
data intensive application.
An additional costs may be
incurred when connecting
and using online services.
Check your data charges
with your network provider.
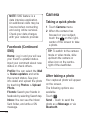
Facebook (Continued
SNS)
Home: Log in and you will see
your friend’s updated status.
Input your comment about new
status or check others.
Profile: You can select the Wall
> Status updates and write
the current status. See your
info detail and upload the photo
by touching Photos > Upload
Photo.
Friends: Search your friends in
facebook by selecting Search tap.
Inbox: You can see the Inbox/
Sent folder, and write a SN
message.
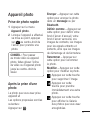
Camera
Taking a quick photo
1 Touch Camera menu.
2 When the camera has
focused on your subject,
touch the on the right-
center of the screen to take
a photo.
TIP: To switch to the camera
mode or video mode, slide
up/down the camera or
video icon on the centre-
right of the viewfinder.
After taking a photo
Your captured photo will appear
on the screen.
The following options are
available.
Touch .
Send - Touch to send the
photo as a Message or via
Bluetooth.

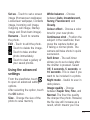
15
Set as - Touch to set a screen
image (Homescreen wallpaper,
Lockscreen wallpaper, Contacts
image, Incoming call image,
Outgoing call image, Startup
image and Shut down image).
Rename - Touch to rename
the photo.
Edit - Touch to edit the photo.
Touch to delete the image.
Touch to take another
photo immediately.
Touch to view a gallery of
your saved photos.
Using the advanced
settings
From the viewfinder, touch
to open all advanced settings
options.
After selecting the option, touch
the OK button.
Size - Change the size of the
photo to save memory
White balance - Choose
between Auto, Incandescent,
Sunny, Fluorescent, and
Cloudy.
Colour effect - Choose a color
tone for your new photo.
Continuous shot - Position the
subject in the viewfinder, then
press the capture button as
if taking a normal photo. The
camera will take shots in quick
succession.
Self-timer - The self-timer
allows you to set a delay after
the shutter is pressed. Select
Off, 3 seconds, 5 seconds, or
10 seconds. This is ideal if you
want to be included in a photo.
Night mode - Useful to user in
dark places.
Image quality - Choose
between Super fine, Fine, and
Normal. The finer the quality,
the sharper the photo. However,
the file size will increase as a
result, which means you’ll be

16
able to store fewer photos in
the memory.
Select storage - Choose
whether to save your photos to
the Handset memory or to the
External memory.
Hide icons - Choose the
camera setting icons to hide
manually or automatically.
Show captured image -
Choose On to check the picture
you took right away.
Shutter sound - Select one of
the three shutter sounds.
Grid screen - Choose
between Off, Simple cross, or
Trisection.
Reset settings - Restore all
camera default settings.
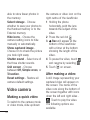
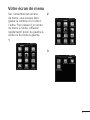
Video camera
Making a quick video
To switch to the camera mode
or video mode, slide up/down
the camera or video icon on the
right centre of the viewfinder.
1 Holding the phone
horizontally, point the lens
towards the subject of the
video.
2 Press the red dot .
3 Rec will appear at the
bottom of the viewfinder
with a timer at the bottom
showing the length of the
video.
4 To pause the video, touch
and resume by selecting .
5 Touch on screen.
After making a video
A still image representing your
captured video will appear on
the screen. The name of the
video runs along the bottom of
the screen together with icons
down the left and right sides .
Touch to play the video.
The following options are
available.

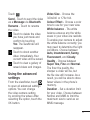
17
Touch .
Send - Touch to send the video
as a Message via Bluetooth.
Rename - Touch to rename
the video.
Touch to delete the video
you have just made and
confirm by touching
Yes. The viewfinder will
reappear.
Touch to shoot another
video immediately. Your
current video will be saved.
Touch to view a gallery of
saved videos and images.
Using the advanced
settings
From the viewfinder, touch
to open all advanced settings
options. You can change
the video camera setting
by scrolling the wheel. After
selecting the option, touch the
OK button.
Video Size - Choose the
320x240 or 176x144.
Colour Effect - Choose a color
tone to use for your new view.
White balance - The white
balance ensures any the white
areas in your video are realistic.
To enable your camera to adjust
the white balance correctly, you
may need to determine the light
conditions. Choose between
Auto, Incandescent, Sunny,
Fluorescent, and Cloudy.
Quality - Choose between
Super fine, Fine and Normal.
The finer the quality, the
sharper a video will be, but
the file size will increase. As a
result, you will be able to store
fewer videos in the phone’s
memory.
Duration - Set a duration limit
for your video. Choose between
Normal and MMS to limit the
maximum size to send as an
MMS message.

18
Select storage - Choose
whether to save your videos to
the Handset memory or to the
External memory.
Audio recording - Choose
Mute to record a video without
sound.
Hide icons - Select whether
to hide the icons in the camera
menu automatically or manually.
Reset settings - Reset all the
video camera settings.
Music
To access the music player,
touch Music. From here, you
can access a number of folders:
Recently played - Plays the
songs you have played recently.
All tracks - Contains the songs
you have on your phone except
the pre-loaded default music.
Artists - Browse through your
music collection by artist.
Albums - Browse through your
music collection by album.
Genres - Browse through your
music collection by genre.
Playlists - Contains all the
playlists you have created.
Shuffle tracks - Play your
tracks in a random order.
NOTE: Music file copyrights
may be protected by
international treaties and
national copyright laws.
Therefore, it may be
necessary to obtain
permission or a license to
reproduce or copy music.
In some countries, national
laws prohibit private
copying of copyrighted
material. Before
downloading or copying
the file, please check the
national laws of the relevant
country concerning the use
of such material.
La page charge ...
La page charge ...
La page charge ...
La page charge ...
La page charge ...
La page charge ...
La page charge ...
La page charge ...
La page charge ...
La page charge ...
La page charge ...
La page charge ...
La page charge ...
La page charge ...
La page charge ...
La page charge ...
La page charge ...
La page charge ...
La page charge ...
La page charge ...
La page charge ...
La page charge ...
La page charge ...
La page charge ...
La page charge ...
La page charge ...
La page charge ...
La page charge ...
La page charge ...
La page charge ...
La page charge ...
La page charge ...
La page charge ...
La page charge ...
La page charge ...
La page charge ...
La page charge ...
La page charge ...
La page charge ...
La page charge ...
La page charge ...
La page charge ...
La page charge ...
La page charge ...
La page charge ...
La page charge ...
La page charge ...
La page charge ...
La page charge ...
La page charge ...
La page charge ...
La page charge ...
La page charge ...
La page charge ...
La page charge ...
La page charge ...
La page charge ...
La page charge ...
La page charge ...
La page charge ...
La page charge ...
La page charge ...
La page charge ...
La page charge ...
La page charge ...
La page charge ...
La page charge ...
La page charge ...
La page charge ...
La page charge ...
La page charge ...
La page charge ...
La page charge ...
La page charge ...
La page charge ...
La page charge ...
La page charge ...
La page charge ...
La page charge ...
La page charge ...
La page charge ...
La page charge ...
La page charge ...
La page charge ...
La page charge ...
La page charge ...
La page charge ...
La page charge ...
La page charge ...
La page charge ...
La page charge ...
La page charge ...
La page charge ...
La page charge ...
La page charge ...
La page charge ...
La page charge ...
La page charge ...
La page charge ...
La page charge ...
La page charge ...
La page charge ...
La page charge ...
La page charge ...
La page charge ...
La page charge ...
La page charge ...
La page charge ...
La page charge ...
La page charge ...
-
 1
1
-
 2
2
-
 3
3
-
 4
4
-
 5
5
-
 6
6
-
 7
7
-
 8
8
-
 9
9
-
 10
10
-
 11
11
-
 12
12
-
 13
13
-
 14
14
-
 15
15
-
 16
16
-
 17
17
-
 18
18
-
 19
19
-
 20
20
-
 21
21
-
 22
22
-
 23
23
-
 24
24
-
 25
25
-
 26
26
-
 27
27
-
 28
28
-
 29
29
-
 30
30
-
 31
31
-
 32
32
-
 33
33
-
 34
34
-
 35
35
-
 36
36
-
 37
37
-
 38
38
-
 39
39
-
 40
40
-
 41
41
-
 42
42
-
 43
43
-
 44
44
-
 45
45
-
 46
46
-
 47
47
-
 48
48
-
 49
49
-
 50
50
-
 51
51
-
 52
52
-
 53
53
-
 54
54
-
 55
55
-
 56
56
-
 57
57
-
 58
58
-
 59
59
-
 60
60
-
 61
61
-
 62
62
-
 63
63
-
 64
64
-
 65
65
-
 66
66
-
 67
67
-
 68
68
-
 69
69
-
 70
70
-
 71
71
-
 72
72
-
 73
73
-
 74
74
-
 75
75
-
 76
76
-
 77
77
-
 78
78
-
 79
79
-
 80
80
-
 81
81
-
 82
82
-
 83
83
-
 84
84
-
 85
85
-
 86
86
-
 87
87
-
 88
88
-
 89
89
-
 90
90
-
 91
91
-
 92
92
-
 93
93
-
 94
94
-
 95
95
-
 96
96
-
 97
97
-
 98
98
-
 99
99
-
 100
100
-
 101
101
-
 102
102
-
 103
103
-
 104
104
-
 105
105
-
 106
106
-
 107
107
-
 108
108
-
 109
109
-
 110
110
-
 111
111
-
 112
112
-
 113
113
-
 114
114
-
 115
115
-
 116
116
-
 117
117
-
 118
118
-
 119
119
-
 120
120
-
 121
121
-
 122
122
-
 123
123
-
 124
124
-
 125
125
-
 126
126
-
 127
127
-
 128
128
-
 129
129
-
 130
130


LG LGT320G.APRNTL Manuel utilisateur
- Catégorie
- Téléphones portables
- Taper
- Manuel utilisateur
- Ce manuel convient également à
dans d''autres langues
- English: LG LGT320G.APRNTL User manual
Documents connexes
-
LG LGC195N.ACHRSV Le manuel du propriétaire
-
LG Série LGC440.ABLMBK Le manuel du propriétaire
-
LG LGT310I Manuel utilisateur
-
LG LGT500.APOLRP Manuel utilisateur
-
LG LGT300.ASWSWA Manuel utilisateur
-
-
-
LG LGP935 Le manuel du propriétaire
-
-
LG KP501.AORWBK Manuel utilisateur