La page est en cours de chargement...
La page est en cours de chargement...
La page est en cours de chargement...

A
B
D
C
C
C
C
D
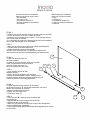
Before starting the installation,
make sure you have on hand:
• A drill
• A drill bit 1/8 "
• A screwdriver square # 8
• A tube of construction adhesive
• A hammer
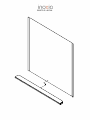
ÉTAPE 3:
• Installer temporairement la pièce ‘’
B
’’ à sa place
(le dessus de la pièce ‘’
B
’’ devrait être exactement à la même
hauteur que le dessus du comptoir).
• Marquer l’emplacement des trous
et percer avec une mèche 1/8’’
• Finalement, visser "
C
".
STEP 3:
• Place the shelf "
B
", ensuring its top is aligned with
the counter top.
• Mark and drill the center of holes with drill bit 1/8 ".
• Remove the film of the shelf "
B
".
• Make sure you place the screws in the center of the oblong holes,
but do not tighten them completely.
• Firmly push the shelf against the wall and finish thightening the screws
on the counter.
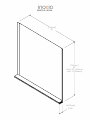
ÉTAPE 2:
• Enduire le dos de la pièce "
A
"
de silicone adhésif,
• Installer le plus haut possible, coller sous la hotte.
Coller le dosseret bien centré à sa place,
et le fixer à l'aide des clous "
D
"
afin qu'il ne glisse pas vers le bas.
STEP 2:
• Cover the back of part "
A
" with
adhesive silicone.
• Place it as high as possible under the hood.
Carefully fix the backsplash in place, making sure it is
properly centered, and hold it with the provided nails "
D
"
in order to prevent it from sliding downward.
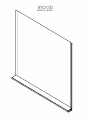
ÉTAPE 1:
• Assurez-vous de bien nettoyer l'endroit ou vous collerez le dosseret.
• Trouver et marquer sur le mur le centre de la hotte.
• Décoller le bas de la pellicule sur la pièce ‘’
A
’’ de quelques pouces
vers le haut avant de l'installer.
• Il est important de conserver la pellicule jusqu'à la fin de l'installation
pour ne pas endommager l'acier inoxydable.
STEP 1:
• Make sure to clean the place where you'll paste the backsplash.
• Find the center of the hood and mark it.
• Detach the bottom part of the film (part
A
)
and lift it a few inches upward. It is important to keep the film
until the end of the process to avoid damaging the stainless steel.
Avant de commencer l’installation,
assurez-vous d’avoir sous la main :
• Une perceuse
• Une mèche 1/8"
• Un tournevis carré No 8
• Un tube d’adhésif de construction
• Un marteau
BSATC-S / ALPHA
-
 1
1
-
 2
2
-
 3
3
-
 4
4


