IKEA IGS426AS3 Le manuel du propriétaire
- Catégorie
- Cuisinières
- Taper
- Le manuel du propriétaire

W11122566A
GAS RANGE
USER INSTRUCTIONS
RANGE SAFETY .......................................................................................... 2
The Anti-Tip Bracket ................................................................................. 3
FEATURE GUIDE ......................................................................................... 4
COOKTOP USE ........................................................................................... 5
Sealed Surface Burners ............................................................................ 5
Burner Size ............................................................................................... 6
Cookware .................................................................................................. 6
Home Canning .......................................................................................... 7
OVEN USE .................................................................................................... 7
Electronic Oven Controls .......................................................................... 7
Sabbath Mode .......................................................................................... 8
Aluminum Foil ........................................................................................... 8
Positioning Racks and Bakeware ............................................................. 9
Oven Vent.................................................................................................. 9
Baking and Roasting ................................................................................ 9
Broiling ...................................................................................................... 9
Cook Time ............................................................................................... 10
RANGE CARE ............................................................................................ 10
Self-Cleaning Cycle ................................................................................ 10
General Cleaning .................................................................................... 11
Oven Light ............................................................................................... 11
TROUBLESHOOTING ............................................................................... 12
ACCESSORIES .......................................................................................... 14
WARRANTY ............................................................................................... 15
THANK YOU for purchasing this high-quality product. If you should experience a problem not covered in TROUBLESHOOTING, call us at
1-866-664-2449.
You will need your model and serial number located on the oven frame behind the top left side of the oven door.
For warranty concerns, do not take the appliance back to the store. Please contact us in the U.S.A. or Canada at 1-866-664-2449.
This product features a Limited Warranty - See the “Warranty” section for complete details. IKEA
®
appliances carry a 5-year warranty
(excludes LAGAN family - see warranty for coverage details).
NOTE: Proof of Purchase is required to obtain warranty service.
Para obtener acceso a “Instrucciones para el usuario de la estufa eléctrica” en español, visite: www.whirlpool.com
Necesitará tener a mano el número de modelo y de serie, que está ubicado en el marco del horno detrás del lado superior izquierdo de la
puerta del horno.
Si tiene dudas acerca de la garantía, no devuelva el aparato a la tienda. Póngase en contacto con nosotros en los EE.UU. o en Canadá al
1-866-664-2449.
Este producto tiene una garantía limitada - Consulte la sección “Garantía” para obtener todos los detalles. Los aparatos IKEA
®
tienen una
garantía de 5 años (excluyendo los de la familia LAGAN - consulte la garantía para ver los detalles acerca de la cobertura).
NOTA: Se requiere la prueba de compra para obtener servicio bajo la garantía.
Table of Contents

2
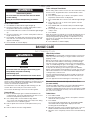
RANGE SAFETY
You can be killed or seriously injured if you don't immediately
You
can be killed or seriously injured if you don't
follow
All safety messages will tell you what the potential hazard is, tell you how to reduce the chance of injury, and tell you what can
happen if the instructions are not followed.
Your safety and the safety of others are very important.
We have provided many important safety messages in this manual and on your appliance. Always read and obey all safety
messages.
This is the safety alert symbol.
This symbol alerts you to potential hazards that can kill or hurt you and others.
All safety messages will follow the safety alert symbol and either the word “DANGER” or “WARNING.”
These words mean:
follow instructions.
instructions.
DANGER
WARNING
WARNING: Gas leaks cannot always be detected by smell.
Gas suppliers recommend that you use a gas detector approved by UL or CSA.
For more information, contact your gas supplier.
If a gas leak is detected, follow the “What to do if you smell gas” instructions.
WARNING: If the information in these instructions is not followed exactly, a fire or
explosion may result causing property damage, personal injury or death.
– Do not store or use gasoline or other flammable vapors and liquids in the vicinity of this
or any other appliance.
– WHAT TO DO IF YOU SMELL GAS:
•
Do not try to light any appliance.
•
Do not touch any electrical switch.
•
Do not use any phone in your building.
•
Immediately call your gas supplier from a neighbor's phone. Follow the gas supplier's
instructions.
•
If you cannot reach your gas supplier, call the fire department.
–
Installation and service must be performed by a qualified installer, service agency or
the gas supplier.
State of California Proposition 65 Warnings:
WARNING: This product contains one or more chemicals known to the State of California to cause cancer.
WARNING: This product contains one or more chemicals known to the State of California to cause birth defects or other
reproductive harm.

3
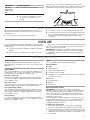
The Anti-Tip Bracket
The range will not tip during normal use. However, the range can tip if you apply too much force or weight to the open door without the
anti-tip bracket fastened down properly.
Tip Over Hazard
A child or adult can tip the range and be killed.
Verify the anti-tip bracket has been properly installed and engaged per installation instructions.
Re-engage anti-tip bracket if range is moved.
Do not operate range without anti-tip bracket installed and engaged.
Failure to follow these instructions can result in death or serious burns to children and adults.
To verify the anti-tip bracket is installed and engaged:
• Slide range forward.
• Look for the anti-tip bracket securely attached to floor or wall.
• Slide range back so rear range foot is under anti-tip bracket.
• See installation instructions for details.
WARNING
Anti-Tip
Bracket
Range Foot
SAVE THESE INSTRUCTIONS
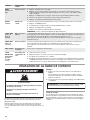
IMPORTANT SAFETY INSTRUCTIONS
WARNING: To reduce the risk of fire, electrical shock,
injury to persons, or damage when using the range, follow
basic precautions, including the following:
WARNING: TO REDUCE THE RISK OF TIPPING OF
THE RANGE, THE RANGE MUST BE SECURED BY
PROPERLY INSTALLED ANTI-TIP DEVICES. TO CHECK
IF THE DEVICES ARE INSTALLED PROPERLY, SLIDE
RANGE FORWARD, LOOK FOR ANTI-TIP BRACKET
SECURELY ATTACHED TO FLOOR OR WALL, AND
SLIDE RANGE BACK SO REAR RANGE FOOT IS UNDER
ANTI-TIP BRACKET.
WARNING: NEVER use this appliance as a space
heater to heat or warm the room. Doing so may result in
carbon monoxide poisoning and overheating of the oven.
WARNING: NEVER cover any slots, holes or passages
in the oven bottom or cover an entire rack with materials
such as aluminum foil. Doing so blocks air flow through the
oven and may cause carbon monoxide poisoning.
Aluminum foil linings may also trap heat, causing a fire
hazard.
CAUTION: Do not store items of interest to children in
cabinets above a range or on the backguard of a range –
children climbing on the range to reach items could be
seriously injured.
Proper Installation – The range, when installed, must be
electrically grounded in accordance with local codes or, in
the absence of local codes, with the
National Electrical
Code, ANSI/NFPA 70
. Be sure the range is properly
installed and grounded by a qualified technician.
This range is equipped with a three-prong grounding plug
for your protection against shock hazard and should be
plugged directly into a properly grounded receptacle. Do
not cut or remove the grounding prong from this plug.
Disconnect power before servicing.
Injuries may result from the misuse of appliance doors or
drawers such as stepping, leaning, or sitting on the doors
or drawers.
Maintenance – Keep range area clear and free from
combustible materials, gasoline, and other flammable
vapors and liquids.
Storage in or on the Range – Flammable materials should
not be stored in an oven or near surface units.
Top burner flame size should be adjusted so it does not
extend beyond the edge of the cooking utensil.
For self-cleaning ranges –
Before Self-Cleaning the Oven – Remove broiler pan and
other utensils. Wipe off all excessive spillage before
initiating the cleaning cycle.

4
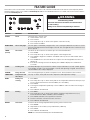
FEATURE GUIDE
This manual covers several models. Your model may have some or all of the items listed. Refer to this manual or the Frequently Asked
Questions (FAQs) section of our website at www.whirlpool.com for more detailed instructions. In Canada, refer to the Customer Service
section at www.whirlpool.ca.
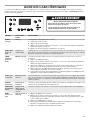
KEYPAD FEATURE INSTRUCTIONS
CLOCK Clock
The Clock uses a 12-hour cycle.
1. Check that the oven is off.
2. Press CLOCK.
3. Press Temp-Time “up” or “down” arrow pads to set the time of day.
4. Press CLOCK or START.
OVEN LIGHT Oven cavity light
The oven light is controlled by a keypad on the oven control panel. While the oven door is closed,
press the oven light switch to turn the light on and off. The oven light will come on when the oven
door is opened.
TIMER
(Set/off)
Oven timer
The Timer can be set in hours or minutes up to 12 hours and 59 minutes.
1. Press TIMER.
2. Press Temp-Time “up” or “down” arrow pads to set the length of time.
3. Press START to begin the countdown. If enabled, end-of-cycle tones will sound at end of
countdown.
4. Press TIMER twice to cancel the Timer. Do not press the Cancel keypad because the oven
will turn off.
5. If the Timer is running, but not in the display, press TIMER to display the countdown for
5 seconds.
START Cooking start
The Start pad begins any oven function. If Start is not pressed within 5 seconds, “PUSH” appears
in the display. If Start is not pressed within 1 minute after pressing a keypad, the function is
canceled and the time of day is displayed.
CANCEL Range function
The Cancel keypad stops any function except the Clock, Timer and Oven Control Lockout.
TEMP-TIME Temperature and
time adjust
The “up” or “down” arrow pads are used to adjust time and temperature settings.
BAKE Baking and
roasting
1. Press BAKE.
2. Press Temp-Time “up” or “down” arrow pads to set a temperature other than 350°F (175°C) in
5°F (5°C) increments between 170°F and 500°F (75°C and 260°C).
3. Press START.
4. To change the temperature repeat Step 2. Press START or wait 5 seconds for the change to
take effect.
5. Press CANCEL when finished.
BROIL Broiling
1. Press BROIL.
2. Press Temp-Time “up” or “down” arrow pads to change the temperature in 5°F (5°C)
increments between 300°F and 500°F (150°C and 260°C).
3. Press START, and allow oven to preheat for 5 minutes.
4. Position cookware in oven and close the oven door.
5. Press CANCEL when finished.
WARM Hold warm
Food must be at serving temperature before placing it in the warmed oven.
1. Press WARM.
2. Temperature is set at 170°F (75°C) for 60 minutes (1.00 hour).
3. Press START.
4. Press CANCEL when finished.
NOTE: The oven will automatically turn off after 60 minutes.
WARNING
Food Poisoning Hazard
Do not let food sit in oven more than one hour before
or after cooking.
Doing so can result in food poisoning or sickness.

5
KEYPAD FEATURE INSTRUCTIONS
START TIME Delayed start
The Start Time keypad is used to enter the starting time for an oven function with a delayed start.
Start Time should not be used for foods such as breads and cakes because they may not bake
properly.
To set a Timed Cook or a Delayed Timed Cook, see “Cook Time” section.
COOK TIME Timed cooking
Timed Cooking allows the oven to be set to turn on at a certain time of day, cook for a set length
of time, and/or shut off automatically.
To set a Timed Cook or a Delayed Timed Cook, see “Cook Time” section.
SELF CLEAN Self-Cleaning
cycle
See the “Self-Cleaning Cycle” section.
LOCK
HOLD 3 SEC
Oven control
lockout
1. Check that the oven is off.
2. Press and hold the LOCK keypad for 3 seconds.
3. A tone will sound, and “Loc” will be displayed.
4. Repeat to unlock. Only the CLOCK, OVEN LIGHT and TIMER keypads will function with the
controls locked. The cooktop functions are not affected by the oven control lockout.
COOKTOP USE
WARNING
Fire Hazard
Do not let the burner flame extend beyond the edge of
the pan.
Turn off all controls when not cooking.
Failure to follow these instructions can result in death
or fire.
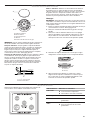
Electric igniters automatically light the surface burners when
control knobs are turned to IGNITE.
Before setting a control knob, place filled cookware on the grate.
Do not operate a burner using empty cookware or without
cookware on the grate.
To Set:
1. Push in and turn knob counterclockwise to IGNITE.
All surface burners will click. Only the burner with the control
knob turned to IGNITE will produce a flame.
2. Turn knob to anywhere between HIGH and LOW.
REMEMBER: When range is in use, the entire cooktop area
may become hot.
Power Failure
In case of prolonged power failure, the surface burners can
be lit manually. Hold a lit match near a burner and turn knob
counterclockwise to IGNITE. After burner lights, turn knob to
setting.
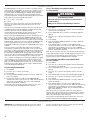
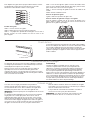
Sealed Surface Burners
A
B
D
E
C
A. Burner cap
B. Burner base
C. Alignment pins
D. Igniter
E. Gas tube opening
IMPORTANT: Do not obstruct the flow of combustion and
ventilation air around the burner grate edges.
Burner cap: Always keep the burner cap in place when using a
surface burner. A clean burner cap will help avoid poor ignition and
uneven flames. Always clean the burner cap after a spillover and
routinely remove and clean the caps according to the “General
Cleaning” section.
Gas tube opening: Gas must flow freely throughout the gas tube
opening for the burner to light properly. Keep this area free of soil
and do not allow spills, food, cleaning agents or any other material
to enter the gas tube opening. Keep spillovers out of the gas tube
by always using a burner cap.
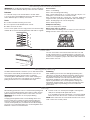
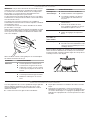
B
A
A. 1-1
1
⁄
2
” (25-38 mm)
B. Burner ports
Burner ports: Check burner flames occasionally for proper size
and shape as shown in the previous illustration. A good flame
is blue in color, not yellow. Keep this area free of soil and do not
allow spills, food, cleaning agents or any other material to enter
the burner ports.
To Clean:
IMPORTANT: Before cleaning, make sure all controls are off and
the oven and cooktop are cool. Do not use oven cleaners, bleach
or rust removers.

6
1. Remove the burner cap from the burner base and clean
according to “General Cleaning” section.
2. Clean the gas tube opening with a damp cloth.
3. Clean clogged burner ports with a straight pin as shown. Do
not enlarge or distort the port. Do not use a wooden toothpick.
If the burner needs to be adjusted, contact a trained repair
specialist.
4. Replace the burner cap, making sure the alignment pins are
properly aligned with the burner cap.
A
B
A. Incorrect
B. Correct
5. Turn on the burner. If the burner does not light, check cap
alignment. If the burner still does not light, do not service the
sealed burner yourself. Contact a trained repair specialist.
Burner Size
Select a burner that best fits your cookware. See the following
illustration and chart.
Burner Size Recommended Use
Small
■ Low-heat cooking
■ Melting chocolate or butter
Medium
■ Multipurpose burner
Large
■ For large cookware
Extra-Large
■ Most powerful burner
■ For large cookware
Cookware
IMPORTANT: Do not leave empty cookware on a hot surface
cooking area, element or surface burner.
Ideal cookware should have a flat bottom, straight sides and a
well fitting lid, and the material should be of medium-to-heavy
thickness.
Rough finishes may scratch the cooktop or grates. Aluminum and
copper may be used as a core or base in cookware.
Cookware material is a factor in how quickly and evenly heat is
transferred, which affects cooking results.
Cookware with nonstick surfaces should not be used under the
broiler.
Check for flatness by placing the straight edge of a ruler across
the bottom of the cookware. While you rotate the ruler, no space
or light should be visible between it and the cookware.
1
2
3
4
5
6
7
8
9
1 0
1 1
1 2
1 3
1 4
1 5
1 6
1 7
1 8
1 9
2 0
1
2
3
4
5
6
7
Use the following chart as a guide for cookware material
characteristics.
COOKWARE CHARACTERISTICS
Aluminum
■ Heats quickly and evenly.
■ Suitable for all types of cooking.
■ Medium or heavy thickness is best for
most cooking tasks.
Cast iron
■ Heats slowly and evenly.
■ Good for browning and frying.
■ Maintains heat for slow cooking.
Ceramic or
Ceramic glass
■ Follow manufacturer’s instructions.
■ Heats slowly, but unevenly.
■ Ideal results on low to medium heat
settings.
Copper
■ Heats very quickly and evenly.
■ May leave copper residues, which may
be diminished if cleaned immediately
after cooking
Earthenware/
Stoneware
■ Follow manufacturer’s instructions.
■ Use on low heat settings.

7
COOKWARE CHARACTERISTICS
Porcelain
enamel-on-
steel or cast
iron
■ See stainless steel or cast iron.
Stainless steel
■ Heats quickly, but unevenly.
■ A core or base of aluminum or copper
on stainless steel provides even
heating.
For best results, the cookware should be centered above the
burner with the bottom sitting level on the grate. The flame should
be adjusted so that it does not extend up the sides of the pan.
Home Canning
When canning for long periods, alternate the use of surface
burners between batches. This allows time for the most recently
used areas to cool.
■ Center the canner on the grate above the burner.
■ Do not place canner on 2 surface burners at the same time.
■ For more information, contact your local agricultural extension
office, or refer to published home canning guides. Companies
that manufacture home canning products can also offer
assistance.
OVEN USE
The normal operation of the range will include several noises that
may be heard each time the Bake or Broil burners ignite during the
cooking cycle:
■ Gas valves may make a “popping” sound when opening or
closing
■ Igniters will “click” several times until a flame is sensed
■ A “poof” sound is heard when a Bake or Broil burner ignites
Odors and smoke are normal when the oven is used the first few
times, or when it is heavily soiled.
IMPORTANT: The health of some birds is extremely sensitive to
the fumes given off. Exposure to the fumes may result in death
to certain birds. Always move birds to another closed and well-
ventilated room.
Electronic Oven Controls
Control Display
The display will flash when powered up or after a power loss.
Press CANCEL to clear. When oven is not in use, the time of day is
displayed.
Options Mode
Press and hold TIMER for 5 seconds, and “Opt” will appear. Use
the Temp-Time “up” or “down” arrow pads to cycle through the
following options. Press CANCEL to exit the mode.
Fahrenheit and Celsius
The temperature is preset at Fahrenheit, but can be changed to
Celsius. Press TIMER to toggle between Fahrenheit and Celsius.
Press CANCEL to exit.
End of Cycle Tones
“b1” (beep once) or “b” (continue to beep) will be displayed. Press
TIMER to toggle through selections. Press CANCEL to exit.
Oven Light with Door Open
“LOn” indicates that the oven light will turn on when the door is
open. If “LOFF” is displayed, the oven light will turn on only with
the oven light switch. Press TIMER to toggle through selection.
Press CANCEL to exit.
12-Hour Shutoff
If “12 Hr” is displayed, the oven will automatically shut off after
12 hours. Press TIMER to toggle to “- - Hr” to disable the 12-hour
shutoff. Press CANCEL to exit.
Tones
Tones are audible signals, indicating the following:
Basic Functions
One tone
■ Valid pad press
■ Oven is preheated (long tone)
■ Function has been entered
■ Reminder (on some models), repeating every 20 seconds after
the end-of-cycle tones
Three tones
■ Invalid pad press
Four tones
■ End of cycle
Oven Temperature Control
IMPORTANT: Do not use a thermometer to measure oven
temperature. Elements will cycle on and off as needed to provide
consistent temperature but may run slightly hot or cool at any
point in time due to this cycling. Most thermometers are slow
to react to temperature change and will not provide an accurate
reading due to this cycling.
The oven provides accurate temperatures; however, it may cook
faster or slower than your previous oven, so the temperature can
be adjusted to personalize it for your cooking needs. It can be
changed in Fahrenheit or Celsius.
To Adjust Oven Temperature:
1. Press and hold BAKE for 5 seconds until the oven display
shows the current setting, for example “0°F CAL” or “00.”
2. Press the Temp-Time “up” or “down” arrow pads to increase or
to decrease the temperature in 10°F (5°C or 6°C) amounts. The
adjustment can be set between 30°F (17°C) and -30°F (-17°C).
3. Press START.

8
The Sabbath Mode sets the oven to remain on in a Bake setting
until turned off. A Timed Bake can also be set to keep the oven on
for only part of the Sabbath. The Oven Control Lockout Feature
(if present) will be disabled during the Sabbath Mode. After the
Sabbath Mode is set no tones will sound, the display will not
show the temperature, the Kitchen Timer Mode will be canceled (if
active) and only the following pads will function:
■ “up” or “down” arrow pads
■ Cancel
When the oven door is opened or closed, the oven light will not
turn on or off and the heating elements will not turn on or off
immediately.
When power is restored after a power failure, the oven will return
to Sabbath Mode and remain Sabbath compliant with the bake
elements off until the Cancel keypad is pressed.
Pressing the Cancel keypad at any time returns the oven to the
normal cooking mode (not Sabbath Mode compliant).
Before entering the Sabbath Mode, it must be decided if the oven
light is to be on or off for the entire Sabbath Mode period. If the
light is on when entering Sabbath Mode, it will remain on for the
entire time Sabbath Mode is in use. If the light is off when entering
Sabbath Mode, it will remain off for the entire time Sabbath Mode
is in use. Opening the oven door or pressing the Oven Light
keypad will not affect the oven light once Sabbath Mode has been
entered.
If the oven has the Convection Bake feature, the oven light is
controlled by a separate Oven Light switch on the console. If the
oven light is on when entering the Sabbath Mode, it will remain on
for the entire time Sabbath Mode is in use. For the oven light to
be off during the Sabbath Mode, the light bulb must be removed
from the oven prior to entering the Sabbath Mode. Not performing
these steps will cause the oven light to turn on when the oven
door is opened, resulting in the oven being not Sabbath compliant.
On the Holiday, the oven temperature can be changed once the
oven is in Sabbath Mode by pressing the “up” or “down” arrow
pads. The oven temperature will change 25°F (14°C) each time the
keypad is pressed. The display will not change, and there will be
no sounds during this adjustment.
To Bake Using Sabbath Mode:
1. Press BAKE.
2. Press the “up” or “down” arrow pads.
3. Press START.
4. Press and hold the TIMER keypad for 5 seconds. “SAb” will
flash in the display.
5. Press START within 5 seconds to enter Sabbath Mode;
otherwise, the entire cycle cancels out. “SAb” will stop flashing
and remain on in the display. The oven is now in Sabbath
Mode and is Sabbath compliant.
Pressing the Cancel keypad at any time returns the oven to the
normal cooking mode (not Sabbath Mode compliant).
Sabbath Mode
WARNING
Food Poisoning Hazard
Do not let food sit in oven more than one hour before
or after cooking.
Doing so can result in food poisoning or sickness.
To set a Timed Bake using Sabbath Mode
(on some models):
1. Press BAKE.
2. Press the “up” or “down” arrow pads to enter a temperature
other than the one displayed.
3. Press COOK TIME. The Cook Time oven indicator light will
light up.
4. Press the “up” or “down” arrow pads to enter a cook time
length.
5. Press START.
6. Press and hold the TIMER keypad for 5 seconds. “SAb” will
flash in the display.
7. Press START within 5 seconds to enter Sabbath Mode;
otherwise, the entire cycle cancels out. “SAb” will stop flashing
and remain on in the display. The oven is now in Sabbath
Mode and is Sabbath compliant. The Bake, On and Cook Time
indicator lights will be displayed.
When the set cook time ends, the oven will shut off automatically
and the indicator lights will turn off, indicating the end of the cycle.
Pressing the Cancel keypad at any time returns the oven to the
normal cooking mode (not Sabbath Mode compliant).
To set a Delayed Timed Bake using Sabbath Mode
(on some models):
1. Press BAKE.
2. Press the “up” or “down” arrow pads to enter a temperature
other than the one displayed.
3. Press COOK TIME. The Cook Time oven indicator light will
light up.
4. Press the “up” or “down” arrow pads to enter a cook time
length.
5. Press START TIME. The Start Time indicator light will light up.
6. Press the “up” or “down” arrow pads to enter a start time.
7. Press START.
8. Press and hold the TIMER keypad for 5 seconds. “SAb” will
flash in the display.
9. Press START within 5 seconds to enter Sabbath Mode;
otherwise, the entire cycle cancels out. “SAb” will stop flashing
and remain on in the display. The oven is now in Sabbath
Mode and is Sabbath compliant. The On and Delay indicator
lights will be displayed.
When the start time is reached the Bake, On and Cook Time
indicator lights will automatically turn on. When the set cook time
ends, the oven will shut off automatically and the indicator lights
will turn off, indicating the end of the cycle.
Pressing the Cancel keypad at any time returns the oven to the
normal cooking mode (not Sabbath Mode compliant).
Aluminum Foil
IMPORTANT: To avoid permanent damage to the oven bottom
finish, do not line the oven bottom with any type of foil or liner.
For best cooking results, do not cover entire oven rack with foil
because air must be able to move freely.

9
Positioning Racks and Bakeware
6
1
2
3
4
5
Rack Positions
Rack 5: 2-rack baking.
Rack 4: Use for broiling and toasting.
Rack 3: Most baked goods on a cookie sheet, jelly roll pan, or in
muffin pans; casseroles; frozen convenience foods.
Rack 2: Roasting small cuts of meat, pies, casseroles, bundt and
angel food cakes, yeast bread, quick breads, and 2-rack baking.
Rack 1: Roasting large cuts of meat and poultry.
Rack 6: Extra-large items.
Multiple Rack Cooking
2-rack: Use rack positions 2 and 5.
Baking Layer Cakes on 2 Racks
For best results when baking cakes on 2 racks use racks 2 and 5 for
baking. Place the cakes on the racks as shown.
Oven Vent
A
A. Oven vent
The oven vent releases hot air and moisture from the oven, and
should not be blocked or covered. Blocking or covering the oven
vent will cause poor air circulation, affecting cooking and cleaning
results. Do not set plastics, paper or other items that could melt or
burn near the oven vent.
IMPORTANT: To avoid permanent damage to the porcelain finish,
do not place food or bakeware directly on the oven door or bottom.
Bakeware
To cook food evenly, hot air must be able to circulate. Allow
2” (5 cm) of space around bakeware and oven walls. Make sure
that no bakeware piece is directly over another.
Racks
■ Position racks before turning on the oven.
■ Do not position racks with bakeware on them.
■ Make sure racks are level.
To move a rack, pull it out to the stop position, raise the front edge,
and then lift out. Use the following illustration and charts as a guide.
The bake and broil elements or burners cycle on and off in intervals.
This feature is automatically activated when the oven is in use.
Before baking and roasting, position racks according to
“Positioning Racks and Bakeware” section. When roasting, it is
not necessary to wait for the oven preheat cycle to end before
putting food in unless it is recommended in the recipe.
Baking and Roasting
Preheating
When START is pressed, the oven will begin preheating. Once
100ºF (35ºC) is reached, the display temperature will increase as
the actual temperature of the oven increases. When the preheat
temperature is reached, a tone will sound, and the selected
temperature will appear on the display. Factors that have an
impact on preheat times are: room temperature, starting oven
temperature, and the number of oven racks. Unused oven racks
can be removed prior to preheating your oven to reduce the
preheat times.
Broiling
When broiling, preheat the oven for 5 minutes before putting food
in unless recommended otherwise in the recipe. Position food on
grid in a broiler pan, then place it in the center of the oven rack.
IMPORTANT: Close the door to ensure proper broiling
temperature.
Changing the temperature when Custom Broiling allows more
precise control when cooking. The lower the broil setting, the
slower the cooking. Thicker cuts and unevenly shaped pieces
of meat, fish and poultry may cook better at lower broil settings.
Use racks 4 or 5 for broiling. Refer to the “Positioning Racks and
Bakeware” section for more information.
■ For best results, use a broiler pan and grid. It is designed to
drain juices and help avoid spatter and smoke.
If you would like to purchase a broiler pan, one may be ordered.
Please refer to the “Accessories” section for more information.
NOTE: Odors and smoke are normal the first few times the oven is
used or if the oven is heavily soiled.

10
Cook Time
WARNING
Food Poisoning Hazard
Do not let food sit in oven more than one hour before
or after cooking.
Doing so can result in food poisoning or sickness.
To Set a Timed Cook:
1. Press BAKE. The bake indicator light will light up.
2. Press the Temp-Time “up” or “down” arrow pads to enter a
temperature other than the one displayed.
3. Press COOK TIME. The cook time oven indicator light will light
up.
4. Press the Temp-Time “up” or “down” arrow pads to enter the
length of time to cook.
5. Press START. The display will count down the time. When the
time ends, the oven will shut off automatically and “End” will
appear on the display.
6. Press CANCEL to clear the display.
To Set a Delayed Timed Cook:
Before setting, make sure the clock is set to the correct time of day.
See the “Clock” keypad feature in the “Feature Guide” section.
1. Press BAKE.
2. Press the Temp-Time “up” or “down” arrow pads to enter a
temperature other than the one displayed.
3. Press COOK TIME. The cook time oven indicator light will light
up.
4. Press Temp-Time “up” or “down” arrow pads to enter the
length of time to cook.
5. Press START TIME. The start time/delay oven indicator light
will light up.
6. Press Temp-Time “up” or “down” arrow pads to enter the time
of day to start.
7. Press START.
When the start time is reached, the oven will automatically turn on.
The temperature and/or time settings can be changed anytime
after pressing Start by repeating steps 1-7. When the set cook
time ends, the oven will shut off automatically and “End” will
appear on the display.
8. Press CANCEL to clear the display.
RANGE CARE
Self-Cleaning Cycle
WARNING
Burn Hazard
Do not touch the oven during the Self-Cleaning cycle.
Keep children away from oven during
Self-Cleaning cycle.
Failure to follow these instructions can result in burns.
IMPORTANT: The health of some birds is extremely sensitive to
the fumes given off during the Self-Cleaning cycle. Exposure to the
fumes may result in death to certain birds. Always move birds to
another closed and well-ventilated room.
Do not block the oven vent during the Self-Cleaning cycle. Air
must be able to move freely. See “Oven Vent” section.
Do not clean, rub, damage or move the oven door gasket.
Prepare Range
■ Remove the broiler pan, grid, cookware and bakeware, all
cooking utensils, oven racks and aluminum foil and, on some
models, the temperature probe from the oven.
■ Use a damp cloth to clean inside door edge and the
1½” (3.8 cm) area around the inside oven cavity frame, being
certain not to move or bend the gasket.
■ Remove plastic items from the cooktop because they may
melt.
■ Remove all items from the storage drawer.
How the Cycle Works
IMPORTANT: The heating and cooling of porcelain on steel in the
oven may result in discoloring, loss of gloss, hairline cracks and
popping sounds.
Before self-cleaning, make sure the door is completely closed or
the door will not lock and the self-cleaning cycle will not begin.
Once the oven has completely cooled, remove ash with a damp
cloth. To avoid breaking the glass, do not apply a cool damp cloth
to the inner door glass before it has completely cooled.
To stop the self-cleaning cycle at anytime, press the CANCEL
button on the keypad. If the temperature is too high, the oven door
will remain locked and “cool” and “locked” will be displayed. The
cooling fan may continue to run.
Once the cleaning temperature has been reached, the electronic
control requires a 12-hour delay before another self-clean cycle
can be started.
The oven light will not function during the self-cleaning cycle.
Electronic Oven Control with Adjustable Clean Time
(on some models)
The SELF CLEAN self-cleaning cycle is time adjustable between
2 hours 30 minutes and 4 hours 30 minutes in 15-minute
increments. Suggested clean times are 2 hours 30 minutes for light
soil, and 4 hours 30 minutes for heavy soil. The last 30 minutes of
the cycle is for cool down.
To Self-Clean:
1. Press SELF CLEAN.
2. Press the Temp-Time “up” or “down” arrow pads to enter the
desired self-clean cycle time.
3. Press START.
The oven door will automatically lock. The DOOR LOCKED
and CLEAN indicator lights will be displayed. The time
remaining will also be displayed.
4. When the self-clean cycle is complete and the oven cools, the
DOOR LOCKED and CLEAN indicator lights will turn off.
5. When the oven is completely cooled, remove ash with a damp
cloth.

11
General Cleaning
IMPORTANT: Before cleaning, make sure all controls are off and
the oven and cooktop are cool. Always follow label instructions
on cleaning products. For additional information, you can visit
the Frequently Asked Questions (FAQs) section of our website at
www.whirlpool.com. In Canada, reference the Customer Service
section at www.whirlpool.ca.
Soap, water and a soft cloth or sponge are suggested first unless
otherwise noted.
EXTERIOR PORCELAIN ENAMEL SURFACES (on some
models)
Food spills containing acids, such as vinegar and tomato, should
be cleaned as soon as the entire range is cool. These spills may
affect the finish.
Cleaning Method:
■ Glass cleaner, mild liquid cleaner or nonabrasive scrubbing
pad:
Gently clean around the model and serial number plate
because scrubbing may remove numbers.
■ Affresh
®†
Kitchen and Appliance Cleaner Part Number
W10355010 (not included):
See the “Accessories” section for more information.
STAINLESS STEEL (on some models)
NOTE: To avoid damage to stainless steel surfaces, do not use
soap-filled scouring pads, abrasive cleaners, Cooktop Cleaner,
steel-wool pads, gritty washcloths or abrasive paper towels.
Damage may occur to stainless steel surfaces, even with one-time
or limited use.
Cleaning Method:
Rub in direction of grain to avoid damaging.
■ Affresh
®†
Stainless Steel Cleaner Part Number W10355016 (not
included):
See the “Accessories” section for more information.
All-purpose cleaner:
Rinse with clean water and dry with soft, lint-free cloth.
METALLIC PAINT (on some models)
Do not use abrasive cleaners, cleaners with bleach, rust removers,
ammonia or sodium hydroxide (lye) because paint surface may
stain.
PORCELAIN-COATED GRATES AND CAPS
Food spills containing acids, such as vinegar and tomato, should
be cleaned as soon as the cooktop, grates and caps are cool.
These spills may affect the finish.
To avoid chipping, do not bang grates and caps against each other
or hard surfaces such as cast iron cookware.
Do not reassemble caps on burners while wet.
Cleaning Method:
■ Nonabrasive plastic scrubbing pad and mildly abrasive
cleanser:
Clean as soon as cooktop, grates and caps are cool.
■ Dishwasher (grates only, not caps):
Use the most aggressive cycle. Cooked-on soils should be
soaked or scrubbed before going into a dishwasher.
■ Gas Grate and Drip Pan Cleaner Part Number 31617A:
See the “Accessories” section for more information.
SURFACE BURNERS
■ See “Sealed Surface Burners” section.
COOKTOP CONTROLS
To avoid damage to the cooktop controls, do not use steel wool,
abrasive cleansers or oven cleaner.
To avoid damage, do not soak knobs. When replacing knobs,
make sure knobs are in the OFF position.
On some models, do not remove seals under knobs.
Cleaning Method:
■ Soap and water:
Pull knobs straight away from control panel to remove.
CONTROL PANEL AND OVEN DOOR EXTERIOR
To avoid damage to the control panel, do not use abrasive
cleaners, steel-wool pads, gritty washcloths or abrasive paper
towels.
Cleaning Method:
■ Glass cleaner and soft cloth or sponge:
Apply glass cleaner to soft cloth or sponge, not directly on
panel.
■ Affresh
®†
Kitchen and Appliance Cleaner Part Number
W10355010 (not included):
See the “Accessories” section for more information.
OVEN RACKS
Cleaning Method:
■ Steel-wool pad
■ For racks that have discolored and are harder to slide, a light
coating of vegetable oil applied to the rack guides will help
them slide.
STORAGE DRAWER
Check that storage drawer is cool and empty before cleaning.
Cleaning Method:
■ Mild detergent
OVEN CAVITY
Do not use oven cleaners.
Food spills should be cleaned when oven cools. At high
temperatures, foods react with porcelain and staining, etching,
pitting or faint white spots can result.
Cleaning Method:
■ Clean cycle: See “Self-Cleaning Cycle” section
Oven Light
The oven light is a standard 40-watt appliance bulb. Before
replacing, make sure the oven and cooktop are cool and the
control knobs are in the off position.
To Replace:
1. Unplug range or disconnect power.
2. Turn the glass bulb cover in the back of the oven
counterclockwise to remove.
3. Turn bulb counterclockwise to remove from socket.
4. Replace bulb, then bulb cover by turning clockwise.
5. Plug in range or reconnect power.
†affresh
®
is a registered trademark of Whirlpool, U.S.A. Used with permission.

12
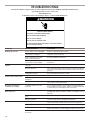
TROUBLESHOOTING
First try the solutions suggested here or visit our website and reference FAQs (Frequently Asked Questions)
to possibly avoid the cost of a service call.
www.whirlpool.com
In Canada, reference the Customer Service section at www.whirlpool.ca
Electrical Shock Hazard
Plug into a grounded 3 prong outlet.
Do not remove ground prong.
Do not use an adapter.
Do not use an extension cord.
Failure to follow these instructions can result in death,
fire, or electrical shock.
WARNING
PROBLEM POSSIBLE CAUSES SOLUTIONS
Nothing will operate
Power supply cord is unplugged. Plug into a grounded 3 prong outlet.
Household fuse is blown or a
circuit breaker is tripped.
Replace the fuse or reset the circuit breaker. If the problem
continues, call an electrician.
Main or regulator gas shutoff
valve is in the off position.
See the Installation Instructions.
The range is improperly
connected to the gas supply.
Contact a trained repair specialist or see Installation
Instructions.
Surface burners will not
operate
The control knob is not set
correctly.
Push in knob before turning to a setting.
Air in the gas lines If this is the first time the surface burners have been used, turn
on any one of the surface burner knobs to release air from the
gas lines.
Clogged burner ports See “Sealed Surface Burners” section.
Surface burner flames are
uneven, yellow and/or noisy
Clogged burner ports See “Sealed Surface Burners” section.
Burner caps positioned
improperly
See “Sealed Surface Burners” section.
Range converted improperly If propane gas is being used, contact a service technician or
see cover for contact information.
Excessive heat around
cookware on cooktop
Cookware and flame are not
matched.
The cookware should be centered above the burner with the
bottom sitting level on the grate. The flame should be adjusted
so that it does not extend up the sides of the pan.
Cooktop cooking results not
what expected
Improper cookware Ideal cookware should have a flat bottom, straight sides and a
well fitting lid, and the material should be of a medium to heavy
thickness.
Control knob set to incorrect heat
level
See “Cooktop Use” section.
Range is not level Level the range. See the Installation Instructions.
Oven will not operate
Air in the gas lines If this is the first time the oven has been used, turn on any one
of the surface burner knobs to release air from the gas lines.
Control is locked. Press and hold START for 3 seconds to unlock.
Control is in Demo Mode. Press and hold START TIME for 10 seconds to exit Demo
Mode. Demo Mode is used for display models in a showroom.
Electronic oven control set
incorrectly
See “Electronic Oven Controls” section.

13
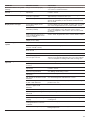
PROBLEM POSSIBLE CAUSES SOLUTIONS
Oven burner flames are yellow
or noisy
Range converted improperly If propane gas is being used, contact a service technician or
see cover for contact information.
Oven temperature too high or
too low
Oven temperature needs
adjustment.
See “Oven Temperature Control” in the “Electronic Oven
Controls” section.
Convection fan not working
The convection cycle is in the first
5 minutes of operation.
This is normal. The convection fan will start running
approximately 5 minutes into the cycle.
Oven door is open. If the oven door is opened during convention cooking, the fan
will turn off immediately. It will come back on when the oven
door is closed.
Display shows messages
Power failure (display shows
flashing time)
Clear the display. On some models, reset the clock, if needed.
See “Clock” keypad feature in the “Feature Guide” section.
Error code (display shows letter
followed by number)
Depending on your model, press CANCEL to clear the display.
See “Control Display” in the “Electronic Oven Controls”
section. If it reappears, call for service. See cover for contact
information.
Start needs to be pressed so a
cycle can begin (display shows
“PUSH” or “PSH”).
See the “Start” keypad feature in the “Feature Guide” section.
Range is in Sabbath Mode
(display shows “SAb”).
Press CANCEL to exit Sabbath Mode.
Self-Cleaning Cycle will not
operate
The oven door is not closed. Make sure the oven door is fully closed.
The Self-Cleaning function has
not been entered correctly.
See the “Self-Cleaning Cycle” section.
A Timed Cooking function has
been entered.
See the “Cook Time” section.
The range is in Sabbath Mode. See the “Sabbath Mode” section.
A Self-Cleaning cycle has been
run in the past 12 hours.
If a Self-Cleaning cycle has been run, or has been canceled
after the oven reached temperature, the oven control requires
a 12-hour delay before starting another Self-Cleaning cycle.
Oven cooking results not what
expected
Range is not level. Level the range. See the Installation Instructions.
The temperature set was
incorrect.
Double-check the recipe in a reliable cookbook.
Oven temperature needs
adjustment.
See “Oven Temperature Control” in the “Electronic Oven
Controls” section.
Oven was not preheated. See “Baking and Roasting” section.
Racks were positioned
improperly.
See “Positioning Racks and Bakeware” section.
Not enough air circulation around
bakeware
See “Positioning Racks and Bakeware” section.
Darker browning of food caused
by dull or dark bakeware
Lower oven temperature 25°F (15°C) or move rack to a higher
position in the oven.
Lighter browning of food caused
by shiny or light colored
bakeware
Move rack to a lower position in the oven.
Batter distributed unevenly in pan Check that batter is level in the pan.
Incorrect length of cooking time
was used.
Adjust cooking time.
Oven door was not closed. Be sure that the bakeware does not keep the door from closing.
Oven door was opened during
cooking.
Oven peeking releases oven heat and can result in longer
cooking times.
Rack is too close to bake burner,
making baked items too brown
on bottom.
Move rack to higher position in the oven.
Pie crusts browning too quickly Use aluminum foil to cover the edge of the crust and/or reduce
baking temperature.

14
Noises
ACCESSORIES
For accessories, call us at: 1-866-664-2449.
Affresh
®
Stainless Steel Cleaner
(stainless steel models)
Order Part Number W10355016
Affresh
®
Stainless Steel Cleaning Wipes
(stainless steel models)
Order Part Number W10355049
Affresh
®
Kitchen and Appliance Cleaner
Order Part Number W10355010
Gourmet Griddle
Order Part Number 4396096RB
Porcelain Broiler Pan and Grid
Order Part Number 4396923
Premium Broiler Pan and Roasting
Rack
Order Part Number W10123240
PROBLEM POSSIBLE CAUSES SOLUTIONS
Surface burner making
popping noises
Wet burner Allow it to dry.
Gas range noises during Bake
and Broil operations
The following are some normal
sounds with the explanations.
These sounds are normal
operational noises that can be
heard each time the Bake or Broil
burners ignite during the cycle.
Pop Gas valve is opening or cycling
on and will make a single pop
when it snaps open from the
solenoid. It sounds similar to a
suction cup being pulled off of a
piece of glass.
This is normal.
Click The igniters will click several
times until the flame is detected.
These are short clicking sounds
like tapping a nail onto a piece of
glass.
This is normal.
Convection fan relay is cycling on
and off (on some models).
This is normal.
Woosh or poof Bake or Broil burner is igniting. This is normal.
Oven burner flames are yellow
or noisy
Range converted improperly If propane gas is being used, contact a service technician or
see cover for contact information.
Affresh
®
Cooktop Cleaner
Order Part Number W10355051
Granite Cleaner and Polish
Order Part Number W10275756
Gas Grate and Drip Pan Cleaner
Order Part Number 31617A
Standard Flat Oven Rack
Order Part Number W10268578

15
IKEA MAJOR APPLIANCE WARRANTY
How long is the IKEA limited warranty valid?
This limited warranty is valid for five years from the date of purchase, when this major appliance is operated and maintained according
to instructions attached to or furnished with the product, unless the appliance is named LAGAN in which case this limited warranty is
valid for one year from the date of purchase. This limited warranty is valid only in the United States or Canada and applies only when the
major appliance is used in the country in which it was purchased. Proof of original purchase date is required to obtain service under this
limited warranty.
Which appliances are not covered by the IKEA five (5) year limited warranty?
For major appliances named “LAGAN,” this limited warranty is valid for one year from the date of purchase.
Who will execute the service?
This limited warranty is provided by Whirlpool Corporation or Whirlpool Canada LP (hereafter “Whirlpool”). Service must be provided by a
Whirlpool designated service company.
What does this limited warranty cover?
The limited warranty will pay for factory specified parts and repair labor to correct defects in materials or workmanship that existed when
the major appliance was purchased. The exceptions are specified under the headline “What is not covered under this limited warranty?”.
What will be done to correct the problem?
The designated service company will examine the product and decide, at its sole discretion, if it is covered under this limited warranty.
If considered covered, the designated service company will then repair the defect. Your sole and exclusive remedy under this limited
warranty shall be product repair as provided herein.
What is not covered under this limited warranty?
■ Service calls to correct the installation of your major appliance, to instruct you on how to use your major appliance, to replace or repair
house fuses, or to correct house wiring or plumbing.
■ Service calls to repair or replace appliance light bulbs, air filters or water filters. Consumable parts are excluded from warranty
coverage.
■ Replacement parts or repair labor if this major appliance is used for other than normal, single-family household use or when it is used
in a manner that is inconsistent to published user or operator instructions and/or installation instructions.
■ Damage resulting from accident, alteration, misuse, abuse, fire, flood, acts of God, improper installation, installation not in accordance
with electrical or plumbing codes, or use of consumables or cleaning products not approved for use.
■ Cosmetic damage, including scratches, dents, chips or other damage to the finish of your major appliance, unless such damage
results from defects in materials or workmanship and is reported within 30 days from the date of purchase.
■ Any food loss or medicine loss due to refrigerator or freezer product failures.
■ Pick up and delivery. This major appliance is intended to be repaired in your home.
■ Repairs to parts or systems resulting from unauthorized modifications made to the appliance.
■ Expenses for travel and transportation for product service if your major appliance is located in a remote area where service by an
authorized servicer is not available.
■ The removal and reinstallation of your major appliance if it is installed in an inaccessible location or is not installed in accordance with
published installation instructions.
■ Replacement parts or repair labor on major appliances with original model/serial numbers that have been removed, altered or cannot
be easily determined.
The cost of repair or replacement under these excluded circumstances shall be borne by the customer.
Disclaimer of Implied Warranties
IMPLIED WARRANTIES, INCLUDING ANY IMPLIED WARRANTY OF MERCHANTABILITY OR IMPLIED WARRANTY OF FITNESS FOR A
PARTICULAR PURPOSE, ARE LIMITED TO FIVE YEARS (ONE YEAR FOR MAJOR APPLIANCES NAMED “LAGAN”) OR THE SHORTEST
PERIOD ALLOWED BY LAW. Some states and provinces do not allow limitations on the duration of implied warranties of merchantability
or fitness, so this limitation may not apply to you. This warranty gives you specific legal rights, and you also may have other rights that
vary from state to state or province to province.
Limitation of Remedies; Exclusion of Incidental and Consequential Damages
YOUR SOLE AND EXCLUSIVE REMEDY UNDER THIS LIMITED WARRANTY SHALL BE PRODUCT REPAIR AS PROVIDED HEREIN.
WHIRLPOOL SHALL NOT BE LIABLE FOR INCIDENTAL OR CONSEQUENTIAL DAMAGES. Some states and provinces do not allow the
exclusion or limitation of incidental or consequential damages, so these limitations and exclusions may not apply to you. This warranty
gives you specific legal rights, and you also may have other rights that vary from state to state or province to province.
How to reach us if you need our service
If outside the 50 United States and Canada, contact your authorized IKEA retailer to determine if another warranty applies.
10/09

For additional product information, in the U.S.A., visit www.whirlpool.com. In Canada, visit www.whirlpool.ca
If you do not have access to the Internet and you need assistance using your product or you would like to schedule service, you may
contact IKEA at the number below.
Have your complete model number ready. You can find your model number and serial number on the label, located on the oven frame
behind the top left side of the oven door.
For assistance or service in the U.S.A. or Canada, call 1-866-664-2449.
If you need further assistance, you can write to IKEA with any questions or concerns at the address below:
In the U.S.A.:
IKEA Brand Home Appliances
Customer eXperience Center
553 Benson Road
Benton Harbor, MI 49022-2692
In Canada:
Customer eXperience Centre
Whirlpool Canada LP
200-6750 Century Ave.
Mississauga, ON L5N 0B7
Please include a daytime phone number in your correspondence.
Please keep this User Instructions and model number information for future reference.

INSTRUCTIONS D’UTILISATION
DE LA CUISINIÈRE À GAS
SÉCURITÉ DE LA CUISINIÈRE ................................................................ 18
La bride antibasculement ....................................................................... 19
GUIDE DES CARACTÉRISTIQUES .......................................................... 21
UTILISATION DE LA TABLE DE CUISSON ............................................. 22
Brûleurs de surface scellés .................................................................... 23
Taille du brûleur ....................................................................................... 23
Ustensiles de cuisson ............................................................................. 24
Mise en conserve à la maison ................................................................ 24
UTILISATION DU FOUR ............................................................................ 25
Commandes électroniques du four ........................................................ 25
Mode Sabbat .......................................................................................... 25
Papier d’aluminium ................................................................................. 26
Positionnement des grilles et des ustensiles de cuisson ...................... 26
Évent du four........................................................................................... 27
Cuisson au four et rôtissage ................................................................... 27
Cuisson au gril ........................................................................................ 27
Durée de cuisson .................................................................................... 28
ENTRETIEN DE LA CUISINIÈRE .............................................................. 28
Programme d’autonettoyage.................................................................. 28
Nettoyage général .................................................................................. 29
Lampe du four ........................................................................................ 30
DÉPANNAGE .............................................................................................. 30
ACCESSOIRES .......................................................................................... 33
GARANTIE .................................................................................................. 34
MERCI d’avoir acheté ce produit de grande qualité. Si vous rencontrez un problème non abordé à la section DÉPANNAGE, veuillez
composez le 1 866 664-2449.
Vous aurez besoin des numéros de modèle et de série situés sur le châssis du four, derrière la partie supérieure gauche de la porte
du four.
Pour toute question concernant l’application de la garantie, ne pas rapporter l’appareil au magasin. Veuillez nous contacter aux É.-U.
ou au Canada au 1 866 664-2449.
Ce produit est couvert par une garantie limitée - Voir la section “Garantie” pour des détails complets. Les appareils IKEA
®
sont
couverts par une garantie de 5 ans (hormis les appareils de la série LAGAN - voir la garantie pour des détails concernant les
modalités de garantie).
REMARQUE : Une preuve d’achat est obligatoire pour obtenir l’application de la garantie.
Table des matières

18
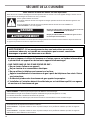
SÉCURITÉ DE LA CUISINIÈRE
Risque possible de décès ou de blessure grave si vous ne
suivez pas immédiatement les instructions.
Risque possible de décès ou de blessure grave si vous
ne suivez pas les instructions.
Tous les messages de sécurité vous diront quel est le danger potentiel et vous disent comment réduire le risque de blessure et
ce qui peut se produire en cas de non-respect des instructions.
Votre sécurité et celle des autres est très importante.
Nous donnons de nombreux messages de sécurité importants dans ce manuel et sur votre appareil ménager. Assurez-vous de
toujours lire tous les messages de sécurité et de vous y conformer.
AVERTISSEMENT
DANGER
Voici le symbole d’alerte de sécurité.
Ce symbole d’alerte de sécurité vous signale les dangers potentiels de décès et de blessures graves à vous
et à d’autres.
Tous les messages de sécurité suivront le symbole d’alerte de sécurité et le mot “DANGER” ou
“AVERTISSEMENT”. Ces mots signifient :
AVERTISSEMENT : Si les renseignements dans ce manuel ne sont pas exactement
observés, un incendie ou une explosion peut survenir, causant des dommages au
produit, des blessures ou un décès.
– Ne pas entreposer ni utiliser de l’essence ou d’autres vapeurs ou liquides inflammables
à proximité de cet appareil ou de tout autre appareil électroménager.
– QUE FAIRE DANS LE CAS D’UNE ODEUR DE GAZ :
•
Ne pas tenter d’allumer un appareil.
•
Ne pas toucher à un commutateur électrique.
•
Ne pas utiliser le téléphone se trouvant sur les lieux.
•
Appeler immédiatement le fournisseur de gaz à partir du téléphone d'un voisin. Suivre
ses instructions.
•
À défaut de joindre votre fournisseur de gaz, appeler les pompiers.
– L’installation et l’entretien doivent être effectués par un installateur qualifié, une agence
de service ou le fournisseur de gaz.
AVERTISSEMENT : L’odorat ne permet pas toujours la détection d’une fuite de gaz.
Les distributeurs de gaz recommandent l’emploi d’un détecteur de gaz (homologation UL ou CSA).
Pour d’autre information, contacter le fournisseur de gaz local.
En cas de détection d’une fuite de gaz, exécuter les instructions “Que faire dans le cas d’une odeur de gaz”.
Avertissements de la proposition 65 de l'État de Californie :
AVERTISSEMENT : Ce produit contient au moins un produit chimique connu par l’État de Californie pour être à l’origine de
cancers.
AVERTISSEMENT : Ce produit contient au moins un produit chimique connu par l’État de Californie pour être à l’origine de
malformations et autres déficiences de naissance.
AVERTISSEMENT : Si les renseignements dans ces instructions ne sont pas
exactement observés, un incendie ou une explosion peut survenir, causant des
dommages au produit, des blessures ou un décès.
– Ne pas entreposer ni utiliser de l’essence ou d’autres vapeurs ou liquides inflammables
à proximité de cet appareil ou de tout autre appareil électroménager.
– QUE FAIRE DANS LE CAS D’UNE ODEUR DE GAZ :
•
Ne pas tenter d’allumer un appareil.
•
Ne pas toucher à un commutateur électrique.
•
Ne pas utiliser le téléphone se trouvant sur les lieux.
•
Appeler immédiatement le fournisseur de gaz à partir du téléphone d'un voisin. Suivre
ses instructions.
•
À défaut de joindre votre fournisseur de gaz, appeler les pompiers.
– L’installation et l’entretien doivent être effectués par un installateur qualifié, une agence
de service ou le fournisseur de gaz.

19
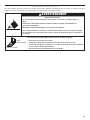
La bride antibasculement
Dans des conditions de service normales, la cuisinière ne bascule pas. Elle peut cependant basculer si une force ou un poids excessif est
appliqué sur la porte ouverte alors que la bride antibasculement n’est pas convenablement fixée.
Risque de basculement
Un enfant ou une personne adulte peut faire basculer la cuisinière, ce qui peut causer un
décès.
Vérifier que la bride antibasculement est bien installée et engagée, conformément aux
instructions d'installation.
Réengager la bride antibasculement si la cuisinière a été déplacée.
Ne pas faire fonctionner la cuisinière si la bride antibasculement n'est pas installée et engagée.
Le non-respect de ces instructions peut causer un décès ou des brûlures graves aux enfants et
aux adultes.
Pour vérifier que la bride antibasculement est bien installée et engagée :
• Faire glisser la cuisinière vers l'avant.
• Vérifier que la bride antibasculement est bien fixée au plancher ou au mur.
• Faire de nouveau glisser la cuisinière vers l'arrière de sorte que le pied de la cuisinière
se trouve sous la bride antibasculement.
• Voir les instructions d'installation pour plus de détails.
AVERTISSEMENT
Bride
antibasculement
Pied de la cuisinière

20
IMPORTANTES INSTRUCTIONS DE SÉCURITÉ
CONSERVEZ CES INSTRUCTIONS
AVERTISSEMENT : Pour réduire le risque d’incendie, de
choc électrique, de blessures ou de dommages lors de
l’utilisation de la cuisinière, il convient d’observer certaines
précautions élémentaires dont les suivantes :
AVERTISSEMENT :
POUR MINIMISER LE RISQUE DE
BASCULEMENT DE LA CUISINIÈRE, ELLE DOIT ÊTRE
BIEN IMMOBILISÉE PAR DES DISPOSITIFS
ANTIBASCULEMENT CORRECTEMENT INSTALLÉS.
POUR VÉRIFIER SI LES DISPOSITIFS SONT
CORRECTEMENT INSTALLÉS, GLISSER LA CUISINIÈRE
VERS L’AVANT ET VÉRIFIER SI LA BRIDE
ANTIBASCULEMENT EST BIEN FIXÉE AU PLANCHER OU
AU MUR, ET GLISSER LA CUISINIÈRE VERS L’ARRIÈRE
POUR QUE LE PIED ARRIÈRE DE LA CUISINIÈRE SOIT
SOUS LA BRIDE ANTIBASCULEMENT.
AVERTISSEMENT : NE JAMAIS utiliser cet appareil
comme dispositif de chauffage de la pièce. Le non-respect
de cette instruction peut entraîner une intoxication au
monoxyde de carbone et une surchauffe du four.
AVERTISSEMENT : NE JAMAIS couvrir les fentes,
trous ou passages d'air au fond du four ou couvrir
entièrement une grille avec des matériaux tels que du
papier d'aluminium. Le non-respect de cette instruction
empêche la circulation de l'air dans le four et peut entraîner
une intoxication au monoxyde de carbone. Les feuilles de
papier d'aluminium peuvent également retenir la chaleur et
créer un risque d'incendie.
MISE EN GARDE : Ne pas remiser dans des armoires
au-dessus de la cuisinière ou sur le dosseret d’une
cuisinière, des objets que des enfants pourraient vouloir
atteindre. Les enfants pourraient se blesser gravement en
grimpant sur la cuisinière.
Installation appropriée – La cuisinière, lorsqu’elle est
correctement installée, doit être reliée à la terre
conformément aux codes électriques locaux ou, en
l’absence de codes locaux, selon le Code électrique national
ANSI/NFPA 70 . S’assurer que la cuisinière est correctement
installée et reliée à la terre par un technicien qualifié.
Cette cuisinière est munie d’une fiche de liaison à la terre à
trois broches pour votre protection contre les risques de
choc électrique et doit être branchée directement dans une
prise de courant bien reliée à la terre. Ne pas couper ni
enlever la broche de liaison à la terre de cette fiche.
Déconnecter la source de courant électrique avant
l'entretien.
Des blessures peuvent survenir du fait d'un mauvais usage
des portes ou des tiroirs de l’appareil tel que se tenir
debout sur la surface, se pencher ou s’asseoir sur les
portes ou tiroirs.
Entretien – Garder l’espace autour de la cuisinière dégagé
et libre de matériaux combustibles, d’essence et d’autres
vapeurs et liquides inflammables.
Remisage dans ou sur la cuisinière – Des produits
inflammables ne devraient pas être remisés dans un four ou
près des éléments de surface.
La taille de la flamme des brûleurs de surface devrait être
ajustée de sorte qu’elle ne dépasse pas le bord de
l’ustensile de cuisson.
Cuisinière autonettoyante –
Avant l’autonettoyage du four – Ôter la lèchefrite et son plat
et les autres ustensiles. Essuyer tous les renversements
excessifs avant de mettre en marche le programme
d’autonettoyage.
La page est en cours de chargement...
La page est en cours de chargement...
La page est en cours de chargement...
La page est en cours de chargement...
La page est en cours de chargement...
La page est en cours de chargement...
La page est en cours de chargement...
La page est en cours de chargement...
La page est en cours de chargement...
La page est en cours de chargement...
La page est en cours de chargement...
La page est en cours de chargement...
La page est en cours de chargement...
La page est en cours de chargement...
La page est en cours de chargement...
La page est en cours de chargement...
-
 1
1
-
 2
2
-
 3
3
-
 4
4
-
 5
5
-
 6
6
-
 7
7
-
 8
8
-
 9
9
-
 10
10
-
 11
11
-
 12
12
-
 13
13
-
 14
14
-
 15
15
-
 16
16
-
 17
17
-
 18
18
-
 19
19
-
 20
20
-
 21
21
-
 22
22
-
 23
23
-
 24
24
-
 25
25
-
 26
26
-
 27
27
-
 28
28
-
 29
29
-
 30
30
-
 31
31
-
 32
32
-
 33
33
-
 34
34
-
 35
35
-
 36
36


IKEA IGS426AS3 Le manuel du propriétaire
- Catégorie
- Cuisinières
- Taper
- Le manuel du propriétaire
dans d''autres langues
- English: IKEA IGS426AS3 Owner's manual
Documents connexes
Autres documents
-
Whirlpool WFG525S0HW Mode d'emploi
-
Bauknecht W10196152B Manuel utilisateur
-
Whirlpool WFG550S0HZ Le manuel du propriétaire
-
Whirlpool WFG520S0AW Manuel utilisateur
-
Amana AER5522VCW Manuel utilisateur
-
-
-
-
-