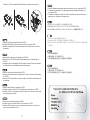
SilverStone FP55B Le manuel du propriétaire
- Catégorie
- Boîtiers HDD / SSD
- Taper
- Le manuel du propriétaire
Ce manuel convient également à
La page est en cours de chargement...
La page est en cours de chargement...

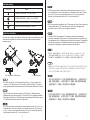
2.Install the 2.5” hard drive and secure with included M3 screws
(Installation of three hard drives in the FP55 is only recommended if the case used
has sufficient airflow around the 5.25" drive bay.)
(Die Installation von drei Festplatten im FP55 ist nur dann ratsam, wenn innerhalb des
Gehäuses ein ausreichender Luftstrom um den 5,25 Zoll-Laufwerkschacht herrscht.)
(La instalación de tres discos duros en el FP55 solo se recomienda si la carcasa
usada tiene suficiente flujo de aire alrededor de la bahía para dispositivos de 5,25”)
2.Installieren Sie die 2,5 Zoll-Festplatte, anschließend mit den beigelegten
M3-Schrauben fixieren.
2.Instale el disco duro de 2,5” y fíjelo con los tornillos M3 incluidos.
(L'installation de trois disques durs dans le FP55 est seulement recommandé si le
boîtier utilisé permet d'avoir un flux d'air suffisant autour de la baie 5.25".)
2.Installez le disque dur 2.5” et fixez-le avec les vis M3 fournies
(Installation of three hard drives in the FP55 is only recommended if the case used
has sufficient airflow around the 5.25" drive bay.)
2.Install the 2.5” hard drive and secure with included M3 screws
Hard drive installation
3
2.Установите 2.5-дюймовый жесткий диск и закрепите прилагаемыми болтами M3
(Установка в устройство FP55 трех жестких дисков допустима лишь при
условии того, что 5.25-дюймовый отсек для установки дисков достаточно
хорошо вентилируется.)
2.2.5”ࡂ࠼࠺ࠖࠬࠢ࠼ࠗࡉߪઃዻߩM3ࡀࠫߢ࿕ቯߒߡ⸳⟎ߒ߹ߔޕ
FP55ߦࡂ࠼࠺ࠖࠬࠢ࠼ࠗࡉ3บࠍ⸳⟎ߢ߈ࠆߩߪޔ5.25"࠼ࠗࡉࡌࠗ࿐ߦචಽߩ
ࠛࠕࡈࡠ߇⏕ߐࠇߡࠆ႐วߦ㒢ࠅ߹ߔޕ㧕
2.2.5” 䚌☐ ♈㏘䆠⏈ ┍⸽═ M3 ⇌㇠⦐ Ḕ㥉䚝⏼␘.
( FP55㜄 䚌☐♈㏘䆠 3ᵐ 㣙㵝㐐㜄⏈ 5.25” ☐⢰㢨⽀ ⷔ㢨㜄 㻝⺸䚐 ḩὤᴴ ḩἽ╌⏈
ㇵ䞝㜄㉐⬀ Ề㣙䚝⏼␘. ~ 䚌☐♈㏘䆠㜄㉐ ⵐ㈑䚌⏈ 㜨⦐㢬䚨 ⱬ㥐ᴴ ⵐ㈑䚔 ㍌⓸ 㢼㏩⏼␘. )
ᅝ㺱ā⹀ˈϺҹܻ䰘ⱘ≝丁0㶎㍆䥪DŽ
ᅝ㕂ৄ⹀ᰖ⚎⹀䴴ᕫᕜ䖥ˈⱐ➅↨䓗催ˈᓎ䅄ܜ⺎ᅮॳᴀ″←ⱘā᳝䎇ⱘ䗮乼
ᰖˈᠡৃҹ䗭咐خDŽ
ᅝ㺙ā⹀Ⲭˈᑊҹݙ䰘ⱘ≝༈0㶎ϱ䫕DŽ
ᅝ㕂ৄ⹀ⲬᯊЎ⹀Ⲭ䴴ᕫᕜ䖥ˈথ⛁↨䕗催ˈᓎ䆂ܜ⹂ᅮॳᴀᴎⱘā᳝䎇ⱘ䗮亢ᯊˈ
ᠡৃҹ䖭МخDŽ
4

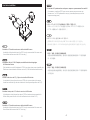
A.Install the 3.5” external device
1.Please follow the user manual to complete the installation.
2.For the best compatibility with 3.5” bay cover in any chassis, the front screw holes
of FP55 are slightly sunken so they can be used with drive bay cover in place.
However, if this prevents installation of tool-less mechanisms in your chassis, please
revert to using regular screws for installing FP55.
1.Bitte schließen Sie die Installation wie in der Bedienungsanleitung beschrieben ab.
2.Zur optimalen Kompatibilität mit 3,5 Zoll-Schachtabdeckungen wurden die vorderen
Schraubenlöcher des FP55 etwas vertieft ausgeführt. Falls dies jedoch mit
werkzeuglosen Mechanismen im Gehäuse kollidieren sollte, installieren Sie das
FP55 mit normalen Schrauben.
1.Por favor, siga el manual de usuario para completar la instalación.
2.Para la mejor compatibilidad con la cubierta para bahías de 3,5” en cualquier chasis,
los agujeros frontales para tornillos del FP55 están algo hundidos para de este
modo poder ser cubiertos por el panel para la bahía de dispositivos una vez sea
colocada. Sin embargo, si esto impide la instalación de mecanismos sin herramientas
en su chasis, por favor vuelva a usar tornillos normales a la hora de instalar el FP55.
1.Veuillez suivre le manuel utilisateur pour terminer l'installation.
2.Pour une meilleure compatibilité avec les caches 3.5” de tous les boîtiers, les trous
pour les vis frontales du FP55 sont légèrement encaissés afin qu'ils puisent être
utilisé avec les caches du boîtier en place. Cependant, si cela empêche l'utilisation
de fixation sans-outils de votre boîtier, veuillez utiliser les trous de vis standards
pour installer le FP55.
Install the FP55 into the chassis
5
1.࡙ࠩࡑ࠾ࡘࠕ࡞ߦᓥߞߡࠗࡦࠬ࠻࡞ࠍቢᚑߐߖ߹ߔޕ
2.⒳ޘߩࠤࠬߩ3.5”ࡌࠗࠞࡃߦวࠊߖࠄࠇࠆࠃ߁ޔFP55ߩࡈࡠࡦ࠻ࡀࠫⓣߪዋߒᅏ
ߦߥߞߡ߅ࠅ࠼ࠗࡉࡌࠗࠞࡃ߇ࠄࠇ߹ߔޕߚߛߒޔߎߩ⟎ߢࠤࠬߦ࠷࡞
ਇⷐᯏ᭴߇⸳⟎ߢ߈ߥ႐วߪޔㅢᏱߩ⟎ߩⓣߢFP55ࠍࠗࡦࠬ࠻࡞ߒߡߊߛߐޕ
XU㇠㟝㣄 ⬘⎨㛰㡸 ♤⢰ ㉘㾌⪰ ⫼㾝⏼␘.
YU⺴⺸㢌 䀴㢨㏘㜄 㢼⏈ 3.5” 䀘ⶸ㝴 㺐Ḕ㢌 䝬䞌㉥㡸 Ḕ⥘䚨 FP55㢌 㤸⮨ ⇌㇠䝴㢨 㚱ᴸ
GGG㙸⣌㯱㡰⦐ ⇨⥘ᴴ 㢼㛨 ☐⢰㢨⽀ ⷔ㢨 䀘ⶸ⪰ 㣙㵝䚌Ḕ⓸ ㉘㾌ᴴ ᴴ⏙䚌⓸⦑ ╌㛨 㢼㏩⏼␘.
GGGἬ⤠⇌, 㢨⤤ 㢨㡔⦐ 䀴㢨㏘㜄 䍨⫠㏘ ⮈㾨⏼㫌㢨 ┍㣅䚌㫴 㙾᷀ ╌⦐ FP55⪰ 㣙㵝䚔⚀⏈
GGG㢰ⵌ ⇌㇠⪰ 㢨㟝䚨 Ḕ㥉䚌㐐ὤ ⵈ⣁⏼␘.
䂟গ✻″←䁾ᯢˈᇛ)3ᅝ㺱Ϟ″←DŽ
⚎њ㟛。″←ⱘāᵓ᳔᳝Ⳍᆍᗻˈ)3ࠡᥦⱘā䥪ᄨ᳝ᕔܻ≝DŽ
བᵰℸ㟛″←āܡᎹ″ᾟ⛵⊩वড়ˈ䂟ᢚ䰸ܡᎹ″ᾟˈҹ㶎㍆䥪DŽ
䇋খ✻ᴎ䇈ᯢкˈᇚ)3ᅝ㺙ϞᴎDŽ
ЎњϢ⾡ᴎⱘāḷᵓ᳔᳝ݐᆍᗻˈ)3ࠡᥦⱘā䫕ᄨ᳝ᕔݙ≝DŽ
བᵰℸϢᴎāܡᎹᴎᵘ᮴⊩वড়ˈ䇋ᢚ䰸ܡᎹᴎᵘˈҹ㶎ϱ䫕DŽ
1.Seguire le istruzioni del manuale utente per completare l’installazione.
2.Per una maggiore compatibilità con i bay cover da 3,5” di qualsiasi case, I fori
frontali per le viti di FP55 sono leggermente incassati in modo da poter essere
utilizzati con il bay cover nella sua sede. Naturalmente, se ci fossero problemi con
l’installazione in case provvisti di meccanismi toll less, e possibile utilizzare viti
tradizionali per il montaggio di FP55.
1.Для завершения установки следуйте указаниям руководства пользователя.
2.В целях лучшей совместимости с крышкой отсека для установки 3.5-дюймовых
устройств в любом корпусе, передние отверстия для болтов на устройстве
FP55 слегка утоплены так, чтобы крышка встала на свое место. Тем не менее,
если это мешает установке в корпус устройств, не требующих инструментов,
используйте стандартные болты для установки устройства FP55.
6

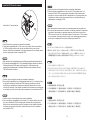
B.Internal 3.5” device installation with common 5.25” drive bay cover
1.Remove the aluminum front bezel from the FP55
2.Install FP55 into the case and reinstall the case’s own 5.25” drive bay cover
3.Adjust FP55’s position to ensure that it does not interfere with the drive bay cover
and secure it with screws. If the case does not have any more mounting holes for
adjustment, the FP55 has additional set of holes to allow for moving it further into
the case.
1.Nehmen Sie die Aluminum-Frontblende vom FP55 ab.
2.Installieren Sie das FP55 im Gehäuse, setzen Sie die Gehäuse-eigene 5,25
Zoll-Schachtabdeckung wieder auf.
3.Passen Sie die Position des FP55 so an, dass es nicht mit der Schachtabdeckung
kollidiert; anschließend mit Schrauben fixieren. Falls die Montagebohrungen nicht
zur Anpassung ausreichen sollten, verfügt das FP55 über zusätzliche Bohrungen,
damit es nahezu frei platziert werden kann.
1.Retire la cubierta frontal de aluminio del FP55
2.Instale el FP55 en la carcasa y reinstale la cubierta de la bahía para dispositivos
de 5,25”
3.Ajuste la posición del FP55 para asegurar que no interfiere con la cubierta de la
bahía de dispositivos y fíjela con tornillos. Si la carcasa no tiene más agujeros de
montaje para el ajuste, el FP55 tiene un juego adicional de agujeros para poder
moverlo hacia el interior de la carcasa.
1.Retirez le cadre frontal en aluminium du FP55
2.Installez le FP55 dans le boîtier et réinstallez le cache de la baie 5.25”
3.Ajustez la position du FP55 pour assurer qu'il n'interfère pas avec le cache de la
baie et fixez-le avec des vis. Si le boîtier n'a pas d'autres trous de montage pour
procéder à l'ajustement, le FP55 possède un ensemble de trous pour permettre des
réglages plus précis dans le boîtier.
Case front panel
1. 2. 3.
7
1.FP55߆ࠄࠕ࡞ࡒ࠾࠙ࡓࡈࡠࡦ࠻ࡌ࡞ࠍขࠅᄖߒ߹ߔޕ
2.FP55ࠍࠤࠬߦࠗࡦࠬ࠻࡞ߒޔࠤࠬઃዻߩ5.25”࠼ࠗࡉࡌࠗࠞࡃࠍขࠅઃߌ߹ߔޕ
3.FP55ߩ⟎ࠍ࠼ࠗࡉࡌࠗࠞࡃߩ㇎㝷ߦߥࠄߥ᭽ߦ⺞ᢛߒߡޔࡀࠫߢ࿕ቯߒ߹ߔޕ
ࠤࠬߩⓣߢ⺞ᢛߢ߈ߥ႐วޔFP55ߦ߽ⓣ߇ࠅࠤࠬߩᅏߦ⸳⟎ߢ߈ࠆࠃ߁ߦߥߞߡ߹ߔޕ
XUmw\\㢌G㤸⮨G㚀⨜⎸Gⷔ㥘㡸G㥐ᶤ䚝⏼␘UG
YUmw\\⪰G䀴㢨㏘㜄G㣙㵝䚌ḔG䀴㢨㏘㢌G㠄⣌G\UY\ˉG☐⢰㢨⽀Gⷔ㢨G䀘ⶸ⪰G㣙㵝䚝⏼␘U
ZUmw\\㢌G㠸㾌⪰G㦤㥉䚌ḔSG☐⢰㢨⽀Gⷔ㢨G䀘ⶸᴴGᴸ㉡╌㫴G㙾㡴G㠸㾌⪰G䞉㢬䚌ḔG⇌㇠⦐G
GGḔ㥉㐐䇩⏼␘UG⬀㚱G䀴㢨㏘㝴G㠸㾌G㦤㤼㡸G㠸䚐G⫼㟨䐹G䝴㢨G㛺⏈Gᷱ㟤Gmw\\⏈G㻈ᴴG䝴㢨G
GG㢼㛨G䀴㢨㏘G⇨⺴⦐G⸨␘G⒈Gⴴ㛨G≗㛨G㠸㾌G㦤㥉㢨Gᴴ⏙䚝⏼␘UG
ᇛ)3ⱘ䢕䊾䴶ᵓᢚ䰸DŽ
ᇛ)3ᅝ㕂Ϟ″←ˈᇛ″←ⱘāᵓᰃ䴶ᵓ㺱ಲDŽ
䂓ᭈ)3ⱘࠡᕠԡ㕂ˈ⺎ᅮϡ᳗㟛″←ᵓᑆ⍝ᕠˈᇛ)3ᅮDŽབᵰ″←≦ֱ᳝⬭ৃկ⿏ࢩ
ⱘᄨԡˈ)3῭⑪ⱘ䥪ᄨࠡᮍֱ⬭ϔ㌘䥪ᄨˈկᕠ䗔⫼DŽ
ᇚ)3ⱘ䪱䋼䴶ᵓᢚ䰸DŽ
ᇚ)3ᅝ㕂Ϟᴎˈᇚᴎⱘāḷᵓᰃ䴶ᵓ㺙ಲDŽ
䇗ᭈ)3ⱘࠡৢԡ㕂ˈ⹂ᅮϡӮϢᴎḷᵓᑆ⍝ৢˈᇚ)3ᅮDŽབᵰᴎ≵ֱ᳝⬭ৃկ⿏ࡼ
ⱘᄨԡˈ)3ᷛޚⱘ䫕ᄨࠡᮍֱ⬭ϔ㒘䫕ᄨˈկৢ䗔⫼DŽ
1.Rimuovere il frontalino in alluminio da FP55
2.Installare FP55 nel case e riposizionare il bay cover da 5,25 del case.
3.Aggiustare la posizione di FP55 assicurandosi che non interferisca con il bay cover
ed assicurarlo alla struttura con le viti. Se i fori presenti nel case non sono sufficienti
per una regolazione fine della posizione, FP55 possiede un suo set di fori che gli
permettono di essere posizionato nel modo migliore.
1.Снимите алюминиевую фальш-панель с внешней стороны устройства FP55
2.Установите устройство FP55 в отсек закройте его крышкой для 5.25-дюймового
отсека
3.Подгоните устройство FP55 так, чтобы оно не мешало крышке отсека для
жестких дисков и закрепите болтами. Если в корпусе не предусмотрены
дополнительные отверстия для крепления, то устройство FP55 снабжено
дополнительным набором крепежных отверстий, позволяющих закрепить его
глубже внутри корпуса.
8

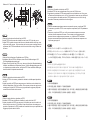
C.Internal 3.5” device installation with SilverStone aluminum drive bay cover
1.Remove the aluminum front bezel from the FP55
2.Install the SilverStone 5.25” aluminum drive bay cover onto the FP55
3.Install the completed FP55 into the case and secure it with screws or tool-less
mechanism.
1.Nehmen Sie die Aluminum-Frontblende vom FP55 ab.
2.Bringen Sie die 5,25 Zoll-Aluminium-Schachtabdeckung von SilverStone am
FP55 an.
3.Installieren Sie das vollständige FP55 im Gehäuse, fixieren Sie es anschließend
mit Schrauben oder dem Gehäuse-eigenen Mechanismus.
1.Retire la cubierta frontal de aluminio del FP55
2.Instale la cubierta para bahía de dispositivos de 5,25” de aluminio de Silverstone
en el FP55
3.Instale el FP55 completado en la carcasa y fíjelo con tornillos o mecanismos sin
herramientas
1.Retirez le cadre frontal en aluminium du FP55
2.Installez le cache de la baie 5.25” de SilverStone en aluminium sur le FP55
3.Installez le FP55 au complet dans le boîtier et fixez-le avec des vis ou avec l'aide
d'un mécanisme sans-outils.
1.Rimuovere il frontalino in alluminio da FP55
2.Installare il bay cover SilverStone da 5,25 in alluminio su FP55
3.Installare il P55 completo nel case ed assicurarlo alla struttura con le viti o per
mezzo del meccanismo tool less
1. 2. 3.
9
1.FP55߆ࠄࠕ࡞ࡒ࠾࠙ࡓࡈࡠࡦ࠻ࡌ࡞ࠍขࠅᄖߒ߹ߔޕ
2.SilverStone 5.25”ࠕ࡞ࡒ࠾࠙ࡓ࠼ࠗࡉࡌࠗࠞࡃࠍFP55ߦขࠅઃߌ߹ߔޕ
3.ขࠅઃߌߩ⚳ࠊߞߚFP55ࠍࠤࠬߦࠇޔࡀࠫ߹ߚߪ࠷࡞ਇⷐᯏ᭴ߢ࿕ቯߒ߹ߔޕ
XUmw\\㢌G㤸⮨G㚀⨜⎸Gⷔ㥘㡸G㥐ᶤ䚝⏼␘
YUzzG\UY\ˉG㚀⨜⎸Gⷔ㢨G䀘ⶸ⪰Gmw\\㜄G㣙㵝䚝⏼␘UG
ZUⷔ㢨䀘ⶸᴴG㣙㵝═Gmw\\⪰G䀴㢨㏘㜄G㉘㾌䚌ḔG⇌㇠⦐GḔ㥉䚌ᶤ⇌G䍨⫠㏘G⮈㾨⏼㫌㡸G㢨㟝䚨G
GGGḔ㥉䚝⏼␘UG
ᇛ)3ⱘ䢕䊾䴶ᵓᢚ䰸DŽ
ᇛ䡔″←ⱘāᵓᅝ㺱㟇)3DŽ
ᇛ)3䗷ৠᵓᅝ㺱Ϟ″←ˈϺҹ㶎㍆ܡᎹ㺱㕂ᅮDŽ
ᇚ)3ⱘ䪱䋼䴶ᵓᢚ䰸DŽ
ᇚ䫊ᴎⱘāᵓᅝ㺙㟇)3DŽ
ᇚ)3䖲ৠḷᵓᅝ㺙Ϟᴎˈᑊҹ㶎ϱܡᎹ㺙㕂ᅮDŽ
1.Снимите алюминиевую фальш-панель с внешней стороны устройства FP55
2.Установите алюминиевую 5.25-дюймовую крышку компании SilverStone на
устройство FP55
3.Установите собранное устройство FP55 и закрепите при помощи болтов или
механизма, не требующего инструментов.
10
-
 1
1
-
 2
2
-
 3
3
-
 4
4
-
 5
5
-
 6
6


SilverStone FP55B Le manuel du propriétaire
- Catégorie
- Boîtiers HDD / SSD
- Taper
- Le manuel du propriétaire
- Ce manuel convient également à
dans d''autres langues
- italiano: SilverStone FP55B Manuale del proprietario
- English: SilverStone FP55B Owner's manual
- español: SilverStone FP55B El manual del propietario
- Deutsch: SilverStone FP55B Bedienungsanleitung
- русский: SilverStone FP55B Инструкция по применению