KitchenAid KSIB900ESS Mode d'emploi
- Catégorie
- Cuisinières
- Taper
- Mode d'emploi

1
Slide-In Induction Range Control Guide
FEATURE GUIDE
WARNING: To reduce the risk of fire, electric shock, or injury to persons, read the IMPORTANT SAFETY INSTRUCTIONS, located in
your appliance's Owner's Manual, before operating this appliance.
This manual covers several models. Your model may have some or all of the items listed. Refer to this manual or the Product Help
section of our website at www.kitchenaid.com for more detailed instructions. In Canada, refer to the Product Help Section at
www.kitchenaid.ca.
WARNING
Food Poisoning Hazard
Do not let food sit for more than one hour before or
after cooking.
Doing so can result in food poisoning or sickness.
KEYPAD FEATURE INSTRUCTIONS
CLOCK/TOOLS Clock This clock can use a 12- or 24-hour cycle. See the “Electronic Oven Controls” section.
1. Press OPTIONS/CLOCK until “CLOCK” is displayed.
2. Use the number keypads to set the time of day.
3. Press START to change the time.
4. Press “3” for AM or “6” for PM.
CLOCK/TOOLS Settings Enables you to personalize the audible tones and oven operation to suit your needs. See
the “Electronic Oven Controls” section.
OVEN LIGHT Oven cavity
light The oven light is controlled by a keypad on the oven control panel. While the oven door is
closed, press OVEN LIGHT to turn the light on and off. When the oven door is opened, the
oven light will automatically come on.
TIMER SET/OFF Oven timer The Timer can be set in hours or minutes up to 9 hours and 59 minutes.
1. Press TIMER SET/OFF.
2. Press the number keypads to set the length of time in hr-hr-min-min. Leading zeroes
do not have to be entered. For example, for 2 minutes, enter “2.”
3. Press TIMER SET/OFF to begin the countdown. If enabled, one tone will sound at end
of countdown.
4. Press TIMER SET/OFF again to cancel the Timer and return to the time of day. Do not
press CANCEL because the oven will turn off.
5. If the Timer is running but not in the display, press TIMER SET/OFF to display the
countdown for 5 seconds.
START Cooking start The Start pad begins any oven function. If Start is not pressed within 2 minutes after
pressing a keypad, the function is canceled and the time of day is displayed.
CANCEL UPPER
CANCEL LOWER
(on some models)
Range
function The Cancel keypad stops any function for the appropriate oven or drawer, except the
Clock and Timer.
BAKE Baking and
roasting 1. Press BAKE.
2. Press the number keypads to set the desired temperature. If the temperature entered
is not in the range of the temperatures allowed, the minimum or maximum allowed
temperature will be displayed. Enter a temperature in the allowable range.
3. Press START.
4. To change the temperature, repeat steps 2 and 3.
5. Press CANCEL UPPER when finished.

2
KEYPAD FEATURE INSTRUCTIONS
STEAM BAKE Steam bake 1. Insert the steam rack with water reservoir in the oven.
2. Pour 1 1/2cups (350 mL) of warm water into the water reservoir.
NOTE: Do not fill past the MAX mark.
3. Press STEAM BAKE.
4. Press the number keypad to select the desired food option.
5. Press the number keypads to set the temperature.
6. Press START.
7. (Optional) Press COOK TIME. Press the number keypads to set the cook time.
8. Press START.
9. Insert food when preheating finishes.
10. Press CANCEL UPPER when finished.
NOTE: Let oven cool before removing and emptying water reservoir.
BROIL Broiling 1. Press BROIL.
2. Press the number keypads to set the desired temperature. If the temperature entered
is not in the range of the temperatures allowed, the minimum or maximum allowed
temperature will be displayed. Enter a temperature in the allowable range.
3. Press STARTand allow the oven to preheat for 2 minutes.
4. To change the temperature, repeat steps 2 and 3.
5. Position the cookware in the oven and close the door.
6. Press CANCEL UPPER when finished.
PROOF Proofing
bread 1. Place prepared dough in oven. Press PROOF.
2. Press START
Let the dough rise until nearly doubled in size. Proofing time may vary depending on
dough type and quantity.
3. Press CANCEL UPPER when finished proofing.
Refer to the “Proofing Bread” section for more information.
KEEP WARM Hold warm Food must be at serving temperature before placing it in the warmed oven.
1. Press KEEP WARM.
2. Press the number keypads to set the desired temperature. If the temperature entered
is not in the range of the temperatures allowed, the minimum or maximum allowed
temperature will be displayed. Enter a temperature in the allowable range.
3. Press START.
4. Press CANCEL UPPER when finished.
EASY CONVECT BAKE Convection
cooking 1. Press EASY CONVECT BAKE.
2. Press “1” to have the oven automatically convert the temperature and time for
convection baking. Press “2” to manually convert the temperature and time.
3. Press the number keypads to set the desired temperature. If the temperature entered
is not in the range of the temperatures allowed, the minimum or maximum allowed
temperature will be displayed. Enter a temperature in the allowable range.
4. Press START.
5. (Optional) Press the number keypads to set a cook time.
6. Press START.
7. To change the temperature, repeat steps 2 and 3.
8. Press CANCEL UPPER when finished.
EASY CONVECT
BROIL Convection
cooking 1. Press EASY CONVECT BROIL.
2. Press “1” to have the oven automatically convert the temperature and time for
convection baking. Press “2” to manually convert the temperature and time.
3. Press the number keypads to set the desired temperature. If the temperature entered
is not in the range of the temperatures allowed, the minimum or maximum allowed
temperature will be displayed. Enter a temperature in the allowable range.
4. Press START.
5. (Optional) Press the number keypads to set a cook time.
6. Press START.
7. To change the temperature, repeat steps 2 and 3.
8. Press CANCEL UPPER when finished.

3
KEYPAD FEATURE INSTRUCTIONS
EASY CONVECT
ROAST Convection
cooking 1. Press EASY CONVECT ROAST.
2. Press “1” to have the oven automatically convert the temperature and time for
convection baking. Press “2” to manually convert the temperature and time.
3. Press the number keypads to set the desired temperature. If the temperature entered
is not in the range of the temperatures allowed, the minimum or maximum allowed
temperature will be displayed. Enter a temperature in the allowable range.
4. Press START.
5. (Optional) Press the number keypads to set a cook time.
6. Press START.
7. To change the temperature, repeat steps 2 and 3.
8. Press CANCEL UPPER when finished.
DELAY START Delayed start The Delay Start keypad is used to enter the starting time for an oven function with a
delayed start. Delay Start should not be used for foods such as breads and cakes
because they may not bake properly.
To set a Timed Cook or a Delayed Timed Cook, see the “Cook Time” section.
COOK TIME Timed coking Timed cooking allows the oven to be set to turn on at a certain time of day, cook for
a set length of time, and/or shut off automatically.
To set a Timed Cook or a Delayed Timed Cook, see the “Cook Time” section.
BAKING DRAWER
BAKE
(on some models)
Baking drawer 1. Press BAKING DRAWER BAKE.
2. Press the number keypads to set the desired temperature. If the temperature entered
is not in the range of the temperatures allowed, the minimum or maximum.
3. Press START.
4. To change the temperature, repeat steps 2 and 3.
5. Press CANCEL LOWER when finished.
BAKING DRAWER
SLOW COOK
(on some models)
Slow cook
drawer 1. Press BAKING DRAWER SLOW COOK.
2. Press the number keypads to set the desired temperature. If the temperature entered
is not in the range of the temperatures allowed, the minimum or maximum allowed
temperature will be displayed. Enter a temperature in the allowable range.
3. Place the food(s) in the baking drawer.
4. Press START.
5. (Optional) Set the desired cook time using the number keypads.
6. Press START to begin heating the baking drawer.
7. Press CANCEL LOWER when finished.
BAKING DRAWER
KEEP WARM
(on some models)
Warming
drawer Food must be at serving temperature before placing it in the warmed oven.
1. Press BAKING DRAWER KEEP WARM.
2. Press the number keypads to set the desired temperature. If the temperature entered
is not in the range of the temperatures allowed, the minimum or maximum allowed
temperature will be displayed. Enter a temperature in the allowable range.
3. Press START.
4. Press CANCEL LOWER when finished.
AQUALIFT SELF
CLEAN Clean cycle See the “Clean Cycle” section in the Owner’s Manual.
START
(Hold 3 Sec) Oven control
lockout No keypads will function with the controls locked. The cooktop functions are not affected
by the oven control lockout.
1. Check that the oven is OFF.
2. Press and hold START (Hold 3 Sec) for 3 seconds.
3. A tone will sound, and “Control Locked” will scroll, and then “Locked” will be displayed.
4. Repeat to unlock. No keypads will function with the controls locked. The cooktop
functions are not affected by the oven control lockout.
CLOCK/TOOLS Energy save 1. Press CLOCK/ TOOLS until “ENERGY SAVE” is displayed.
2. The current setting will be displayed.
3. Press the “1” keypad to adjust the setting.
4. Press CANCEL to exit and display the time of day.
If Energy Save is on, the range will go into sleep mode after 5 minutes of inactivity.
Any keypad press will activate the display. If Energy Save is off, the display will be on
at all times.

4
AquaLift®® Self-Cleaning Technology
AquaLift®Self-Cleaning Technology is a first-of-its-kind cleaning
solution designed to minimize the time, temperature and odors
that ordinarily come with traditional self-cleaning methods. With
AquaLift®Self-Cleaning Technology, an exclusive coating on the
interior of the oven is activated with heat and water to release
baked-on soil. To use AquaLift®Self-Cleaning Technology, simply
wipe out loose debris, pour water into the oven bottom and run the
AquaLift®Self-Cleaning cycle. When the cycle finishes in under 1
hour at a lower temperature than traditional self-cleaning
methods, just wipe out the remaining water and loose debris. See
the “Clean Cycle” section in the Owner’s Manual for more detailed
instructions. For additional information, frequently asked
questions and videos on using AquaLift®Self-Cleaning
Technology, visit our website at
http://whirlpoolcorp.com/aqualift.
Surface Temperature
When the range is in use, all range surfaces may become hot,
such as the knobs and oven door.
Warming Drawer, Storage Drawer, or Baking Drawer (On
Some Models)
When the oven is in use, the drawer may become hot. Do not
store plastics, cloth, or other items that could melt or burn in the
drawer.
Oven Vent
The oven vent releases hot air and moisture from the oven, and
should not be blocked or covered. Do not set plastics, paper or
other items that could melt or burn near the oven vent.
Electronic Oven Controls
Control Display
The display will flash when powered up or after a power loss.
Press CANCEL UPPER to clear. When the oven is not in use, the
time of day is displayed. If the range is in Energy Save mode, the
display will be blank when not in use.
Tones
Tones are audible signals, indicating the following:
One Tone
■Valid keypad press
■Oven is preheated (long tone).
■Function has been entered
■Reminder, repeating each minute after the end-of-cycle tones
Three Tones
■Invalid keypad press
Four Tones
■End of cycle
Use the Clock/Tools keypad to change the tone settings.
Energy Save
The Energy Save mode puts the range into sleep mode and
reduces energy consumption.
To Activate the Energy Save Mode:
1. Press CLOCK/TOOLS until “ENERGY SAVE” is displayed
2. The current setting will be displayed.
3. Press the “1” keypad to adjust the setting.
4. Press CANCEL to exit and display the time of day.
5. The setting will be activated after 5 minutes.
To Deactivate the Energy Save Mode
1. Press CLOCK/TOOLS until “ENERGY SAVE” is displayed
2. The current setting will be displayed.
3. Press the “1” keypad to adjust the setting.
4. Press CANCEL to exit and display the time of day.
5. The clock will reappear in the display and the range can be
operated as usual.
Settings
Many features of the oven control can be adjusted to meet your
personal needs. These changes are made using the Clock/Tools
keypad.
Use the Clock/Tools keypad to scroll through the features that can
be changed. Each press of the Clock/Tools keypad will advance
the display to the next setting. After selecting the feature to be
changed, the control will prompt you for the required input. Then
press START or CANCEL UPPER to exit and display the time of
day. Details of all of the feature changes are explained in the
following sections.
Press CANCEL UPPER to exit Settings.
Clock
The Clock can use a 12- or 24-hour cycle.
1. Press CLOCK/TOOLS until “CLOCK” is displayed.
2. Use the number keypads to set the time of day.
3. Press START to change the time.
4. Press “3” for AM or “6” for PM.
Fahrenheit and Celsius
The temperature is preset to Fahrenheit but can be changed to
Celsius.
1. Press CLOCK/TOOLS until “TEMP UNIT” is displayed.
2. The current setting will be displayed.
3. Press the “1” keypad to adjust the setting.
4. Press START or CANCEL UPPER to exit and display the time
of day.
Audible Tones Disable
Turns off all tones, including the end-of-cycle tone and keypress
tones. Reminder tones are still active when all tones are disabled.
1. Press CLOCK/TOOLS until “SOUND” is displayed.
2. The current setting will be displayed.
3. Press the “1” keypad to adjust the setting.
4. Press START or CANCEL UPPER to exit and display the time
of day.
Sound Volume
Sets the volume of the tone to either high or low.
1. Press CLOCK/TOOLS until "SOUND VOLUME" is displayed.
2. The current setting will be displayed.
3. Press the “1” keypad to adjust the setting.
4. Press START or CANCEL UPPER to exit and display the time
of day.

5
End of Cycle Tone
Activates or turns off the tones that sound at the end of a cycle.
1. Press CLOCK/TOOLS until “END TONE” is displayed.
2. The current setting will be displayed.
3. Press the “1” keypad to adjust the setting.
4. Press START or CANCEL UPPER to exit and display the time
of day.
Reminder Tones Disable
Turns off the short repeating tone that sounds every 1 minute after
the end-of-cycle tones.
1. Press CLOCK/TOOLS until “REMINDER TONE” is displayed.
2. The current setting will be displayed.
3. Press the “1” keypad to adjust the setting.
4. Press START or CANCEL UPPER to exit and display the time
of day.
Keypress Tones
Activates or turns off the tones when a keypad is pressed.
1. Press CLOCK/TOOLS until “KEYPRESS TONE” is displayed.
2. The current setting will be displayed.
3. Press the “1” keypad to adjust the setting.
4. Press START or CANCEL UPPER to exit and display the time
of day.
Demo Mode
IMPORTANT: This feature is intended for use on the sales floor
with 120 V power connection and permits the control features to
be demonstrated without heating elements turning on. If this
feature is activated, the oven will not work.
1. Press CLOCK/TOOLS until “DEMO MODE” is displayed.
2. The current setting will be displayed.
3. Press the “1” keypad to adjust the setting.
4. Press START or CANCEL UPPER to exit and display the time
of day.
12-Hour Shutoff
The oven control is set to automatically shut off the oven 12 hours
after the oven initiates a cook or clean function. This will not
interfere with any timed or delay cook functions.
1. Press CLOCK/TOOLS until “12Hr AUTO_OFF” is displayed.
2. The current setting will be displayed.
3. Press the “1” keypad to adjust the setting.
4. Press START or CANCEL UPPER to exit and display the time
of day.
12/24 Hour Clock
1. Press CLOCK/TOOLS until “12/24 HOUR” is displayed.
2. The current setting will be displayed.
3. Press the “1” keypad to adjust the setting.
4. Press START or CANCEL UPPER to exit and display the time
of day.
Sabbath Mode
The Sabbath mode sets the oven to remain ON in a bake setting
until turned off.
When the Sabbath mode is set, only the Bake cycle will operate.
All other cooking and cleaning cycles are disabled. No tones will
sound and the displays will not indicate temperature changes.
When the oven door is opened or closed, the oven light will not
turn on or off and the heating elements will not turn on or off
immediately.
To Enable Sabbath Mode Capability (One Time Only):
1. Press CLOCK/TOOLS until “SABBATH” is displayed
2. The current setting will be displayed.
3. Press the “1” keypad to adjust the setting.
4. Press START or CANCEL UPPER to exit and display the time
of day.
Languages - Scrolling Display Text
Language options are English, Spanish and French.
1. Press CLOCK/TOOLS until “LANGUAGE” is displayed.
2. The current setting will be displayed.
3. Press the “1” or “2” keypad to select the desired language.
4. Press START or CANCEL UPPER to exit and display the time
of day.
Oven Temperature Offset Control
IMPORTANT: Do not use a thermometer to measure oven
temperature. Elements will cycle on and off as needed to provide
consistent temperature but may run slightly hot or cool at any
point in time due to this cycling. Most thermometers are slow to
react to temperature change and will not provide an accurate
reading due to this cycling.
The oven provides accurate temperatures; however, it may cook
faster or slower than your previous oven, so the temperature can
be adjusted to personalize it for your cooking needs. It can be
changed to Fahrenheit or Celsius.
To Adjust Oven Temperature:
1. Press CLOCK/TOOLS until “TEMP CALIB” is displayed.
2. On some models, press “1” to adjust the drawer temperature
calibration. Press START, wait 10 seconds for the display to
change, and then continue with Step 3.
OR
Press START to adjust the oven temperature calibration. Wait
10 seconds for the display to change, and then continue with
Step 3.
3. Press the “3” keypad to increase the temperature in 5°F (3°C)
increments or press the “6” keypad to decrease the
temperature in 5°F (3°C) increments. The offset range is from
-30°F to +30°F (-18°C to +18°C).
4. Press START or CANCEL UPPER to exit and display the time
of day.

6
Cooktop Use
A. Cooktop power
B. Simmer
C. Melt
D. Left front surface cooking area display
E. Left rear surface cooking area display
F. Surface cooking area off
G. Heat level display
H. Timer display
I. Right rear surface cooking area display
J. Right front surface cooking area display
K. Control lock
L. Bridge
M. Heat level slider
N. Timer (increase/decrease)
Induction Cooking
Induction cooking is quite different from traditional forms of
cooking. The heat is generated directly in the pan, keeping the
cooking surface cooler than with a traditional element.
Induction cooking does not lose as much heat as traditional forms
because all the heat is created in the pan itself.
The cooktop heats up or cools down quickly after the controls are
set. It also stops heating when the pan is removed without turning
off the power.
Food spilled on the cooktop surface will not burn because the
glass is not heated. Induction cooking allows for immediate
cleaning after use because the heat is created in the pan.
Pan size, material (see the “Cookware” section), and positioning
are very important to achieve maximum wattage.
The diameter of the pan’s base should be equal to the size of the
element.
If the pan is too small, the burner does not sense the pan and will
not activate.
Cooktop Controls
WARNING
Fire Hazard
Turn off all controls when done cooking.
Failure to do so could result in death or fire.
The touch-activated electronic controls offer a variety of heat
settings for optimal cooking results. When melting foods, such as
chocolate or butter, the surface cooking area can be set to the
Melt function for minimal surface cooking area operation.
For maximum surface cooking area operation, all cooktop touch-
activated electronic controls can be set to the Performance Boost
function when bringing liquids to a fast and rapid boil. Select the
desired surface cooking area, and then press “Boost” on the heat
level slider to immediately reach the highest setting.
NOTE: Where 240V installation is not available, this cooktop will
automatically adjust to 208V operation.
To Use
To Turn On the Cooktop:
1. Press POWER.
The indicator light above the Power keypad and a dash (“-”) in
each surface cooking area will light to indicate that each
surface cooking area is ready to be activated.
Inactivity for 60 seconds after the main power has been turned
on will automatically turn off the power to the cooktop.
If a cooking function or the power slider is touched without first
selecting a surface cooking area, all dashes (1 for each zone)
will flash and an invalid tone will sound 4 times.
To Turn On a Surface Cooking Area:
2. Touch directly on the display area for the surface cooking area
you want to use. See D, E, I, and J of previous illustration.
The current power level and indicator light will flash for 10
seconds and then remain ON.
Touching any other feature or the power slider stops the
flashing, and then information for the keypad that was touched
will be displayed.
When a surface cooking area is left at the “0” power level for
30 seconds, the surface cooking area will automatically turn
off and display only the middle dash without the indicator light.
3. Select a heat setting from “1” through “9” by touching/sliding
on the power slider. The heat setting will appear in the surface
cooking area display.
The power slider consists of 9 positions plus a “Boost”
position. When the user slides to “0,” “0” will be displayed. The
surface cooking area will not turn on but remains active/
selected.
When a surface cooking area is left at the “0” power level for
30 seconds, the zone will automatically turn off and display
only the middle dash without the indicator light.

7
IMPORTANT: The heat setting for an active cooking area may be
adjusted by hand or cooking utensil above the heat level slider
even if there is no contact with the cooktop glass. A beep will
sound only if the slider moves to “0” or “Boost” or the cooking area
is turned off.
Use the following chart as a guide when setting heat levels.
Setting Recommended Use
9 to Boost ■Bring liquid to a boil.
9■Start food cooking.
7 to 8 ■Quickly brown or sear food.
6 to 7 ■Hold a rapid boil.
5 to 6 ■Fry poultry or meat.
■Cook soups, sauces, and gravies.
4 to 5 ■Maintain a slow boil.
■Stew or steam food.
3 to 5 ■Simmer.
1 to 2 ■Keep cooked food warm.
■Melt chocolate or butter.
Simmer ■Maintain a slow boil.
On some models: Touching the TIMER “+” or “-” keypad will turn
the cooktop timer on. “01” appears in the cooktop timer display,
and then the cooktop timer can be set if desired.
To Turn Off:
1. Touch OFF to turn off desired surface cooking area. One tone
will sound when Off is pressed.
2. Touch POWER to turn off the cooktop when finished.
Hot Surface Indicator
An “H” will appear in the heat setting display of a surface cooking
area that is too hot to touch, even after that surface cooking area
is turned off.
A. Heat setting display
B. Hot surface indicator “H”
If the cooktop is on when a power failure occurs, the Hot Surface
Indicator “H” will remain on up to 45 minutes after the power is
restored to the cooktop.
Simmer
The Simmer function can be used on all surface cooking areas.
To Use:
To Turn On:
1. Check that a surface cooking area has been selected.
2. Touch SIMMER. “A” will appear in the display and the
indicator light next to Simmer will light.
The cooktop timer remains visible and can be set if desired.
To Turn Off:
Touch the surface cooking area Off keypad.
Melt
The Melt function can be used with all surface cooking areas.
To Use:
To Turn On:
1. Check that a surface cooking area has been selected.
2. Touch MELT. “A” will appear in the display and the indicator
light next to Melt will light.
The cooktop timer remains visible and can be set if desired.
To Turn Off:
Touch the surface cooking area Off keypad.
Bridge
The Bridge function can be activated when surface cooking areas
are ON or OFF. The Bridge function allows you to use 2 cooking
zones as an extra-large cooking zone.
To Turn On the Bridge:
1. Touch BRIDGE.
The heat setting levels for the 2 left surface cooking areas will
default to “0” and can be set from a minimum of “1” to a
maximum of “9.” If the cooktop timer was active, it will turn off.
2. Slide a finger on the heat level slider to change the power
level up or down.
The selected heat level will show in the heat level display for
each surface cooking area using the bridge.
To Turn Off the Bridge:
1. Touch BRIDGE.
The surface cooking areas will resume operation as 2
separate areas.
NOTE: Performance Boost cannot be used on the same elements
in combination with the Bridge function.
Pan Detection
If the system cannot recognize the pan, or if the pan has been
removed from the surface cooking area, the “replace pan”
animation appears in the cooking area display as a reminder. See
the following illustration.
If the pan is not placed within 30 seconds, the zone(s) will
switch off.
If a timer is running when a pan is removed, the countdown
will continue.
Control Lock
The Control Lock avoids unintended use of the surface cooking
areas.
If Control Lock is activated when power to the cooktop is OFF, the
cooktop is locked out and the surface cooking areas cannot be
turned on by the cooktop touch controls.
If Control Lock is activated when power to the cooktop is ON, all
keypads are locked out except for the Power and Off keypads.
To Lock Cooktop:
Touch and hold the Control Lock keypad for 5 seconds. After 5
seconds, a tone will sound and the indicator light above the
Control Lock keypad will light, indicating that the cooktop controls
are in the lockout position.
If the cooktop is in use when Control Lock is activated, cooking
will proceed as normal and any timers that have been set will
continue their countdown.
To Unlock Cooktop:
Touch and hold the Control Lock keypad for 5 seconds.

8
Performance Boost Function
This function allows you to increase the heat setting level above
the maximum heat setting “9” for 10 minutes or less.
NOTE: Performance Boost function is available on only 1 surface
cooking area at a time within a zone. See the following illustration
for zones.
Zone 1
A. Surface cooking area 1
B. Surface cooking area 2
Zone 2
C. Surface cooking area 3
D. Surface cooking area 4
If you attempt to use Performance Boost on more than one
surface cooking area in the same zone, “P” will briefly flash in the
display and the first surface cooking area selected for
Performance Boost will automatically be set back to the highest
power available setting. The last surface cooking area selected
will be set to Performance Boost.
1. Check that a surface cooking area has been selected.
2. Touch BOOST on the heat level slider. “P” will appear in the
display.
3. Touch BOOST again when finished. The “P” will no longer be
visible in the display and the Performance Boost function will
no longer be active. The surface cooking area turns back to
the highest available power level.
NOTE: The Performance Boost function may automatically
deactivate to keep the internal electronic components of
the cooktop from becoming too hot.
Timer
Use the cooktop timer to set times up to 90 minutes. The timer is
independent of any other control settings. A cooktop element must
be active in order for the cooktop timer to be used. If the element
is turned off, then the timer will also turn off.
To Use:
1. Touch the Timer “+” keypad. “01” appears in the timer display.
2. Touch the Timer “+” keypad to increase the time in 1-minute
increments.
OR
Touch the Timer “-” keypad to decrease the time in 1-minute
increments.
3. The timer will start to count down after a few seconds. To
change the time, touch the Timer “+” or Timer “-” keypad.
4. When the countdown is finished, “00” flashes and a tone
will sound.
5. Touch the Timer “-” keypad to turn off the timer
NOTE: When the power is restored after an outage, the timer will
no longer be running.
Tones
Tones are audible signals, indicating the following:
One Tone
■Valid keypad press
■Slider is moved to “0” power level.
■Slider is moved to “Boost” power level.
Three Tones
■Invalid keypad press
Four Tones
■End of cycle
Ceramic Glass
Clean the cooktop after each use to help avoid scratches, pitting,
abrasions, and to condition the glass surface. Ceramic glass
cooktop cleaner and a cooktop scraper are also recommended for
stubborn soils. Do not use abrasive cleaners, cleaning pads, or
harsh chemicals for cleaning. The Cooktop Care Kit Part Number
31605 contains all of the items needed to clean and condition your
ceramic glass cooktop. Refer to the “Range Maintenance and
Care” section in the Owner’s Manual for additional information.
IMPORTANT: To avoid permanent damage to the cooktop surface
and to make soils easier to remove, clean the cooktop after each
use to remove all soils.
■Avoid storing jars or cans above the cooktop. Dropping a
heavy or hard object onto the cooktop could crack the cooktop.
■To avoid damage to the cooktop, do not leave a hot lid on the
cooktop. As the cooktop cools, air can become trapped
between the lid and the cooktop and the ceramic glass could
break when the lid is removed.
■For foods containing sugar in any form, clean up all spills and
soils as soon as possible. Allow the cooktop to cool down
slightly. Then, while wearing oven mitts, remove the spills
while the surface is still warm. If sugary spills are allowed to
cool down, they can adhere to the cooktop and can cause
pitting and permanent marks.
■To avoid scratches, do not slide cookware or bakeware across
the cooktop.
■To avoid damage to the cooktop, do not allow objects that
could melt, such as plastic or aluminum foil, to touch any part
of the entire cooktop.
■To avoid damage to the cooktop, do not use the cooktop as a
cutting board.
■Use cookware about the same size as the surface cooking
area. Cookware should not extend more than 1/2" (1.3 cm)
outside the area. Minimum pan size is also noted on the
cooktop with the inner ring, if applicable.
A. 1/2" (1.3 cm) maximum overhang
B. Outer edge of cooktop
C. Minimum pan size, if applicable
■Use flat-bottomed cookware for best heat conduction and
energy efficiency. Cookware with rounded, warped, ribbed, or
dented bottoms could cause uneven heating and poor cooking
results.

9
■Determine flatness by placing the straight edge of a ruler
across the bottom of the cookware. While you rotate the ruler,
no space or light should be visible between it and the
cookware.
■To determine which pan to use on which induction element,
measure the bottom of the flat area of your pan. Do not include
the sides if they curve up. Use this measurement to help
determine which induction element would best fit your pan.
Manufacturer measurements listed on pans are usually for the
top opening dimension. The flat bottom may be smaller.
■Make sure the bottoms of pots and pans are clean and dry
before using them. Residue and water can leave deposits
when heated.
Cookware
IMPORTANT: This range has induction cooktop elements. Pan
size, material, and positioning are very important to achieve the
best results. See “Induction Cooking” in the “Cooktop” or “Cooktop
Use” section before using the cooktop.
Only ferromagnetic pans can be used for induction cooking.
Ferromagnetic Materials Include:
■Enameled steel
■Cast iron
■Stainless steel designed for induction cooking
Non-Ferromagnetic Materials Include:
These types of pans will not work with induction cooking.
■Stainless steel
■Glass
■Ceramic
■Copper or aluminum pans
To find out whether your pans can be used with an induction
cooktop, flip the pan over, hold a magnet to the bottom of the pan,
and then see whether it sticks. If the magnet sticks to the bottom
of the pan, the pan is ferromagnetic and can be used for induction
cooking.
In addition, many manufacturers are now placing an “induction
compatible” symbol on the bottom of their cookware or they will
note compatibility on their packaging. See the following symbol.
The number on the surface cooking area heat-setting display will
flash if no pan is placed on the surface cooking area, the pan is
not made of the right material, or it is not the right size. It will stop
flashing once a suitable pan is placed on the surface cooking
area. If you take longer than 30 seconds to place the correct pan
on the surface cooking area, the surface cooking area will turn off.
If there is no activity for 90 seconds, the cooktop will turn off.
Ideal cookware should have a flat bottom, straight sides, and a
well-fitting lid, and the material should be of medium-to-heavy
thickness.
Choose the correct pan size for each surface cooking area. The
diameter of the pan’s base should correspond to the size of the
surface cooking area.
NOTE: Cookware manufacturers often give the diameter across
the top of the pan. This is usually larger than the diameter of the
base.
Pans with rough finishes may scratch the cooktop.
Home Canning
Canning can be performed on the induction cooktop. See the
“Cookware” section to check if the canner will work on the
induction cooktop. When canning for long periods, alternate the
use of surface cooking areas or elements between batches. This
allows time for the most recently used areas to cool.
■Center the canner on the largest surface cooking area or
element. On electric cooktops, canners should not extend
more than 1/2" (1.3 cm) beyond the surface cooking area or
element.
■Do not place canner on 2 surface cooking areas or elements at
the same time.
■On ceramic glass models, use only flat-bottomed canners to
avoid damage to the cooktop and elements.
■For more information, contact your local agricultural extension
office or refer to published home canning guides. Companies
that manufacture home canning products can also offer
assistance.
OVEN USE
Odors and smoke are normal when the oven is used the first few
times or when it is heavily soiled.
IMPORTANT: The health of some birds is extremely sensitive to
the fumes given off. Exposure to the fumes may result in death to
certain birds. Always move birds to another closed and well
ventilated room.

10
POSITIONING RACKS AND
BAKEWARE
To position a rack, pull it out to the stop position, raise the front
edge, and then lift out. Use the following illustration and charts as
a guide.
The oven has 7 positions for a flat rack, as shown in the previous
illustration and the following table.
Flat Rack Position Type of Food
7Broiling/searing meats, hamburgers,
steaks
6 Broiled meats, poultry, fish
3 or 4 Most baked goods, casseroles
2 Roasted meats
1 Large roasts or poultry
IMPORTANT: If your model has a Max Capacity Rack, the
recessed ends must be placed in the rack position above the
desired position of the food. See the following illustration.
A. Ends of rack in position 3
B. Food in position 2
IMPORTANT: These rack positions are for flat racks. If a Max
Capacity Oven Rack is used, the rack position must be adjusted
as shown in the previous figure.
Multiple Rack Cooking
2-rack (non-convection): Use rack positions 2 and 5 or 3 and 6.
2-rack (convection): Use rack positions 2 and 5 or 3 and 6.
3-rack (convection): Use rack positions 2 and 7 and a Max
Capacity Oven Rack in rack position 5.
Bakeware
To cook food evenly, hot air must be able to circulate. Allow 2" (5
cm) of space around bakeware and oven walls. Make sure that no
bakeware piece is directly over another.
Roll-Out Rack
The roll-out rack allows easy access to position and remove food
in the oven. It is not recommended to use the roll-out rack in the
top rack, position 7, or the bottom rack, position 1.
Open Position
A. Rack frame
B. Sliding rack
Closed and Engaged Position
A. Rack frame
B. Sliding rack
To Insert Roll-Out Rack
1. Angle the front of the rack assembly up, and then insert the
rack frame into the “V” cutout in the rack guides of the oven
cavity.
A. “V” cutout
B. Rack guides
2. Keep rack assembly lifted up at an angle, and then push in to
bypass the lower “V” cutout.

11
3. Lower the front of the rack assembly, and then gently slide
rack assembly into oven, bypassing the “V” cutouts. Push the
rack assembly into the oven until it stops at the ladder in the
back of the oven.
A. “V” cutout
B. Rack guides C. Ladder hook
D. Ladder
4. Reach through the rack to hold the sliding rack and the front
crossbar. Lift the front of the rack assembly, and then push the
rack assembly to the back of the oven. Lower the front of the
rack assembly so the ladder hook engages with the ladder on
both sides of the oven.
A. Sliding rack
B. Front crossbar
To Remove Roll-Out Rack
1. Push the sliding rack in completely so that it is in the closed
and engaged position.
2. Reach through the rack to hold the sliding rack and the front
crossbar. Lift the front of the rack assembly to disengage the
ladder hook from the ladders at the rear of the oven, and then
pull the rack assembly forward.
3. Using 2 hands, gently pull the sliding rack and the rack frame
at the same time to the “V” cutout. Angle the rack so that the
front is higher than the back, and then gently pull rack past “V”
cutout and then out of the oven.
To avoid damage to the sliding rack, do not place more than 25 lbs
(11.4 kg) on the rack.
Do not clean the roll-out rack in a dishwasher. It may remove the
rack’s lubricant and affect its ability to slide.
See the “General Cleaning” section in the Owner’s Manual for
more information.
Sabbath Mode
The Sabbath mode sets the oven to remain on in a bake setting
until turned off.
When the Sabbath mode is set, only the Bake cycle will operate.
All other cooking and cleaning cycles are disabled. No tones will
sound and the displays will not indicate temperature changes.
When the oven door is opened or closed, the oven light will not
turn on or off and the heating elements will not turn on or off
immediately.
To Enable Sabbath Mode Capability (One Time Only):
1. Press CLOCK/TOOLS until “SABBATH” is displayed. “OFF.
Press (1) for On” will scroll in the display
2. Press the “1” keypad. “ON. Press (1) for Off” will scroll in the
display. Sabbath mode can be activated for baking.
3. Press START or CANCEL to exit and display the time of day.
NOTE: To disable the Sabbath mode, repeat steps 1 through
3 to change the status from “SABBATH ON” to “SABBATH
OFF.”
To Activate Sabbath Mode:
1. Press BAKE for the desired oven.
2. Press the number keypad to set a temperature other than
350°F (177°C).
3. Press START.
For timed cooking in Sabbath mode, press COOK TIME and
then the number keypads to set the desired cook time.
4. Press CLOCK/TOOLS. Three tones will sound. Then press
“7.” “SAb” will appear in the display
To Adjust Temperature (When Sabbath Mode Is Running):
1. Press the number keypad as instructed by the scrolling text to
select the new temperature.
NOTE: The temperature adjustment will not appear on the
display. The scrolling text will be shown on the display as it
was before the keypad was pressed.
2. Press START.
To Deactivate Sabbath Mode:
Press CLOCK/TOOLS, and then press “7” to return to regular
baking, or press CANCEL for the desired oven to turn off the
range.
NOTE: No tones will sound while deactivating Sabbath mode.
Baking and Roasting
Preheating
When beginning a Bake, Convect Bake, or Convect Roast cycle,
the oven will begin preheating after Start is pressed. The oven will
take approximately 12 to 15 minutes to reach 350°F (177°C) with
all of the oven racks provided with your oven inside the oven
cavity. Higher temperatures will take longer to preheat. The
preheat cycle rapidly increases the oven temperature. The actual
oven temperature will go above your set temperature to offset the
heat lost when your oven door is opened to insert food. This
ensures that when you place your food in the oven, the oven will
begin at the proper temperature. Insert your food when the
preheat tone sounds. Do not open the door during preheat before
the tone sounds.
Oven Temperature
While in use, the oven elements will cycle on and off as needed to
maintain a consistent temperature, but they may run slightly hot or
cool at any point in time due to this cycling. Opening the oven door
while in use will release the hot air and cool the oven which could
impact the cooking time and performance. It is recommended to
use the oven light to monitor cooking progress.
NOTE: On models with convection, the convection fan may run in
the non-convection bake mode to improve oven performance.
Temperature Management System
The Temperature Management System electronically regulates
the oven heat levels during preheat and bake to maintain a
precise temperature range for optimal cooking results. The bake
and broil elements or burners cycle on and off in intervals. On
convection range models, the fan will run while preheating and
may be cycled on and off for short intervals during bake to provide
the best results. This feature is automatically activated when the
oven is in use.
Before baking and roasting, position racks according to the
“Positioning Racks and Bakeware” section. When roasting, it is
not necessary to wait for the oven preheat cycle to end before
putting food in unless it is recommended in the recipe.

12
Steam Bake
The Steam Bake function works in conjunction with the steam
rack to provide additional moisture during baking. The steam rack
contains a water reservoir which heats up and releases steam into
the oven cavity during the Steam Bake cycle. There are 3
preprogrammed food options to choose from: Breads, Desserts,
and Fish as well as a Refresh/Reheat option.
For best performance, place the steam rack in the lowest
available rack position in the cavity and pour 1 1/2cups (350 mL)
of water into the reservoir. Do not fill past the MAX level indicated
on the reservoir.
After the Steam Bake cycle is complete, some water may remain
in the reservoir. This is normal. Wait for the oven to cool and
discard the water.
A. Steam rack
B. Water reservoir
Broiling
When broiling, preheat the oven for 2 minutes before putting food
in, unless recommended otherwise in the recipe. Position food on
grid in a broiler pan, and then place it in the center of the oven
rack.
IMPORTANT: Close the door to ensure proper broiling
temperature.
Changing the temperature when broiling allows more precise
control when cooking. The lower the broil setting is, the slower the
cooking. Thicker cuts and unevenly shaped pieces of meat, fish,
and poultry may cook better at lower broil settings. Use rack 6 or 7
for broiling. Refer to the "Positioning Racks and Bakeware"
section for more information.
On lower settings, the broil element will cycle on and off to
maintain the proper temperature.
■For best results, use a broiler pan and grid. It is designed to
drain juices and help avoid spatter and smoke.
If you would like to purchase a broiler pan, one may be
ordered. Please refer to the Quick Start Guide for contact
information.
Convection Cooking
In a convection oven, the fan-circulated hot air continually
distributes heat more evenly than the natural movement of air in a
standard thermal oven. This movement of hot air helps maintain a
consistent temperature throughout the oven, cooking foods more
evenly, crisping surfaces while sealing in moisture and yielding
crustier breads.
During convection baking or roasting, the bake, broil, and
convection elements cycle on and off in intervals while the fan
circulates the hot air. During convection broiling, the broil and
convection elements cycle on and off.
If the oven door is opened during convection cooking, the fan will
turn off immediately. It will come back on when the oven door is
closed.
With convection cooking, most foods can be cooked at a lower
temperature and/or a shorter cooking time than in a standard
thermal oven. Depending upon the selected cooking mode,
EasyConvect™conversion can automatically reduce the standard
recipe temperature and/or time you input for convection cooking. If
you choose not to use the EasyConvect™conversion, use the
following table as a guide.
Convection Mode Time/Temperature Guidelines
Convection Bake 25°F (15°C) lower temperature,
possible shortened cooking time
Convection Roast Cooking time shortened by up to 30%
Convection Broil Shortened cooking time
Convect Options
Convect Bake - multiple-rack baking or cookies, biscuits, breads,
casseroles, tarts, tortes, cakes
Convect Roast - whole chicken or turkey, vegetables, pork roasts,
beef roasts
Convect Broil - thicker cuts or unevenly shaped pieces of meat,
fish, or poultry
Proofing Bread
Proofing bread prepares the dough for baking by activating the
yeast. Follow the recipe directions as a guide. Proof should be
used for fresh dough, thawed dough, and for the first and second
rise.
To Proof:
Before first proofing, place the dough in a lightly greased bowl and
cover loosely with wax paper, coated with shortening. Place on
rack guide 2 and close the oven door.
NOTE: If the temperature of the oven is greater than 120°F (49°
C), “Oven Cooling” will be displayed until the temperature is less
than 120°F (49°C).
1. Press PROOF.
2. Press START.
Let the dough rise until nearly doubled in size. Proofing time
may vary depending on dough type and quantity.
3. Press CANCEL when finished proofing.
Before second proofing, shape the dough, place it in baking pan
(s), and cover loosely. Follow the same placement and control
steps above. Before baking, remove the cover.
NOTE: If the oven temperature is greater than 120°F (49°C),
the display will indicate “Oven Cooling” until the temperature
is below 120°F (49°C).

13
Cook Time
WARNING
Food Poisoning Hazard
Do not let food sit for more than one hour before or after
cooking.
Doing so can result in food poisoning or sickness.
To Set a Timed Cook:
1. Press BAKE or BROIL or press an Easy Convect function.
2. Press the number keypads to enter a temperature other than
the one displayed.
3. Press COOK TIME. The cook time oven indicator light will
light up.
4. Press the number keypads to enter the length of time to cook.
5. Press START. The display will count down the time. When the
time ends, the oven will shut off automatically.
6. Press CANCEL for the desired oven to clear the display.
To Set a Delayed Timed Cook:
1. Press BAKE or BROIL or press an Easy Convect function.
2. Press the number keypads to enter a temperature other than
the one displayed.
3. Press COOK TIME. The Cook Time oven indicator light will
light up.
4. Press number keypads to enter the length of time to cook.
5. Press DELAY START.
6. Press number keypads to enter the number of hours and/or
minutes you want to delay the start time.
7. Press START.
When the start time is reached, the oven will automatically
turn on. The temperature and/or time settings can be changed
anytime after the oven turns on by repeating steps 2 through
4. When the set cook time ends, the oven will shut off
automatically.
8. Press CANCEL for the desired oven to clear the display.
Baking Drawer
WARNING
Food Poisoning Hazard
Do not let food sit for more than one hour before or after
cooking.
Doing so can result in food poisoning or sickness.
The baking drawer is highly recommended for baking frozen
foods. Use the temperature and medium cook time given on the
frozen food packaging. For example, if the packaging suggests a
cook time of 15 to 20 minutes, set the cook time for 17 minutes.
Check food for doneness before removing from the baking drawer.
The baking drawer may also be used for conventional baking,
slow cooking, and keeping hot cooked foods warm. It is not
recommended to prepare foods taller than the height of the baking
drawer rack handles or foods that may rise above 2 1/2" (6.4 cm) in
the baking drawer.
IMPORTANT: Always use the baking drawer rack when using the
baking drawer.
A. Baking drawer
B. Baking drawer rack
C. Baking drawer rack handles
See the “General Cleaning” section in the Owner’s Manual for
more information.
To Bake with the Baking Drawer:
1. Press BAKING DRAWER BAKE.
2. Press the number keypads to set the desired temperature. If
the temperature entered is not in the range of the
temperatures allowed, the minimum or maximum allowed
temperature will be displayed. Enter a temperature in the
allowable range.
3. Press START.
4. To change the temperature, repeat steps 2 and 3.
5. Press CANCEL LOWER when finished.
6. Remove food from the drawer.
To Slow Cook with the Baking Drawer:
IMPORTANT: Brown roasts thoroughly before starting to slow
cook.
1. Place food in the Baking Drawer.
2. Press BAKING DRAWER SLOW COOK.
3. Press the number keypads to set the desired temperature. If
the temperature entered is not in the range of the
temperatures allowed, the minimum or maximum allowed
temperature will be displayed. Enter a temperature in the
allowable range.
4. Press START.
5. (Optional) Set the desired cook time using the number
keypads.
6. Press START.
7. Press CANCEL LOWER when finished.
8. Remove food from the baking drawer.
To Keep Warm with the Baking Drawer:
Food must be at serving temperature before placing it in the
warmed drawer.
1. Place food in the baking drawer
2. Press BAKING DRAWER KEEP WARM.
3. Press the number keypads to set the desired temperature. If
the temperature entered is not in the range of the
temperatures allowed, the minimum or maximum allowed
temperature will be displayed. Enter a temperature in the
allowable range.
4. Press START.
5. Press CANCEL LOWER when finished.
6. Remove food from the baking drawer.

14
GUIDE DES CARACTÉRISTIQUES
AVERTISSEMENT : Pour réduire le risque d’incendie, de décharge électrique ou de blessures, lire les INSTRUCTIONS IMPORTANTES
DE SÉCURITÉ du guide d’utilisation de votre appareil avant de faire fonctionner cet appareil.
Ce manuel concerne plusieurs modèles. Le modèle que vous avez peut comporter toutes les caractéristiques énumérées ou seulement
certaines d’entre elles. Consulter ce manuel ou la section d’aide des produits de notre site Internet www.kitchenaid.com. Au Canada,
consulter la section d’aide des produits de notre site Internet www.kitchenaid.ca.
AVERTISSEMENT
Risque d'empoisonnement alimentaire
Ne pas laisser des aliments dans un four plus d'une
heure avant ou après la cuisson.
Le non-respect de cette instruction peut causer un
empoisonnement alimentaire ou une maladie.
TOUCHE CARACTÉRIS-
TIQUES
INSTRUCTIONS
CLOCK/TOOLS
(horloge/outils) Horloge Cette horloge est réglable sur 12 ou 24 heures. Voir la section “Commandes électroniques
du four”.
1. Appuyer sur CLOCK/TOOLS (horloge/outils) jusqu’à afficher “CLOCK” (horloge).
2. Appuyer sur les touches numériques pour régler l’heure.
3. Appuyer sur START (mise en marche) pour changer l’heure.
4. Appuyer sur “3” pour AM (heure du matin) ou “6” pour PM (heure de l’après-midi).
CLOCK/TOOLS
(horloge/outils) Réglages Permet de personnaliser les signaux sonores et le fonctionnement du four selon les
préférences de l’utilisateur. Voir la section “Commandes électroniques du four”.
OVEN LIGHT
(éclairage du four) Éclairage de la
cavité du four
L’éclairage du four est commandé par une touche située sur le tableau de commande du
four. La porte du four étant fermée, appuyer sur OVEN LIGHT (éclairage du four) pour
allumer ou éteindre la lampe. L’éclairage du four s’allume automatiquement à l’ouverture
de la porte.
TIMER SET/OFF
(réglage/arrêt de la
minuterie)
Minuterie du
four La minuterie peut être réglée en heures ou en minutes jusqu’à concurrence de 9 heures et
59 minutes.
1. Appuyer sur TIMER SET/OFF (réglage/arrêt de la minuterie).
2. Appuyer sur les touches numériques pour régler la durée en hr-min-min. Les zéros de
gauche peuvent ne pas être entrés. Entrer “2” pour 2 minutes par exemple.
3. Appuyer sur TIMER SET/OFF (réglage/arrêt de la minuterie) pour commencer le
compte à rebours. Si activés, les signaux sonores de fin de programme retentissent à
la fin du compte à rebours.
4. Appuyer sur TIMER SET/OFF (réglage/arrêt de la minuterie) pour annuler la minuterie
et revenir à l’heure du jour. Ne pas appuyer sur la touche Cancel (annulation), sinon le
four s’éteindra.
5. Si la minuterie est activée mais n’apparaît pas sur l’affichage, appuyer sur TIMER
SET/OFF (réglage/arrêt de la minuterie) pour faire apparaître le compte à rebours
pendant 5 secondes.
START (mise en
marche) Démarrage de
la cuisson La touche Start (mise en marche) met en marche n’importe quelle fonction du four. Si,
après avoir appuyé sur une touche, on n’appuie pas sur Start (mise en marche) dans les 2
minutes qui suivent, la fonction est annulée et l’heure s’affiche.
Guide de contrôle de la Cuisinières à induction encastrées

15
TOUCHE CARACTÉRIS-
TIQUES
INSTRUCTIONS
CANCEL UPPER
CANCEL LOWER
(annulation four
supérieur/annulation
four inférieur) (sur
certains modèles)
Fonction de la
cuisinière La touche Cancel (annulation) désactivent toutes les fonctions du four ou du tiroir
correspondant à l’exception de l’horloge et de la minuterie.
BAKE (cuisson au
four) Cuisson au
four et
rôtissage
1. Appuyer sur BAKE (cuisson au four).
2. Utiliser les touches numériques pour régler la température souhaitée. Si la
température entrée ne se trouve pas dans la fourchette des températures autorisées,
la température minimale ou maximale autorisée s’affiche. Entrer une température
dans la fourchette autorisée.
3. Appuyer sur START (mise en marche).
4. Pour modifier la température, répéter les étapes 2 et 3.
5. Appuyer sur CANCEL UPPER (annulation four supérieur) après avoir terminé.
STEAM BAKE (cuisson
au four vapeur) Cuisson au
four vapeur 1. Insérer la grille d’étuvage avec le réservoir d’eau dans le four.
2. Verser 1 1/2tasse (350 mL) d’eau tiède dans le réservoir d’eau.
REMARQUE: Ne pas remplir au-delà de la ligne MAX.
3. Appuyer sur STEAM BAKE (cuisson au four vapeur).
4. Utiliser les touches numériques pour sélectionner le plat souhaité.
5. Utiliser les touches numériques pour régler la température souhaitée. Si la
température entrée ne se trouve pas dans la fourchette des températures autorisées,
la température minimale ou maximale autorisée s’affiche. Entrer une température
dans la fourchette autorisée.
6. Appuyer sur START (mise en marche).
7. (Facultatif) Appuyer sur COOK TIME (durée de cuisson). Appuyer sur les touches
numériques pour régler la durée de cuisson.
8. Appuyer sur START (mise en marche).
9. Insérer les aliments lorsque le préchauffage est terminé.
10. Appuyer sur CANCEL UPPER (annulation four supérieur) après avoir terminé.
REMARQUE: Laisser le four refroidir avant de retirer et vider le réservoir d’eau.
BROIL (cuisson au
gril) Cuisson au
gril 1. Appuyer sur BROIL (cuisson au gril).
2. Utiliser les touches numériques pour régler la température souhaitée. Si la
température entrée ne se trouve pas dans la fourchette des températures autorisées,
la température minimale ou maximale autorisée s’affiche. Entrer une température
dans la fourchette autorisée.
3. Appuyer sur START (mise en marche) et laisser le four préchauffer pendant 5
minutes.
4. Pour modifier la température, répéter les étapes 2 et 3.
5. Placer le plat dans le four et fermer la porte.
6. Appuyer sur CANCEL UPPER (annulation four supérieur) après avoir terminé.
PROOF (levée) Levée du pain 1. Placer la pâte préparée dans le four. Appuyer sur PROOF (levée du pain).
2. Appuyer sur START (mise en marche).
Laisser la pâte lever jusqu’à ce qu’elle ait presque doublé de volume. La durée de
levée du pain peut varier en fonction du type de pâte et de la quantité.
3. Appuyer sur CANCEL UPPER (annulation four supérieur) lorsque la levée est
terminée.
Consulter la section “Levée du pain” pour plus d’informations.
KEEP WARM (maintien
au chaud) Maintien au
chaud Les aliments doivent être à la température de service avant d’être placés dans le four
chaud.
1. Appuyer sur KEEP WARM (maintien au chaud).
2. Utiliser les touches numériques pour régler la température souhaitée. Si la
température entrée ne se trouve pas dans la fourchette des températures autorisées,
la température minimale ou maximale autorisée s’affiche. Entrer une température
dans la fourchette autorisée.
3. Appuyer sur START (mise en marche).
4. Appuyer sur CANCEL UPPER (annulation four supérieur) après avoir terminé.

16
TOUCHE CARACTÉRIS-
TIQUES
INSTRUCTIONS
EASY CONVECT BAKE
(cuisson au four par
convection facile)
Cuisson par
convection 1. Appuyer sur EASY CONVECT BAKE (cuisson au four par convection facile).
2. Appuyer sur “1” pour que le four convertisse automatiquement la température et la
durée pour la cuisson par convection. Appuyer sur “2” pour convertir manuellement la
température et la durée.
3. Utiliser les touches numériques pour régler la température souhaitée. Si la
température entrée ne se trouve pas dans la fourchette des températures autorisées,
la température minimale ou maximale autorisée s’affiche. Entrer une température
dans la fourchette autorisée.
4. Appuyer sur START (mise en marche).
5. (Facultatif) Appuyer sur les touches numériques pour régler une durée de cuisson.
6. Appuyer sur START (mise en marche).
7. Pour changer la température, répéter les étapes 2 et 3.
8. Appuyer sur CANCEL UPPER (annulation four supérieur) après avoir terminé.
EASY CONVECT
BROIL (cuisson au gril
par convection facile)
Cuisson par
convection 1. Appuyer sur EASY CONVECT BROIL (cuisson au gril par convection facile).
2. Appuyer sur “1” pour que le four convertisse automatiquement la température et la
durée pour la cuisson par convection. Appuyer sur “2” pour convertir manuellement la
température et la durée.
3. Utiliser les touches numériques pour régler la température souhaitée. Si la
température entrée ne se trouve pas dans la fourchette des températures autorisées,
la température minimale ou maximale autorisée s’affiche. Entrer une température
dans la fourchette autorisée.
4. Appuyer sur START (mise en marche).
5. (Facultatif) Appuyer sur les touches numériques pour régler une durée de cuisson.
6. Appuyer sur START (mise en marche).
7. Pour changer la température, répéter les étapes 2 et 3.
8. Appuyer sur CANCEL UPPER (annulation four supérieur) après avoir terminé.
EASY CONVECT
ROAST (rôtissage par
convection facile)
Cuisson par
convection 1. Appuyer sur EASY CONVECT ROAST (rôtissage par convection facile).
2. Appuyer sur “1” pour que le four convertisse automatiquement la température et la
durée pour la cuisson par convection. Appuyer sur “2” pour convertir manuellement la
température et la durée.
3. Utiliser les touches numériques pour régler la température souhaitée. Si la
température entrée ne se trouve pas dans la fourchette des températures autorisées,
la température minimale ou maximale autorisée s’affiche. Entrer une température
dans la fourchette autorisée.
4. Appuyer sur START (mise en marche).
5. (Facultatif) Appuyer sur les touches numériques pour régler une durée de cuisson.
6. Appuyer sur START (mise en marche).
7. Pour changer la température, répéter les étapes 2 et 3.
8. Appuyer sur CANCEL UPPER (annulation four supérieur) après avoir terminé.
COOK TIME (durée de
cuisson) Cuisson
minutée La cuisson minutée permet d’allumer le four à une certaine heure de la journée,
d’effectuer une cuisson pendant une durée déterminée et/ou d’éteindre le four
automatiquement.
Pour régler une cuisson minutée ou une cuisson minutée différée, voir la section “Durée
de cuisson”.
DELAY START (mise
en marche différée) Mise en
marche
différée
La touche Delay Start (mise en marche différée) sert à entrer l’heure de mise en marche
pour un four équipé d’une mise en marche différée. La mise en marche différée ne doit
pas être utilisée pour les aliments tels que pains et gâteaux, car ils risquent de ne pas
bien cuire.
Pour régler une cuisson minutée ou une cuisson minutée différée, voir la section “Durée
de cuisson”.
BAKING DRAWER
BAKE
(cuisson au tiroir de
cuisson) (sur certains
modèles)
Tiroir de
cuisson 1. Appuyer sur BAKING DRAWER BAKE (cuisson au tiroir de cuisson).
2. Utiliser les touches numériques pour régler la température souhaitée. Si la
température entrée ne se trouve pas dans la fourchette des températures autorisées,
la température minimale ou maximale autorisée s’affiche. Entrer une température
dans la fourchette autorisée.
3. Appuyer sur START (mise en marche).
4. Pour modifier la température, répéter les étapes 2 et 3.
5. Appuyer sur CANCEL LOWER (annulation four inférieur) après avoir terminé.

17
TOUCHE CARACTÉRIS-
TIQUES
INSTRUCTIONS
BAKING DRAWER
SLOW COOK
(cuisson lente au tiroir
de cuisson) (sur
certains modèles)
Tiroir de
cuisson lente 1. Appuyer sur BAKING DRAWER SLOW COOK (cuisson lente au tiroir de cuisson).
2. Utiliser les touches numériques pour régler la température souhaitée. Si la
température entrée ne se trouve pas dans la fourchette des températures autorisées,
la température minimale ou maximale autorisée s’affiche. Entrer une température
dans la fourchette autorisée.
3. Placer l’aliment/les aliments dans le tiroir de cuisson.
4. Appuyer sur START (mise en marche).
5. (Facultatif) Entrer la durée de cuisson souhaitée à l’aide du clavier numérique.
6. Appuyer sur START (mise en marche) pour commencer le chauffage du tiroir de
cuisson.
7. Appuyer sur CANCEL LOWER (annulation four inférieur) après avoir terminé.
BAKING DRAWER
KEEP WARM
(maintien au chaud au
tiroir de cuisson) (sur
certains modèles)
Tiroir-réchaud Les aliments doivent être à la température de service avant d’être placés dans le four
chaud.
1. Appuyer sur BAKING DRAWER KEEP WARM (maintien au chaud au tiroir de
cuisson).
2. Utiliser les touches numériques pour régler la température souhaitée. Si la
température entrée ne se trouve pas dans la fourchette des températures autorisées,
la température minimale ou maximale autorisée s’affiche. Entrer une température
dans la fourchette autorisée.
3. Appuyer sur START (mise en marche).
4. Appuyer sur CANCEL LOWER (annulation four inférieur) après avoir terminé.
AQUALIFT SELF
CLEAN (autonettoyage
Aqualift)
Programme
de nettoyage Voir la section “Programme de nettoyage”.
START
(Control Lock hold 3
sec to lock) (mise en
marche [verrouillage
des commandes -
appuyer pendant 3
secondes])
Verrouillage
des
commandes
du four
Aucune touche ne fonctionne lorsque les commandes sont verrouillées. Les fonctions de
la table de cuisson ne sont pas affectées par le verrouillage des commandes du four.
1. Vérifier que le four est OFF (éteint).
2. Appuyer pendant 3 secondes sur la touche START (Control Lock Hold 3 Sec) (mise
en marche [verrouillage des commandes - appuyer pendant 3 secondes]).
3. Un signal sonore retentit et l’avertissement “Control Locked” (commandes
verrouillées) défile, puis “Locked” (verrouillé) s’affiche.
4. Répéter l’opération pour déverrouiller. Aucune touche ne fonctionne lorsque les
commandes sont verrouillées. Les fonctions de la table de cuisson ne sont pas
affectées par le verrouillage des commandes du four.
CLOCK/TOOLS
(horloge/outils) Économie
d’énergie 1. Appuyer sur CLOCK/TOOLS (horloge/outils) jusqu’à afficher “ENERGY SAVE”
(économie d’énergie).
2. Le réglage en cours s’affiche.
3. Appuyer sur la touche “1” pour changer le réglage.
4. Appuyer sur CANCEL (annulation) pour quitter et afficher l’heure.
Si le mode d’économie d’énergie est activé, l’affichage passe en mode de veille après
5 minutes d’inactivité. Appuyer sur n’importe quelle touche pour activer l’affichage. Si
le mode d’économie d’énergie est désactivé, l’affichage reste constamment allumé.

18
Technologie d’autonettoyage
AquaLift®®
La technologie d’autonettoyage AquaLift®est une solution de
nettoyage inédite permettant de réduire la durée, la température
et les odeurs habituellement dégagées par rapport aux méthodes
d’autonettoyage traditionnelles. Avec la technologie
d’autonettoyage AquaLift®, une pellicule protectrice exclusive est
activée par la chaleur et l’eau à l’intérieur du four pour décoller les
salissures incrustées. Pour utiliser la technologie d’autonettoyage
AquaLift®, il suffit d’essuyer les débris décollés, de verser de l’eau
au fond du four et de lancer le programme d’autonettoyage
AquaLift®. Une fois le programme terminé, en moins de 1 heure à
une température plus basse que les méthodes d’autonettoyage
traditionnelles, essuyer simplement l’eau restante et les salissures
décollées. Voir la section "Programme de nettoyage" pour des
instructions plus détaillées. Pour plus d’informations, des
réponses aux questions fréquentes et des vidéos consacrées à la
technologie d’autonettoyage AquaLift®, visiter notre site Web à
l’adresse http://whirlpoolcorp.com/aqualift.
Températures en surface
Lorsque la cuisinière est en marche, toutes ses surfaces peuvent
chauffer, y compris les boutons de commande et la porte du four.
Tiroir de remisage
Lorsque le four est en marche, le tiroir peut chauffer. Ne pas
placer d’objets en plastique, en tissu ou susceptibles de fondre ou
de brûler dans le tiroir.
Évent du four
L’évent du four permet l’évacuation de l’air chaud et de l’humidité
du four. Il ne doit pas être obstrué ou couvert. Ne pas placer près
de l’évent du four des objets en plastique, en papier ou
susceptibles de fondre ou de brûler.
Commandes électroniques du four
Affichage des commandes
L’affichage clignote à la mise sous tension ou après une coupure
de courant. Appuyer sur CANCEL UPPER (annulation du four
supérieur) pour effacer. Lorsque le four n’est pas utilisé, l’heure
s’affiche. Si la cuisinière est en mode d’économie d’énergie,
l’écran est inactif lorsque le four n’est pas utilisé.
Signaux sonores
Les signaux sonores avertissent l’utilisateur de divers
événements :
Un seul signal sonore
■Appui sur une touche valide
■Préchauffage du four terminé (signal sonore long).
■Saisie d’une fonction.
■Rappel émis chaque minute après le signal sonore de fin de
programme
Trois signaux sonores
■Appui sur une touche non valide
Quatre signaux sonores
■Fin de programme
Appuyer sur la touche Clock/Tools (réglages/outils) pour modifier
les réglages des Sleep mode (signaux sonores).
Mode d’économie d’énergie
Le mode Energy Save (économie d’énergie) place la cuisinière en
mode de veille pour réduire la consommation d’énergie.
Pour activer le mode Energy Save :
1. Appuyer sur CLOCK/TOOLS (horloge/outils) jusqu’à afficher
“ENERGY SAVE” (économie d’énergie).
2. Le réglage en cours s’affiche.
3. Appuyer sur la touche “1” pour changer le réglage.
4. Appuyer sur CANCEL (annulation) pour quitter et afficher
l’heure.
5. Le réglage sera activé après 5 minutes.
Pour désactiver le mode Energy Save :
1. Appuyer sur CLOCK/TOOLS (horloge/outils) jusqu’à afficher
“ENERGY SAVE” (économie d’énergie).
2. Le réglage en cours s’affiche.
3. Appuyer sur la touche “1” pour changer le réglage.
4. Appuyer sur CANCEL (annulation) pour quitter et afficher
l’heure.
5. L’horloge réapparaît dans l’affichage; on peut alors faire
fonctionner la cuisinière comme d’habitude.
Réglages
De nombreuses fonctions du four peuvent être réglées pour
répondre à vos besoins. La touche Clock/Tools (réglages/outils)
sert à effectuer ces ajustements.
Appuyer sur la touche Clock/Tools (réglages/outils) pour faire
défiler les fonctions modifiables. L’affichage passe au réglage
suivant à chaque pression supplémentaire sur Clock/Tools
(réglages/outils). Après avoir sélectionné la fonction à modifier, le
tableau de commande demande à l’utilisateur d’effectuer la
manoeuvre nécessaire. Appuyer sur START (mise en marche) ou
CANCEL UPPER (annulation du four supérieur) pour quitter et
afficher l’heure. Les sections suivantes détaillent toutes les
fonctions modifiables.
Appuyer sur CANCEL UPPER (annulation du four supérieur) pour
quitter le mode Settings (réglages).
Horloge
Cette horloge est réglable sur 12 ou 24 heures.
1. Appuyer sur CLOCK/TOOLS (horloge/outils) jusqu’à afficher
“CLOCK” (horloge).
2. Appuyer sur les touches numériques pour régler l’heure.
3. Appuyer sur START (mise en marche) pour changer l’heure.
4. Appuyer sur “3” pour AM (heure du matin) ou “6” pour PM
(heure de l’après-midi).
Fahrenheit et Celsius
Le four est préréglé pour un affichage de la température en
degrés Fahrenheit, mais on peut le permuter en degrés Celsius.
1. Appuyer sur CLOCK/TOOLS (réglages/outils) jusqu’à afficher
“TEMP UNIT” (unité de température).
2. Le réglage en cours s’affiche.
3. Appuyer sur la touche “1” pour changer le réglage.
4. Appuyer sur START (mise en marche) ou CANCEL UPPER
(annulation du four supérieur) pour quitter et afficher l’heure.
Désactivation des signaux sonores
Désactive tous les signaux sonores, y compris le signal sonore de
fin de programme et les signaux sonores d’appui sur une touche.
Les signaux sonores de rappel restent actifs lorsque tous les sons
sont désactivés.
1. Appuyer sur CLOCK/TOOLS (réglages/outils) jusqu’à afficher
“SOUND” (son).
2. Appuyer sur CLOCK/TOOLS (réglages/outils) jusqu’à afficher
“SOUND” (son).
3. Appuyer sur la touche “1” pour changer le réglage.
4. Appuyer sur START (mise en marche) ou CANCEL UPPER
(annulation du four supérieur) pour quitter et afficher l’heure.

19
Volume sonore
Règle le volume du signal sonore à bas ou élevé.
1. Appuyer sur CLOCK/TOOLS (réglages/outils) jusqu’à afficher
“SOUND VOLUME” (volume sonore).
2. Le réglage en cours s’affiche.
3. Appuyer sur la touche “1” pour changer le réglage.
4. Appuyer sur START (mise en marche) ou CANCEL UPPER
(annulation du four supérieur) pour quitter et afficher l’heure.
Signal sonore de fin de programme
Active ou désactive les signaux sonores émis à la fin d’un
programme.
1. Appuyer sur CLOCK/TOOLS (réglages/outils) jusqu’à afficher
“END TONE” (signal sonore de fin).
2. Le réglage en cours s’affiche.
3. Appuyer sur la touche “1” pour changer le réglage.
4. Appuyer sur START (mise en marche) ou CANCEL UPPER
(annulation du four supérieur) pour quitter et afficher l’heure.
Désactivation des signaux sonores de rappel
Désactive le signal sonore bref qui retentit chaque minute après le
signal sonore de fin de programme.
1. Appuyer sur CLOCK/TOOLS (réglages/outils) jusqu’à afficher
“REMINDER TONE” (signal sonore de rappel).
2. Le réglage en cours s’affiche.
3. Appuyer sur la touche “1” pour changer le réglage.
4. Appuyer sur START (mise en marche) ou CANCEL UPPER
(annulation du four supérieur) pour quitter et afficher l’heure.
Signaux sonores d’appui sur une touche
Active ou désactive les signaux sonores lorsqu’on appuie sur une
touche.
1. Appuyer sur CLOCK/TOOLS (réglages/outils) jusqu’à afficher
“KEYPRESS TONE” (signal sonore des touches).
2. Le réglage en cours s’affiche.
3. Appuyer sur la touche “1” pour changer le réglage.
4. Appuyer sur START (mise en marche) ou CANCEL UPPER
(annulation du four supérieur) pour quitter et afficher l’heure.
Mode de démonstration
IMPORTANT:Destinée au personnel commercial en rayon, cette
fonction permet, avec un raccordement au secteur 120 V, de
présenter les fonctions des commandes sans pour autant activer
le four. Si cette fonction est activée, le four ne fonctionnera pas.
1. Appuyer sur CLOCK/TOOLS (réglages/outils) jusqu’à afficher
“DEMO MODE” (mode démo).
2. Le réglage en cours s’affiche.
3. Appuyer sur la touche “1” pour changer le réglage.
4. Appuyer sur START (mise en marche) ou CANCEL UPPER
(annulation du four supérieur) pour quitter et afficher l’heure.
Arrêt au bout de 12 heures
Le four est configuré pour s’éteindre automatiquement 12 heures
après avoir activé une fonction de cuisson ou de nettoyage. Cette
fonction ne perturbe aucune fonction de cuisson minutée ou
différée.
1. Appuyer sur CLOCK/TOOLS (réglages/outils) jusqu’à afficher
“12Hr AUTO_OFF” (arrêt automatique après 12 heures).
2. Le réglage en cours s’affiche.
3. Appuyer sur la touche “1” pour changer le réglage.
4. Appuyer sur START (mise en marche) ou CANCEL UPPER
(annulation du four supérieur) pour quitter et afficher l’heure.
Horloge 12/24 heures
1. Appuyer sur CLOCK/TOOLS (réglages/outils) jusqu’à afficher
“12/24 HOUR” (horloge sur 12/24 heures).
2. Le réglage en cours s’affiche.
3. Appuyer sur la touche “1” pour changer le réglage.
4. Appuyer sur START (mise en marche) ou CANCEL UPPER
(annulation du four supérieur) pour quitter et afficher l’heure.
Mode Sabbat
Le mode Sabbat maintient le réglage de cuisson au four tant que
le four n’est pas éteint.
Lorsque le mode Sabbat est réglé, seul le programme de cuisson
au four fonctionne. Tous les autres programmes de cuisson et de
nettoyage sont désactivés. Aucun signal sonore ne retentit et les
affichages n’indiquent pas les changements de température.
Lorsque la porte du four est ouverte ou fermée, la lampe du four
ne s’allume ou ne s’éteint pas et les éléments de chauffage ne
s’allument ou ne s’éteignent pas immédiatement.
Activation du mode Sabbat (une seule fois) :
1. Appuyer sur CLOCK/TOOLS (réglages/outils) jusqu’à afficher
“SABBATH” (sabbat).
2. Le réglage en cours s’affiche.
3. Appuyer sur la touche “1” pour changer le réglage.
4. Appuyer sur START (mise en marche) ou CANCEL UPPER
(annulation du four supérieur) pour quitter et afficher l’heure.
Langue du texte inscrit sur l’affichage
Les options de langue sont l’anglais, l’espagnol et le français.
1. Appuyer sur CLOCK/TOOLS (réglages/outils) jusqu’à afficher
“LANGUAGE” (langue).
2. Le réglage en cours s’affiche.
3. Appuyer sur la touche “1” ou “2” pour sélectionner la langue
souhaitée.
4. Appuyer sur START (mise en marche) ou CANCEL UPPER
(annulation du four supérieur) pour quitter et afficher l’heure.
Commande de décalage de température du four
IMPORTANT: Ne pas utiliser de thermomètre pour mesurer la
température du four. Les éléments chauffants s’allument et
s’éteignent en alternance pour maintenir une température
constante, mais leur température peut varier légèrement dans un
sens ou dans l’autre du fait de cette alternance. De nombreux
thermomètres réagissent lentement à un changement de
température, et ne donneront pas une mesure exacte du fait de
cette alternance.
Le four fournit des températures précises; toutefois, il peut cuire
plus rapidement ou plus lentement que votre ancien four, c’est
pourquoi la température peut être ajustée à vos besoins de
cuisson. Elle peut être modifiée en degrés Fahrenheit ou Celsius.
Ajustement de la température du four :
1. Appuyer sur CLOCK/TOOLS (réglages/outils) jusqu’à afficher
“TEMP CALIB” (étalonnage température).
2. Sur certains modèles, appuyer sur “1” pour effectuer
l’étalonnage de température du tiroir. Appuyer sur START
(mise en marche), attendre 10 secondes que l’affichage
change, puis passer à l’étape 3.
OU
Appuyer sur START (mise en marche) pour effectuer le
réglage de la température du four. Attendre 10 secondes que
l’affichage change, puis passer à l’étape 3.
3. Appuyer sur la touche “3” pour augmenter la température par
paliers de 5°F (3°C) ou sur la touche “6” pour diminuer la
température par paliers de 5°F (3°C). L’intervalle d’ajustement
se situe entre -30°F et +30°F (-18°C à +18°C).
4. Appuyer sur START (mise en marche) ou CANCEL UPPER
(annulation du four supérieur) pour quitter et afficher l’heure.

20
TABLE DE CUISSON
A. Puissance de la table de cuisson
B. Mijotage
C. Faire fondre
D. Affichage de la surface de cuisson avant
gauche
E. Affichage de la surface de cuisson
arrière gauche
F. Arrêt de la surface de cuisson
G. Affichage du niveau de chaleur
H. Affichage de la minuterie
I. Affichage de la surface de cuisson
arrière droite
J. Affichage de la surface de cuisson avant
droite
K. Verrouillage des commandes
L. Élément de liaison
M. Curseur du niveau de chaleur
N. Minuterie (+/-)
Cuisson par induction
La cuisson par induction est très différente des formes de cuisson
traditionnelles. La chaleur est générée directement dans le plat et
permet ainsi de garder la surface de cuisson plus froide qu’un
élément traditionnel.
Avec la cuisson par induction, il y a une moindre déperdition de
chaleur qu’avec les formes de cuisson traditionnelles du fait que
la chaleur est générée dans l’ustensile lui-même.
La table de cuisson chauffe ou se refroidit rapidement après le
réglage des commandes. Elle cesse également de chauffer
lorsqu’on retire l’ustensile sans avoir à éteindre l’appareil.
Les aliments renversés sur la surface de la table de cuisson ne
brûlent pas car le verre n’est pas chauffé. La cuisson par induction
permet un nettoyage immédiat après utilisation car la chaleur est
générée dans l’ustensile.
La taille, le matériau (voir la section “Ustensiles de cuisson”) et le
positionnement du plat sont très importants pour atteindre une
puissance maximale.
Le diamètre de la base du plat doit être identique à la taille de
l’élément.
Si l’ustensile est trop petit, le brûleur ne le détecte pas et reste
éteint.
Commandes de la table de cuisson
AVERTISSEMENT
Risque d'incendie
Fermer tous les réglages lorsque la cuisson est
terminée.
Le non-respect de cette instruction peut causer un
décès ou un incendie.
Les commandes électroniques tactiles offrent une grande variété
de réglages de chaleur pour des résultats de cuisson optimaux.
Lorsqu’on fait fondre des aliments comme du chocolat ou du
beurre, la surface de cuisson peut être réglée à la fonction Faire
fondre pour un fonctionnement minimal de la surface de cuisson.
Pour un fonctionnement maximal de la surface de cuisson, toutes
les commandes tactiles de la table de cuisson peuvent être
réglées à la fonction Optimisation de rendement pour porter un
liquide à ébullition rapidement. Sélectionner la surface de cuisson
souhaitée puis appuyer sur “Boost” (optimisation) pour atteindre
immédiatement le réglage le plus élevé.
REMARQUE: Si une installation à 240 V n’est pas disponible, la
table de cuisson s’ajuste automatiquement pour une alimentation
en 208 V.
Utilisation
Allumage de la table de cuisson :
1. Appuyer sur POWER (mise sous tension).
Le témoin lumineux situé au-dessus de la touche Power (mise
sous tension) ainsi qu’un tiret (“-”) pour chaque surface de
cuisson s’allume pour indiquer que toutes les surfaces de
cuisson sont prêtes à être activées.
Si l’on ne fait rien pendant les 60 secondes qui suivent
l’activation de l’alimentation principale, l’alimentation de la
table de cuisson est automatiquement interrompue.
Si l’on touche une fonction de cuisson ou le curseur
d’alimentation sans sélectionner de surface de cuisson au
préalable, tous les tirets (un par zone) clignotent et un signal
sonore d’action invalide retentit 4 fois.
La page est en cours de chargement...
La page est en cours de chargement...
La page est en cours de chargement...
La page est en cours de chargement...
La page est en cours de chargement...
La page est en cours de chargement...
La page est en cours de chargement...
La page est en cours de chargement...
-
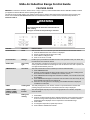 1
1
-
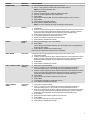 2
2
-
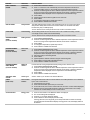 3
3
-
 4
4
-
 5
5
-
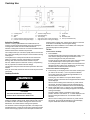 6
6
-
 7
7
-
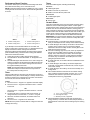 8
8
-
 9
9
-
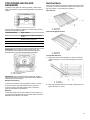 10
10
-
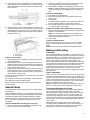 11
11
-
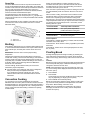 12
12
-
 13
13
-
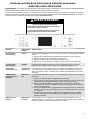 14
14
-
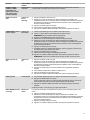 15
15
-
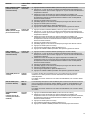 16
16
-
 17
17
-
 18
18
-
 19
19
-
 20
20
-
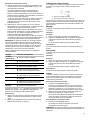 21
21
-
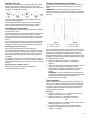 22
22
-
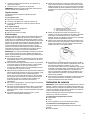 23
23
-
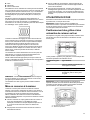 24
24
-
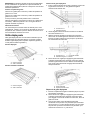 25
25
-
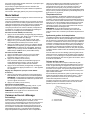 26
26
-
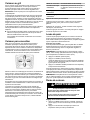 27
27
-
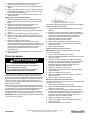 28
28


KitchenAid KSIB900ESS Mode d'emploi
- Catégorie
- Cuisinières
- Taper
- Mode d'emploi
dans d''autres langues
- English: KitchenAid KSIB900ESS User guide