La page est en cours de chargement...

THANK YOU
We appreciate the trust and confidence you have placed in Hampton Bay through the purchase of
this flushmount. We strive to continually create quality products designed to enhance your home. Visit
us online to see our full line of products available for your home improvement needs. Thank you for
choosing Hampton Bay!
Item #1002 957 046
Model # IKE2001L
Item # 000-000
Model # XXXXXXX
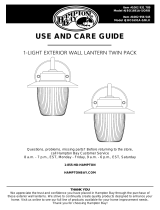
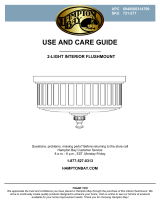
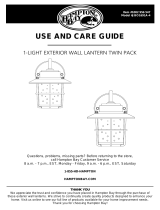
USE AND CARE GUIDE
LED EXTERIOR / INTERIOR FLUSHMOUNT
Questions, problems, missing parts? Before returning to the store,
call Hampton Bay Customer Service
8 a.m. - 7 p.m., EST, Monday - Friday, 9 a.m. - 6 p.m., EST, Saturday
1-855-HD-HAMPTON
HAMPTONBAY.COM

2
Table of Contents
Table of Contents ................................. 2
Safety Information ................................ 2
Warranty ............................................... 2
What is Covered ............................... 2
What is Not Covered ........................ 2
Pre-Installation ..................................... 3
Planning Installation ......................... 3
Tools Required ................................ 3
Hardware Included .......................... 3
Package Contents ........................... 4
Installation ........................................... 5
Care and Cleaning ............................... 7
Troubleshooting .................................. 7
Safety Information
WARNING: Carefully read and understand the
information given in this manual before beginning
the assembly and installation. Failure to do so
could lead to electric shock, fire or other injuries
which could be hazardous or even fatal.
WARNING: Be sure the electricity to the wires
you are working on is shut off. Either remove the
fuse or turn the circuit off.
NOTICE: Changes or modifications not expressly
approved by the party responsible for compliance could
void the user’s authority to operate the equipment.
NOTICE: This equipment has been tested and found to
comply with the limits for a Class B digital device, pursuant
to Part 15 of the FCC Rules.
These limits are designed to provide reasonable protection
against harmful interference in a residential installation.
This equipment generates, uses and can radiate radio
frequency energy and, if not installed and used in
accordance with the instructions, may cause harmful
interference to radio communications.
However, there is no guarantee that interference will not
occur in a particular installation.
If this equipment does cause harmful interference to radio or
television reception, which can be determined by turning the
equipment off and on, the user is encouraged to try to
correct the interference by one or more of the following
measures:
–Reorient or relocate the receiving antenna.
–Increase the separation between the equipment and
receiver.
–Connect the equipment into an outlet on a circuit different
from that to which the receiver is connected.
–Consult the dealer or an experienced radio/TV technician
for help.
Warranty
WHAT IS COVERED
The manufacturer warrants this lighting fixture to be free from defects in materials and workmanship
for a period of five (5) years from date of purchase. This warranty applies only to the original
consumer and only to products used in normal use and service. If this product is found to be
defective, the manufacturer’s only obligation, and your exclusive remedy, is the repair or replacement
of the product at the manufacturer’s discretion, provided that the product has not been damaged
through misuse, abuse, accident, modifications, alterations, neglect or mishandling.
WHAT IS NOT COVERED
This warranty shall not apply to any product that is found to have been improperly installed, set-up, or
used in any way not in accordance with the instructions supplied with the product. This warranty shall
not apply to a failure of the product as a result of an accident, misuse, abuse, negligence, alteration,
or faulty installation, or any other failure not relating to faulty material or workmanship. This warranty
shall not apply to the finish on any portion of the product, such as surface and/or weathering, as this
is considered normal wear and tear.
The manufacturer does not warrant and specifically disclaims any warranty, whether express or
implied, of fitness for a particular purpose, other than the warranty contained herein. The
manufacturer specifically disclaims any liability and shall not be liable for any consequential or
incidental loss or damage, including but not limited to any labor / expense costs involved in the
replacement or repair of said product.
Contact the Customer Service Team at 1-855-HD-HAMPTON or visit HAMPTONBAY.COM.

3 HAMPTONBAY.COM
Please contact 1-855-HD-HAMPTON for further assistance.
Pre-Installation
PLANNING INSTALLATION
Read all instructions before assembly. Before starting installation of this fixture or removal of a
previous fixture, disconnect the power by turning off the circuit breaker or by removing the fuse at the
fuse box. To avoid damaging this product, assemble it on a soft, non-abrasive surface such as carpet
or cardboard.
NOTE: Keep your receipt and these instructions for
proof of purchase.
TOOLS REQUIRED
Wire
Strippers
Safety
Goggles
Ladder
Gloves
Flathead
Screwdriver
Phillips
Screwdriver
Electrical
Tape
Wire
Cutters
HARDWARE INCLUDED
NOTE: Hardware not shown to actual size.
Part
Description
Quantity
AA
Mounting Strap
1
BB
Wire Connector
3
CC
Ground Screw
1
DD
Outlet Box Screw (15 mm)
2
EE
Nipple (60 mm)
1
FF
Hex Nut
1
GG
Cap Nut
1

4
Pre-Installation (continued)
PACKAGE CONTENTS
Part
Description
Quantity
A
Canopy
1
B
Shade
1
CAUTION: The canopy (A) is one piece. Do not
disassemble it.

5 HAMPTONBAY.COM
Please contact 1-855-HD-HAMPTON for further assistance.
Installation
1
Attaching the mounting
strap to the outlet box
2
Connecting the
electrical wires
□ Screw the hex nut (FF) about 1 in. onto the
nipple (EE).
□ Screw the nipple (EE) about 1/2 in. into the
mounting strap (AA).
□ Tighten the hex nut (FF) against the
mounting strap (AA) to secure the nipple
(EE).
□ Mount the mounting strap (AA) to the outlet
box (not included) using the outlet box
screws (DD).
□ Wrap the ground wire from the fixture
around the ground screw (CC) on the
mounting strap (AA). Use a wire
connector (BB) to connect the ground
wire from the fixture to the ground wire
from the outlet box.
□ Use a wire connector (BB) to connect
the white wire from the fixture to the
white wire (neutral wire) from the outlet
box.
□ Use a wire connector (BB) to connect
the black wire from the fixture to the
black wire (live wire) from the outlet box.
□ Wrap the three wire connections with
electrical tape for a more secure
connection.
□ Position the wires back inside the outlet
box.

6
Installation (continued)
3
Securing the fixture to the
outlet box
4
Securing the shade
□ Align the nipple (EE) to protrude through the
hole in the center of the canopy (A).
□ Place the canopy (A) firmly against the ceiling.
□ Screw the cap nut (GG) onto the nipple (EE).
CAUTION: The canopy (A) is one piece. Do not
disassemble it.
□ Align the three slots on the shade (B)
with the three divots located inside the
canopy (A).
□ Carefully turn the shade (B) clockwise
until it locks into the canopy (A).
□ The shade (B) only turns about 1/4 of a
turn. Do not over tighten.

7 HAMPTONBAY.COM
Please contact 1-855-HD-HAMPTON for further assistance.
Care and Cleaning
□ Clean the fixture with a soft, dry cloth.
□ Do not use any cleaners with chemicals, solvents or hash abrasives.
CAUTION: Before attempting to clean the fixture,
disconnect the power to the fixture by turning the
breaker off or removing the fuse from the fuse
box.
Troubleshooting
Problem
Possible Cause
Solution
The fixture will not light.
The power is off.
Ensure the power supply is On.
The circuit breaker is
off.
Ensure the circuit breaker is in the On
position.
The fuse blows or circuit
breaker trips when the light
is turned on.
Crossed wires or
power wire is
grounding out.
□ Check the wire connections.
□ Contact a qualified electrician or
call the Customer Service Team at
1-855-HD-HAMPTON.

Questions, problems, missing parts? Before returning to the store,
call Hampton Bay Customer Service
8 a.m. - 7 p.m., EST, Monday - Friday, 9 a.m. - 6 p.m., EST, Saturday
1-855-HD-HAMPTON
HAMPTONBAY.COM
Retain this manual for future use.

GRACIAS POR TU COMPRA
Agradecemos la confianza que ha tenido en Hampton Bay a traves de de la compra de este de
empotrar. Nos esforzamos para continuamente crear productos de calidad diseñados para mejorar tu
hogar. Visítanos por Internet para ver nuestra línea completa de productos disponibles para las
necesidades de mejoras de tu hogar. Gracias por elegir Hampton Bay!
Artículo # 1002 957 046
Modelo # IKE2001L
Item # 000-000
Model # XXXXXXX
U GUÍA DE USO Y MANTENIMIENTO
EXTERIOR / INTERIOR LED
DE EMPOTRAR
Preguntas, problemas o piezas faltantes? Antes de regresar a la tienda, llama
al Servicio al Cliente de Hampton Bay
de Lunes a Viernes entre 8 a.m. y 7 p.m., El Sábado entre 9 a.m. y 6 p.m., (hora del Este
de EE. UU.)
1-855-HD-HAMPTON
HAMPTONBAY.COM

10
Índice
Índice .................................................. 10
Información de Seguridad ................. 10
Garantía .............................................. 10
Lo que esta Cubierto ...................... 10
Lo que (no) esta Cubierto ............... 10
Pre-Instalación ................................... 11
Planificación de la Instalatión ......... 11
Herraminentas Necesarias .............11
Requiere de Hardware ...................11
Contenido del Paquete ...................12
Instalación ..........................................13
Mantenimiento y Limpieza .................15
Solución de Problemas ......................15
Información de Seguridad
ADVERTENCIA: Lea cuidadosamente y
entienda la información dada en este manual
antes de empezar el proceso de ensamble e
instalación. Si falla en hacerlo, puede ocasionar
un choque eléctrico, incendio u otros daños que
pueden ser perjudiciales o fatales.
ADVERTENCIA: Asegúrese de que la
electricidad que llega a los cables con los que se
encuentra trabajando estén apagados. Remueva
el fusible o apague el interruptor.
ANUNCIO: Cualquier cambio o modificación que no se
encuentre expresamente aprobada por el proveedor
responsable del cumplimiento puede revocar la
autorización del usuario a utilizar el equipo.
Garantía
LO QUE ESTA CUBIERTO
El fabricante garantiza que esta lámpara no presentará defectos materiales o de fabricación por un
período de cinco (5) años a partir de la fecha de compra. Esta garantía es válida sólo para el
comprador original y sólo cubre los productos en uso y funciones normales. Si se descubre algún
defecto en este producto, la única obligación y solución exclusiva del fabricante, a criterio del mismo,
será reparar o reemplazar el producto siempre y cuando el defecto no sea resultado de un mal uso,
abuso, accidente, modificaciones, alteraciones, negligencia o manejo indebido.
LO QUE (NO) ESTA CUBIERTO
Esta garantía no cubre ningún producto instalado, configurado o usado incorrectamente sin seguir
las instrucciones adjuntas al producto. Esta garantía no cubre fallas del producto a consecuencia de
un accidente, mal uso, abuso, negligencia, modificaciones o instalaciones defectuosas, o cualquier
otra falla no relacionada con defectos materiales o de fabricación. Esta garantía no se aplica al
acabado de ninguna parte del producto, como por ejemplo el de la superficie, ni al deterioro por
condiciones ambientales, ya que eso se considera un desgaste normal.
El fabricante no garantiza y rechaza específicamente cualquier garantía, expresa o implícita, de
idoneidad para un propósito en particular, distinta de la garantía indicada aquí. El fabricante se exime
específicamente de cualquier obligación y no es responsable por daños o pérdidas directas o
indirectas, lo que incluye cualquier costo de mano de obra o gastos relacionados con el reemplazo o
reparación de dicho producto.
Comunícate con el Equipo de Servicio al Cliente al 1-855-HD-HAMPTON o visita
HAMPTONBAY.COM.
PRECAUCIÓN: El dosel (A) es una sola pieza.
No la desarme.
NOTA: Este equipo ha sido probado y se encuentra que
cumple con los límites de dispositivos de la Clase B, y
cumple con la arte 15 de la regla del FCC.
Estos límites están diseñados para suministrar una
protección razonable contra interferencia perjudicial en
una instalación residencial.
Este equipo genera, utiliza y puede irradiar energía de
frecuencia radial, si no se instala e utiliza según las
instrucciones, puede causar interferencia dañina en las
comunicaciones de radio.
Sin embargo, no hay garantía de que la interferencia no
ocurrirá en una instalación en particular.
Si el equipo causa interferencia perjudicial a la radio o a
la recepción del televisor, lo cual puede determinar
apagando el quipo, se le invita al usuario a intentar
corregir la interferencia con una de las siguientes
medidas:
–Reorientar o reubicar la antena receptora.
–Aumente la separación entre el quipo y el receptor.
–Conecte el equipo en el enchufe de un circuito
diferente a aquel donde se encuentra conectado el
receptor.
–Consulte al distribuidor o a un técnico experto en
radio/TV para solicitar ayuda.

11 HAMPTONBAY.COM
Para obtener asistencia, llama al 1-855-HD-HAMPTON.
PLANIFICACIÓN DE LA INSTALLATIÓN
Lee todas las instrucciones antes de ensamblar. Antes de comenzar la instalación o de quitar la
instalación anterior, desconecte la alimentacion apagando el interruptor del circuito o quitando el
fusible en la caja de fusible. Para evitar dañar el artículo, ensámblalo sobre una superficie suave, no
abrasiva, como por ejemplo una alfombra o cartón.
NOTA: Conserva el recibo y estas Instrucciones como
Comprobante de Compra.
HERRAMIENTAS NECESARIAS
Peladores
de Cables
Gafas de
Seguridad
Escalera
Guantes
Destornillador
de Cabeza
Plana
Destornillador
Phillips
Cinta
Aislan
Pinzas
Cortacables
REQUIERE DE HARDWARE
NOTA: El objeto no se muestra en su tamaño real.
Pre-Instalación
Pieza
Descripción
Cantidad
AA
Correa de Montaje
1
BB
Conector de Cable
3
CC
Tornillo de Toma de Tierra
1
DD
Tornillo de la Caja de Salida (15 mm)
2
EE
Boquilla (60 mm)
1
FF
Tuerca Hexagonal
1
GG
Tuerca de Sombrerete
1

12
Pre-Instalación (continuación)
CONTENIDO DEL PAQUETE
Pieza
Descripción
Cantidad
A
Dosel
1
B
Pantalla
1
PRECAUCIÓN: El dosel (A) es una sola pieza. No
la desarme.

13 HAMPTONBAY.COM
Para obtener asistencia, llama al 1-855-HD-HAMPTON.
Instalación
1
Acoplar la correa de
montaje a la caja de salida
2
Conectar los cables
eléctricos
□ Apriete la tuerca hexagonal (FF) como una
pulgada dentro de la boquilla (EE).
□ Atornille la boquilla (EE) como media
pulgada dentro de la correa de montaje
(AA).
□ Apriete la tuerca hexagonal (FF) contra la
correa de montaje (AA) para asegurar la
boquilla (EE).
□ Coloque la correa de montaje (AA) en la
caja de salida (no includio) usando los
tornillos de la caja de salida (DD).
□ Envuelva el cable de toma de tierra de
la instalación alrrededor del tornillo de
toma de tierra (CC) que hay en la correa
de montaje (AA). Usar un conectore de
cable (BB) a conecte el cable de toma
de tierra de la instalación al cable de
toma de tierra de la caja de salida.
□ Usar un conector de cable (BB) a
conecte el cable blanco de la instalación
con el cable blanco (cable néutro) de la
caja de salida.
□ Usar un conector de cable (BB) a
conecte el cable negro de la instalación
con el cable negro (cable vivo) de la
caja de salida.
□ Envuelva las tres conexiones de cables
con cinta aislante para una conexión
más segura.
□ Posicione los cables de vuelta al interior
de la caja de salida.

14
Instalación (continuación)
3
Asegurar el instalación a la
caja de salida
4
Asegurar la pantalla
□ Alinee la boquilla (EE) para que sobresalga
pro el orificio en el dosel (A).
□ Coloque el dosel (A) firmemente contra el
cielo raso.
□ Atornille la tuerca de sombrerete (GG) en la
boquilla (EE).
PRECAUCIÓN: El dosel (A) es una sola pieza. No
la desarme.
□ At aliñe los tres espacios en la pantalla
(B) con las tres marcas situado en el
interior del dosel (A).
□ Gire cuidadosamente la pantalla (B) en
el sentido horario reloj hasta que quede
bien ajustada en el dosel (A).
□ La pantalla (B) gira solo
aproximadamente 1/4 de un giro
completo. No la ajuste de más.

15 HAMPTONBAY.COM
Para obtener asistencia, llama al 1-855-HD-HAMPTON.
Mantenimiento y Limpieza
□ Limpia la lámpara con un paño suave y seco.
□ No uses limpiadores con químicos, solvents, o productos abrasivos.
PRECAUCIÓN: Antes de intentar limpiar la pieza,
desconéctela o apague el interruptor o remueva
el fusible de la caja de fusibles.
Solución de Problemas
Problema
Causa Posible
Solución
El accesorio no
iluminará.
La electricidad está
apagada.
Asegúrate de que el suministro de
electricidad esté encendido.
El cortacircuito está
apagado.
Verifica que el cortacircuitos está en la
posición de “ON” (encendido).
El fusible se funde
o el cortacircuito se
activa cuando se
enciende la luz.
Los cables están
cruzados o el cable de
poder tiene polo a tierra
□ Compruebe las conexiones del
cableado.
□ Contacta a un electricista calificado o
llama al equipo de Servicio al Cliente al
1-855-HD-HAMPTON.

Preguntas, problemas o piezas faltantes? Antes de regresar a la tienda, llama
al Servicio al Cliente de Hampton Bay
de Lunes a Viernes entre 8 a.m. y 7 p.m.,,El Sábado entre 9 a.m. y 6 p.m., (hora del
Este de EE. UU.)
1-855-HD-HAMPTON
HAMPTONBAY.COM
Conserva este manual para referencias futuras.

MERCI
Nous vous remercions de la confiance que vous avez place en Hampton Bay en achetant ce
plafornnier. Nous nous efforçons en permanence de créer des produits de qualité conçus pour
perfectionner votre maison. Vous pouvez visiter notre site en ligne pour consulter notre gamme
complète de produits pour vos besoins de rénovation résidentielle. Merci d'avoir choisi Hampton Bay!
Article #1002 957 046
Modèle # IKE2001L
Item # 000-000
Model # XXXXXXX
GUIDE D'UTILISATION ET D'ENTRETIEN
LUMIÈRE LED PLAFONNIER
INTERIEUR/EXTÉRIEUR
Questions, problèmes, pièces manquantes? Avant de retourner au magasin,
veuillez communiquez avec le service à la clientèle Hampton Bay
entre 8h00 et 19h00 (HNE) du lundi au vendredi, entre 9h00 et 18h00 (HNE) du samedi
1-855-HD-HAMPTON
HAMPTONBAY.COM

18
Table des Matières
Table des Matières ............................. 18
Consignes de Sécurité ....................... 18
Garantie .............................................. 18
Ce qui est Cuvert............................ 18
Ce qui est Cuvert (et Pas) .............. 18
Pré-Installation ................................... 19
Planification de l’installation ............ 19
Outils Requis ..................................19
Materiel Requis ..............................19
Contenu de l'Emballag ....................20
Installation ..........................................21
Entretien et Nettoyage........................23
Dépannage ..........................................23
Consignes de Sécurité
AVERTISSEMENT: Veuillez soigneusement lire
et comprendre les informations contenues dans
ce manuel avant de commencer l’assemblage et
l’installation. Vous vous exposez, dans le cas
contraire, à des risques dangereux ou mortels
d’électrocution, d’incendie ou d’autres blessures.
AVERTISSEMENT: Be Enlevez les fusibles
concernés ou désactivez le disjoncteur afin de
vous assurer de mettre hors tension les fils
électriques à manipuler.
REMARQUE: Tout changement ou modification non
expressément approuvé par le parti responsable de la
conformité peut annuler le droit par l’utilisateur d’utiliser le
matériel.
Garantie
CE QUI EST COUVERT
Le fabricant garantit que ce luminaire sera exempt de défauts de fabrication et de matériaux pendant
une période d'un cinq (5) ans à compter de la date d’achat. Cette garantie ne vise que l’acheteur
original et uniquement un usage et un entretien normaux des produits. Si ce produit est défectueux,
la seule obligation du fabricant, et votre seul recours, est de remplacer ou de réparer le produit, au
choix du fabricant, pourvu que le produit n’ait pas été endommagé par une utilisation inadéquate ou
abusive, par un accident, une modification, une altération, la négligence ou une mauvaise
manipulation.
CE QUI EST COUVERT (ET PAS)
Cette garantie ne s’applique pas à un produit qui est déclaré avoir été mal installé, mal posé ou utilisé
d’une façon non conforme aux instructions qui l’accompagnent. Cette garantie ne s’applique pas à un
défaut du produit qui découle d’un accident, d’un mauvais usage, d’un usage abusif, d’une
négligence, d’une modification ou d’une installation incorrecte, ou à tout défaut étranger à un défaut
de matériaux ou de fabrication. Cette garantie ne s’applique pas au fini de toute partie du produit,
comme la surface, ni à l’altération par le climat, puisqu’il s’agit d’une usure normale.
Le fabricant ne garantit aucunement, et réfute expressément toute garantie, explicite ou tacite,
d’adaptation à un usage particulier autre que celui exprimé aux présentes. Le fabricant réfute
expressément toute responsabilité et ne peut être tenu responsable de toute perte ou de tout
dommage indirect ou accessoire, y compris mais non de façon limitative, tous les frais de main-
d’œuvre ou autres encourus pour le remplacement ou la réparation dudit produit.
Communiquez avec l’équipe du service à la clientèle au 1-855-HD-HAMPTON ou visitez le site
HAMPTONBAY.COM.
ATTENTION: Le pavilion (A) est d’une pièce.
Ne pas le désassembler.
REMARQUE: Cet appareil a été testé conformément à la
partie 15 de la réglementation de la FCC (Commission
fédérale des communications). Il répond aux critères d’un
appareil numérique de classe B.
Ces critères ont été déterminés pour obtenir une protection
raisonnable contre les interférences gênantes dans les
installations à caractère résidentiel.
Si cet appareil est installé ou utilisé de manière non conforme
aux instructions, il peut générer, utiliser ou émettre de
l’énergie de radiofréquence pouvant causer des interférences
qui gêneraient les communications radio.
Il n’est toutefois pas garanti qu’aucune interférence ne
subsistera dans certains cas.
Si l’utilisation de l’appareil cause des interférences et gène
ainsi la réception de radio ou de télévision (allumer et éteindre
l’appareil pour vérifier), l’utilisateur doit essayer de les faire
disparaître à l’aide des méthodes suivantes:
–En réorientant ou en changeant l’antenne de réception de
place.
–En augmentant la distance entre l’appareil et le récepteur.
–En connectant l’appareil à la sortie d’un circuit autre que
celui du récepteur.
–En se renseignant auprès du vendeur ou d’un spécialiste
radio/TV.

19 HAMPTONBAY.COM
Veuillez composer le 1-855-HD-HAMPTON pour une assistance supplémentaire.
Pré-Installation
PLANIFICATION DE L'INSTALLATION
Lisez toutes les instructions avant de procéder à l’assemblage. Avant de commencer à installer ce
luminaire ou d’enlever l’ancien luminaire, déconnectez le courant en eteignant le disjoncteur ou en
enlevant le fusible correspondent du coffret à fusibles. Pour éviter d’endommager ce produit,
assemblez-le sur une surface molle et non abrasive telle qu’un tapis ou un carton.
REMARQUE: Conservez le reçu, ainsi que ces
instructions, à titre de preuve d’achat.
OUTILS REQUIS
Dénudeur
de Câbles
Électriques
Lunettes de
Protection
Echelle
Gants
Tournevis
à Tête
Plate
Tournevis à
Croisillon
Ruban
Adhésif
Isolant
Pince Pour
Câbles
Électriques
MATERIEL REQUIS
REMARQUE: Le matériel n’est pas illustré à sa taille
réelle.
Pièce
Description
Quantité
AA
Sangle de Montage
1
BB
Serre-fil
3
CC
Vis de Terre
1
DD
Vis de Boîte de Sortie (15 mm)
2
EE
Embout (60 mm)
1
FF
Écrou Hexagonal
1
GG
Écrou de Capuchon
1

20
Pré-Installation (suite)
CONTENU DE L'EMBALLAG
Pièce
Description
Quantité
A
Pavillon
1
B
Abat-jour
1
ATTENTION: Le pavilion (A) est d’une pièce. Ne
pas le désassembler.
1/24