Hoover DYN DP Manuel utilisateur
- Catégorie
- Machines à laver
- Taper
- Manuel utilisateur
La page est en cours de chargement...

2
FR
IT
TOUS NOS
COMPLIMENTS
En achetant cet appareil
ménager Hoover, vous avez
démontré que vous
n’acceptez aucun
compromis: vous voulez
toujours ce qu’il y a de
mieux.
Hoover a le plaisir de vous
proposer cette nouvelle
machine à laver qui est le
résultat d’années de
recherches et d’études des
besoins du consommateur.
Vous avez fait le choix de la
qualité, de la fiabilité et de
l’efficacité.
Hoover vous propose une
large gamme d’appareils
électroménagers: machines
à laver la vaisselle, machines
à laver et sécher le linge,
cuisinières, fours à micro-
ondes, fours et tables de
cuisson, hottes, réfrigerateurs
et congélateurs.
Demandez à votre
Revendeur le catalogue
complet des produits
Hoover.
Nous vous prions de lire
attentivement les conseils
contenus dans ce livret. Il
contient d’importantes
indications concernant les
procédures d’installation,
d’emploi, d’entretien et
quelques suggestions utiles
en vue d’améliorer
l’utilisation de la machine à
laver.
Conservez avec soin ce
livret: vous pourrez le
consulter bien souvent.
Quand vous communiquez
avec Hoover, ou avec ses
centres d’assistance, veuillez
citer le Modèle, le n° et le
numéro G (éventuellement).
COMPLIMENTI
Con l’acquisto di questo
elettrodomestico Hoover;
Lei ha dimostrato di non
accettare compromessi:
Lei vuole il meglio.
Hoover é lieta di proporLe
questa nuova lavatrice
frutto di anni di ricerche e di
esperienze maturate sul
mercato, a contatto diretto
con i Consumatori. Lei ha
scelto la qualità, la durata e
le elevate prestazioni che
questa lavatrice Le offre.
Hoover Le propone inoltre
una vasta gamma di
elettrodomestici: lavatrici,
lavastoviglie, lavasciuga,
cucine, forni a microonde,
forni e piani di cottura,
frigoriferi e congelatori.
Chieda al Suo Rivenditore
il catalogo completo dei
prodotti Hoover
La preghiamo di leggere
attentamente le avvertenze
contenute nel presente
libretto in quanto forniscono
importanti indicazioni
riguardanti la sicurezza di
installazione, d’uso, di
manutenzione e alcuni utili
consigli per il migliore utilizzo
della lavatrice.
Conservi con cura questo
libretto per ogni ulteriore
consultazione.
Quando comunica con la
Hoover o con i suoi centri di
assistenza citi sempre il
Modello, il n° e il numero G
(se c’è). Praticamente tutto
ciò che é citato nel
riquadro.
3
EN
OUR COMPLIMENTS
With the purchase of this
Hoover household
appliance, you have shown
that you will not accept
compromises: you want only
the best.
Hoover is happy to present
their new washing machine,
the result of years of
research and market
experience through direct
contact with Consumers.
You have chosen the quality,
durability and high
performance that this
washing machine offers.
Hoover is also able to offer a
vast range of other
household appliances:
washing machines,
dishwashers, washer-dryers,
cookers, microwave ovens.
Traditional ovens and hobs,
refrigerators and freezers.
Ask your local retailer for the
complete catalogue of
Hoover products.
Please read this booklet
carefully as it provides
important guide lines for
safe installation, use and
maintenance and some
useful advise for best results
when using your washing
machine.
Keep this booklet in a safe
place for further
consultation.
When contacting Hoover
or a Customer Services
Centre always refer to the
Model, No., and G number
(if applicable of the
appliance see panel).
RU
ÏÎÇÄPÀÂËßÅÌ!
Ïpèîápåòÿ ∋òó ñòèpàëüíóю
ìàøèíó Hoover, Âû påøèëè
íå èäòè íà êîìïpîìèññ: Âû
ïîæåëàëè ëó÷øåå.
Ôèpìà Hoover pàäà
ïpåäëîæèòü Âàì
∋òó íîâóю
ñòèpàëüíóю ìàøèíó - ïëîä
ìíîãîëåòíèõ íàó÷íî-
èññëåäîâàòåëüñêèõ pàáîò è
ïpèîápåòåííîãî íà pûíêå, â
òåñíîì êîíòpàêòå ñ
ïîòpåáèòåëåì, îïûòà.
Âû âûápàëè êà÷åñòâî,
äîëãîâå÷íîñòü è øèpîêèå
âîçìîæíîñòè, êîòîpûå Âàì
ïpåäîñòàâëÿåò ∋òà
ñòèpàëüíàÿ ìàøèíà.
Êpîìå òîãî Hoover
ïpåäëàãàåò Âàì øèpîêóю
ãàììó ∋ëåêòpîáûòîâîé
òåõíèêè: ñòèpàëüíûå
ìàøèíû, ïîñóäîìîå÷íûå
ìàøèíû, ñòèpàëüíûå
ìàøèíû ñ ñóøêîé, êóõîííûå
ïëèòû, ìèêpîâîëíîâûå ïå÷è,
äóõîâêè, âàpî÷íûå ïàíåëè,
õîëîäèëüíèêè,
ìîpîçèëüíèêè.
Ñïpîñèòå ó Âàøåãî ïpîäàâöà
ïîëíûé êàòàëîã ïpîäóêöèè
ôèpìû Hoover.
Ïpîñèì Âàñ âíèìàòåëüíî
îçíàêîìèòüñÿ ñ
ïpåäóïpåæäåíèÿìè,
ñîäåpæàùèìèñÿ â
∋òîé
èíñòpóêöèè, êîòîpûå äàäóò
Âàì âàæíûå ñâåäåíèÿ,
êàñàюùèåñÿ áåçîïàñíîñòè,
óñòàíîâêè, ∋êñïëóàòàöèè è
îáñëóæèâàíèÿ, íåêîòîpûå
ïîëåçíûå ñîâåòû ïî
ëó÷øåìó èñïîëüçîâàíèю
ìàøèíû.
Áåpåæíî õpàíèòå ∋òó êíèæêó
èíñòpóêöèé äëÿ
ïîñëåäóюùèõ êîíñóëüòàöèé.
Ïpè îáùåíèè ñ ôèpìîé
Hoover èëè ñ åå
ñïåöèàëèñòàìè ïî
òåõíè÷åñêîìó îáñëóæèâàíèю
ïîñòîÿííî ññûëàéòåñü íà
ìîäåëü è íîìåp G (åñëè
òàêîâîé èìååòñÿ).
Ïpàêòè÷åñêè, ññûëàéòåñü íà
âñå, ÷òî ñîäåpæèòñÿ â
òàáëè÷êå.
NL
ONZE COMPLIMENTEN
Met de aankoop van dit
Hoover huishoudelijk
apparaat hebt u laten zien
dat u geen genoegen
neemt met
tussenoplossingen en dat u
alleen het allerbeste wilt.
Het is voor Hoover een ge-
noegen u een nieuwe
wasautomaat aan te
bieden die het resultaat is
van jarenlang onderzoek en
ervaring opgedaan door
een direct contact met de
gebruiker. U hebt gekozen
voor de kwaliteit, de
duurzaamheid en de
uitstekende prestatie die
deze wasmachine levert.
Hoover kan u ook een
uitgebreid assortiment van
ander huishoudelijke
apparaten en stofzuigers
bieden. Kijk hiervoor op de
lokale website van Hoover.
Een uitgebreide catalogus
van Hoover apparaten kunt
u bij uw winkelier krijgen.
Wij verzoeken u dit boekje
aandachtig door te lezen,
want het geeft u belangrijke
richtlijnen omtrent het veilig
installeren, het gebruik en
het onderhoud en bruikbare
tips om met uw
wasautomaat de beste
resultaten te verkrijgen.
Bewaar dit boekje op een
goede plaats zodat u het
kunt raadplegen.
Vermeld altijd het type,
nummer en G-nummer
(indien van toepassing) van
het apparaat (staat op het
paneel) als u contact
opneemt met Hoover of de
Klantenservice.

FR
IT
INDEX
Avant-propos
Notes générales à la
livraison
Garantie
Mesures de sécurité
Données techniques
Mise en place, installation
Description des commandes
Tableau des programmes
Sélection
Tiroir à lessive
Le produit
Lavage
Nettoyage et entretien
Recherche des pannes
INDICE
Prefazione
Note generali alla consegna
Garanzia
Prescrizioni di sicurezza
Dati tecnici
Messa in opera, installazione
Descrizione comandi
Tabella programmi
Selezione
Cassetto detersivo
Il prodotto
Lavaggio
Pulizia e manutenzione
ordinaria
Ricerca guasti
CHAPITRE
CAPITOLO
HOOFDSTUK
ÏAPAÃPAÔ
CHAPTER
1
2
3
4
5
6
7
8
9
10
11
12
13
4 5
EN
INDEX
Introduction
General points on delivery
Guarantee
Safety Measures
Technical Data
Setting up and Installation
Control Description
Table of Programmes
Selection
Detergent drawer
The Product
Washing
Cleaning and routine
maintenance
Faults Search
RU
OÃËABËEHÈE
Ââåäåíèe
Oáùèe ñâåäeíèÿ ïî
∋êñïëyàòàöèè
Ãàpàíòèÿ
Mepû áåçoïacíocòè
Texíè÷ecêèe xapaêòepècòèêè
Ycòaíoâêa
Oïècaíèe êoìaíä
Taáëèöû âûáopa ïpoãpaìì
Bûáop ïpoãpaìì
Koíòeéíep äëÿ ìoюùèx
cpeäcòâ
Tèï áeëüÿ
Còèpêa
Чècòêa è yxoä ça ìaøèíoé
Boçìoæíûe íeècïpaâíocòè
NL
INHOUDSOPGAVE
Inleiding
Algemene aanwijzingen bij
levering
Garantie
Veiligheidsmaatregelen
Technische gegevens
In elkaar zetten en
installeren
Bedieningspaneel
Overzicht van programma’s
Kiezen van het programma
Wasmiddelbakje
De weefsels
Het wassen
Schoonmaken en normaal
onderhoud
Storingzoeker

6
FR
IT
CHAPITRE 1
NOTES GENERALES
A LA LIVRAISON
A la livraison veuillez,
contrôler que le matériel
suivant accompagne la
machine:
A) LIVRET
D’INSTRUCTIONS
B) ADRESSES DE SERVICE
APRES VENTE
C) CERTIFICAT DE
GARANTIE
D) BOUCHONS
E) COUDES POUR LE TUBE
DE VIDANGE
F) BAC POUR LES
PRODUITS LESSIVIELS
LIQUIDES OU POUR LES
PRODUITS
BLANCHISSANTS
LIQUIDES
LES CONSERVER
et contrôler que ce matériel
soit en bon état; si tel n’est
pas le cas appelez le centre
Hoover le plus proche.
CAPITOLO 1
NOTE GENERALI
ALLA CONSEGNA
Alla consegna controlli che
con la macchina ci siano:
A) MANUALE
D’ISTRUZIONE
B) INDIRIZZI DI ASSISTENZA
C) CERTIFICATI DI
GARANZIA
D) TAPPI
E) CURVA PER TUBO
SCARICO
F) BACINELLA DETERSIVO
LIQUIDO O
CANDEGGIANTE
CONSERVATELI
e controlli che non abbia
subito danni durante il
trasporto, in caso contrario
chiami il centro Hoover più
vicino.
7
EN
CHAPTER 1
GENERAL POINTS
ON DELIVERY
On delivery, check that the
following are included with
the machine:
A) INSTRUCTION MANUAL
B) CUSTOMER SERVICE
ADDRESSES
C) GUARANTEE
CERTIFICATES
D) CAPS
E) BEND FOR OUTLET TUBE
F) LIQUID DETERGENT OR
LIQUID BLEACH
COMPARTMENT
(CONTAINER)
KEEP THEM IN A SAFE
PLACE
Check that the machine has
not incurred damage during
transport. If this is the case,
contact your nearest Hoover
Centre.
RU
ÏÀPÀÃPÀÔ 1
ÎÁÙÈÅ
ÑÂÅÄÅÍÈß
Ïpè ïîêóïêå óáåäèòåñü,
÷òîáû ñ ìàøèíîé áûëè:
À) ÈÍÑÒPÓÊÖÈß ÏÎ
ЭÊÑÏËÓÀÒÀÖÈÈ ÍÀ
PÓÑÑÊÎÌ ßÇÛÊÅ;
Â) ÀÄPÅÑÀ ÑËÓÆÁ
ÒÅÕÍÈЧÅÑÊÎÃÎ
ÎÁÑËÓÆÈÂÀÍÈß;
Ñ) ÑÅPÒÈÔÈÊÀÒ
ÃÀPÀÍÒÈÈ;
D) ÇÀÃËÓØÊA;
E) ÆÅÑÒÊÎÅ
ÓÑÒPÎÉÑÒÂÎ ÄËß
ÇÀÃÈÁÀ ÑËÈÂÍÎÉ
ÒPÓÁÛ;
F) éíÑÖãÖçàÖ Ñãü
ÜàÑäéÉé åéûôÖÉé
ëêÖÑëíÇÄ àãà Ñãü
ÜàÑäéÉé
éíÅÖãàÇÄíÖãü
(äéçíÖâçÖê).
ÕPÀÍÈÒÅ ÈÕ
Ïpîâåpüòå îòñóòñòâèå
ïîâpåæäåíèé ìàøèíû ïpè
òpàíñïîpòèpîâêå. Ïpè
íàëè÷èè ïîâpåæäåíèé
îápàòèòåñü â öåíòp
òåõîáñëóæèâàíèÿ Hoover.
NL
HOOFDSTUK 1
ALGEMENE
AANWIJZINGEN BIJ
DE LEVERING
Controleer bij de levering of
met de machine het
volgende is bijgeleverd:
A) HANDLEIDING
B) ADRESSEN KLANTEN-
SERVICE
C) GARANTIEBEWIJZEN
D) KAPJES
E) AFVOERSLANGGELEI-
DER
F) WASMIDDELENBAKJE
BEWAAR DEZE GOED
Controleer ook of de
machine gedurende het
transport niet beschadigd is.
Mocht dat wel het geval
zijn, neemt u dan contact
met uw Hoover leverancier
E
AB
C
F
D
La page est en cours de chargement...

10
FR
IT
CAPITOLO 3
PRESCRIZIONI DI
SICUREZZA
ATTENZIONE:
PER QUALSIASI
INTERVENTO DI PULIZIA
E MANUTENZIONE
DELLA LAVATRICE
●
Tolga la spina.
●
Chiuda il rubinetto
dell’acqua.
●
La Hoover correda tutte le
sue macchine di messa a
terra.
Si assicuri che l’impianto
elettrico sia provvisto di
messa a terra in caso
contrario richieda
l’intervento di personale
qualificato.
Apparecchio
conforme alle Direttive
Europee 73/23/CEE e
89/336/CEE , sostituite
rispettivamente da
2006/95/CE e 2004/108/CE ,
e successive modifiche.
●
Non tocchi l’apparecchio
con mani, piedi bagnati o
umidi.
●
Non usi l’apparecchio a
piedi nudi.
●
Non usi, se non con
particolare cautela,
prolunghe in locali adibiti a
bagno o doccia.
ATTENZIONE:
DURANTE IL LAVAGGIO
L’ACQUA PUO’ ANDARE
A 90°C.
●
Prima di aprire l’oblò si
assicuri che non vi sia
acqua nel cestello.
CHAPITRE 3
MESURES DE
SECURITE
ATTENTION:
EN CAS
D’INTERVENTION DE
NETTOYAGE ET
D’ENTRETIEN
● Débrancher la prise de
courant.
● Fermer le robinet
d’alimentation d’eau.
● Toutes les machines
Hoover sont pourvues de
mise à la terre.
Vérifier que l’installation
électrique soit alimentée par
une prise de terre, en cas
contraire demander
l’intervention du personnel
qualifié.
Produit compatible
avec les Directives
Européennes 73/23/EEC et
89/336/EEC, remplacé par
2006/95/EC et 2004/108/EC,
et les amendements
successifs.
● Ne pas toucher l’appareil
pieds nus.
● Autant que possible éviter
l’usage de rallonges dans les
salles de bains ou les
douches.
ATTENTION:
PENDANT LE LAVAGE
L’EAU PEUT ATTEINDRE
90°C.
● Avant d’ouvrir le hublot
vérifier que le tambour soit
sans eau.
11
EN
CHAPTER 3
SAFETY MEASURES
IMPORTANT:
FOR ALL CLEANING
AND MAINTENANCE
WORK
● Remove the plug
● Turn off the water inlet tap.
● All Hoover appliances are
earthed. Ensure that the
main electricity circuit is
earthed. Contact a qualified
electrician if this is not the
case.
Appliance complies
with European Directives
73/23/EEC and 89/336/EEC,
replaced by 2006/95/EC and
2004/108/EC, and
subsequent amendments.
● Do not touch the
appliance with wet or damp
hands or feet.
● Do not use the appliance
when bare-footed.
● Extreme care should be
taken if extension leads are
used in bathrooms or shower
rooms. Avoid this where
possible.
WARNING: DURING THE
WASHING CYCLE, THE
WATER CAN REACH A
TEMPERATURE OF 90°C.
● Before opening the
washing machine door,
ensure that there is no water
in the drum.
RU
ÏÀPÀÃPÀÔ 3
ÌÅPÛ
ÁÅÇÎÏÀÑÍÎÑÒÈ
ÂÍÈÌÀÍÈÅ!
ÏPÈ ËЮÁÛÕ
ÎÏÅPÀÖÈßÕ ЧÈÑÒÊÈ
È ÒÅÕÍÈЧÅÑÊÎÃÎ
ÎÁÑËÓÆÈÂÀÍÈß
ÑÒÈPÀËÜÍÎÉ
ÌÀØÈÍÛ:
● îòêëю÷èòå ñòèpàëüíóю
ìàøèíó îò ñåòè è âûäåpíèòå
øòåïñåëü èç pîçåòêè;
● ïåpåêpîéòå êpàí ïîäà÷è
âîäû;
● Hoover îñíàùàåò âñå ñâîè
ìàøèíû êàáåëåì ñ
çàçåìëåíèåì. Óáåäèòåñü â
òîì, ÷òî çëåêòpîñåòü èìååò
çàçåìëåííûé ïpîâîä. Â
ñëó÷àå åãî îòñóòñòâèÿ,
íåîáõîäèìî îápàùàòüñÿ ê
êâàëèôèöèpîâàííîìó
ïåpñîíàëó.
áÌ‡Í Û͇Á˚‚‡ÂÚ, ˜ÚÓ ÔË·Ó
ÒÓÓÚ‚ÂÚÒÚ‚ÛÂÚ Ú·ӂ‡ÌËflÏ
‚ÓÔÂÈÒÍËı Òڇ̉‡ÚÓ‚, 73/23/CEE
Ë 89/336/CEE, ‚ ‰‡Î¸ÌÂȯÂÏ
Á‡ÏÂÌÂÌÌ˚ı ÒÓÓÚ‚ÂÚÒÚ‚ÂÌÌÓ
„·ÏÂÌÚ‡ÏË 2006/95/CE Ë
2004/108/CE Ò ËÁÏÂÌÂÌËflÏË Ë
‰ÓÔÓÎÌÂÌËflÏË Í ÌËÏ.
● íå êàñàéòåñü ñòèpàëüíîé
ìàøèíû âëàæíûìè póêàìè è
íîãàìè;
● íå pàáîòàéòå ñî
ñòèpàëüíîé ìàøèíîé
áîñèêîì;
● íå ïpèìåíÿéòå óäëèíèòåëè
âî âëàæíûõ è ñûpûõ
ïîìåùåíèÿõ (âàííàÿ,
äóøåâàÿ êîìíàòà).
ÂÍÈÌÀÍÈÅ!
ÒÅÌÏÅPÀÒÓPÀ ÂÎÄÛ
ÂÎ ÂPÅÌß ÑÒÈPÊÈ
ÌÎÆÅÒ ÄÎÑÒÈÃÀÒÜ 90°Ñ.
● ïpåæäå ÷åì îòêpûòü
êpûøêó çàãpóçî÷íîãî ëюêà,
óáåäèòåñü â îòñóòñòâèè âîäû
â áàpàáàíå.
NL
HOOFDSTUK 3
VEILIGHEIDSMAAT-
REGELEN
BELANGRIJK:
VOOR HET
SCHOONMAKEN EN
ONDERHOUD
●
Haal de stekker uit het
stopcontact.
●
Draai de
watertoevoerkraan dicht.
●
Alle Hoover apparaten zijn
geaard. Controleer of het
hoofdnet wel geaard is.Als
dat niet het geval is dient u
contact op te nemen met
een erkend elektricien.
Dit apparaat voldoet
aan de Europese Richtlijnen
73/23/EEC en 89/336/EEC,
vervangen door 2006/95/EC
and 2004/108/EC en
eventuele wijzigingen
●
Raak het apparaat niet
aan met natte of vochtige
handen of voeten.
●
Gebruik het apparaat niet
blootsvoets.
●
Als er verlengsnoeren in
de badkamer of
doucheruimte worden
gebruikt moet u extra
voorzichtig zijn.Vermijd dat,
als dat mogelijk is.
WAARSCHUWING:
TIJDENS HET
WASPROGRAMMA
KAN DE TEMPERATUUR
VAN HET WATER
OPLOPEN TOT 90° C.
●
Controleer voordat u de
deur van de wasautomaat
openmaakt of er geen water
in de trommel zit.

12
FR
IT
● Ne pas utiliser
d’adaptateurs ou de prises
multiples.
● Cet appareil n’est pas
destiné à être utilisé par des
personnes (notamment les
enfants) incapables,
irresponsables ou sans
connaissance sur l’utilisation
du produit, à moins qu’elles ne
soient surveillées, ou instruites
sur l’utilisation de l’appareil,
par une personne responsable
de leur sécurité.
Surveillez les enfants pour être
sûr qu’ils ne jouent pas avec
l’appareil.
● Pour débrancher la prise, ne
pas tirer sur le câble.
● Ne pas laisser la machine
exposée aux agents
atmosphériques (pluie, soleil,
etc...).
● En cas de déménagement
ne jamais soulever la machine
par les boutons ou par le tiroir
des produits lessiviels.
● Pendant le transport ne pas
appuyer le hublot sur le
chariot.
Important!
Les ouvertures à la base de
l’appareil ne doivent en
aucun cas être obstruées par
des tapis, moquette ou autres
objets.
● 2 personnes pour soulever la
machine (voir dessin).
● En cas de panne et/ou de
mauvais fonctionnement
éteindre la machine,fermer le
robinet d’alimentation d’eau
et ne pas toucher à la
machine. Pour toute
réparation adressez-vous
exclusivement à un centre
d’assistance technique Hoover
en demandant des pièces de
rechange certifiées
constructeur. Le fait de ne pas
respecter les indications
susmentionnées peut
compromettre la sécurité de
l’appareil.
● Si le remplacement du
câble d’alimentation s’avère
nécessaire, il devra être
remplacé par un câble
special fourni par le service
après-vente.
●
Non usi adattatori o spine
multiple
●
Questo apparecchio non è
destinato ad essere usato da
bambini e persone incapaci o
inesperte all'uso del prodotto, a
meno che non vengano
sorvegliate o istruite riguardo
all'uso dell'apparecchio da
una persona responsabile
della loro sicurezza.
Sorvegliare i bambini in modo
tale da assicurarsi che non
giochino con l'apparecchio.
●
Non tiri il cavo di
alimentazione, o
l’apparecchio stesso, per
staccare la spina dalla presa
di corrente.
●
Non lasci esposto
l’apparecchio ad agenti
atmosferici (pioggia, sole,
ecc...).
●
In caso di trasloco non la
sollevi mai dalle manopole o
dal cassetto del detersivo.
●
Durante il trasporto non
appoggi mai l’oblò al
carrello.
Importante!
Nel caso si installi
l’apparecchio su un
pavimento ricoperto da
tappeti o con moquette, si
deve fare attenzione che le
aperture di ventilazione alla
base dell’apparecchio non
vengano ostruite.
●
Sollevarla in due persone
come illustrato in figura.
●
In caso di guasto e/o di
cattivo funzionamento
dell’apparecchio, lo spenga,
chiuda il rubinetto
dell’acqua e non
manometta
l’elettrodomestico. Per
l’eventuale riparazione si
rivolga solamente a un
centro di Assistenza Tecnica
Hoover e richieda l’utilizzo di
ricambi originali.
Il mancato rispetto di quanto
sopra può compromettere la
sicurezza dell’apparecchio.
●
Se il cavo di alimentazione
risultasse danneggiato, dovrà
essere sostituito da un cavo
speciale disponibile presso il
servizio di Assistenza Tecnica.
13
EN
● Do not use adaptors or
multiple plugs.
● This appliance is not
intended for use by persons
(including children) with
reduced physical, sensory or
mental capabilities, or lack of
experience and knowledge,
unless they have been given
supervision or instruction
concerning use of the
appliance by a person
responsible for their safety.
Children should be supervised
to ensure that they do not
play with the appliance.
● Do not pull the mains lead
or the appliance itself to
remove the plug from the
socket.
● Do not leave the appliance
exposed to atmospheric
agents (rain, sun etc.)
● In the case of removal,
never lift the appliance by
the knobs or detersive drawer.
● During transportation
do not lean the door against
the trolley.
Important!
When the appliance location
is on carpet floors, attention
must be paid so as to ensure
that there is no obstruction to
the bottom vents.
● Lift the appliance in pairs as
illustrated in the diagram.
● In the case of failure
and/or incorrect operation,
turn the washing machine off,
close the water inlet tap and
do not tamper with the
appliance. Contact a Hoover
Technical Assistance Centre
for any repairs and ask for
original Hoover spare parts.
Avoidance of these norms
may compromise the safety
of the appliance.
● Should the supply cord
(mains cable) be demaged,
this is to be replaced by a
specific cable available from
the after sales service centre.
RU
● íå ïîëüçóéòåñü òpîéíèêàìè
è ïåpåõîäíèêàìè;
● чÌÌ˚Ï ËÁ‰ÂÎËÂÏ ÌÂθÁfl
ÔÓθÁÓ‚‡Ú¸Òfl β‰flÏ (‚Íβ˜‡fl
‰ÂÚÂÈ) Ò Ó„‡Ì˘ÂÌÌ˚ÏË
ÙËÁ˘ÂÒÍËÏË Ë ÏÂÌڇθÌ˚ÏË
‚ÓÁÏÓÊÌÓÒÚflÏË ËÎË Î˛‰flÏ, ÌÂ
Ëϲ˘ËÏ ‰ÓÒÚ‡ÚÓ˜ÌÓ„Ó ÓÔ˚Ú‡ Ë
Á̇ÌËÈ, ÂÒÎË ÓÌË Ì ̇ıÓ‰flÚÒfl ÔÓ‰
ÔËÒÏÓÚÓÏ Î˛‰ÂÈ, ‰‡‚¯Ëı ËÏ
ÌÂÓ·ıÓ‰ËÏ˚ ËÌÒÚÛ͈ËË ÔÓ
ËÒÔÓθÁÓ‚‡Ì˲ ËÁ‰ÂÎËfl Ë
Óڂ˜‡˛˘Ëı Á‡ Ëı ·ÂÁÓÔ‡ÒÌÓÒÚ¸.
óÚÓ·˚ ‰ÂÚË Ì ÏÓ„ÎË Ë„‡Ú¸ Ò
ËÁ‰ÂÎËÂÏ, ÓÌË ‰ÓÎÊÌ˚ ̇ıÓ‰ËÚ¸Òfl
ÔÓ‰ ̇‰ÂÊÌ˚Ï ÔËÒÏÓÚÓÏ.
● íå òÿíèòå çà êàáåëü
ìàøèíû è ñàìó ìàøèíó äëÿ
îòêëю÷åíèÿ åå îò
∋ëåêòpîñåòè;
● íå îñòàâëÿéòå ìàøèíó â
óñëîâèÿõ àòìîñôåpíûõ
âîçäåéñòâèé (äîæäü, ñîëíöå è
ò.ï.);
● ïpè òpàíñïîpòèpîâêå íå
îïèpàéòå ìàøèíó åå ëюêîì
íà òåëåæêó;
Âàæíî!
 ñëó÷àå óñòàíîâêè ìàøèíû
íà ïîëó, ïîêpûòîì êîâpîì èëè
âîpñèñòûì ïîêpûòèåì,
íåîáõîäèìî îápàòèòü
âíèìàíèå íà òî, ÷òîáû
âåíòèëÿöèîííûå îòâåpñòèÿ,
pàñïîëîæåííûå ñíèçó
ìàøèíû, íå áûëè çàêpûòû
âîpñîì.
● ïîäíèìàéòå ìàøèíó
âäâîåì, êàê ïîêàçàíî íà
pèñóíêå;
● â ñëó÷àå íåèñïpàâíîñòè èëè
ïëîõîé pàáîòû ìàøèíû,
îòêëю÷èòå åå, çàêpîéòå êpàí
ïîäà÷è âîäû è íå ïîëüçóéòåñü
åю. Äëÿ âîçìîæíîãî påìîíòà
îápàùàéòåñü òîëüêî â öåíòp
òåõîáñëóæèâàíèÿ Hoover è
òpåáóéòå èñïîëüçîâàíèÿ
îpèãèíàëüíûõ çàï÷àñòåé.
Íåñîáëюäåíèå çòèõ íîpì
ìîæåò ïpèâåñòè ê íàpóøåíèю
áåçîïàñíîñòè ìàøèíû.;
● Åñëè êàáåëü ïèòàíèÿ
ïîâpåæäåí, íåîáõîäèìî
çàìåíèòü åãî ñïåöèàëüíûì
êàáåëåì, êîòîpèé ìîæíî
íàéòè â ñëóæáå òåõíè÷åñêîãî
îáåñïå÷åíèÿ.
NL
●
Gebruik geen
verdeelstekkers of
meervoudige contactdozen.
●
Het gebruik van dit
apparaat is niet bedoeld voor
personen (inclusief kinderen)
met verminderde lichamelijke,
zintuiglijke of geestelijke
capaciteiten of tekort van
ervaring en kennis, tenzij er
toezicht of instructie is van een
persoon die verantwoordelijk is
voor hun veiligheid.
Kinderen moeten in de gaten
worden gehouden worden,
om er zeker van te zijn dat ze
niet met het apparaat gaan
spelen.
●
Trek niet aan de
elektriciteitsdraad of aan het
apparaat zelf om de stekker
uit het stopcontact te halen.
●
Stel het apparaat niet bloot
aan atmosferische invloeden
(regen, zon, etc.)
●
Als u het apparaat wilt
verplaatsen til het dan nooit
op aan de knoppen of aan de
wasmiddellade.
●
Laat tijdens het verplaatsen
de vuldeur niet tegen de
steekwagen steunen.
●
Als u het apparaat op een
ondergrond met een hoog
polig tapijt zet, controleer dan
of de opening aan de
onderkant vrij blijft.
●
Til het apparaat op zoals in
de schets is aangegeven.
●
Ingeval van storing en/of
niet goed functioneren: zet de
wasautomaat uit, draai de
watertoevoerkraan dicht en
kom verder niet aan het
apparaat. U hoeft alleen maar
contact op te nemen met een
Gias Service Center voor
eventuele reparaties en vraag
om originele Hoover
onderdelen.Als deze regels
niet worden opgevolgd zou
de veiligheid van het
apparaat in gevaar gebracht
kunnen worden.
● Als de (hoofd) aanvoerslang
beschadigd is, moet deze
worden vervangen door een
speciale kabel die verkrijgbaar
is bij de after sales afdeling
van Hoover (Gias Service).
La page est en cours de chargement...

16
FR
IT
CAPITOLO 5
MESSA IN OPERA
INSTALLAZIONE
Porti la macchina vicino al
luogo di utilizzo senza il
basamento dell’imballo.
Tagliare le fascette
fermatubo, prestando
attenzione di non
danneggiare il tubo e il
cavo elettrico
Svitare le 4 viti (A) sul lato
posteriore e rimuovere i 4
distanziali (B).
Richiudere i 4 fori utilizzando
i tappi contenuti nella busta
istruzione.
ATTENZIONE:
NON LASCI ALLA
PORTATA DI BAMBINI
GLI ELEMENTI
DELL’IMBALLAGGIO IN
QUANTO POTENZIALI
FONTI DI PERICOLO.
CHAPITRE 5
MISE EN PLACE
INSTALLATION
Placer la machine près du
lieu d’utilisation sans la base
d’emballage.
Couper avec précaution le
cordon qui maintient le
tuyeau d’évacuation et le
cable d’alimentation
Enlever les 4 vis de fixation
indiquées en (A) et enlever
les espaces indiqués en (B)
Couvrir les quatre trous en
utilisant les capuchons
prévus à cet effet dans le
sachet où se trouve la
notice
ATTENTION:
NE PAS LAISSER À LA
PORTÉE DES ENFANTS
DES ELEMENTS
D’EMBALLAGE QUI
PEUVENT CAUSER DES
RISQUES.
17
EN
CHAPTER 5
SETTING UP
INSTALLA
TION
Move the machine near its
permanent position without
the packaging base.
Carefully cut the securing
strap that holds the main
cord and the drain hose.
Remove the 4 fixing screws
marked (A) and remove the
4 spacers marked (B)
Cover the 4 holes using the
caps provided in the
instruction booklet pack.
WARNING:
DO NOT LEAVE THE
PACKAGING IN THE
REACH OF CHILDREN
AS IT IS A POTENTIAL
SOURCE OF DANGER.
RU
ÏÀPÀÃPÀÔ 5
ÓÑÒÀÍÎÂÊÀ
Ïîìåñòèòå ìàøèíó âáëèçè
ìåñòà åå èñïîëüçîâàíèÿ áåç
ïîäñòàâêè è óïàêîâêè.
èÂÂÂʸÚ Ô·ÒÚχÒÒÓ‚˚È ıÓÏÛÚ.
ÑÂÈÒÚ‚ÛÈÚÂ ÓÒÚÓÓÊÌÓ, ˜ÚÓ·˚ ÌÂ
Ôӂ‰ËÚ¸ ¯Î‡Ì„ Ë ˝ÎÂÍÚ˘ÂÒÍËÈ
ÔÓ‚Ó‰.
éÚÍÛÚËÚ 4 ‚ËÌÚ‡ (A) ̇ Á‡‰ÌÂÈ
ÒÚÂÌÍÂ Ë ËÁ‚ÎÂÍËÚÂ 4 ‡ÒÔÓÌ˚ı
‚ÚÛÎÍË (B).
á‡ÍÓÈÚ 4 ÓÚ‚ÂÒÚËfl
ÒÔˆˇθÌ˚ÏË Á‡„Îۯ͇ÏË. Ç˚
̇ȉÂÚ Ëı ‚ ÔÓÎË˝ÚËÎÂÌÓ‚ÓÏ
Ô‡ÍÂÚÂ Ò ËÌÒÚÛ͈ËÂÈ.
ÂÍÈÌÀÍÈÅ!
ÍÅ ÎÑÒÀÂËßÉÒÅ
∋ËÅÌÅÍÒÛ
ÓÏÀÊÎÂÊÈ ÄÅÒßÌ
ÄËß ÈÃP.
NL
HOOFDSTUK 5
INSTALLATIE
Breng de machine (zonder
de onderkant van de
verpakking) dicht bij de
plaats waar hij komt te
staan.
Knip voorzichtig de
beveiligingslus van het snoer
en de afvoerslang door.
Verwijder de 4 schroeven zie
(A) en verwijder de 4
pluggen zie (B)
Vul de 4 gaatjes op met de
dopjes die in de verpakking
bij de gebruiksaanwijzing
zitten.
WAARSCHUWING:
ZORG ERVOOR DAT HET
VERPAKKINGSMATERI-
AAL BUITEN HET BEREIK
VAN KINDEREN BLIJFT
OMDAT DAT GEVAAR
KAN OPLEVEREN.

18
min 50 cm
max 85 cm
+2,6 mt max
max 100 cm
min 4 cm
min 50 cm
max 85 cm
+2,6 mt max
max 100 cm
min 4 cm
19
EN
Fix the sheet of corrugated
material on the bottom as
shown in picture.
Connect the fill hose
to the tap.
The appliance must be
connected to the water
mains using new hose-sets.
The old hose-sets should not
be reused.
IMPORTANT:
DO NOT TURN THE TAP
ON AT THIS TIME.
Position the washing
machine next to the wall.
Hook the outlet tube to the
edge of the bath tub,
paying attention that there
are no bends or
contractions along the tube.
It is better to connect the
discharge hose to a fixed
outlet of a diameter greater
than that of the outlet tube
and at a height of min. 50
cm. If is necessary to use the
plastic sleeve supplied.
Appliquer la feuille
supplémentaire sur le fond
comme dans la figure.
Raccorder le tuyau d’arrivée
d’eau au robinet.
L'appareil doit être relié à
l'arrivée d'eau exlusivement
avec les tuyaux fournis .
Ne pas réutiliser les anciens
tuyaux.
ATTENTION:
NE PAS OUVRIR LE ROBINET
Approcher la machine contre
le mur en faisant attention à
ce que le tuyau n’ait ni
coudes ni étranglements.
Raccorder le tuyau de
vidange au rebord de la
baignoire ou, mieux encore, à
un dispositif fixe d’évacuation,
hauteur mini. 50 cm, et de
diamètre supérieur au tuyau
de la machine à laver.
En cas de besoin, utiliser le
coude rigide livré avec la
machine.
FR
IT
Applichi il foglio di polionda
sul fondo come mostrato in
figura.
Allacci il tubo dell’acqua al
rubinetto.
L’apparecchio deve essere
connesso alla rete idrica
solo con i nuovi tubi di
carico forniti in dotazione. I
vecchi tubi di carico non
devono essere riutilizzati.
ATTENZIONE:
NON APRA IL RUBINETTO
Accosti la lavatrice al muro
facendo attenzione che
non vi siano curve o
strozzature,allacci il tubo di
scarico al bordo della
vasca.
o meglio a uno scarico fisso;
altezza minima 50 cm, di
diametro superiore al tubo
della lavatrice.
In caso di necessità utilizzare
la curva rigida in dotazione.
Çaêpeïèòå ∧ècò
ãoôpèpoâaííoão ìaòåpèa∧a
ía äíe, êaê ïoêaçaío ía
pècyíêe.
Ïpèñîåäèíèòå òpóáó ê
âîäîïpîâîäíîìó êpàíó è ê
ìàøèíå.
èË·Ó ‰ÓÎÊÂÌ ·˚Ú¸ ÔÓ‰ÒÓ‰ËÌÂÌ
Í ‚Ó‰ÓÔÓ‚Ó‰Û ÔË ÔÓÏÓ˘Ë ÌÓ‚˚ı
ÒÓ‰ËÌËÚÂθÌ˚ı ¯Î‡Ì„Ó‚. çÂ
ËÒÔÓθÁÛÈÚ ÒÚ‡˚ ¯Î‡Ì„Ë Ë
ÒÓ‰ËÌÂÌËfl.
Âíèìàíèå!
Íå îòêpûâàéòå
âîäîïpîâîäíûé êpàí.
Ïpèäâèíüòå ìàøèíó ê ñòåíå,
îápàùàÿ âíèìàíèå íà òî,
÷òîáû îòñóòñòâîâàëè
ïåpåãèáû, çàæèìû òpóá,
çàêpåïèòå ñëèâíóю òpóáó íà
áîpòó pàêîâèíû èëè ëó÷øå ê
êàíàëèçàöèîííîé òpóáå ñ
ìèíèìàëüíîé âûñîòîé íàä
ópîâíåì ïîëà 50 ñì è
äèàìåòpîì áîëüøå
äèàìåòpà ñëèâíîé òpóáêè.
 ñëó÷àå íåîáõîäèìîñòè
èñïîëüçóéòå æåñòêîå
óñòpîéñòâî äëÿ ñãèáà
ñëèâíîé òpóáû.
RU
NL
Bevestig de dempplaat op
de bodem, (zie tekening).
Verbind de
watertoevoerslang met de
waterkraan.
Het apparaat moet
aangesloten worden aan
de waterkraan met behulp
van de watertoevoerslang.
Maak gebruik van de
nieuwe watertoevoerslang,
gebruik niet de oude!
BELANGRIJK:
DRAAI DE WATERKRAAN
NIET OPEN
Zet de wasmachine dicht
tegen de muur aan.
Let er op dat er geen
bochten of vernauwingen in
de buis zitten.
Het is het beste om de
afvoerslang aan te sluiten
op een vaste afvoer met
een doorsnee die groter is
dan die van de afvoerslang
en op een hoogte van
minstens 50 cm.
Gebruik zonodig de
bligeleverde slanggeleider.

20
FR
IT
Mettre la machine à niveau
en reglant les 4 pieds:
a) Tourner dans le sens des
aiguilles d’une montre
l’écrou de façon à
dévérouiller la vis du pied.
b) Tourner le pied et le faire
monter ou descendre
jusqu’à obtenir une parfaite
adhérence au sol.
c) Enfin bloquer le pied en
revissant l’écrou dans le sens
inverse des aiguilles d’une
montre et le faire adhérer au
fond de la machine.
Vérifier que la manette soit
sur la position “OFF” et que le
hublot soit fermé.
Brancher la prise.
ATTENTION:
Au cas où il serait nécessaire
de remplacer le cable
d’alimentation, assurez vous
de respecter les codes-
couleur suivants dans le
branchement de chacun
des fils:
BLEU - NEUTRE (N)
MARRON - PHASE (L)
VERT-JAUNE - TERRE ( )
Une fois l'appareil installé, la
prise électrique doit rester
accessible.
Livelli la macchina con i 4
piedini:
a) Girare in senso orario il
dado per sbloccare la vite
del piedino.
b) Ruotare il piedino e farlo
scendere o salire fino ad
ottenere la perfetta
aderenza al suolo.
c) Bloccare infine il piedino
riavvitando il dado in senso
antiorario, fino a farlo aderire
al fondo della lavatrice.
Si assicuri che la manopola
sia in posizione “OFF” e l’oblò
sia chiuso.
Inserisca la spina.
ATTENZIONE:
nel caso si renda necessario
sostituire il cavo di
alimentazione, assicurarsi di
rispettare il seguente codice-
colore durante il
collegamento dei singoli fili:
BLU - NEUTRO (N)
MARRONE - FASE (L)
GIALLO-VERDE - TERRA ( )
L’apparecchio deve essere
posto in modo che la spina
sia accessibile ad
installazione avvenuta.
21
EN
Use the 4 feet to level the
machine with the floor:
a) Turn the nut clockwise to
release the screw adjuster of
the foot.
b) Rotate foot to raise or
lower it until it stands firmly on
the ground.
c) Lock the foot in position
by turning the nut anti-
clockwise until it comes up
against the bottom of the
machine.
Ensure that the knob is on the
“OFF” position and the load
door is closed
Insert the plug.
ATTENTION:
should it be necessary to
replace the supply cord,
connect the wire in
accordance with the
following colours/codes:
BLUE - NEUTRAL (N)
BROWN - LIVE (L)
YELLOW-GREEN - EARTH ( )
After installation, the
appliance must be
positioned so that the plug is
accessible.
A
B
C
RU
Óñòàíîâèòå ìàøèíó ïî
ópîâíю ñ ïîìîùüю 4 íîæåê.
a) ïîâåpíèòå ïî ÷àñîâîé
ñòpåëêå ãàéêó, ÷òîáû
pàçáëîêèpîâàòü âèíò íîæêè.
b) âpàùàÿ íîæêó, ïîäíèìèòå
èëè îïóñòèòå ìàøèíó äî
õîpîøåé åå îïîpû íà ïîë.
c) çàáëîêèpóéòå âèíò íîæêè,
çàòÿíóâ ãàéêó ïpîòèâ ÷àñîâîé
ñòpåëêè äî óïîpà.
ì·Â‰ËÚÂÒ¸, ˜ÚÓ ÔÂÂÍβ˜‡ÚÂθ
ÔÓ„‡ÏÏ Ì‡ıÓ‰ËÚÒfl ‚ ÔÓÎÓÊÂÌËË
Çõäã Ë Á‡„ÛÁÓ˜Ì˚È Î˛Í Á‡Í˚Ú.
Âêëю÷èòå âèëêó â pîçåòêó.
ÇçàåÄçàÖ:
ÖÒÎË ÌÂÓ·ıÓ‰ËÏÓ Á‡ÏÂÌËÚ¸
ÔËÚ‡˛˘ËÈ Í‡·Âθ, ÚÓ ÔÓ‚Ó‰‡
‰ÓÎÊÌ˚ ÍÓÏÏÛÚËÓ‚‡Ú¸Òfl ‚
ÒÓÓÚ‚ÂÚÒÚ‚ËË Ò Ëı ˆ‚ÂÚÌÓÈ
χÍËÓ‚ÍÓÈ:
ëàçàâ - çÖâíêÄãú (N)
äéêàóçÖÇõâ - îÄáÄ (L)
ÜÖãíé-áÖãÖçõâ - áÖåãü ( )
èÓÒΠÔÓ‰ÒÓ‰ËÌÂÌËfl ÔË·Ó
‰ÓÎÊÂÌ ·˚Ú¸ ‡ÒÔÓÎÓÊÂÌ Ú‡ÍËÏ
Ó·‡ÁÓÏ, ˜ÚÓ·˚ ÓÁÂÚ͇ ·˚·
‰ÓÒÚÛÔÌÓÈ.
NL
Gebruik de 4 pootje om de
machine waterpas te zetten:
a) Kontra moer losdraaien
b) Apparaat waterpas zetten
m.b.v. verstelbare voeten
(maak eventueel gebruik
van een waterpas)
c) Kontra moer weer
vastdraaien.
Controleer of alle knoppen
op “OFF” staan en of de
vuldeur gesloten is.
Steek de stekker in het
stopcontact.
LET OP:
Mocht het nodig zijn dat het
aansluitsnoer vervangen
moet worden, verbind de
draden dan volgens
onderstaande kleur/codes
(wij raden aan dit door een
erkende installateur te laten
doen):
BLAUW - NEUTRAAL (N)
BRUIN - FASE (L)
GEEL-GROEN -AARDE ( )
Na installatie, plaatst u het
apparaat zo, het
stopcontact makkelijk
toegangbaar is.

CHAPITRE 6
COMMANDES
Poignée d’ouverture du
hublot
Manette des programmes de
lavage avec OFF
Touche Selection Temperature
Touche Essorage
Touche Temps de Lavage
Témoin de Bouton
Touche Nuit Calme
Touche
Aquaplus
Touche Départ Différé
Touche Repassage Facile
Touche marche/pause
Temoin de verrouillage de
porte
Ecran Digital
Bacs à produits
CAPITOLO 6
COMANDI
Maniglia apertura oblò
Manopola programmi di
lavaggio con OFF
Tasto Selezione Temperatura
Tasto Selezione Centrifuga
Tasto Tempo Lavaggio
Spie tasti
Tasto Buona Notte
Tasto Stop Allergia
Tasto Partenza Differita
Tasto Stiro Facile
Tasto Avvio/pausa
Spia porta bloccata
Display Digit
Cassetto detersivo
22
23
FR
IT
A
B
C
D
E
F
G
H
I
L
M
N
O
P
EN
CHAPTER 6
CONTROLS
Door handle
Timer knob for wash
programmes with OFF position
Wash Temperature button
Spin Speed button
“Wash Time” button
Buttons indicator light
Night Option button
Aquaplus button
Start Delay button
Crease Guard button
Start button
Door locked indicator light
Digital Display
Detergent drawer
NL
HOOFDSTUK 6
BEDIENINGSPANEEL
Deurgreep
Programmaknop wassen
Met OFF
Wastemperatuur toets
Knop regeling
centrifugesnelheid
Toets voor “Wastijd”
Indicatielampjes bij de knoppen
"Dag & Nacht" -knop
"Aquaplus" –knop
Knop voor Uitgestelde Start
Makkelijk strijken knop
Knop Start/Pauze
Deurvergrendeling - indicatie
“Digitaal” Display
Wasmiddelbakje
ÏÀPÀÃPÀÔ 6
Îïèñàíèå êîìàíä
êÛÍÓflÚ͇ β͇
èÂÂÍβ˜‡ÚÂθ ÔÓ„‡ÏÏ Ò
ÓÚÏÂÚÍÓÈ Çõäã
Í·‚˯‡ "ÚÂÏÔ‡ÚÛ‡ ‚Ó‰˚"
äÌÓÔ͇ "„ÛÎËÓ‚ÍË ÒÍÓÓÒÚË
ÓÚÊËχ"
ä·‚˯‡ "ÇêÖåü ëíàêäà"
‚ÂÚÓ‚˚ Ë̉Ë͇ÚÓ˚ Í·‚˯
ä·‚˯‡ çӘ̇fl ëÚË͇
äÌÓÔ͇ "ÄÍ‚‡ÔβÒ"
äÌÓÔ͇ "ÓÚÎÓÊÂÌÌÓ„Ó Á‡ÔÛÒ͇"
äÌÓÔ͇ "·ÂÁ ÒÍ·‰ÓÍ"
äÌÓÔ͇ “ëÚ‡Ú/è‡ÛÁ‡”
à̉Ë͇ÚÓ ·ÎÓÍËÓ‚ÍË Î˛Í‡
ñËÙÓ‚ÓÈ ‰ËÒÔÎÂÈ
Êîíòåéíåp äëÿ ìîюùèõ
ñpåäñòâ
RU
P
B
A
G
H
ICLM
E
O
ND
F

25
FR
DESCRIPTION DES
COMMANDES
“Kg MODE”
(La fonction n’est active que
pour les programmes Coton
et Synthétique)
Le “ Kg MODE ” permet de
mesurer une série
d’information sur le linge
chargé dans le tambour
durant toues les phases du
lavage.
Ainsi, durant les 4 premières
minutes du cycle de lavage,
le “ Kg MODE ” :
- régule la quantité d’eau
nécessaire
- détermine la durée du cycle
de lavage
- ajuste les rinçages
En fonction de la quantité et
du type de linge lavé:
- régule le rythme des
rotations du tambour per
l’adapter au type de tissu
- reconnaît la présence de
mousse et augmente
éventuellement le niveau
d’eau durant les rinçages
- régule la vitesse d’essorage
en fonction de la charge,
pour éviter les déséquilibres
“ Kg MODE ” parvient ainsi à
assurer systématiquement la
recette de lavage la plus
adaptée à la charge de linge
parmi la centaine de recettes
possibles.
“ Kg MODE ” répond aux
exigences de simplicité
d’utilisation en permettant
une sélection simplifiée du
programme de lavage. En
effet, l’utilisateur indique
simplement le type de tissu
chargé dans la machine et le
degré de salissure des
vêtements, et il obtiendra un
linge parfaitement lavé et
essoré dans le respect des
textiles.
POIGNEE D’OUVERTURE DU
HUBLOT
Pour ouvrir le hublot
actionner le bouton dans la
poignée.
24
DESCRIPTION OF
CONTROL
“Kg MODE”
(Function active only on
Cotton and Synthetics
programmes)
Through every wash phase
“Kg MODE” allows to
monitor information on
the wash load in the drum.
So, as soon as the “Kg
MODE” is set in motion, in the
first 4 minutes of the wash, it:
o adjusts the amount of
water required
o determines the length of
the wash cycle
o controls rinsing
according to the type of
fabric selected to be
washed it:
o adjusts the rhythm of drum
rotation for the type of
fabric being washed
o recognises the presence
of lather, increasing, if
necessary, the amount of
water during
rinsing
o adjusts the spin speed
according to the load, thus
avoiding any imbalance.
In this way “Kg MODE” is
able to decide, by itself, the
most suitable programme
for
each individual wash from
the hundreds of possible
wash combinations.
“Kg MODE” meets the need
for easy use by permitting a
simplified programme
selection. In
fact, the user need only tell
the machine the type of
fabric in the drum and the
degree of soiling, to obtain a
perfect wash with the
highest
level of drying possible with
a spin which really cares for
your clothes.
DOOR HANDLE
Press the finger-bar inside
the door handle to open the
door
EN
IT
DESCRIZIONE
COMANDI
“Kg MODE”
(Funzione attiva solo nei
programmi Cotone e Sintetici)
E’ l’ultima frontiera dell’
elettronica applicata alle
tecnologie di lavaggio.
“Kg MODE” consente di
misurare durante tutte le fasi
del lavaggio una serie di
informazioni sulla biancheria
inserita all’ interno del cesto.
In questo modo “Kg MODE”
nei primi 4 minuti del ciclo di
lavaggio:
- regola la quantità di acqua
necessaria
- determina la durata del
lavaggio
- regola i risciacqui
in base al carico e al tipo di
biancheria che si è scelto di
lavare:
- regola il ritmo di rotazione del
cesto per adattarlo al tipo di
tessuto
- riconoscere la presenza di
schiuma, aumentando
eventualmente il livello
dell’acqua durante i risciacqui
- regola il numero di giri della
centrifuga in funzione del
carico, evitando che ci siano
squilibri
Così “Kg MODE” riesce a
decidere da sola tra le
centinaia di possibili
combinazioni di lavaggio
quale si adatta meglio alle
singole condizioni del bucato.
“Kg MODE” viene incontro alle
esigenze di semplicità di
utilizzo della lavatrice
permettendo un’impostazione
semplificata del programma di
lavaggio.Infatti l’utilizzatore
indicando solo il tipo di tessuto
inserito nel cesto e il grado di
sporco degli indumenti otterrà
un bucato perfettamente
pulito e con il più elevato
grado di asciugatura ottenibile
con una centrifuga attenta ai
capi.
MANIGLIA APERTURA OBLÒ
Per aprire l’oblò premere la
leva situata all’interno della
maniglia.
A
ÍÀÇÍÀЧÅÍÈÅ
ÊÍÎÏÎÊ
“Kg MODE” (ÑÖíÖäíéê
áÄÉêìáäà)
(îÛÌ͈Ëfl ‡ÍÚ˂̇ ÚÓθÍÓ ‰Îfl
ÔÓ„‡ÏÏ ÒÚËÍË ıÎÓÔ͇ Ë
ÒËÌÚÂÚËÍË) ç‡ ‚ÒÂı ˝Ú‡Ô‡ı ÒÚËÍË
ÛÒÚÓÈÒÚ‚Ó “ Kg MODE ” ÔÓÁ‚ÓÎflÂÚ
ÔÓÎÛ˜‡Ú¸ ËÌÙÓχˆË˛ Ó ‚ÂÒÂ
·Âθfl, Á‡„ÛÊÂÌÌÓ„Ó ‚ ÒÚˇθÌÛ˛
χ¯ËÌÛ.
ÖÒÎË ÛÒÚÓÈÒÚ‚Ó “ Kg MODE ”
‡·ÓÚ‡ÂÚ ‚ Ú˜ÂÌË Ô‚˚ı 4 ÏËÌÛÚ
ÒÚËÍË, ÚÓ ÓÌÓ:
- ‚˚ÔÓÎÌflÂÚ Â„ÛÎËÓ‚ÍÛ ÔÓ‰‡˜Ë
ÌÛÊÌÓ„Ó ÍÓ΢ÂÒÚ‚‡ ‚Ó‰˚ ‚
χ¯ËÌÛ
- ÓÔ‰ÂÎflÂÚ ‰ÎËÚÂθÌÓÒÚ¸ ˆËÍ·
ÒÚËÍË
- „ÛÎËÛÂÚ ÔÓÎÓÒ͇ÌË ‚
ÒÓÓÚ‚ÂÚÒÚ‚ËË Ò ‚˚·‡ÌÌ˚Ï ÚËÔÓÏ
Ú͇ÌË
- „ÛÎËÛÂÚ ÒÍÓÓÒÚ¸ ‚‡˘ÂÌËfl
·‡‡·‡Ì‡ ‚ ÒÓÓÚ‚ÂÚÒÚ‚ËË Ò ÚËÔÓÏ
Ú͇ÌË
- „ËÒÚËÛÂÚ Ì‡Î˘Ë Ï˚θÌÓÈ
ÔÂÌ˚, Ë, ‚ ÒÎÛ˜‡Â ÌÂÓ·ıÓ‰ËÏÓÒÚË,
Û‚Â΢˂‡ÂÚ ÍÓ΢ÂÒÚ‚Ó ‚Ó‰˚ ÔË
ÔÓÎÓÒ͇ÌËË
- „ÛÎËÛÂÚ ÒÍÓÓÒÚ¸ ‚‡˘ÂÌËfl
·‡‡·‡Ì‡ ‚ ÒÓÓÚ‚ÂÚÒÚ‚ËË Ò
Á‡„ÛÁÍÓÈ, Ë ÚÂÏ Ò‡Ï˚Ï ÛÒÚ‡ÌflÂÚ
̇ۯÂÌËfl ·‡Î‡ÌÒ‡ ‚ ·‡‡·‡ÌÂ
χ¯ËÌ˚.
í‡ÍËÏ Ó·‡ÁÓÏ, “ Kg MODE ”
ÏÓÊÂÚ Ò‡ÏÓÒÚÓflÚÂθÌÓ ‚˚·‡Ú¸
̇˷ÓΠÔÓ‰ıÓ‰fl˘Û˛ ÔÓ„‡ÏÏÛ
ËÁ ÒÓÚÂÌ ‚ÓÁÏÓÊÌ˚ı ÍÓÏ·Ë̇ˆËÈ
‰Îfl ͇ʉÓÈ ÓÚ‰ÂθÌÓÈ ÒÚËÍË.
“ Kg MODE ” ӷ΄˜‡ÂÚ
˝ÍÒÔÎÛ‡Ú‡ˆË˛ ÒÚˇθÌÓÈ Ï‡¯ËÌ˚
ÔÓÒ‰ÒÚ‚ÓÏ ÛÔÓ˘
ÂÌËfl ‚˚·Ó‡
ÌÛÊÌÓÈ ÔÓ„‡ÏÏ˚ ÒÚËÍË.
î‡ÍÚ˘ÂÒÍË ÔÓθÁÓ‚‡ÚÂβ ÌÛÊÌÓ
Û͇Á‡Ú¸ ‚ÒÂ„Ó Î˯¸ ÚËÔ
Á‡„ÛÊÂÌÌ˚ı ‚ ·‡‡·‡Ì ËÁ‰ÂÎËÈ Ë
ÒÚÂÔÂ̸ Ëı Á‡„flÁÌÂÌËfl ‰Îfl ÚÓ„Ó,
˜ÚÓ·˚ ‰Ó·ËÚ¸Òfl ÓÔÚËχθÌ˚ı
ÂÁÛθڇÚÓ‚ ÒÚËÍË Ë ÓÔÚËχθÌÓÈ
ÒÚÂÔÂÌË ÒÛ¯ÍË Ò ÔÓÏÓ˘¸˛
‚‡˘ÂÌËfl ·‡‡·‡Ì‡.
êìäéüíäÄ ãûäÄ
óÚÓ·˚ ÓÚÍ˚Ú¸ βÍ, ̇ÊÏËÚ ̇
Í·‚Ë¯Û ‚ ÛÍÓflÚÍÂ.
RUNL
BEDIENINGSPANEEL
“Kg MODE”
(Deze functie werkt alleen bij
katoen en Synthetische
programma’s)
Tijdens elke wasfase maakt
de “Kg MODE” het mogelijk
de informatie van de lading
in kaart te brengen.
Zodra de “Kg MODE” is
geactiveerd zal deze tijdens
de eerste 4 minuten van de
was;
- de benodigde
waterhoeveelheid
aanpassen
- de lengte van het
wasprogramma aanpassen
- het spoelen contoleren
Afhankelijk van de
geselecteerde stof die
gewassen moet worden zal;
- het ritme/ snelheid van de
trommel rotatie worden
aangepast
- de aanwezigheid van
wasmiddel worden herkend
en zonodig de hoeveelheid
water tijdens het spoelen
aanpassen.
- De centrifuge snelheid
worden aangepast, om
onbalans tegen te gaan.
Op deze manier kan de “Kg
MODE” het best passende
programma kiezen voor de
verschillende was.
“Kg MODE” komt de
behoefte van simpel gebruik
tegemoet . De gebruiker
hoeft alleen nog maar aan
te geven hoe vuil de was is
en welke stof er in de
machine zit om zo het
perfecte was en droog
resultaat te krijgen voor uw
was.
DEURGREEP
Gebruik de knop binnenin
de deurgreep om de deur
te openen.
La page est en cours de chargement...

28
29
C
TOUCHE “SELECTION
TEMPERATURE”
Après sélection d’un
programme, le voyant
correspondant à la
température correspondante
conseillée s’allume. Il est
possible de diminuer ou
d’augmenter cette
température en appuyant
plusieurs fois sur la touche.A
chaque pression de la
touche, le voyant
correspondant à la
température sélectionnée
s’allume.
TOUCHE "ESSORAGE"
La phase d'essorage est très
importante pour la
préparation à un bon
séchage et votre modèle est
doté d'une grande flexibilité
pour satisfaire chaque
exigence.
En agissant sur cette touche
vous pouvez réduire la vitesse
maximale possible pour le
programme sélectionnée,
jusqu'à une complète
élimination de l'essorage.
Pour réactiver l'essorage,il est
suffisant de presser la touche
de nouveau,jusqu'à atteindre
la vitesse choisie.
Pour la sauvegarde des tissus,
il n'est pas possible
d'augmenter la vitesse
d'essorage, au-delà de celle
qui est indiquée
automatiquement au
moment de la sélection du
programme.
Il est toujours possible de
modifier la vitesse d'essorage,
sans mettre la machine en
PAUSE.
NOTE:
LA MACHINE EST
DOTEE D’UN DISPOSITIF
ELECTRONIQUE QUI
EMPECHE LE DÉPART
DE L’ESSORAGE SI LES
CHARGES SONT MAL
REPARTIES ET LIMITE LES
VIBRATIONS ET LE
BRUIT DURANT LE
LAVAGE.
TASTO “SELEZIONE
TEMPERATURA”
Quando si seleziona un
programma viene indicata la
temperatura consigliata
tramite l’ accensione della
relativa spia.
E’ possibile sia diminuire che
aumentare la temperatura
premendo più volte il tasto.
Ad ogni pressione del tasto si
illumina la spia corrispondente
alla temperatura scelta tra
quelle a disposizione.
TASTO “SELEZIONE CENTRIFUGA”
La fase di centrifuga è molto
importante per la
preparazione ad una buona
asciugatura ed il vostro
modello è dotato della
massima flessibilità per ogni
vostra esigenza.
Premendo questo tasto, si può
ridurre la massima velocità di
centrifuga possibile per il
programma selezionato,fino
alla sua completa esclusione.
Per riattivare la centrifuga, è
sufficiente premere
nuovamente il tasto, fino al
raggiungimento della velocità
scelta.
Per la salvaguardia dei tessuti,
non è possibile aumentare la
velocità oltre quella
automaticamente indicata al
momento della selezione del
programma.
E' possibile modificare la
velocità della centrifuga in
qualsiasi momento, anche
senza portare la macchina in
PAUSA.
NOTA:
IL MODELLO È DOTATO DI
UN PARTICOLARE
DISPOSITIVO ELETTRONICO
CHE IMPEDISCE LA
PARTENZA DELLA
CENTRIFUGA CON
CARICHI
PARTICOLARMENTE
SBILANCIATI. QUESTO
SERVE A MIGLIORARE LE
VIBRAZIONI, LA
SILENZIOSITÀ E LA DURATA
DELLA LAVABIANCHERIA.
“WASH TEMPERATURE” BUTTON
When a programme is
selected the relevant
indicator will light up to show
the recommended wash
temperature.
The Temperature button can
be used to decrease or
increase the temperature of
your chosen wash cycle.
Each time the button is
pressed, the new
temperature level is shown on
the Wash Temperature
Indicator.
“SPIN SPEED” BUTTON
The spin cycle is very
important to remove as
much water as possible from
the laundry without
damaging the fabrics.You
can adjust the spin speed of
the machine to suit your
needs.
By pressing this button, it is
possible to reduce the
maximum speed, and if you
wish, the spin cycle can be
cancelled.
To reactivate the spin cycle is
enough to press the button
until you reach the spin
speed you would like to set.
For not damage the fabrics,
it is not possible to increase
the speed over that
automatically suitable during
the selection of the program.
It is possible to modify the
spin speed in any moment,
also without to pause the
machine.
NOTE:
THE MACHINE IS FITTED
WITH A SPECIAL
ELECTRONIC DEVICE,
WHICH PREVENTS THE
SPIN CYCLE SHOULD
THE LOAD BE
UNBALANCED.
THIS REDUCES THE
NOISE AND VIBRATION
IN THE MACHINE AND
SO PROLONGS THE LIFE
OF YOUR MACHINE.
EN
FR
IT
D
NL
“WASTEMPERATUUR” TOETS
Als een programma is
geselecteerd zal het
bijbehorende aanbevolen
temperatuur lampje gaan
branden.
De temperatuur toets is
bedoeld om de
wastemperatuur te verhogen
op verlagen.
Elke keer als de toets word
ingedrukt zal er een andere
temperatuur worden
weergegeven op de
wastemperatuur indicator.
KNOP “REGELING
CENTRIFUGESNELHEID”
De centrifuge snelheid is erg
belangrijk voor het zoveel
mogelijk water verwijderen uit
de kleding. U kunt de snelheid
naar eigen wens instellen.
Door deze knop in te drukken
is het mogelijk om het
toerental te verminderen en
als u wilt zelfs uitzetten.
Om de centrifugesnelheid
terug te zetten moet u de
knop indrukken totdat u bij
de gewenste snelheid bent.
Het is mogelijk de snelheid
ten aller tijde aan te passen
zonder de machine stop te
zetten.
OPMERKING: DIT MODEL HEEFT
EEN ELEKTRONISCHE SENSOR DIE
VOELT OF DE LADING GOED
UITGEBALANCEERD IS. ALS DE
LADING ENIGSZINS
ONEVENWICHTIG IS, ZAL DE
MACHINE DE WAS AUTOMATISCH
BALANCEREN EN DAN NORMAAL
CENTRIFUGEREN.
ALS ER, NA EEN AANTAL KEREN
PROBEREN, GEEN EVENWICHT
WORDT BEREIKT, WORDT EEN
LAGERE CENTRIFUGESNELHEID
GEBRUIKT.
ALS DE LADING ERG
ONEVENWICHTIG IS, WORDT DE
CENTRIFUGEFASE GEANNULEERD.
HIERDOOR WORDT DE TRILLING
VERMINDERD, HET LAWAAI
MINDER EN WORDT DE
BETROUWBAARHEID EN DE
LEVENSDUUR VAN DE
WASMACHINE VERGROOT.
RU
äãÄÇàòÄ "íÖåèÖêÄíìêÄ
ÇéÑõ"
èÓÒΠ‚˚·Ó‡ ÔÓ„‡ÏÏ˚ ÒÚËÍË
Á‡„Ó‡ÂÚÒfl ÒÓÓÚ‚ÂÚÒÚ‚Û˛˘ËÈ
Ë̉Ë͇ÚÓ, ÍÓÚÓ˚È Û͇Á˚‚‡ÂÚ
ÂÍÓÏẨÛÂÏÛ˛ ÚÂÏÔ‡ÚÛÛ ÒÚËÍË.
äÌÓÔ͇ „ÛÎËÓ‚ÍË ÚÂÏÔ‡ÚÛ˚
ËÒÔÓθÁÛÂÚÒfl ‰Îfl ÛÏÂ̸¯ÂÌËfl ËÎË
‰Îfl Û‚Â΢ÂÌËfl ÚÂÏÔ‡ÚÛ˚
‚˚·‡ÌÌÓ„Ó ‚‡ÏË ˆËÍ· ÒÚËÍË.
èÓÒÎÂ Í‡Ê‰Ó„Ó Ì‡Ê‡ÚËfl ˝ÚÓÈ ÍÌÓÔÍË
̇ Ë̉Ë͇ÚÓ ÚÂÏÔ‡ÚÛ˚ ÒÚËÍË
ÓÚÓ·‡Ê‡ÂÚÒfl ÌÓ‚‡fl ÚÂÏÔ‡ÚÛ‡.
äçéèäÄ “êÖÉìãàêéÇäà
ëäéêéëíà éíÜàåÄ”
éÚ ÒÍÓÓÒÚË ÓÚÊËχ Á‡‚ËÒËÚ Í‡ÍÓÂ
ÍÓ΢ÂÒÚ‚Ó ‚·„Ë ·Û‰ÂÚ Û‰‡ÎÂÌÓ ËÁ
·Âθfl ·ÂÁ ̇ÌÂÒÂÌËfl ÂÏÛ
ÔÓ‚ÂʉÂÌËÈ. Ç˚ ÏÓÊÂÚ Á‡‰‡Ú¸
ÒÍÓÓÒÚ¸ ÓÚÊËχ ÔÓ Ç‡¯ÂÏÛ
Ê·Ì˲.
ç‡Ê‡ÚËÂÏ ˝ÚÓÈ ÍÌÓÔÍË ÏÓÊÌÓ
ÛÏÂ̸¯ËÚ¸ χÍÒËχθÌÛ˛ ÒÍÓÓÒÚ¸
ÓÚÊËχ Ë, ÂÒÎË Á‡ıÓÚËÚÂ, ÚÓ Ë
ÓÚÏÂÌËÚ¸ ÂÊËÏ ÓÚÊËχ.
ÑÎfl ÚÓ„Ó ˜ÚÓ·˚ ‚ÌÓ‚¸ ‚Íβ˜ËÚ¸
ÓÚÊËÏ, ‰ÓÒÚ‡ÚÓ˜ÌÓ Ì‡ÊËχڸ ÍÌÓÔÍÛ
‰Ó ÚÂı ÔÓ, ÔÓ͇ Á̇˜ÂÌË ÒÍÓÓÒÚË
ÓÚÊËχ Ì ‰ÓÒÚË„ÌÂÚ Ê·ÂÏÓÈ
‚Â΢ËÌ˚.
ÇÓ ËÁ·ÂʇÌË ÔÓ‚ÂʉÂÌËÈ
·Âθfl, Ì‚ÓÁÏÓÊÌÓ Û‚Â΢ËÚ¸
ÒÍÓÓÒÚ¸ ÓÚÊËχ ·Óθ¯Â ÚÓ„Ó
Á̇˜ÂÌËfl, ÍÓÚÓÓ ‡‚ÚÓχÚ˘ÂÒÍË
ÛÒڇ̇‚ÎË‚‡ÂÚÒfl ‰Îfl ‚˚·‡ÌÌÓÈ
ÔÓ„‡ÏÏ˚.
àÁÏÂÌÂÌË ÒÍÓÓÒÚË ÓÚÊËχ
‚ÓÁÏÓÊÌÓ ‚ β·ÓÈ ÏÓÏÂÌÚ, ‰‡Ê ·ÂÁ
ÓÒÚ‡ÌÓ‚ÍË Ï‡¯ËÌ˚.
Ïpèìe÷aíèe. Maøèía èìeeò
çëeêòpcííoe ycòpoécòâo, êoòopoe
ïpeïÿòcòâyeò âêëю÷eíèю
öeíòpèôyãè (oòæèìa), ecëè áeëüe â
áapaáaíe paçìecòèëocü
íepaâíoìepío.
ùÚÓ ÔÓÁ‚ÓÎflÂÚ ÒÌËÁËÚ¸ ¯ÛÏÌÓÒÚ¸ Ë
‚Ë·‡ˆË˛ χ¯ËÌ˚ Ë ÚÂÏ Ò‡Ï˚Ï
ÔÓ‰ÎËÚ¸ ÒÓÍ Â ÒÎÛÊ·˚.

30
E
EN
“WASH TIME” BUTTON
By selecting this button
(active only on COTTON and
MIXED FIBRES programmes)
there is a choice of 3 levels
of wash intensity, depending
on how much the fabrics
are soiled.
Once the programme has
been selected the indicator
light will automatically show
the minimum level required
for that programme. Pressing
the button increases the
duration of the wash cycle,
and adjusts the wash
settings accordingly. For
example: Using this button
on the Rapid Wash cycle will
enable you to select either
a 14, 30 or 44 minute wash
cycle.
BUTTONS INDICATOR LIGHT
These light up when the
relevant buttons are
pressed.
If an option is selected that
is not compatible with the
selected programme then
the light on the button first
flashes and then goes off.
31
FR
IT
TOUCHE “TEMPS DE LAVAGE”
L’activation de ce bouton
(uniquement sur les
programmes COTON et
MIXTES) permet le choix de 3
niveaux d’intensité de
lavage selon le degré de
salissure du linge.
Après sélection du
programme de lavage, le
voyant se positionne
automatiquement sur le
niveau de salissure minimum;
en appuyant sur la touche
on augmente le niveau de
salissure et par conséquent
la durée du cycle. En utilisant
cette touche après avoir
sélectionné le programme
Rapide, il est possible de
choisir parmi 3 programmes
de 14mn, 30mn et 44mn.
TEMOIN DE BOUTON
Ces témoins s’allument
lorsque qu’une option est
choisie
Si une option est
incompatible avec le
programme, le témoin de
l’option clignotera puis
s’éteindra.
TASTO “TEMPO DI LAVAGGIO”
Agendo sul tasto (attivo solo
nei programmi COTONE e
MISTI) è possibile scegliere 3
livelli di intensità di lavaggio, a
seconda del grado di sporco
dei tessuti,.
Dopo la selezione del
programma la spia si
posiziona automaticamente
sul livello minimo consentito;
premendo il tasto si aumenta
il livello e di conseguenza
vengono modificati anche i
parametri della durata del
ciclo.
Utilizzando questo tasto dopo
aver selezionato il programma
rapido è possibile scegliere fra
3 diversi programmi della
durata di 14’, 30’ e 44’.
SPIE TASTI
Si accendono quando i
rispettivi tasti vengono
premuti.
Nel caso in cui sia stata
selezionata un’ opzione non
compatibile con il
programma scelto la luce sul
pulsante prima lampeggia e
dopo si spegne.
F
NL
TOETS VOOR “WASTIJD”
Door deze toets te selecteren
(alleen bij katoen en
gemengde weefsel
programma’s) is er een keuze
van 3 wasniveau’s, afhankelijk
van hoe vuil het wasgoed is.
Als het programma is
geselecteerd zal het indicatie
lampje automatisch op het
minimale niveau staat; door de
toets in te drukken verhoogd u
het niveau,de tijd van het
programma zal automatisch
worden aangepast.
Gebruikt u deze toets na het
selecteren van een
snelwasprogramma dan is het
mogelijk om te kiezen tussen een
14’,30’en een 44’ minuten
programma
TOETS LAMPJES
Deze lampjes gaan branden als
de toets wordt ingedrukt.
Als er een keuze wordt gemaakt
welke niet kan worden
ingeschakeld, gaat het lampje
knipperen en vervolgens weer
uit.
äãÄÇàòÄ "ÇêÖåü ëíàêäà"
ùÚÓÈ Í·‚˯ÂÈ (‡·ÓÚ‡ÂÚ Ó̇, ÍÒÚ‡ÚË,
ÚÓθÍÓ ‚ ÔÓ„‡Ïχı "ïãéèéä" Ë
"ëåÖòÄççõÖ íäÄçà") ÏÓÊÌÓ
ÛÒÚ‡ÌÓ‚ËÚ¸ 3 ÒÚÂÔÂÌË ËÌÚÂÌÒË‚ÌÓÒÚË
ÒÚËÍË ‚ Á‡‚ËÒËÏÓÒÚË ÓÚ ÒÚÂÔÂÌË
Á‡„flÁÌÂÌËfl ·Âθfl. èÓÒΠ‚˚·Ó‡
ÔÓ„‡ÏÏ˚ ÒÚËÍË Ë̉Ë͇ÚÓ ÒÚÂÔÂÌË
Á‡„flÁÌÂÌËfl ‡‚ÚÓχÚ˘ÂÒÍË
ÛÒڇ̇‚ÎË‚‡ÂÚÒfl ̇ ÏËÌËχθÌÓÂ
Á̇˜ÂÌËÂ. ç‡Ê‡ÚË ˝ÚÓÈ ÍÌÓÔÍË
Ó·ÂÒÔ˜˂‡ÂÚ Û‚Â΢ÂÌË ÛÒÚ‡ÌÓ‚ÍË
ÛÓ‚Ìfl Á‡„flÁÌÂÌËfl, Ë, ÒÓÓÚ‚ÂÚÒÚ‚ÂÌÌÓ,
Ó·ÂÒÔ˜˂‡ÂÚ Û‚Â΢ÂÌËÂ
‰ÎËÚÂθÌÓÒÚË ˆËÍ· ÒÚËÍË.
àÒÔÓθÁÓ‚‡ÌË ˝ÚÓÈ ÍÌÓÔÍË ÔÓÒÎÂ
‚˚·Ó‡ ÔÓ„‡ÏÏ˚ ·˚ÒÚÓÈ ÒÚËÍË
ÔÓÁ‚ÓÎflÂÚ ‚˚·‡Ú¸ Ó‰ÌÛ ËÁ ÚÂı
‰ÎËÚÂθÌÓÒÚÂÈ Ô
Ó„‡ÏÏ˚: 14 ÏËÌÛÚ,
30 ÏËÌÛÚ Ë 44 ÏËÌÛÚ˚.
àçÑàäÄíéêõ îìçäñàéçÄãúçõï
äãÄÇàò
à̉Ë͇ÚÓ Á‡„Ó‡ÂÚÒfl ÔË Ì‡Ê‡ÚËË Ì‡
Í·‚˯Û.
Ç ÒÎÛ˜‡Â ÂÒÎË ÙÛÌ͈Ëfl, ÍÓÚÓÛ˛ ‚˚
Ô˚Ú‡ÂÚÂÒ¸ ‚Íβ˜ËÚ¸ ̇ʇÚËÂÏ
ÒÓÓÚ‚ÂÚÒÚ‚Û˛˘ÂÈ Í·‚˯Ë, ÌÂ
ÔÓ‰ıÓ‰ËÚ Í ‚˚·‡ÌÌÓÈ ÔÓ„‡ÏÏÂ,
Ë̉Ë͇ÚÓ Ò̇˜‡Î‡ ÏË„‡ÂÚ, ÔÓÚÓÏ
„‡ÒÌÂÚ.
RU

32
G
33
EN
The option buttons should be
selected before pressing the
START button
If an option is selected that
is not compatible with the
selected programme then
the light on the button first
flashes and then goes off.
NIGHT OPTION BUTTON
Press this button to reduce
the intermediate spin speed
to 400 rpm, where
applicable; the water level
is increased during rinsing
and the washing is kept
immersed in water after the
final rinse in order to spread
the fibres evenly.
During the phase in which
the water is held in the tub,
the indicator lights to show
that the machine is at a
standstill.
Release the button to end
the cycle with a spin dry
(which may be reduced or
cancelled using the
appropriate button) and
emptying phase.
Thanks to electronic control,
the water in the
intermediate phases is
emptied silently, making this
option very useful for
washing at night.
FR
IT
Les options doivent être
sélectionnées AVANT d’appuyer
sur la touche “MARCHE”.
Si une option est
incompatible avec le
programme, le témoin de
l’option clignotera puis
s’éteindra.
TOUCHE “NUIT CALME”
Pressez ce bouton afin de
réduire les essorages
intermédiaires quand cela
est approprié. Le niveau
d’eau est augmenté durant
le rinçage ; le linge reste
immergé après le rinçage
final afin d’étendre les fibres.
Durant la phase où le linge
est immergé dans le
tambour, la LED allumée
indique que la machine est
en attente.
Appuyez sur le bouton pour
finir le cycle avec un
essorage final (qui peut être
réduit ou annulé en utilisant
le bouton approprié) et une
phase de vidange.
Grâce au contrôle
électronique, l’eau utilisée
durant les phases
intermédiaires est vidée en
silence. Cette option est
particulièrement
appréciable pour les lavages
la nuit.
I tasti opzione devono essere
selezionati prima di premere il
tasto AVVIO.
Nel caso in cui sia stata
selezionata un’ opzione non
compatibile con il
programma scelto la luce sul
pulsante prima lampeggia e
dopo si spegne.
TASTO “BUONA NOTTE”
Azionando questo tasto
vengono limitate le
centrifughe intermedie, dove
previsto,a 400 giri, viene
aumentato il livello d’ acqua
nei risciacqui e i capi
vengono lasciati immersi
nell’acqua alla fine dell’
ultimo risciacquo al fine di
distendere perfettamente le
fibre.
Durante la fase di fermo
acqua in vasca la spia del
tasto lampeggia ad indicare
che la macchina è in pausa.
Rilasciare il tasto per
terminare il ciclo con la fase
di centrifuga (eventualmente
riducibile o annullabile tramite
l’ apposito tasto) e scarico.
Grazie ad un controllo
elettronico lo scarico dell’
acqua nelle fasi intermedie
viene fatto in modo silenzioso
rendendo questa opzione
molto utile per lavaggi
notturni.
NL
U moet de optieknoppen
gebruiken voordat u op de
START-knop drukt
Als er een keuze wordt gemaakt
welke niet kan worden
ingeschakeld, gaat het lampje
knipperen en vervolgens weer
uit.
“DAG & NACHT” –KNOP
Druk deze knop in om de
tussentijdse
centrifugesnelheid (waar
toepasbaar) te verlagen tot
400 toeren per minuut; het
waterniveau is tijdens het
spoelen toegenomen en het
wasgoed wordt na het
spoelen onder water
gehouden om de vezels
gelijkmatig uit te spreiden.
Tijdens de fase waarin het
water in de trommel blijft,
geeft het indicatie lampje
aan dat de machine stil staat.
Geef de knoop vrij om de
wascyclus te eindigen met
centrifugeren (deze kan ook
verminderd of geannuleerd
worden met de daarvoor
geschikte knop) en .
Met dank aan de
elektronische controle, kan
het water in de tussentijds
fasen geluidloos afgevoerd
worden, zodat de machine
erg geschikt is om ‘s nachts te
wassen.appréciable pour les
lavages la nuit.
ä·‚Ë¯Ë ‰ÓÔÓÎÌËÚÂθÌ˚ı ÙÛÌ͈ËÈ
ÒΉÛÂÚ Ì‡ÊËχڸ ÚÓθÍÓ Ô‰
̇ʇÚËÂÏ Ì‡ Í·‚Ë¯Û èìëä.
Ç ÒÎÛ˜‡Â ÂÒÎË ÙÛÌ͈Ëfl, ÍÓÚÓÛ˛ ‚˚
Ô˚Ú‡ÂÚÂÒ¸ ‚Íβ˜ËÚ¸ ̇ʇÚËÂÏ
ÒÓÓÚ‚ÂÚÒÚ‚Û˛˘ÂÈ Í·‚˯Ë, ÌÂ
ÔÓ‰ıÓ‰ËÚ Í ‚˚·‡ÌÌÓÈ ÔÓ„‡ÏÏÂ,
Ë̉Ë͇ÚÓ Ò̇˜‡Î‡ ÏË„‡ÂÚ, ÔÓÚÓÏ
„‡ÒÌÂÚ.
äãÄÇàòÄ çéóçÄü ëíàêäÄ
èË Ì‡Ê‡ÚËË ˝ÚÓÈ Í·‚Ë¯Ë Ò‰Ìflfl
ÒÍÓÓÒÚ¸ ÓÚÊËχ ÒÌËʇÂÚÒfl ‰Ó 400
Ó·/ÏËÌ, ÂÒÎË ˝ÚÓ ÔÓÁ‚ÓÎflÂÚ
‚˚·‡Ì̇fl ÔÓ„‡Ïχ; Ó·˙ÂÏ
Á‡ÎË‚‡ÂÏÓÈ ‚Ó‰˚ ÔË ÔÓÎÓÒ͇ÌËË
Û‚Â΢˂‡ÂÚÒfl, Ë ·Âθ ÓÒÚ‡ÂÚÒfl ‚
‚Ӊ ÔÓÒΠÔÓÒΉÌÂ„Ó ˆËÍ·
ÔÓÎÓÒ͇ÌËfl ‰Îfl ÚÓ„Ó, ˜ÚÓ·˚ ÓÌÓ
‡‚ÌÓÏÂÌÓ ‡ÒÔ‰ÂÎËÎÓÒ¸ ‚
·‡‡·‡ÌÂ.
ÇÓ ‚ÂÏfl Ù‡Á˚, ÍÓ„‰‡ ·ÂθÂ
ÓÒÚ‡ÂÚÒfl ÔÓ„ÛÊÂÌÌ˚Ï ‚ ‚Ó‰Û,
Ë̉Ë͇ÚÓ ÔÓ͇Á˚‚‡ÂÚ ,˜ÚÓ Ï‡¯Ë̇
̇ıÓ‰ËÚÒfl ‚ ÒÓÒÚÓflÌËË Ô‡ÛÁ˚.
éÚÓÊÏËÚ ‰‡ÌÌÛ˛ Í·‚˯Û, ˜ÚÓ·˚
Á‡ÍÓ̘ËÚ¸ ÔÓ„‡ÏÏÛ ÓÚÊËÏÓÏ („Ó
ÒÍÓÓÒÚ¸ ÏÓÊÌÓ ÛÏÂ̸¯ËÚ¸ ËÎË
‰‡Ê ‚ÓÓ·˘Â ËÒÍβ˜ËÚ¸ ÔÓθÁÛflÒ¸
ÒÓÓÚ‚ÂÚÒÚ‚Û˛˘ËÏË Í·‚˯‡ÏË).
Å·„Ó‰‡fl ˝ÎÂÍÚÓÌÌÓÏÛ
ÛÔ‡‚ÎÂÌ˲ ‚Ó‰‡ ‚ ÔÓÏÂÊÛÚÓ˜Ì˚ı
Ù‡Á‡ı ÒÎË‚‡ÂÚÒfl ·ÂÒ¯ÛÏÌÓ, ˜ÚÓ
‰Â·ÂÚ ‰‡ÌÌÛ˛ ÓÔˆË˛ Ó˜Â̸
ÔÓÎÂÁÌÓÈ ‰Îfl ÒÚËÍË ‚ ÌÓ˜ÌÓ ‚ÂÏfl.
RU

34
H
EN
“AQUAPLUS” BUTTON
By pressing this button you
can activate a special new
wash cycle in the Colourfast
and Mixed Fabrics
programs, thanks to the new
Sensor System.This option
treats with care the fibres of
garments and the delicate
skin of those who wear
them.
The load is washed in a
much larger quantity of
water and this, together with
the new combined action
of the drum rotation cycles,
where water is filled and
emptied, will give you
garments which have been
cleaned and rinsed to
perfection.The amount of
water in the wash is
increased so that the
detergent dissolves
perfectly, ensuring an
efficient cleaning action.The
amount of water is also
increased during the rinse
procedure so as to remove
all traces of detergent from
the fibres.
This function has been
specifically designed for
people with delicate and
sensitive skin, for whom even
a very small amount of
detergent can cause
irritation or allergy.
You are advised to also use
this function for children’s
clothing and for delicate
fabrics in general,or when
washing garments made of
towelling, where the fibres
tend to absorb a greater
quantity of detergent.
To ensure the best
performance for your wash,
this function is always
activated on the Delicates
and Woollens.
35
FR
IT
TOUCHE "AQUAPLUS"
Grâce au nouveau Sensor
System, il est possible, en
activant la touche
Aquaplus, d’effectuer un
cycle de lavage spécifique
pour les tissus résistants et
mixtes. Le lavage ainsi
effectué permet d’éliminer
tout résidu lessiviel et donc
de prendre soin des peaux
délicates qui seront en
contact avec ces fibres.
L’ajout d’une plus grande
quantité d’eau au lavage
ainsi que l’action renforcée
de 5 rinçages avec
essorages intermédiaires
permettent d’obtenir un
linge propre parfaitement
rincé. Afin d’obtenir un
résultat optimal de lavage,
la quantité d’eau est
accrue pendant cette
phase du cycle garantissant
une parfaite dilution de la
lessive. La quantité d’eau est
également accrue au
moment du rinçage de
manière à éliminer toute
trace de lessive des fibres.
Cette fonction a été
spécialement étudiée pour
les PEAUX DELICATES ET
SENSIBLES pour lesquelles
même un minimum de
résidu de lessive peut causer
irritations ou allergies.
Il est aussi conseillé d’utiliser
cette fonction pour le LINGE
DES ENFANTS, pour le LINGE
DELICAT en général ainsi
que pour le lavage des
TISSUS EPONGE dont les
fibres tendent à retenir la
lessive.
Pour assurer une meilleure
prestation de lavage, cette
fonction est toujours active
pendant les programmes
Délicat et Laine.
TASTO “STOP ALLERGIA”
Grazie al nuovo Sensor
System, agendo sul tasto è
possibile effettuare un nuovo
speciale ciclo di lavaggio
applicabile nei programmi
per tessuti resistenti e misti
che si prende cura delle
fibre e della pelle delicata di
chi le indossa.
L’aggiunta di molta più
acqua e la nuova azione
combinata di cicli di
rotazione del cesto con
carico e scarico d’acqua,
permette di ottenere capi
perfettamente puliti e
risciacquati.Viene
aumentata l’acqua in
lavaggio per ottenere la
perfetta dissoluzione del
detersivo, garantendo
un’efficace azione pulente.
Viene aumentata l’acqua
anche al momento dei
risciacqui in modo da
eliminare ogni traccia di
detersivo dalle fibre.
Questa funzione è stata
studiata appositamente per
le persone con pelle
delicata e sensibile, per le
quali anche un minimo
residuo di detersivo può
causare irritazioni o allergie.
Si consiglia di utilizzare
questa funzione anche per i
capi dei bambini e per i
delicati in generale, oppure
nel lavaggio di capi di
spugna le cui fibre tendono
maggiormente a trattenere
il detersivo.
Per assicurare le migliori
prestazioni di lavaggio
questa funzione è sempre
attiva nei programmi
Delicati e Lana.
NL
"AQUAPLUS" –KNOP
Door deze knop in te drukken
activeert u een nieuw
speciaal wasprogramma in
het kleurvast en gemengde
weefsel programma, dankzij
het nieuwe Sensor Sijsteem.
Dit programma behandeld
de vezels van uw kleding met
de grootste zorg.
De lading zal gewassen
worden in een grotere
hoeveelheid water en te
samen met de nieuwe
gecombineerde werking van
de trommel en wascyclus,
door een continue wisselend
waterniveau,Dit zal er voor
zorgen dat uw kleding
perfect gereinigd en
gespoeld word.
De hoeveelheid water word
verhoogd waardoor het
wasmiddel perfect kan
oplossen voor een perfect
wasresultaat. De hoeveelheid
water tijdens het spoelen is
ook verhoogd om te zorgen
dat al het wasmiddel uit de
vezels va de kleding word
verwijderd.
Deze functie is speciaal
ontwikkeld voor mensen met
een gevoelige huid, en die
ook maar van de kleinste
hoeveelheid wasmiddel,
irritatie of een allergische
reactie krijgen.
Ook adviseren wij dit
programma te gebruiken
voor kinderkleding en
delicate stoffen in het
algemeen, en voor het
wassen van badstof
producten welke een groter
wasmiddel absorptie
vermorgen hebben.
Om zeker te zijn van het
beste wasresultaat is deze
functie altijd geactiveerd in
het delicaat en
wolwasprogramma.
äçéèäÄ “ÄäÇÄèãûë”
ç‡Ê‡ÚËÂÏ ˝ÚÓÈ ÍÌÓÔÍË
ÔÓθÁÓ‚‡ÚÂθ ‡ÍÚË‚ËÛÂÚ
ÒÔˆˇθÌ˚È ÌÓ‚˚È ˆËÍÎ ÒÚËÍË
‰Îfl ÔÓ„‡ÏÏ ÒÚËÍË ëÏÂÒÓ‚˚ı Ë
ãËÌfl˛˘Ëı Ú͇ÌÂÈ. ùÚÓ ÒÚ‡ÎÓ
‚ÓÁÏÓÊÌ˚Ï ·Î‡„Ó‰‡fl
ÔËÏÂÌÂÌ˲ ÌÓ‚ÓÈ ÒËÒÚÂÏ˚ Sensor
System. ùÚ‡ ÙÛÌ͈Ëfl
Ô‰ÛÒχÚË‚‡ÂÚ ·ÂÂÊÌÓÂ
Ó·‡˘ÂÌËÂ Ò ‚ÓÎÓÍ̇ÏË Ú͇ÌË
Ó‰Âʉ˚, ‡ Ú‡ÍÊ ÂÍÓÏẨÛÂÚÒfl
‰Îfl β‰ÂÈ Ò ˜ÛÒÚ‚ËÚÂθÌÓÈ ÍÓÊÂÈ.
ÅÂθ ÒÚˇÂÚÒfl ‚ Á̇˜ËÚÂθÌÓ
·Óθ¯ÂÏ ÍÓ΢ÂÒÚ‚Â ‚Ó‰˚ Ë ˝ÚÓ,
‚ÏÂÒÚÂ Ò ÌÓ‚ÓÈ ÍÓÏ·Ë̇ˆËÂÈ
ˆËÍÎÓ‚ ‚‡˘ÂÌËfl ·‡‡·‡Ì‡ ‚Ó
‚ÂÏfl Á‡ÔÓÎÌÂÌËfl ·‡Í‡ ‚Ó‰ÓÈ Ë
ÒÎË‚‡ ‚Ó‰˚, ·Û‰ÂÚ ‰‡‚‡Ú¸ LJ¯ÂÈ
Ó‰Âʉ ·ÂÁÛÍÓËÁÌÂÌÌÓ ͇˜ÂÒÚ‚Ó
ÒÚË
ÍË Ë ÓÔÓ·ÒÍË‚‡ÌËfl.
äÓ΢ÂÒÚ‚Ó ‚Ó‰˚ ÔË ÒÚËÍÂ
‚ÓÁ‡ÒÚ‡ÂÚ Ú‡Í, ˜ÚÓ ÏÓ˛˘ÂÂ
Ò‰ÒÚ‚Ó ‡ÒÚ‚ÓflÂÚÒfl ÔÓÎÌÓÒÚ¸˛,
ÔÓ‚˚¯‡fl ÚÂÏ Ò‡Ï˚Ï
˝ÙÙÂÍÚË‚ÌÓÒÚ¸ ÒÚËÍË ·Âθfl.
äÓ΢ÂÒÚ‚Ó ‚Ó‰˚ ÔË
ÓÔÓ·ÒÍË‚‡ÌËË Ú‡ÍÊ ‚ÓÁ‡ÒÚ‡ÂÚ,
Ó·ÂÒÔ˜˂‡fl ÔÓÎÌÓ ۉ‡ÎÂÌË Ò
·Âθfl ‚ÒÂı ÒΉӂ ÏÓ˛˘Â„Ó
Ò‰ÒÚ‚‡.
ùÚ‡ ÙÛÌ͈Ëfl ÒÚËÍË ÒÔˆˇθÌÓ
ÒÓÁ‰‡Ì‡ ‰Îfl β‰ÂÈ Ò ÌÂÊÌÓÈ Ë
˜ÛÒÚ‚ËÚÂθÌÓÈ ÍÓÊÂÈ, Û ÍÓ„Ó ‰‡ÊÂ
χÎÂȯ ÍÓ΢ÂÒÚ‚Ó ÏÓ˛˘Â„Ó
Ò‰ÒÚ‚‡ ÏÓÊÂÚ ‚˚Á˚‚‡Ú¸
‡Á‰‡ÊÂÌË ËÎË ‡Î΄˲.
ëÓ‚ÂÚÛÂÏ Ú‡ÍÊ ËÒÔÓθÁÓ‚‡Ú¸
‰‡ÌÌÛ˛ ÙÛÌÍˆË˛ ‰Îfl ‰ÂÚÒÍÓ„Ó
·Âθfl Ë ‰ÂÎË͇ÚÌ˚ı Ú͇ÌÂÈ ‚ÓÓ·˘Â
ËÎË ÔË ÒÚËÍ χıÓ‚˚ı Ú͇ÌÂÈ,
‚ÓÎÓÍ̇ ÍÓÚÓ˚ı ÔÓ„ÎÓ˘‡˛Ú
·Óθ¯Â ÍÓ΢ÂÒÚ‚Ó ÏÓ˛˘Â„Ó
Ò‰ÒÚ‚‡.
ÑÎfl Ó·ÂÒÔ˜ÂÌËfl ÎÛ˜¯Â„Ó Í‡˜ÂÒÚ‚‡
ÒÚËÍË ‰‡Ì̇fl ÙÛÌ͈Ëfl ‚Ò„‰‡
‡ÍÚË‚ËÛÂÚÒfl ÔË ÒÚËÍÂ
‰ÂÎË͇ÚÌ˚ı Ë ¯ÂÒÚflÌ˚ı Ú͇ÌÂÈ.
RU

36
37
TOUCHE “DEPART DIFFERE”
Cette option permet de
programmer le départ du
cycle de lavage jusqu’à 24
heures.
Afin d’utiliser cette fonction,
suivez la procédure ci-
dessous :
Choisissez le programme
Pressez le bouton départ
différé pour l’activer (h00
apparais sur l’écran) puis
pressez le à nouveau pour
choisir un départ différé
d’1 heure (h01 apparaît sur
l’écran) ; à chaque pression
le départ différé augmentera
d’1 heure jusqu’à ce que 24h
apparaisse sur l’écran, une
pression supplémentaire
réinitialisera le départ différé.
Confirmez en appuyant sur
"START/PAUSE" (la lumière sur
l’écran clignotera). Le
compte à rebours
commencera et à son terme
le programme débutera
automatiquement.
Il est possible d’annuler le
départ différé selon la
procédure suivante :
Maintenez le bouton appuyé
durant 5 secondes jusqu’à ce
que l’écran montre les
réglages du programme
choisi.
A cette étape il est possible
soit de lancer le programme
en appuyant sur
"START/PAUSE" soit d’annuler
le départ différé en
positionnant le
programmateur sur OFF puis
en sélectionnant un autre
programme.
TOUCHE “REPASSAGE FACILE”
Si vous utilisez cette touche
il vous sera possible de
réduire la formations des plis,
selon le programme choisi et
la nature du tissu lavé.
Le refroidissement de l’eau
sera fait graduellement pour
éviter les chocs thermiques;
la vidange sera faite sans
aucune action mécanique
du tambour;
une phase d’essorage doux,
pour assurer la distension
maximale des fibres.
TASTO “PARTENZA DIFFERITA”
Questo tasto permette di
programmare l’avvio del
ciclo di lavaggio con un
ritardo massimo di 24h.
Per impostare la partenza
ritardata procedere nel
seguente modo:
Impostare il programma
desiderato.
Premere il pulsante una prima
volta per attivarlo (sul display
viene visualizzato h00) e
premere nuovamente per
impostare un ritardo di 1 ora
(sul display viene visualizzato
h01), ad ogni pressione
successiva il ritardo impostato
aumenta di 1 ora fino a h24
mentre con un ulteriore
pressione si azzera la partenza
ritardata.
Confermare premendo il tasto
“START/PAUSA” (La spia nel
display inizia a lampeggiare)
per iniziare il conteggio alla
fine del quale il programma
inizierà automaticamente.
E’ possibile annullare la
partenza ritardata agendo
come segue:
Tenere premuto il tasto per 5
secondi fino a quando sul
display non vengono
visualizzati i parametri del
programma scelto.
A questo punto è possibile
iniziare il programma scelto in
precedenza premendo il
tasto “START/PAUSA”o
annullare l’operazione
portando il selettore in
posizione di OFF e
successivamente selezionare
un’ altro programma.
TASTO “STIRO FACILE”
Attivando questa funzione è
possibile ridurre al minimo la
formazione di pieghe
personalizzando
ulteriormente il ciclo di
lavaggio in base al
programma scelto ed al tipo
di biancheria da lavare. In
modo particolare l’azione
combinata di una fase di
raffreddamento graduale
dell’acqua,l’assenza di
rotazione del cesto durante
gli scarichi dell’acqua ed
una centrifuga delicata a
bassa velocità assicura la
massima distensione dei
capi.
“DELAY START” BUTTON
This button allows you to pre-
programme the wash cycle
to delay the start of the cycle
for up to 24 hours.
To delay the start use the
following procedure:
Set the required programme.
Press the button once to
activate it (h00 appears on
the display) and then press it
again to set a 1 hour delay
(h01 appears on the display);
the pre-set delay increases
by 1 hour each time the
button is pressed, until h24
appears on the display, at
which point pressing the
button again will reset the
delay start to zero.
Confirm by pressing the
“START/PAUSE” button (the
light on the display starts to
flash). The countdown will
begin and when it has
finished the programme will
start automatically.
It is possible to cancel the
delay start by taking the
following action:
Press and hold the button for
5 seconds until the display will
show the settings for the
programme selected.
At this stage it is possible to
start the programme
previously selected by
pressing the “START/PAUSE”
button or to cancel the
process by setting the
selector to the OFF position
and then selecting another
programme.
“CREASE GUARD” BUTTON
The Crease Guard function
minimizes creases as much
as possible with a uniquely
designed
anti-crease system that is
tailored to specific fabrics.
The water is gradually
cooled throughout the final
two rinses with no spinning
and then a delicate spin
assures the maximum
relaxation of the fabrics.
EN
FR
IT
I
L
NL
“UITGESTELDE START” TOETS
Deze knop geeft u de
mogelijkheid om de start en
eindtijd van uw
wasprogramma voor te
programmeren.(tot 24 uur)
Om de start uit te stellen
handelt u als volgt:
Stel het programma in.
Druk eenmaal op de toets
om hem te activeren (h00
verschijnt in het display) druk
nogmaals om 1 uur in te
stellen (h01 verschijnt in het
display) elke keer als u op de
toets druk verhoogt u de tijd
met 1 uur tot een maximum
van 24 uur. Als u dan nog een
keer druk begint hij weer bij 0
uur.
Bevestig door de
“START/PAUZE” toets in te
drukken (het lampje op het
display zal gaan knipperen).
Het aftellen zal beginnen en
als deze voorbij is zal het
programma automatisch
starten.
Het is mogelijk om de
uitgestelde start te annuleren:
Druk de toets in en hou deze
5 sec. vast totdat het display
de instellingen weergeeft.
Tijdens deze fase is het
mogelijk het al geselecteerde
programma te starten door
op de “START/PAUZE” toets te
drukken. U kunt het
programma annuleren door
de selectie op de UIT positie
zetten.
"MAKKELIJK STRIJKEN" -KNOP
De Kreukvrij functie
minimaliseert kreuken zoveel
mogelijk met een uniek
ontworpen anti-kreuk system
dat op maat gemaakt is van
specifieke stoffen.
Het water wordt geleidelijk
afgekoeld gedurende de
laatste twee spoelingen
zonder zwieren en daarna
garandeert een voorzichtige
zwiercyclus de optimale
relaxatie van de stoffen.
RU
äãÄÇàòÄ "éíãéÜÖççõâ
áÄèìëä"
ùÚ‡ Í·‚˯‡ ÔÓÁ‚ÓÎflÂÚ
Á‡ÔÓ„‡ÏÏËÓ‚‡Ú¸ Á‡ÔÛÒÍ ÒÚËÍË Ò
ÓÚÒÓ˜ÍÓÈ ‰Ó 24 ˜‡ÒÓ‚.
óÚÓ·˚ ‚Íβ˜ËÚ¸ ÓÚÎÓÊÂÌÌ˚È Á‡ÔÛÒÍ,
‚˚ÔÓÎÌËÚ ÒÎÂ‰Û˛˘Ë ‰ÂÈÒÚ‚Ëfl:
Ç˚·ÂËÚ Ê·ÂÏÛ˛ ÔÓ„‡ÏÏÛ
ÒÚËÍË.
ç‡ÊÏËÚ Í·‚Ë¯Û "éÚÎÓÊÂÌÌ˚È
Á‡ÔÛÒÍ" Ô‚˚È ‡Á, ˜ÚÓ·˚ ÔÓÒÚÓ
‚Íβ˜ËÚ¸ ÂÊËÏ ÓÚÒÓ˜ÍË (̇
‰ËÒÔΠ‚˚ ۂˉËÚ ÒËÏ‚ÓÎ˚ h00),
ÚÂÔ¸ ̇ÊÏËÚ ¢ ‡Á, Ë ˝ÚÓ ·Û‰ÂÚ
ÓÚÒӘ͇ ̇ 1 ˜‡Ò (̇ ‰ËÒÔΠ‚˚
ۂˉËÚ ÒËÏ‚ÓÎ˚ h01) Ë Ú‡Í ‰‡Î -
͇ʉÓ ÒÎÂ‰Û˛˘Â ̇ʇÚË ·Û‰ÂÚ
Û‚Â΢˂‡Ú¸ ÓÚÒÓ˜ÍÛ ÓÚ 1 ‰Ó 24.
èÓÒΠ24 ˜‡ÒÓ‚ ÓÚÒ˜ÂÚ Ó·ÌÛÎËÚÒfl Ë
ÓÔflÚ¸ ÔÓȉÂÚ "ÔÓ ÍÛ„Û".
äÓ„‰‡ ‚˚
ÛÒÚ‡ÌÓ‚ËÎË ÌÛÊÌÛ˛
ÓÚÒÓ˜ÍÛ,  ̇‰Ó ÔӉڂ‰ËÚ¸, ‰Îfl
˝ÚÓ„Ó Ì‡ÊÏËÚ Í·‚˯Û
"èìëä/èÄìáÄ" (‡Ì„Î. Start/Pausa)
(Ë̉Ë͇ÚÓ Ì‡ ‰ËÒÔΠ̇˜ÌÂÚ
ÏË„‡Ú¸), Ë ÚÓ„‰‡ ̇˜ÌÂÚÒfl Ó·‡ÚÌ˚È
ÓÚÒ˜ÂÚ ‚ÂÏÂÌË, ÔÓ ËÒÚ˜ÂÌËË
ÍÓÚÓÓ„Ó ÔÓ„‡Ïχ Á‡ÔÛÒÚËÚÒfl
‡‚ÚÓχÚ˘ÂÒÍË.
íÂÍÛ˘Û˛ ÓÚÒÓ˜ÍÛ Á‡ÔÛÒ͇ ÏÓÊÌÓ
ÓÚÏÂÌËÚ¸, ‰Îfl ˝ÚÓ„Ó:
ç‡ÊÏËÚÂ Ë Û‰ÂÊË‚‡ÈÚ Í·‚Ë¯Û ‚
Ú˜ÂÌË 5 ÒÂÍ, ÔÓ͇ ̇ ‰ËÒÔΠÌÂ
ÔÓfl‚flÚÒfl Ô‡‡ÏÂÚ˚ ÛÒÚ‡ÌÓ‚ÎÂÌÌÓÈ
ÔÓ„‡ÏÏ˚.
íÂÔ¸ ÏÓÊÌÓ Á‡ÔÛÒÚËÚ¸ ‡ÌÂÂ
‚˚·‡ÌÌÛ˛ ÔÓ„‡ÏÏÛ Ì‡Ê‡ÚËÂÏ
Í·‚Ë¯Ë "èìëä/èÄìáÄ" (‡Ì„Î.
Start/Pausa) ËÎË ‚ÓÓ·˘Â ‚ÒÂ
ÓÚÏÂÌËÚ¸, ‰Îfl ˜Â„Ó ÛÒÚ‡ÌÓ‚ËÚÂ
ÔÂÂÍβ˜‡ÚÂθ ‚ ÔÓÎÓÊÂÌË "Ç˚ÍÎ."
(‡Ì„Î. Off), ‡ ÔÓÚÓÏ ‚˚·ÂËÚ ‰Û„Û˛
ÔÓ„‡ÏÏÛ.
äçéèäÄ ÅÖá ëäãÄÑéä
äÌÓÔ͇ "ÅÂÁ ÒÍ·‰ÓÍ" ÏËÌËÏËÁËÛÂÚ
Ó·‡ÁÓ‚‡ÌË ÒÍ·‰ÓÍ ‚ χÍÒËχθÌÓ
‚ÓÁÏÓÊÌÓÈ ÒÚÂÔÂÌË Ò ÛÌË͇θÌÓ
‡Á‡·ÓÚ‡ÌÌÓÈ ÒËÒÚÂÏÓÈ ‡ÌÚË-
ÒÍ·‰ÍË, ÍÓÚÓ‡fl ÔËÒÔÓÒÓ·ÎÂ̇ ‰Îfl
ÓÔ‰ÂÎÂÌÌ˚ı Ú͇ÌÂÈ.
ÇÓ‰‡ ÔÓÒÚÂÔÂÌÌÓ Óı·ʉ‡ÂÚÒfl ‚Ó
‚ÂÏfl ÔÓÒΉÌËı ‰‚Ûı ÔÓÎÓÒ͇ÌËÈ
(·ÂÁ ÓÚÊËχ) Ë Á‡ÚÂÏ ‰ÂÎË͇ÚÌ˚È
ÓÚÊËÏ „‡‡ÌÚËÛÂÚ Ï‡ÍÒËχθÌÓÂ
‡ÒÒ··ÎÂÌË Ú͇ÌÂÈ.

39
FR
IT
TOUCHE MARCHE/PAUSE
Appuyez sur la touche pour
commencer le cycle.
NOTE:
QUELQUES SECONDES
APRES AVOIR APPUYE SUR
LA TOUCHE START, LA
MACHINE MESURE
PENDANT LES 4
PREMIERES MINUTES LA
QUANTITE DE LINGE A
L’INTERIEUR DU TAMBOUR
GRACE A LA FONCTION
KG MODE (ACTIVE
UNIQUEMENT SUR LES
PROGRAMMES COTON ET
SYNTHETIQUES) . AU
COURS DE CETTE PHASE,
LES LEDS DE L’ECRAN
TOURNOIENT, EN
AFFICHANT TOUTES LES 5
SECONDES LA DUREE DU
CYCLE MISE A JOUR AU
FUR ET A MESURE DU
CALCUL DE LA MACHINE.
PENDANT CETTE PHASE, LE
VOYANT " KG MODE " EST
ALLUME POUR INDIQUER
QUE LA FONCTION EST
ACTIVE.
CHANGER LA
PROGRAMMATION APRES LE
DEMARRAGE DE LA MACHINE
(PAUSE)
Maintenez la pression sur le
bouton “START/PAUSE” durant
2 secondes, les témoins des
boutons d’options
clignoteront et l’indicateur du
temps restant indiquera que la
machine est en pause.
Modifiez et pressez le bouton
“START/PAUSE” pour relancer
le programme.
Le voyant lumineux " Témoin
de verrouillage de porte "
reste allumé pendant environ
2 minutes. Il est possible
d’ouvrir la porte une fois le
voyant lumineux éteint.
Pour relancer le programme,
appuyez une nouvelle fois
sur le bouton "MARCHE".
ANNULATION D’UN
PROGRAMME SELECTIONNÉ
Afin d’annuler un programme,
positionnez le sélecteur sur
OFF
Sélectionnez un programme
différent
Repositionnez le sélecteur sur
OFF.
TASTO AVVIO/PAUSA
Premere per avviare il ciclo
impostato con la manopola
programmi.
ALCUNI SECONDI DOPO
AVERE PREMUTO IL TASTO
START, LA MACCHINA
TRAMITE LA FUNZIONE
“KG MODE” (ATTIVA
SOLO NEI PROGRAMMI
COTONE E SINTETICI) PER I
PRIMI 4 MINUTI CALCOLA
LA QUANTITÀ DI
BIANCHERIA ALL’INTERNO
DEL CESTO. DURANTE
QUESTA FASE LE SPIE DEL
DISPLAY RUOTERANNO,
VISUALIZZANDO IL TEMPO
DI DURATA MASSIMA DEL
CICLO OGNI 5 SECONDI.
IN QUESTA FASE LA SPIA
“KG MODE” È ACCESA
AD INDICARE CHE LA
FUNZIONE È ATTIVA.
MODIFICARE IMPOSTAZIONI
DOPO AVVIO DEL
PROGRAMMA (PAUSA)
Dopo l’avvio del programma
possono essere modificate solo
le regolazioni e le opzioni
tramite i tasti opzione.Tenere il
tasto “START/PAUSA” premuto
per circa 2 secondi, il
lampeggio delle spie dei tasti
opzione e del tempo residuo
indica che la macchina è in
pausa, modifichi quanto
desiderato e prema
nuovamente il tasto
“START/PAUSA” annullando
l’intermittenza.
Se si desidera aggiungere o
togliere capi durante il
lavaggio,attendere DUE minuti
affinché il dispositivo di
sicurezza liberi il blocco
dell’oblò e ne permetta
l’apertura.
Effettuata la manovra,dopo
aver richiuso l’oblò e premuto
il tasto AVVIO/PAUSA, la
macchina ripartirà dal punto
in cui era stata fermata.
CANCELLAZIONE PROGRAMMA
IMPOSTATO
Per annullare il programma,
portare il selettore in posizione
OFF.
Selezionare un programma
diverso.
Riportare il selettore
programmi in posizione OFF.
38
M
START BUTTON
Press to start the selected
cycle.
NOTE:
FEW SECONDS AFTER
THE START THE WASH
CYCLE WILL BEGIN.
DURING THE FIRST 4
MINUTES OF THE WASH
CYCLE, THE KG MODE
(ACTIVE ONLY ON
COTTON AND
SYNTHETICS
PROGRAMMES) WILL
WEIGH THE CLOTHES
AND UPDATE THE
MAXIMUM WASH TIME
REMAINING ON THE
DISPLAY EVERY FIVE
SECONDS UNTIL THE
WEIGHT HAS BEEN
DETERMINED.
WHILE THIS FUNCTION
IS OPERATING THE “Kg
MODE” INDICATOR IS
ON.
CHANGING THE SETTINGS
AFTER THE PROGRAMMES
HAS STARTED (PAUSE)
Press and hold the
“START/PAUSE” button for
about 2 seconds, the
flashing lights on the options
buttons and time remaining
indicator will show that the
machine has been paused,
adjust as required and press
the “START/PAUSE” button
again to cancel the flashing
lights.
If you wish to add or remove
items during washing, wait 2
minutes until the safety
device unlocks the door.
When you have carried out
the manoeuvre,close the
door, press START button and
the appliance will continue
working where it left off.
CANCELLING THE
PROGRAMME
To cancel the programme,
set the selector to the OFF
position.
Select a different
programme.
Re-set the programme ector
to the OFF position.
EN
NL
START/PAUZE KNOP
Druk op start voor het
selecteren van een
wascyclus.
OPMERKING
EEN PAAR SECONDEN NA DE
START, ZAL DE WASMACHINE,
DANKZIJ DE “Kg MODE”(WERKT
ALLEEN BIJ KATOEN EN
SYNTHETISCHE PROGRAMMA’S)
GEDURENDE DE EERSTE 4
MINUTEN DE HOEVEELHEID WAS
IN DE TROMMEL DETECTEREN.
TIJDENS DEZE FASE ZULLEN DE
LAMPJES OP HET DISPLAY MET
DE KLOK MEE ROTEREN, EN ELKE
5 SECONDEN DE MAXIMALE
WASTIJD WEERGEVEN.
TIJDENS DEZE PERIODE ZAL HET
BIJBEHORENDE LAMPJE VAN DE
“Kg MODE “ AANGEVEN DAT DE
TOEPASSING IS GEACTIVEERD.
Instellingen veranderen nadat
een programma is gestart
(PAUZE).
Houd de Start/Pauze knop
gedurende 2 sec.ingedrukt,
de knipperende lampjes op
de keuze toets en de resttijd
indicator geven aan dat de
machine gepauzeerd is. Nu
uw aanpassing invoeren.
Druk weer op de
“start/pauze” toets en de
lampjes stoppen met
knipperen.
Indien u kledingstukken toe
wil voegen of wil verwijderen
uit de trommel tijdens het
wassen: wacht twee minuten
totdat het veiligheidsslot van
de deur is.
Wanneer de handeling is
uitgevoerd, sluit de deur, druk
op de START knop en de
wasautomaat gaat verder
met het programma.
HET WASPROGRAMMA
VOORTIJDIG BEËINDIGEN
Om het programma te
annuleren, zet u de
programma keuze op de UIT
positie.
Selecteer een ander
programma
En zet de programma keuze
weer op de UIT positie.
äçéèäÄ ëíÄêí/èAìáA
ç‡ÊÏËÚ ̇ ÍÌÓÔÍÛ ëíÄêí ‰Îfl
Á‡ÔÛÒ͇ ‚˚·‡ÌÌÓÈ ÔÓ„‡ÏÏ˚.
èêàåÖóÄçàÖ:
èéëãÖ áÄèìëäÄ ëíàêÄãúçéâ
åÄòàçõ ìëíêéâëíÇé “Kg
MODE” (Ñéëíìèçé íéãúäé
Ñãü èêéÉêÄåå ëíàêäà
íäÄçÖâ àá ïãéèäÄ à
ëàçíÖíàäà ) Ç íÖóÖçàÖ
èÖêÇõï 4 åàçìí êÄÅéíõ
åÄòàçõ éèêÖÑÖãüÖí ÇÖë
àáÑÖãàâ, áÄÉêìÜÖççõï Ç
ÅÄêÄÅÄç åÄòàçõ.
Ç ùíé ÇêÖåü äÄÜÑõÖ 5
ëÖäìçÑ ëÇÖíéÇÄü
àçÑàäÄñàü ÅìÑÖí åàÉÄíú èé
çÄèêÄÇãÖçàû ÑÇàÜÖçàü
óÄëéÇéâ ëíêÖãäà,
éíéÅêÄÜÄü åÄäëàåÄãúçéÖ
ÇêÖåü ñàäãÄ Ç íÖóÖçàÖ
ùíéÉé ÇêÖåÖçà ëÇÖíéÇéâ
àçÑàäÄíéê “Kg MODE” ÅìÑÖí
èéäÄáõÇÄíú, óíé ÇäãûóÖçÄ
ùíÄ îìçäñàü.
àáåÖçÖçàÖ èÄêÄåÖíêéÇ èéëãÖ
áÄèìëäÄ èêéÉêÄååõ (èÄìáÄ)
ç‡ÊÏËÚÂ Ë Û‰ÂÊË‚‡ÈÚ ÓÍÓÎÓ 2 ÒÂÍ
Í·‚Ë¯Û "èìëä/èÄìáÄ" (‡Ì„Î.
Start/Pausa). åË„‡ÌË ҂ÂÚÓ‚˚ı
Ë̉Ë͇ÚÓÓ‚ Í·‚˯
‰ÓÔÓÎÌËÚÂθÌ˚ı ÙÛÌ͈ËÈ Ë Ù‡Á˚
ÒÚËÍË ÓÁ̇˜‡ÂÚ, ˜ÚÓ Ï‡¯Ë̇
Ô¯· ‚ ÂÊËÏ Ô‡ÛÁ˚. èÓ͇ Ó̇
̇ Ô‡ÛÁÂ, ‚ÌÂÒËÚ Ê·ÂÏ˚Â
ËÁÏÂÌÂÌËfl, Á‡ÚÂÏ ‚ÌÓ‚¸ ̇ÊÏËÚÂ
Í·‚Ë¯Û "èìëä/èÄìáÄ" (‡Ì„Î.
Start/Pausa), Ë ÏË„‡ÌË ÔÂ͇ÚËÚÒfl.
ÖÒÎË Ç˚ ıÓÚËÚÂ ‰ÓÎÓÊËÚ¸ ËÎË
‚˚ÌÛÚ¸ ·Âθ ‚ ÔÓˆÂÒÒ ÒÚËÍË,
ÔÓ‰ÓʉËÚ 2 ÏËÌÛÚ˚, ÔÓ͇
ÛÒÚÓÈÒÚ‚Ó ·ÂÁÓÔ‡ÒÌÓÒÚË
‡Á·ÎÓÍËÛÂÚ Á‡„ÛÁÓ˜Ì˚È Î˛Í.
ë‰Â·ÈÚ ÌÂÓ·ıÓ‰ËÏÛ˛ LJÏ
ÓÔ‡ˆË˛, Á‡ÍÓÈÚ Á‡„ÛÁÓ˜Ì˚È
Î˛Í Ë Ì‡ÊÏËÚ ÍÌÓÔÍÛ ëíÄêí.
凯Ë̇ Ô
Ó‰ÓÎÊËÚ ˆËÍÎ Ò ÚÓ„Ó
ÏÓÏÂÌÚ‡, ̇ ÍÓÚÓÓÏ ÓÌ ·˚Î
Ô‚‡Ì.
éíåÖçÄ èêéÉêÄååõ
óÚÓ·˚ ÓÚÏÂÌËÚ¸ ÔÓ„‡ÏÏÛ,
ÛÒÚ‡ÌÓ‚ËÚ ÔÂÂÍβ˜‡ÚÂθ ‚
ÔÓÎÓÊÂÌË "Çõäã." (‡Ì„Î. Off).
Ç˚·ÂËÚ ‰Û„Û˛ ÔÓ„‡ÏÏÛ.
ÇÂÌËÚ ÔÂÂÍβ˜‡ÚÂθ ÔÓ„‡ÏÏ ‚
ÔÓÎÓÊÂÌË "Çõäã." (‡Ì„Î. Off).
RU

41
FR
IT
TEMOIN DE VERROUILLAGE DE
PORTE
Le voyant lumineux s’allume
lorsque la porte est
totalement fermée et que la
machine est en marche.
Lorsque la touche "MARCHE"
est enfoncée sur la machine
et que la porte est fermée,
l’indicateur clignote
temporairement puis s’allume.
Si la porte n’est pas
fermée, le voyant lumineux
continue de clignoter.
Un dispositif de sécurité
spécial vous empêche
d’ouvrir la porte
immédiatement après la fin
du cycle.Attendez
2 minutes après la fin du cycle
de lavage et assurez-vous que
le témoin est éteint avant
d’ouvrir la porte. Par
mesure de sécurité, vérifiez
qu’il n’y a plus d’eau dans le
tambour. A la fin du cycle,
tournez le sélecteur de
programmes à la position OFF.
ECRAN DIGITAL
Cet écran électronique
permet une information
constante envers l’utilisateur:
1) TEMPERATURE DE LAVAGE
Après sélection d’un
programme, le voyant
correspondant à la
température correspondante
conseillée s’allume
automatiquement. Il est
possible de diminuer ou
d’augmenter cette
température en appuyant
plusieurs fois sur la touche.A
chaque pression de la touche,
le voyant correspondant à la
température sélectionnée
s’allume.
2) TEMOIN DE PORTE
Dès le début du lavage le
témoin clignote puis reste
allumé jusqu’à la fin du
lavage.
2 minutes après la fin du
lavage le témoin s’éteint
signifiant que la porte peut
être ouverte.
SPIA PORTA BLOCCATA
La spia è illuminata quando
l’oblò è chiuso correttamente e
la macchina è accesa.
Dopo aver premuto il tasto
AVVIO/PAUSA inizialmente la
spia lampeggia per poi
diventare fissa sino alla fine del
lavaggio.
Nel caso in cui l’oblò non sia
chiuso correttamente la spia
continuerà a lampeggiare.
Uno speciale dispositivo di
sicurezza impedisce che l’oblò
possa venire aperto
immediatamente dopo la fine
di un ciclo di lavaggio,
attendere 2 minuti che la spia si
spenga e quindi spegnere la
macchina portando la
manopola programmi in
posizione di OFF.
DISPLAY DIGIT
Il sistema di segnalazione del
display consente di essere
costantemente informati sul
funzionamento dell’
apparecchio:
1) TEMPERATURA DI LAVAGGIO
Al momento della selezione di
un programma verrà
automaticamente indicata la
temperatura di lavaggio
consigliata tramite l’accensione
della relativa spia.
Scegliendo una temperatura
differente, tramite l’apposito
tasto, si illuminerà la spia
corrispondente.
2) SPIA OBLO’
Dopo aver premuto il tasto
START/PAUSA inizialmente la spia
lampeggia per poi diventare
fissa sino alla fine del lavaggio.
Dopo 2 minuti dalla fine del
lavaggio la spia si spegne per
indicare che ora è possibile
aprire l’ oblò.
40
N
DOOR LOCKED INDICATOR
The “Door Locked” indicator
light is illuminated when the
door is fully closed and the
machine is ON.
When START is pressed on the
machine with the door
closed the indicator will flash
momentarily and then
illuminate.
If the door is not closed the
indicator will continue to
flash.
A special safety device
prevents the door from being
opened immediately after
the end of the cycle.Wait for
2 minutes after the wash
cycle has finished and the
Door Locked light has gone
out before opening the door.
At the end of cycle turn the
programme selector to OFF .
“DIGITAL” DISPLAY
The display’s indicator system
allows you to be constantly
informed about the status of
the machine:
1) WASH TEMPERATURE
When a programme is
selected the relevant
indicator will light up to show
the recommended wash
temperature.The Temperature
button can be used to
decrease or increase the
temperature of your chosen
wash cycle. Each time the
button is pressed, the new
temperature level is shown on
the Wash Temperature
Indicator.
2) DOOR LIGHT
Once the START/PAUSE button
has been pressed the light
first flashes then stops flashing
and remains on until the end
of the wash.
2 minutes after the end of the
wash the light goes off to
show that the door can now
be opened.
EN
àçÑàäÄíéê ÅãéäàêéÇäà
ãûäÄ
à̉Ë͇ÚÓ ·ÎÓÍËÓ‚ÍË Î˛Í‡
Ò‚ÂÚËÚÒfl, ÍÓ„‰‡ Î˛Í ÔÓÎÌÓÒÚ¸˛
Á‡Í˚Ú Ì‡ ‡·ÓÚ‡˛˘ÂÈ Ï‡¯ËÌÂ.
èË Ì‡Ê‡ÚËË Ì‡ Í·‚Ë¯Û èìëä,
ÍÓ„‰‡ Î˛Í Á‡Í˚Ú, Ë̉Ë͇ÚÓ
ÏË„‡ÂÚ, Á‡ÚÂÏ Ì‡˜Ë̇ÂÚ Ò‚ÂÚËÚ¸Òfl
ÔÓÒÚÓflÌÌÓ.
ÖÒÎË Î˛Í Ì Á‡Í˚Ú, Ë̉Ë͇ÚÓ
ÔÓ‰ÓÎʇÂÚ ÏË„‡Ú¸.
ëÔˆˇθÌÓ ÛÒÚÓÈÒÚ‚Ó ÌÂ
ÔÓÁ‚ÓÎflÂÚ ÓÚÍ˚Ú¸ Î˛Í Ò‡ÁÛ ÔÓ
ÓÍÓ̘‡ÌËË ÒÚËÍË. èÓ‰ÓʉËÚÂ
ÓÍÓÎÓ 2 ÏËÌÛÚ ÔÓÒΠÁ‡‚¯ÂÌËfl
ÔÓ„‡ÏÏ˚, ÔÓ͇ Ë̉Ë͇ÚÓ
·ÎÓÍËÓ‚ÍË Î˛Í‡ Ì ÔÓ„‡ÒÌÂÚ. èÓ
Á‡‚¯ÂÌËË ÒÚËÍË ÛÒÚ‡ÌÓ‚ËÚÂ
ÛÍÓflÚÍÛ ‚˚·Ó‡ ÔÓ„‡ÏÏ ‚
ÔÓÎÓÊÂÌËÂ Ç˚ÍÎ.
ñàîêéÇéâ ÑàëèãÖâ
ÑËÒÔÎÂÈ Ó„‡ÌËÁÓ‚‡Ì Ú‡ÍËÏ
Ó·‡ÁÓÏ, ˜ÚÓ·˚ ‚˚ ‚Ò„‰‡ ÏÓ„ÎË
ÚÓ˜ÌÓ Á̇ڸ, ˜ÚÓ ÔÓËÒıÓ‰ËÚ Ò
‚‡¯ÂÈ Ï‡¯ËÌÓÈ:
1) íÖåèÖêÄíìêÄ ÇéÑõ
èÓÒΠ‚˚·Ó‡ ÔÓ„‡ÏÏ˚ ÒÚËÍË
Á‡„Ó‡ÂÚÒfl ÒÓÓÚ‚ÂÚÒÚ‚Û˛˘ËÈ
Ë̉Ë͇ÚÓ, ÍÓÚÓ˚È Û͇Á˚‚‡ÂÚ
ÂÍÓÏẨÛÂÏÛ˛ ÚÂÏÔ‡ÚÛÛ
ÒÚËÍË.
ÖÒÎË ‚‡Ï Ú·ÛÂÚÒfl ‰Û„‡fl
ÚÂÏÔ‡ÚÛ‡ ÒÚËÍË, ‚˚·ÂËڠ Ò
ÔÓÏÓ˘¸˛ ÍÌÓÔÍË Â„ÛÎËÓ‚ÍË
ÚÂÏÔ‡ÚÛ˚. Ç˚·‡Ì̇fl ‚‡ÏË
ÚÂÏÔ‡ÚÛ‡ ·Û‰ÂÚ ÓÚÓ·‡Ê‡Ú¸Òfl
̇ ‰ËÒÔÎÂÂ.
2) àçÑàäÄíéê ÅãéäàêéÇäà
ãûäÄ
èÓÒΠ̇ʇÚËfl ̇ Í·‚˯Û
"èìëä/èÄìáÄ" (‡Ì„Î. Start/Pausa)
Ë̉Ë͇ÚÓ Ò̇˜‡Î‡ ÔÓÏË„‡ÂÚ, ‡
ÔÓÚÓÏ ·Û‰ÂÚ „ÓÂÚ¸ ÌÂÔÂ˚‚ÌÓ ‰Ó
ÍÓ̈‡ ÒÚËÍË. à ¢ 2 ÏËÌÛÚ˚.
óÂÂÁ 2 ÏËÌÛÚ˚ ÔÓÒΠÓÍÓ̘‡ÌËfl
Ë̉Ë͇ÚÓ ÔÓ„‡ÒÌÂÚ, Ë Î˛Í
‡Á·ÎÓÍËÛÂÚÒfl.
RUNL
DEURVERGRENDELING-
INDICATIE
Het indicatielampje voor de
“deurvergrendeling” licht op
als de deur goed dichtzit en
wanneer de wasmachine
AAN staat.
Wanneer u op START drukt als
de deur dicht is, zal het
indicatielampje eventjes
knipperen en vervolgens
blijven branden.
Als de deur niet dicht is, zal
het indicatielampje blijven
knipperen.
Een speciale beveiliging zorgt
ervoor dat u de deur niet
meteen kunt openen na
afloop van een wascyclus.
Wacht na afloop van de
wascyclus 2 minuten tot het
lampje van de
deurvergrendeling is
gedoofd voordat u de deur
probeert te openen. Zet na
afloop van de wascyclus de
programmaknop op UIT
(OFF).
“DIGITAAL” DISPLAY
Het display indicatie sijsteem
geeft u de mogelijkheid
continue op de hoogte te
blijven van de status van de
machine.
1) WASTEMPERATUUR
Al seen programma is
geselecteerd zal het
relevante wastemperatuur
lampje gaan branden.
Selecteer een andere
temperatuur met de
temperatuur toets. De
temperatuur zal worden
weergegeven op het display.
2) DEUR LAMPJE
Als de START/PAUZE toets is
ingedrukt zal het lampje voor
de deur gaan knipperen en
daarna gaan branden. Deze
blijft branden totdat het
programma is beëindigd.
2 minuten na het einde van
het programma zal het
lampje uit gaan en de deur
kan worden geopend.
O
{
1
3
{
{
1
7
{
4
5
{
6
2
2

42
EN
3) SPIN SPEED
Once the programme has
been selected, the maximum
spin speed allowed for that
programme appears on the
display. Pressing the spin
button will reduce the speed
by 100 rpm each time the
button is pressed. The
minimum speed allowed is
400 rpm, or it is possible to
omit the spin by pressing the
spin button repeatedly.
4) DELAY START LIGHT
This flashes when delay start
has been set.
5) CYCLE DURATION
When a programme is
selected the display
automatically shows the
cycle duration, which can
vary, depending on the
options selected.
Once the programme has
started you will be kept
informed constantly of the
time remaining to the end of
the wash.
6) Kg MODE indicator
Available on Cotton and
Synthetic cycles, during the
first 4 minutes of the cycle
the intelligent sensor will
weigh the laundry and
adjust the cycle time, water
and electricity consumption
accordingly.
7) WASH TIME
When a programme is
selected the relevant
indicator will light up to show
the minimum possible wash
time.
Selecting a greater time
using the special button will
cause the corresponding
indicator to light up.
43
FR
IT
3) VITESSE D’ESORAGE
Lors de la sélection du
programme un voyant
indiquera la vitesse
d’essorage maximum.
Chaque pression du bouton
entrainera une réduction de
100 tours/minute jusqu’à à la
vitesse minium de 400
tours/minutes ou jusqu’à
une complète élimination de
l’essorage.
4) TEMOIN DEPART DIFFERE
Ce témoin clignote lorsque
le départ différé à été activé
5) DUREE DU CYCLE
Au moment de la sélection
d’un programme, la durée
maximum du cycle à pleine
charge s’affiche
automatiquement. Cette
durée pourra varier en
fonction des options qui
seront choisies.
6) Voyant “Kg MODE” (La
fonction n’est active que
pour les programmes Coton
et Synthétique)
Durant les 4 premières
minutes de fonctionnement
le voyant “Kg MODE” reste
allumé pendant que la
machine calcule le temps
restant, en fonction des
quantités de linge chargée
dans le tambour.
7) TEMPS DE LAVAGE
Une fois le choix du
programme et de la
température effectué, le
temps de lavage est
automatiquement réglé sur
le minimum.
Chaque pression du bouton
augmente le temps et
allume le nouveau temps de
lavage
3) GIRI CENTRIFUGA
Una volta selezionato il
programma,sul display
apparirà la massima velocità
consentita di centrifuga per
quel programma.Premendo
ripetutamente il pulsante di
centrifuga, la velocità
diminuirà ogni volta di 100
g/m. La velocità minima
consentita è di 400 g/m,
oppure è possibile escludere
la centrifuga premendo
ripetutamente il pulsante di
selezione della centrifuga.
4) SPIA PARTENZA RITARDATA
Lampeggia quando è
impostata la partenza
ritardata.
5) DURATA CICLO
Al momento della selezione di
un programma,verrà
automaticamente indicata la
durata del ciclo che potrà
variare a seconda delle
opzioni che verranno
selezionate.
Dopo l’ avvio del programma
vi terrà costantemente
informati sul tempo restante
alla fine del lavaggio.
6) Spia “Kg MODE”
(Attiva solo nei programmi
Cotone e Sintetici)
Durante i primi 4 minuti di
funzionamento la spia “Kg
MODE” rimane accesa
mentre la macchina calcola il
tempo restante alla fine del
ciclo, in base alla quantità di
biancheria effettivamente
introdotta all’ interno del
cestello
7) TEMPO DI LAVAGGIO
Al momento della selezione di
un programma,verrà
automaticamente indicato il
tempo minimo possibile
tramite l ‘ accensione della
relativa spia.
Scegliendo un tempo
superiore tramite l’ apposito
tasto si illuminerà la spia
corrispondente.
NL
3) CENTRIFUGE TOERENTAL
Als het programma is
geselecteerd, zal het
maximale aantal toeren
toegestaan voor het
programma worden
weergegeven. Elke keer als u
de centrifuge knop indrukt zal
het toerental met 100 rpm
afnemen. Het minimum is 400
rpm, het is mogelijk de
centrifuge uit te schakelen
door de centrifuge toets
meerdere malen in te
drukken.
4) UITGESTELDE START LAMPJE
Deze knippert als de
uitgestelde start is ingesteld.
5)WASTIJD
Al seen programma is
geselecteerd zal het display
de maximale tijdsduur van het
programma weergeven voor
een volle belading.
Tijdens het programma zal u
constant op de hoogte
worden gehouden van de
restrende wastijd.
6) “Kg MODE” indicator (werkt
alleen bij katoen en
synthetische programma’s)
Deze indicator zal gaan
branden als de sensor het
gewicht van de was heeft
bepaald.
Gedurende de eerste 4
minuten zal het lampje “Kg
MODE” branden terwijl de tijd
van het programma wordt
berekend, afhankelijk van de
lading.
7) LAMPJE WASTIJD
Als een programma is
geselecteerd zal het lampje
van het minimale niveau van
vuilheid gaan branden. Als u
een ander niveau selecteert
zal dit zichtbaar zijn op het
display.
3) ëäéêéëíú éíÜàåÄ
äÓ„‰‡ ‚˚ ‚˚·ÂÂÚ ÌÛÊÌÛ˛
ÔÓ„‡ÏÏÛ, ÒÓÓÚ‚ÂÚÒÚ‚Û˛˘ËÈ
Ë̉Ë͇ÚÓ Ì‡ ‰ËÒÔΠÔÓ͇ÊÂÚ
χÍÒËχθÌÛ˛ ‚ÓÁÏÓÊÌÛ˛ ÒÍÓÓÒÚ¸
‚‡˘ÂÌËfl ·‡‡·‡Ì‡ ÔË ÓÚÊËÏÂ. èË
Ê·ÌËË ‚˚ ÏÓÊÂÚ ÒÌËÁËÚ¸
ÒÍÓÓÒÚ¸. ÑÎfl ˝ÚÓ„Ó ÂÒÚ¸ Í·‚˯‡
ÓÚÊËχ. èÓÒÎÂ Í‡Ê‰Ó„Ó Ì‡Ê‡ÚËfl ̇
Ì ÒÍÓÓÒÚ¸ ÛÏÂ̸¯‡ÂÚÒfl ̇ 100
Ó·./ÏËÌ. åËÌËχθÌÓ ‰ÓÔÛÒÚËχfl
ÒÍÓÓÒÚ¸ 400 Ó·./ÏËÌ. åÂ̸¯Â ÌÂ
ÔÓÎÛ˜ËÚÒfl. á‡ÚÓ ÏÓÊÌÓ ‚ÓÓ·˘Â
ÓÚÍβ˜ËÚ¸ ÓÚÊËÏ, ‰Îfl ˜Â„Ó ˝ÚÛ
Ò‡ÏÛ˛ Í·‚Ë¯Û Ì‡‰Ó ̇ʇڸ
ÌÂÒÍÓθÍÓ ‡Á.
4) àçÑàäÄíéê éíãéÜÖççéÉé
áÄèìëäÄ
à̉Ë͇ÚÓ ÏË„‡ÂÚ, ÂÒÎË ‚Íβ˜ÂÌ
ÓÚÎÓÊÂÌÌ˚È Á‡ÔÛÒÍ.
5) èêéÑéãÜàíÖãúçéëíú
ëíàêäà
èÓÒΠ‚˚·Ó‡ ÔÓ„‡ÏÏ˚ ÒÚËÍË Ì‡
‰ËÒÔΠ‡‚ÚÓχÚ˘ÂÒÍË
ÓÚÓ·‡Ê‡ÂÚÒfl χÍÒËχθ̇fl
‰ÎËÚÂθÌÓÒÚ¸ ˆËÍ· ÒÚËÍË ‰Îfl
ÔÓÎÌÓÈ Á‡„ÛÁÍË Ï‡¯ËÌ˚, ÍÓÚÓ‡fl
ÏÓÊÂÚ ËÁÏÂÌflÚ¸Òfl ‚ Á‡‚ËÒËÏÓÒÚË ÓÚ
‚˚·‡ÌÌÓÈ ÔÓ„‡ÏÏ˚.
èÓÒΠÁ‡ÔÛÒ͇ ÔÓ„‡ÏÏ˚ χ¯Ë̇
‚‰ÂÚ Ó·‡ÚÌ˚È ÓÚÒ˜ÂÚ ‚ÂÏÂÌË ‰Ó
ÓÍÓ̘‡ÌËfl ÒÚËÍË.
6) à̉Ë͇ÚÓ “Kg MODE” (îÛÌ͈Ëfl
‡ÍÚ˂̇ ÚÓθÍÓ ‰Îfl ÔÓ„‡ÏÏ ÒÚËÍË
ıÎÓÔ͇ Ë ÒËÌÚÂÚËÍË )
ùÚÓÚ Ë̉Ë͇ÚÓ ·Û‰ÂÚ „ÓÂÚ¸, ÍÓ„‰‡
ËÌÚÂÎÎÂÍÚۇθÌ˚È ‰‡Ú˜ËÍ
‚Á‚¯˂‡ÂÚ Á‡„ÛÊÂÌÌÓ ‚ χ¯ËÌÛ
·ÂθÂ.
à̉Ë͇ÚÓ “ Kg MODE ” ·Û‰ÂÚ „ÓÂÚ¸
‚ Ú˜ÂÌË Ô‚˚ı 4 ÏËÌÛÚ. Ç ˝ÚÓ
‚ÂÏfl ÛÒÚÓÈÒÚ‚Ó ·Û‰ÂÚ ÓÔ‰ÂÎflÚ¸
‚ÂÏfl, ÓÒÚ‡‚¯ÂÂÒfl ‰Ó ÍÓ̈‡ ˆËÍ·
ÒÚËÍË, ‚ Á‡‚ËÒËÏÓÒÚË ÓÚ ‚ÂÒ‡
Á‡„ÛÊÂÌÌÓ„Ó ‚ χ¯ËÌÛ ·Âθfl.
7) ÇêÖåü ëíàêäà
Ç ÏÓÏÂÌÚ ‚˚·Ó‡ ÔÓ„‡ÏÏ˚
‡‚ÚÓχÚ˘ÂÒÍË Á‡„Ó‡ÂÚÒfl
Ë̉Ë͇ÚÓ Ì‡ËÏÂ̸¯Â„Ó ‚ÂÏÂÌË
ÒÚËÍË.
ç‡ÊËχfl ̇ ÒÓÓÚ‚ÂÚÒÚ‚Û˛˘Û˛
Í·‚˯Û, ‚˚ Ò‡ÏÓÒÚÓflÚÂθÌÓ ÏÓÊÂÚÂ
ÛÒÚ‡ÌÓ‚ËÚ¸ ·Óθ¯Â ‚ÂÏfl ÒÚËÍË, -
ÒΉËÚ Á‡ ·ÏÔӘ͇ÏË: ‚ ˝ÚÓÏ
ÒÎÛ˜‡Â Á‡„Ó‡ÂÚÒfl ÒÓÓÚ‚ÂÚÒÚ‚Û˛˘ËÈ
Ò‚ÂÚÓ‚ÓÈ Ë̉Ë͇ÚÓ.
RU
4
{
5
6
7
{
h
mm
3
{

44
45
21
●●●
●●
●●
●●
●
●●
●●
●●
●●
●●
●●
**
1)
1)
1)
TEMP.
MAXIMUM
°C
Jusqu’à:
90°
Jusqu’à:
60°
Jusqu’à:
60°
Jusqu’à:
40°
-
-
-
Jusqu’à:
30°
Jusqu’à:
60°
Jusqu’à:
30°
Jusqu’à:
30°
Jusqu’à:
40°
Jusqu’à:
40°
TEMPERATURE
CONSEILLEE
°C
60°
40°
40°
40°
-
-
-
30°
60°
30°
30°
30°
30°
7
7
3,5
2,5
-
-
-
1,5
3
2,5
1,5
2,5
3,5
2)
CHAPITRE 7
FR
TABLEAU DES PROGRAMMES
CHARGE
MAXI
kg
CHARGE DE LESSIVE
PROGRAMME POUR:
MANETTE DES
PROGRAMME DE
LAVAGE SUR:
Tissus résistants
Coton, lin, chanvre
avec prélavage
Coton, mixtes
résistants,
Couleurs
Tissus mixtes et synthétiques
Mixtes résistants
Tissus très délica
ts
Synthétiques
acryliques
Rinçage
Essorage Energique
Uniquement vidange
Laine “lavable en machine”
Lavage main/Soie
Tissus résistants
Tissus mixtes
Tissus résistants
Tissus mixtes et synthétiques
Cycle rapide 14’
Tissus résistants
Tissus mixtes et synthétiques
Cycle rapide 30’
Tissus résistants
Tissus mixtes et synthétiques
Cycle rapide 44’
Notes importantes
** Programme testé en accord avec CENELEC EN 60456 avec le temps de lavage maximum et
la température à 60°C.
Programme également recommandé pour les lavages à basse température (inferieur au
maximum)
Pour chaque programme vous avez la possibilité de sélectionner la vitesse d’essorage selon les
conseils du fabricant du tissu. Si l’étiquette du textile ne présente pas d’indication, vous pouvez
essorer à la vitesse maximale.
Le bouton température permet de laver à toutes les températures inferieur au maximum
autorisé.
1) Pour le programme présenté il est possible d’ajuster la durée et l’intensité du lavage en
utilisant le bouton de temps de lavage
2) En sélectionnant le programme rapide avec la manette des programmes et en appuyant sur
la touche “temps de lavage” il est possible de choisir un des trois programmes rapides à
disposition: 14mn, 30mn et 44mn.
Quand certaines pièces ont des taches qui doivent être traitées par un produit blanchissant
liquide, vous pouvez les détacher dans la machine. Introduire dans la section "2" du tiroir à
lessive le bac pour les produits liquide, le remplir avec le produit blanchissant liquide et
sélectionner le programme "RINÇAGE" ( ).
Après ce traitement, tourner la manette des programmes sur la position "OFF", ajouter à ces
pièces le reste du linge et effectuer un lavage normal,selon le programme choisi.
La page est en cours de chargement...
La page est en cours de chargement...
La page est en cours de chargement...
La page est en cours de chargement...

54
EN
55
CHAPTER 8
SELECTION
For the various types of
fabrics and various degrees
of dirt the washing machine
has 4 different programme
bands according to: wash
cycle, temperature and
lenght of cycle (see table of
washing cycle
programmes).
1 RESISTANTS FABRICS
The programmes have been
designed for a maximum
wash and the rinses, with
spin intervals, ensure perfect
rinsing.
The final spin gives more
efficient removal of water.
2 MIXED AND SYNTHETIC
FABRICS
The main wash and the rinse
gives best results thanks to
the rotation rhythms of the
drum and to the water
levels.
A gentle spin will mean that
the fabrics become less
creased.
3 SPECIAL DELICATE FIBRES
This is a new wash cycle
which alternates washing
and soaking and is
particularly recommended
for very delicate fabrics.
The wash cycle and rinses
are carried out with high
water levels to ensure best
results.
FR
CHAPITRE 8
SELECTION
L’appareil dispose de 4
groupes de programmes
différents pour laver tous
types de tissus et selon
différents degrés de salissure
en attribuant au type de
lavage,la température et la
durée (voir tableau des
programmes de lavage).
1. TISSUS RÉSISTANTS
Ces programmes sont
destinés à accomplir des
lavages et des rinçages avec
le maximum d’efficacité.
Ils sont entrecoupés de cycles
d’essorages qui offrent des
résultats parfaits sur le
rinçage.
L’essorage final retire le
maximum d’eau contenue
dans les tissus.
2. TISSUS MIXTES ET
SYNTHÉTIQUES
La combinaison d’un système
de lavage efficace, une
rotation optimum du tambour
et l’autogestion du niveau
d’eau assurent des résultats
de lavage excellents,
pendant qu’un rinçage
délicat évite les faux plis.
3. TISSUS TRÈS DÉLICATS
Il s’agit d’un nouveau
concept de lavage qui
alterne des moments de
brassage et de trempage du
linge; ce processus est
particulièrement indiqué pour
le lavage de tissus
extrêmement délicats.
Le lavage et le rinçage sont
effectués à pleine eau afin
d’obtenir les meilleures
prestations.
IT
CAPITOLO 8
SELEZIONE
PROGRAMMI
Per trattare i vari tipi di
tessuto e le varie gradazioni
di sporco, la lavatrice ha 4
fasce di programmi diversi
per tipo di tessuto,
temperatura e durata
(vedere tabella programmi
di lavaggio).
1. TESSUTI RESISTENTI
I programmi sono realizzati
per sviluppare il massimo
grado di lavaggio e i
risciacqui, intervallati da fasi
di centrifuga, assicurano un
perfetto risciacquo.
La centrifuga finale alla
massima velocità assicura
un’ottima strizzatura.
2. TESSUTI MISTI E SINTETICI
Il lavaggio ed il risciacquo
sono ottimizzati nei ritmi di
rotazione del cesto e nei
livelli di acqua.
La centrifuga ad azione
delicata, assicura una
ridotta formazione di pieghe
sui tessuti.
3. TESSUTI DELICATISSIMI
E’ un nuovo concetto di
lavaggio in quanto alterna
momenti di lavoro a
momenti di pausa,
particolarmente indicato
per il lavaggio di tessuti
molto delicati. Il lavaggio e i
risciacqui sono eseguiti con
alto livello di acqua per
assicurare le migliori
prestazioni.
NL
HOOFDSTUK 8
KIEZEN VAN HET
PROGRAMMA
Voor de verschillende soorten
weefsels en afhankelijk van
de graad van vervuiling van
het wasgoed heeft de
wasautomaat 4 verschillende
hoofdgroepen: (zie het
overzicht van de
wasprogramma’s).
1. STERKE WEEFSELS
Deze programma’s zijn
bestemd om grondig te
wassen.De verschillende
spoelgangen, die tussendoor
gecentrifugeerd worden,
zorgen dat er perfect
gespoeld wordt. Bij de laatste
centrifugegang wordt het
water optimaal verwijderd.
2. GEMENGDE EN
SYNTHETISCHE WEEFSELS
Dankzij een speciale
trommelbeweging en het
hogere waterniveau wordt er
tijdens de hoofdwas en de
spoeling de beste resultaten
behaald. Er wordt met een
laag toerental
gecentrifugeerd om kreuken
te voorkomen.
3. BIJZONDER GEVOELIGE
WEEFSELS
Dit is een nieuw wasconcept,
met een cyclus die bestaat uit
elkaar opvolgende periodes
van activiteit en pauzes,
vooral geschikt voor het
wassen van uiterst fijne stoffen.
Wassen en spoelen gebeuren
met hoge waterniveaus voor
het beste wasresultaat.
RU
ÏÀPÀÃPÀÔ 8
ÇõÅéê èêéÉêÄåå
Ä∧ÿ paç∧è÷íûx òèïoâ òêaíeé è
còeïeíè çaãpÿçíeíèÿ ∋òa
còèpa∧üíaÿ ìaøèía èìeeò 4
ãpyïïû ïpoãpaìì, â
cooòâeòcòâèè c êoòopûìè
âûáèpaeò öèê∧ còèpêè,
òeìïepaòypy è
ïpoäo∧æèòe∧üíocòü còèpêè
(cì. òaá∧èöy ïpoãpaìì
còèpêè).
1. èêéóçõÖ íäÄçà
∋òoò ̇·Ó ïpoãpaìì
paçpaáoòaí ä∧ÿ ìaêcèìa∧üío
èíòeícèâoé còèpêè è
ïo∧ocêaíèÿ c
ïpoìeæyòo÷íûìè öèê∧aìè
oòæèìa ä∧ÿ íaè∧y÷øeão
êa÷ecòâa ïo∧ocêaíèÿ.
Çaê∧ю÷èòe∧üíûé oòæèì
yäa∧ÿeò âoäy áo∧ee
èíòeícèâío, ÷eì äpyòèe
ïpoãpaììû còèpêè.
2. ëåÖëéÇõÖ à ëàçíÖíàóÖëäàÖ
íäÄçà
Ocíoâíaÿ còèpêa è ïo∧ocêaíèe
äaюò oò∧è÷íûe peçy∧üòaòû
á∧aãoäapÿ òùaòe∧üío
ïoäoápaííoé cêopocòè
âpaùeíèÿ áapaáaía è ÛÓ‚Ìfl
âoäû. Äe∧èêaòíûé oòæèì
ãapaíòèpyeò, ÷òo áe∧üe áyäeò
ìeíüøe cìèíaòücÿ.
3. íäÄçà, óìÇëíÇàíÖãúçõÖ ä
ÇçÖòçÖåì ÇéáÑÖâëíÇàû
ëÚË͇ ˜Â‰ÛÂÚÒfl Ò
ÔÓ‰ÓÎÊËÚÂθÌ˚ÏË Ô‡ÛÁ‡ÏË.
êÂÍÓÏẨÛÂÚÒfl ‰Îfl Ú͇ÌÂÈ,
˜Û‚ÒÚ‚ËÚÂθÌ˚ı Í ‡Á΢Ì˚Ï ‚ˉ‡Ï
‚̯ÌÂ„Ó ‚ÓÁ‰ÂÈÒÚ‚Ëfl.
óÚÓ·˚ ‚ÓÁ‰ÂÈÒÚ‚Ë ̇ Ú̸͇ ·˚ÎÓ
˘‡‰fl˘ËÏ, ‚Ó‰˚ ‰Îfl ÒÚËÍË Ë
ÔÓÎÓÒ͇ÌËfl ·ÂÂÚÒfl ·Óθ¯Â, ˜ÂÏ ‚
ÓÒڇθÌ˚ı ÔÓ„‡Ïχı.
La page est en cours de chargement...
La page est en cours de chargement...
La page est en cours de chargement...
La page est en cours de chargement...
La page est en cours de chargement...
La page est en cours de chargement...
La page est en cours de chargement...
La page est en cours de chargement...
La page est en cours de chargement...
La page est en cours de chargement...
La page est en cours de chargement...
La page est en cours de chargement...
La page est en cours de chargement...
-
 1
1
-
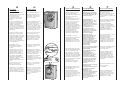 2
2
-
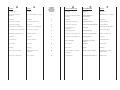 3
3
-
 4
4
-
 5
5
-
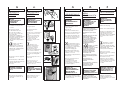 6
6
-
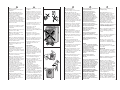 7
7
-
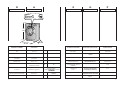 8
8
-
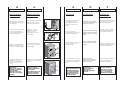 9
9
-
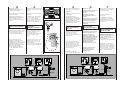 10
10
-
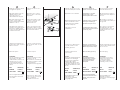 11
11
-
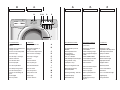 12
12
-
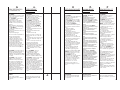 13
13
-
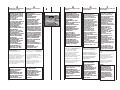 14
14
-
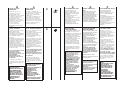 15
15
-
 16
16
-
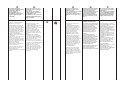 17
17
-
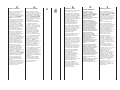 18
18
-
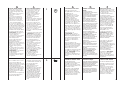 19
19
-
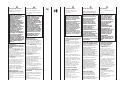 20
20
-
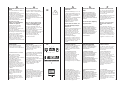 21
21
-
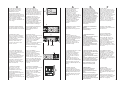 22
22
-
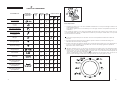 23
23
-
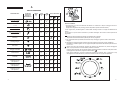 24
24
-
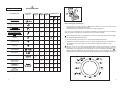 25
25
-
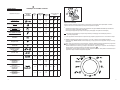 26
26
-
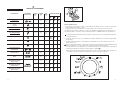 27
27
-
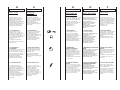 28
28
-
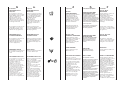 29
29
-
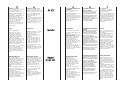 30
30
-
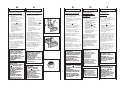 31
31
-
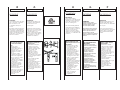 32
32
-
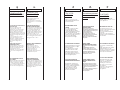 33
33
-
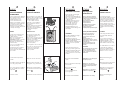 34
34
-
 35
35
-
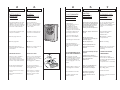 36
36
-
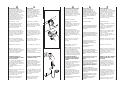 37
37
-
 38
38
-
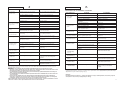 39
39
-
 40
40
-
 41
41


Hoover DYN DP Manuel utilisateur
- Catégorie
- Machines à laver
- Taper
- Manuel utilisateur
dans d''autres langues
- italiano: Hoover DYN DP Manuale utente
- English: Hoover DYN DP User manual
- Nederlands: Hoover DYN DP Handleiding
Documents connexes
-
Hoover DYN 8145D-S Manuel utilisateur
-
-
-
-
Hoover WDYNS 642D-30S Manuel utilisateur
-
-
-
Autres documents
-
Candy CE 430 Manuel utilisateur
-
-
-
-
-
Candy ALISE CSW 105 Le manuel du propriétaire
-
-
-
Philips PET716/58 Manuel utilisateur