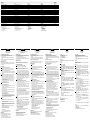
SICK WTB12C-3P2462B01 Photoelectric retro-reflective sensor Mode d'emploi
- Taper
- Mode d'emploi

ENGLISH
Photoelectric retro-reective sensor
with background suppression
Operating instructions
Safety notes
> Read the operating instructions before starting operation.
> Connection, assembly, and settings only by competent technicians.
> Protect the device against moisture and soiling when operating.
> No safety component in accordance with EU machine guidelines.
Correct use
The WTB12C-3 photoelectric proximity sensor is an opto-electronic sensor
for the optical, non-contact detection of objects.
Starting operation
1 With following connectors only:
Connect and secure cable receptacle tension-free.
2 Mountphotoelectricretro-reectivesensortosuitableholders
(e. g. SICK mounting bracket).
Maintain direction in which object moves relative to sensor.
Connectphotoelectricretro-reectivesensortooperatingvoltage
(see type label).
3 Check application conditions such as sensing distance, size and
reectanceofobjecttobedetectedaswellasofbackground,and
compare with characteristic in diagram. (x = sensing distance,
y = transition range between set sensing distance and reliable back-
groundsuppression(z)in%ofsensingdistance,Ro=reectanceof
object,Rh=reectanceofbackground).
Reectance:6%=black,18%=gray,90%=white(basedonstan-
dardwhitetoDIN5033).
4 Adjustment of light reception:
Position object in the beam path
Press teach-in pushbutton (approx. 2 sec.) until yellow status LED
ashes=objectisdetected
Release teach-in pushbutton, yellow status LED is continuously lit
= object is reliably detected
Remove the object, yellow receive indicator no longer lit (no back-
groundeectpresent).Adjustmentiscompleted.
If the yellow status LED stays lit, repeat the teach procedure until the
yellow receive indicator goes out.
Position object in the beam path
If the yellow receive indicator is lit, the adjustment is completed.
If not, check the application conditions, such as the sensing range,
theobjectsize,andthereectivityofthetargetobjectandtheback-
ground, and compare with the characteristic curve in the diagram.
5 Function
WTB12C-3 can be used in the standard I / O or IO-Link mode.
In addition to the basic IO-Link functions, the following advance
functionsareintegrated:
TimeStamp = TimeStamp for switching signal for product tracking
according to the SICK TimeStamp standard
Debouncing = Signal debouncing (ON / OFF) across debouncing time
Δt.DebouncingonlypossibleinIO-LinkmodeΔtmax.=200ms
The following options are possible:
Debouncing ON / OFF
SelectionofdebouncingtimesΔtONandΔtOFF
(individuallyselectable0...200ms)
Maintenance
SICK light barriers are maintenance-free.
Werecommenddoingthefollowingregularly:
- clean the external lens surfaces
- check the screw connections and plug-in connections.
Nomodicationsmaybemadetodevices.
DEUTSCH
Reexions-Lichttaster
mit Hintergrundausblendung
Betriebsanleitung
Sicherheitshinweise
> Vor der Inbetriebnahme die Betriebsanleitung lesen.
> Anschluss,MontageundEinstellungnurdurchFachpersonal.
> Gerät bei Inbetriebnahme vor Feuchte und Verunreinigung schützen.
> Kein Sicherheitsbauteil gemäß EU-Maschinenrichtlinie.
Bestimmungsgemäße Verwendung
DerReexions-LichttasterWTB12C-3isteinoptoelektronischerSensorund
wird zum optischen, berührungslosen Erfassen von Objekten eingesetzt.
Inbetriebnahme
1 Nur bei den Steckerversionen:
Leitungsdose spannungsfrei aufstecken und festschrauben.
2 Lichttaster mit Befestigungsbohrungen an geeignete Halter montieren
(z. B. SICK-Haltewinkel).
Bewegungsrichtung des Objektes relativ zum Taster einhalten.
Lichttaster an Betriebsspannung legen (s. Typenaufdruck).
3 Einsatzbedingungen wie Tastweite, Objektgröße und Remissions-
vermögen des Tastgutes sowie des Hintergrundes überprüfen und mit
der Kennlinie im Diagramm vergleichen. (x = Tastweite, y = Übergangs-
bereich zwischen eingestellter Tastweite und sicherer Hintergrundaus-
blendung (z) in % der Tastweite, Ro = Remission Objekt, Rh = Remis-
sion Hintergrund).
Remission:6%=schwarz,18%=grau,90%=weiß(bezogenauf
StandardweißnachDIN5033).
4 Justage Lichtempfang:
Objekt im Strahlengang positionieren
Teach-in Taste drücken (ca. 2 s) bis gelbe Status-LED blinkt = Objekt
ist erfasst
Teach-in Taste loslassen, gelbe Status-LED leuchtet konstant = Objekt
wird sicher detektiert
Objekt entfernen, gelbe Empfangsanzeige leuchtet nicht mehr (kein
Hintergrundeinussvorhanden).Einstellungistbeendet.
Leuchtet die gelbe Status-LED weiter, Teach-Vorgang wiederholen bis
die gelbe Empfangsanzeige erlischt.
Objekt im Strahlengang positionieren
Wenn gelbe Empfangsanzeige leuchtet, ist die Einstellung beendet,
falls nicht, Einsatzbedingungen wie Tastweite, Objektgröße und Remis-
sionsvermögen des Tastgutes sowie des Hintergrundes überprüfen und
mit der Kennlinie im Diagramm vergleichen.
5 Funktion
Morerepresentativesandagenciesatwww.sick.com∙Subjecttochange
withoutnotice∙Thespeciedproductfeaturesandtechnicaldatadonot
represent any guarantee.
WeitereNiederlassungenndenSieunterwww.sick.com∙Irrtümer
undÄnderungenvorbehalten∙AngegebeneProdukteigenschaftenund
technische Daten stellen keine Garantieerklärung dar.
Plusdereprésentationsetd’agencesàl’adressewww.sick.com∙Sujetà
modicationsanspréavis∙Lescaractéristiquesdeproduitettechniques
indiquéesneconstituentpasdedéclarationdegarantie.
Paramaisrepresentanteseagências,consultewww.sick.com∙Alterações
poderãoserfeitassemprévioaviso∙Ascaracterísticasdoprodutoeos
dadostécnicosapresentadosnãoconstituemdeclaraçãodegarantia.
Altrirappresentantiedagenziesitrovanosuwww.sick.com∙Contenuti
soggettiamodichesenzapreavviso∙Lecaratteristichedelprodottoeidati
tecnici non rappresentano una dichiarazione di garanzia.
Másrepresentantesyagenciasenwww.sick.com∙Sujetoacambiosin
previoaviso∙Lascaracterísticasylosdatostécnicosespecicadosno
constituyenningunadeclaracióndegarantía.
欲了解更多代表机构和代理商信息,请登录 www.sick.com∙
如有更改 , 不另行通知∙对所给出的产品特性和技术参数
的正确性不予保证。
その他の営業所は www.sick.com よりご覧ください∙予告なし
に変更されることがあります∙ 記載されている製品機能およ
び技術データは保証を明示するものではありません。
WTB12C-
3P2462B01
-------------------------------------------------------8015843.10DB1218COMAT -----------------------------------------------------
1
A
WTB12C-3 kann verwendet werden im Standard I / O Mode oder
IO-Link-Mode.
Zusätzlich zu den IO-Link Grundfunktionen sind noch folgende
erweiterteFunktionenintegriert:
TimeStamp = Zeitstempel zum Schaltsignal zur Produktverfolgung
gemäß SICK TimeStamp Standard
Entprellung=Signal-Entprellung(Anzug&Abfall)überEntprellzeitΔt
EntprellungnurimIO-LinkModemöglichΔtmax.=200ms
Folgende Optionen sind möglich:
EntprellungAN/AUS
AuswahlEntprellzeitenΔtONundΔtOFF
(individuellwählbar0...200ms)
Wartung
SICK-Lichtschranken sind wartungsfrei.
Wirempfehlen,inregelmäßigenAbständen
–dieoptischenGrenzächenzureinigen,
– Verschraubungen und Steckverbindungen zu überprüfen.
Veränderungen an Geräten dürfen nicht vorgenommen werden.
+ (L+)
Q
- (M)
1
2
3
Q/C
4
wht
blu
brn
blk
PNP
NPN
1
0
1
0
1
0
1
0
x
y
z
B WTB12C-3P2462B01
4
2
5 3 6
2000
(7.87)
400
(15.74)
600
(23.62)
800
(31.49)
1000
(39.37)
40
15
20
25
30
35
10
0
5
Distance in mm (inch)
% of sensing distance
6 % / 90 %
18 % / 90 %
90 % / 90 %
WTB12C-3 P2462B01
Order number Bestellnummer N° de commande Número de pedido 1061490
Recommended sensing range Empfohlene Tastweite Distance de détection conseillée Alcancededetecçãorecomendado 50...700mm
1)
Light spot diameter / distance Lichtfleckdurchmesser / Entfernung Diamètre de la tache lumineuse / distance Diâmetro do ponto de luz / distância 9mm/400mm
Sensing range limitation Tastweitenbegrenzung Limitation de la distance de détection Limitaçãodoalcancededetecção 700mm+/-100mm
Sensing range adjustment Tastweiteneinstellung Réglage de la distance de détection Ajustedoalcancededetecção Teach-in via IO-Link,
simple teach-button
Supply voltage V
S
Versorgungsspannung U
V
Tension d'alimentation U
V
TensãodeforçaU
V
10...30VDC
2)
Output current I
max
AusgangsstromI
max.
Courant de sortie I
maxi
CorrentedesaídaI
máx.
≤100mA
Output Ausgang Sortie Saída PNP, Q not, PNP, Q/C
Communication mode Kommunikationsmodus Mode de communication Mododecomunicação COM2
TimeStamp function
(*with programmable resolution)
Funktion TimeStamp
(*mitprogrammierbarerAuflösung)
Fonction Estampille
(*avec résolution programmable)
FunçãoTimeStamp
(*comresoluçãoprogramável)
14*
TimeStamp accuracy TimeStampgenauigkeit Précision de l'estampille AcuráciadoTimeStamp 12.98µs
Debounce function Funktion Entprellen FonctionAntirebond FunçãoEliminaçãoderebotes Δton/Δtoffdelay
Switchingfrequency Schaltfolge max. Le signal min. Sequênciadosinalmin. 1500/s
5)
Response time Ansprechzeit Temps de réponse Tempodereação ≤330µs
5)
Enclosure rating Schutzart Type de protection Tipodeproteção IP66,IP67
Protection class Schutzklasse Classe de protection Classedeproteção
3)
Circuit protection Schutzschaltungen Circuits de protection Circuitos protetores A,B,C
4)
Ambientoperatingtemperature Betriebsumgebungstemperatur Température ambiante Temperaturaambientedeoperação -25…+55°C
1)
Object90%reflectionaccordingtoDIN5033
2)
Limitvalues:
Operationinshort-circuitprotectednetworkmax.8A;ripplemax.5V
pp
3)
Referencevoltage50VDC
4)
A=V
S
connections reverse polarity protected
B = Outputs protected against short circuits
C = Interference pulse suppression
5)
Typicalvalueatlight/darkratio1:1
1)
Objekt90%RemissionnachDIN5033
2)
Grenzwerte:
BetriebimkurzschlussgeschützenNetzmax.8A;Restwelligkeitmax.5V
SS
3)
BemessungsspannungDC50V
4)
A=U
V
-Anschlüsseverpolsicher
B=Ausgängekurzschlussfest
C = Störimpulsunterdrückung
5)
Typ.WertbeiHell-/Dunkelverhältnis1:1
1)
ObjetLuminancede90%selonDIN5033
2)
Valeurslimites:
Servicedansunréseauprotégévcontrelescourts-circuits8A;
au max. Ondulation résiduelle max. 5 V
SS
3)
TensiondecalculDC50V
4)
A=RaccordementsU
V
protégés contre les inversions de polarité
B = Sorties protégées contre les courts-circuits
C = Suppression des impulsions parasites
5)
Pourunrapportclair/sombre1:1
1)
Objeto:90%deremissãosegundoDIN5033
2)
Valoreslimite:
Operaçãoemredeprotegidacontracurto-circuitosmax.8A;
Ondulaçãoresidualmax.5V
SS
3)
TensãodedimensionamentoDC50V
4)
A=ConexõesU
V
protegidas contra inversão de polos
B=Saídasprotegidascontracurtocircuito
C = Supressão de impulsos parasitas
5)
Comumarelaçãoluminoso/escurode1:1
17.9
(0.7)
7.3 (0.29)
23.1
(0.91)
6.1
(0.24)
48.5 (1.91)
5.1 (0.2)
42 (1.65)
24 (0.94)
10 (0.39)
29.9 (1.18)
ø 4.2
(0.17)
32 (1.26)
15.6
(0.61)
Output signal
Q
Switching dela
y Δt
Output Q/C
Cor
rection Δt via TimeStamp
Raw-signal
t
signal
< Δt
Disturbing signal blanked out
Wanted signal
Δt ON Δt OFF
Disturbing signal
7 8
2006/42/EG
NO
SAFETY
---------------------------------------------------------------------------------------------------------------------------------------------------------------------------------------------------------------------------------------------------
BZ int48
Please find detailed addresses and further locations in all major industrial
nations at www.sick.com
Australia
Phone +61 (3) 9457 0600
Austria
Phone +43 (0) 2236 62288-0
Belgium/Luxembourg
Phone +32 (0) 2 466 55 66
Brazil
Phone +55 11 3215-4900
Canada
Phone +1 905.771.1444
Czech Republic
Phone +420 2 57 91 18 50
Chile
Phone +56 (2) 2274 7430
China
Phone +86 20 2882 3600
Denmark
Phone +45 45 82 64 00
Finland
Phone +358-9-25 15 800
France
Phone +33 1 64 62 35 00
Germany
Phone +49 (0) 2 11 53 01
Hong Kong
Phone +852 2153 6300
Hungary
Phone +36 1 371 2680
India
Phone +91-22-6119 8900
Israel
Phone +972-4-6881000
Italy
Phone +39 02 27 43 41
Japan
Phone +81 3 5309 2112
Malaysia
Phone +603-8080 7425
Mexico
Phone +52 (472) 748 9451
Netherlands
Phone +31 (0) 30 229 25 44
New Zealand
Phone +64 9 415 0459
Norway
Phone +47 67 81 50 00
Poland
Phone +48 22 539 41 00
Romania
Phone +40 356-17 11 20
Russia
Phone +7 495 283 09 90
Singapore
Phone +65 6744 3732
Slovakia
Phone +421 482 901 201
Slovenia
Phone +386 591 78849
South Africa
Phone +27 (0)11 472 3733
South Korea
Phone +82 2 786 6321
Spain
Phone +34 93 480 31 00
Sweden
Phone +46 10 110 10 00
Switzerland
Phone +41 41 619 29 39
Taiwan
Phone +886-2-2375-6288
Thailand
Phone +66 2 645 0009
Turkey
Phone +90 (216) 528 50 00
United Arab Emirates
Phone +971 (0) 4 88 65 878
United Kingdom
Phone +44 (0)17278 31121
USA
Phone +1 800.325.7425
Vietnam
Phone +65 6744 3732

FRANÇAIS
Détecteur réex
avec élimination d’arrière-plan
Manuel d’utilisations
Remarques relatives à la sécurité
> Lire les Instructions de Service avant la mise en marche.
> Installation,raccordementetréglagenedoiventêtreeectuésquepar
dupersonnelqualié.
> Lors de la mise en service, protéger l’appareil de l’humidité et des
saletés.
> N’est pas un composant de sécurité au sens de la directive européenne
concernant les machines.
Utilisation conforme
LabarrièrelumineuseàréexionWTB12C-3estuncapteuroptoélectro-
niquequisertàladétectionvisuelled’objets,d’animauxoudepersonnes
sans contact direct.
Mise en service
1 Seulement pour les versions à connecteur:
Encherlaboîteàconducteurssansaucunetensionetlavisser.
2 Installerledétecteurmunidetrousdexationsurdessupports
appropriés (p.e. cornière de maintien SICK).
Respecter le sens de déplacement de l’objet par rapport au détecteur.
Appliquerlatensiondeserviceaudétecteur(voirinscriptionindiquant
le modèle).
3 Vérierlesconditionsd’utilisationtellesquedistancededétection,
taille de l’objet, facteur de luminance du matériel à détecter et de
l’arrière-plan,etlescompareràlacourbecaractéristiquedudia-
gramme. (x = distance de détection, y = plage de transition entre la
distance de détection ajustée et une élimination certaine de l’arrière-
plan (z) en % de la distance de détection, Ro = luminance objet,
Rh = luminance arrière-plan).
Luminance:6%=noir,18%=gris,90%=blanc(parrapportau
blancétalonselonDIN5033).
4 Ajustement Réception de la lumière :
Placer un objet devant le faisceau
AppuyersurlatoucheTeach-in(2senviron)jusqu’àcequeletémoin
jaune clignote = l’objet a été détecté.
Relâcher la touche Teach-in, le témoin jaune reste allumé = l’objet est
dans tous les cas détecté.
Enleverl’objet.Letémoinjaunes’éteint(pasd’inuencedel’arrière-
plan). Le réglage est terminé.
Siletémoinjauneresteallumé,répéterl’opérationdeteachjusqu’à
cequeletémoinjaunes’éteigne.
Placer un objet devant le faisceau
Lorsqueletémoinserallume,leréglageestalorsterminé.Danslecas
contraire,contrôlerlesconditionsdel’utilisationtellesqueladistance
dedétection,latailledel’objetetletauxderéexiondel’objetà
détecter et comparer avec la courbe du diagramme.
5 Fonction
L‘utilisation de WTB12C-3 est possible en mode Standard I / O ou
IO-Link.
Les fonctions étendues suivantes ont été intégrées en complément
desfonctionsI/OLinkdebase:
Antirebond=antibattementdesignal(montée&descente)viadurée
antirebondΔtAntirebondpossibleuniquementenmodeIO-LinkΔt
max.=200ms
TimeStamp = estampille du signal de commutation pour un suivi
produit selon SICK TimeStamp Standard
Les options suivantes sont possibles:
AntirebondON/OFF
SélectiondestempsantirebondΔtONetΔtOFF
(sélectionpossibleséparément0...200ms)
Maintenance
Les barrières lumineuses SICK sont sans entretien.
Nous vous recommandons de procéder régulièrement
-aunettoyagedessurfacesoptiques
- au contrôle des liaisons vissées et des connexions.
Neprocédezàaucunemodicationsurlesappareils.
PORTUGUÊS
Foto-célula de reexão no objeto
comreduçãodaintensidadedaluzdoplanodefundo
Instruções de operação
Notas de segurança
> Antesdocomissionamentodevlerasinstruçõesdeoperação.
> Conexões,montagemeajustedevemserexecutadosexclusivamente
porpessoaldevidamentequalicado.
> Guardar o aparelho ao abrigo de umidade e sujidade.
> NãosetratadeelementodesegurançasegundoaDiretivaMáquinas
da União Europêa.
Especificações de uso
AbarreiradeluzcomreexãoWTB12C-3éumsensoroptoeletrônico
utilizadoparaadetecçãoóptica,semcontato,deobjetos.
Colocação em funcionamento
1 Vale somente para as versões com conetores:
Enaracaixadecabossemtorçõeseaparafusá-la.
2 Montarafoto-célulamedianteosfurosdexaçãonumsuporte
apropriado (p. ex. em suporte angular SICK).
Observar o sentido do movimento do objeto para com o sensor.
Ligarafoto-célulaàtensãooperacional(veridenticaçãodetipo).
3 Controlarosparâmetrosdeoperação,comosejam:raiodeexplora-
ção,dimensõesdoobjetoecapacidadederemissão,tantodoobjeto
aanalisarcomodofundo,comparando-oscomalinhacaraterística
dodiagrama.(x=raiodeexploração,y=espaçointermédioentre
raiodeexploraçãoeplenailuminaçãodofundo)(z)em%doraiode
exploração,Ro=remissãodoobjeto,Rh=remissãodofundo).
Remissão:6%=preto,18%=cinzento,90%=branco(emfunção
dobranconormalsegundoDIN5033).
4 Ajuste da recepção de luz:
Posicionar o objeto na trajetória do raio luminoso
Pressionar a tecla Teach-in (aprox. 2 s) até o LED de estado amarelo
tornar-se intermitente = objeto foi detectado
SoltarateclaTeach-in;oLEDdeestadoamareloestáconstantemente
aceso=objetoédetectadocomconabilidade
Removeroobjeto;oindicadorderecepçãoamarelonãoestámais
aceso(nãohánenhumainuênciadoplanodefundo).Ajustenal-
izado.
Se o LED de estado amarelo continuar aceso, repetir o procedimento
teachatéoindicadorderecepçãoamareloapagar.
Posicionar o objeto na trajetória do raio luminoso
Oindicadorderecepçãoamareloacendecomanalizaçãodoajuste.
Senãoacender,vericarascondiçõesdeoperação,comoalcancede
detecção,dimensãodoobjeto,bemcomoareetividadedoobjeto
edoplanodefundo,ecompará-lascomacurvacaracterísticano
diagrama.
5 Função
O WTB12C-3 pode ser utilizado no modo I / O padrão ou no modo
IO-Link.
AlémdasfunçõesbásicasdoIO-Link,tambémestãointegradasas
seguintesfunçõesavançadas:
TimeStamp=Carimbodetemporelativoaosinaldecomutaçãopara
o rastreamento do produto de acordo com o padrão SICK TimeStamp
Eliminação de rebotes=Eliminaçãoderebotesdosinal(pickupe
dropout)durantetempodeeliminaçãoderebotesΔtEliminaçãode
rebotessóépossívelnomodoIO-LinkΔtmáx.=200ms
São possíveis as seguintes opções:
ON./OFFEliminaçãodereboques
SeleçãodetemposdeeliminaçãodereboquesΔtONeΔtOFF
(selecionáveisindividualmente0...200ms)
Manutenção
AsbarreirasdeluzSICKnãorequeremmanutenção.
Recomendamosqueseefetueemintervalosregulares
-umalimpezadassuperfíciesópticas
-umavericaçãodasconexõesroscadasedosconectores.
Nãosãopermitidasmodicaçõesnoaparelho.
ITALIANO
Sensore luminoso a riessione
con soppressione dello sfondo
Struzioni d’uso
Avvertenze sulla sicurezza
> Leggere prima della messa in esercizio.
> Allacciamento,montaggioeregolazionesolodapartedipersonale
qualicato.
> Durante la messa in esercizio proteggere da umidità e sporcizia.
> Non componente di sicurezza secondo la Direttiva macchine EN.
Impiego conforme agli usi previsti
LafotocellulaariessioneWTB12C-3èunsensoreoptoelettronico
utilizzato per il rilevamento ottico senza contatto di oggetti.
Messa in funzione
1 Solo con spine:
Inserire scatola esente da tensione e avvitare stringendo.
2 Coniforidissaggiomontareilsensoreluminosoaunsupporto
adatto (supporto angolare SICK).
Mantenere la direzione di moto dell’oggetto in relazione al
sensore.
Allacciareatensionediesercizio(cf.stampigliatura).
3 Vericarelecondizionidiimpiegoqualidistanzadiricezione,dimen-
sionidell’oggettoeriettenzadell’oggettoedellosfondoallamano
della curva caratteristica nel diagramma. (x = distanza di ricezione,
y = ambito di passaggio tra distanza di ricezione impostata e masche-
ramentosfondo(z)in%delladistanzadiricezione,Ro=riettenza
oggetto,Rh=riettenzasfondo).
Riettenza:6%=nero,18%=grigio,90%=bianco(biancostandard
DIN5033).
4 Aggiustare ricezione luce:
Posizionare l’oggetto nel raggio emesso
PremereiltastoTeach-in(percirca2s)noaquandolampeggiailLED
giallo di stato = oggetto individuato
RilasciareiltastoTeach-in,ilLEDgiallodistatoèaccesoconlucessa
= oggetto rilevato in sicurezza
Allontanarel’oggetto,l’indicatorediricezionegiallosispegne
(nessunainuenzadellosfondo).L’impostazioneèterminata.
Se il LED giallo di stato resta acceso, ripetere la procedura di
apprendimentonoaquandol’indicatorediricezionegiallosispegne.
Posizionare l’oggetto nel raggio emesso
Quando l’indicatore di ricezione si illumina, l’impostazione è
terminata;seciònonaccadesse,vericarelecondizionidiimpiego
come la distanza di ricezione, le dimensioni dell’oggetto e il fattore di
riessionedell’oggettoedellosfondoeconfrontarleconlalineacarat-
teristica nel diagramma.
5 Funzione
SipuòusareWTB12C-3nellamodalitàstandardI/OModeo
IO-Link-Mode.
In aggiunta alle funzioni di base IO-Link sono state integrate anche
eseguentifunzioniampliate:
TimeStamp = marcatempo sul segnale di commutazione per rileva-
mento del prodotto secondo il TimeStamp standard di SICK
Anti-rimbalzo=anti-rimbalzodelsegnale(attrazione&diseccitazi-
one)tramitetempodianti-rimbalzoΔtAnti-rimbalzopossibilesolo
nellamodalitàIO-LinkModeΔtmax.=200ms
Sono possibili le seguenti opzioni:
Anti-rimbalzoON/OFF
Selezionetempidianti-rimbalzoΔtONeΔtOFF
(selezionabiliindividualmente0...200ms)
Manutenzione
Le barriere fotoelettriche SICK sono esenti da manutenzione.
Consigliamo di pulire in intervalli regolari
-lesupercilimiteottiche
-vericareicollegamentiaviteegliinnestiaspina.
Nonèconsentitoeettuaremodicheagliapparecchi.
ESPAÑOL
Barrera de luz de reexión
con ocultación de fondo
Instrucciones de servicio
Indicaciones de seguridad
> Leer el Manual de Servicio antes de la puesta en marcha.
> Conexión, montaje y ajuste solo por personal técnico.
> Alapuestaenmarchaprotegerelaparatocontrahumedadysuciedad.
> No es elemento constructivo de seguridad según la Directiva UE sobre
maquinaria.
Uso conforme a lo previsto
ElsensorluminosodereexiónWTB12C-3esunsensoroptoelectrónico
empleado para la detección óptica y sin contacto de objetos.
Puesta en funcionamiento
1 Solo en conectores:
Insertar y atornillar bien la caja de conexiones sin tensión.
2 Montarelpalpadorfotoeléctricoconlostaladrosdejaciónaun
soporte adecuado (p. ej. escuadra SICK de soporte).
Conservar el sentido de movimiento del objeto relativamente hacia
el palpador.
Ponerelpalpadorluminosoentensión(verimpresióntipográca).
3 Comprobar las condiciones de trabajo, como amplitud de palpación,
tamaño del objeto y capacidad de remisión del producto a detectar,
asícomotambiénelfondo,ycompararconlalíneacaracterísticadel
diagrama. (x = amplitud de palpación, y = zona transitoria entre el
alcance de palpación ajustado y enmascaramiento seguro de fondo
(z)en%delalcancedepalpación,Ro=reexiónespectraldelobjeto,
Rh=reexiónespectraldelfondo).
Reexiónespectral:6%=negra,18%=gris,90%=blanca(referida
ablancoestándarenbasealanormaDIN5033).
4 Ajuste de la recepción de luz:
Posicionar el objeto en el haz luminoso
Pulselatecladeprogramación(aprox.2s)hastaqueparpadeeel
LED de estado amarillo = se ha detectado el objeto
Sueltelatecladeprogramación;elLEDdeestadoquedará
iluminado = el objeto se ha detectado con seguridad
Retire el objeto, el indicador de recepción amarillo se apaga
(noexisteinuenciadefondo).Ajustenalizado.
Si el LED de estado sigue encendido, repita el procedimiento de
programaciónhastaqueseapagueelindicadordedetección
amarillo.
Posicionar el objeto en el haz luminoso
Siseenciendeelindicadoramarillo,elajustehanalizado;encaso
contrario, compruebe las condiciones de uso, tales como distancia
de detección, tamaño de objeto y capacidad de remisión del objeto a
captar,asícomoelfondo,ycompáreloconlacurvacaracterísticaen
el diagrama.
5 Función
El sensor WTB12C-3 puede usarse en modo I / O estándar o IO-Link.
AdemásdelasfuncionesbásicasIO-Link,tambiénintegralas
siguientesfuncionesadicionales:
TimeStamp = sellado de tiempo para la señal de conmutación
destinado al seguimiento del producto, de conformidad con el
estándar SICK TimeStamp
Supresión de rebotes = supresión de rebotes de la señal (excitación
yreposo)medianteeltiempodesupresiónderebotesΔtSolose
permitelasupresiónderebotesenmodoIO-LinkΔtmáx.=200ms
Se permiten las siguientes opciones:
Supresión de rebotes ON / OFF
SeleccióndetiemposdesupresiónderebotesΔtONyΔtOFF
(selecciónindividual0...200ms)
Mantenimiento
Las barreras fotoeléctricas SICK no precisan mantenimiento.
En intervalos regulares, recomendamos
-limpiarlassuperciesópticasexternas
- comprobar las uniones roscadas y las conexiones.
Nosepermiterealizarmodicacionesenlosaparatos.
中文
对比度探测器
带背景抑制功能
操作规程
安全须知
> 使用前阅读操作规程。
> 只允许专业人员进行接线,安装及调整。
> 使用时应防潮湿防污染。
> 按照 EU-机器规程无保护元件。
正确使用须知
反射光传感器
WTB12C-3 是一种光电传感器,用于对物体进 行非接触式的
光学探测。
投入使用
1 只适用于该类型的插头:
(无电)插上电缆插座,拧紧。
2 将带有紧固孔的光电器安装在适当的支架上(例如 SICK-托架)。保持物体
相对于光测器的运动方向。将光电器接通工作电压(参考印签上的型)。
3 检查工作环境如感知距离,物体尺寸,被测物体的漫反射度及背景,并
与特性曲线比较。
(
x = 感知距离,y =设定的感知距离于安全背景遮光之间的过渡区(z)以%
计的感知距离,
Ro = 漫反射物体,
Rh = 漫反射背景)。
漫反射:
6% = 黑色,18% = 灰色,90% = 白色 (以 DIN5033中规定
的标准白色为基准)。
4 感知距离置 Max. 最大位。
在光路中定位物体
按下示教按键(约 2 秒),直至黄色 LED 状态指示灯闪烁 = 感测到物体
松开示教按键,黄色 LED 状态指示灯持续亮起 = 确定检测到物体
移开物体,黄色接收指示灯不再亮起(无背景干扰)。设置已完成。
黄色 LED 状态指示灯继续亮起,重复示教过程,直至黄色接收指示灯熄
灭。
在光路中定位物体
如果黄色接收指示灯亮起,则说明设置已结束;如果未亮起,则检查使
用条件,如待检测物体和背景的感应距离、大小和反射能力, 并与图中
的特征曲线进行比较。
5 功能
WTB12C-3 可用于标准 I / O 模式或 IO-Link 模式。此外,IO-Link 基础功
能中还集成了以下扩展功能:
时间戳 = 根据 SICK 时间戳标准用于追踪产品的开关信号时间戳
消除反冲 = 与消除反冲时间Δt相关的信号消除反冲(加速及下降);消
除反冲仅在 IO-Link 模式中可用,最大Δt=200ms
可选用以下选项:
开 / 关消除反冲
选择ΔtON及ΔtOFF消除反冲时间(可在0...200ms间自定义)
保养
SICK 光电开关无需保养。我们建议,定期
- 清洁镜头检测面
- 检查螺丝接头和插头连接。
不得对设备进行任何改装。
日本語
反射形光電スイッチ
背景抑制機能付き
取扱説明書
安全上の注意事項
> 使用を開始する前に取扱説明書をお読みください。
> 接続、取付けおよび設定できるのは専門技術者に限ります。
> 装置を使用開始する際には、濡れたり汚れたりしないように保護して
ください。
> 本製品は EU 機械指令の要件を満たす安全コンポーネントではありま
せん。
使用目的
反射形光電スイッチ WTB12C-3 は光電センサで、対象物 を光学技術により
非接触で検知するための装置です。
使用開始
1 以下のプラグタイプの場合のみ:ケーブルプラグをケーブルに張力が
かからないように取り付け、ネジ止めします。接続ケーブル付タイプ
2 光電センサを適切なホルダーに取り付けボアを通して取り付けます
(
SICK ブラケットなど)。
対象物の移動方向がセンサに対し、相対的になるように維持します。
光電センサに稼働電圧を供給します (型式ラベル参照)。
3 検出範囲、対象物の大きさや反射能力および背景などの使用条件を点
検し、図の指数と比較します。(x = 検出範囲、 y = 設定した検出範囲
と確実な背景抑制 (z) の間の移行範囲 = 検出範囲内 % 、
Ro = 対象物反
射率、
Rh = 背景反射率)。
反射率:
6% = 黒、18% = グレー、 90% = 白 (DIN5033 に準拠した
白)
4 受光調整:
対象物を光軸上に位置づけます。
黄色の LED ステイタス表示が点滅するまでティーチインボタンを押し
ます(約
2 秒)= 背景が検出されました。
ティーチインボタンを離すと、黄色の LED ステイタス表示が継続的に
点灯します
= 対象物が確実に検査されます。
対象物を取り除くと、黄色の信号強度表示は消灯します(背景の及ぼ
す影響なし)。設定は完了しました。
黄色の LED ステイタス表示が引き続き点灯している場合、黄色の信号
強度表示が消灯するまでティーチ手順を繰り返します。
対象物を光軸上に位置づけます。
黄色の信号強度表示が点灯している場合、設定は終了しています。
そうでない場合は、検出範囲、対象物の大きさ、対象物ならびに背景
の反射率 などの使用条件を点検し、 図の指数と比較します。
5 機能
WTB12C-3 は標準 I / O モードまたは IO-Link モードで使用すること が
できます。
IO-Link
の基本機能に加え、以下の拡張機能が統合されています:
タイムスタンプ = SICK タイムスタンプ基準に準拠した製品追跡のため
の 切替信号用タイムスタンプ
デバウンス = デバウンス時間Δt 以上の信号デバウンス(作動& 復
帰)。デバウンスは
IO-Link モードでのみ可能。最大Δt=200ミリ秒
オプションは以下のとおりです:
デバウンス ON / OFF
デバウンス時間ΔtONとΔtOFFの選択(0...200ミリ秒 まで個別選択
可 )
メンテナンス
SICK の光電スイッチはメンテナンス不要です。推奨する定期的な保全作業
- レンズ境界面の清掃
- ネジ締結と差込み締結の点検
デバイスに変更を加えることは一切禁止されています。
WTB12C-3 P2462B01
Numero ordine Referencia
订单号 注文番号
1061490
Distanza di ricezione consigliata Distancia de detección recomendada
建议的感应距离
推奨検出範囲
50...700mm
1)
Diametro punto luminoso / distanza Diámetro / distancia de mancha de luz 光点直径 / 距离 スポット径 / 距離 9mm/400mm
Limitazione della distanza di ricezione Limitación de la distancia de detección
感应距离限制 検出範囲制限
700mm+/-100mm
Impostazione della distanza di ricezione Ajustedeladistanciadedetección
感应距离设置 検出範囲設定
Teach-in via IO-Link,
simple teach-button
Tensione di alimentazione U
V
Tensión de alimentación U
V
电源电压 U
V
供給電圧 V
S
10...30VDC
2)
Corrente di uscita max. I
max.
Corriente de salida I
máx.
输出电流 I
max.
最大出力電流 I
max.
≤100mA
Uscita Salida
输出 出力
PNP, Q not, PNP, Q/C
Modalità di comunicazione Modo de comunicación
通信模式 通信モード
COM2
Funzione TimeStamp
(*con risoluzione programmabile)
Función TimeStamp
(*con resolución programable)
时间戳功能
(*带可编程分辨率)
タイムスタンプ機能
(*プログラミング可能な解像度を使用)
14*
Esattezza TimeStamp Precisión de TimeStamp
时间戳精度 タイムスタンプ精度
12.98µs
Funzione anti-rimbalzo Función de supresión de rebotes
消除反冲功能 デバウンス機能
Δton/Δtoffdelay
Sequenzasegnalimin. Secuencia de señal mini.
最小信号序列 最小信号シーケンス
1500/s
5)
Tempo di risposta Tiempo de reacción
触发时间 応答時間
≤330µs
5)
Tipo di protezione Tipo de protección
保护种类
保護等級
IP66,IP67
Classe di protezione Protección clase
保护级别 保護クラス
3)
Commutazioni di protezione Circuitos de protección
保护电路 保護回路
A,B,C
4)
Temperatura ambiente circostante Temperatura ambiente de servicio
工作环境-温度 動作周囲温度
–40…+60°C
1)
Oggetto90%remissionesec.DIN5033
2)
Valorilimite:
Funzionamentoinreteconprotezionedaicortocircuitimax.8A;
ondulazione residua max. 5 V
SS
3)
TensioneditaraturaDC50V
4)
A=U
V
-collegamenti con protezione contro inversione di poli
B = Uscite a prova di corto circuito
C = Soppressione impulsi
5)
Conrelatiochiaro/scuro1:1
1)
Objeto90%deremissionenbaseaDIN5033
2)
Valoreslímite:
Funcionamientoenlaredprotegidacontracortocircuito,max.8A;
ondulación residual max. 5 V
SS
3)
TensióntolerableDC50V
4)
A=ConexionesU
V
a prueba de inversión de polaridad
B = Salidas resistentes al cortocircuito
C = Represión de impulso de interferencia
5)
Conunarelaciónclaro/oscuro1:1
1) 90%漫反射比物体按照 DIN5033
2)
操作电流:
在防短路的网络里, 最大8A; 极限值剩余波纹度 max. 5 V
SS
3) 限定电压 DC50V
4) A=U
V
-接头防反接
B = 输出端抗过流-及短路
C = 消除干扰脉冲
5) 光暗比为1:1
1)
対象物 90%、反射率DIN5033に準拠
2)
限界値:
短絡防止回路での動作
最大 8A、残留リップル 最大 5 V
pp
3)
基準電圧50VDC
4)
A=V
S
電源電圧逆接保護
B = 出力回路逆接保護
C = 干渉パルス抑制
5)
型式明暗比率 1:1の場合の値
-
 1
1
-
 2
2


SICK WTB12C-3P2462B01 Photoelectric retro-reflective sensor Mode d'emploi
- Taper
- Mode d'emploi
dans d''autres langues
- italiano: SICK WTB12C-3P2462B01 Photoelectric retro-reflective sensor Istruzioni per l'uso
- español: SICK WTB12C-3P2462B01 Photoelectric retro-reflective sensor Instrucciones de operación
- português: SICK WTB12C-3P2462B01 Photoelectric retro-reflective sensor Instruções de operação
- 日本語: SICK WTB12C-3P2462B01 Photoelectric retro-reflective sensor 取扱説明書
Documents connexes
-
SICK WTB11-2P2461S03/P04 Mode d'emploi
-
-
-
-
-
-
-
-
-