Whirlpool WRT518SZFM Mode d'emploi
- Catégorie
- Frigos
- Taper
- Mode d'emploi
Ce manuel convient également à

THANK YOU for purchasing this high-quality product. Register your new refrigerator at www.whirlpool.com. In Canada, register your
refrigerator at www.whirlpool.ca.
For future reference, please make a note of your product model and serial numbers. These can be located on the inside wall of the
refrigerator compartment.
Model Number __________________________________________________ Serial Number __________________________________________________
REFRIGERATOR
USER INSTRUCTIONS
Table of Contents/Índice/Table des matières
REFRIGERATOR SAFETY..................... 2
INSTALLATION INSTRUCTIONS .........3
Unpack the Refrigerator......................3
Location Requirements ....................... 4
Electrical Requirements....................... 4
Water Supply Requirements ...............5
Connect the Water Supply..................5
Refrigerator Doors............................... 6
Adjust the Doors.................................. 9
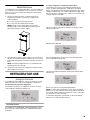
REFRIGERATOR USE ........................... 9
Using the Controls............................... 9
Ice Maker...........................................10
REFRIGERATOR FEATURES .............11
Refrigerator Shelves .......................... 11
Deli Drawer ........................................11
Crisper ............................................... 11
FREEZER FEATURES .........................12
Freezer Shelf......................................12
DOOR FEATURES ...............................12
Door Rails ..........................................12
REFRIGERATOR CARE....................... 12
Cleaning............................................. 12
Changing the Light Bulbs..................13
Vacation and Moving Care................ 13
TROUBLESHOOTING..........................14
ACCESSORIES ....................................15
WARRANTY..........................................16
BRAND BADGE PLACEMENT
TEMPLATE ...................... BACK COVER
SEGURIDAD DEL REFRIGERADOR .. 17
Cómo deshacerse adecuadamente
de su refrigerador viejo...................... 18
INSTRUCCIONES
DE INSTALACIÓN................................ 19
Desempaque el refrigerador.............. 19
Requisitos de ubicación .................... 19
Requisitos eléctricos ......................... 20
Requisitos del suministro de agua.... 20
Conexión del suministro de agua...... 21
Puertas del refrigerador..................... 22
Ajuste las puertas .............................. 25
USO DE SU REFRIGERADOR ............ 25
Uso de los controles.......................... 25
Fábrica de hielo ................................. 26
CARACTERÍSTICAS
DEL
REFRIGERADOR ......................... 27
Estantes del refrigerador ................... 27
Cajón para deli................................... 27
Cajón para verduras .......................... 28
CARACTERÍSTICAS
DEL
CONGELADOR ............................ 28
Estante del congelador...................... 28
CARACTERÍSTICAS DE
LA PUERTA .......................................... 29
Rieles de la puerta............................. 29
CUIDADO DE SU REFRIGERADOR... 29
Limpieza............................................. 29
Cómo cambiar los focos ................... 30
Cuidado durante las vacaciones
y mudanzas........................................ 30
SOLUCIÓN DE PROBLEMAS............. 31
ACCESORIOS ...................................... 33
GARANTÍA............................................ 34
PLANTILLA DE COLOCACIÓN
DE LA PLACA......... CONTRAPORTADA
SÉCURITÉ DU RÉFRIGÉRATEUR.............35
INSTRUCTIONS D’INSTALLATION..........37
Déballage du réfrigérateur........................37
Exigences d’emplacement.......................37
Spécifications électriques ........................38
Spécifications de l’alimentation en eau ...38
Raccordement de la canalisation d’eau...38
Portes du réfrigérateur .............................40
Ajustement des portes .............................43
UTILISATION DU RÉFRIGÉRATEUR........43
Utilisation des commandes......................43
Machine à glaçons ...................................44
CARACTÉRISTIQUES
DU
RÉFRIGÉRATEUR................................45
Tablettes du réfrigérateur.........................45
Bac à déli..................................................46
Bac à légumes..........................................46
CARACTÉRISTIQUES
DU CONGÉLATEUR ...................................47
Tablette du congélateur ...........................47
CARACTÉRISTIQUES DE LA PORTE.......47
Tringles de porte.......................................47
ENTRETIEN DU RÉFRIGÉRATEUR ..........48
Nettoyage .................................................48
Remplacement des ampoules
d’éclairage ................................................48
Entretien avant les vacances
ou lors d’un déménagement....................48
DÉPANNAGE...............................................50
ACCESSOIRES ...........................................52
GARANTIE...................................................53
GABARIT DE POSITIONNEMENT
DE L’INSIGNE DE
LA MARQUE.........COUVERTURE ARRIÈRE
W10843051A

222
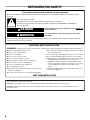
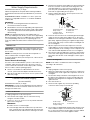
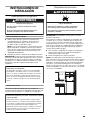
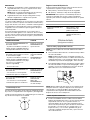
REFRIGERATOR SAFETY
You can be killed or seriously injured if you don't immediately
You
can be killed or seriously injured if you don't
follow
All safety messages will tell you what the potential hazard is, tell you how to reduce the chance of injury, and tell you what can
happen if the instructions are not followed.
Your safety and the safety of others are very important.
We have provided many important safety messages in this manual and on your appliance. Always read and obey all safety
messages.
This is the safety alert symbol.
This symbol alerts you to potential hazards that can kill or hurt you and others.
All safety messages will follow the safety alert symbol and either the word “DANGER” or “WARNING.”
These words mean:
follow instructions.
instructions.
DANGER
WARNING
IMPORTANT SAFETY INSTRUCTIONS
WARNING:
To reduce the risk of fire, electric shock, or injury when using your refrigerator, follow these basic precautions:
SAVE THESE INSTRUCTIONS
■
Plug into a grounded 3 prong outlet.
■
Do not remove ground prong.
■
Do not use an adapter.
■
Do not use an extension cord.
■
Disconnect power before servicing.
■
Replace all parts and panels before operating.
■
Remove doors from your old refrigerator.
■
Connect to a potable water supply only.
■
Use nonflammable cleaner.
■
Keep flammable materials and vapors, such as gasoline,
away from refrigerator.
■
Use two or more people to move and install refrigerator.
■
Disconnect power before installing ice maker (on ice maker
kit ready models only).
■
Use a sturdy glass when dispensing ice (on some models).
■
Do not hit the refrigerator glass doors (on some models).
■
This appliance is not intended for use by persons (including
children) with reduced physical, sensory or mental
capabilities, or lack of experience and knowledge, unless
they have been given supervision or instruction concerning
use of the appliance by a person responsible for their
safety.
■
Children should be supervised to ensure that they do not
play with the appliance.
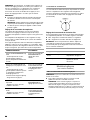
State of California Proposition 65 Warnings:
WARNING: This product contains one or more chemicals known to the State of California to cause cancer.
WARNING: This product contains one or more chemicals known to the State of California to cause birth defects or other
reproductive harm.

333
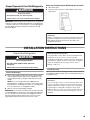
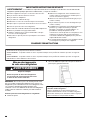
INSTALLATION INSTRUCTIONS
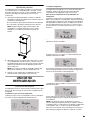
Unpack the Refrigerator
Remove the Packaging
■ Remove tape and glue residue from surfaces before turning
on the refrigerator. Rub a small amount of liquid dish soap
over the adhesive with your fingers. Wipe with warm water
and dry.
NOTE: Do not use sharp instruments, rubbing alcohol,
flammable fluids, or abrasive cleaners to remove tape or glue.
These products can damage the surface of your refrigerator.
For more information, see “Refrigerator Safety.”
■ Dispose of/recycle all packaging materials.
IMPORTANT: Do not remove the white foam air return insert that
is located behind the control panel on the ceiling of the refrigerator
(on some models). The insert is part of the refrigerator and not
part of the packing material. If the insert is removed, ice may
migrate down from the freezer and cause icicles to form.
Clean Before Using
After you remove all of the package materials, clean the inside of
your refrigerator before using it. See the cleaning instructions in
“Refrigerator Care.”
Proper Disposal of Your Old Refrigerator
IMPORTANT: Child entrapment and suffocation are not problems
of the past. Junked or abandoned refrigerators are still dangerous
– even if they will sit for “just a few days.” If you are getting rid of
your old refrigerator, please follow these instructions to help
prevent accidents.
Before You Throw Away Your Old Refrigerator or Freezer:
■ Take off the doors.
■ Leave the shelves in place so that children may not easily
climb inside.
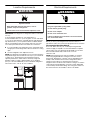
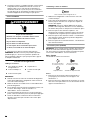
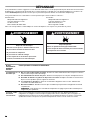
WARNING
Suffocation Hazard
Remove doors from your old refrigerator.
Failure to do so can result in death or brain damage.
Important information to know about disposal of
refrigerants:
Dispose of refrigerator in accordance with Federal and Local
regulations. Refrigerants must be evacuated by a licensed,
EPA certified refrigerant technician in accordance with
established procedures.
WARNING
Excessive Weight Hazard
Use two or more people to move and install
refrigerator.
Failure to do so can result in back or other injury.
When Moving Your Refrigerator:
Your refrigerator is heavy. When moving the refrigerator for
cleaning or service, be sure to cover the floor with
cardboard or hardboard to avoid floor damage. Always pull
the refrigerator straight out when moving it. Do not wiggle or
“walk” the refrigerator when trying to move it, as floor
damage could occur.
Important information to know about glass shelves
and covers:
Do not clean glass shelves or covers with warm water when
they are cold. Shelves and covers may break if exposed to
sudden temperature changes or impact, such as bumping.
Tempered glass is designed to shatter into many small,
pebble-size pieces. This is normal. Glass shelves and covers
are heavy. Use both hands when removing them to avoid
dropping.

444
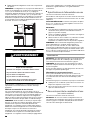
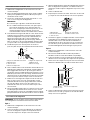
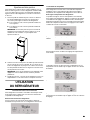
Location Requirements
IMPORTANT: This refrigerator is designed for indoor, household
use only.
To ensure proper ventilation for your refrigerator, it is
recommended to allow a ¹⁄₂" (1.25 cm) space on each side. Allow
3" (7.5 cm) of space between overhead cabinets and refrigerator
top. Allow at least 1" (2.5
cm) between back of cabinet and the
wall. If your refrigerator has an ice maker, make sure you leave
some extra space at the back for the water line connections.
■ If you are installing your refrigerator next to a fixed wall, leave
enough space on the hinge side to allow for the door to swing
open.
■ Level the refrigerator. See “Adjust the Doors.”
NOTE: This refrigerator is intended for use in a location where the
temperature ranges from a minimum of 55°F (13°C) to a maximum
of 110°F (43°C). The preferred room temperature range for
optimum performance, which reduces electricity usage and
provides superior cooling, is between 60°F (15°C) and 90°F
(32°C). It is recommended that you do not install the refrigerator
near a heat source, such as an oven or radiator.
Electrical Requirements
Before you move your refrigerator into its final location, it is
important to make sure you have the proper electrical connection.
Recommended Grounding Method
A 115-volt, 60 Hz, AC-only, 15- or 20-amp fused, grounded
electrical supply is required. It is recommended that a separate
circuit serving only your refrigerator be provided. Use an outlet
that cannot be turned off by a switch. Do not use an
extension
cord.
NOTE: Before performing any type of installation or cleaning,
or removing a light bulb, turn cooling off or turn the control
(Thermostat, Refrigerator, or Freezer control, depending on the
model) to OFF, and then disconnect the refrigerator from the
electrical source. When you are finished, reconnect the
refrigerator to the electrical source and turn cooling on or reset the
control (Thermostat, Refrigerator, or Freezer control, depending
on the model) to the desired setting. See “Using the Controls” in
the User Instructions, User Guide, or Use
& Care Guide.
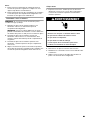
WARNING
Explosion Hazard
Keep flammable materials and vapors, such as
gasoline, away from refrigerator.
Failure to do so can result in death, explosion, or fire.
3"
(7.5 cm)
¹⁄₂"
(1.25 cm)
3"
(7.5 cm)
1
"
(1.25 cm)
2/
Electrical Shock Hazard
Plug into a grounded 3 prong outlet.
Do not remove ground prong.
Do not use an adapter.
Do not use an extension cord.
Failure to follow these instructions can result in death,
fire, or electrical shock.
WARNING

555
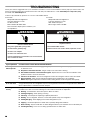
Water Supply Requirements
Read all directions before you begin.
Gather the required tools and parts before starting installation.
Read and follow the instructions provided with any tools listed
here.
Tools Needed: Flat-blade screwdriver, ⁷⁄₁₆" and ¹⁄₂" open-end
wrenches or 2
adjustable wrenches, ¹⁄₄" nut driver and drill bit,
cordless drill.
IMPORTANT:
■ If you turn on the refrigerator before the water line is
connected, turn off the ice maker.
■ All installations must meet local plumbing code requirements.
■ Use copper tubing and check for leaks. Install copper tubing
only in areas where the household temperatures will remain
above freezing.
NOTE: Your refrigerator dealer has a kit available with a ¹⁄₄"
(6.35
mm) saddle-type shut-off valve, a union, and copper tubing.
Before purchasing, make sure a saddle-type valve complies with
your local plumbing codes. Do not use a piercing-type or ³⁄₁₆"
(4.76
mm) saddle valve which reduces water flow and clogs more
easily.
Water Pressure
IMPORTANT: A cold potable water supply with water pressure
between 30 and 120 psi (207 and 827 kPa) is required to operate
the ice maker.
NOTE: If the water pressure is less than what is required, ice
cubes could be hollow or irregular shaped.
If you have questions about your water pressure, call a licensed,
qualified plumber.
Reverse Osmosis Water Supply
If a reverse osmosis water filtration system is connected to your
cold water supply, the water pressure to the reverse osmosis
system needs to be a minimum of 40 to 60 psi (276 to 414 kPa).
If the ice maker is still not operating properly:
■ Check to see whether the sediment filter in the reverse
osmosis system is blocked. Replace the filter if necessary.
■ Allow the storage tank on the reverse osmosis system to refill
after heavy usage.
Connect the Water Supply
(on some models)
Read all directions before you begin.
IMPORTANT: If you turn on the refrigerator before the water line
is connected, turn off the ice maker to avoid excessive noise or
damage to the water valve.
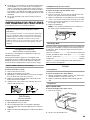
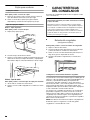
Connect to Water Line
1. Unplug refrigerator or disconnect power.
2. Turn off main water supply. Turn on nearest faucet long
enough to clear line of water.
3. Locate a ¹⁄₂" to 1¹⁄₄" (1.27 cm to 3.18 cm) vertical cold water
pipe near the refrigerator.
IMPORTANT:
■ Make sure it is a cold water pipe.
■ Horizontal pipe will work, but drill on the top side of the
pipe, not the bottom. This will help keep water away from
the drill and normal sediment from collecting in the valve.
4. Determine the length of copper tubing you will need. Measure
from the connection on lower-left rear of refrigerator to the
water pipe. Add 7 ft (2.1 m) to allow for cleaning. Use ¹⁄₄"
(6.35
mm) O.D. (outside diameter) copper tubing. Be sure
both ends of copper tubing are cut square.
5. Using a cordless drill, drill a ¹⁄₄" (6.35 mm) hole in the cold
water pipe you have selected.
6. Fasten the shut-off valve to the cold water pipe with the pipe
clamp. Be sure the outlet end is solidly in the ¹⁄₄" (6.35
mm)
drilled hole in the water pipe and that the washer is under the
pipe clamp. Tighten the packing nut. Tighten the pipe clamp
screws slowly and evenly so washer makes a watertight seal.
Do not overtighten.
7. Slip the compression sleeve and compression nut on the
copper tubing, as shown. Insert the end of the tubing into the
outlet end squarely as far as it will go. Screw compression nut
onto outlet end with adjustable wrench. Do not overtighten.
8. Place the free end of the tubing in a container or sink and turn
on the main water supply. Flush the tubing until water is clear.
Turn off the shut-off valve on the water pipe. Coil the copper
tubing.
Connect to Refrigerator
NOTE: On kit models, assemble water valve to refrigerator
according to kit instructions.
Style 1
1. Unplug refrigerator or disconnect power.
2. Attach the copper tube to the valve inlet using a compression
nut and sleeve as shown. Tighten the compression nut. Do not
overtighten.
3. Use the tube clamp on the back of the refrigerator to secure
the tubing to the refrigerator as shown. This will help avoid
damage to the tubing when the refrigerator is pushed back
against the wall.
4. Turn shut-off valve on.
5. Check for leaks. Tighten any connections (including
connections at the valve) or nuts that leak.
6. The ice maker is equipped with a built-in water strainer. If your
water conditions require a second water strainer, install it in
the ¹⁄₄" (6.35
mm) water line at either tube connection. Obtain
a water strainer from your nearest appliance dealer.
A. Cold water pipe
B. Pipe clamp
C. Copper tubing
D. Compression nut
E. Compression sleeve
F. S h u toff v alve
G. Packing nut
A. Tube clamp
B. Tube clamp screw
C. Copper tubing
D. Compression nut
E. Valve inlet
A
B
C
DEF
G
A
C
B
D
E

666
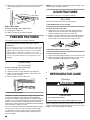
Style 2
1. Unplug refrigerator or disconnect power.
2. Disconnect the tube clamp on the back of the product and
insert the copper tubing through the clamp as shown.
3. Attach the copper tube to the valve inlet using a compression
nut and sleeve as shown.
4. Tighten the compression nut. Do not overtighten. Reattach
the tube clamp and tube to the back of the cabinet.
5. Turn shut-off valve on. Check for leaks. Tighten any
connections (including connections at the valve) or nuts
that leak.
6. The ice maker is equipped with a built-in water strainer. If your
water conditions require a second water strainer, install it in
the ¹⁄₄" (6.35 mm) water line at either tube connection. Obtain
a water strainer from your nearest appliance dealer.
Complete the Installation
1. Plug into a grounded 3 prong outlet.
NOTE: Allow 24 hours to produce the first batch of ice. Discard
the first three batches of ice produced. Allow 3
days to completely
fill ice container.
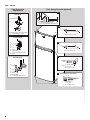
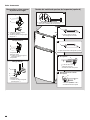
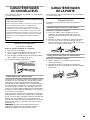
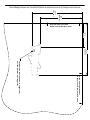
Refrigerator Doors
Tools Needed:
IMPORTANT:
■ Before you begin, turn the refrigerator control to OFF. Unplug
refrigerator or disconnect power.
■ Remove food and adjustable door or utility bins from doors.
■ If you are only removing and replacing the doors, see the
“Remove Doors and Hinges” and “Replace Doors and
Hinges” sections.
■ If you are also going to reverse the door swing, follow the
instructions for the appropriate door style.
■ All graphics referenced in the following instructions are
included later in this section after “Final Steps.”
Remove Doors and Hinges
⁵⁄₁₆" Hex-head Hinge Screw
1. Unplug refrigerator or disconnect power.
2. Close the refrigerator door and keep both doors closed until
you are ready to lift them free from the cabinet.
NOTE: Provide additional support for the doors while the
hinges are being moved. Do not depend on the door magnets
to hold the doors in place while you are working.
3. Remove the parts for the top hinge as shown in Top Hinge
graphic. Lift the freezer door free from the cabinet.
4. Remove the parts for the center hinge as shown in the Center
Hinge graphic. Lift the refrigerator door free from the cabinet.
5. Remove the parts for the bottom hinge as shown in the
Bottom Hinge graphic.
A. Tube clamp
B. Copper tubing
C. Compression nut
A
B
C
Electrical Shock Hazard
Plug into a grounded 3 prong outlet.
Do not remove ground prong.
Do not use an adapter.
Do not use an extension cord.
Failure to follow these instructions can result in death,
fire, or electrical shock.
WARNING
■ ⁵⁄₁₆" hex-head socket
wrench
■ ⁵⁄₁₆" open-end wrench
■ #2 Phillips screwdriver ■ Flat 2" putty knife
■ Flat-blade screwdriver

777
Reverse Doors (optional)
IMPORTANT: If you want to reverse your doors so that they
open in the opposite direction, follow these steps. If you are
not reversing the doors, see “Replace Doors and Hinges.”
Style - Contoured
Graphics follow these instructions.
Cabinet
1. Remove ⁵⁄₁₆" hex-head hinge screws from handle side and
move them to opposite side. See Graphic 1-1.
2. Remove cabinet hinge hole plugs from the cabinet top and
move them to opposite side hinge holes. See Graphic 1-2.
Doors
1. Remove door hinge hole plug from top of freezer door. Move
to opposite side. See Graphic 2.
2. Remove door stop from both the freezer and refrigerator
doors and move to the other side. See Graphic 3.
Replace Doors and Hinges
NOTE: Graphic may be reversed if door swing is reversed.
1. Replace the parts for the bottom hinge as shown. Tighten
screws. Replace the refrigerator door.
NOTE: Provide additional support for the doors while the
hinges are being moved. Do not depend on the door magnets
to hold the doors in place while you are working.
2. Assemble the parts for the center hinge as shown and tighten
all screws. See Center Hinge graphic. Replace the freezer
door.
3. Assemble the parts for the top hinge as shown. See Top
Hinge graphic. Do not tighten screws completely.
4. Line up the doors so that the bottom of the freezer door
aligns evenly with the top of the refrigerator door. Tighten
all screws.
Final Steps
1. Check all holes to make sure that hole plugs and screws are
in place. Reinstall top hinge cover. See Top Hinge graphic.
2. Plug into a grounded 3 prong outlet.
3. Reset the controls. See “Using the Controls.”
4. Return all removable door parts to doors and food
to refrigerator.
Door Hinge
Hole Plug
Cabinet Hinge
Hole Plug
Dome Cap
Dome Cap Washer
Electrical Shock Hazard
Plug into a grounded 3 prong outlet.
Do not remove ground prong.
Do not use an adapter.
Do not use an extension cord.
Failure to follow these instructions can result in death,
fire, or electrical shock.
WARNING

888
Style - Contour
Door Swing Reversal (optional)
3
1-2
A. Door Hinge Hole Plug
2
A
A. Door Stop
B. Door Stop Screw
A
Removal of Door Stops
B
A. Cabinet Hinge Hole Plugs
A
Door Removal &
Replacement
4
A. Door Stop
B. Door Stop Screw
B
A
Reinstallation of Door Stops
A. Spacer
Top Hinge
Bottom Hinge
Center Hinge
B. Bottom Hinge
C.
5
/
16
" Hex-Head Hinge Screws
B. Center Hinge
C.
5
/
16
" Hex-Head Hinge Screws
A. Spacer
D. Spacer
A. Top Hinge Cover (on some models)
B.
5
/
16
" Hex-Head Hinge Screws
1-1
A.
5
/
16
" Hex-Head Hinge
Screws,
Dome Caps and Dome Cap Washers
A
A
B
C
A
B
C
D
A
B

999
Adjust the Doors
Your refrigerator has two adjustable rollers - one on the right and
one on the left. If your refrigerator seems unsteady or you want
the doors to close easier, adjust the refrigerator's tilt using the
instructions below.
1. Turn the leveling leg to lower or raise that side of the
refrigerator. It may take several turns to adjust the tilt
of the refrigerator.
■ To raise, turn the leveling leg to the left.
■ To lower, turn the leveling leg to the right.
NOTE: Having someone push against the top of the
refrigerator takes some weight off the leveling legs and
rollers which makes it easier to adjust.
2. Open both doors again to make sure they close as easily as
you like. If not, tilt the refrigerator slightly more to the rear by
turning both leveling legs to the left; it may take several more
turns.
NOTE: To keep the refrigerator level, you should turn both
leveling legs the same amount.
3. Using a level, be sure that the refrigerator is still level side to
side. Readjust if necessary.
REFRIGERATOR USE
Using the Controls
Your refrigerator has a high-tech, easy-to-use electronic control
feature located on the inside of the refrigerator compartment.
The first time you plug in the refrigerator:
The first time you plug in your refrigerator, all of the electronic
control indicators will flash simultaneously.
Temperature Control
Your refrigerator is equipped with a Smart temperature control.
You can use it to set the refrigerator compartment temperature
as needed.
To set the refrigerator compartment temperature:
The product is set to the recommended temperature at the
factory. To adjust that temperature, simply press the Setting
button. This will decrease the refrigerator temperature. The setting
change is unidirectional, from Cold to Coldest (left to right). Once
the control is in the Coldest position, it will move to the least-cold
setting (Cold) if pressed again.
This is the coldest temperature (Coldest) in the product. All the
indicators will be ON.
The least-cold temperature setting will be shown with the first
indicator (left to right) ON.
The median minimum temperature will be displayed when you
press the Setting button once from the least-cold temperature.
The second indicator will be ON.
The “Recommended” temperature will be shown with the third
indicator ON.
The fourth indicator will come on when you press the Setting
button once from the recommended temperature.
NOTE: To switch off the refrigeration system, press the Setting
button for 4 seconds and then release it. No indicator will remain
on. This will lead the refrigerator and freezer to stop cooling, but
the electricity is not disconnected.
To switch the refrigeration system back on, press the Setting
button for 4 seconds and then release it.

101010
IMPORTANT:
■ Give your refrigerator time to cool down completely before
adding food. It is best to wait 24 hours before you put food
into the refrigerator.
NOTE: Adjusting the Temperature control to a higher (colder)
setting will not cool the compartments any faster.
■ If you add food before the refrigerator has cooled completely,
your food may spoil.
Adjust the Temperature Control
The mid-settings should be correct for normal household usage.
The controls are set correctly when milk or juice is as cold as you
like and ice cream is firm.
If the temperature is too warm or too cold in the refrigerator or
freezer, first check the air vents to be sure they are not blocked.
If you need to adjust temperatures, use the settings listed in the
chart below as a guide. On models with two controls, adjust the
refrigerator temperature first. Wait at least 24 hours between
adjustments and then recheck the temperatures.
Airflow Control
The Airflow control regulates the amount of air flowing between
the freezer and the refrigerator compartments.
When you plug in the refrigerator for the first time, turn the Airflow
control to the Recommended setting.
Adjust the Airflow Control
If you want to temporarily increase the cold air flow to a specific
compartment, adjust the control.
■ Max - Increase airflow to the freezer.
■ Min - Increase airflow to the refrigerator.
IMPORTANT: Once the performance is achieved, return the
Airflow control to the Recommended setting to keep the
refrigerator operating at optimum efficiency.
Ice Maker
(on some models)
Turning the Ice Maker On/Off
NOTE: Do not force the wire shut-off arm up or down.
■ To turn on the ice maker, simply lower the wire shut-off arm.
NOTE: Your ice maker has an automatic shutoff. As ice is
made, the ice cubes will fill the ice storage bin and the ice
cubes will raise the wire shut-off arm to the Off (arm up)
position.
■ To manually turn off the ice maker, lift the wire shut-off arm to
the Off (arm up) position and listen for the click to make sure
the ice maker will not continue to operate.
NOTE: Turn off the ice maker before removing the ice storage bin
to serve ice or to clean the bin. This will keep the ice cubes from
dropping out of the ice maker and into the freezer compartment.
After replacing the ice storage bin, turn on the ice maker.
Ice Production Rate
■ NORMAL Ice Production: The ice maker should produce
approximately 8 to 12
batches of ice in a 24-hour period. If ice
is not being made fast enough, turn the Freezer control toward
a higher (colder) number in half number steps. (For example, if
the control is at 3, move it to between 3 and 4.) Wait 24
hours
and, if necessary, gradually turn the Freezer control to the
highest setting, waiting 24 hours between each increase.
■ MAXIMUM Ice Production (on some models): The ice maker
should produce approximately 16
to 20 batches of ice in
a
24-hour period. If your refrigerator has the maximum ice
production feature, push the switch to MAX.
Remember
■ Allow 24 hours to produce the first batch of ice. Allow 3 days
to completely fill the ice storage bin. Discard the first three
batches of ice produced.
CONDITION/REASON: ADJUSTMENT:
REFRIGERATOR section too warm
- Door opened often, large amount
of food added or room
temperature very warm
Adjust REFRIGERATOR
control one setting
higher.
FREEZER section too warm/ice not
made fast enough
- Door opened often, large amount
of food added, or very cold room
temperature (can’t cycle often
enough)
- Heavy ice usage
Adjust AIRFLOW or
REFRIGERATOR control
one setting higher.
REFRIGERATOR section too cold
- Controls not set correctly for your
conditions
Adjust REFRIGERATOR
control one setting
lower.
FREEZER section too cold
- Controls not set correctly for your
conditions
Adjust AIRFLOW or
REFRIGERATOR control
one setting lower.
CONDITION/REASON: ADJUSTMENT:
Heavy ice use Max
Hot room temperature Max - To maintain ice making
production rate
Large quantity of groceries Min - To quickly chill food and
beverages

111111
■ The quality of your ice will be only as good as the quality of the
water supplied to your ice maker. Avoid connecting the ice
maker to a softened water supply. Water softener chemicals
(such as salt) can damage parts of the ice maker and lead to
poor quality ice. If a softened water supply cannot be avoided,
make sure the water softener is operating properly and is well
maintained.
■ Do not store anything on top of the ice maker or in the ice
storage bin.
REFRIGERATOR FEATURES
Your model may have some or all of these features.
Refrigerator Shelves
(Glass shelves on some models)
The shelves in your refrigerator are adjustable to match your
individual storage needs.
Storing similar food items together in your refrigerator and
adjusting the shelves to fit different heights of items will make
finding the exact item you want easier. It will also reduce the
amount of time the refrigerator door is open and save energy.
Shelves and Glass Shelves (on some models)
To remove and replace a shelf:
1. Remove items from the shelf.
2. Slide the shelf straight out to the stop.
3. Depending on your model, lift back or front of the shelf past
the stop. Slide shelf out the rest of the way.
4. Replace the shelf by sliding the back of the shelf into the
track in the wall of the cabinet.
5. Guide the front of the shelf into the shelf track. Be sure to
slide the shelf in all the way.
Deli Drawer
(on some models)
To remove and replace the deli drawer:
1. Slide deli drawer out to the stop.
2. Lift front of deli drawer with one hand while supporting
bottom of drawer with other hand. Slide drawer out the rest
of the way.
3. Replace the drawer by sliding it back in fully past the drawer
stop.
Deli Drawer Cover (on some models)
To remove and replace the deli drawer cover:
1. Remove the deli drawer.
2. Push the cover back to release the rear clips from the shelf.
Tilt the cover up at the front and pull it forward.
3. Replace the deli drawer cover by fitting the notches and clips
on the cover over the rear and center crossbars on the shelf.
4. Lower cover into place and pull the cover forward to secure
the rear clips onto the shelf.
5. Replace the deli drawer.
NOTE: In some models the deli drawer moves sideways on
the shelf to allow for flexible positioning.
Meat Storage Guide
Store most meat in original wrapping as long as it is airtight and
moisture proof. Rewrap if necessary. See the following chart for
storage times. When storing meat longer than the times given,
freeze the meat.
Fresh fish or shellfish....................... Use same day as purchased.
Chicken, ground beef, variety meats (liver)......................1-2 days
Cold cuts, steaks/roasts ..................................................3-5 days
Cured meats...................................................................7-10 days
Leftovers - Cover leftovers with plastic wrap, aluminum foil, or
plastic containers with tight lids.
Crisper
Crisper Drawers
To remove and replace the crisper drawer:
1. Slide the crisper drawer straight out to the stop. Lift the front
and slide the drawer out the rest of the way.
2. Replace the drawer by sliding the drawer in fully past the
stop.
Crisper Cover
Style 1 - Plastic Cover
To remove and replace the crisper cover:
1. Remove the crisper(s).
2. Lift the cover up and slide it out.
Important information to know about glass shelves
and covers:
Do not clean glass shelves or covers with warm water when
they are cold. Shelves and covers may break if exposed to
sudden temperature changes or impact, such as bumping.
Tempered glass is designed to shatter into many small,
pebble-size pieces. This is normal. Glass shelves and covers
are heavy. Use both hands when removing them to avoid
dropping.

121212
3. Replace the cover by fitting the cover tabs into lowest cabinet
slots and pushing them in. Lower the front retainers into
place.
Style 2 - Glass Cover
To remove and replace the crisper cover:
1. Pull the glass straight out.
2. Replace the glass by pushing it straight in.
FREEZER FEATURES
Your model may have some or all of these features.
Freezer Shelf
(on some models)
To remove and replace the freezer shelf:
1. Remove items from the shelf.
2. Lift back of shelf over stop and slide shelf straight out.
3. Replace the shelf by sliding the back of the shelf into the
tracks on walls of cabinet.
4. Be sure to slide the shelf in all the way.
Frozen Food Storage Guide
Storage times will vary according to the quality and type of food,
the type of packaging or wrap used (should be airtight and
moisture proof), and the storage temperature. Seal the package or
container securely to avoid taste and odor transfer throughout the
product. Ice crystals inside a sealed package are normal. This
simply means that moisture in the food and air inside the package
have condensed, creating ice crystals.
Put no more unfrozen food into the freezer than will freeze within
24
hours (no more than 2 to 3 lbs of food per cubic foot [907
to 1,350 g per L] of freezer space). Leave enough space in the
freezer for air to circulate around packages. The freezer door
must close tightly.
NOTE: For more information on preparing food for freezing, check
a freezer guide or reliable cookbook.
DOOR FEATURES
Your model may have some or all of these features.
Door Rails
The door rails may be removed for easier cleaning.
Snap-On Door Rails (on some models)
To remove and replace the rails:
1. Depending on your model, remove the rails by pushing in
slightly on the front of the bracket while pulling out on the
inside tab. Repeat these steps for the other end.
2. Replace the rails by aligning the ends of the brackets with the
buttons on the sides of the door liner. Firmly snap bracket
and assembly onto the tabs above the shelf as shown.
Drop-In Door Rails (on some models)
To remove and replace the rails:
1. Remove the rails by pulling straight up on each end of the rail.
2. Replace the rails by sliding the shelf rail into the slots on the
door and pushing the rail straight down until it stops.
REFRIGERATOR CARE
Cleaning
Both the refrigerator and freezer sections defrost automatically.
However, clean both compartments about once a month to avoid
buildup of odors. Wipe up spills immediately.
Important information to know about glass shelves
and covers:
Do not clean glass shelves or covers with warm water when
they are cold. Shelves and covers may break if exposed to
sudden temperature changes or impact, such as bumping.
Tempered glass is designed to shatter into many small,
pebble-size pieces. This is normal. Glass shelves and covers
are heavy. Use both hands when removing them to avoid
dropping.
WARNING
Explosion Hazard
Use nonflammable cleaner.
Failure to do so can result in death, explosion, or fire.

131313
IMPORTANT: Because air circulates between both sections, any
odors formed in one section will transfer to the other. You must
thoroughly clean both sections to eliminate odors. To avoid odor
transfer and drying out of food, wrap or cover foods tightly.
To Clean Your Refrigerator:
NOTE: Do not use abrasive or harsh cleaners such as window
sprays, scouring cleansers, flammable fluids, cleaning waxes,
concentrated detergents, bleaches, or cleansers containing
petroleum products on plastic parts, interior and door liners, or
gaskets. Do not use paper towels, scouring pads, or other harsh
cleaning tool.
1. Unplug refrigerator or disconnect power.
2. Hand wash, rinse, and dry removable parts and interior
surfaces thoroughly. Use a clean sponge or soft cloth and
a mild detergent in warm water.
3. Wash stainless steel and painted metal exteriors with a clean
sponge or soft cloth and a mild detergent in warm water. Dry
thoroughly with a soft cloth.
NOTE: To keep your stainless steel refrigerator looking like
new and to remove minor scuffs or marks, it is suggested that
you use the manufacturer’s approved Stainless Steel Cleaner
and Polish. To order the cleaner, see the “Accessories”
section.
IMPORTANT: This cleaner is for stainless steel parts only!
Do not allow the Stainless Steel Cleaner and Polish to come
into contact with any plastic parts such as the trim pieces,
dispenser covers, or door gaskets. If unintentional contact
does occur, clean plastic part with a sponge and mild
detergent in warm water. Dry thoroughly with a soft cloth.
4. Clean the condenser coils regularly. Coils may need to be
cleaned as often as every other month. This may help save
energy.
■ Pull refrigerator out away from the wall. See “Unpack the
Refrigerator.”
■ Vacuum coils when they are dusty or dirty.
■ Roll refrigerator back into place. Make sure to leave
1" (2.5 cm) between the cabinet back and the wall.
■ Check to see that the refrigerator is level.
5. Plug in refrigerator or reconnect power.
Changing the Light Bulbs
NOTE: Not all appliance bulbs will fit your refrigerator. Be sure to
replace the bulb with an appliance bulb of the same size, shape,
and wattage (no greater than 40 watts).
Refrigerator Light
1. Unplug refrigerator or disconnect power.
2. Reach behind the control panel and unscrew the bulb.
3. Replace the LED bulb or one appliance bulb MAX 40 watt.
4. Plug in refrigerator or reconnect power.
Vacation and Moving Care
Vacations
If You Choose to Leave the Refrigerator On While You’re
Away:
1. Use up any perishables and freeze other items.
2. If your refrigerator has an automatic ice maker and is
connected to the household water supply, turn off the water
supply to the refrigerator. Property damage can occur if the
water supply is not turned off.
3. If you have an automatic ice maker, turn off the ice maker.
NOTE: Raise the wire shut-off arm to Off (up) position.
4. Empty the ice bin.
If You Choose to Turn Off the Refrigerator Before You
Leave:
1. Remove all food from the refrigerator.
2. If your refrigerator has an automatic ice maker:
■ Turn off the water supply to the ice maker at least one day
ahead of time.
■ When the last load of ice drops, raise the wire shut-off
arm to the Off (up) position.
3. Turn off the Temperature controls. See “Using the Controls.”
4. Clean refrigerator, wipe it, and dry well.
5. Tape rubber or wood blocks to the tops of both doors to prop
them open far enough for air to get in. This stops odor and
mold from building up.
Moving
When you are moving your refrigerator to a new home, follow
these steps to prepare it for the move.
1. If your refrigerator has an automatic ice maker:
■ Turn off the water supply to the ice maker at least one day
ahead of time.
■ Disconnect the water line from the back of the
refrigerator.
■ When the last load of ice drops, raise the wire shut-off
arm to the Off (up) position.
2. Remove all food from the refrigerator and pack all frozen food
in dry ice.
3. Empty the ice bin.
4. Turn off the Temperature controls. See “Using the Controls.”
5. Unplug refrigerator.
6. Clean, wipe, and dry thoroughly.
7. Take out all removable parts, wrap them well, and tape them
together so they don’t shift and rattle during the move.
8. Depending on the model, raise the front of the refrigerator so
it rolls more easily OR raise the leveling screws so they don't
scrape the floor. See “Adjust the Door(s).”
9. Tape the doors closed and tape the power cord to the back of
the refrigerator.
When you get to your new home, put everything back and refer to
the “Installation Instructions” section for preparation instructions.
Also, if your refrigerator has an automatic ice maker, remember to
reconnect the water supply to the refrigerator.

141414
TROUBLESHOOTING
First try the solutions suggested here. If you need further assistance or more recommendations that may help you avoid a service call,
refer to the warranty page in this manual and scan the code with your mobile device, or visit www.whirlpool.com/product_help.
In
Canada, visit www.whirlpool.ca.
Contact us by mail with any questions or concerns at the address below:
In the U.S.A.:
Whirlpool Brand Home Appliances
Customer eXperience Center
553 Benson Road
Benton Harbor, MI 49022-2692
Please include a daytime phone number in your
correspondence.
In Canada:
Whirlpool Brand Home Appliances
Customer eXperience Centre
200 – 6750 Century Ave.
Mississauga, Ontario L5N 0B7
Electrical Shock Hazard
Plug into a grounded 3 prong outlet.
Do not remove ground prong.
Do not use an adapter.
Do not use an extension cord.
Failure to follow these instructions can result in death,
fire, or electrical shock.
WARNING
WARNING
Explosion Hazard
Use nonflammable cleaner.
Failure to do so can result in death, explosion, or fire.
If you experience Possible Causes and/or Recommended Solutions
The refrigerator
will not operate
■ Not connected to an electrical supply - Plug the power cord into a grounded 3 prong outlet. Do not use
an extension cord.
■ No power to the electrical outlet - Plug in a lamp to see if the outlet is working.
■ Household fuse blown or circuit breaker tripped - Replace the fuse or reset the circuit breaker. If the
problem continues, contact an electrician.
■ Control is not turned on - Turn on the refrigerator control. See “Using the Controls” in the User Guide.
■ New installation - Allow 24 hours following installation for the refrigerator to cool completely.
NOTE: Adjusting the temperature controls to coldest setting will not cool the refrigerator more quickly.
The motor seems
to run too much
Your new refrigerator may run longer than your old one. Energy-efficient refrigerators run longer at lower, more
energy-efficient speeds. Your refrigerator may run even longer if the room is warm, a large food load is added, the
door is opened often, or if the door has been left open.
The refrigerator
is noisy
Refrigerator noise has been reduced over the years. Due to this reduction in operating noise, you may notice
unfamiliar noises that are normal. Following are some normal sounds with an explanation:
■ Buzzing - heard when the water valve opens to fill the ice maker
■ Clicking/Snapping - valves opening or closing
■ Pulsating - fans/compressor adjusting to optimize performance
■ Rattling - flow of refrigerant, water line, or from items placed on top of the refrigerator
■ Sizzling/Gurgling - water dripping on the heater during Defrost cycle
■ Popping - contraction/expansion of inside walls, especially during initial cooldown
■ Water running - may be heard when ice melts during the Defrost cycle and water runs into the drain pan
■ Creaking/Cracking - occurs as ice is being ejected from the ice maker mold

151515
ACCESSORIES
The following accessories are available for your refrigerator.
To order, contact us and ask for the Part Number.
In the U.S.A., visit our webpage
www.whirlpool.com/accessories or call 1-800-901-2042.
In Canada, visit our webpage www.whirlpoolparts.ca
or call 1-800-807-6777.
affresh
®
Stainless Steel Cleaner:
In U.S.A., order Part #W10355016
In Canada, order Part #W10355016B
affresh
®
Stainless Steel Wipes:
In U.S.A., order Part #W10355049
In Canada, order Part #W10355049B
affresh
®
Kitchen & Appliance Cleaner:
In U.S.A., order Part #W10355010
In Canada, order Part #W10355010B
Reversibility Kit:
Order Part # W10395148
Ice maker Kit:
Order Part # W10663778
LED Bulb:
Order Part # W1082003
The door will not
close completely
■ The door is blocked open - Move food packages away from door. Push bin or shelf back into the correct
position. Make sure the crisper cover is fully pushed in so that the back rests on the supports.
The door is
difficult to open
■ Gaskets are dirty or sticky - Clean gaskets and contact surfaces with mild soap and warm water. Rinse and
dry with soft cloth.
Temperature is too
warm
■ New installation - Allow 24 hours following installation for the refrigerator to cool completely.
■ Doors opened often or not closed completely - Allows warm air to enter refrigerator. Minimize door
openings and keep doors fully closed.
■ A large amount of warm food has been recently added - Allow several hours for refrigerator to return to
normal temperature.
■ Check that the Temperature controls are set correctly for the surrounding conditions - Adjust the
controls to one setting colder. Check temperature in 24
hours. See “Using the Controls” in the User Guide.
There is interior
moisture buildup
NOTE: Some
moisture buildup
is normal.
■ Humid room - Contributes to moisture buildup in the refrigerator.
■ Doors opened often or not closed completely - Allows humid air to enter the refrigerator. Minimize door
openings and keep door fully closed.
The ice maker is
not producing ice
or not enough ice
(on some models)
■ The ice maker is not connected to a water supply - Connect refrigerator to water supply and turn water
shut-off valve fully open.
■ A kink in the line can reduce water flow - Straighten the water source line.
■ Ice maker is not turned on - Make sure the ice maker wire shut-off arm or switch (depending on model)
is in the on position.
■ New installation - Wait 24 hours following ice maker installation for ice production to begin. Wait 3 days
for full ice production.
■ Large amount of ice recently removed - Allow sufficient time for ice maker to produce more ice.
■ Ice cube jammed in the ice maker ejector arm - Remove ice from the ejector arm with a plastic utensil.
■ A reverse osmosis water filtration system connected to your cold water supply can decrease water
pressure
- See “Water Supply Requirements.”
The ice cubes are
hollow or small
(on some models)
NOTE: This is an
indication of low
water pressure.
■ The water valve is not completely open - Turn the water shut-off valve fully open.
■ A kink in the line can reduce water flow - Straighten the water source line.
■ A reverse osmosis water filtration system connected to your cold water supply can decrease water
pressure
- See “Water Supply Requirements.”
■ If questions remain regarding water pressure, call a licensed, qualified plumber.
Off-taste, odor,
or gray color
in the ice
(on some models)
■ New plumbing connections can cause discolored or off-flavored ice - Discard the ice and wash the
ice storage bin. Allow 24 hours for the ice maker to make new ice and discard the first three batches of
ice produced.
■ Ice stored too long can develop an off-taste - Discard ice. Wash ice bin. Allow 24 hours for ice maker
to make new ice.
■ Food odor transferring to ice - Use airtight, moisture-proof packaging to store food.
■ There are minerals (such as sulfur) in the water - A water filter may need to be installed to remove the
minerals.
If you experience Possible Causes and/or Recommended Solutions

16
11/14
WHIRLPOOL
®
MAJOR APPLIANCE
LIMITED WARRANTY
ATTACH YOUR RECEIPT HERE. PROOF OF PURCHASE IS REQUIRED
TO OBTAIN WARRANTY SERVICE.
Please have the following information available when you call the
Customer eXperience Center:
■ Name, address and telephone number
■ Model number and serial number
■ A clear, detailed description of the problem
■ Proof of purchase including dealer or retailer name and address
IF YOU NEED SERVICE:
1. Before contacting us to arrange service, please determine whether your product requires repair. Some
questions can be addressed without service. Please take a few minutes to review the Troubleshooting or
Problem Solver section of the Use and Care Guide, scan the QR code on the right to access additional
resources, or visit www.whirlpool.com/product_help.
2. All warranty service is provided exclusively by our authorized Whirlpool Service Providers. In the U.S. and
Canada, direct all requests for warranty service to:
Whirlpool Customer eXperience Center
In the U.S.A., call 1-800-253-1301. In Canada, call 1-800-807-6777.
If outside the 50 United States or Canada, contact your authorized Whirlpool dealer to determine whether another warranty applies.
www.whirlpool.com/product_help
ONE YEAR LIMITED WARRANTY
WHAT IS COVERED WHAT IS NOT COVERED
For one year from the date of purchase, when this
major appliance is installed, operated and maintained
according to instructions attached to or furnished with
the product, Whirlpool Corporation or Whirlpool
Canada LP (hereafter “Whirlpool”) will pay for Factory
Specified Replacement Parts and repair labor to
correct defects in materials or workmanship that
existed when this major appliance was purchased, or
at its sole discretion replace the product. In the event
of product replacement, your appliance will be
warranted for the remaining term of the original unit's
warranty period.
YOUR SOLE AND EXCLUSIVE REMEDY UNDER THIS
LIMITED WARRANTY SHALL BE PRODUCT REPAIR
AS PROVIDED HEREIN. Service must be provided by a
Whirlpool designated service company. This limited
warranty is valid only in the United States or Canada
and applies only when the major appliance is used in
the country in which it was purchased. This limited
warranty is effective from the date of original consumer
purchase. Proof of original purchase date is required to
obtain service under this limited warranty.
1. Commercial, non-residential, multiple-family use, or use inconsistent with published
user, operator or installation instructions.
2. In-home instruction on how to use your product.
3. Service to correct improper product maintenance or installation, installation not in
accordance with electrical or plumbing codes or correction of household electrical or
plumbing (i.e. house wiring, fuses or water inlet hoses).
4. Consumable parts (i.e. light bulbs, batteries, air or water filters, preservation
solutions, etc.).
5. Defects or damage caused by the use of non-genuine Whirlpool parts or accessories.
6. Conversion of products from natural gas or L.P. gas.
7. Damage from accident, misuse, abuse, fire, floods, acts of God or use with products
not approved by Whirlpool.
8. Repairs to parts or systems to correct product damage or defects caused by
unauthorized service, alteration or modification of the appliance.
9. Cosmetic damage including scratches, dents, chips, and other damage to the
appliance finishes unless such damage results from defects in materials and
workmanship and is reported to Whirlpool within 30 days.
10. Discoloration, rust or oxidation of surfaces resulting from caustic or corrosive
environments including but not limited to high salt concentrations, high moisture or
humidity or exposure to chemicals.
11. Food or medicine loss due to product failure.
12. Pick-up or delivery. This product is intended for in-home repair.
13. Travel or transportation expenses for service in remote locations where an authorized
Whirlpool servicer is not available.
14. Removal or reinstallation of inaccessible appliances or built-in fixtures (i.e. trim,
decorative panels, flooring, cabinetry, islands, countertops, drywall, etc.) that
interfere with servicing, removal or replacement of the product.
15. Service or parts for appliances with original model/serial numbers removed, altered
or not easily determined.
The cost of repair or replacement under these excluded circumstances shall be
borne by the customer.
DISCLAIMER OF IMPLIED WARRANTIES
IMPLIED WARRANTIES, INCLUDING ANY IMPLIED WARRANTY OF MERCHANTABILITY OR IMPLIED WARRANTY OF FITNESS FOR A
PARTICULAR PURPOSE, ARE LIMITED TO ONE YEAR OR THE SHORTEST PERIOD ALLOWED BY LAW. Some states and provinces do not allow
limitations on the duration of implied warranties of merchantability or fitness, so this limitation may not apply to you. This warranty gives you
specific legal rights, and you also may have other rights that vary from state to state or province to province.
DISCLAIMER OF REPRESENTATIONS OUTSIDE OF WARRANTY
Whirlpool makes no representations about the quality, durability, or need for service or repair of this major appliance other than the representations
contained in this warranty. If you want a longer or more comprehensive warranty than the limited warranty that comes with this major appliance,
you should ask Whirlpool or your retailer about buying an extended warranty.
LIMITATION OF REMEDIES; EXCLUSION OF INCIDENTAL AND CONSEQUENTIAL DAMAGES
YOUR SOLE AND EXCLUSIVE REMEDY UNDER THIS LIMITED WARRANTY SHALL BE PRODUCT REPAIR AS PROVIDED HEREIN. WHIRLPOOL
SHALL NOT BE LIABLE FOR INCIDENTAL OR CONSEQUENTIAL DAMAGES. Some states and provinces do not allow the exclusion or limitation
of incidental or consequential damages, so these limitations and exclusions may not apply to you. This warranty gives you specific legal rights, and
you also may have other rights that vary from state to state or province to province.

171717
LE AGRADECEMOS la compra de este producto de alta calidad. Registre su refrigerador en www.whirlpool.com. En Canadá, registre
su refrigerador en www.whirlpool.ca.
Para referencia futura, tome nota del número de modelo y de serie del producto, ubicados en la pared interior del compartimiento del
refrigerador.
Número de modelo ______________________________________________ Número de serie ________________________________________________
SEGURIDAD DEL REFRIGERADOR
INSTRUCCIONES PARA
EL USUARIO DEL REFRIGERADOR
Si no sigue las instrucciones de inmediato, usted puede
morir o sufrir una lesión grave.
Si no sigue las instrucciones, usted puede morir o sufrir
una lesión grave.
Todos los mensajes de seguridad le dirán el peligro potencial, le dirán cómo reducir las posibilidades de sufrir una lesión y lo que
puede suceder si no se siguen las instrucciones.
Su seguridad y la seguridad de los demás es muy importante.
Hemos incluido muchos mensajes importantes de seguridad en este manual y en su electrodoméstico. Lea y obedezca siempre
todos los mensajes de seguridad.
ADVERTENCIA
PELIGRO
Este es el símbolo de advertencia de seguridad.
Este símbolo le llama la atención sobre peligros potenciales que pueden ocasionar la muerte o una lesión a
usted y a los demás.
Todos los mensajes de seguridad irán a continuación del símbolo de advertencia de seguridad y de la palabra
“PELIGRO” o “ADVERTENCIA”. Estas palabras significan:

181818
Cómo deshacerse adecuadamente
de su refrigerador viejo
IMPORTANTE: El atrapamiento y asfixia de niños no es un
problema del pasado. Los refrigeradores tirados y abandonados
son un peligro, aún si van a quedar ahí “por unos pocos días”.
Si Ud. está por deshacerse de su refrigerador viejo, por favor
siga las instrucciones que se dan a continuación para prevenir
accidentes.
Antes de tirar su viejo refrigerador o congelador:
■ Saque las puertas.
■ Deje los estantes en su lugar para que los niños no puedan
meterse con facilidad.
Para reducir el riesgo de incendio, choque eléctrico, o lesiones personales al usar su refrigerador siga
estas precauciones básicas:
ADVERTENCIA:
INSTRUCCIONES IMPORTANTES DE SEGURIDAD
CONSERVAR ESTAS INSTRUCCIONES
■
Conecte a un contacto de pared de conexión a tierra de
3 terminales.
■
No use un adaptador.
■
No quite la terminal de conexión a tierra.
■
No use un cable eléctrico de extensión.
■
Desconecte el suministro de energía antes de darle servicio.
■
Vuelva a colocar todos los componentes y paneles antes de
hacerlo funcionar.
■
Remueva las puertas de su refrigerador viejo.
■
Conecte solamente al suministro de agua potable.
■
Use un limpiador no inflamable.
■
Mantenga los materiales y vapores inflamables, tales como
gasolina, alejados del refrigerador.
■
Use dos o más personas para mover e instalar el refrigerador.
■
Desconecte el suministro de energía antes de instalar la
fábrica de hielo (en aquellos modelos que incluyen el juego
de instalación de la fábrica de hielo).
■
Use un vaso resistente para recibir hielo del despachador
(en algunos modelos).
■
No golpee las puertas de vidrio del refrigerador (en algunos
modelos).
■
Este aparato no ha sido diseñado para ser usado por
personas (incluidos niños) con capacidad física, sensorial o
mental reducida, o con falta de experiencia y conocimiento,
a menos que lo hagan bajo supervisión o siguiendo las
instrucciones relativas al uso del aparato, a cargo de una
persona responsable por su seguridad.
■
Los niños deberán estar bajo supervisión para asegurarse
de que no jueguen con el electrodoméstico.
Advertencias de la Proposición 65 del estado de California:
ADVERTENCIA: Este producto contiene una o más sustancias químicas identificadas por el estado de California como
causantes de cáncer.
ADVERTENCIA: Este producto contiene una o más sustancias químicas identificadas por el estado de California como
causantes de defectos congénitos o algún otro tipo de daños en la función reproductora.
ADVERTENCIA
Peligro de Asfixia
Remueva las puertas de su refrigerador viejo.
No seguir esta instrucción puede ocasionar la muerte
o daño al cerebro.
Información importante para saber acerca del desecho
de refrigerantes:
Deshágase del refrigerador siguiendo los reglamentos
federales y locales. Los refrigerantes deberán ser evacuados
por un técnico certificado en refrigeración por EPA (Agencia
de protección del medioambiente) según los procedimientos
establecidos.

191919
INSTRUCCIONES DE
INSTALACIÓN
Desempaque el refrigerador
Quite los materiales de empaque
■ Quite los restos de cinta y goma de las superficies de
su refrigerador antes de encenderlo. Frote un poco de
detergente líquido para vajillas sobre el adhesivo con
los dedos. Limpie con agua tibia y seque.
NOTA: No use instrumentos filosos, alcohol para fricciones,
líquidos inflamables o limpiadores abrasivos para eliminar
restos de cinta o goma. Estos productos pueden dañar la
superficie de su refrigerador. Para más información, vea
“Seguridad del refrigerador”.
■ Deshágase de todos los materiales de embalaje o recíclelos.
IMPORTANTE: No quite el inserto de espuma blanca de retorno
de aire que está ubicado detrás del panel de control, en el techo
del refrigerador (en algunos modelos). Esta pieza es parte del
refrigerador y no es parte del material de empaque. Si se quita
dicha pieza, el hielo del congelador puede bajar y formar
carámbanos.
Limpieza antes del uso
Una vez que usted haya quitado todos los materiales de
empaque, limpie el interior de su refrigerador antes de usarlo. Vea
las instrucciones de limpieza en “Cuidado de su refrigerador”.
Requisitos de ubicación
IMPORTANTE: Este refrigerador se diseñó para uso interior
doméstico únicamente.
Para asegurar la ventilación adecuada de su refrigerador, deje
un espacio de ¹⁄₂" (1,25 cm) a cada lado. Deje un espacio de
3"
(7,5 cm) entre los armarios de arriba y la parte superior del
refrigerador. Deje por lo menos 1"
(2,5 cm) entre la parte trasera
de la carcasa y la pared. Si su refrigerador tiene una fábrica de
hielo, asegúrese de que haya espacio adicional atrás para la
conexión de las tuberías de agua.
■ Si va a instalar su refrigerador al costado de una pared fija,
deje un espacio suficiente en el lado de la bisagra para
permitir que la puerta se abra bien.
■ Nivele el refrigerador. Vea “Ajuste las puertas”.
NOTA: Este refrigerador ha sido diseñado para usarse en un
lugar en donde los rangos de temperatura varíen entre un mínimo
de 55 °F (13 °C) y un máximo de 110 °F (43 °C). Para un óptimo
rendimiento, el rango preferido de temperatura de la habitación
(que reduce el uso de electricidad y provee un enfriamiento
superior) es entre 60
°F (15 °C) y 90 °F (32 °C). No se recomienda
instalar el refrigerador cerca de una fuente de calor, como puede
ser un horno o un radiador.
ADVERTENCIA
Peligro de Peso Excesivo
Use dos o más personas para mover e instalar
el refrigerador.
No seguir esta instrucción puede ocasionar una
lesión en la espalda u otro tipo de lesiones.
Cómo mover su refrigerador:
Su refrigerador es pesado. Cuando mueva el refrigerador
para limpiarlo o para darle servicio, cerciórese de cubrir
el piso con cartón o madera para evitar daños en el mismo.
Al mover el refrigerador, siempre tire directamente hacia
afuera. No menee el refrigerador de lado a lado ni lo haga
“caminar” cuando lo trate de mover ya que podría dañar
el piso.
Información importante para saber acerca de los estantes
y tapas de vidrio:
No limpie los estantes y tapas de vidrio con agua caliente
mientras están fríos. Los estantes y tapas pueden romperse
si se exponen a cambios bruscos de temperatura o impacto,
como sería un golpe brusco. El vidrio templado se ha
diseñado para hacerse añicos. Esto es normal. Los estantes
y tapas de vidrio son muy pesados. Use ambas manos al
sacarlos para evitar que se caigan.
ADVERTENCIA
Peligro de Explosión
Mantenga los materiales y vapores inflamables,
tales como gasolina, alejados del refrigerador.
No seguir esta instrucción puede ocasionar la muerte,
explosión, o incendio.
3"
(7,5 cm)
¹⁄₂"
(1,25 cm)
3"
(7,5 cm)
1
"
(1,25 cm)
2/

202020
Requisitos eléctricos
Antes de mover el refrigerador a su ubicación final, es importante
asegurarse de que tiene la conexión eléctrica adecuada.
Método de conexión a tierra recomendado
Se requiere una fuente de energía eléctrica de 115 Voltios, 60 Hz,
CA solamente y con fusibles de 15 o 20
amperios, conectada a
tierra. Se recomienda que use un circuito separado sólo para su
refrigerador. Use un tomacorriente que no se pueda apagar con
un interruptor. No use un cable eléctrico de extensión.
NOTA: Antes de realizar cualquier tipo de instalación, limpieza o
de quitar un foco de luz, apague el enfriamiento o gire el control
(del termostato, del refrigerador o del congelador dependiendo
del modelo) hacia la posición OFF (Apagado) y luego desconecte
el refrigerador de la fuente de energía. Cuando haya terminado,
reconecte el refrigerador a la fuente de energía eléctrica y
encienda el enfriamiento o vuelva a fijar el control (del termostato,
del refrigerador o del congelador dependiendo del modelo) en la
posición deseada. Vea “Uso de los controles” en las Instrucciones
para el usuario, el Manual del usuario, o el Manual de uso y
cuidado.
Requisitos del suministro de agua
Lea todas las instrucciones antes de comenzar.
Reúna las herramientas y piezas necesarias antes de comenzar la
instalación. Lea y siga las instrucciones provistas con cualquiera
de las herramientas mencionadas.
HERRAMIENTAS NECESARIAS: Destornillador de hoja plana,
llaves de boca de ⁷⁄₁₆" y ½" o 2
llaves ajustables, llave de tuercas
y broca de ¼", y un taladro inalámbrico.
IMPORTANTE:
■ Si enciende el refrigerador antes de conectar la tubería de
agua, APAGUE la fábrica de hielo.
■ Todas las instalaciones deben hacerse de acuerdo a los
requerimientos del código de plomería local.
■ Use tubería de cobre y revise si hay fugas. Instale la tubería de
cobre sólo en áreas donde la temperatura vaya a permanecer
por encima del punto de congelación.
NOTA: El distribuidor de su refrigerador tiene un juego disponible
de válvula de cierre tipo montura de ¼" (6,35
mm), una unión y
tubería de cobre. Antes de comprar, asegúrese de que la válvula
de tipo montura cumple con los códigos de plomería locales. No
use una válvula perforadora o una válvula de montura de ³⁄₁₆"
(4,76
mm), que reduce el flujo de agua y se obstruye con más
facilidad.
Presión del agua
IMPORTANTE: Se necesita un suministro de agua fría potable
con presión de agua entre 30 y 120
lbs/pulg² (207 y 827 kPa) para
hacer funcionar la fábrica de hielo.
NOTA: Si la presión de agua es menor de lo requerido, los cubos
de hielo pueden ser huecos o de tamaño irregular.
Si tiene preguntas acerca de la presión del agua, llame a un
plomero competente autorizado.
Suministro de agua de ósmosis inversa
Si se conecta un sistema de filtración de agua de ósmosis
inversa al suministro de agua fría, la presión de agua al sistema
de ósmosis inversa necesitará ser de un mínimo de 40 a
60 lbs/pulg² (276 a 414 kPa).
Si la fábrica de hielo continúa sin funcionar adecuadamente:
■ Fíjese si el filtro de sedimentos en el sistema de ósmosis
inversa está bloqueado. Reemplácelo si fuera necesario.
■ Deje que se vuelva a llenar el tanque de almacenaje del
sistema de ósmosis inversa después del uso intenso.
ADVERTENCIA
Peligro de Choque Eléctrico
Conecte a un contacto de pared de conexión a tierra de
3 terminales.
No quite la terminal de conexión a tierra.
No use un adaptador.
No use un cable eléctrico de extensión.
No seguir estas instrucciones puede ocasionar
la muerte, incendio o choque eléctrico.
La page charge ...
La page charge ...
La page charge ...
La page charge ...
La page charge ...
La page charge ...
La page charge ...
La page charge ...
La page charge ...
La page charge ...
La page charge ...
La page charge ...
La page charge ...
La page charge ...
La page charge ...
La page charge ...
La page charge ...
La page charge ...
La page charge ...
La page charge ...
La page charge ...
La page charge ...
La page charge ...
La page charge ...
La page charge ...
La page charge ...
La page charge ...
La page charge ...
La page charge ...
La page charge ...
La page charge ...
La page charge ...
La page charge ...
La page charge ...
La page charge ...
La page charge ...
-
 1
1
-
 2
2
-
 3
3
-
 4
4
-
 5
5
-
 6
6
-
 7
7
-
 8
8
-
 9
9
-
 10
10
-
 11
11
-
 12
12
-
 13
13
-
 14
14
-
 15
15
-
 16
16
-
 17
17
-
 18
18
-
 19
19
-
 20
20
-
 21
21
-
 22
22
-
 23
23
-
 24
24
-
 25
25
-
 26
26
-
 27
27
-
 28
28
-
 29
29
-
 30
30
-
 31
31
-
 32
32
-
 33
33
-
 34
34
-
 35
35
-
 36
36
-
 37
37
-
 38
38
-
 39
39
-
 40
40
-
 41
41
-
 42
42
-
 43
43
-
 44
44
-
 45
45
-
 46
46
-
 47
47
-
 48
48
-
 49
49
-
 50
50
-
 51
51
-
 52
52
-
 53
53
-
 54
54
-
 55
55
-
 56
56


Whirlpool WRT518SZFM Mode d'emploi
- Catégorie
- Frigos
- Taper
- Mode d'emploi
- Ce manuel convient également à