
1
2
Thank you for purchasing the Korg BEAT-
LAB mini Rhythm Trainer.
Merci d’avoir choisi le Entraîneur de rythme
BEATLAB mini de Korg.
Vielen Dank, dass Sie sich für das Rhyth-
mus Trainer BEATLAB mini von Korg ent-
schieden haben.
Gracias por comprar el Entrenador Rítmico
BEATLAB mini de Korg.
このたびは、コルグ・リズム・トレーナー
BEATLAB miniをお買い上げいただきまして、
まことにありがとうございます。
保証規定(必ずお読みください)
本保証書は、保証期間中に本製品を保証するもので、付
属品類(ヘッドホンなど)は保証の対象になりません。
保証期間内に本製品が故障した場合は、保証規定によっ
て無償修理いたします。
1.本保証書の有効期間はお買い上げ日より1か年です。
2.次の修理等は保証期間内であっても有償修理となり
ます。
• 消耗部品(電池、スピーカー、真空管、フェーダー
など)の交換。
•お取扱い方法が不適当のために生じた故障。
•天災(火災、浸水等)によって生じた故障。
•故障の原因が本製品以外の他の機器にある場合。
•不当な改造、調整、部品交換などにより生じた故障
または損傷。
• 保証書にお買い上げ日、販売店名が未記入の場合、
または字句が書き替えられている場合。
•本保証書の提示がない場合。
尚、当社が修理した部分が再度故障した場合は、保
証期間外であっても、修理した日より3か月以内に
限り無償修理いたします。
3.本保証書は日本国内においてのみ有効です。
ThiswarrantyisvalidonlyinJapan.
4.お客様が保証期間中に移転された場合でも、保証は
引き続きお使いいただけます。詳しくは、お客様相
談窓口までお問い合わせください。
radios and televisions.
Handling
To avoid breakage, do not apply excessive force to the switches
or controls.
Care
If the exterior becomes dirty, wipe it with a clean, dry cloth. Do
not use liquid cleaners such as benzene or thinner, or cleaning
compounds or ammable polishes.
Keep this manual
After reading this manual, please keep it for later reference.
Keeping foreign matter out of your equipment
Never set any container with liquid in it near this equipment. If
liquid gets into the equipment, it could cause a breakdown, re,
or electrical shock.
Be careful not to let metal objects get into the equipment. If
something does slip into the equipment, unplug the AC adapter
from the wall outlet. Then contact your nearest Korg dealer or
the store where the equipment was purchased.
THE FCC REGULATION WARNING (for USA)
NOTE: This equipment has been tested and found to comply
with the limits for a Class B digital device, pursuant to Part
15 of the FCC Rules. These limits are designed to provide
reasonable protection against harmful interference in a
residential installation. This equipment generates, uses,
and can radiate radio frequency energy and, if not installed
and used in accordance with the instructions, may cause
harmful interference to radio communications. However,
there is no guarantee that interference will not occur in a
particular installation. If this equipment does cause harmful
interference to radio or television reception, which can be
determined by turning the equipment off and on, the user
is encouraged to try to correct the interference by one or
more of the following measures:
• Reorient or relocate the receiving antenna.
• Increase the separation between the equipment and
receiver.
• Connect the equipment into an outlet on a circuit different
from that to which the receiver is connected.
• Consult the dealer or an experienced radio/TV technician
for help.
If items such as cables are included with this equipment,
you must use those included items.
Unauthorized changes or modication to this system can
void the user’s authority to operate this equipment.
5.修理、運送費用が製品の価格より高くなることもあります
ので、あらかじめお客様相談窓口へご相談ください。発送
にかかる費用は、お客様の負担とさせていただきます。
6.修理中の代替品、商品の貸し出し等は、いかなる場合にお
いても一切行っておりません。
本製品の故障、または使用上生じたお客様の直接、間接の損害
につきましては、弊社は一切の責任を負いかねますのでご了承
ください。本保証書は、保証規定により無償修理をお約束する
ためのもので、これによりお客様の法律上の権利を制限するも
のではありません。
コルグ
BEATLAB mini
保証書
本保証書は、保証規定により無償修理をお約束するもので
す。
お買い上げ日 年 月 日
販売店名
アフターサービス
修理および商品のお取り扱いについてのご質問、ご相談は、お
客様相談窓口へお問い合わせください。
お客様相談窓口
PHS等一部の電話ではご利用できません。固定電話または
携帯電話からおかけください。
受付時間 月曜~金曜10:00 ~ 17:00(祝祭日、窓口休業
日を除く)
●サービス・センター :
〒168-0073 東京都杉並区下高井戸1-18-162F
■お願い
1.保証書に販売年月日等の記入がない場合は無効となりま
す。記入できないときは、お買い上げ年月日を証明できる
領収書等と一緒に保管してください。
2.保証書は再発行致しませんので、紛失しないように大切に
保管してください。
Precautions
Location
Using the unit in the following locations can result in a mal-
function.
• In direct sunlight
• Locations of extreme temperature or humidity
• Excessively dusty or dirty locations
• Locations of excessive vibration
• Close to magnetic elds
Power supply
Be sure to turn the power switch to OFF when the unit is not in
use. Remove the battery in order to prevent it from leaking when
the unit is not in use for extended periods.
Interference with other electrical devices
Radios and televisions placed nearby may experience recep-
tion interference. Operate this unit at a suitable distance from
Notice regarding disposal (EU only)
When this “crossed-out wheeled bin” symbol is
displayed on the product, owner’s manual, battery,
or battery package, it signies that when you wish
to dispose of this product, manual, package or
battery you must do so in an approved manner.
Do not discard this product, manual, package or
battery along with ordinary household waste.
Disposing in the correct manner will prevent harm
to human health and potential damage to the en-
vironment. Since the correct method of disposal will de-
pend on the applicable laws and regulations in your local-
ity, please contact your local administrative body for
details. If the battery contains heavy metals in excess of
the regulated amount, a chemical symbol is displayed
below the “crossed-out wheeled bin” symbol on the bat-
tery or battery package.
IMPORTANT NOTICE TO CONSUMERS
This product has been manufactured according to strict
specications and voltage requirements that are appli-
cable in the country in which it is intended that this product
should be used. If you have purchased this product via
the internet, through mail order, and/or via a telephone
sale, you must verify that this product is intended to be
used in the country in which you reside.
WARNING: Use of this product in any country other than
that for which it is intended could be dangerous and could
invalidate the manufacturer’s or distributor’s warranty.
Please also retain your receipt as proof of purchase
otherwise your product may be disqualied from the
manufacturer’s or distributor’s warranty.
* All product names and company names are the trademarks
or registered trademarks of their respective owners.
Voice List
No. Voice
1
Mechanical metronome
2
Electronic metronome
3
Male-voice metronome
4
Female-voice metronome
Pattern List
No. Paern No. Paern No. Paern No. Paern No. Paern
01 Snare 01 07 Snare 07 13 Snare 13
19 Snare 19 25 SonClave 3-2
02 Snare 02 08 Snare 08 14 Snare 14
20 Snare 20 26 SonClave 2-3
03 Snare 03 09 Snare 09 15 Snare 15
21 Snare 21 27 RumbaClave 3-2
04 Snare 04 10 Snare 10 16 Snare 16
22 Snare 22 28 RumbaClave 2-3
05 Snare 05 11 Snare 11
17 Snare 17 23 Snare 23 29 BossaNovaClave 3-2
06 Snare 06 12 Snare 12
18 Snare 18 24 RideCymbal 30 BossaNovaClave 2-3

4 3
Press the START/STOP buon to start the metronome. To stop it, press
the START/STOP buon again. In Metronome mode, you can change
the tempo, beat, rhythm, paern and voice of the metronome.
Setting the tempo
There are three ways to set the tempo: using Pendulum Step, Full Step,
and Tap Tempo.
Pendulum Step and Full Step
Pendulum Step enables you to increase or decrease the tempo by the
same step as a mechanical metronome. Full Step enables you to in-
crease or decrease the tempo in one BPM increments.
1.
Press the TEMPO/TAP TEMPO/SPLIT/RESET buon to display
the
“
TEMPO
”
indicator in the display.
2.
Press and hold down the TEMPO/TAP TEMPO/SPLIT/RESET but-
ton for one second to select Pendulum Step (the
indicator will
appear). Press and hold down the TEMPO/TAP TEMPO/SPLIT/
RESET buon again for one second to switch to Full step.
3.
Press the ▼ or ▲ buons to adjust the tempo value.
Tap Tempo (Setting the tempo in sync with a song)
If you press the TEMPO/TAP TEMPO/SPLIT/RESET buon repeatedly
with a specic BPM interval, the BEATLAB mini will detect the interval
and set the tempo accordingly. When the interval is detected, “TAP TEM-
PO” will ash in the display. The BEATLAB mini can detect tempo values
in the range of 30 to 300. You cannot set a tempo outside this range.
Setting the rhythm, beat, pattern and voice
Metronome seings for RHYTHM and BEAT can be specied. In ad-
dition, the metronome tone (VOICE) can be changed, and a drum pat-
tern (PATTERN) can be played back.
1.
Press the RHYTHM/BEAT/PATTERN/VOICE buon until “RHYTHM”,
“BEAT”, “PATTERN” or “VOICE” ashes in the display.
2.
Use the ▼ or ▲ buon to select the seing.
TIP:
The seings in Metronome mode will also be used in Training mode.
TIP:
If you change the beat while the metronome is running, the beat
will change at the rst beat of the next bar.
TIP:
“PATTERN” appears only when voice seing “P” is selected.
The new pattern setting will be applied with the first beat of
the next bar. When voice seing “P” is selected, any beat and
rhythm seing specied using the procedure described above
will be canceled, and the paern will be played back using the
voice specied for that paern.
Training mode
To enter Training mode, press the TRAINING buon.
The dierence between the metronome beat and the input from the contact
microphone connected to the trigger jack will be measured.
The degree of
deviation is indicated by sound during measurement, and the grade
and overall trend appear in the display after measurement.
Connecting and setting up the contact microphone
1.
Make sure that the BEATLAB mini is turned o, and then plug the
included contact microphone into the trigger jack.
2.
Aach the clip on the contact microphone to an object.
3.
Turn on the BEATLAB mini, and then press the MODE/SENS/
GRADE buon until “SENS” ashes in the display.
4.
Use the ▼ or ▲ buon to set the trigger sensitivity. With a larger
number, even weak vibrations will be picked up. After striking
the object (where the contact microphone is attached) using an
appropriate strength, set the trigger sensitivity so that the trigger
mark (
) appears.
Depending on the material of the object as well as the locations where
the object is struck and where the contact microphone is aached, some
vibrations may not be picked up, even if the object was struck with the
same strength. When seing and checking the trigger sensitivity, strike
the object at the same location used in Training mode.
If you leave the clip aached for an extended period of time, it
might leave a surface mark when you detach it. Depending on
the age of the object or the state of its nish, it could be damaged
regardless of the length of time.
Be sure to turn o the BEATLAB mini before connecting the
contact microphone.
Do not twist the cord of the microphone around the BEATLAB mini
or pull the cord strongly, since it will cause the cord to break. Take
great care in handling the cord and microphone at all times.
Setting the mode
Evaluations during measurement are given in voice modes and a
sound mode.
Mode 1 (female-voice mode), Mode 2 (
male-voice
mode): If there is
no deviation from the metronome, the voice says “GOOD”. If there
is deviation, the voice says “TOO FAST” or “TOO SLOW”. If the per-
formance continues without deviation, the voice changes from saying
“GOOD” to “GREAT”, “WONDERFUL” or “PERFECT”.
Mode 3 (sound mode): If there is no deviation from the metronome, a
snare sound is produced. If the deviation increases, the sound changes
to a cowbell. Strike the object along with the beat so that the snare
sound continues to be produced.
1.
Press the MODE/SENS/GRADE buon until “MODE” ashes in
the display.
2.
Use the ▼ or ▲ buon to select the mode.
TIP:
When playing back a paern in Training mode, a clicking sound
is also played back at the same time. However, depending on the
timing of the evaluation, the clicking sound may not be produced.
Setting the grading level
The evaluation can be set to one of six diculty levels.
1.
Press the MODE/SENS/GRADE buon until “GRADE” ashes in
the display.
2.
Use the ▼ or ▲ buon to select the grading level. With a larger
number, the grading level for evaluations becomes stricter.
TIP:
Start practicing with grading level 1, and then gradually in-
crease the diculty level.
Using Training mode
TIP:
Specify the metronome seings from Metronome mode.
1.
Press the START/STOP buon to start the metronome. After a pre-
count of one bar, measuring begins.
2.
Along with the beat, strike the object where the contact microphone
is aached.
After eight bars are measured and measuring is nished, the metro-
nome stops.
Do not strike the contact microphone itself.
3.
After the metronome stops, the grade appears, and the pendulum
indicator shows the overall trend.
The lower the deviation, the higher the grade on the 100-point
scale. If the overall timing of the trigger matches the beat, “JUST”
is indicated. If the trend is faster than the beat, an indicator toward
“FAST” appears. If the trend is slower than the beat, an indicator
toward “SLOW” appears. If the dierence between the beat and
trigger is small, the indicator appears near “JUST”. If the
dierence is large, the indicator appears far from “JUST”.
Sound Out mode
When the SOUND/CALIB buon is pressed, the BEATLAB mini en-
ters Sound Out mode and produces a reference pitch. This reference
pitch can be used as a guide for tuning.
You can also specify the note name and frequency (calibration) of the
reference pitch in Sound Out mode.
Select the name of the desired note
1.
Press the SOUND/CALIB buon so the display indicates “NOTE”.
2.
Use the ▼ or ▲ buons to set the name of the Reference tone.
To adjust the calibration
1.
Press the SOUND/CALIB buon to make the display indicate “CALIB”.
2.
Use the ▼ or ▲buons to adjust the calibration. You can adjust
the calibration in steps of 1 Hz.
Stand (belt clip) and strap hole
At the rear of the BEATLAB mini, there is
a strap hole as well as a stand, which can
also be used as a belt clip.
To use the stand, press in at arrows (a)
with your ngers, and then fold open (b)
the stand.
To use the stand as a belt clip, close the
stand, and then clamp a belt with the clip
so the BEATLAB mini is secured.
strap hole
A neck strap, etc., can be attached to the strap
hole. This is useful for using the BEATLAB mini
as a stopwatch.
Turning the power on/off
Press the buon to turn the power on. At this time, the BEATLAB
mini enters Metronome mode.To turn o the BEATLAB mini, press
the
buon again.The power will automatically turn o if the met-
ronome has not been used for 20 minutes.(Auto power-o)
Restoring the factory settings
While holding down the SOUND/CALIB buon, press the buon.
Backlight
Press the buon to set the backlight. Each time the buon is
pressed, you can switch to Soft → Auto → O → Soft…
Soft: Low-intensity lighting to prevent baery consumption.
Auto: The backlight will light brightly when sound is input and
when buons are used. If a sound is not input or a buon is not
pressed for 10 seconds, the backlight will automatically light up to
the soft seing brightness.
TIP:
While using the timer, the backlight ashes when the speci-
ed time has elapsed.
TIP:
In Training mode, the backlight lights brightly for about 10
seconds when the metronome stops.
O: The backlight does not light up.
Metronome mode
To enter Metronome mode, press the RHYTHM/BEAT/PATTERN/
VOICE buon.
(a)
(a)
(b)
Timer and stopwatch
Timer
1.
Press the TIMER/STOP WATCH button so the display indicates
“TIMER.”
2.
Use the ▼ or ▲ buttons to set the amount of time (in
1-minute steps) to be counted down.
3.
Press the START/STOP buon to start the timer countdown.
If you press the START/STOP buon during the countdown,
the countdown will be paused. When you press the START/
STOP buon once again, the countdown will resume from
the paused time. If you press the TEMPO/TAP TEMPO/
SPLIT/RESET buon while paused, the seing will return to
the duration you specied. The timer will continue counting
down even if you move to a dierent mode.
4.
An alarm will sound when the specied time has elapsed.
Press any switch to stop the alarm tone.
Stopwatch
1.
Press the TIMER/STOP WATCH buon to make the dis-
play indicate “STOPWATCH.”
2.
Press the START/STOP buon to begin measuring the time.
If you press the TEMPO/TAP TEMPO/SPLIT/RESET buon
while measuring the time, the Split Time will be shown. If
you press the TEMPO/TAP TEMPO/SPLIT/RESET buon
once again while the Split Time is shown, the Split Time
indication will disappear. The stopwatch will continue
running even if you move to a dierent mode.
3.
To stop measuring the time, press the START/STOP buon
once again.
Press the TEMPO/TAP TEMPO/SPLIT/RESET buon to
reset the time display to zero.
Specications
Metronome mode
Tempo range: q = 30–300 beats per minute (bpm), Tempo set-
tings: Pendulum Step, Full Step, Tap Tempo、Beat: 0–9 beats,
Rhythm: quarter, eighth, triplets (
, , ), quadruplets
( , , ), Number of paerns: 30 (Refer to the Paern
List.), Number of voice: 4 (Refer to the Voice List.) , Tempo ac-
curacy: +/-0.2 %
Training mode
Mode: female-voice mode, male-voice mode, sound mode,
Grade: 1–6,Trigger sensitivity: 1–30
Sound Out mode
Reference pitch: Twelve-tone equal temperament C4–B4 (C, C
♯
,
D, D
♯
, E, F, F
♯
, G, G
♯
, A, A
♯
, B), Calibration range: 438 Hz–445 Hz
(1Hz steps), Reference pitch precision: +/-1 centor beer
Timer and stopwatch
Time range: 1–99 minutes, Stopwatch seing range: 0.1 second–99
minutes 59.9 seconds
Main specications
Connectors: Trigger jack(mono phone jacks φ6.3 mm / 1/4”),
Headphones jack (stereo mini jack φ3.5 mm / 1/8”)
,Speaker: Dy-
namic speaker (Max. 0.5 W, φ23 mm)
,Power supply: Two AAA
baeries(alkaline or nickel-metal hydride baeries), Baery life:
approximately 30 hours (tempo=120, beat=4, rhythm=quarter,
voice=1, when using alkaline baeries), Dimensions (W x D x
H): 82 mm x 82 mm x 27 mm / 3.23” x 3.23” x 1.06”, Weight: 97 g
/ 3.42 oz. (including baeries), Included items: Owner’s manual,
Contact microphone, two AAA baeries
* The seings in each mode will be retained after the power is
turned o. However, if you replace the baeries, all seings
will be initialized as follows.
The factory default seings are listed below.
Default values: BEAT=4, RHYTHM= q (quarter), TEMPO=120,
FULL STEP, PATTERN=1, VOICE = 1, SENS=30, GRADE=1,
MODE=1, NOTE=A, CALIB=440 Hz, TIMER=1 minute
* Specications and appearance are subject to change without
notice for improvement.
Part names and turning on the power
1.
(Power) buon
2.
▼(Down) buon
3.
▲(Up) buon
4.
SOUND/CALIB buon
5.
RHYTHM/BEAT/PAT-
TERN/VOICE buon
6.
TRAINING buon
7.
MODE/SENS/GRADE buon
8.
TIMER/STOP WATCH buon
9.
(Backlight) buon
10.
TEMPO/TAP TEMPO/
SPLIT/RESET buon
11.
START/STOP buon
12.
Trigger jack (Mono)
This jack is for connecting
the included contact micro-
phone.
13.
Headphones jack (Stereo
mini)
This jack is where head-
phones are to be connected.
When headphones are con-
nected, no sound is output
from the speaker.
14.
VOL (Volume)
This adjusts the volume of
the speaker and head-
phones.
15.
Display
16.
Speaker
P
A
T
T
E
R
N
/
V
O
I
C
E
S
T
O
P
W
A
T
C
H
G
R
A
D
E
S
O
U
N
D
/
C
A
L
I
B
T
R
A
I
N
I
N
G
T
I
M
E
R
M
O
D
E
/
S
E
N
S
R
H
Y
T
H
M
/
B
E
A
T
T
E
M
P
O
/
T
A
P
T
E
M
P
O
V
O
L
.
S
P
L
I
T
/
R
E
S
E
T
S
T
A
R
T
/
S
T
O
P
BEATLAB
mini
RHYTHM TRAINER
1
2
3
4 5
76 8
9
10
11
12
13
15
14
16
En

5
6
REMARQUE IMPORTANTE POUR LES CLIENTS
Ce produit a été fabriqué suivant des spécications
sévères et des besoins en tension applicables dans le
pays où ce produit doit être utilisé. Si vous avez acheté
ce produit via l’internet, par vente par correspondance
ou/et vente par téléphone, vous devez vérier que ce
produit est bien utilisable dans le pays où vous résidez.
ATTENTION: L’utilisation de ce produit dans un pays autre
que celui pour lequel il a été conçu peut être dangereuse
et annulera la garantie du fabricant ou du distributeur.
Conservez bien votre récépissé qui est la preuve de votre
achat, faute de quoi votre produit ne risque de ne plus
être couvert par la garantie du fabricant ou du distributeur.
* Tous les noms de produits et de sociétés sont des marques
commerciales ou déposées de leur détenteur respectif.
Vorsichtsmaßnahmen
Aufstellungsort
Vermeiden Sie das Aufstellen des Geräts an Orten, an denen
• es direkter Sonneneinstrahlung ausgesetzt ist;
• hohe Feuchtigkeit oder Extremtemperaturen auftreten können;
• Staub oder Schmutz in großen Mengen vorhanden sind;
• das Gerät Erschütterungen ausgesetzt sein kann.
• in der Nähe eines Magnetfeldes.
Stromversorgung
Schließen Sie das optionale Netzteil nur an eine geeignete Steckdo-
se an. Verbinden Sie es niemals mit einer Steckdose einer anderen
Spannung.
Störeinüsse auf andere Elektrogeräte
Dieser kann bei in der Nähe aufgestellten Rund-funkempfängern oder
Fernsehgeräten Empfangsstörungen hervorrufen. Betreiben Sie sol-
che Geräte nur in einem geeigneten Abstand von diesem Erzeugnis.
Bedienung
Vermeiden Sie bei der Bedienung von Schaltern und Reglern unan-
gemessenen Kraftaufwand.
Reinigung
Bei auftretender Verschmutzung können Sie das Gehäuse mit einem
trockenen, sauberen Tuch abwischen. Verwenden Sie keinerlei Flüs-
sigreiniger wie beispielsweise Reinigungsbenzin, Verdünnungs- oder
Spülmittel. Verwenden Sie niemals brennbare Reiniger.
Bedienungsanleitung
Bewahren Sie diese Bedienungsanleitung gut auf, falls Sie sie später
noch einmal benötigen.
Flüssigkeiten und Fremdkörper
Stellen Sie niemals Behältnisse mit Flüssigkeiten in der Nähe desGe-
räts auf. Wenn Flüssigkeit in das Gerät gelangt, können Beschädigung
des Geräts, Feuer oder ein elek-trischer Schlag die Folge sein.
Beachten Sie, daß keinerlei Fremdkörper in das Gerät gelangen.
Sollte ein Fremdkörper in das Gerät gelangt sein, so trennen Sie es
sofort vom Netz. Wenden Sie sich dann an Ihren KORG-Fachhändler.
安全上のご注意
火災・感電・人身傷害の危険を防止するには
以下の指示を守ってください
警告
この注意事項を無視した取り扱いをすると、
死亡や重傷を負う可能性が予想されます
・
次のような場合には、直ちに電源を切る。
○
異物が内部に入ったとき
○
製品に異常や故障が生じたとき
修理が必要なときは、コルグお客様相談窓口へ依頼し
てください。
・ 本製品を分解したり改造したりしない。
・ 修理、部品の交換などで、取扱説明書に書かれている
以外のことは絶対にしない。
・ 大音量や不快な程度の音量で長時間使用しない。
大音量で長時間使用すると、難聴になる可能性があり
ます。万一、聴力低下や耳鳴りを感じたら、専門の医
師に相談してください。
・ 本製品に異物(燃えやすいもの、硬貨、針金など)を入
れない。
・ 温度が極端に高い場所(直射日光の当たる場所、暖房機
器の近く、発熱する機器の上など)で使用や保管はしな
い。
・ 振動の多い場所で使用や保管はしない。
・ ホコリの多い場所で使用や保管はしない。
・ 風呂場、シャワー室で使用や保管はしない。
・ 雨天時の野外のように、湿気の多い場所や水滴のかか
る場所で、使用や保管はしない。
・ 本製品に液体をこぼさない。
・ 濡れた手で本製品を使用しない。
注意
この注意事項を無視した取り扱いをすると、傷害を負う可能性、
または物理的損害が発生する可能性があります
・ 正常な通気が妨げられない所に設置して使用する。
・ ラジオ、テレビ、電子機器などから十分に離して使用
する。
ラジオやテレビ等に接近して使用すると、本製品が雑
音を受けて誤動作する場合があります。また、ラジオ、
テレビ等に雑音が入ることがあります。
・ 外装のお手入れは、乾いた柔らかい布を使って軽く拭
く。
・ 長時間使用しないときは、電池の液漏れを防ぐために
電池を抜く。
・ 電池や本体は幼児の手の届かないところに保管する。
・ 電池を過度の熱源(日光、火など)にさらさない。
・ ボタンやツマミなどに必要以上の力を加えない。
故障の原因になります。
・ 外装のお手入れに、ベンジンやシンナー系の液体、コ
ンパウンド質、強燃性のポリッシャーは使用しない。
・ 不安定な場所に置かない。
※ 全ての製品名および会社名は、各社の商標または登録商
標です。
Hinweis zur Entsorgung (Nur EU)
Wenn Sie das Symbol mit der „durchgekreuzten
Mülltonne“ auf Ihrem Produkt, der dazugehörigen
Bedienungsanleitung, der Batterie oder dem Batterie-
fach sehen, müssen Sie das Produkt in der vorge-
schriebenen Art und Weise entsorgen. Dies bedeutet,
dass dieses Produkt mit elektrischen und elektroni-
schen Komponenten nicht mit dem normalen Hausmüll
entsorgt werden darf. Für Produkte dieser Art existiert
ein separates, gesetzlich festgelegtes Entsorgungs-
system. Gebrauchte elektrische und elektronische Geräte
müssen separat entsorgt werden, um ein umweltgerechtes
Recycling sicherzustellen. Diese Produkte müssen bei benann-
ten Sammelstellen abgegeben werden. Die Entsorgung ist für
den Endverbraucher kostenfrei! Bitte erkundigen sie sich bei
ihrer zuständigen Behörde, wo sie diese Produkte zur fachge-
rechten Entsorgung abgeben können. Falls ihr Produkt mit
Batterien oder Akkumulatoren ausgerüstet ist, müssen sie
diese vor Abgabe des Produktes entfernen und separat ent-
sorgen (siehe oben). Die Abgabe dieses Produktes bei einer
zuständigen Stelle hilft ihnen, dass das Produkt umweltgerecht
entsorgt wird. Damit leisten sie persönlich einen nicht uner-
heblichen Beitrag zum Schutz der Umwelt und der menschli-
chen Gesundheit vor möglichen negativen Effekten durch
unsachgemäße Entsorgung von Müll. Batterien oder Akkus,
die Schadstoffe enthalten, sind auch mit dem Symbol einer
durchgekreuzten Mülltonne gekennzeichnet. In der Nähe zum
Mülltonnensymbol bendet sich die chemische Bezeichnung
des Schadstoffes.
Cd oder NiCd steht für Cadmium, Pb für Blei und Hg für
Quecksilber.
WICHTIGER HINWEIS FÜR KUNDEN
Dieses Produkt wurde unter strenger Beachtung von Spezi-
kationen und Spannungsanforderungen hergestellt, die im
Bestimmungsland gelten. Wenn Sie dieses Produkt über das
Internet, per Postversand und/oder mit telefonischer Bestellung
gekauft haben, müssen Sie bestätigen, dass dieses Produkt für
Ihr Wohngebiet ausgelegt ist.
WARNUNG: Verwendung dieses Produkts in einem anderen
Land als dem, für das es bestimmt ist, verwendet wird, kann
gefährlich sein und die Garantie des Herstellers oder Importeurs
hinfällig lassen werden. Bitte bewahren Sie diese Quittung als
Kaufbeleg auf, da andernfalls das Produkt von der Garantie
des Herstellers oder Importeurs ausgeschlossen werden kann.
* Alle Produkt- und Firmennamen sind Warenzeichen oder einge-
tragene Warenzeichen der betreffenden Eigentümer.
Précautions
Emplacement
L'utilisation de cet instrument dans les endroits suivants peut
en entraîner le mauvais fonctionnement.
• En plein soleil
• Endroits très chauds ou très humides
• Endroits sales ou fort poussiéreux
• Endroits soumis à de fortes vibrations
• A proximité de champs magnétiques
Alimentation
Lorsque vous n’utilisez pas l’appareil, n’oubliez pas de le mettre
hors tension. Retirez les piles pour éviter toute fuite lorsque
l’appareil ne sera pas utilisé pendant de longues périodes
de temps.
Interférences avec d'autres appareils électriques
Les postes de radio et de télévision situés à proximité peuvent
par conséquent souffrir d'interférences à la réception. Veuillez
dès lors faire fonctionner cet appareil à une distance raison-
nable de postes de radio et de télévision.
Maniement
Pour éviter de les endommager, manipulez les commandes et
les boutons de cet instrument avec soin.
Entretien
Lorsque l'instrument se salit, nettoyez-le avec un chiffon propre
et sec. Ne vous servez pas d'agents de nettoyage liquides tels
que du b enzène ou du diluant , voire des produits in ammables.
Conservez ce manuel
Après avoir lu ce manuel, veuillez le conserver soigneusement
pour toute référence ultérieure.
Evitez toute intrusion d'objets ou de liquide
Ne placez jamais de récipient contenant du liquide près de
l’instrument. Si le liquide se renverse ou coule, il risque de
provoquer des dommages, un court-circuit ou une électrocution.
Veillez à ne pas laisser tomber des objets métalliques dans
le boîtier (trombones, par ex.). Si cela se produit, débranchez
l’alimentation de la prise de courant et contactez votre reven-
deur korg le plus proche ou la surface où vous avez acheté
l’instrument.
Note concernant les dispositions (Seulement EU)
Quand un symbole avec une poubelle barrée
d’une croix apparait sur le produit, le mode
d’emploi, les piles ou le pack de piles, cela signi-
e que ce produit, manuel ou piles doit être dé-
posé chez un représentant compétent, et non pas
dans une poubelle ou toute autre déchetterie
conventionnelle. Disposer de cette manière, de
prévenir les dommages pour la santé humaine et
les dommages potentiels pour l’environnement. La bonne
méthode d’élimination dépendra des lois et règlements
applicables dans votre localité, s’il vous plaît, contactez
votre organisme administratif pour plus de détails. Si la
pile contient des métaux lourds au-delà du seuil régle-
menté, un symbole chimique est afché en dessous du
symbole de la poubelle barrée d’une croix sur la pile ou
le pack de piles.

7 8
Installing batteries
Installation des piles
Batterien einlegen
Instalación de las pilas
電池の入れ方
Open the baery case cover located on
the back side of the unit to insert two
AAA baeries, paying careful aention
to observe the correct polarity orienta-
tion of the baeries.
If battery power becomes low,
the
indicator will appear in the
display. In this case, replace the baer-
ies with new ones as soon as possible.
Before replacing the batteries, be sure
to turn the power o.
Ouvrez le couvercle du compartiment des
piles situé sur le dessous de l’instrument et insérez deux piles de type AAA
en veillant à les orienter dans le sens correct (en respectant les indications de
polarité).
Si la tension des piles faiblit, le témoin
apparaît dans de l’écran. Dans
ce cas, remplacez les anciennes piles par des neuves aussi vite que possible.
Avant de remplacer les piles, veillez à couper l’alimentation.
Önen Sie den Baeriefachdeckel an der Unterseite des Geräts und seen
Sie zwei AAA-Baerien ins Baeriefach ein. Achten Sie dabei auf die richti-
ge Polung.
Wenn die Baerien fast erschöpft sind, im Display ein „ “-Symbol. Wech-
seln Sie die Baerien dann so schnell wie möglich aus. Vor dem Auswechseln der
Baerien müssen Sie das Gerät unbedingt ausschalten.
Abra la cubierta de la caja de pilas situada en la parte posterior de la
unidad para insertar dos pilas AAA, prestando especial atención a la obser-
vación de la orientación correcta de la polaridad de las pilas.
Si la energía de las pilas está baja, el indicador
aparecerá en la
pantalla. En este caso, reemplace las pilas con nuevas tan pronto como sea
posible. Antes de reemplazar las pilas, asegúrese de apagar la unidad.
底面の電池ケース蓋を開けて、単4形電池2本を、電池の極性に注意して
入れてください。
電池が消耗してくると、ディスプレイに
が表示されます。このとき
は、早めに新しい電池と交換してください。
電池交換するときは、電源を切ってから行ってください。
付属の電池は、動作確認用のため、通常より寿命が短い場合があり
ます。
Setting the battery type
In order to get accurate readings of the remaining battery
power, select the type of baery being used.
1.
Insert the baeries, and then turn on the BEATLAB mini.
After the BEATLAB mini has been turned on, the baery
type seing appears in the display.
2.
Use the ▼ or ▲ buon to select the baery type.
AL: When using alkaline baeries.
nH: When using nickel-metal hydride baeries.
3.
Press the buon. The seing is saved, and the BEATLAB
mini starts up.
Réglage du type de piles
Pour garantir une estimation précise de la puissance résiduelle des
piles, sélectionnez le type de piles utilisé.
1.
Insérez les piles dans le BEATLAB mini, puis meez-le sous ten-
sion. Une fois que le BEATLAB mini est sous tension, il ache
sur son écran le réglage du type de piles.
2.
Sélectionnez le type de piles approprié avec les boutons ▼ et ▲.
AL: Choisissez cee option pour des piles alcalines.
nH: Choisissez cee option pour des piles au nickel-métal-hy-
drure.
3.
Appuyez sur le bouton . Le réglage est mémorisé et le BEAT-
LAB mini démarre.
Batterietyp angeben
Damit der Ladezustand der Baerien korrekt angezeigt wird, müs-
sen Sie den verwendeten Baerietyp angeben.
1.
Legen Sie die Baerien ein und schalten Sie den BEATLAB mini
ein. Nach dem Einschalten erscheint im Display die Baeriety-
panzeige.
2.
Wählen Sie mit der Taste-▼oder ▲ den Baerietyp aus.
AL: Bei Verwendung von Alkali-Baerien.
nH: Bei Verwendung von Nickel-Metallhydridakkus.
3.
Drücken Sie die -Taste. Die Einstellung ist gespeichert und
der BEATLAB mini ist betriebsbereit.
Selección del tipo de pilas
Para que la lectura de la carga de energía que le queda a las pilas
sea precisa, seleccione el tipo de pilas en uso.
1.
Inserte las pilas y después encienda el BEATLAB mini. Después
de que haya encendido el BEATLAB mini, en la pantalla apare-
cerá el ajuste para la selección del tipo de pilas.
2.
Utilice el botón▼ o el botón ▲ para seleccionar el tipo de pilas.
AL: Cuando se utilizan pilas alcalinas.
nH: Cuando se utilizan pilas de níquel-metal hidruro.
3.
Pulse el botón . El ajuste quedará guardado y se iniciará el
BEATLAB mini.
電池の種類の設定
電池の残量を正しく表示するため、使用する電池の種類に合わせ
て設定をしてください。
1.
電池を入れ替えて電源を入れます。電源が入ると、ディスプレ
イに電池の種類を設定する画面が表示されます。
2.
▼または▲ボタンで電池の種類を選択します。
AL:アルカリ乾電池を使用する場合。
nH:ニッケル水素電池を使用する場合。
3.
ボタンを押します。設定が保存され、本機が起動します。
Precauciones
Ubicación
El uso de la unidad en las siguientes ubicaciones puede
dar como resultado un mal funcionamiento:
• Expuesto a la luz directa del sol
• Zonas de extremada temperatura o humedad
• Zonas con exceso de suciedad o polvo
• Zonas con excesiva vibración
• Cercano a campos magnéticos
Fuente de alimentación
Apague la unidad cuando no la use la batería. Retire las
baterías si no va a usar la unidad durante un tiempo largo.
Interferencias con otros aparatos
Las radios y televisores situados cerca pueden experimen-
tar interferencias en la recepción. Opere este dispositivo a
una distancia prudencial de radios y televisores.
Manejo
Para evitar una rotura, no aplique excesiva fuerza a los
conmutadores o controles.
Cuidado
Si exterior se ensucia, límpiese con un trapo seco. No
use líquidos limpiadores como disolvente, ni compuestos
inamables.
Guarde este manual
Después de leer este manual, guárdelo para futuras
consultas.
Mantenga los elementos externos alejados del
equipo
Nunca coloque ningún recipiente con líquido cerca de este
equipo, podría causar un cortocircuito, fuero o descarga
eléctrica. Cuide de que no caiga ningún objeto metálico
dentro del equipo.
Nota respecto a residuos y deshechos (solo UE)
Cuando aparezca el símbolo del cubo de basura
tachado sobre un producto, su manual de usuario,
la batería, o el embalaje de cualquiera de éstos,
signica que cuando quiere tire dichos artículos a
la basura, ha de hacerlo en acuerdo con la norma-
tiva vigente de la Unión Europea. No debe verter
dichos artículos junto con la basura de casa. Verter
este producto de manera adecuada ayudará a
evitar daños a su salud pública y posibles daños al
medioambiente. Cada país tiene una normativa especíca
acerca de cómo verter productos potencialmente tóxicos,
por tanto le rogamos que se ponga en contacto con su o-
cina o ministerio de medioambiente para más detalles. Si
la batería contiene metales pesados por encima del límite
permitido, habrá un símbolo de un material químico, deba-
jo del símbolo del cubo de basura tachado.
NOTA IMPORTANTE PARA EL CONSUMIDOR
Este producto ha sido fabricado de acuerdo a estrictas espe-
cicaciones y requerimientos de voltaje aplicables en el país
para el cual está destinado. Si ha comprado este producto
por internet, a través de correo, y/o venta telefónica, debe
usted vericar que el uso de este producto está destinado al
país en el cual reside. AVISO: El uso de este producto en un
país distinto al cual está destinado podría resultar peligroso y
podría invalidar la garantía del fabricante o distribuidor. Por
favor guarde su recibo como prueba de compra ya que de
otro modo el producto puede verse privado de la garantía del
fabricante o distribuidor.
* Todos los nombres de productos y compañías son marcas
comerciales o marcas registradas de sus respectivos propie-
tarios.
部件名称
有毒有害物质或元素
铅
(pb)
汞
(Hg)
镉
(Cd)
六价铬
(C r(V I))
多溴联苯
(PBB)
多溴二苯醚
(PBDE)
电路板 × ○ ○ ○ ○ ○
扬声器 ○ ○ ○ ○ ○ ○
液晶显示器 × ○ ○ ○ ○ ○
壳体 ○ ○ ○ ○ ○ ○
金属架 × ○ ○ ○ ○ ○
○ : 表示该有毒有害物质或元素在该部件所有均质材料中的含量均在
GB/T26572标准规定的限量要求以下。
× :
表示该有毒有害物质或元素至少在该部件的某一均质材料中的含量超
出GB/T26572标准规定的限量要求。
此标记适用于中华人民共和国销售的电子信息产品,标记中央的
数字表示环境保护使用期限的年数。
自制造日算起的此年月内,产品中的指定6物质不会向外部泄漏或发生突变,
不会产生环境污染或者对人体或财产带来深刻的影响。此环境保护使用期限
并不表示产品保证期限。

9
10
Mode métronome
Pour activer le mode métronome, appuyez sur le bouton RHYTHM/BEAT/
PATTERN/VOICE.
Appuyez sur le bouton START/STOP pour lancer le métronome. Appuyez
de nouveau sur le bouton START/STOP pour l’arrêter. En mode métronome,
vous pouvez changer le tempo, le nombre de temps, le rythme (le motif) et le
son du métronome
Réglage du tempo
Vous pouvez régler le tempo de trois façons diérentes: en mode balancier,
en mode intégral et en mode Tap Tempo.
Mode balancier et mode intégral
Le mode balancier vous permet d’augmenter et de diminuer le tempo selon
les mêmes unités qu’un métronome mécanique. Le mode intégral vous
permet d’augmenter et de diminuer le tempo par baements (pulsations)
par minute (BPM).
1.
Appuyez sur le bouton TEMPO/TAP TEMPO/SPLIT/RESET pour
acher le témoin “TEMPO” au l’écran.
2.
Maintenez le bouton TEMPO/TAP TEMPO/SPLIT/RESET enfoncé une
seconde pour sélectionner le mode balancier (le témoin
apparaît à
l’écran). Maintenez une fois de plus le bouton TEMPO/TAP TEMPO/
SPLIT/RESET enfoncé une seconde pour passer en mode intégral.
3.
Appuyez sur le bouton ▼ ou ▲ pour régler le tempo.
Tap Tempo (synchroniser le tempo avec un morceau)
Si vous appuyez plusieurs fois sur le bouton TEMPO/TAP TEMPO/SPLIT/
RESET selon un intervalle spécique, le BEATLAB mini détecte cet inter-
valle et l’utilise pour régler le tempo. Quand l’intervalle est détecté, “TAP
TEMPO” clignote sur l’écran. Le BEATLAB mini peut détecter des valeurs
de tempo comprises entre 30 et 300 baements par minute (BPM). Il est
impossible de régler le tempo en dehors de cee plage.
Réglages du rythme, du nombre de battements, du motif et
du son du métronome
Vous pouvez régler les paramètres RHYTHM (rythme) et BEAT (nombre
de baements) du métronome. En outre, vous pouvez changer le son du
métronome (VOICE) et jouer un motif de baerie (PATTERN).
1.
Appuyez sur le bouton RHYTHM/BEAT/PATTERN/VOICE jusqu’à ce que
“RHYTHM”, “BEAT”, “PATTERN” ou “VOICE” clignote sur l’écran.
2.
Réglez le paramètre choisi avec les boutons ▼ et ▲.
Astuce:
Les réglages dénis ici s’appliquent aussi au mode d’entraînement.
Astuce:
Si vous changez le nombre de temps en cours d’utilisation du
métronome, le changement intervient au premier temps de la
mesure suivante.
Astuce:
“PATTERN” s’ache uniquement quand le réglage de voix “P”
est sélectionné. Le nouveau motif (‘PATTERN’) choisi est activé
au début de la mesure suivante. Quand le réglage de voix “P” est
choisi, tout réglage de mesure et du nombre de baements déni
via la procédure ci-dessus est annulé et le motif est joué avec la voix
qui lui est aectée.
Mode d’entraînement
Pour activer le mode d’entraînement, appuyez sur le bouton TRAINING.
L’instrument mesure la diérence entre les baements du métronome et le
signal capté par le micro de contact branché à la Prise Détection Le métronome
vous fournit un repère sonore de votre degré d’exactitude rythmique pendant
la mesure, et vous donne une évaluation et une note d’ensemble à la n de la
mesure.
Connexion et réglage du micro de contact
1.
Vériez que le BEATLAB mini est hors tension, puis branchez le micro
de contact fourni à la Prise Détection
2.
Fixez la pince du micro de contact à un objet.
3.
Meez le BEATLAB mini sous tension, puis appuyez sur le bouton
MODE/SENS/GRADE jusqu’à ce que “SENS” clignote sur l’écran.
4.
Réglez la sensibilité de détection avec les boutons ▼ et ▲. Quand ce
réglage est élevé, le micro de contact détecte même de faibles vibrations.
Frappez l’objet (auquel le micro de contact est xé) avec la force souhai-
tée, puis réglez le seuil de détection de sorte que le symbole de détection
(
) s’ache.
Selon la composition de l’objet, l’endroit de frappe sur l’objet et
l’emplacement du microphone de contact sur l’objet, il se peut que des
vibrations ne soient pas captées, même si vous appliquez une force
de frappe constante. Quand vous réglez et vériez la sensibilité de
déclenchement, frappez l’objet au même endroit que le point utilisé en
mode d’entraînement.
Si vous laissez la pince xée sur un objet pendant une période prolon-
gée, il se pourrait qu’elle laisse une empreinte sur la surface de l’objet
quand vous la retirez. Notez en outre que selon la nition et/ou l’âge de
l’objet, il se pourrait que la pince laisse une empreinte après avoir été
brièvement xée à l’objet.
Veillez à mere le BEATLAB mini hors tension avant de brancher le
micro de contact.
N’enroulez pas le cordon du microphone autour du BEATLAB mini et ne
le tirez pas trop fortement, sous peine de le casser. Faites très aention à la
manipulation du cordon et microphone en toute circonstance.
Réglage du mode d’évaluation
L’instrument ore un mode d’évaluation vocal et un mode d’évaluation
sonore de votre performance.
Mode 1 (mode vocal - femme), Mode 2 (mode vocal - homme): Si votre
timing est calqué sur le métronome, la voix dit: “GOOD” (“Bien!”). En cas
d’écart, la voix dit: “TOO FAST” (“Trop rapide!”) ou “TOO SLOW” (“Trop
lent!”). Si, au l du jeu, votre timing reste correct, la voix vous dit alors
“GREAT” (“Super!”), “WONDERFUL” (“Fabuleux!”) ou “PERFECT” (“Par-
fait!”).
Mode 3 (mode sonore): Si votre timing est calqué sur le métronome, l’instru-
ment joue un son de caisse claire. Si votre timing s’éloigne du métronome,
l’instrument change de son et produit un son de cloche. Frappez l’objet
rigoureusement sur le temps de sorte que l’instrument continue de produire
le son de caisse claire.
1.
Appuyez sur le bouton MODE/SENS/GRADE jusqu’à ce que “MODE”
clignote sur l'écran.
2.
Choisissez le mode avec les boutons ▼ et ▲.
Astuce:
Quand vous jouez un motif en mode d’entraînement, le métro-
nome produit aussi simultanément un son de clic. Toutefois, selon
le timing de l’évaluation, il se pourrait que le son de clic ne soit pas
produit.
Réglage du niveau d’évaluation
L’instrument vous permet de choisir parmi six niveaux d’évaluation.
1.
Appuyez sur le bouton MODE/SENS/GRADE jusqu’à ce que “GRADE”
clignote sur l’écran.
2.
Sélectionnez le niveau d’évaluation avec les boutons ▼ et ▲. Plus le
numéro est élevé, plus l’instrument devient ‘sévère’ dans son évaluation.
Astuce:
Commencez par vous entraîner avec le niveau d’évaluation 1, puis
passez au niveau de diculté suivant.
Utilisation du mode d’entraînement
Astuce:
Eectuez les réglages de métronome en mode métronome.
1.
Appuyez sur le bouton START/STOP pour lancer le métronome. L’éva-
luation commence après un décompte d’une mesure.
2.
Frappez l’objet sur lequel vous avez xé le microphone de contact, en
vous calant sur les baements du métronome.
Une fois que huit mesures ont été jouées et évaluées, le métronome
s’arrête.
Faites aention de ne pas frapper le microphone de contact.
3.
Une fois que le métronome s’arrête, la note d’évaluation s’ache et le
témoin de balancier indique le niveau général de votre performance.
Plus votre écart avec le métronome est mince, plus la note sur 100 est
élevée. Si votre frappe est dans l’ensemble sur le temps, l’écran ache
“JUST” (“Correct”). Si vous tendez à anticiper le temps, un segment
s’ache dans la plage “FAST” (“Trop rapide”). Si par contre votre jeu est
plus lent que le métronome, un segment s’ache dans la plage “SLOW”
(“Trop lent”). Plus votre timing est proche de celui du métronome, plus
le segment aché se rapproche du point médian “JUST” (“Correct”).
Plus votre frappe s’écarte des baements du métronome, plus le segment
allumé est éloigné du point “JUST”.
Mode sonore
Quand vous appuyez sur le bouton SOUND/CALIB, le BEATLAB mini
active son mode sonore et produit une note de référence. Cee note de réfé-
rence peut servir de guide pour vous accorder.
Vous pouvez aussi régler le nom de la note de référence et la fréquence (calibrage).
Sélectionnez le nom de la note de référence
1.
Appuyez sur le bouton SOUND/CALIB pour acher le témoin “NOTE”
à l’écran.
Pied (clip de ceinture) et orice pour cordon
Le dos du BEATLAB mini comporte un ori-
ce pour cordon ainsi qu’un pied, qui peut
aussi servir de clip de ceinture.
Pour utiliser le pied, exercez une pression
des doigts sur les emplacements marqués
d’une èche (a), puis déployez (b) le pied.
Pour utiliser le pied comme clip de ceinture,
fermez-le, puis xez-le sur la ceinture en veil-
lant à ce que le BEATLAB mini soit correctement
maintenu en place.
Vous pouvez passer un cordon, etc. dans l’orice
prévu à cet eet. C’est pratique pour utiliser le
BEATLAB mini comme chronomètre.
Mise sous/hors tension
Appuyez sur le bouton pour mere l’appareil sous tension. Le
BEATLAB mini est en mode métronome. Pour mere le BEATLAB
mini hors tension, appuyez à nouveau sur le bouton
. L’alimentation
est automatiquement coupée si le métronome reste inutilisé durant 20
minutes (fonction de coupure automatique d’alimentation).
Restoration des d’usine
Tout en maintenant le bouton SOUND/CALIB enfoncé, appuyez sur
le bouton
.
Rétroéclairage
Appuyez sur le (bouton du rétroéclairage) pour régler le rétroéclai-
rage. A chaque fois que vous appuyez sur ce bouton, le rétroéclairage
sera déni de la manière suivante Léger Auto O Léger…
Léger: Faible intensité d’éclairage par soucis d’économie d’énergie.
Auto: A chaque diusion de note ou pression de touche, le rétro-
éclairage est activé. Si aucun signal n’est reçu ou aucun bouton
n’est utilisé en l’espace de 10 secondes, le rétroéclairage passera
automatiquement au réglage léger.
Astuce:
Quand vous utilisez la minuterie, le rétroéclairage se
met à clignoter une fois la durée programmée écoulée.
Astuce:
En mode d’entraînement, le rétroéclairage (intense)
s’allume pendant environ 10 secondes quand le métro-
nome s’arrête.
O: Le rétroéclairage est désactivé.
(a)
(a)
(b)
orifice pour
cordon
2.
Appuyez sur le bouton ▲ ou ▼ pour sélectionner la note.
Réglage du calibrage
1.
Appuyez sur le bouton SOUND/CALIB pour acher le témoin
“CALIB” à l’écran.
2.
Utilisez le bouton ▲ ou ▼ pour régler le calibrage. Vous pouvez
régler le calibrage par incréments de 1 Hz.
Minuterie et chronomètre
Minuterie
1.
Appuyez sur le bouton TIMER/STOP WATCH pour acher le témoin
“TIMER” à l’écran.
2.
Utilisez le bouton ▲ ou ▼ pour régler a durée du décompte (par pas
de 1 minutes).
3.
Appuyez sur le bouton START/STOP pour lancer le compte à rebours. Si
vous appuyez sur le bouton START/STOP pendant le compte à rebours,
ce dernier sera interrompu. Si vous appuyez de nouveau sur le bouton
START/STOP, le compte à rebours reprendra à partir de la pause. Si vous
appuyez sur le bouton TEMPO/TAP TEMPO/SPLIT/RESET pendant la
pause, le réglage reviendra à la durée spéciée. La minuterie poursuivra le
compte à rebours même si vous passez dans un mode diérent.
4.
Une alarme sonnera quand le temps spécié se sera écoulé. Appuyez
sur un bouton quelconque pour arrêter la sonnerie.
Chronomètre
1.
Appuyez sur le bouton TIMER/STOP WATCH pour acher le
témoin “STOPWATCH.” à l’écran.
2.
Appuyez sur le bouton START/STOP pour commencer à mesurer le
temps écoulé. Si vous appuyez sur le bouton TEMPO/TAP TEMPO/
SPLIT/RESET pendant que le temps écoulé est mesuré, le temps intermé-
diaire sera aché. Si vous appuyez de nouveau sur le bouton TEMPO/
TAP TEMPO/SPLIT/RESET pendant que le temps intermédiaire est
aché, l’indication de temps intermédiaire disparaîtra. Le chronomètre
continuera à fonctionner même si vous passez dans un mode diérent.
3.
Pour arrêter le chronomètre, appuyez de nouveau sur le bouton
START/STOP. Appuyez sur le bouton TEMPO/TAP TEMPO/SPLIT/
RESET pour remere l’achage du temps à zéro.
Spécications
Mode métronome
Plage de réglage du tempo: q = 30~300 baements par minute (bpm),
Réglages de tempo: mode balancier, mode intégral, mode Tap Tempo,
Temps: 0~9 temps, Rythme: Noire, Croche, Triolet (
, , ), Double
croche ( , , ), Nombre de motifs: 30 (voyez la liste des motifs),
Nombre de voix: 4 (voyez la liste des voix), Précision du tempo: +/-0.2 %
Mode d’entraînement
Modes: Voix de femme, voix d’homme, mode sonore, Niveaux d’évalua-
tion: 1~6, Sensibilité de déclenchement: 1~30
Mode sonore
Note de référence: Gamme chromatique tempérée C4~B4 (C, C
♯
, D, D
♯
, E,
F, F
♯
, G, G
♯
, A, A
♯
, B
), Plage de calibrage du diapason: 438 Hz~445 Hz (par
pas de 1 Hz), Précision de la note de référence: +/-1 cent ou mieux
Minuterie et chronomètre
Plage de réglage de la minuterie: 1~99 minutes,
Plage de réglage du chro-
nomètre: 0,1 seconde
~
99 minutes 59,9 secondes
Fiche technique
Prises: Prise Détection (prise jack mono de 6,3 mm), Prise casque (prise
minijack stéréo de 3,5 mm), Haut-parleur: Dynamique (max. 0,5 W,
φ23 mm), Alimentation: Deux piles AAA(alcalines ou nickel-métal-
hydrure), Durée de vie des piles: Environ 30 heures ( avec les réglages
“TEMPO=120”, “BEAT=4”, ”RHYTHM=Noire” et ”VOICE=1”, avec des
piles alcalines), Dimensions (L x P x H): 82 mm x 82 mm x 27 mm, Poids:
97 g (piles comprises), Accessoires fournis: Manuel d’utilisation, micro de
contact, deux piles AAA
* Les réglages de chaque mode sont conservés après la mise hors tension.
Cependant, quand vous changez les piles, tous les réglages sont initialisés
de la façon suivante.
Valeurs par défaut: BEAT=4, RHYTHM= q (noire), TEMPO=120, FULL
STEP, PATTERN=1, VOICE=1, SENS=30, GRADE=1, MODE=1, NOTE=A,
CALIB=440 Hz, TIMER=1 minute
* Les caractéristiques et l’aspect du produit sont susceptibles d’être modi-
és sans avis préalable en vue d’une amélioration.
Nom des éléments et mise sous tension
1.
Bouton (Interrupteur)
2.
Bouton ▼(Bas)
3.
Bouton ▲(Haut)
4.
Bouton SOUND/CALIB
5.
Bouton RHYTHM/BEAT/
PATTERN/VOICE
6.
Bouton TRAINING
7.
Bouton MODE/SENS/
GRADE
8.
Bouton TIMER/STOP
WATCH
9.
(Bouton du rétroéclai-
rage)
10.
Bouton TEMPO/TAP
TEMPO/SPLIT/RESET
11.
Bouton START/STOP
12.
Prise Détection (monopho-
nique)
Cee prise permet de
brancher le microphone de
contact fourni.
13.
Prise casque (minijack stéréo)
Cee prise permet de bran-
cher un casque d’écoute.
Quand vous branchez un
casque à l’instrument, le son
du haut-parleur interne est
coupé.
14.
VOL (commande de
volume)
Cee commande règle le
volume du haut-parleur ou
du casque branché.
15.
Ecran
16.
Haut-parleur.
P
A
T
T
E
R
N
/
V
O
I
C
E
S
T
O
P
W
A
T
C
H
G
R
A
D
E
S
O
U
N
D
/
C
A
L
I
B
T
R
A
I
N
I
N
G
T
I
M
E
R
M
O
D
E
/
S
E
N
S
R
H
Y
T
H
M
/
B
E
A
T
T
E
M
P
O
/
T
A
P
T
E
M
P
O
V
O
L
.
S
P
L
I
T
/
R
E
S
E
T
S
T
A
R
T
/
S
T
O
P
BEATLAB
mini
RHYTHM TRAINER
1
2
3
4 5
76 8
9
10
11
12
13
15
14
16
Fr

11 12
PATTERN/VOICE-Taste.
Drücken Sie den START/STOP-Taster, um das Metronom zu starten. Drück
en Sie den START/STOP-Taster erneut, um es anzuhalten. Im Metronom-
modus können Sie das Tempo, die Taktart, den Rhythmus und die Stimme
wählen.
Einstellen des Tempos
Das Tempo kann auf drei Arten eingestellt werden: In Pendelsch ri en, in
Einzelsch rien und mit dem Tap Tempo-Verfahren.
Pendel- und Einzelschritte
Im Pendelsch ri modus ändert sich das Tempo in den gleich en Schriin-
tervallen wie bei einem mechanisch en Metronom. Im Einzelsch ri modus
ändert sich das Tempo in linearen BPM-Sch ri en.
1.
Drücken Sie den TEMPO/TAP TEMPO/SPLIT/RESET-Taster, damit die
„TEMPO“-Anzeige in der Display-Mi e erscheint.
2.
Halten Sie den TEMPO/TAP TEMPO/SPLIT/RESET-Taster eine Sekunde
gedrückt, um den Pendelschrimodus zu wählen (siehe das „
“-Sym-
bol). Halten Sie den TEMPO/TAP TEMPO/SPLIT/RESET-Taster erneut
eine Sekunde gedrückt, um den Einzelsch ri modus zu wählen.
3.
Stellen Sie mit dem ▼oder ▲-Taster das Tempo ein.
‘Tap Tempo’ (Eintippen des gewünschten Tempos)
Wenn Sie den TEMPO/TAP TEMPO/SPLIT/RESET-Taster wiederholt im
gewünsch ten Tempo drücken, berech net das BEATLAB mini automatisch
das entsprechende Tempo und stellt dieses ein.
Ist das Tempo ermielt,
blinkt „TAP TEMPO“ im Display.
Das BEATLAB mini unterstüt Tem-
powerte im Bereich 30–300. Niedrigere oder höhere Werte können nicht
eingestellt werden.
Rhythmus, Taktart, Pattern und Sound einstellen
Mit RHYTHM und BEAT stellen Sie Rhythmus und Taktart des Metronoms
ein. Sie können zudem einen anderen Metronomton auswählen (VOICE)
sowie ein Schlagzeugpaern (PATTERN) wiedergeben.
1.
Drücken Sie die RHYTHM/BEAT/PATTERN/VOICE-Taste, bis im
Display „RHYTHM“, „BEAT“, „PATTERN“ oder „VOICE“ blinkt.
2.
Wählen Sie mit der ▼oder ▲-Taste eine Einstellung aus.
Tipp:
Die im Metronommodus Einstellungen gelten auch im Übungsmo-
dus.
Tipp:
Wenn Sie die Taktart bei laufendem Metronom ändern, wird die
neue Einstellung erst ab dem näch sten Takt übernommen.
Tipp:
„PATTERN“ wird nur angezeigt, wenn die Voice-Einstellung „P“
ausgewählt ist. Wird die neue Einstellung erst ab dem nächsten Takt
übernommen. Ist die Voice-Einstellung „P“ ausgewählt, werden
die wie oben beschrieben eingestellte Taktart und der Rhythmus
deaktiviert und das zuvor gewählte Paern wird wiedergegeben.
Übungsmodus
Den Übungsmodus rufen Sie mit der TRAINING-Taste auf.
Nun werden die Abweichungen zwischen Metronomschlag und dem Ein-
gangssignal des an der Trigger-Buchse angeschlossenen Kontaktmikrofons
gemessen.
Der Grad der Abweichung wird während der Messung durch Töne
angezeigt; Bewertung und Tendenz erscheinen nach der Messung im Display.
Anschluss und Anbringen des Kontaktmikrofons
1.
Achten Sie darauf, dass das BEATLAB mini ausgeschaltet ist und
schließen Sie das im Lieferumfang enthaltene Kontaktmikrofon an die
Trigger-Buchse an.
2.
Befestigen Sie den Clip des Kontaktmikrofons an einem Objekt.
3.
Schalten Sie das BEATLAB mini ein und drücken Sie so lange die
MODE/SENS/GRADE-Taste, bis „SENS“im Display blinkt.
4.
Wählen Sie mit der ▼oder ▲-Taste die Triggerempndlichkeit aus.
Bei höheren Werten lösen auch schwache Vibrationen den Trigger aus.
Trommeln Sie auf das Objekt, an dem das Kontaktmikrofon befestigt
ist und stellen Sie die Triggerempndlichkeit so ein, dass das Trigger-
symbol (
) erscheint.
Je nach Materialart des Objekts sowie in Abhängigkeit von der Schlag-
äche und vom Anbringungsort des Mikrofons können beim Trommeln
aufs Objekt nicht alle Vibrationen ermielt werden. Verwenden Sie
deshalb beim Einstellen und Prüfen der Trigger-Empndlichkeit die
Schlagäche, auf der Sie später auch üben werden.
Wenn Sie den Clip über längere Zeit an einem Gegenstand befestigt
lassen, kann beim Entfernen ein Fleck zurückbleiben. Je nach Alter
des Gegenstands oder des Zustands von dessen Oberäche kann es
schon nach kurzen Zeiträumen zu Beschädigungen kommen.
Achten Sie stets darauf, dass das BEATLAB mini ausgeschaltet ist,
bevor Sie das Kontaktmikrofon anschließen.
Wickeln Sie das Mikrofonkabel nicht um den BEATLAB mini herum und
vermeiden Sie starken Zug auf dem Kabel, da es sonst zum Kabelbruch
kommen kann. Gehen Sie zu jeder Zeit sorgsam sowohl mit dem Kabel
als auch dem Mikrofon um.
Modus auswählen
Die Auswertung der Messung kann in zwei Stimm-Modi und einem
Sound-Modus erfolgen.
Modus1 (Frauenstimme-Modus), Modus 2 (Männerstimme-Modus): Falls
keine Abweichung zum Metronom auftri, sagt die Stimme „GOOD“. Im
Fall einer Abweichung sagt die Stimme „TOO FAST“ (zu schnell) oder
„TOO SLOW“ (zu langsam). Falls Sie längere Zeit ohne Abweichung vom
Metronom spielen, kommentiert die Stimme dies nach dem „GOOD“ erst
mit „GREAT“, dann mit„WONDERFUL“ und schließlich mit „PERFECT“.
MODUS 3 (Sound-Modus): Falls keine Abweichung zum Metronom auf-
tri, ist ein Snare-Schlag zu hören. Falls Sie vom Tempo abweichen, ertönt
eine Kuhglocke. Trommeln Sie im Takt auf dem Objekt, damit der Snare-
Schlag regelmäßig zu hören ist.
1.
Drücken Sie so lange die MODE/SENS/GRADE-Taste, bis „MODE“im
Display blinkt.
2.
Wählen Sie mit der ▼oder ▲-Taste einen Modus aus.
Tipp:
Wird ein Paern im Übungsmodus wiedergegeben, ist gleichzeitig
auch ein Klicken zu hören. Je nach Timing der Auswertung kann
dieses Klicken jedoch auch nicht erzeugt werden.
Bewertungsgrad einstellen
Sie können für die Bewertung sechs verschiedene Schwierigkeitsgrade
auswählen.
1.
Drücken Sie so lange die MODE/SENS/GRADE-Taste, bis „GRADE“im
Display blinkt.
2.
Wählen Sie mit der ▼oder ▲-Taste den Bewertungsgrad aus. Je höher
der Wert, desto genauer werden Timingschwankungen ermielt.
Tipp:
Fangen Sie mit Stufe 1 an und erhöhen Sie den Schwierigkeitsgrad
allmählich.
Üben im Übungsmodus
Tipp:
Nehmen Sie die Metronomeinstellungen im Metronommodus vor.
1.
Starten Sie das Metronom mit der START/STOP-Taste. Nach einem Vor-
zähltakt beginnt die Messung.
2.
Trommeln Sie im Takt auf das Objekt, an dem das Kontaktmikrofon
befestigt ist.
Nach acht Takten endet die Messung und das Metronom stoppt.
Trommeln Sie nie auf das Kontaktmikrofon selbst.
3.
Nachdem das Metronom stoppt, erscheint die Bewertung und die
Pendelskala zeigt die Tendenz an.
Je geringer die Abweichung, desto höher die Bewertung auf der
100-Punkte-Skala. Falls Ihr Timing korrekt ist, wird „JUST“ angezeigt.
Fall Sie dazu tendieren, schneller zu werden, weicht die Anzeige in
Richtung „FAST“ aus. Fall Sie dazu tendieren, langsamer zu werden,
weicht die Anzeige in Richtung „SLOW“ aus. Je geringer die Dierenz
zwischen Metronom und Ihrem Timing, desto näher liegt die Anzeige
bei „JUST“. Je höher diese Dierenz, desto weiter entfernt liegt die
Anzeige von „JUST“.
Referenztonmodus
Wird die SOUND/CALIB-Taste gedrückt, fährt das BEATLAB mini in
den Referenztonmodus und produziert einen Referenzton. Nach diesem
Referenzton können Sie Ihr Instrument stimmen.
Im Referenztonmodus kann man den Notennamen und die Kammertonfre-
quenz einstellen.
Einstellen des Notennamens
1.
Drücken Sie den SOUND/CALIB-Taster, damit die „NOTE“-Anzeige
ersch eint.
2.
Drücken Sie den ▼oder ▲-Taster, um den Notennamen zu wählen.
Einstellen der Kalibrierung
1.
Drücken Sie die SOUND/CALIB-Taste, so dass das display „CALIB”
anzeigt.
2.
Verwenden Sie die ▼oder ▲-Taster, zum Justieren der Kalibrierung.
Sie können die Kalibrierung in Schrien von 1 Hz justieren.
Ständer (Gürtelclip) und Öse
Auf der Rückseite des BEATLAB mini ben-
den sich eine Öse und ein Ständer, der auch
als Gürtelclip dient.
Um den Ständer aufzuklappen, drücken Sie
die Seiten (a) in Pfeilrichtung und ziehen den
Bügel (b) heraus.
Um ihn als Gürtelclip zu verwenden, klap-
pen Sie den Bügel ein, bis er einrastet und
klemmen Sie den BEATLAB mini an Ihrem
Gürtel fest.
An der Öse können Sie z. B. eine Trageschlaufe oder ein
Halsband befestigen. Dies erleichtert die Verwendung
des BEATLAB mini als Stoppuhr.
Ein-/Ausschalten
Drücken Sie den -Taste, um das Gerät einzusch alten.Das BEATLAB
mini wech selt automatisch in den Metronommodus. Zum Ausschalten
drücken Sie die
-Taste erneut. Wenn Sie das Metronom ungefähr 20 Mi-
nuten lang nicht verwenden, schaltet es sich selbsätig aus(Energiespar).
Wiederherstellen der Werksvorgaben
Während Sie die SOUND/CALIB-Taste gedrückt halten, drücken Sie die
-Taste.
Hintergrundbeleuchtung
Drücken Sie bei Bedarf die -Taste, um die Hintergrundbeleuchtung
einzustellen. Mit jedem Tastendruck verändert sich die Hintergrundbe-
leuchtung gemäß folgendem Schema:
Soft → Auto → Aus → Soft …
Soft: Geringe Leuchtstärke zum Schonen der Baerie.
Auto: Die Hintergrundbeleuchtung leuchtet hell, wenn ein Eingangssi-
gnal empfangen wird und wenn die Tasten gedrückt werden. Wenn
10 Sekunden lang kein Ton gespielt oder keine Taste gedrückt wird,
verringert sich die Beleuchtungsstärke automatisch.
Tipp:
Bei der Verwendung als Timer blit die Hintergrundbe-
leuchtung nach Ablauf der vorgegebenen Zeit.
Tipp:
Im Trainingsmodus leuchtet die Hintergrundbeleuchtung
etwa 10 Sekunden lang hell auf, wenn das Metronom stoppt.
Aus: Die Hintergrundbeleuchtung ist deaktiviert.
Metronommodus
Zum Aufrufen des Metronommodus drücken Sie die RHYTHM/BEAT/
(a)
(a)
(b)
Öse
Timer und Stoppuhr
Timer
1.
Drücken Sie die TIMER/STOP WATCH-Taste, so dass das
display „TIMER” anzeigt.
2.
Stellen Sie mit der ▼ oder ▲-Taste die Countdowndauer
ein (in Schrien von 1 Minute).
3.
Drücken Sie die START/STOP-Taste zum Starten der Timer-
Herunterzählung. Wenn Sie mit der START/STOP-Taste wäh-
rend der Herunterzählung stoppen, wird die Herunterzählung
unterbrochen. Wenn Sie die START/STOP-Taste erneut drü-
cken, wird die Herunterzählung von der unterbrochenen Stelle
fortgeset. Wenn Sie die TEMPO/TAP TEMPO/SPLIT/RESET
-Taste im Pausezustand drücken, wird die Einstellung auf die
festgelegte Dauer zurückgeset. Der Timer set die Zählung
fort, auch wenn Sie auf einen anderen Modus umschalten.
4.
Ein Alarm wird ausgegeben, wenn die festgelegte Zeit abge-
laufen ist. Drücken Sie eine beliebige Taste zum Stoppen des
Alarmtons.
Stoppuhr
1.
Drücken Sie die TIMER/STOP WATCH-Taste, um das display
„STOPWATCH.” anzeigen zu lassen.
2.
Drücken Sie die START/STOP-Taste zum Starten der Zeitmes-
sung. Wenn Sie die TEMPO/TAP TEMPO/SPLIT/RESET-Taste
bei der Zeitmessung drücken, wird die Split-Zeit angezeigt.
Wenn Sie die TEMPO/TAP TEMPO/SPLIT/RESET-Taste erneut
drücken, während die Split-Zeit angezeigt wird, verschwindet
die Split-Zeitanzeige. Die Stoppuhr läuft weiter, auch wenn Sie
auf einen anderen Modus umschalten.
3.
Zum Stoppen der Zeitmessung drücken Sie die START/STOP-
Taste erneut. Drücken Sie die TEMPO/TAP TEMPO/SPLIT/
RESET-Taste zum Rückstellen der Zeitanzeige auf Null.
Specications
Metronommodus
Tempobereich : q = 30–300 Taktschläge/Minute (BPM), Tempoein-
stellung: Pendelschrie, Einzelschrie, Tap Tempo, Taktart: 0–9
Taktschläge, Rhythmus: Viertelnote, Ach telnote, Triole (
,
, ), Sech zehntelnote ( , , ), Anzahl der Paern: 30
(Siehe Paern-Liste), Anzahl der Sounds: 4 (Siehe Sound-Liste),
Tempogenauigkeit: ±0,2%
Übungsmodus
Modus: Frauenstimme-Modus, Männerstimme-Modus, Sound-Modus,
Schwierigkeitsgrad: 1–6, Trigger-Empndlichkeit: 1–30
Referenztonmodus
Referenznote: Zwölf Halbtöne, gleich sch webende Stimmung C4–
B4 (
C, C
♯
, D, D
♯
, E, F, F
♯
, G, G
♯
, A, A
♯
, B), Kammertonfrequenz:
438Hz–445Hz (in 1Hz-Schrien), Referenztongenauigkeit: ±1 Cent
oder besser
Timer und Stoppuhr
Zeitbereich:1–99 Minuten, Stoppuhr-Messbereich: 0,1 Sekunden bis
99 Minuten und 59,9 Sekunden
Technische Daten
Ansch lüsse: Trigger-Buchse (mono, 6,3 mm), Kopörerbuchse
(stereo, 3,5 mm Miniklinke), Lautsprecher: Dynamischer Laut-
sprecher (max. 0,5 W, φ23 mm), Stromversorgung: Zwei AAA-
Baerien(Alkali-Baerien oder Nickel-Metallhydridakkus), Baeri-
elebensdauer: Ca. 30 Stunden (wenn das Metronom mit Alakalibat-
terien betrieben wird, TEMPO=120, BEAT=4, RHYTHM=Viertelnote
und VOICE=1), Abmessungen (B x T x H): 82 mm x 82 mm x
27 mm, Gewicht: 97 g (inklusive Baerien), Included items: Bedie-
nungshandbuch, Kontakt mikrofon, zwei AAA-Baerien
* Beim Aussch alten werden alle vorgenommenen Einstellungen
gepu ert. Bei der Initialisierung werden alle Funktionen auf
folgende Werte zurück gestellt.
Vorgabewerte: BEAT=4, RHYTHM= q (Viertelnote), TEMPO=120,
FULL STEP, PATTERN=1, VOICE = 1, SENS=30, GRADE=1,
MODE=1, NOTE=A, CALIB=440 Hz, TIMER=1 minute
* Änderungen der tech nisch en Daten und des Designs ohne vor-
herige Ankündigung vorbehalten.
Bedienelemente und Einschalten
1.
-Taste (Neschalter)
2.
▼-Taste (Auf)
3.
▲-Taste (Ab)
4.
SOUND/CALIB-Taste
5.
RHYTHM/BEAT/PATTERN/
VOICE-Taste
6.
TRAINING-Taste
7.
MODE/SENS/GRADE-Taste
8.
TIMER/STOP WATCH-Taste
9.
-Taste (Beleuchtungstaste)
10.
TEMPO/TAP TEMPO/SPLIT/
RESET-Taste
11.
START/STOP-Taste
12.
Trigger-Buchse (Mono)
Buchse zum Anschluss des
im Lieferumfang enthaltenen
Kontaktmikrofons.
13.
Kopörerbuchse (Stereo
mini)
Zum Anschluss eines Kopf-
hörers. Beim Anschluss eines
Kopörers wird der Laut-
sprecher stumm geschaltet.
14.
VOL (Volume)
Regelt die Lautstärke des
Lautsprechers bzw. Kopö-
rers.
15.
Display
16.
Lautsprecher
P
A
T
T
E
R
N
/
V
O
I
C
E
S
T
O
P
W
A
T
C
H
G
R
A
D
E
S
O
U
N
D
/
C
A
L
I
B
T
R
A
I
N
I
N
G
T
I
M
E
R
M
O
D
E
/
S
E
N
S
R
H
Y
T
H
M
/
B
E
A
T
T
E
M
P
O
/
T
A
P
T
E
M
P
O
V
O
L
.
S
P
L
I
T
/
R
E
S
E
T
S
T
A
R
T
/
S
T
O
P
BEATLAB
mini
RHYTHM TRAINER
1
2
3
4 5
76 8
9
10
11
12
13
15
14
16
De

13
14
Modo de Metrónomo
Para acceder al modo de Metrónomo, pulse el botón RHYTHM/BEAT/PAT-
TERN/VOICE.
Pulse el botón START/STOP para iniciar el metrónomo. Para detenerlo,
presione el botón START/STOP de nuevo. En el modo de Metrónomo, puede
cambiar el tempo, el compás, el ritmo, el patrón y la voz del metrónomo.
Ajuste del Tempo
Hay tres maneras de establecer el tempo: usando Pendulum Step, Full Step,
y Tap Tempo.
Pendulum Step y Full Step
Pendulum Step permite aumentar o disminuir el Tempo con el mismo paso
como en un metrónomo mecánico. Full Step permite aumentar o disminuir
el Tempo en incrementos de un BPM.
1.
Pulse el botón TEMPO/TAP TEMPO/SPLIT/RESET para mostrar el
indicador
“
TEMPO” en la pantalla.
2.
Pulse y mantenga pulsado el botón TEMPO/TAP TEMPO/SPLIT/RE-
SET durante un segundo seleccionar paso de péndulo (
, aparecerá
el indicador ). Pulse y mantenga pulsado el botón TEMPO/TAP
TEMPO/SPLIT/RESET
de nuevo durante un segundo para pasar a
paso completo Full step.
3.
Pulse los botones ▼ o ▲ para ajustar el valor de tempo.
Tap Tempo (Ajuste del Tempo en sincronización con una canción)
Si pulsa el botón TEMPO/TAP TEMPO/SPLIT/RESET repetidamente con un
intervalo especíco de BPM, el BEATLAB mini detectará el intervalo y estable-
cerá el tempo en consecuencia. Cuando se detecte el intervalo, “TAP TEMPO”
parpadeará en la pantalla. El BEATLAB mini puede detectar valores de tempo
en el rango de 30 a 300. No puede establecer un tempo fuera de este rango.
Ajustar el ritmo, el compás, el patrón y la voz
Es posible especicar los ajustes del metrónomo correspondientes a
RHYTHM (RITMO) y BEAT (COMPÁS). Además, se puede cambiar el
sonido o voz del metrónomo (VOICE) y se puede reproducir un patrón de
percusión (PATTERN).
1.
Pulse el botón RHYTHM/BEAT/PATTERN/VOICE hasta que la panta-
lla muestre parpadeando “RHYTHM” (RITMO), “BEAT” (COMPÁS),
“PATTERN” (PATRÓN) o “VOICE” (VOZ).
2.
Utilice el botón ▼ o el botón ▲ para seleccionar el ajuste.
Consejo:
Los ajustes en el modo de Metrónomo también se utilizarán en
el modo de Práctica.
Consejo:
Si cambia el compás mientras se está ejecutando el metrónomo,
el compás cambiará en el primer tiempo del siguiente compás.
Consejo:
“PATTERN” (PATRÓN) aparece solo cuando se selecciona “P”
como ajuste de voz. El nuevo ajuste de patrón se aplicará en el
primer tiempo del siguiente compás. Cuando se selecciona “P”
como ajuste de voz, se cancelará cualquier ajuste de compás
y de ritmo especicados mediante el procedimiento descrito
anteriormente, y se reproducirá el patrón utilizando la voz
especicada para dicho patrón.
Modo de Práctica
Para acceder al modo de Práctica, pulse el botón TRAINING.
En este modo se mide la diferencia entre el compás del metrónomo y la señal
de entrada procedente del micrófono de contacto conectado al jack Trigger. El
grado de desviación se indica mediante sonido durante la medición, y la cali-
cación y la tendencia global aparecen en la pantalla después de la medición.
Conexión y ajuste del micrófono de contacto
1.
Asegúrese de que el BEATLAB mini está apagado, y a continuación
conecte en el jack Trigger el micrófono de contacto incluido.
2.
Sujete el clip del micrófono de contacto a un objeto.
3.
Encienda el BEATLAB mini, y a continuación pulse el botón MODE/
SENS/GRADE hasta que “SENS” parpadee en la pantalla.
4.
Utilice el botón ▼ o el botón ▲ para ajustar la sensibilidad del dis-
parador (trigger). Si se ajusta en un valor alto, se captarán incluso las
vibraciones débiles. Después de golpear el objeto (donde está sujeto el
micrófono de contacto) con la fuerza adecuada, ajuste la sensibilidad del
disparador de forma que aparezca la marca del disparador (
).
Dependiendo del material del objeto, así como de dónde se golpee el objeto
y de dónde esté sujeto el micrófono de contacto, es posible que no se cap-
ten algunas vibraciones, incluso aunque el objeto se golpee siempre con la
misma fuerza. Cuando ajuste y compruebe la sensibilidad del disparador,
golpee el objeto en el mismo punto que durante el modo de Práctica.
Si deja el clip jado durante un periodo prolongado, es posible que
deje una marca supercial al retirarlo. En función de la antigüedad del
objeto o del estado de su acabado, podría resultar dañado sin importar
la duración.
Asegúrese de apagar el BEATLAB mini antes de conectar el micrófono
de contacto.
No doble el cable del micrófono alrededor del BEATLAB mini ni tire del
cable con fuerza, ya que dicho cable se podría romper. Ponga especial
cuidado en la manipulación del cable y del micrófono en todo momento.
Selección del modo
Las evaluaciones durante la medición se producen en los modos de voz y
en el modo de sonido.
Mode 1 (modo de voz femenina), Mode 2 (modo de voz masculina): Si no
hay desviación del metrónomo, la voz dice “GOOD” (BIEN). Si hay desvia-
ción, la voz dice “TOO FAST” (DEMASIADO RÁPIDO) o “TOO SLOW”
(DEMASIADO LENTO). Si la interpretación continúa sin desviación, la voz
cambia de “GOOD” (BIEN) a “GREAT” (ESTUPENDO), “WONDERFUL”
(MARAVILLOSO) o “PERFECT” (PERFECTO).
Mode 3 (modo de sonido): Si no hay desviación del metrónomo, se pro-
duce el sonido de una caja de batería. Si la desviación aumenta, el sonido
cambia a un cencerro. Golpee el objeto a la vez que el compás de forma que
continúe produciéndose el sonido de caja.
1.
Pulse el botón MODE/SENS/GRADE hasta que “MODE” parpadee en
la pantalla.
2.
Utilice el botón ▼ o el botón ▲ para seleccionar el modo.
Consejo:
Al reproducir un patrón en el modo de Práctica, también se
reproduce al mismo tiempo un sonido de clic. Sin embargo,
dependiendo cómo sea el seguimiento del tiempo de la evalua-
ción, el sonido de clic podría no producirse.
Selección del nivel de calicación
Hay seis niveles de dicultad para realizar la evaluación.
1.
Pulse el botón MODE/SENS/GRADE hasta que “GRADE” (CALIFICA-
CIÓN) parpadee en la pantalla.
2.
Utilice el botón ▼ o el botón ▲ para seleccionar el nivel de calicación.
Si se ajusta en un valor alto, el nivel de calicación de las evaluaciones
será más estricto.
Consejo:
Comience practicando con el nivel de calicación 1 y después
aumente gradualmente el nivel de dicultad.
Utilización del modo de Práctica
Consejo:
Especique los ajustes del metrónomo desde el modo de Metró-
nomo.
1.
Pulse el botón START/STOP para iniciar el metrónomo. Después de
una cuenta de entrada de un compás, comienza la medición.
2.
Golpee el objeto al que está sujeto el micrófono de contacto siguiendo el
compás.
Una vez que se han medido ocho compases y ha terminado la medición,
el metrónomo se detiene.
No golpee el micrófono de contacto en sí mismo.
3.
Después de que el metrónomo se detenga, aparecerá la calicación y el
indicador de péndulo mostrará la tendencia global.
Cuanto menor sea la desviación, más alta será la calicación en la escala
de 100 puntos.Si la señal procedente del disparador (trigger) sigue
correctamente el compás, se indicará “JUST” (CORRECTO). Si tiende a
adelantarse con respecto al compás, aparecerá un indicador en la
dirección de “FAST” (RÁPIDO). Si tiende a atrasarse con respecto al
compás, aparecerá un indicador en la dirección de “SLOW” (LENTO).
Si la diferencia entre la señal del disparador y el compás es pequeña, el
indicador aparecerá cerca de “JUST”. Si la diferencia es grande, el
indicador aparecerá lejos de “JUST”.
Modo de Salida de Sonido
Cuando se pulsa el botón SOUND/CALIB, el BEATLAB mini accede al
modo de Salida de Sonido y produce un tono de referencia. El tono de
referencia puede utilizarse como guía de anación.
También puede especi car el nombre de la nota y la frecuencia (cali-
bración) del tono de referencia en el modo de Salida de Sonido.
Especicar el nombre de nota
1.
Pulse el botón SOUND/CALIB para mostrar el indicador de nota
Soporte (clip de cinturón) y oricio para cordón
En la parte posterior del BEATLAB
mini hay un oricio para cordón y un
soporte, que también se puede utilizar
como clip de sujeción al cinturón.
Para utilizar el soporte, pulse hacia
adentro en los puntos que indican las
echas (a) y después despliegue el
soporte (b).
Para utilizar el soporte como clip de
cinturón, cierre el soporte y después
sujete el BEATLAB mini pillando su cinturón
con el clip de modo que quede bien seguro.
También se puede colocar un cordón de cuello,
etc., a través del oricio que tiene la unidad a tal efecto. Esto es útil
para utilizar el BEATLAB mini como cronómetro.
Encendido/apagado
Pulse el botón para encender la unidad. En este momento, el
BEATLAB mini entra en modo de Metrónomo.Para apagar el
BEATLAB mini, vuelva a pulsar el botón
otra vez. La unidad se
apaga automáticamente si el metrónomo no ha sido usado durante
20 minutos (Auto power-o).
Restablecer los ajustes de fábrica
Mientras mantiene pulsado el botón SOUND/CALIB, pulse el botón .
Luz de fondo
En caso necesario, pulse el botón para denir la luz de fondo.
Cada vez que pulse el botón , podrá alternar entre Suave Auto
Desactivada Suave…
Suave: iluminación de baja intensidad para evitar el consumo de las
pilas.
Auto: la luz de fondo se iluminará intensamente cuando se reciba
sonido y cuando se utilicen los botones. Si no se introduce un so-
nido o no se pulsa un botón durante 10 segundos, la luz de fondo
cambiará automáticamente al brillo de ajuste suave.
Consejo:
Cuando se utiliza el temporizador, la luz de fondo
parpadea una vez transcurrido el tiempo especicado.
Consejo:
En el modo de Práctica, la luz de fondo se ilumina
brevemente durante aproximadamente 10 segundos
cuando se detiene el metrónomo.
Desactivada: la luz de fondo no se ilumina.
(a)
(a)
(b)
orificio para
cordón
“NOTE” en la pantalla.
2.
Pulse el botón ▼ o ▲ para seleccionar el nombre de la nota.
Para ajustar la calibración
1.
Pulse el botón SOUND/CALIB para hacer que la pantalla indique
“CALIB.”
2.
Utilice el botón ▼ o el botón ▲ para ajustar la calibración. La calibra-
ción se puede ajustar en pasos de 1 Hz.
Temporizador y cronómetro
Temporizador
1.
Pulse el botón TIMER/STOP WATCH para hacer que la pantalla indique
“TIMER” (TEMPORIZADOR).
2.
Utilice el botón ▼ o el botón ▲para jar la cantidad de tiempo (en
pasos de 1 minuto) de la cuenta regresiva.
3.
Pulse el botón START/STOP para iniciar la cuenta regresiva del
temporizador. Si pulsa el botón START/STOP durante la cuenta
regresiva, esta se pondrá en pausa. Si vuelve a pulsar otra vez el
botón START/STOP, la cuenta regresiva se reanudará desde el punto
en que se puso en pausa. Si pulsa el botón TEMPO/TAP TEMPO/
SPLIT/RESET mientras está en pausa, el ajuste volverá a la duración
especicada. El temporizador continuará corriendo incluso aunque
cambiemos a otro modo diferente.
4.
Sonará una alarma cuando haya transcurrido el tiempo especicado.
Pulse cualquier interruptor para detener el sonido de la alarma.
Cronómetro
1.
Pulse el botón TIMER/STOP WATCH para hacer que la pantalla
indique “STOPWATCH” (CRONÓMETRO).
2.
Pulse el botón START/STOP para empezar a medir el tiempo. Si
pulsa el botón TEMPO/TAP TEMPO/SPLIT/RESET mientras está
midiendo el tiempo, se mostrará el tiempo intermedio. Si pulsa el
botón TEMPO/TAP TEMPO/SPLIT/RESET otra vez mientras en
pantalla se está mostrando el tiempo intermedio, este desaparecerá.
El cronómetro continuará corriendo incluso aunque cambiemos a
otro modo diferente.
3.
Para detener la medición de tiempo, pulse otra vez el botón START/STOP.
Pulse el botón TEMPO/TAP TEMPO/SPLIT/RESET para volver a
poner el indicador de tiempo en pantalla a cero.
Especicaciones
Modo de Metrónomo
Rango de Tempo: q = 30–300 tiempos por minuto (BPM), Ajustes de Tempo:
Pendulum Step, Full Step, Tap Tempo, Compás: 0–9 tiempos, Ritmo: Nota ne-
gra, nota corchea, tresillo (
, , ), nota semicorchea ( , , ),
Número de patrones: 30 (consultar la lista de patrones), Número de voces: 4
(consultar la lista de voces), Exactitud de Tempo: +/-0.2 %
Modo de Práctica
Modos: modo de voz femenina, modo de voz masculina, modo de sonido,
Niveles de calicación: 1–6, Sensibilidad del disparador (trigger): 1–30
Modo de Salida de Sonido
Tono de Referencia: Temperamento igual de doce tonos C4–B4 (C, C
♯
, D,
D
♯
, E, F, F
♯
, G, G
♯
, A, A
♯
, B
), Rango de Calibración: 438 Hz–445 Hz (pasos
de 1Hz), Precisión del Tono de Referencia: +/-1 centésima o mejor
Temporizador y cronómetro
Rango del temporizador: 1–99 minutos, Rango de ajuste del cronómetro: 0,1
segundos–99 minutos y 59,9 segundos
Especicaciones principales
Conectores: Jack Trigger(jack telefónica monoaural de 6.3 mm), Jack para
auriculares (minijack telefónica estéreo de 3.5 mm)
,Altavoz: Altavoz
Dinámico (Máx. 0,5 W, φ23 mm), Alimentación: Dos pilas AAA(pilas
alcalinas o pilas de níquel-metal hidruro), Vida de las pilas: aproxima-
damente 30 horas (Tempo=120, Compás=4, Ritmo=Nota negra, voz =1,
con pilas alcalinas erien), Dimensiones (Anch. x Prof. x Alt.): 82 mm
x 82 mm x 27 mm, Peso: 97 g (incluyendo pilas), Elementos incluidos:
Manual de usuario, Contactar con Micrófono, Dos pilas AAA
* Después de que la unidad se apaga, se mantendrá la conguración
en cada modo. Sin embargo, si reemplaza las pilas, todos los Ajustes se
inicializarán como se indica a continuación.
Valores por defecto: BEAT=4, RHYTHM= q (Nota negra), TEMPO=120,
FULL STEP, PATTERN=1, VOICE = 1, SENS=30, GRADE=1, MODE=1,
NOTE=A, CALIB=440Hz, TIMER=1 minuto
* Las especi caciones y el aspecto están sujetas a cambios sin previo
aviso por mejora.
Nombre de las partes y encendido de la unidad
1.
Botón (encendido)
2.
Botón ▼ (abajo)
3.
Botón ▲ (arriba)
4.
Botón SOUND/CALIB
5.
Botón RHYTHM/BEAT/
PATTERN/VOICE
6.
Botón TRAINING
7.
Botón MODE/SENS/
GRADE
8.
Botón TIMER/STOP
WATCH
9.
Botón (botón de luz de
fondo)
10.
Botón TEMPO/TAP
TEMPO/SPLIT/RESET
11.
Botón START/STOP
12.
Jack Trigger (mono)
Este jack es para conectar
el micrófono de contacto
incluido.
13.
Jack para auriculares (mini-
jack estéreo)
Esta jack es para conectar
unos auriculares. Cuando
hay unos auriculares conec-
tados, no sale sonido por el
altavoz.
14.
VOL (volumen)
Ajusta el volumen del
altavoz y de los auriculares.
15.
Pantalla
16.
Altavoz
P
A
T
T
E
R
N
/
V
O
I
C
E
S
T
O
P
W
A
T
C
H
G
R
A
D
E
S
O
U
N
D
/
C
A
L
I
B
T
R
A
I
N
I
N
G
T
I
M
E
R
M
O
D
E
/
S
E
N
S
R
H
Y
T
H
M
/
B
E
A
T
T
E
M
P
O
/
T
A
P
T
E
M
P
O
V
O
L
.
S
P
L
I
T
/
R
E
S
E
T
S
T
A
R
T
/
S
T
O
P
BEATLAB
mini
RHYTHM TRAINER
1
2
3
4 5
76 8
9
10
11
12
13
15
14
16
Es

15 16
メト ロ ノー ム・モ ード
RHYTHM/BEAT/PATTERN/VOICEボタンを押すと、メトロノーム・
モードに入ります。
メトロノームは、START/STOPボタンを押すと動きだし、もう一度
START/STOPボタンを押すと止まります。メトロノーム・モードでは、メト
ロノームのテンポ、リズム、拍子、パターン、ボイスの設定が行えます。
テンポの設定
テンポの設定には、ペ ン デ ュ ラ ム・ス テ ッ プ 、フ ル・ス テ ッ プ 、タ ッ プ・テ ン ポ
入力の
3つの方法
があります。
ペ ン デ ュ ラ ム・ス テ ッ プ と フ ル・ス テッ プ
機械式メトロノームと同じステップでテンポを増減させるペ ン デ ュ ラ ム・
ステップと、テンポを1ステップずつ増減させるフ ル・ス テ ッ プ があります。
1.
TEMPO/TAPTEMPO/SPLIT/RESETボタンを押してディスプレ
イの中央に“TEMPO”を表示させます。
2.
TEMPO/TAPTEMPO/SPLIT/RESETボタンを1秒間押し続けると、
ペ ン デ ュ ラ ム・ス テ ッ プ( が 表 示 )ま た は フ ル ・ ス テ ッ プ が 選 べ ま す 。こ
のボタンを1秒間押し続けるたびに設定が切り替わります。
3.
▼または▲ボタンを押してテンポの値を設定します。
タップ・テンポ入力(曲にあわせてテンポを設定)
TEMPO/TAPTEMPO/SPLIT/RESETボタンを一定の間隔で何回か
押すと、押した間隔を検知しテンポとして設定されます。検知していると
きは“TAP TEMPO”が点滅します。検知できるテンポは30~300で、そ
の範囲外のテンポは設定できません。
リズム、拍子、パターン、ボイスの設定
メトロノームのリズム(RHYTHM)、拍子(BEAT)の設定を行います。ま
た、本機はメトロノームの音(VOICE)を変更することや、ドラム・パターン
(PATTERN)を再生することもできます。
1.
RHYTHM/BEAT/PATTERN/VOICEボタンを何度か押して、ディ
スプレイに“RHYTHM”、“BEAT”、“PATTERN”、“VOICE”のい
ずれかを点滅表示させます。
2.
▼または▲ボタンを押して、設定します。
TIP:
メトロノーム・モードの設定はトレーニング・モードでも使用されます。
TIP:
メトロノーム動作中に拍子を変更したときは、次の小節の1拍目か
ら拍子が切り替わります。
TIP:
“PATTERN”はボイスの設定をPにしたときのみ、表示されます。
メトロノーム動作中にパターンを変更したときは、次の小節の1拍
目からパターンが切り替わります。ボイスの設定をPにした時点で、
上記で設定した、拍子、リズムは無効となり、パターンごとに設定さ
れたボイスで、パターンが再生されます。
トレ ーニ ン グ・モ ード
TRAININGボタンを押すと、トレーニング・モードに入ります。
トリガー端子に接続したコンタクト・マイクロフォンからの入力音を受け、メ
トロノームのビートとのズレを測定します。測定中は音でズレの度合いを
示し、測定後にディスプレイに得点と全体の傾向を表示します。
コンタクト・マイクロフォンの接続と設定
1.
本機の電源が切れていることを確認し、トリガー端子に付属のコンタ
クト・マイクロフォンを接続します。
2.
コンタクト・マイクロフォンのクリップ部を素材に取り付けます。
3.
電源を入れ、MODE/SENS/GRADEボタンを何度か押して、ディス
プレイに“SENS”を点滅表示させます。
4.
▼または▲ボタンを押してトリガー感度を設定します。数値が大きく
なるほど、弱い振動でも拾うようになります。
コンタクト・マイクロフォンを接続した素材を適当な強さで叩いたとき、
ト リ ガ ー ・ マ ー ク(
)が表示するように、トリガー感度を設定します。
素材の材質や素材を叩く位置、コンタクト・マイクロフォンの取り付け
位置によって、同じ強さで叩いても、反応しない場合があります。トリ
ガー感度を設定するときは、トレーニング・モードで素材を叩くときと同
じ位置を叩いて、トリガー感度の設定と確認を行ってください。
クリップを長時間取り付けたままにすると、取り付け跡が残る場合が
あります。また、経年変化や塗装の状態によっては、時間の長さに関
係なく損傷を与える場合があります。
本機の電源をオフにしてから、コンタクト・マイクロフォンを接続してくだ
さい。
マイクロフォン のコードは 本 機に巻きつ けたり、強く引っ張ったりすると断 線
の原因となりますので、お取り扱いには充分気をつけてください。
モードの設定
測定中の評価はサウンド・モードとボイス・モードがあります。
モード1(女性ボイス・モード)、モード2(男性ボイス・モード):メト ロ ノ ー
ムとのズレが無いときは「GOOD」、ズレがあると「TOOFAST」、「TOO
SLOW」と発音します。更にズレが無い状態が連続したときは、「GOOD」か
ら「GREAT」、「WONDERFUL」、「PERFECT」と発音するボイスが変わっ
ていきます。
モード3(サウンド・モード):メトロノームとのズレが無いときはスネアの音
が出ます。また、ズレが大きくなるにつれて、カウベルの音に切り替わりま
す。スネアの音が続くように、ビートに合わせて叩きます。
1.
MODE/SENS/GRADEボタンを何度か押して、ディスプレイに
“MODE”を点滅表示させます。
2.
▼または▲ボタンを押してモードを設定します。
TIP:
トレーニング・モードでパターンを再生しているとき、クリック音も
同時に再生されます。ただし、評価のタイミングによって、クリック
音が鳴らない場合があります。
グレードの設定
評価の難易度(グレード)は6段階で設定できます。
1.
MODE/SENS/GRADEボタンを何度か押して、ディスプレイに
“GRADE”を点滅表示させます。
2.
▼または▲ボタンを押してグレードを設定します。
グレードは数字が大きくなるほど、評価が厳しくなります。
TIP:
まずは、グレード1から練習を始め、徐々に難易度を上げていきま
しょう。
トレーニング・モードの使い方
TIP:
メトロノームの設定はメトロノーム・モードに切り替えて行ってくだ
さい。
1.
START/STOPボタンを押して、メトロノームをスタートさせます。
プリカウントが1小節(拍子が2拍以下の場合は4拍)鳴った後、測定
が開始します。
2.
ビートに合わせてコンタクト・マイクロフォンを接続した素材を叩きます。
測定は8小節の間行われ、測定が終了するとメトロノームは停止します。
コンタクト・マイクロフォン自体を叩かないでください。
3.
メトロノームが停止した後、得点と振り子表示に全体の傾向が表示され
ます。
得点は100点満点で、ズレが少ないほど、高得点になります。また、全
体の傾向は、全体的にビートとトリガーのタイミングが合っていれば
“JUST”、ビートより早めの傾向があれば“FAST”側に、ビートより
遅めの傾向があれば“SLOW”側に表示が出ます。また、ビートとトリ
ガーのズレが小さければ“JUST”の近くに、ズレが大きければ
“JUST”から遠くに表示が出ます。
サ ウンドア ウト・モ ード
SOUND/CALIBボタンを押すと、サウンドアウト・モードに入り基準音が
出力されます。この基準音はチューニング時のガイドになります。
サウンドアウト・モードでは、基準音にする音名やキャリブレーションを設
定します。
音名の設定
1.
SOUND/CALIBボタンを押して、ディスプレイに“NOTE”を点滅表
示させます。
2.
▼または▲ボタンを押して音名を設定します。
キャリブレーション(A4の基準ピッチ)の設定
1.
SOUND/CALIBボタンを押して、ディスプレイに“CALIB”を表示
させます。
スタンド(ベルト・クリップ)とストラップ・ホール
本機の裏側にはベルト・クリップとしても使
用 で き るスタンドと、ストラップ・ホ ー ル が 付
いています。
ス タ ン ド と し て 使 用 す る 場 合 は 、矢 印 の 位 置 を
指で押さえながら(a)、スタンドを起こします
(b)。
ス タ ン ド を ベ ル ト・ク リ ッ プ と し て 使 用 す る 場 合
は、スタンドを倒した状態で、ベルトをクリップ
で挟み、本機を固定してください。
ストラップ・ホールにはネック・ストラップなどを取り
付けることができます。ストップ・ウォッチとして使
用するときに便利です。
電源の入れ方、切り方
ボタンを押して電源を入れます。電源を入れたときはメトロノーム・
モードに入ります。もう一度 ボタンを押すと電源が切れます。メトロ
ノームが停止した状態で20分経過すると、自動的に電源が切れます。
(オート・パワー・オフ)
工場出荷設定に戻す
工場出荷設定に戻すには、SOUND/CALIBボタンを押しながら、電源
を入れます。
バック ラ イト
ボタンを押して、バックライトを設定します。
ボタンを押すたびに、ソフト→オート→オフ→ソフト…と切り替わり
ます。
ソ フ ト:電池の消耗を防ぐため、常に低輝度の点灯になります。
オ ー ト:ボタンの操作をしたときに明るく点灯し、約10秒後にソフト設
定の明るさになります。
TIP:
タイマー使用時に、設定した時間が経過すると、バックライト
が点滅します。
TIP:
トレーニングモード時は、メトロノームが停止すると約10秒間
明るく点灯します。
オ フ:バックライトは点灯しません。
(a)
(a)
(b)
ストラップ・ホール
2.
▼または▲ボタンを押して基準ピッチを1Hz単位で設定します。
タ イ マー と ストップ・ウ ォッ チ
タイマー機能
1.
TIMER/STOPWATCHボタンを押して、ディスプレイに
“TIMER”を表示させます。
2.
▼または▲ボタンを押して、計測する時間を分単位で設定し
ます。
3.
START/STOPボタンを押すと、計測が始まります。
計測中にSTART/STOPボタンを押すと、計測を中断しま
す。再度START/STOPボタンを押すと、中断した時間から
計測を再開します。また、中断しているときに、TEMPO/TAP
TEMPO/SPLIT/RESETボタンを押すと、設定した時間に戻
ります。
計測中に別のモードに移っても、計測は引き続き行われます。
4.
設定した時間が経過すると、アラーム音が鳴ります。いずれか
のボタンを押すと、アラーム音は止まります。
スト ッ プ・ウ ォッ チ 機 能
1.
TIMER/STOPWATCHボタンを押して、ディスプレイに
“STOPWATCH”を表示させます。
2.
START/STOPボタンを押すと、計測が始まります。
計測中にTEMPO/TAPTEMPO/SPLIT/RESETボタンを
押すと、スプリット・タイムが表示できます。スプリット・タイム
表示中に再度TEMPO/T
APTEMPO/SPLIT/RESETボタ
ンを押すと、スプリット・タイム表示が消えます。
計測中に別のモードに移っても、計測は引き続き行われます。
3.
再度START/STOPボタンを押すと計測が終了します。
TEMPO/TAPTEMPO/SPLIT/RESETボタンを押すと、タ
イム表示が0にリセットされます。
仕様
メトロノーム・モード
テ ン ポ 範 囲:
q = 30~300/分、テ ン ポ 設 定: ペ ン デ ュ ラ ム ・ ス テ ッ プ 、フ
ル・ス テップ 、タップ・テン ポ 、拍 子: 0~9拍子、リ ズ ム: 4分音符、8分音
符 、3 連 符( 、 、 )、4連符( 、 、 )、パターン数: 30
(Pattern List参照)、ボ イ ス 数:4(VoiceList参照)、テ ン ポ 精 度:
±0.2%
トレーニング・モード
モ ード :
女 性 ボ イ ス・モ ー ド 、男 性 ボ イ ス・モ ー ド 、サ ウ ン ド・モ ー ド 、
グレ ード :
1~6、ト リ ガ ー 感 度: 1~30
サ ウ ンド ア ウト・モ ー ド
基準音:
12平均律C4~B4(C, C♯, D, D♯, E, F, F♯, G, G♯,
A,A♯, B)、キ ャ リ ブ レ ー シ ョ ン 範 囲:438Hz~445Hz(1Hz単位)、
基準音精度:
±1セント以内
タ イ マ ー と スト ッ プ・ウ ォッ チ
タ イ マ ー 計 測 時 間:1~99分、ス ト ッ プ・ウ ォ ッ チ 計 測 時 間:0.1秒~99分
59.9秒
主要仕様
接続端子:
トリガー端子(モノラル標準ジャックφ6.3mm)、ヘッドホン端
子(ステレオ・ミニジャックφ3.5mm)、ス ピ ー カ ー: ダイナミック・スピー
カー(最大0.5W、φ23mm)、電 源:単4形電池2個(アルカリ乾電池また
はニッケル水素電池)、電池寿命: 約30時間(アルカリ乾電池使用時、
テンポ: 120、拍子: 4拍子、リズム: 4分音符、ボイス: 1のとき)、外形
寸法(幅 x 奥行 x 高さ):
82x82x27mm、質 量:97g(電池含む)、
付 属 品: 取扱説明書、コンタクト・マイクロフォン、動作確認用単4形アル
カリ乾電池2本
* 各モードでの設定は、電源を切る、電池を交換する、などしても記憶
しています。
工場出荷時は次のようになります。
初期値: BEAT=4、RHYTHM= q (4分音符)、TEMPO=120、
FULL STEP、PATTERN=1、VOICE=1、SENS=30、GRADE=1、
MODE=1、NOTE=A、CALIB=440Hz、TIMER=1分
*仕様および外観は、改良のため予告なく変更する場合があります。
各部の名称および電源の入れ方
1.
(電源)ボタン
2.
▼( ダ ウ ン )ボ タ ン
3.
▲( ア ッ プ )ボ タ ン
4.
SOUND/CALIBボタン
5.
RHYTHM/BEAT/
PATTERN/VOICEボタン
6.
TRAININGボタン
7.
MODE/SENS/GRADEボタン
8.
TIMER/STOPWATCHボタン
9.
( バ ッ ク ラ イ ト )ボ タ ン
10.
TEMPO/TAPTEMPO/
SPLIT/RESETボタン
11.
START/STOPボタン
12.
トリガー端子
(モノラル標準)
付属のコンタクト・マイクロ
フォンを接続します。
13.
ヘッドホン端子
(ステレオミニ)
ヘッドホンを 接 続します 。ヘッ
ドホンを接続したときは、ス
ピーカーから音が出ません。
14.
VOL(ボリューム)
スピーカーまたはヘッドホン
の音量を調整します。
15.
ディスプレイ
16.
スピーカー
P
A
T
T
E
R
N
/
V
O
I
C
E
S
T
O
P
W
A
T
C
H
G
R
A
D
E
S
O
U
N
D
/
C
A
L
I
B
T
R
A
I
N
I
N
G
T
I
M
E
R
M
O
D
E
/
S
E
N
S
R
H
Y
T
H
M
/
B
E
A
T
T
E
M
P
O
/
T
A
P
T
E
M
P
O
V
O
L
.
S
P
L
I
T
/
R
E
S
E
T
S
T
A
R
T
/
S
T
O
P
BEATLAB
mini
RHYTHM TRAINER
1
2
3
4 5
76 8
9
10
11
12
13
15
14
16
Ja
-
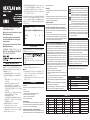 1
1
-
 2
2
-
 3
3
-
 4
4
-
 5
5
-
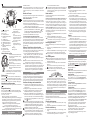 6
6
-
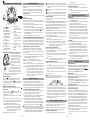 7
7
-
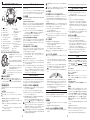 8
8


Korg Beatlab mini EFGSJ2 Le manuel du propriétaire
- Taper
- Le manuel du propriétaire
- Ce manuel convient également à
dans d''autres langues
Documents connexes
-
Korg MA-1 Le manuel du propriétaire
-
-
-
-
Korg GM-1 Le manuel du propriétaire
-
-
-
-
-
Autres documents
-
Yamaha DTX430K Le manuel du propriétaire
-
Boss DB-60 Le manuel du propriétaire
-
-
-
-
-
-
Yamaha MM6 Le manuel du propriétaire
-
-
 Tama RW200 Rhythm Watch Manuel utilisateur
