Danby DMW111KPSSDD Product Manual (351 KB)
- Catégorie
- Micro-ondes
- Taper
- Product Manual (351 KB)

Owner’s Use and Care Guide
Guide d’utilisation et soins de Propriètaire
Model • Modèle
DMW111KPSSDD
Danby Products Limited, Guelph, Ontario Canada N1H 6Z9
Danby Products Inc., Findlay, Ohio USA 45840
V2.2.10 JF
CAUTION:
Read and follow
all safety rules
and operating
instructions before
first use of this
product.
MISE EN GARDE:
Lisez et suivez
toutes les consignes
de sécurité et
d’utilisation avant la
première utilisation
de ce produit.
MICROWAVE OVEN
Owner’s Use and Care Guide . . . . . . . . . . . . . . . . . . . . . . . . . . . . . . . . . . . . . . . . . 1 - 12
• Welcome
• Important Safety Information
• Important Safety Instructions
• Installation Guide
• Operation
• Care and Maintenance
• Warranty
FOUR À MICRO-ONDES
Guide d’utilisation et soins de Propriètaire . . . . . . . . . . . . . . . . . . . . . . . . . . . . . . 13 - 24
• Bienvenue
• Information de Sécurité Important
• Consignes de Sécurité Important
• Guide d’Installation
• Fonctionnement
• Soins et Entretien
• Garantie

Write down the model and serial numbers here. They are on a label located on the back of the
oven.
Model Number
Serial Number
Date Purchased
Staple your receipt to this manual. You will need it to obtain service under warranty.
Before you call for service, there are a few things you can do to help us serve you better...
Read this manual:
It contains instructions to help you use and maintain your microwave properly.
If you received a damaged oven:
Immediately contact the dealer (or builder) that sold you the oven.
Save time and money:
Check the section titled “Troubleshooting” before calling. This section helps you solve common
problems that might occur. If you do need service, you can relax knowing help is only a phone call
away.
Tel: 1-800-26-
(1-800-263-2629)
WELCOME
Welcome to the Danby family. We’re proud of our quality products and we believe in dependable
service. You’ll see it in this easy to use manual and you’ll hear it in the friendly voices of our
consumer service department.
Tel: 1-800-26-
(1-800-263-2629)
Best of all, you’ll experience these values each time you use your microwave. That’s important,
because your new microwave will be part of your family for a long time.
BEFORE USING
YOUR MICROWAVE
NEED HELP?
1

READ ALL SAFETY INFORMATION BEFORE USING
PRECAUTIONS TO AVOID POSSIBLE EXPOSURE TO
EXCESSIVE MICROWAVE ENERGY
For your safety the information in this manual must be followed to minimize the risk of fire or explosion or
to prevent property damage, personal injury or loss of life.
Do Not Attempt to operate this oven with the door open since open-door operation can result in harmful
exposure to microwave energy. It is important not to defeat or tamper with the safety interlocks.
Do Not Place any object between the oven front face and the door or allow soil or cleaner residue to
accumulate on sealing surfaces.
Do Not Operate the oven if it is damaged. It is particularly important that the oven door close properly and
that there is no damage to the:
1 door (bent),
2 hinges and latches (broken or loosened),
3 door seals and sealing surfaces.
The Oven Should Not be adjusted or repaired by anyone except properly qualified service personnel.
FEDERAL COMMUNICATIONS COMMISSION RADIO FREQUENCY
INTERFERENCE STATEMENT (U.S.A. ONLY)
This equipment generates and uses ISM frequencies and if not installed and used properly, that is in strict
accordance with the manufacturer's instructions, may cause interference to radio and television reception. It
has been type-tested and found to comply with limits for ISM Equipment pursuant to Part 18 of FCC Rules,
which are designed to provide reasonable protection against such interference in a residential installation.
However, there is no guarantee that interference will not occur in particular installations. If this equipment
does cause interference to radio or television reception, which can be determined by turning the equipment
off and on, the user is encouraged to try to correct the interference by one or more ofthe following:
• Reorient the receiving antenna of radio or television.
• Relocate the microwave oven with respect to the receiver.
• Move the microwave oven away from the receiver.
• Plug the microwave into a different outlet so that microwave and receiver are on different branch circuits.
The Manufacturer is not responsible for any radio or TV interference caused by UNAUTHORIZED
MODIFICATION to this microwave oven. It is the responsibility of the user to correct such interference.
SAVE THESE INSTRUCTIONS!
IMPORTANT SAFETY INFORMATION
2

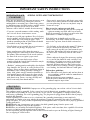
To reduce the risk of fire, burns, electric shock, injury to persons or exposure of excessive microwave energy
when using your appliance, follow basic precautions, including the following sections.
• Read and follow the specific “Precautions to Avoid
Possible Exposure to Excessive Microwave Energy”
on page 2.
• This appliance must be grounded. Connect only to a
properly grounded outlet. See “Grounding
Instructions” section on page 5.
• Do not operate this appliance if it has a damaged
power cord or plug, if it is not working properly, or if
it has been damaged or dropped.
• Do not cover or block any openings on the appliance.
• Use this appliance only for its intended use as
described in this manual. Do not use corrosive
chemicals or vapors in this appliance.
• This microwave oven is specifically designed to heat,
dry or cook food, and is not intended for laboratory or
industrial use.
• Some products such as whole eggs and sealed
containers – for example, closed glass jars- may
explode and should not be heated in this oven.
• Do not store this appliance outdoors.
• Do not use this product near water-for example, in a
wet basement, near a swimming pool or near a sink.
• Keep power cord away from heated surfaces.
• Do not immerse power cord or plug in water.
• See door surface cleaning instructions in the Care
and Maintenance section(s) of this manual.
• This appliance should be serviced only by
qualified service personnel. Contact nearest
authorized service facility for examination, repair
or adjustment.
• As with any appliance, close supervision is
necessarry when used by children.
To reduce the risk of fire in the oven cavity:
• Do not overcook food.
• Carefully attend appliance if paper, plastic or
other combustible materials are placed inside the
oven while cooking.
• Remove wire twist-ties and metal handles from
paper or plastic containers before placing them in
the oven.
• Do not use the oven for storage purposes. Do not
leave paper products, cooking utensils or food in
the oven when not in use.
• Do not use the microwave to dry newspapers.
• If materials inside oven should ignite, keep the
oven door closed, turn the oven off and
disconnect the power at the fuse or circuit breaker
panel. If the door is opened, the fire may spread.
WARNING
SAFETY
PRECAUTIONS
3
IMPORTANT SAFETY INSTRUCTIONS

SPECIAL NOTES ABOUT MICROWAVING
Arcing is the microwave term for sparks in the oven. Arcing is caused by:
• Metal or foil touching the side of the oven.
• Foil not molded to food (upturned edges act like antennae).
• Metal, such as twist-ties, poultry pins, or gold-rimmed dishes, in the microwave.
• Recycled paper towels containing small metal pieces being used in the microwave.
• Only cook popcorn in your microwave oven using a special microwave popcorn accessory dish, unless you
use popcorn labeled for use in microwave ovens.
• Some products- such as whole eggs (with shell), sealed containers, and closed jars - will explode and
should not be heated in this microwave oven. Heating these products in the microwave oven could result in
injury.
• Do not boil eggs in a microwave oven. Pressure will build up inside egg yolk and will cause it to burst,
possibly resulting in injury.
• Operating the microwave with no food inside may cause damage to the oven and could start a fire. It
increases the heat around the magnetron and can shorten the life of the oven.
• Foods with unbroken outer “skin” such as potatoes, hot dogs, sausages, tomatoes, apples, chicken livers and
other giblets, and egg yolks should be pierced to allow steam to escape before cooking.
ARCING
If you see arcing, press the “START/STOP” button and correct the problem.
FOODS
4
SAFETY FACT:
SUPERHEATED WATER
Microwaved water and other liquids do not always
bubble when they reach the boiling point; they can
actually get superheated and not bubble at all.
Superheated liquid can bubble up when it is moved or
when something like a spoon or tea bag is put into it.
To prevent this from happening and causing injury, do
not heat any liquid for more than 2 minutes per cup.
After heating, let the cup stand in the microwave for
30 seconds before moving it or putting anything into
it.
• Avoid heating baby food in glass jars, even with the
lid off. Make sure all infant food is thoroughly
cooked. Stir food to distribute the heat evenly. Be
careful to prevent scalding when warming formula.
The container may feel cooler than the milk really is.
Always test the milk before feeding the baby.
• Spontaneous boiling- Under certain circumstances,
liquids may start to boilduring or shortly after
removal from the microwave oven. To prevent burns
from splashing liquid, we recommend the following:
Before removing the container from the oven, allow
the container to stand in the the oven for 30 to 40
containers such as soft drink bottles, wine flasks and
especially narrow-necked coffee cups. Even if the
container is opened, excessive steam can build up and
cause it to burst or overflow.
• Don’t defrost frozen beverages in narrow-necked
bottles (especially carbonated beverages). Even if the
container is opened, pressure can build up. This can
cause the container to burst, possibly resulting in
injury.
• Hot foods and steam can cause burns. Be careful
when opening any containers of hot food, including
popcorn bags, cooking pouches and boxes. To prevent
possible injury, direct steam away from hands and
face.
• Do not overcook potatoes. They could dehydrate and
catch fire, causing damage to your oven.
• Cook meat and poultry thoroughly- meat to at least
an INTERNAL temperature of 160°F (71.1°C), and
poultry to at least an INTERNAL temperature of
180°F (82.2°C). Cooking to these temperatures
usually protects against food borne illness.
IMPORTANT SAFETY INSTRUCTIONS

SPECIAL NOTES ABOUT MICROWAVING
Make sure all cookware used in your microwave oven
is suitable for microwaving. Most glass casserole,
cooking dishes, measuring cups, custard cups, pottery
or china dinnerware which do not have metallic trim or
glaze with a metallic sheen can be used. Some
cookware will be labeled “suitable for microwaving”.
• If you use a meat thermometer while cooking, make
sure it is safe for use in microwave ovens.
• Do not use recycled paper products. Recycled paper
towels, napkins, and waxed paper can contain metal
flecks which may cause arcing or ignite. Paper
products containing nylon or nylon filament should
be avoided, as they may also ignite.
• Not all plastic wrap is suitable for use in microwave
ovens. Check the package for proper use.
• Some styrofoam trays (like those that meat is
packaged on) have a thin strip of metal embedded in
the bottom. When microwaved, the metal can burn
the floor of the oven, or ignite a paper towel.
• Cookware may become hot because of heat
transferred from the heated food. Pot holders may be
needed to handle the cookware.
• “Boilable” cooking pouches and tightly closed plastic
bags should be slit, pierced, or vented as directed by
package. If they are not, plastic could burst during or
immediately after cooking, possibly resulting in
injury. Also, plastic storage containers should be at
least partially uncovered because they form a tight
seal. When cooking with containers tightly covered
with plastic wrap, remove covering carefully and
direct steam away from hands and face.
• Paper towels, waxed paper, and plastic wrap can be
used to cover dishes in order to retain moisture and
prevent splattering. Be sure to vent plastic wrap so
steam can escape.
How to test for a microwave-safe dish:
1) Place in the oven both the dish you are testing and
a glass measuring cup filled with1 cup of water.
2) Set the measuring cup either in or next to the dish.
3) Microwave 1 minute on high power.
If the dish heats, it should not be used for
microwaving. If the dish remains cool and only the
water in the cup heats, then the dish is microwave-
safe.
• Use foil only as directed in this manual. TV dinners
may be microwaved in foil trays less than 3/4”
high; remove the top foil cover and return the tray
to the box. When using foil in the microwave, keep
the foil at least 1 inch away from the sides of the
oven.
• Plastic cookware designed for microwave cooking
is very useful, but should be used carefully. Even
microwave-safe plastic may not be as tolerant of
overcooking conditions as are glass and ceramic
materials, and may soften or char if subjected to
short periods of over-cooking. In longer exposure to
over-cooking, the food and cookware could ignite.
Follow these guidelines:
1) Use Microwave-safe plastics only and use them in
strict compliance with the cookware manufacturer’s
recommendations.
2) Do not microwave empty containers.
3) Do not permit children to use plastic cookware
without complete supervision.
MICROWAVE-SAFE
COOKWARE
5
GROUNDING
INSTRUCTIONS
This appliance must be grounded. In the event of an electrical short circuit, grounding reduces the risk of
electric shock by providing an escape wire for the electric current. This appliance is equipped with a power
cord having a grounding wire with a grounding plug. The plug must be plugged into an outlet that is properly
installed and grounded.
Consult a qualified electrician or service technician if the grounding instructions are not completely
understood, or if doubt exists as to whether the appliance is properly grounded.If the outlet is a standard 2-
prong wall outlet, it is your personal responsibility and obligation to have it replaced with a properly grounded
3-prong wall outlet.
DO NOT under any circumstances cut or remove the third (ground) prong from the power cord.
DO NOT use an adapter plug with this appliance.
DO NOT use an extension cord with this appliance. If the power cord is too short, have a qualified electrician
or service technician install an outlet near the appliance.
For best operation, plug this appliance into its own electrical outlet to prevent flickering of lights, blowing of
fuse, or tripping of circuit breaker.
WARNING: Improper use of the grounding plug can result in a risk of electric shock.
IMPORTANT SAFETY INSTRUCTIONS

INSTALLATION GUIDE
1) Make sure that all packing materials are removed from the inside of the microwave oven.
2) Check the microwave for any damage, such as misaligned or bent door, damaged door seals and sealing
surface, broken or loose door hinges and latches, and dents inside the cavity or on the door. If there is any
damage, do not operate the oven but contact a qualified service personnel.
3) This microwave oven must be placed on a flat, stable surface to hold its weight.
4) Do not place the microwave oven where heat, moisture, or high humidity are generated, or near
combustible materials.
5) For correct operation, the microwave oven must have sufficient air flow. Allow 20 cm of space above the
microwave oven, 10 cm at back and 5 cm at both sides. Do not cover or block any openings on the
appliance. Do not remove the feet on which the microwave oven stands.
6) Do not operate the oven without glass tray, roller support, and shafts in their proper positions.
7) Make sure that the power supply cord is undamaged and does not run under the microwave oven or over
any hot or sharp surfaces.
8) The socket must be readily accessible so that it can be easily unplugged in an emergency.
6

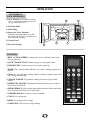
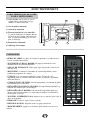
1) Oven Window: Screen allows cooking
to be viewed while keeping microwave
energy confined in oven.
2) Turntable Shaft
3) Roller Ring
4) Removable Glass Turntable:
Turntable and support must be in place
when using the oven. The turntable may
be removed for cleaning.
5) Control Panel
6) Electronic Display
FEATURES OF
YOUR MICROWAVE
CONTROLS
• MENU ACTION SCREEN: Cooking time, power, indicators and current
time are displayed.
• QUICK COOK BUTTONS: Instant settings to cook popular foods.
• POWER LEVEL: Used to set power levels other than high.
• TIMER: Timer functions independently, even while a cooking program is in
process.
• COOK: Use for multi-stage cooking. Enables cooking at multiple power and
time settings automatically.
• COOK BY WEIGHT: Programmed cooking based on weight of foods
cooked.
• DEFROST BY WEIGHT: Programmed defrosting based on the weight of
the foods to be defrosted.
• SPEED DEFROST: Quick defrost function that alternates defrost and stand
times to quickly and effectively defrost foods.
• NUMBER PADS (0-9): Touch to set time or amount.
• CLOCK: Sets current time.
• RESET: Clears all previous settings.
• START/STOP: Touch to start or stop cooking.
7
1
3
2
4
6
5
OPERATION

SETTING
THE CLOCK
8
1) Press “CLOCK” pad.
2) Press the number keys and enter the current time.
For example, to set 12:10, press “1, 2, 1, 0” in
turn.
3) Press “CLOCK” again to finish clock setting.
NOTES:
• When the microwave is first plugged in, or when
power resumes after a power interruption, the display
will show ENTER CLOCK TIME. If you prefer not
to have the clock displayed, touch RESET.
• You can check the clock time while cooking is in
progress by touching the CLOCK pad.
SETTING THE
KITCHEN TIMER
1) Press “TIMER” pad.
2) Press the number keys and enter the timer time (the
maximum cooking time is 99 minutes and 99
seconds).
3) Press “START/STOP.” to confirm the setting.
NOTES:
• Timer countdown can be seen in the display before
the clock or cooking time is returned to the display.
• Touch TIMER and then RESET to cancel the
Timer during timing process.
Your microwave clock is a 12-hour system.
MICROWAVE
COOKING
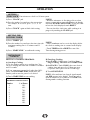
SETTING A COOKING PROGRAM:
A) One-Stage Cooking.
1) Use the number pads to set a cooking time. You
can set a cooking time from one second to 99 minutes
and 99 seconds.
2) If you want to set a power level other than 100%
power, touch POWER LEVEL and then use the
number pads to enter the power level desired.
3) Touch START/STOP to start cooking.
B) Two-Stage Cooking.
1) Set STAGE 1: Follow steps 1 and 2 in “One-
Stage Cooking”. DO NOT touch START/STOP.
2) Set STAGE 2: Touch COOK, then enter desired
cooking time and power level. Most two-stage
recipes use lower power for the second stage.
3) Touch START/STOP.
NOTE: After total time has elapsed, signal sounds
and END appears in the display. Touch any pad or
open the microwave oven door to clear END before
starting another cooking function.
USE THESE SINGLE DIGITS TO
REPRESENT POWER LEVELS:
Number % of Power
9 90%
8 80%
7 70%
6 60%
5 50%
4 40%
3 30%
2 20%
1 10%
OPERATION

SPEED
DEFROST
9
1) Touch SPEED DEFROST.
2) Enter desired defrosting time by touching
corresponding number pads.Digital timer sets
minutes and seconds from left to right so a single
digit can be set (5 for 5 seconds) or up to 4 digits
(2, 4, 0, 5 for 24 minutes and 5 seconds).
3) Touch START/STOP.
NOTES:
• The longest valid defrosting time is 99 min., 99 sec.
• After time has elapsed signals sound and END
appears in display. Touch any pad or open the door
to clear END before starting another cooking
function.
• After setting Speed Defrost, microwave can be
programmed to automatically switch to one or two-
stage cooking.
• For Speed Defrost and one stage cooking, follow
steps 1-3. Before touching START/STOP, touch
COOK, enter time and power level. Then touch
START/STOP.
• For Speed Defrost and two stage cooking, follow
steps above, only you will enter two separate time’s
and power levels consecutively before touching
START/STOP.
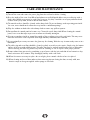
1) Press “COOK BY WEIGHT”.
2) Enter the one digit (see Table 1) code by touching the correct number pads.
3) Enter weight.
4) Touch START/STOP.
NOTES:
• Meat must be defrosted and at refrigerated temperature.
• Weight must be in pounds and ounches. Ounce weights less than 10 must be
preceeded by a 0. If label gives weight in pounds only, change the fraction of a
pound to ounces using Table 2.
• At around mid point of the program, the oven will stop and beep. Turn the food
over or rearrange pieces for more even cooking. Press START/QUICK START
to resume the program.
COOK BY
WEIGHT
FRACTION OF
POUND
OUNCES
less than 0.3
0.4 to 0.9
0.10 to 0.15
0.16 to 0.21
0.22 to 0.27
0.28 to 0.34
0.35 to 0.40
0.41 to 0.46
0.47 to 0.53
0.54 to 0.59
0.60 to 0.65
0.66 to 0.71
0.72 to 0.78
0.79 to 0.84
0.85 to 0.90
0.91 to 0.97
0
1
2
3
4
5
6
7
8
9
10
11
12
13
14
15
OPERATION
CODE TYPE
MAX.
WEIGHT
1 Beef
5lbs. 16 oz.
2 Mutton
5 lbs. 16 oz.
3 Pork
5 lbs. 4 oz.
TABLE 1
TABLE 2
DEFROST
BY WEIGHT
1) Touch DEFROST BY WEIGHT pad.
2) Enter weight.
3) Touch START/STOP pad.
NOTES:
• Weight must be in pounds and ounces. Ounce
weights less than 10 must be preceeded by a 0. If
label gives weight in pounds only, change the
fraction of a pound to ounces using Table 2. The
maximum weight is 5 lbs. 16 oz.
• Turn over food when oven signals twice. Touch
START/STOP pad to resume defrosting.
• After defrosting time has ended signal will sound
and END appears in display. Touch any pad or open
the door to clear END before starting a function.

10
POPCORN:
a) Touch POPCORN; CODE and cooking time
appear in the display. POPCORN automatically
sets the cooking time for a 3.5 oz. bag of
microwave popcorn.
b) Touch START/STOP.
NOTE: To change the preset POPCORN time:
Touch POPCORN twice. ENTER TIME appears in
the display; touch number pads to enter minutes and
seconds. Touch START/STOP. This new cooking
time will remain whenever you use the POPCORN
setting.
POTATO:
For 4 to 6 oz. potatoes:
1) Touch POTATO once.
2) Enter number of potatoes by touching number pads
from 1 to 4.
3) Touch START/STOP.
For large 8 to 10 oz. potatoes:
1) Touch POTATO twice.
2) Enter number of potatoes by touching number pads
from 1 to 4.
3) Touch START/STOP.
BEVERAGE:
For 5 to 7 cups:
1) Touch BEVERAGE once.
2) Enter number of cups by touching number pads
from 1 to 4.
3) Touch START/STOP.
For larger 9 to 11 oz. cups:
1) Touch BEVERAGE twice.
2) Enter number of cups by touching number pads
from 1 to 4.
3) Touch START/STOP.
FROZEN DINNER:
For one or two small (7-9 oz.) frozen dinners:
1) Touch FROZEN DINNER once.
2) For 1 entree, touch the number pad “1”; for 2 touch
“2”.
3) Touch START/STOP.
For one or two large (10-12 oz.) frozen dinners:
1) Touch FROZEN DINNER twice.
2)
For 1 entree touch the number pad “1”; for 2 press
“2”.
3) Touch START/STOP.
PIZZA:
Reheating a slice of pizza:
1) Touch PIZZA once; CODE and cooking time
appears.
2) Touch START/STOP.
Heating a whole frozen pizza:
1) Touch PIZZA twice; CODE and cooking time
appears.
2) Touch START/STOP.
REHEAT:
1) Touch REHEAT pad. CODE and cooking time
appear.
2) Touch START/STOP.
ONE TOUCH
COOKING
OPERATION
SPECIAL CORD SET INSTRUCTIONS
DANGER
- Electric Shock Hazard
Touching some of the internal components can cause serious personal injury or death. Do not disassemble this
appliance.
WARNING - Electric Shock Hazard
Improper grounding can result in electric shock. Do not plug into an outlet until appliance is properly installed
and grounded.
POWER
SUPPLY CORD

11
1) Turn off the oven and remove the power plug from the wall socket before cleaning.
2) Keep the inside of the oven clean.When food splatters or spilled liquids adhere to oven walls,wipe with a
damp cloth. Mild detergent may be used if the oven gets very dirty. Avoid the use of spray and other harsh
cleaners as they may stain, streak or dull the door surface.
3) The outside surfaces should be cleaned with a damp cloth. To prevent damage to the operating parts inside
the oven, water should not be allowed to seep into the ventilation openings.
4) Wipe the window on both sides with a damp cloth to remove any spills or spatters.
5) Do not allow the control panel to become wet. Clean with a soft, damp cloth.When cleaning the control
panel, leave oven door open to prevent oven from accidentally turning on.
6) If steam accumulates inside or around the outside of the oven door, wipe with a soft cloth. This may occur
when the microwave oven is operated under high humidity conditions; this is normal.
7) It is occasionally necessary to remove the glass tray for cleaning. Wash the tray in warm sudsy water or in a
dishwasher.
8) The roller ring and oven floor should be cleaned regularly to avoid excessive noise. Simply wipe the bottom
surface of the oven with mild detergent. The roller ring may be washed in mild sudsy water or dishwasher.
When removing the roller ring from cavity floor for cleaning, be sure to replace in the proper position.
9) Remove odors from your oven by combining a cup of water with the juice and skin of one lemon in a deep
bowl, microwave for 5 minutes. Wipe thoroughly and dry with a soft cloth.
10) When it becomes necessary to replace the oven light, please consult a dealer to have it replaced.
11) When cleaning surfaces of door and oven that comes together on closing the door, use only mild, non
abrasive soaps or detergents applied with a sponge or soft cloth.
CARE AND MAINTENANCE

Inscrivez les numéros de modèle et de série ici. Ils se trouvent sur une étiquette a l’arrière du four á
micro-ondes.
Numéro de Modèle
Numéro de série
Date d’achat
Brochez votre coupon de caisse à l’endos de ce guide. Il sera nécessaire pour votre garantie.
BIENVENUE
Bienvenue dans la famille de produits Danby. Nous sommes fiers de nos produits de qualité et nous
croyons en un service fiable. Vous le constaterez à ce guide pratique et su ton amical de notre
personnel du service à la clientèle
Tél.: 1-800-26- (1-800-263-2629)
Mieux encoure, vous constaterez la qualité de nos produits et leur fiabilitié à chaque utilisation de
votre four à micro-ondes. C’est important: votre nouveau four à micro-ondes fera longtemps partie de
votre famille.
AVANT D’UTILISER
VOTRE FOUR À
MICRO-ONDES
BESOIN
D’AIDE?
Avant de téléphonez pour une réparation, voici quelques petites choses que vous pouvez faire afin que
nous puissions mieux vous servir...
Lisez ce guide: Il contient des instructions qui vous aideront à utiliser et entretenir correctement votre
four à micro-ondes.
Si vous avez reçu un four à micro-ondes endommagé: Contactez immédiatement le détaillant (ou le
fabricant) qui vous a vendu le four á micro-ondes.
Économisez temps et argent: Consultez la section « Dépannage » avant de téléphoner. Cette section
vous aidera à résoudre les problèmes courants éventuels. Si vous avez besoin de notre aide, vous
pouvez être assuré que nous serons au bout du fil.
Tél.: 1-800-26- (1-800-263-2629)
13

LISEZ TOUTES LES CONSIGNES DE SÉCURITÉ AVANT L’UTILISATION
PRÉCAUTIONS À PRENDRE AFIN D’ÉVITER UNE
EXPOSITION EXCESSIVE À L’ÉNERGIE MICRO-ONDE
Afin d’assurer votre sécurité, les consignes de ce guide doivent être suivies afin de réduire les risques
d’incendie ou d’explosion, de dommages à la propriété, de blessure ou de décès.
Ne faites pas fonctionner ce four la porte ouverte : un tel fonctionnement peut entraîner une exposition
dangereuse à l’énergie micro-onde. Il est important de ne pas contourner ou altérer le verrouillage de sécurité.
Ne déposez pas d’objet entre la face du four et la porte. Ne laissez pas la saleté ou les résidus de produits
nettoyants s’accumuler sur les surfaces d’étanchéité.
Ne faites pas fonctionner le four s’il est endommagé. Il est très important que la porte du four se ferme bien
et que les éléments suivants ne soient pas endommagés :
1 porte (courbée);
2 charnières et loquets (brisés ou lâches);
3 surface d’étanchéité et porte étanche.
Le four doit être réglé ou réparé par un technicien qualifié.
DÉCLARATION QUANT AUX INTERFÉRENCES DE FRÉQUENCE RADIO DE LA
COMMISSION FÉDÉRALE DES COMMUNICATIONS (É.-U. SEULEMENT)
Cet équipement génère et utilise des fréquences sur bande ISM. S’il n’est pas installé et utilisé correctement,
c’est-à-dire selon les directives du fabricant, ces fréquences peuvent entraîner des interférences dans les
réceptions radiophoniques et télévisuelles. Cet équipement a été mis à l’essai et déclaré conforme aux
limitations de l’équipement ISM énoncées à l’article 18 de la réglementation de la Commission, dont le but
est d’offrir une protection raisonnable contre de telles interférences dans les installations résidentielles.
Il n’existe cependant aucune garantie que des interférences ne surviendront pas dans des installations
particulières. Si cet équipement entraîne des interférences dans les réceptions radiophonique ettélévisuelle, ce
qui peut être déterminé en allumant et en éteignant l’équipement, l’utilisateur devrait tenter de corriger
l’interférence en posant un ou plusieurs des gestes suivants :
• réorienter l’antenne réceptrice de la radio ou de la télévision;
• déplacer le four à micro-ondes par rapport au récepteur;
• éloigner le four à micro-ondes du récepteur;
• brancher le four à micro-ondes dans une prise différente afin qu’il ne se trouve pas sur le même circuit que
le récepteur.
Le fabricant n’est pas responsable des interférences radiophoniques ou télévisuelles causées par une
MODIFICATION NON AUTORISÉE à ce four à micro-ondes. L’utilisateur est responsable de la
correction de telles interférences.
CONSERVEZ CES INSTRUCTIONS!
INFORMATION DE SÉCURITÉ IMPORTANTES
14

• Lisez et respectez les «Précautions à prendre afin
d’éviter une expositionexcessive à l’énergie
micro-onde», à la page 14.
• Cet appareil doit être mis à la terre. Ne le branchez
que sur une prise correctement mise à la terre.
Consultez la section « Directives de mise à la terre »,
à la page 17.
• N’utilisez pas cet appareil si son cordon ou sa fiche
d’alimentation sont endommagés, s’il ne fonctionne
pas correctement ou s’il a été échappé ou
endommagé.
• Ne couvrez ni ne bloquez aucune ouverture de
l’appareil.
• Utilisez cet appareil à ce pour quoi il a été conçu, tel
que décrit dans ce guide. N’utilisez pas de vapeurs ou
de produits chimiques corrosifs dans cet appareil.
• Ce four à micro-ondes est spécialement conçu pour
chauffer, sécher ou cuire des aliments. Il n’est pas
conçu pour une utilisation industrielle ou en
laboratoire.
• Certains produits tels les œufs entiers et les
contenants hermétiques tels les pots de verre fermés
peuvent exploser et ne devraient pas être chauffés
dans ce four.
• Ne rangez pas cet appareil à l’extérieur.
• N’utilisez pas ce produit près d’une source d’eau, tel
un sous-sol humide, une piscine ou un évier.
• Éloignez le cordon d’alimentation de toute surface
chauffée.
• N’immergez pas le cordon d’alimentation ou la
fiche.
• Consultez les directives de nettoyage de la surface
de la porte aux sections «Entretien et nettoyage »
de ce guide.
• Toute réparation doit être effectuée par un
personnel qualifié seulement. Contactez le centre
de service autorisé le plus près pour vérification,
réparation ou réglage.
• Comme c’est le cas de tout appareil, une
surveillance étroite est nécessaire lors de
l’utilisation par des enfants.
Pour réduire le risque d’incendie dans l’enceinte
du four :
• Ne cuisez pas trop les aliments.
• Surveillez étroitement l’appareil pendant la
cuisson si du papier, plastique ou autre matériau
combustible sont placés dans le four.
• Retirez les attaches et les poignées métalliques des
contenants de plastique avant de les placer dans le
four.
• N’utilisez pas le four comme espace de rangement.
Ne laissez pas de papier, ustensiles ou aliments
dans le four lorsqu’il n’est pas utilisé.
• N’utilisez pas le four pour sécher les journaux.
• Si des matériaux devaient s’enflammer dans le four,
laissez la porte du four fermée, éteignez le four et
débranchez l’alimentation au niveau de la fusible
ou du disjoncteur. Le feu risque de se propager si la
porte est ouverte.
AVERTISSEMENT
Afin de réduire le risque d’incendie, brûlure, choc électrique, blessure ou exposition excessive à l’énergie
micro-onde pendant l’utilisation de votre appareil, prenez des précautions de base, incluant celles énoncées
dans les sections qui suivent.
CONSIGNES DE
SÉCURITÉ
15
CONSIGNES DE SÉCURITÉ IMPORTANTES

REMARQUES PARTICULIÈRES CONCERNANT LA CUISSON MICRO-ONDE
« Arcing » est le terme des micro-ondes pour décrire la formation d’étincelles dans le four. La formation
d’étincelle est causée par :
• Du métal ou du papier d’aluminium en contact avec la paroi du four;
• Du papier d’aluminium non moulé autour des aliments (les arêtes pointant vers le haut agissent comme des
antennes);
• Du métal, tel des attaches métalliques, des broches de volaille ou de la vaisselle cordonnée d’or dans le
four à micro-ondes;
• Essuie-tout recyclé contenant de petits morceaux de métal dans le four à micro-ondes.
• Le maïs soufflé ne doit être cuit dans votre four à micro-ondes qu’à l’aide d’un accessoire de cuisson
spécialement conçu à cet effet, à moins que vous n’utilisiez du maïs soufflé identifié pour l’utilisation au
four à micro-ondes.
• Certains produits, tels les œufs entiers (dans leur coquille), les contenants hermétiques et les pots de verre
fermés, peuvent exploser et ne devraient pas être chauffés dans ce four à micro-ondes.
• Ne faites pas bouillir des œufs au four à micro-ondes. La pression s’accumulera dans le jaune d’œuf et le
fera exploser, entraînant potentiellement des blessures.
• Faire fonctionner le four à micro-ondes sans aliment à l’intérieur causer un incendie. La chaleur autour du
magnétron augmente et peut réduire la durée de vie du four.
• Les aliments dotés d’une «peau» fermée tels les pommes de terre, saucisses, tomates, pommes, foie de
poulet ou autres abattis et les jaunes d’œuf doivent être piqués avant la cuisson afin de permettre que la
vapeur s’en échappe.
FORMATION
D’ÉTINCELLES
Si vous voyez des étincelles, appuyez sur le bouton MARCHE/ARRÊT et
corrigez le problème.
ALIMENTS
DONNÉES DE
SÉCURITÉ: EAU
SURCHAUFFÉE
L’eau et les autres liquides ne font pas toujours de bulles
lorsqu’ils atteignent le point d’ébullition au four à
micro-ondes. Ils peuvent en fait surchauffer sans faire
une seule bulle. Le liquide surchauffé peut faire des
bulles lorsqu’il est déplacé ou que quelque chose y est
déposé, telle une cuiller ou un sachet de thé. Afin d’éviter
cette situation pouvant entraîner des blessures, ne
chauffez aucun liquide pendant plus de 2 minutes par
tasse. Une fois le liquide chauffé, laissez reposer la tasse
pendant 30 secondes dans le four à micro-ondes avant de
la déplacer ou d’y déposer quoi que ce soit.
• Évitez de chauffer de la nourriture pour bébé dans des
pots de verre, même sans le couvercle. Assurez-vous
que la nourriture pour bébé est entièrement cuite.
Mélangez les aliments afin de répartir la chaleur
également. Prenez soin de ne pas vous ébouillanter
lorsque vous chauffez du lait maternisé. Le contenant
peut sembler plus froid que le lait ne l’est en réalité.
Vérifiez toujours la température du lait avant de
nourrir le bébé.
• Ébullition spontanée – Dans certains cas, un liquide peut
commencer à bouillir pendant qu’on le retire du four à
micro-ondes ou immédiatement après. Afin d’éviter les
blessures causées par un éclaboussement, nous vous
recommandons de laisser le contenant reposer entre 30 et
40 secondes dans le four éteint avant de l’en retirer. Ne
faites pas bouillir de liquide dans des contenants à col
mince tels les bouteilles de boissons gazeuses, les flacons
de vinet surtout les tasses à café étroites. Même si le
contenant est ouvert, de la vapeur peut s’accumuler en
excès et entraîner une explosion ou un débordement.
• Ne faites pas dégeler de boissons surgelées dans des
bouteilles étroites (surtout les boissons gazeuses). Même
si le contenant est ouvert, de la pression peut s’accumuler.
Le contenant pourrait exploser, entraînant des blessures.
• La vapeur et les aliments chauds peuvent entraîner des
brûlures. Soyez prudent lorsque vous ouvrez des
contenants d’aliments chauds, y compris les sacs de maïs
soufflé, les pochettes de cuisson et les boîtes. Afin
d’éviter les blessures, dirigez la vapeur loin des mains et
du visage.
• Ne cuisez pas trop les pommes de terre. Elles pourraient
se déshydrater et s’enflammer, endommageant votre four.
• Cuisez entièrement la viande et la volaille : la viande doit
avoir une température INTERNE d’au moins 71,1°C
(160°F) et la volaille 82,2°C (180°F). La cuisson à ces
températures prévient habituellement les maladies
alimentaires.
16
CONSIGNES DE SÉCURITÉ IMPORTANTES

REMARQUES PARTICULIÈRES CONCERNANT LA CUISSON MICRO-ONDE
Assurez-vous que tous les ustensiles utilisés dans votre four à
micro-ondes conviennent à ce type de cuisson. La plupart des
casseroles de verre, plats de cuisson, tasses à mesurer,
ramequins, poteries ou porcelaines sans bordure métallique
ou enduit métallique peuvent être utilisés. Certains ustensiles
de cuisson sont identifiés «sûr pour la cuisson aux
micro-ondes».
• Si vous utilisez un thermomètre à viande durant la cuisson,
assurez-vous qu’il convient aux fours au micro-ondes.
• N’utilisez pas de produits de papier recyclé. Les essuie-tout,
serviettes de table et papier ciré recyclés peuvent contenir
des particules métalliques pouvant causer la formation
d’étincelles ou de flammes. Les produits de papier
contenant du nylon ou des fils de nylon devraient être
évités: eux aussi peuvent s’enflammer.
• Tous les emballages de plastique ne conviennent pas aux
fours à micro-ondes. Vérifiez l’emballage pour une
utilisation adéquate.
• Le fond de certains plateaux de polystyrène, tels les
emballages de viande, comporte une fine couche de métal.
Lorsque cuit aux micro-ondes, le métal peut brûler le
plancher du four ou enflammer un essuie-tout.
• La chaleur des aliments chauffés peut se transférer sur
l’ustensile de cuisson. Vous aurez peut-être besoin de
poignées pour manipuler l’ustensile.
• Les pochettes de cuisson «à bouillir» et les sacs de
plastique hermétiquement fermés devraient être fendus,
percés ou aérés, tel qu’indiqué sur leur emballage. Sans
quoi, le plastique pourrait exploser pendant la cuisson ou
immédiatement après, entraînant des blessures. En outre,
les plats de rangement de plastique devraient être
partiellement découverts afin d’éviter qu’ils ne forment une
fermeture hermétique. Lors de la cuissonde contenants
couverts hermétiquement à l'aide de pellicule plastique,
soyez prudent en retirant la pellicule et dirigez la vapeur
loin des mains et du visage.
• Les essuie-tout, le papier ciré et la pellicule plastique
peuvent être utilisés pour couvrir les plats afin de retenir
l’humidité et d’empêcher les éclaboussures. Assurez-
vous d’aérer la pellicule plastique afin que la vapeur
puisse s’échapper.
Comment déterminer si un plat convient au
micro-ondes :
1) Placez le plat à vérifier et une tasse à mesurer de verre
remplie d’une tasse d’eau dans le four.
2) Placez la tasse à mesurer dans le plat ou à côté.
3) Faites cuire aux micro-ondes pendant une minute à
puissance élevée. Si le plat chauffe, il ne devrait pas
être utilisé pour la cuisson aux micro-ondes. Si le plat
demeure froid et que seule l’eau dans la tasse chauffe,
le plat convient aux micro-ondes.
• N’utilisez le papier d’aluminium que de la façon décrite
dans ce guide. Les plateaux télé peuvent être cuits au
micro-ondes dans des plateaux d’aluminium de moins
de 3/4 po. Retirez le couvercle supérieur et remettez le
plateau dans la boîte. Lorsque vous utilisez du papier
d’aluminium dans le four à micro-ondes, gardez une
distance d’au moins 1 pouce entre le papier et les parois
du four.
• Les ustensiles de cuisson de plastique conçus pour les
micro-ondes sont très pratiques, mais doivent être
utilisés avec prudence. Même les plastiques conçus
pour les micro-ondes peuvent ne pas résister à la
surcuisson aussi bien que le verre ou la céramique : ils
peuvent ramollir ou carboniser lorsque soumis à de
courtes périodes de surcuisson. Les aliments et
l’ustensile peuvent même s’enflammer sur une longue
période de surcuisson.
Suivez les lignes directrices suivantes:
1) Utilisez des ustensiles de plastique conçus pour les
micro-ondes seulement et suivez attentivement les
recommandations du fabricant.
2) Ne cuisez pas de contenant vide aux micro-ondes.
3) Ne laissez pas les enfants utiliser d’ustensile de
plastique sans surveillance étroite.
USTENSILES DE
CUISSON POUR
MICRO-ONDES
INSTRUCTIONS DE
MISE À LA TERRE
• Cet appareil doit être mis à la terre. Dans le cas d’un court-circuit électrique, la mise à la terre réduit le
risque de choc électrique en offrant une sortie au courant électrique.
• Cet appareil est doté d’un cordon d’alimentation avec fiche bipolaire avec terre. La fiche doit être branchée
dans une prise correctement installée et mise à la terre.Consultez un électricien qualifié ou un technicien
d’entretien si les directives de mise à la terre ne sont pas entièrement comprises, ou si un doute subsiste
quant à la mise à la terre appropriée de l’appareil.
• Si la prise est une prise standard à deux fiches, il est de votre responsabilité et devoir de la faire remplacer
par une prise à trois fentes avec terre.
• Ne coupez pas et ne retirez pas la troisième lame (mise à la terre) du cordon d’alimentation, peu importe les
circonstances.N’utilisez pas d’adaptateur de fiche avec cet appareil.
• N’utilisez pas de rallonge avec cet appareil. Si le cordon d’alimentation est trop court, faites installer une
prise près de l’appareil par un électricien qualifié ou un technicien d’entretien. Pour un meilleur
fonctionnement, branchez cet appareil dans une prise à lui seul afin d’éviter le scintillement des lumières, le
grillage d’un fusible ou un arrêt du disjoncteur.
AVERTISSEMENT: Une utilisation inadéquate de la prise de mise à la terre
peut causer des chocs électriques.
17
CONSIGNES DE SÉCURITÉ IMPORTANTES

GUIDE D’INSTALLATION
1) S'assurer que tous matériels emballant sont enlevés de l'intérieur du four de micro-onde.
2) Vérifier la micro-onde pour n'importe quels dommages, comme la porte courbée, endommagé les cachets de
porte et sceller la surface, les gonds de porte cassée ou détachées et les loquets, et cabosse à l'intérieur ou
sur la porte. S'il y a n'importe quels dommages, ne pas fonctionner le four mais contacte un personnel de
service qualifié.
3) Ce four de micro-onde doit être placé sur une surface plate et stable pour tenir son poids.
4) Ne pas placer le four de micro-onde où la chaleur, l'humidité, ou l'haute humidité est produit, ou près des
matériels combustibles.
5) Pour l'opération correcte, le four de micro-onde doit avoir du flux d'air suffisant. Permettre 20 cm d'espace
au-dessus du four de micro-onde, 10 cm à de retour et 5 cm aux deux côtés. Ne pas couvrir ou bloquer des
ouvertures sur l'appareil. Ne pas enlever les pieds sur lesquels le four de micro-onde se tient.
6) Ne pas fonctionner le four sans le plateau de verre, le soutien de cylindre, et les arbres dans leurs positions
correctes.
7) S'assurer que la corde d'alimentation est intacte et ne court pas sous le four de micro-onde ou sur les
surfaces chaudes ou tranchantes.
8) La douille doit être facilement accessible pour qu'il peut être facilement débranché dans une urgence.
18

19
1) Vitre du four: Elle permet de voir la
cuisson tout en conservant l’énergie
confinée à l’intérieur du four.
2) Axe du plateau tournant.
3) Anneau de roulement.
4) Plateau tournant en verre amovible:
Le plateau tournant et le support doivent
être mis en place lorsque vous utilisez le
four. Le plateau tournant peut être retiré
pour le nettoyage.
5) Panneau de commande.
6) Affichage électronique.
CARACTÉRISTIQUES DE VOTRE
FOUR Á MICRO-ONDES
COMMANDES
Merche
Arret
Cuisson
Par Poids
Degel
Par Poids
Degel
Rapide
Minuterie
Intentsite
Cuisson
Horloge
Annuler
Boisson Mets Congele Rechauffage
Pizza
Pomme De
Terre Au Four
Mais Souffle
1
4
78
0
9
56
2
3
1
3
2
4
6
5
Merche
Arret
Cuisson
Par Poids
Degel
Par Poids
Degel
Rapide
Minuterie
Intentsite
Cuisson
Horloge
Annuler
Boisson Mets Congele Rechauffage
Pizza
Pomme De
Terre Au Four
Mais Souffle
1
4
78
0
9
56
2
3
FONCTIONNEMENT
• ÉCRAN DU MENU: La durée de cuisson, la puissance, les indicateurs et
l’heure courante sont affichés.
• TOUCHES DE CUISSON RAPIDE: Réglages permettant de cuire
instantanément des aliments populaires.
• NIVEAU DE PUISSANCE: Utilisé pour régler la puissance à un niveau
autre qu’élevé.
• MINUTERIE: La minuterie fonctionne de façon indépendante, même
pendant un programme de cuisson.
• CUISSON: Sert à la cuisson en plusieurs étapes. Permet de régler
automatiquement la cuisson à différents niveaux de puissance et pendant
différentes durées.
• CUISSON SELON LE POIDS: Cuisson programmée en fonction du poids
des aliments que l’on fait cuire.
• DÉCONGÉLATION SELON LE POIDS: Décongélation programmée en
fonction des aliments que l’on décongèle.
• DÉCONGÉLATION RAPIDE: Fonction de décongélation rapide qui
alterne entre la décongélation et le repos pour décongeler les aliments de
façon rapide et efficace.
• TOUCHES NUMÉRIQUES (0-9): Appuyez sur ces touches pour régler la
durée ou la quantité.
• HORLOGE: Permet de régler l’heure courante.
• RÉINITIALISATION: Supprime tous les réglages antérieurs.
• MARCHE/ARRÊT: Appuyez sur la touche pour démarrer ou arrêter la
cuisson.

RÉGLAGE D’UN PROGRAMME DE CUISSON :
A) Cuisson en une étape :
1) Servez-vous du bloc de touches numériques pour
régler la durée de cuisson. Vous pouvez régler la
durée de cuisson entre une seconde et 99 minutes
et 99 secondes.
2) Si vous souhaitez que la puissance soit autre que
100 %, appuyez sur la touche NIVEAU DE
PUISSANCE, puis utilisez les touches numériques
pour saisir le niveau de puissance souhaité.
3) Appuyez sur la touche MARCHE/ARRÊT pour
commencer la cuisson.
B) Cuisson en deux étapes :
1) Réglez l’ÉTAPE 1 : suivez les étapes 1 et 2 de la
rubrique « Cuisson en une étape ».
N’APPUYEZ PAS sur la touche
MARCHE/ARRÊT.
2) Réglez l’ÉTAPE 2 : appuyez sur la touche
CUISSON, puis saisissez la durée de cuisson et
la puissance souhaitées. La plupart des recettes de
cuisson en deux étapes utilisent un niveau de
puissance plus faible pour la deuxième étape.
3) Appuyez sur la touche MARCHE/ARRÊT.
REMARQUE : après l’écoulement de la première
durée, la sonnerie se fait entendre et END apparaît
sur l’afficheur. Appuyez sur n’importe quelle touche
numérique ou ouvrez la porte du four à micro-ondes
pour réinitialiser END avant de lancer une autre
fonction de cuisson.
20
FONCTIONNEMENT
RÉGLAGE
DE L’HORLOGE
RÉGLAGE DE LA
MINUTERIE
CUISSON AU FOUR À
MICRO-ONDES
NIVELS DE PUISSANCE:
Numero % de Puissance
9 90%
8 80%
7 70%
6 60%
5 50%
4 40%
3 30%
2 20%
1 10%
L’horloge de votre four à micro-ondes est paramétrée sur 12 heures.
1) Appuyez sur la touche « HORLOGE ».
2) Appuyez sur les chiffres pour saisir l’heure
courante. Par exemple, pour configurer 12 h 10,
appuyez sur « 1, 2, 1, 0 » consécutivement.
3) Appuyez sur « HORLOGE » pour terminer le
réglage de l’horloge.
REMARQUES :
• Lorsque le four à micro-ondes est branché pour la
première fois ou lorsque l’alimentation en électricité
revient après une panne de courant, l’afficheur
indique ENTER CLOCK TIME. Si vous préférez
que l’horloge ne soit pas affichée, appuyez sur la
touche RÉINITIALISATION.
• Vous pouvez consulter l’horloge pendant un
programme de cuisson en appuyant sur la touche
HORLOGE.
1) Appuyez sur la touche « MINUTERIE ».
2) Appuyez sur les chiffres pour saisir la durée de
minuterie (la durée maximale de cuisson est de
99 minutes et 99 secondes).
3) Appuyez sur la touche « MARCHE/ARRÊT » pour
confirmer le paramétrage.
REMARQUES :
• Le compte à rebours de la minuterie est visible sur
l’afficheur avant que celui-ci ne retourne à l’affichage
de l’horloge ou de la durée de cuisson.
• Appuyez sur MINUTERIE, puis sur
RÉINITIALISATION pour annuler la minuterie au
cours de l’opération.
La page est en cours de chargement...
La page est en cours de chargement...
La page est en cours de chargement...
La page est en cours de chargement...
-
 1
1
-
 2
2
-
 3
3
-
 4
4
-
 5
5
-
 6
6
-
 7
7
-
 8
8
-
 9
9
-
 10
10
-
 11
11
-
 12
12
-
 13
13
-
 14
14
-
 15
15
-
 16
16
-
 17
17
-
 18
18
-
 19
19
-
 20
20
-
 21
21
-
 22
22
-
 23
23
-
 24
24


Danby DMW111KPSSDD Product Manual (351 KB)
- Catégorie
- Micro-ondes
- Taper
- Product Manual (351 KB)
dans d''autres langues
- English: Danby DMW111KPSSDD