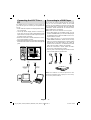
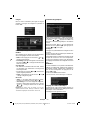
Proline LD1922D2 Operating Instructions Manual
- Catégorie
- Téléviseurs LCD
- Taper
- Operating Instructions Manual

LD1922D2
19” LCD TV
TV LCD 47 cm AVEC TUNER TNT INTEGRE
OPERATING INSTRUCTIONS
MANUEL D’UTILISATION

English - 1 -
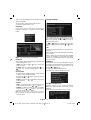
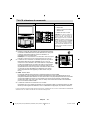
Contents
Install Menu ......................................................22
Source Menu ....................................................24
PC Mode Menu System........................................ 24
PC Position Menu ............................................. 24
Displaying TV Information .................................... 25
Mute Function ....................................................... 25
Picture Mode Selection......................................... 25
Freezing Picture ................................................... 25
Zoom Modes......................................................... 25
Auto .................................................................. 25
16:9 ................................................................... 25
4:3 ..................................................................... 25
Panoramic.........................................................25
14:9 ................................................................... 25
Cinema ............................................................. 25
Subtitle .............................................................. 25
Zoom.................................................................25
Teletext ................................................................. 26
Tips ....................................................................... 26
Screen Care......................................................26
Image Persistence ............................................ 26
Appendix A: PC Input Typical Display Modes ....... 27
Appendix B: AV and HDMI Signal Compatibility
(Input Signal Types) .............................................. 28
Specifi cations ....................................................... 29
IMPORTANT DISPOSAL INSTRUCTIONS ...... 30
Safety information ...............................................2
Accessories ............................................................ 4
Features ................................................................. 4
Introduction ............................................................. 4
Preparation ............................................................. 4
Safety Precautions ................................................. 4
Power Source .....................................................4
Power Cord .........................................................4
Moisture and Water ............................................4
Cleaning..............................................................5
Heat and Flames ................................................5
Lightning ............................................................. 5
Replacement Parts .............................................5
Servicing ............................................................. 5
Waste Disposal ................................................... 5
Disconnecting the Device ...................................5
Headphone Volume ............................................5
Installation...........................................................5
LCD Screen ........................................................5
Warning .............................................................. 5
Overview of the Remote Control ............................ 6
LCD TV and Operating Buttons .............................. 7
Back Connectors ................................................... 7
Side Connectors .................................................... 8
Power Connection .................................................. 8
Aerial Connection ................................................... 8
Connecting the LCD TV to a PC ............................. 9
Connecting to a DVD Player................................... 9
Using Side AV Connectors ................................... 10
Connecting Other Equipment via Scart ................10
Inserting Batteries into the
Remote Control Handset .......................................11
Switching the TV On/Off ........................................11
To Switch the TV On ..........................................11
To Switch the TV Off ..........................................11
Input Selection .......................................................11
Basic Operations ...................................................11
Operation with the Buttons on the TV ................11
Initial Settings ....................................................... 12
General Operation ................................................ 12
Electronic Programme Guide (EPG) .................... 13
Displaying Subtitles ..........................................13
Digital Teletext (** for UK only) .........................13
Analogue Teletext ............................................. 13
Widescreen ....................................................... 13
IDTV Menu System .............................................. 14
Channel List ......................................................14
Timers ............................................................... 15
Conditional Access ........................................... 16
TV Setup ...........................................................16
Setup ................................................................ 16
Analogue TV Menu System .................................. 20
Picture Menu.....................................................20
Sound Menu .....................................................20
Feature Menu ...................................................21
A01_[GB]_MB45_1055UK_PANEUIDTV_BRONZE11_19822_10065707_50156721.indd 1A01_[GB]_MB45_1055UK_PANEUIDTV_BRONZE11_19822_10065707_50156721.indd 1 27.10.2009 16:58:4927.10.2009 16:58:49

English - 2 -
Safety information
Mains supply
This television is designed to operate from a 220-240 Volts 50 Hz AC mains supply. Other power sources
may damage it. Check that the rating (On the back of the unit) states 220-240V AC before you plug it in for
the fi rst time.
Mains plug
We have fi tted this television with a standard mains plug.
• If the mains cord becomes damaged, it must be replaced by the manufacturer, its service agent or similarly
qualifi ed person to avoid a hazard.
• If for any reason you cut off the mains plug, please destroy the old plug as it would be dangerous if inserted
into a live power outlet. Carefully follow the wiring instructions supplied with the new plug.
• If a fuse is fi tted to the plug, remove the fuse before throwing the plug away.
• Never use a fused mains plug without the fuse cover.
• The mains plug shall be the main disconnect device and shall be accessible at all times.
Mains plug wiring for the UK
In a re-wirable plug the wires in the mains lead of this television should be connected as follows.
• The wire-coloured brown must be connected to the terminal that is marked with the letter L.
• The wire-coloured blue must be connected to the terminal that is marked with the letter N.
• No wire must be connected to the earth terminal which is marked E or
• You must make sure the lead is fi rmly secured under the cordclamp.
Mains fuse
UK standard (BS1363) plugs must have a 5 amp (BS1362 type) fuse fi tted. Replace the plug or have the
power lead assembly replaced if the fuse cover is lost.
Symbols
Safe use and care of your television
We have designed and made this television to meet European safety standards, but as with any electronic
equipment you must take care to stay safe and get the best results. Here is some good advice to help you
do this.
Read these instructions carefully before you try to use the television.
If the mains lead becomes damaged, it must be replaced by the manufacturer, its service agent or similarly
qualifi ed person with a lead of the same type and rating to avoid a hazard.
Avoid harsh conditions such as wet or damp places, high humidity, strong vibration, extremely high or low
temperatures, strong sunlight and places that are very dusty.
Never fi t makeshift stands or legs to the television.
Don’t continue to use your television if you have spilt liquids in it, if it is damaged in any way or if it does not
work normally. Immediately unplug the television and get expert advice.
Switch off mains power or pull out the power plug when you leave the television unattended, unless the function
of the television requires a continuous power supply.
Dangerous voltage constituting a risk
of electric shock is present inside this
equipment.
This mark is applied to show the
equipmentconforms to European safety and
electro-magnetic compatibility standards.
There are important operating
andmaintenance instructions in
the literatureaccompanying this
equipment.
A01_[GB]_MB45_1055UK_PANEUIDTV_BRONZE11_19822_10065707_50156721.indd 2A01_[GB]_MB45_1055UK_PANEUIDTV_BRONZE11_19822_10065707_50156721.indd 2 27.10.2009 16:58:5027.10.2009 16:58:50

English - 3 -
Protect the screen from fi ngerprints.
This product is intended for domestic use only, Commercial or any other use may invalidate the warranty and
might be dangerous.
Ventilation
Place the television on a hard fl at surface away from direct sunlight and heat sources. If it is in a cabinet,
allow at least a 10cm gap all around. Don’t obstruct the ventilation slots, including those underneath, with soft
furnishings. Overheating will shorten the life of the television and increase the risk of fi re.
Cleaning
Disconnect the mains supply and use only a lightly dampened soft cloth. Do not use chemical solvents or
strong detergents as these may damage the cabinet or screen.
Never allow water droplets to remain on the screen as moisture can cause permanent discolouration. Greasy
marks must only be removed with a commercial cleaner specifi cally recommended for LCD screens.
Batteries
Remove batteries when the television is not to be used for a long time. Batteries left in equipment may cause
damage through deterioration and corrosive leakage, invalidating the guarantee. To protect the environment,
use local recycling facilities for battery disposal.
Safe use and care of your LCD Television
We have designed and made this television to meet European safety standards, but as with any electronic
equipment you must take care to stay safe and get the best results. Here is some good advice to help you
do this.
Read these instructions carefully before you try to use the television.
Protect the mains lead. You must ensure the mains lead cannot be walked on, crushed, chafed, cut,
trapped.
Avoid harsh conditions such as wet or damp places, high humidity, strong vibration, extremely high or low
temperatures, strong sunlight, places which are very dusty.
Never fi t makeshift stands or legs to the television.
Never push objects into holes and ventilation slots.
Don’t touch the LCD display as it gets warm when operating, this is normal and is not a fault.
WARNINGS:
• To prevent electric shock, do not remove any cover.
• If anything goes wrong, don’t try and fi x it yourself, get a qualifi ed service agent to look at it.
• Do not expose this television to dripping or splashing or place any objects fi lled with liquids, such as vases,
on the television.
Never put a naked fl ame source such as lighted candles on or near the product.
• Pull the mains plug out of the wall socket and disconnect the aerial lead during thunderstorms.
• To prevent injury this television must be securely attached to the wall or it’s supplied stand in accordance
with the installation instructions.
Eye Fatigue
When using this product as a computer monitor, health and safety experts recommend short frequent breaks
rather than occasional, longer breaks, for example a 5-10 minute break after an hour of continuous screen
work is likely to be better than a 15 minute break every 2 hours.
Do not use the monitor against a bright background or where sunlight or other bright light source will shine
directly on the screen.
A01_[GB]_MB45_1055UK_PANEUIDTV_BRONZE11_19822_10065707_50156721.indd 3A01_[GB]_MB45_1055UK_PANEUIDTV_BRONZE11_19822_10065707_50156721.indd 3 27.10.2009 16:58:5127.10.2009 16:58:51

English - 4 -
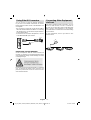
Accessories
ABC ABC
ABC
DEF DEF
DEF
GHI GHI
GHI
JKL JKL
JKL
MNO MNO
MNO
PQR PQR
PQR
STU STU
STU
VWX VWX
VWX
YZ YZ
YZ
1 2
3
4
5
6
7 8 9
0
AV
AV
SOURCE
SOURCE
EXIT EXIT
EXIT
-/--
-/--
INFO INFO
INFO
I-II
I-II
MENU
MENU
TV/DTVTV/DTV
TV/DTV
P/CH
P/CH
OK
OK
SEL ECT
SEL ECT
WIDE WIDE
WIDE
GUIDE GUIDE
GUIDE
PP
PP
P<P/SWAP
P<P/SWAP
Remote
Controller
Batteries
2 X AAA
Instruction Book
Features
• Remote controlled colour LCD TV.
• Fully integrated digital TV (DVB-T).
• HDMI connectors for digital video and audio. This
connection is also designed to accept high defi nition
signals.
•
200 programmes from VHF, UHF(analogue).
• 500 programmes for digital mode (IDTV).
• OSD menu system.
• Scart socket for external devices (such as video,
video games, audio set, etc.).
• Stereo sound syste
m.
• Teletext, fastext, TOP text.
• Headphone connection.
• Automatic programming system.
• Forward or backward manual tuning.
• Sleep timer.
• Child lock.
• Automatic sound mute when no transmission.
• NTSC playback.
• AVL (Automatic Volume Limiting).
• When no valid signal is detected, after 5 minutes the
TV switches automatically to standby mode.
• PLL (Frequency Search).
• PC input.
• Plug&Play for Windows 98,ME,2000,XP, Vista.
• Game Mode (optional).
Introduction
Thank you for choosing this product. This manual will
guide you for the proper operation of your
TV. Before operating the TV, please read
this manual thoroughly.
Please do keep this manual in a safe place
for future references.
Preparation
For ventilation, leave a free space of at least 10 cm
all around the set. To prevent any fault and unsafe
situations, please do not place any objects on top
of the set.
Use this device in moderate climates.
10 cm
10 cm
10 cm
Safety Precautions
Please read the following recommended
safety precautions carefully for your
safety.
Power Source
The TV set should be operated only from a 220-240
V AC, 50 Hz outlet. Ensure that you select the correct
voltage setting for your convenience.
Power Cord
Do not place the set, a piece of furniture, etc. on the power
cord (mains lead) or pinch the cord. Handle the power cord
by the plug. Do not unplug the appliance by pulling from the
power cord and never touch the power cord with wet hands
as this could cause a short circuit or electric shock. Never
make a knot in the cord or tie it with other cords. The power
cords should be placed in such a way that they are not likely
to be stepped on. A damaged power cord can cause fi re or
give you an electric shock. When it is damaged and needs
to be replaced, it should be done by qualifi ed personnel.
Moisture and Water
Do not use this device in a humid and
damp place (avoid the bathroom, the
sink in the kitchen, and near the washing
machine). Do not expose this device to
rain or water, as this may be dangerous
and do not place objects fi lled with liquids,
such as fl ower vases, on top. Avoid from
dripping or splashing.
A01_[GB]_MB45_1055UK_PANEUIDTV_BRONZE11_19822_10065707_50156721.indd 4A01_[GB]_MB45_1055UK_PANEUIDTV_BRONZE11_19822_10065707_50156721.indd 4 27.10.2009 16:58:5127.10.2009 16:58:51

English - 5 -
Disconnecting the Device
The mains plug is used to disconnect TV set from
the mains and therefore it must remain readily
operable.
Headphone Volume
Excessive sound pressure from earphones
and headphones can cause hearing loss.
Installation
To prevent injury, this device must be securely
attached to the wall in accordance with the installation
instructions when mounted to the wall (if the option
is available).
LCD Screen
The LCD panel is a very high technology product with
about a million thin fi lm transistors, giving you fi ne
picture details. Occasionally, a few non-active pixels
may appear on the screen as a fi xed blue, green or
red point. Please note that this does not affect the
performance of your product.
Warning
Do not leave your TV in standby or operating mode
when you leave your house.
If any solid object or liquid falls into the cabinet, unplug
the TV and have it checked by qualifi ed personnel
before operating it any further.
Cleaning
Before cleaning, unplug the TV set
from the wall outlet. Do not use liquid or
aerosol cleaners. Use soft and dry cloth.
Ventilation
The slots and openings on the TV set are intended for
ventilation and to ensure reliable operation. To prevent
overheating, these openings must not be blocked or
covered in anyway.
Heat and Flames
The set should not be placed near to open
fl ames and sources of intense heat such
as an electric heater. Ensure that no open
fl ame sources, such as lighted candles,
are placed on top of the TV. Batteries
should not be exposed to excessive heat
such as sunshine, fi re or the like.
Lightning
In case of storm and lightning or when
going on holiday, disconnect the power
cord from the wall outlet.
Replacement Parts
When replacement parts are required, make sure that
the service technician has used replacement parts,
which are specifi ed by the manufacturer or have the
same specifi cations as the original one. Unauthorized
substitutions may result in fi re, electrical shock or
other hazards.
Servicing
Please refer all servicing to qualified
personnel. Do not remove the cover
yourself as this may result in an electric
shock.
Waste Disposal
Instructions for waste disposal:
• Packaging and packaging aids are recyclable and
should principally be recycled. Packaging materials,
such as foil bag, must be kept away from children.
• Batteries, including those which are heavy metal-
free, should not be disposed of with household
waste. Please dispose of used battery in an
environment friendly manner. Find out about the
legal regulations which apply in your area.
• Cold cathode fluorescent lamp in LCD PANEL
contains a small amount of mercury; please follow
the local laws or regulations for disposal.
A01_[GB]_MB45_1055UK_PANEUIDTV_BRONZE11_19822_10065707_50156721.indd 5A01_[GB]_MB45_1055UK_PANEUIDTV_BRONZE11_19822_10065707_50156721.indd 5 27.10.2009 16:58:5227.10.2009 16:58:52

English - 6 -
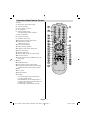
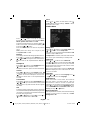
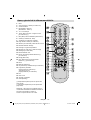
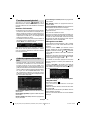
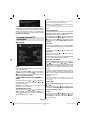
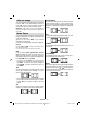
Overview of the Remote Control
Mute1.
No function / Exit (in DTV mode) 2.
Volume up / down3.
Mono / Stereo - Dual I-II4.
TV / Digital TV5.
Yellow / Feature menu / 6.
Current language (in DTV mode) (*)
Blue / Install menu7.
Hold (in TXT mode)8.
Update (in TXT mode)9.
Index page / Guide (in DTV mode)10.
Reveal (in TXT mode) / 11.
Switch from TV to PC
Picture mode selection12.
Swap / Previous program13.
Expand (in TXT mode) / Image Size14.
Mix (in TXT mode)15.
Teletext / PAT mode16.
Time / Subtitle on-off (**) (in DTV mode)17.
Red (Sound menu)18.
Green (Picture menu) / Subtitle on-off (*) (in 19.
DTV mode)
Menu20.
Navigations button21.
Okay (store) / Select (in DTV mode)22.
Programme up (Page down in DTV mode) / 23.
Programme down (Page up in DTV mode)
Info24.
AV / Source25.
Numeric buttons26.
Standby27.
(*) Only available for EU country options.
(**) Only available for UK.
Note: Buttons that are not indicated with a
number on the remote control illustration are
not functional in TV mode.
Remote range is approximately 7m/23ft
ABC ABC
ABC
DEF DEF
DEF
GHI GHI
GHI
JKL JKL
JKL
MNO MNO
MNO
PQR PQR
PQR
STU STU
STU
VWX VWX
VWX
YZ YZ
YZ
1 2
3
4
5
6
7
8 9
0
AV
AV
SOURCE
SOURCE
EXIT EXIT
EXIT
-/--
-/--
INFO INFO
INFO
I-II
I-II
MENU
MENU
TV/DTVTV/DTV
TV/DTV
P/CH
P/CH
OK
OK
SELEC T
SELEC T
WIDE WIDE
WIDE
GUIDE GUIDE
GUIDE
PP
PP
P<P/SWAP
P<P/SWAP
A01_[GB]_MB45_1055UK_PANEUIDTV_BRONZE11_19822_10065707_50156721.indd 6A01_[GB]_MB45_1055UK_PANEUIDTV_BRONZE11_19822_10065707_50156721.indd 6 27.10.2009 16:58:5227.10.2009 16:58:52

English - 7 -
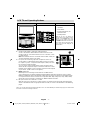
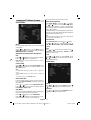
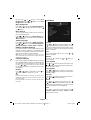
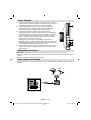
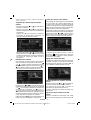
LCD TV and Operating Buttons
FRONT and REAR VIEW SIDE VIEW Control Buttons
Up button1.
Down button2.
Programme/Volume / AV 3.
selection button
Standby button4.
Note:You can use “+/-” buttons to
change volume. If you want to change
channels, press P/V/AV button once
and then use “+/-” buttons. If you hold
the P/V/AV button about a few seconds,
source OSD will be displayed. Main
menu OSD cannot be displayed via
control buttons.
Back Connectors
SCART socket inputs or outputs for external devices.1.
HDMI
Connect the SCART cable between SCART socket on TV and
SCART socket on your external device (such as a decoder, a VCR
or a DVD player).
Note: If an external device is connected via the SCART socket, the
TV will automatically switch to AV mode.
PC Input is for connecting a personal computer to the TV set. 2.
Connect the PC cable between the PC INPUT on the TV and the
PC output on your PC. Component Video Inputs (YPbPr) are used
for connecting component video.
You can use PC input to enable YPbPr signal sonnection with a
device that has component output. Connect the YPbPr to PC cable
between the PC INPUT on the TV and the component video outputs
of your device. (YPbPr cable is not supplied)
HDMI3. : HDMI input
HDMI Input is for connecting a device that has an HDMI socket.
Your LCD Television is capable of displaying High Defi nition pictures from devices such as a High
Defi nition Satellite Receiver or DVD Player. These devices must be connected via the HDMI sockets
or Component Socket. These sockets can accept either 480i, 480p, 576p, 576i, 720p, 1080i, 1080p
signals. No sound connection is needed for an HDMI to HDMI connection.
RF Input connects to an antenna or a cable.4.
Note that if you use a decoder or a media recorder, you should connect the aerial cable through the
device to the television with an appropriate antenna cable, as shown in the illustration in the following
pages.
When you use the wall mount kit (optional) with the LCD TV, we would defi nitely recommend to plug all your cables into the
back of the LCD before mounting to the wall.
A01_[GB]_MB45_1055UK_PANEUIDTV_BRONZE11_19822_10065707_50156721.indd 7A01_[GB]_MB45_1055UK_PANEUIDTV_BRONZE11_19822_10065707_50156721.indd 7 27.10.2009 16:58:5327.10.2009 16:58:53

English - 8 -
Side Connectors
CI Slot is used for inserting a CI card. A CI card allows you to view all the 1.
channels that you subscribe to. For more information, see “Conditional
Access” section.
Video Input is used for connecting video signals of external devices.2.
Connect the video cable between the VIDEO IN socket on the TV and
the VIDEO OUT jack on your device.
Audio Inputs are used for connecting audio signals of external devices. 3.
Connect the audio cable between the AUDIO INPUTS on the TV and the
AUDIO OUTPUT jacks on your device.
Also to enable PC/YPbPr sound connection in such a case, use an
appropriate audio cable between the connected device’s audio outputs
and the TV’s audio inputs
Note: If you connect a device to the TV via the VIDEO or PC/YPbPr
cable (YPbPr cable is not supplied) you should also connect your device
with an audio cable to the AUDIO INPUTS of the TV to enable audio.
Headphone jack is used for connecting an external headphone to the 4.
system. Connect to the HEADPHONE jack to listen to the TV from
headphones.
Power Connection
IMPORTANT : The TV set is designed to operate on 220-240V AC, 50 Hz.
• After unpacking, allow the TV set to reach the ambient room temperature before you connect the set to the
mains.
• Plug the power cable to the mains socket outlet.
Aerial Connection
• Connect the aerial or cable TV plug to the AERIAL INPUT socket located at the rear of the TV.
HDMI
A01_[GB]_MB45_1055UK_PANEUIDTV_BRONZE11_19822_10065707_50156721.indd 8A01_[GB]_MB45_1055UK_PANEUIDTV_BRONZE11_19822_10065707_50156721.indd 8 27.10.2009 16:58:5527.10.2009 16:58:55

English - 9 -
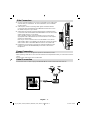
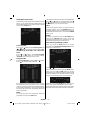
Connecting the LCD TV to a
PC
For displaying your computer’s screen image on
your LCD TV, you can connect your computer to the
TV set.
• Power off both computer and display before making
any connections.
• Use 15-pin D-sub display cable to connect a PC
to the LCD TV.Use an audio cable between audio
inputs of the TV (side) and audio output of your PC
to enable sound connection.
• When the connection is made, switch to PC source.
See “Input selection” section.
• Set the resolution that suits your viewing requirements.
Resolution information can be found in the appendix
parts.
HDMI
PC audio cable
(not supplied)
to AUDIO INPUTS
on the TV
PC RGB cable
(not supplied)
to PC input
Audio
Inputs
PC Input
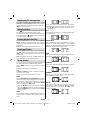
Connecting to a DVD Player
If you want to connect a DVD player to your LCD
TV, you can use connectors of the TV set. DVD
players may have different connectors. Please refer
to your DVD player’s instruction book for additional
information. Power off both the TV and the device
before making any connections.
Note: Cables shown in the illustration are not supplied.
• If your DVD player has an HDMI socket, you can
connect via HDMI. When you connect to DVD player
as illustrated below, switch to HDMI source. See,
“Input Selection” section.
• Most DVD players are connected through
COMPONENT SOCKETS.
YPbPr can be use only
when you connect a device that has a YPbPr output
through the PC input with YPbPr to PC cable. To
enable sound connection, use AUDIO IN located
side of the TV
(YPbPr cable is not supplied).
. When the connection is made, switch to YPbPr
source. See, “Input selection” section.
• You may also connect through the SCART socket.
Use a SCART cable as shown below.
HDMI
input
Scart socket
Component
video
inputs
Component
audio
inputs
DVD Player
Note : These methods of connection perform the same
function but in different levels of quality. It is not necessary
to connect by all three methods.
A01_[GB]_MB45_1055UK_PANEUIDTV_BRONZE11_19822_10065707_50156721.indd 9A01_[GB]_MB45_1055UK_PANEUIDTV_BRONZE11_19822_10065707_50156721.indd 9 27.10.2009 16:58:5727.10.2009 16:58:57

English - 10 -
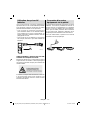
Using Side AV Connectors
You can connect a range of optional equipment
to your LCD TV. Possible connections are shown
below. Note that cables shown in the illustration are
not supplied.
• For connecting a camcorder, connect to the VIDEO
IN socket and the AUDIO SOCKETS. For selecting
the related source, see the section “Input selection”
in the following parts.
• To listen the TV sound from headphones, connect
to the HEADPHONE jack of theTV
Camcorder
Headphone
HEADPHONE VOLUME WARNING
Connect headphones with the volume set low and
increase it if required. Prolonged listening through
some headphones at high volume settings can result
in hearing damage.
Ecouteurs et casques audio doivent être en conformité
avec la directive EN 50332-2 afin d’assurer une
protection permanente contre les niveaux sonores
excessivement élevés.
Connecting Other Equipment
via Scart
Most devices support SCART connection. You can
connect a; DVD recorder, a VCR or a decoder to
your LCD TV by using the SCART socket. Note that
cables shown in the illustration are not supplied.
Power off both the TV and the devices before making
any connections.
For more information, refer to your device’s own
instruction book.
Scart socket
Decoder
DVD Recorder
Video Recorder
A01_[GB]_MB45_1055UK_PANEUIDTV_BRONZE11_19822_10065707_50156721.indd 10A01_[GB]_MB45_1055UK_PANEUIDTV_BRONZE11_19822_10065707_50156721.indd 10 27.10.2009 16:58:5827.10.2009 16:58:58

English - 11 -
Inserting Batteries into the
Remote Control Handset
• Remove the battery cover located on the back of
the handset by gently pulling backwards from the
indicated part.
• Insert two AAA/R3 or equivalent type batteries
inside. Place the batteries in the remote observing
the polarity markings inside the battery compartment
then replace the battery cover.
Note: Remove the battery from remote control handset when
it is not to be used for a long period. Otherwise it can be
damaged due to corrosive leakage of the batteries invalidating
the warranty.
Switching the TV On/Off
To Switch the TV On
• Connect the power cord to the 220-240V AC ,50 Hz.
Then the standby LED lights up.
• To switch on the TV from standby mode either:
• Press the “
” button, P+ / P- or a numeric button
on the remote control.
• Press the “
” button, -P/CH or P/CH+ button on
the TV. The TV will then switch on.
Note : If you switch on your TV via PROGRAMME UP/DOWN
buttons on the remote control or on the TV set, the programme
that you were watching last will be reselected.
By either method the TV will switch on.
To Switch the TV Off
• Press the “ ” button on the remote control or press
the “
” switch on the TV, so the TV will switch to
standby mode.
Note : If you have switched off the TV set from the standby
button on the TV, next time you press the standby button, the
TV set will switch on without going to the standby mode.
• To power down the TV completely, unplug the
power cord from the mains socket.
Input Selection
Once you have connected external systems to your
TV, you can switch to different input sources.
• Press “
/SOURCE” button on your remote control
for directly changing sources.
or
• Select “Source” option from the TV Setup option in the
main menu by using “
” or “ ” button. Use then “ ” or
“ ” button to highlight an input and press “ ” button
to select.
Note : You can mark desired source options by pressing the
OK button. Therefore, when
“ /SOURCE” button is
pressed, only the marked source options will be available
(except for the TV source).
Note : YPbPr mode can be use only when you connect a
device that has a YPbPr output through the PC input with
YPbPr to PC cable (YPbPr cable is not supplied).
Basic Operations
You can operate your TV using both the remote
control and onset buttons.
Operation with the Buttons on the TV
Main menu OSD cannot be displayed via control
buttons. “+/-” buttons will function as volume up/down
as default. Even if you set other functions for these
buttons, “+/-” buttons will perform as default after a
short while.
Volume Setting
• Press “P/V/AV ” button once and then use “+/-” buttons
to increase or decrease volume, so a volume level
scale (slider) will be displayed on the screen.
Programme Selection
• Press “+/-” to select the next or previous programme.
AV Mode
• Hold the “P/V/AV ” button, source OSD will be
displayed.
Operation with the Remote Control
• The remote control of your TV is designed to control
all the functions of the TV. The functions will be
described in accordance with the menu system of
your TV.
A01_[GB]_MB45_1055UK_PANEUIDTV_BRONZE11_19822_10065707_50156721.indd 11A01_[GB]_MB45_1055UK_PANEUIDTV_BRONZE11_19822_10065707_50156721.indd 11 27.10.2009 16:58:5927.10.2009 16:58:59

English - 12 -
• Functions of the menu system are described in the
following sections.
Volume Setting
• Press “V+” button to increase the volume. Press “V-”
button to decrease the volume. A volume level scale
(slider) will be displayed on the screen.
Programme Selection (Previous or Next
Programme)
• Press “ P - ” button to select the previous programme.
• Press “ P + ” button to select the next programme.
Programme Selection (Direct Access)
• Press numeric buttons on the remote control to select
programmes between 0 and 9. The TV will switch
to the selected programme. To select programmes
between 10-500 (for IDTV) or 10-199 (for analogue),
press the numeric buttons consecutively
• Press directly the programme number to reselect
single digit programmes
Initial Settings
When the TV is turned on for the fi rst time, the menu
for the language selection appears on the screen. The
message “Welcome please select your language!”
is displayed in all language options sequentially in
the OSD.
By pressing the “
” or “ ” buttons highlight the
language you want to set and press OK button. After
that the, “First time installation” OSD will appear on
the screen. By pressing “ ” or “ ” buttons, select
the country you want to set and press OK button (*
for EU countries).
Note: Country selection OSD will not be available for UK.
Press OK button on the remote control to continue
and the following message will be displayed on the
screen:
• To select the “Yes” or “No” option, highlight the item
by using “ ” or “ ” buttons and press the “OK”
button.
The IDTV will automatically tune to the UHF or VHF(*)
(* for EU countries) transmission channels, searching
for digital terrestrial TV broadcasts and displaying
the names of channels found. This process will take
about a few minutes.
After Automatic Search is completed, the following
message asking for analogue channel search appears
on the screen:
To search for analogue channels, select “Yes”. TV
switches to the analogue TV mode. The menu is
displayed to search for analogue channels.
Select your Country, Language and Text language
by using “
” or “ ” and “ ” or “ ” buttons. Press
OK or RED button to continue. To cancel, press the
BLUE button.
For more information on this process, see “Install Menu”
section.
Note : For proper functioning of digital teletext in DTV mode, you
should set country as UK in analogue AUTO PROGRAM (for
UK broadcasts only).
Do not turn off the TV while running fi rst time installation.
General Operation
Press the “ /SOURCE” button on the remote
control and select TV/DTV to switch the TV set to
digital terrestrial television broadcasting.
Information Banner
• Whenever you change channel, using the P- / P+
button or the numeric buttons, the TV displays the
broadcast picture along with an information banner
at the bottom of the screen (available only in DTV
mode). This will remain on the screen for a few
seconds.
• The information banner can also be displayed at
any time while watching TV by pressing the “INFO”
button on the remote control:
If the selected channel is locked, you must enter the
correct four numeric code to view the channel. “Enter
PIN” will be displayed on the screen in such a case:
A01_[GB]_MB45_1055UK_PANEUIDTV_BRONZE11_19822_10065707_50156721.indd 12A01_[GB]_MB45_1055UK_PANEUIDTV_BRONZE11_19822_10065707_50156721.indd 12 27.10.2009 16:59:0027.10.2009 16:59:00

English - 13 -
Electronic Programme Guide (EPG)
• Some, but not all, channels send information about
the current and next events. Press GUIDE button to
view the EPG menu. EPG appears on the screen. It
is able to get Information of the channel - programs
weekly by means of 7-DAY-EPG. All programs of
channels are displayed. On the bottom of the screen;
info bar, showing all the available commands, will
be displayed.
RED button (Shrink) : makes the info boxes smaller.
GREEN button (Expand) : makes the info boxes larger.
YELLOW button (Prev. Day) : displays the programmes
of previous day.
BLUE button (Next day) : displays the programmes of
the next day.
INFO (Details): displays the programmes in detail.
Numeric buttons (Jump) : go to preferred channel
directly via numeric buttons.
OK : view for current broadcast/reminders for future
programs.
P<P : jumps to the current broadcast.
• Press “0” button on the remote control to view Guide
Search menu. Using this feature, you can search the
programme guide database in accordance with the
genre selected or with name match.
Displaying Subtitles
With digital terrestrial broadcasting (DVB-T), some
programmes are being broadcasted with subtitles.
Press the “ MENU ” button to display the main menu,
highlight the Setup and then Language menu using “
” or “ ” button and press the OK button to display the
“Language settings” menu.
Highlight the “Subtitle” item in “Language settings”
menu and use
” or “ button to set Subtitle to the
desired language.
To display the subtitles, press the subtitle button, press
it again to turn subtitles off.
If “Subtitle” is on and a language option is set, pressing
the “
” button causes the following warning message
display on the screen (** for UK only):
Digital Teletext (** for UK only)
• Press the “ ” button.
• The digital teletext information appears.
• Operate it with the coloured buttons, cursor buttons
and OK button.
The operation method may differ depending on the
contents of the digital teletext.
Follow the instructions displayed on digital teletext screen.
• When Press “SELECT” button or similar message
appears on the screen, press the OK button.
• When the “
” button is pressed, the TV returns to
television broadcasting.
• With digital terrestrial broadcasting (DVB-T), in
addition to digital teletext broadcasting together with
the normal broadcasting, there are also channels
with just digital teletext broadcasting.
• The aspect ratio (picture shape) when watching a channel
with just digital teletext broadcasting is the same as the
aspect ratio of the picture viewed previously.
• When you press the “ ” button again, the digital
teletext screen will be displayed.
Analogue Teletext
Use of teletext and its functions are identical to
the analogue text system. Please do refer to the
“TELETEXT” explanations.
Widescreen
Depending on the type of the broadcast being
transmitted, programmes can be viewed in a number
of formats. Press the “WIDE” button repeatedly to
change screen format.
When Auto is selected, the format being displayed is
determined by the picture being broadcasted.
PLEASE NOTE : Menu size changes depending on the
chosen image size.
Notice !
AC3 audio type is not supported. In this case, Tv
sound will be muted. If the broadcast includes AC3
stream, the following warning message will be
displayed on the screen:
If there is no audio available, the following warning
message will be displayed on the screen:.
A01_[GB]_MB45_1055UK_PANEUIDTV_BRONZE11_19822_10065707_50156721.indd 13A01_[GB]_MB45_1055UK_PANEUIDTV_BRONZE11_19822_10065707_50156721.indd 13 27.10.2009 16:59:0127.10.2009 16:59:01

English - 14 -
IDTV Menu System
Press the “ MENU ” button. Main menu will be
displayed.
Channel List
Using the “ ” or “ ” button on the remote control, make
sure that the fi rst item, Channel List, is highlighted and
press the “OK” button to display the Channel List.
Navigating the Entire Channel List
Press “ ” or “ ” button for selecting the previous or next
channel. You can press “RED” or “GREEN” button to
move page up or page down.
To watch a specifi c channel, highlight it using “
” or “
” button and then press “ OK ” button, while the “Select”
item on Channel List menu is highlighted by using “
” or “ ” button.
Then the name and number of the selected channel will
be displayed in the top-left and top-right of the channel
display at the top-right of the screen, respectively.
Moving the channels in the channel list
• Press “ ” or “ ” buttons to select the channel that
will be moved.
• Press “
” or “ ” buttons to select the “ Move ” item on
Channel List menu.
Following OSD will be displayed next to “ OK ” item
to indicate that enter a number by using the numeric
buttons on the remote control and press “ OK ” to
confi rm.
Note: If you enter the same programme number of the channel
that you want to move, “.... channel services will be replaced.
Do you want to continue?” OSD will be displayed. Press OK
to confi rm or select “No” to cancel.
Deleting the Channels in the Channel List
• Press “ ” or “ ” button to select the channel that
will be deleted.
• Press “
” or “ ” button to select the “Delete’’ item
on Channel List menu.
• Press the “ OK ” button to delete the highlighted
channel in the channel list. Then the message below
appears on the screen:
• Press “ ” or “ ” button to highlight the desired
option. If “ OK ” button is pressed while “ Yes ” is
highlighted, the highlighted channel is deleted.
Selecting “ No ” cancels the deletion.
Renaming Channels
To rename a specifi c channel, the channel must
be highlighted by pressing “ ” or “ ” button. Then
highlight the Edit Name item by pressing “ ” or “ ”
button as illustrated below. Press the “OK” button to
activate the rename feature.
A01_[GB]_MB45_1055UK_PANEUIDTV_BRONZE11_19822_10065707_50156721.indd 14A01_[GB]_MB45_1055UK_PANEUIDTV_BRONZE11_19822_10065707_50156721.indd 14 27.10.2009 16:59:0127.10.2009 16:59:01

English - 15 -
Now pressing “ ” or “ ” button moves to the previous/
next character. Pressing “ ” or “ ” button toggles
the current character, i.e., ‘b’ character becomes ‘a’
by “ ” and ‘c’ by “ ”. Pressing the numeric buttons
‘0...9’ replaces the highlighted character with the
characters printed above the button one by one as
the button is pressed.
Press the “MENU” button to cancel the editing or OK
button to save the new name.
Adding Locks to Channels
Channel locking provides a password-protected
access to channels selected by parents. In order to
lock a channel you should know the parental lock
password (default value is set to 0000 in the factory
and can only be changed from the Confi guration
menu).
Select the channel to be locked by highlighting it and
select the Lock option by pressing “
” or “ ” button.
When the “OK” button is pressed, a dialog OSD asking
for the password will be displayed.
Enter the password by using the numeric buttons on
the remote control. The lock icon “ ” will now be
displayed next to the selected channel. Repeat the
same operation to cancel the lock.
Setting Favourites
To set a favourite you should highlight the “Favourites”
item at the bottom of the Channel List menu. Then
press “OK” button and Edit Favourite List menu
appears on the screen.
How to Add a Channel to a Favourites List
• By pressing “ ” or “ ” buttons, highlight the channel
that you want to add to the favourite list.
• By pressing “OK” button, the highlighted channel is
added to the Favourite List.
• F icon indicates that a channel is added to Favourite
List.
Removing a Channel from Favourite List
• Highlight the channel that you want to remove from
the favourite list and press OK button to remove.You
can press “OK” button again to re-add a channel.
• To activate Favourites, go to the Confi guration menu
and select Favourite mode. Use “
” / “ ” to set
Favourite mode as on. To cancel Favourites, set
Favourite Mode to Off.
On Screen Help
For all menus, press the INFO button to display the
help information about the menu functions.
Program Guide
This section is same with the instructions given in
the General Operations page. Please see Electronic
Programme Guide (EPG) section in the General
Operations part.
Timers
To display timers window, activate the item from the
main menu. To add a timer, press the YELLOW button
on the remote control. Then “Add Timer” window
appears.
Channel : “
” or “ ” keys will navigate the user
through the TV or Radio list.
Date : Starting date is entered via the Left/Right or the
numeric buttons.
Start : Starting time is entered via the Left/Right or
the numeric buttons.
End : Ending time is entered via the Left/Right or the
numeric buttons.
Change/Delete : permits or prohibits any modifi cations
for other users.
Duration: Duration between Start and End time.
Repeat: You can set a timer to be repeated as Once,
Daily or Weekly.
You can save the adjustments by pressing the GREEN
key or cancel the process by pressing the RED button.
A01_[GB]_MB45_1055UK_PANEUIDTV_BRONZE11_19822_10065707_50156721.indd 15A01_[GB]_MB45_1055UK_PANEUIDTV_BRONZE11_19822_10065707_50156721.indd 15 27.10.2009 16:59:0327.10.2009 16:59:03

English - 16 -
You can edit the list via GREEN key and delete with
the RED button.
Conditional Access
• Press the “ MENU ” button to display the main menu and
use the “ ” or “ ” button to highlight the “Conditional
Access” line and press the “ OK ” button:
Some Digital Terrestrial channels operate on a Pay
Per View basis. These require a subscription and a
hardware decoder.
Obtain the Conditional Access Module (CAM) and the
viewing card by subscribing to a pay channel company,
then insert those to the TV using the following procedure.
• Switch off the TV and unplug from the mains.
• The CAM should be correctly inserted, it is impossible
to insert fully if reversed. The CAM or the TV terminal
may be damaged if the CAM is forcefully inserted.
• Connect the TV to the mains supply, switch on and then
wait for few moments until the card is activated.
• Some CAMs may require the following set up. Please
set the CAM by entering the IDTV menu, Conditional
Access then pressing the “OK” button. (CAM set up
menu is not displayed when it is not required.)
• To see the viewing contract information: enter IDTV;
press the “ MENU ” button, then highlight Conditional
Access and press the “ OK ” button.
• When no module is inserted, “No Conditional Access
module detected” message appears on the screen.
• Refer to the module instruction manual for details of
the settings.
Note: Insert or remove the CI module only when the TV is
switched off or in standby mode.
TV Setup
You can use this item to display the TV functions.
The digital TV Setup menu screen is accessed from
the main menu. Press the “MENU” button to display
the main menu and use “
” or “ ” button to highlight
“TV Setup”, press the “ OK ” button to display TV Setup
menu screen.
You can fi nd detailed information for all menu items in
“Analogue TV Menu System” section.
Setup
The adjustments in this menu are given as the following:
Confi guration
You can confi gure the settings of your TV. Select
Confi guration from Setup menu and press “ OK ” to
view this menu. Press the “EXIT” button on the remote
control to exit.
Note:This menu configuration may look different
according to the country setting selected.
Hard of Hearing (* for EU countries only)
Use “ ” or “ ” button to select Hard of Hearing and
then press “ ” or “ ” button to set this setting as
On or Off.
If the broadcaster enables any special signal
concerning the audio, you can set this setting as On
to receive such signals.
Favourite Mode
Use this function to enable or disable favourite
mode. Press “ ” / “ ” button to set this function as
on or off.
Channel List
Use “ ” or “ ” buttons to go to Channel List option.
Use “ ” or “ ” buttons to toggle Channel List Mode.
If you select “TV Only”, with the “ ” or “ ” buttons,
you navigate through only TV channels. If you select
“Radio Only”, with the “ ” or “ ” buttons, you navigate
through only radio channels. If you select “Text Only”,
with the “ ” or “ ” buttons, you navigate through only
text channels.
Scan Encrypted
Scan Encrypted Channel feature will always be ON
after performing first time installation. When this
setting is on, search process will locate the encrypted
channels as well. If it is set as OFF manually, encrypted
channels will not be located while in automatic search
or manual search.
Use “
” or “ ” button to select Scan Encrypted and
then press “
” or “ ” button to set this setting as
On or Off.
Receiver Upgrade
Over Air Download (OAD)
This feature helps to keep your TV updated. It works
This feature helps to keep your TV updated. It works
automatically and searches for new information
automatically and searches for new information
when available. Note that this setting is inactive to be
when available. Note that this setting is inactive to be
A01_[GB]_MB45_1055UK_PANEUIDTV_BRONZE11_19822_10065707_50156721.indd 16A01_[GB]_MB45_1055UK_PANEUIDTV_BRONZE11_19822_10065707_50156721.indd 16 27.10.2009 16:59:0427.10.2009 16:59:04

English - 17 -
modifi ed
modifi ed
.
. Please ensure that the TV is set to standby
mode. The TV automatically powers up at 3.00 A.M.
each day and searches for any new information which
may be broadcasted and will download this to your
receiver automatically. This operation will normally
take approximately 30 minutes.
Note: Your TV may start in First Time Installation mode after
OAD update.
Parental Control
Use “ ” or “ ” buttons to go to Parental Lock option.
Press OK button to enter the menu. A dialog box
asking for the lock key will be displayed. The key is set
to “0000” initially. Enter PIN. If it is incorrect, “Wrong
Pin” OSD will be displayed. If it is correct, the Parental
Control menu will be displayed:
Maturity Lock (*)
(*) If you set Country option as UK in the fi rst time
installation, Maturity Lock option will not be visible.
This setting is available only for EU countries.
When set, this option gets the maturity information
from the broadcast and if this maturity level is disabled,
does not show video-audio.
Menu Lock
In menu lock you can set locking for all menus, or the
Installation Menu to restrict access to these menus.
If the menu lock is disabled, there will be free access
to the menu system. Use “ ” or “ ” buttons to go to
Menu Lock option. Use “ ” or “ ” buttons to choose
Menu Lock Mode.
DISABLED : All menus are unlocked.
ALL MENUS : All Menus are accessible only with
the correct lock key. So the user cannot add, delete,
rename, channels, cannot set timers.
INSTALLATION MENU : Installation menu is locked.
So the user can’t add channels. Changes will be
updated after exiting ‘Confi guration Menu’.
Set PIN
Use “ ” or “ ” buttons to go to “Set PIN” option.
Press “OK” to display the “Set PIN” window. Use
numeric buttons to enter new pin number you will need
to input your new pin a second time for verifi cation
purposes.The factory default pin number is 0000, if
you change the pin number make sure you write it
down and keep it safe.
Time Settings
In the configuration menu, highlight the Time Settings
item by pressing “ ” or “ ” buttons.
Press “OK” and Time Settings sub menu will be
displayed on the screen. Current Time,Time Zone
Setting and Time Zone will be available.
Use “
” or “ ” buttons to highlight the Time Zone
Setting. Time Zone Setting is set using “
” or “ ”
buttons. It can be set to AUTO or MANUAL.
When AUTO is selected, Current Time and Time Zone
options will not be available to be set. If MANUAL
option is selected as the Time Zone Setting, Time
Zone can be altered:
• By pressing “
” or “ ” buttons select Time Zone.
Use “
” or “ ” buttons to change the Time Zone
between GMT-12 or GMT+12. Current Time on the
top of the menu list will then change according to the
selected Time Zone.
Audio Description
Audio description refers to an additional narration
track for blind and visually impaired viewers of
visual media, including television and movies. The
description narrator talks through the presentation,
describing what is happening on the screen during the
natural pauses in the audio (and sometimes during
dialogue, if deemed necessary). You can use this
feature, only if the broadcaster supports that additional
narration track. Use “ ” or “ ” buttons to select an
item. Then use “ ” or “ ” buttons to set.
Audio Description
This function enables or disables the audio description
feature by pressing the “ ” or “ ” buttons.
Preferred Language
By pressing the “ ” or “ ” buttons the preferred audio
description language is being changed.
This setting can be used, only if it is available.
Relative Volume
Using this option, the Audio Description volume level
can be increased or decreased relatively, according
to the general volume.
Standby Search (*)
(*) This setting is visible only when the Country option
is set to Denmark, Sweden, Norway or Finland.
Use “
” or “ ” button to select Standby Search and
then press “
” or “ ” button to set this setting as On or
A01_[GB]_MB45_1055UK_PANEUIDTV_BRONZE11_19822_10065707_50156721.indd 17A01_[GB]_MB45_1055UK_PANEUIDTV_BRONZE11_19822_10065707_50156721.indd 17 27.10.2009 16:59:0527.10.2009 16:59:05

English - 18 -
Off. If you change Standby Search to Off, this function
will be unavailable.
To use Standby search please make sure that
you select Standby Search as On.
Language
In this menu the user can adjust the preferred
language. Language is changed by pressing “OK”
button.
Menu : shows the language of the system
Preferred
These settings will be used if available. Otherwise the
current settings will be used.
• Audio : by pressing “ ” or “ ” keys change the
audio language.
• Subtitle : alter the subtitle language with “
” or “
” keys. The chosen language will be seen in
subtitles.
Movie Subtitle
• In order to display subtitles properly, use this setting
to select a movie subtitle language.
• By pressing “ ” or “ ” button, select the desired
language option.
• Guide : By pressing “
” or “ ” buttons change the
guide language.
Current
• Audio : if audio language is supported change the
audio language by pressing “ ” or “ ” buttons
• Subtitle : if subtitle is backed up, alter the subtitle
language with “
” or “ ” buttons. The chosen
language will be seen in subtitles.
Note: If the Country option is set to Denmark, Sweden,
Norway or Finland, the Language Settings menu will function
as described below:
Language Settings
In the confi guration menu, highlight the Language
Settings item by pressing “ ” or “ ” buttons. Press
“OK” and Language Settings submenu will be
displayed on the screen:
Use “
” or “ ” buttons to highlight the menu item
that will be adjusted and then press “ ” or “ ” button
to set.
Notes:
• System Language determines the on-screen menu
language.
• Audio Language is used for selecting the soundtrack
of a channels.
• Primary settings are the first priority when multiple
choices are available on a broadcast. Secondary
settings are the alternatives when the first options
are not available.
Installation
The Installation menu is mainly intended to help you
for creating a Channel Table in the most effi cient way.
Select Installation from the Confi guration menu by
pressing “ ” or “ ” buttons.
This menu includes the following items:
(*) For Denmark, Sweden, Norway or Finland.
Automatic Channel Scan
Automatic channel scan is started by pressing
“OK” button while Automatic channel scan item is
highlighted.
The following message appears on the screen:
A01_[GB]_MB45_1055UK_PANEUIDTV_BRONZE11_19822_10065707_50156721.indd 18A01_[GB]_MB45_1055UK_PANEUIDTV_BRONZE11_19822_10065707_50156721.indd 18 27.10.2009 16:59:0727.10.2009 16:59:07

English - 19 -
Highlight Yes or No by using “ ” or “ ” buttons and
press “OK” button to confi rm.
If Yes is selected, automatic search starts.
Selecting No cancels automatic search.
After search is completed for digital channels, a
message asking whether to search for analogue
channels appears on the screen:
Press the “OK” button to search for analogue
channels. The following menu appears on the screen
for analogue channel search:
Select your Country , Language and Text language
by using “ ” or “ ” and “ ” or “ ” buttons. Press
“OK” or RED button to continue. To cancel, press
BLUE button. The following menu will be displayed
during the automatic tuning:
After APS is fi nalised, the programme table will appear
on the screen. In the programme table you will see
the programme numbers and names assigned to the
programmes.
Manual Channel Scan
In manual channel scan, the number of the multiplex is
entered manually and only that multiplex is searched
for the channels. For each valid channel number, signal
level and signal quality are shown on the screen.
In both manual and auto search any existing channel
in the database is not re-stored to avoid redundant
duplicates of that channel.
Clear Service List (*)
(*) This setting is visible only when the Country option
is set to Denmark, Sweden, Norway or Finland.
Use this setting to clear channels stored. Press “
” or “ ”
button to select Clear Service List and then press OK. The
following OSD message will be displayed on the screen:
Press OK to cancel. Select Yes by pressing “ ” or “ ”
button and press OK to delete all of the channels.
First Time Installation
The user can use this item to load default settings,
which were loaded to the receiver at the factory.
To install factory settings, highlight “First Time
Installation” menu item and press “OK” button,
then you will be asked whether or not to delete the
settings. Selecting “Yes” by pressing “OK” button
while the “Yes” is highlighted will delete the existing
channel table.
Then you will be asked to confi rm for deleting all
channels and settings:
By selecting Yes and pressing the “OK” button, the
existing channel table will be deleted. After factory
settings are loaded, “First Time Installation” menu
will be displayed.
The menu which is displayed for language selection
appears on the screen at fi rst. By using “
” or “ ”
buttons, select the desired language option, and press
OK button to activate.
After then, “First time installation” OSD will appear
on the screen. By pressing “
” or “ ” buttons, select
the Country you want to set and press “OK” button
(* only for EU countries).
Press the “OK” button to start installation. After search
is completed for digital channels, a message asking
whether to search for analogue channels appears
on the screen.This process is same as described in
Automatic Search section .
A01_[GB]_MB45_1055UK_PANEUIDTV_BRONZE11_19822_10065707_50156721.indd 19A01_[GB]_MB45_1055UK_PANEUIDTV_BRONZE11_19822_10065707_50156721.indd 19 27.10.2009 16:59:0827.10.2009 16:59:08
La page charge ...
La page charge ...
La page charge ...
La page charge ...
La page charge ...
La page charge ...
La page charge ...
La page charge ...
La page charge ...
La page charge ...
La page charge ...
La page charge ...
La page charge ...
La page charge ...
La page charge ...
La page charge ...
La page charge ...
La page charge ...
La page charge ...
La page charge ...
La page charge ...
La page charge ...
La page charge ...
La page charge ...
La page charge ...
La page charge ...
La page charge ...
La page charge ...
La page charge ...
La page charge ...
La page charge ...
La page charge ...
La page charge ...
La page charge ...
La page charge ...
La page charge ...
La page charge ...
La page charge ...
La page charge ...
La page charge ...
La page charge ...
La page charge ...
La page charge ...
La page charge ...
La page charge ...
-
 1
1
-
 2
2
-
 3
3
-
 4
4
-
 5
5
-
 6
6
-
 7
7
-
 8
8
-
 9
9
-
 10
10
-
 11
11
-
 12
12
-
 13
13
-
 14
14
-
 15
15
-
 16
16
-
 17
17
-
 18
18
-
 19
19
-
 20
20
-
 21
21
-
 22
22
-
 23
23
-
 24
24
-
 25
25
-
 26
26
-
 27
27
-
 28
28
-
 29
29
-
 30
30
-
 31
31
-
 32
32
-
 33
33
-
 34
34
-
 35
35
-
 36
36
-
 37
37
-
 38
38
-
 39
39
-
 40
40
-
 41
41
-
 42
42
-
 43
43
-
 44
44
-
 45
45
-
 46
46
-
 47
47
-
 48
48
-
 49
49
-
 50
50
-
 51
51
-
 52
52
-
 53
53
-
 54
54
-
 55
55
-
 56
56
-
 57
57
-
 58
58
-
 59
59
-
 60
60
-
 61
61
-
 62
62
-
 63
63
-
 64
64
-
 65
65


Proline LD1922D2 Operating Instructions Manual
- Catégorie
- Téléviseurs LCD
- Taper
- Operating Instructions Manual
dans d''autres langues
- English: Proline LD1922D2
Autres documents
-
Panasonic TX32A400E Le manuel du propriétaire
-
Techwood TC2209TN875 MKII Operating Instructions Manual
-
 Grandin LV32W10 Operating Instructions Manual
-
 Grandin L19V99S Operating Instructions Manual
-
Salora lcd4231fh Le manuel du propriétaire
-
CONTINENTAL EDISON 38SD822V Operating Instructions Manual
-
Sharp LC-40SH340E Le manuel du propriétaire
-
Salora 22LED7015TDW Le manuel du propriétaire
-
AYA A22AC2201 Mode d'emploi
-

