Boost Spots 6-LED LIGHT CRYSTAL Le manuel du propriétaire
- Taper
- Le manuel du propriétaire

ASTRO LED RUNNING LIGHT
SEQUENCEUR DE LUMIERE ASTRO A LED
ASTRO LED LOOPLICHT
SECUENCIADOR DE LED ASTRO
Ref. BOOST-BALL4 / BOOST-BALL6
USER MANUAL
FR - MANUEL D’UTILISATION - p. 3
NL - HANDLEIDING - p. 5
ES - MANUAL DE USO - p. 7

2
EN
INSTRUCTIONS FOR USE
The BOOST-BALL4/6 is a new version of a popular light eect which includes dierent colored
LED modules (Red, Green, Blue, White, Yellow or Purple). Each LED module has a reector and
one LED. They light up one after the other, thus creating a ashing eect at high speed.
Contents of Packaging
• 1 ASTRO Running Light
• 1 Power Adapter
• 1 Instruction manual
Safety Recommendations
• Please read the instructions carefully. They contain important information about the installation, operation
and maintenance.
• Keep this User Manual for future reference. If you sell the unit to another user, be sure that he also receives
this instruction booklet.
• Unpack and check the unit carefully that it has not been damaged during transport before using the unit.
• Before operating, ensure that the voltage and frequency of power supply match the power requirements of
the unit.
• The unit is for indoor use only in a dry location.
• The unit must be installed in a location with adequate ventilation, at least 0.5m from adjacent surfaces. Be
sure that no ventilation slots are blocked.
• Disconnect mains power before fuse replacement or servicing.
• Makesuretherearenoinammablematerialsclosetotheunitduringoperation.
• In the event of serious operating problem, stop using the unit immediately.
• Never try to repair the unit by yourself. Repair carried out by unskilled people can lead to damage or malfu-
nction. Please contact the nearest authorized technical assistance center and always use the same type of
spare parts.
• Do not touch any wires during operation as high voltage might be causing electric shock.
• The product is for decorative purposes only and not suitable as a household room illumination.
DISCONNECT DEVICE
Where the MAINS plug or an appliance coupler is used as the disconnect device, the disconnect device shall
remain readily operable.
Operation
• Plug the supplied mains adaptor into an appropriate mains outlet and the DC socket on the rear panel of
the unit.
• Set the I/O button to ON switch the unit on.
• Adjust the microphone sensitivity by turning the left MUSIC button. Turn it clockwise to increase the mic
sensitivity and counterclockwise to reduce it.
• AdjustthespeedoftheeectbyturningtherightSPEEDbutton.
• Afteruse,switchtheunitoviatheI/Obutton.
Care
Before cleaning the unit, disconnect it if from the mains. Do not use aggressive cleaning agents. Use a clean
cloth to wipe any dust or dirt from the product. We are not liable for damage arising from incorrect handing,
improperuseorwearandtear.Wereservetherighttomaketechnicalmodications.
CAUTION
DO NOT OPEN THE HOUSING
SHOCK HAZARD

FR
3
FR
Specications
Adaptor Input ...........................................................................................................100-240V~, 50/60Hz
Adaptor Output ....................................................................................................................5V 1000mA
Wattage ...............................................................................................................................................4W
Light Source ..........................................................................BOOST-BALL4:Red,Green,Blue,WhiteLED
................................................................BOOST-BALL6:Red,Green,Blue,White,YellowandPurpleLED
Dimensions .......................................................................................BOOST-BALL4: 345 x 160 x 245 mm
..........................................................................................................BOOST-BALL6: 345 x 160 x 365 mm
Weight ......................................................................................................................BOOST-BALL4: 1.2kg
..................................................................................................................................BOOST-BALL6: 1.7kg
Correct Disposal of this product
This marking indicates that this product should not be disposed with other household wastes throughout
the EU. To prevent possible harm to the environment or human health from uncontrolled waste disposal,
recycle it responsibly to promote the sustainable reuse of material resources. To return your used device,
please use the return and collection systems or contact the retailer where the product was purchased.
They can take this product for environmental safe recycling.
NOTICE D’UTILISATION
Le BOOST-BALL4/6 est une nouvelle version d’un eet de lumière populaire qui comprends plu-
sieurs modules à LED de couleur (rouge, vert, bleu, blanc jaune ou pourpre). Chaque module à
LED comporte un réecteur et une LED. Ils s’allument les uns après les autres, créant ainsi un
eet ash à haute vitesse.
Contenu de l’emballage
• 1séquenceuràLEDASTRO
• 1 adaptateur secteur
• 1 mode d’emploi
Consignes de Sécurité
• Lire attentivement les consignes de sécurité qui contiennent des informations importantes concernant
l’installation, le fonctionnement et la maintenance
• Conservez ce manuel pour référence ultérieure. Si vous vendez l’appareil à un autre utilisateur, assu-
rez-vous qu’il reçoit également le mode d’emploi.
• Dèsréceptiondel’appareil,ouvrezlecartonetvériezquelecontenuestcompletetenbonétat.
• L’appareil doit être alimenté uniquement par l’adaptateur secteur fourni.
• Uniquement pour utilisation à l’intérieur à un endroit sec !
• Installez l’appareil à un endroit bien ventilé à une distance minimum de 0,5m de toute surface. Assu-
rez-vous que les fentes de ventilation ne sont pas bloquées.
• Débranchez l’appareil du secteur avant toute manipulation ou entretien.
• Vériezqu’aucunmatériauinammablenesetrouveàproximitédel’eetpendantlefonctionnement.
• Encasdedysfonctionnement,arrêtezimmédiatementl’appareiletdébranchez-ledusecteur.
• N’essayez jamais de réparer l’appareil par vous-même. Une réparation mal faite peut entraîner des dom-
mages et des dysfonctionnements. Contactez un service technique agréé. Utilisez uniquement des pièces
détachées identiques aux pièces d’origine.
• Nepastoucherdelsélectriquespendantlefonctionnementcarlestensionsélevéespeuventprovoquer
une électrocution.
• Leluminairenedoitservirqu’àdesnsdécorativesetneconvientpascommeéclairagedomestique
normal.
DISPOSITIF DE COUPURE:Lorsqu’unecheSECTEURouuncoupleursontutiliséspourdéconnecterl’ap-
pareil du secteur, ce dispositif doit rester facilement accessible à tout moment

4
EN
4
FR
Fonctionnement
• Branchezl’adaptateursecteurfournisuruneprisesecteurappropriéeetsurlacheDCaudosdel’appa-
reil.
• Mettez le commutateur ON/OFF sur la position ON.
• Sélectionnerlesfonctionsdevitesse(SPEED)oumusique(MUSIC)aumoyendesdeuxréglagesenfaçade.
• Pour activer la fonction séquenceur, tournez le bouton MUSIC vers la gauche sur la première position et
réglezlavitessedeclignotementavecleboutonSPEED.
• Le mode audio est activé au moyen du bouton de gauche. Les modules réagissent maintenant à la vitesse
réglée et au rythme de la musique. Réglez la sensibilité du microphone au moyen du bouton MUSIC. Les
modules clignotent maintenant en fonction de l’intensité du son à proximité de l’appareil.
• Après utilisation, éteignez l’appareil en mettant l’interrupteur I/O sur la position OFF.
Entretien
Avant de nettoyer l’appareil, débranchez-le du secteur. Ne pas utiliser de détergents agressifs. Utilisez un
chionpropreetessuyezlapoussièreetlessaletés.Nousdéclinonstouteresponsabilitépourdesdommages
duesàunemauvaiseutilisation,manipulationetusure.Sousreservedemodicationstechniques.
Caractéristiques techniques
Tension d’entrée de l’adaptateur secteur ...................................................................100-240V~, 50/60Hz
Tension de sortie de l’adaptateur secteur ...............................................................................5V 1000mA
Consommation ........................................................................................................................................4W
Source lumineuse ................................................................... BOOST-BALL4:LEDRouge,vert,bleu,blanc
.....................................................................BOOST-BALL6:LEDRouge,vert,bleu,blanc,jaune&pourpre
Dimensions ......................................................................................... BOOST-BALL4: 345 x 160 x 245 mm
............................................................................................................ BOOST-BALL6: 345 x 160 x 365 mm
Poids .......................................................................................................................... BOOST-BALL4: 1.2kg
.................................................................................................................................. BOOST-BALL6: 1.67kg
Mise au rebut du produit
Ce symbole indique que ce produit ne doit pas être jeté aux ordures ménagères au sein des pays de la
Communauté européenne. An de protéger l’environnement et/ou la santé humaine contre une mise
aux rebuts incontrôlée, il convient de le recycler d’une manière responsable an de soutenir une réutili-
sation durable des ressources. Pour le recyclage d’appareils usagés, rapportez-le à un centre de collecte
d’appareils électriques ou contactez le revendeur où vous avez acheté le produit. Ils s’assureront du recyclage
écologique du produit.
ATTENTION
NE PAS OUVRIR LE BOITIER
RISQUE DE CHOC ELECTRIQUE

5
NL
HANDLEIDING
De BOOST-BALL4/6 is een nieuwe versie van een populair lichteect met verschillende
gekleurde LED-modules (rood, groen, blauw, wit, geel of paars). Elke LED-module heeft een
reector en een LED. Ze lichten de een na de ander op en creëren zo een itsende werking bij
hoge snelheid.
Inhoud van de verpakking
• 1ASTROLEDLooplicht
• 1 Lichtnet adapter
• 1 handleiding
Veiligheidsmaatregelen
• Lees de instructies aandachtig door. Ze bevatten belangrijke informatie over de installatie, bediening en
onderhoud.
• Bewaar deze gebruikershandleiding voor toekomstig gebruik. Als u het apparaat aan een andere gebrui-
ker verkoopt, moet u ervoor zorgen dat hij ook dit instructieboekje ontvangt.
• Pak de eenheid uit en controleer zorgvuldig of deze tijdens het transport niet is beschadigd voordat u het
apparaat gebruikt.
• Voorzie het apparaat alleen van stroom via de meegeleverde netadapter.
• De unit is alleen voor gebruik binnenshuis op een droge locatie.
• Het apparaat moet worden geïnstalleerd op een locatie met voldoende ventilatie, ten minste 0,5 meter
van aangrenzende oppervlakken. Zorg ervoor dat er geen ventilatiesleuven zijn geblokkeerd.
• Schakel de netspanning uit voordat u de zekering vervangt.
• Zorg ervoor dat er zich tijdens het gebruik geen ontvlambare materialen in de buurt van het apparaat
bevinden.
• In het geval van ernstige bedieningsproblemen, stop dan onmiddellijk met het gebruik van het apparaat.
• Nooit verzoeken het apparaat zelf te repareren. Reparaties door ongeschoolde personen kunnen leiden
tot schade of storingen. Neem contact op met het een erkende technische assistentie centrum en gebruik
altijd hetzelfde type reserveonderdelen.
• Raak tijdens het gebruik geen draden aan, omdat een hoge spanning een elektrische schok kan veroor-
zaken.
• Het product is uitsluitend bedoeld voor decoratieve doeleinden en niet geschikt als verlichting van de
huiskamer.
ONTKOPPELING VAN HET NET
Indien het toestel via het stopcontact wordt uitgeschakeld, moet de contactdoos altijd gemakkelijk be-
reikbaar zijn.
Bediening
• Steek de meegeleverde netadapter in een geschikt stopcontact en de DC-aansluiting op het achterpaneel
van het apparaat.
• Zet de I / O knop op ON om het apparaat aan te zetten.
• Ukuntnudefuncties«SPEED»of«MUSIC»selecterenmetbehulpvandetweeinstelbarebedieningsele-
menten op de voorkant van de besturingsmodule.
• Omdechasefunctievanhetapparaatteactiveren,draaitudeknop«MUSIC»naarlinks(deeerste
mogelijkeinstellingselecteren).Ukuntnude«SPEED»-regelaargebruikenomdeitssnelheidaante
passen.
• De«SoundControl»-functiewordtgeactiveerdmetbehulpvandelinkerbediening.Despotsreageren
LET OP
NIET DE BEHUIZING OPENEN
GEVAAR VOOR ELECTRISCHE SCHOKKEN

6
NL
nu zowel op chase als geluid. U kunt de gevoeligheid van de microfoon aanpassen. Selecteer de gewenste
snelheidmetbehulpvande«SPEED»-regelaarenpashetgevoeligheidsniveauvandegeïntegreerdemi-
crofoonaanmetde«MUSIC»-regelaar.Despotsknipperennuinovereenstemmingmetdeintensiteitvan
het geluid in de buurt van het apparaat.
• Schakel na gebruik het apparaat uit met de I / O-knop.
Onderhoud
Voordat u het apparaat reinigt, moet u het loskoppelen van het elektriciteitsnet. Gebruik geen agressieve
schoonmaakmiddelen. Gebruik een schone doek om stof en vuil van het product te verwijderen. Wij zijn niet
aansprakelijk voor schade die voortvloeit uit onjuiste overdracht, oneigenlijk gebruik of slijtage. We behou-
den ons het recht voor technische wijzigingen aan te brengen.
Specicaties
Adapteringang ...................................................................................................... 100-240V AC, 50 / 60Hz
Adapteruitgang ......................................................................................................................5V 1000mA
Opgenomen vermogen ..........................................................................................................................4W
Lichtbron .......................................................................................... BOOST-BALL4: Rood-groen-Blauw-Wit
..........................................................................BOOST-BALL6:Rood,groen,blauw,wit,geelenpaarsLED
Afmetingen ......................................................................................... BOOST-BALL4: 345 x 160 x 245 mm
............................................................................................................ BOOST-BALL6: 345 x 160 x 365 mm
Gewicht ...................................................................................................................... BOOST-BALL4: 1.2kg
.................................................................................................................................. BOOST-BALL6: 1.67kg
Correcte verwijdering van dit product
Deze markering geeft aan dat dit product niet met ander huishoudelijk afval in de hele EU mag worden
weggegooid. Om mogelijke schade aan het milieu of de menselijke gezondheid door ongecontroleerde
afvalverwijdering te voorkomen, moet u deze op verantwoorde wijze recyclen om duurzaam hergebruik
van materiaalbronnen te bevorderen. Als u uw gebruikt apparaat wilt retourneren, gebruikt u de retour- en
verzamelsystemen of neemt u contact op met de winkel waar het product is gekocht. Ze zullen voor milieuveilige
recycling zorgen.

7
ES
MANUAL DE USO
SECUENCIADOR DE LED ASTRO
El BOOST-BALL4/6 es una nueva versión de un efecto de iluminación muy popular que contiene
diferentes módulos de LED de color (Rojo, Verde, Azul, Blanco, Amarillo o Púrpura). Cada mó-
dulo de LED tiene un reector y un LED. Se iluminan unos tras otros, creando así un efecto de
ash de alta velocidad.
Contenido del embalaje
• 1SecuenciadordeLEDASTRO
• 1 Adaptador de corriente
• 1 Manual de uso
INSTRUCCIONES DE SEGURIDAD
• Lea atentamente este manual que contiene informaciones importantes de la instalación, uso y manteni-
miento de este equipo.
• Conserve el manual para consultas futuras. Si el equipo cambia de propietario algún día asegúrese de
que recibe el manual.
• Alarecepcióndelequipo,compruebeyveriquetodoelcontenidoestádentroyestáenperfectoestado.
• Elequiposolopuedeseralimentadoporsualimentadorincluido.
• Únicamente para ser usado en interiores y lugares secos!
• Instale el equipo en un lugar bien ventilado a una distancia como mínimo de 1 metro de cualquier super-
cie.Asegúresedequelasrejillasdeventilacióndelequipo,noquedanobstruidas..
• Desenchufe el equipo de la corriente antes de cualquier manipulación o mantenimiento.
• Asegúresedequeningúnobjetoinamableseencuentracercadelequipoduranteelfuncionamientodel
mismo.
• Encasodemalfuncionamiento,pareinmediatamenteelequipoydesenchúfelodelacorriente.
• Nointentejamásrepararustedmismoelequipo.Unareparaciónmalefectuada,puedeprovocardaños
y malfuncionamientos. Contacte con un servicio autorizado. Haga que utilicen únicamente recambios
originales.
• No toque los cables eléctricos durante el funcionamiento ya que las tensiones elevadas, pueden provocar
una electrocución.
• Laluminaria,solodebeservirconnesdecorativosynoesadecuadoparausarcomoluminariadomésti-
ca normal.
• DISPOSITIVO DE CORTE:CuandounaclavijadeCORRIENTEouninterruptorsonusadosparadesconec-
tarelequipodelacorriente,estedispositivodebepermanecerfácilmenteaccesibleentodomomento.
FUNCIONAMIENTO
• Conecte el adaptador de corriente incluido en una toma de corriente adecuada y en la clavija DC que hay
en la parte trasera del equipo.
• Ponga el conmutador ON/OFF en la posición ON.
• Seleccionelasfuncionesdevelocidad(SPEED)omúsica(MUSIC)pormediodelosajustesenelfrontal.
• Para activar la función secuenciador, gire el botón MUSIC hacía la izquierda en la primera posición y
ajustelavelocidaddeparpadeoconelbotónSPEED.
• Elmodoaudioseactivamedianteelbotónizquierdo.Losmódulosreaccionanconlavelocidadajustada
y al ritmo de la música. Ajuste la sensibilidad del micrófono por medio del botón MUSIC. Los módulos
ATENCION
NO ABRIR LA CARCASA
PELIGRO DE ELECTROCUCION

8
ES
parpadearan en función de la intensidad de sonido cercano al equipo.
• Despuésdesuuso,apagueelequipomedianteelinterruptorI/O,colocándoloenlaposiciónOFFydespués
desenchúfelo de la corriente.
MANTENIMIENTO
Antesdelimpiarelequipo,desenchúfelodelacorriente.Noutilicedetergentesagresivos.Utiliceunpaño
limpioparapoderlimpiarlo.Nosotrosdeclinamostodaresponsabilidadporlosdañosocasionadosporunmal
uso,manipulaciónodesgastedelequipo.Sujetoamodicacionestécnicas.
CARACTERÍSTICAS TÉCNICAS
Tensión de entrada del adaptador de corriente ..........................................................100-240V~, 50/60Hz
Tensión de salida del adaptador de corriente .........................................................................5V 1000mA
Consumo .................................................................................................................................................4W
Fuente luminosa.....................................................................BOOST-BALL4:LEDRojo,Verde,Azul,Blanco
................................................................BOOST-BALL6:LEDRojo,Verde,Azul,Blanco,Amarilloypúrpura
Dimensiones ....................................................................................... BOOST-BALL4: 345 x 160 x 245 mm
............................................................................................................ BOOST-BALL6: 345 x 160 x 365 mm
Peso ........................................................................................................................... BOOST-BALL4: 1.2kg
.................................................................................................................................. BOOST-BALL6: 1.67kg
Eliminación del producto
Este símbolo indica que este producto no debe desecharse en la Comunidad Europea. Con el n de prote-
ger el medio ambiente y / o la salud humana de la eliminación incontrolada, se debe reciclar de manera
responsable para apoyar la reutilización sostenible de los recursos. Para reciclar el equipo usado, llévelo a
un centro de recolección de electrodomésticos o póngase en contacto con el distribuidor donde adquirió el
producto. Asegurarán el reciclaje ecológico del producto.
Imported from China by LOTRONIC S.A.
Avenue Zénobe Gramme 9
B-1480 Saintes
-
 1
1
-
 2
2
-
 3
3
-
 4
4
-
 5
5
-
 6
6
-
 7
7
-
 8
8
Boost Spots 6-LED LIGHT CRYSTAL Le manuel du propriétaire
- Taper
- Le manuel du propriétaire
dans d''autres langues
Documents connexes
Autres documents
-
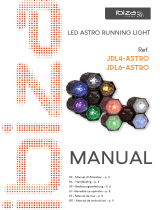 Ibiza Light JDL6-ASTRO Manuel utilisateur
-
 Ibiza Light COMBI-LAS Le manuel du propriétaire
-
 Ibiza Light COMBI-FX2 Le manuel du propriétaire
-
Rotel A11 Le manuel du propriétaire
-
 Ibiza Light COMBI-FX1 Le manuel du propriétaire
-
 Ibiza Light COMBILED20 Le manuel du propriétaire
-
 Ibiza Light 5420047130747 Manuel utilisateur
-
Bresser Astro Planetarium - Multimedia Le manuel du propriétaire


