Miniland digitalk easy Manuel utilisateur
- Catégorie
- Babyphones
- Taper
- Manuel utilisateur

Español
English
Polski
Русский
Deutsch
Italiano
Português
Français
3
12
58
66
38
49
20
29
digitalk easy

2
1
3

3
ESPAÑOL
INDICE
1 Introducción
2 Contenido
3 Instrucciones de seguridad
4 Características del producto
5 Instrucciones de uso
6 Mantenimiento
7 Especicaciones técnicas
8 Información sobre desecho de las pilas y el producto
1. INTRODUCCIÓN
Enhorabuena por haber adquirido este vigilabebés digital de audio que incluye tecnología de
última generación. Estamos convencidos que de quedará totalmente satisfecho por la calidad
y características de este producto. Aun así, le recomendamos que lea las instrucciones de
uso detenidamente antes de su utilización con el n de obtener los mejores resultados de su
vigilabebés.
Este sencillo vigilabebés digital le permitirá recibir el sonido captado en la habitación del bebé
de forma inalámbrica.
2. CONTENIDO
a) 1 unidad de los padres (receptor)
b) 1 unidad del bebé (emisor)
c) 1 adaptador AC/DC para la unidad del bebé
d) 1 adaptador AC/DC con base de carga para la unidad de los padres
e) 2 pilas AAA 1.2V 800mAh Ni-MH recargables para la unidad de los padres
f) 1 manual de instrucciones, guía rápida y garantía
· Si faltara cualquiera de los elementos arriba indicados, póngase en contacto con su
distribuidor o punto de venta.
3. INSTRUCCIONES DE SEGURIDAD
3.1. INSTRUCCIONES DE SEGURIDAD GENERALES
Lea estas instrucciones antes de empezar a usar su vigilabebés por primera vez y guárdelas
para futuras consultas.
Al usar cualquier aparato eléctrico deben seguirse unas precauciones básicas de seguridad:
1. Debe de extremar la precaución cuando se usa el producto con niños y personas mayores
o cuando se usa cerca de ellos. Mantenerlo alejado del alcance de los niños cuando no está
en uso.
2. Este producto no debe utilizarse como el único medio de vigilancia, no siendo en ningún caso
un sustituto de la supervisión responsable de los niños, adultos o propiedades por parte de los
adultos.
3. No permita que los niños jueguen con el material de embalaje, como por ejemplo bolsas de
plástico. Este producto contiene piezas de pequeño tamaño. Es necesario proceder con cuidado
a la hora de desempaquetar y montar el producto.
4. Solamente debe usar el vigilabebés con los adaptadores AC/DC incluidos.
5. La unidad del bebé no está diseñada para utilizarse con baterías, utilice el adaptador AC/
DC incluido.
6. NO utilizar el producto si el cable o el enchufe estuvieran dañados. Si su vigilabebés no
funciona correctamente o ha sufrido algún daño, debe ponerse en contacto con el servicio
técnico autorizado de Miniland para su revisión y reparación, evitando así cualquier posible
riesgo.

4
ESPAÑOL
7. No utilice nunca pilas no recargables en la unidad de los padres. Utilice sólo el tipo de pilas
recomendadas (2 x AAA 1.2 V 800mAh NiMH). NO intente recargar otras pilas en el vigilabebés.
8. NO debe mezclar pilas viejas con nuevas y recargables con no recargables.
9. Colocar el vigilabebés donde pueda circular libremente el aire, no debe ponerlo encima de
ropa de cama, mantas o en la esquina de un armario, librerías, etc.
10. Colocar el vigilabebés alejado de fuentes de calor como pueden ser radiadores, chimeneas,
cocinas y luz directa del sol.
11. Alejar el vigilabebés de televisiones y radios que puedan causar interferencias.
12. NO debe intentar reparar o ajustar las funciones eléctricas o mecánicas de este aparato, ya
que en ese caso la garantía quedará invalidada.
13. Compruebe el voltaje de su vivienda con el n de asegurarse de que corresponda al usado
por el aparato, según se indica en las especicaciones del mismo.
14. Siempre debe desenchufar el adaptador y quitar las pilas si no tiene previsto usar el
vigilabebés durante un largo periodo de tiempo. Para desconectar, debe agarrar por el enchufe,
nunca tirar directamente del cable.
15. Este producto no está destinado para ser usado cuando está mojado o en condiciones
de humedad extrema. Nunca debe colocar el vigilabebés o cargador en una posición donde
pudiese caer en un fregadero u otro recipiente con agua. Cuando no esté en uso, guárdalo en
un sitio seco.
16. Antes de deshacerse de su vigilabebés debe quitar las pilas y deshacerse de ellas de
manera responsable.
3.2. PRECAUCIÓN
· Colocar el aparato fuera del alcance de niños para evitar accidentes.
· Este vigilabebés está diseñado para proporcionar tranquilidad a los padres cuando no les
es posible estar en la misma habitación que el bebé. Este producto no debe reemplazar la
supervisión responsable de un adulto. Es necesario que uno de los padres permanezca cerca
del monitor mientras se esté utilizando. El vigilabebés no es un dispositivo médico y no debe
conarse a él el bienestar del bebé. Es importante que visite periódicamente la habitación del
bebé con el n de asegurarse de que todo esté bien.
· No utilice nunca este vigilabebés en aquellos casos en los que la vida o la salud del bebé u
otras personas, o la integridad de un inmueble, dependan de su funcionamiento. El fabricante no
aceptará ninguna responsabilidad o reclamación alguna por fallecimiento, lesiones personales o
daños materiales resultantes del uso indebido del producto.
· El uso indebido de este vigilabebés inalámbrico podría dar lugar a acciones legales.
· Utilice este producto de manera responsable.
3.3. CONSEJO SOBRE INTERFERENCIA RADIO
Este equipo ha sido probado y cumple con los requisitos de la Directiva RED 2014/53/UE.
Estos requisitos están diseñados para ofrecer una protección razonable contra interferencias
dañinas en una instalación residencial.
Si este equipo no se instala y se usa de acuerdo con las instrucciones puede causar interferencias
dañinas en las radiocomunicaciones.
Tenga en cuenta, sin embargo, que no es posible garantizar que no vayan a producirse interferencias
en una instalación especíca. Si el vigilabebés provocara interferencias en la recepción de la radio o
la televisión, hecho que puede determinarse apagándolo y encendiéndolo de nuevo, se recomienda
al usuario que intente subsanar la interferencia tal y como se indica a continuación:
· Reoriente o cambie el receptor (unidad de los padres) de ubicación.
· Aumente la distancia entre el equipo interferido y el vigilabebés.
· Conectar el equipo a un enchufe que esté en un circuito diferente al que está enchufado el receptor.

5
ESPAÑOL
· Consultar con el servicio de atención al cliente de MINILAND S.A.
Con el n de asegurar el cumplimiento de la Directiva RED 2014/53/UE, en este equipo se usan
cables especialmente revestidos. El funcionamiento con un equipo no aprobado o con cables no
revestidos puede provocar interferencias en la recepción radiofónica o televisiva.
Cualquier cambio o modicación realizada al equipo por personal ajeno al servicio
técnico de MINILAND no será cubierto por la garantía del producto.
3.4. CONSUMO DE ENERGÍA
Los adaptadores de corriente suministrados cumplen con la directiva de eco-diseño de la Unión
Europea (Directiva 2005/32/CE).
El consumo de energía es considerablemente menor que el consumo de otros adaptadores
diseñados con modos de operación y reposo.
3.5. ANTES DE USAR
Elegir el sitio adecuado
· Coloque la unidad del bebé alejada de televisiones, repetidores de TV y radios. Las señales
generadas por estos dispositivos podrían causar ruidos o incluso sonidos retransmitidos en la
unidad del bebé. Si esto sucede, debe cambiar de ubicación la unidad del bebé.
· La unidad del bebé debe colocarse a una distancia de al menos 3 m de la cuna del bebé y en
una supercie plana. Nunca debe colocar la unidad del bebé dentro de la cuna, cama o parque
de juegos. Asegúrese de que la unidad, los cables y adaptador estén fuera del alcance del bebé
y de los niños pequeños.
· Coloque la unidad del bebé en un lugar donde el aire pueda circular libremente, nunca sobre
edredones o mantas ni en las esquinas de armarios, estanterías, etc.
· Coloque el vigilabebés en un lugar alejado de las fuentes de calor como radiadores, chimeneas,
cocinas y la luz solar directa.
4. CARACTERÍSTICAS DEL PRODUCTO
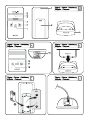
4.1. CARACTERÍSTICAS Y CONTROLES DE LA UNIDAD DE LOS PADRES (Figura 1)
1. Botón de encendido/apagado
2. Botón para subir volumen
3. Botón para bajar volumen
4. LED indicador de encendido y carga: con luz verde ja si está encendido o parpadea en verde
si las pilas se están recargando.
5. LED indicador de nivel de sonido bajo: permanece apagado cuando no se detecta ningún
sonido en la unidad del bebé o parpadea en rojo si se detecta sonido (aunque sea bajo) en la
habitación del bebé.
6. LED indicador de nivel de sonido alto: permanece apagado cuando el nivel de sonido
detectado en la habitación del bebé es bajo o parpadea en rojo cuando la unidad del bebé
detecta un nivel de sonido alto.
7. Oricio para cinta para el cuello
8. Compartimento para las pilas (2 x AAA 1.2V 800mAh Ni-MH recargables)
9. Base de carga
4.2. CARACTERÍSTICAS Y CONTROLES DE LA UNIDAD DEL BEBÉ (Figura 2)
10. Botón de encendido/apagado
11. Botón de luz de compañía (pulsación corta)/búsqueda de la unidad de los padres (pulsación larga).
12. LED indicador de encendido/luz de compañía: se ilumina en verde cuando la unidad del
bebé está encendida y con una luz blanca más potente cuando se activa la luz de compañía.
13. Interruptor de modo de emisión (LOW/ZERO)

6
ESPAÑOL
5. INSTRUCCIONES DE USO
5.1. ANTES DE USO: CONEXIÓN A LA ALIMENTACIÓN Y USO DE LAS PILAS
Unidad de los padres:
La unidad de los padres de este vigilabebés está diseñada para funcionar con las pilas o los
adaptadores AC/DC incluidos. Incluye 2 pilas recargables x AAA 1.2V 800mAh Ni-MH para la
unidad de los padres. Recomendamos el uso de las pilas en la unidad de los padres para poder
escuchar la unidad del bebé desde cualquier lugar (dentro del radio de cobertura del aparato).
Se deben cargar las pilas recargables durante al menos 16 horas antes de usar por primera vez
o si lleva mucho tiempo sin usarse.
Colocar la unidad de los padres en la base de carga (9) cuando sea posible para mantener
siempre las baterías cargadas.
- Quite la tapa del compartimento de las pilas (8) en la parte trasera de la unidad de los padres
presionando y deslizando hacia abajo. Inserte las pilas recargables siguiendo la polaridad
marcada en la propia unidad y cerrar la tapa (Figura 3).
- Coloque la unidad de los padres en la base-cargador (9) (Figura 4).
- Enchufe el adaptador a la corriente. El LED de encendido y carga (4) parpadeará en verde
durante la carga. El LED se enciende en verde cuando la carga está completa.
Unidad del bebé:
La unidad del bebé está diseñada para funcionar con el adaptador AC/DC incluido.
- Conectar el adaptador a la base de la unidad del bebé (Figura 5).
- Conectar el adaptador a una toma de corriente.
5.2. FUNCIONAMIENTO
Encendido de las unidades:
· Unidad de los padres: presione el botón de encendido/apagado (1) durante dos segundos.
El LED de encendido y carga (4) se iluminará en verde.
· Unidad del bebé: presione el botón de encendido/apagado (10) durante dos segundos.
El indicador de encendido/luz de compañía (12) se iluminará en verde.
Una vez que haya preparado su vigilabebés, podrá escuchar los sonidos captados en la
habitación de su bebé a través de la unidad de los padres. También podrá observar como los
LEDs indicadores de sonido parpadean: cuando el sonido captado sea bajo parpadeará en rojo
únicamente el primero de los LEDs (5), pero cuando el sonido captado sea fuerte, ambos LEDs
(5 y 6) parpadearán en rojo.
Apagado de las unidades:
· Unidad de los padres: presione el botón de encendido/apagado (1) durante dos segundos.
· Unidad del bebé: presione el botón de encendido/apagado (10) durante dos segundos.
5.2.1. Activación por sonido (VOX)
Esta función permite la activación por sonido de su vigilabebés cuando éste se encuentra en
modo reposo.
Si la unidad del bebé no detecta ningún sonido o el sonido captado está por debajo del umbral
de sensibilidad (jo, que se establece durante el proceso de fabricación) durante un periodo
de 20 segundos, ésta dejará de transmitir. Sin embargo, seguirá captando los sonidos a su
alrededor empleando una cantidad de energía mínima. La unidad de los padres entrará en
modo reposo y quedará en silencio.
Cuando la unidad del bebé detecte cualquier sonido con intensidad superior al umbral de
sensibilidad del dispositivo, empezará a transmitir de nuevo la señal a la unidad de los padres.

7
ESPAÑOL
5.2.2. Volumen
Puede ajustar el volumen deseado para escuchar a su bebé usando los botones subir/bajar
volumen (2 y 3) en el frontal de la unidad de los padres.
La selección del nivel del volumen (9 niveles) no afectará la sensibilidad de su vigilabebés, que
viene congurado de fábrica, únicamente al volumen con el cual escuchará los sonidos en la
unidad de los padres.
5.2.3. Indicador de carga y advertencia de batería baja
El indicador de encendido y carga (4) de la unidad de los padres funciona como un indicador del
proceso de carga de la unidad:
Si la unidad de los padres está apagada y se coloca sobre la base de carga,
· El LED indicador de encendido y carga (4) parpadea en rojo mientras las baterías de la unidad
de los padres se están cargando.
· Cuando las baterías estén totalmente cargadas, este LED (4) se encenderá en rojo de forma
continua.
Si la unidad de los padres está encendida en modo baja radiación (LOW) y se coloca sobre la
base de carga:
· El LED indicador de encendido y carga (4) parpadea en verde mientras las baterías de la
unidad de los padres se están cargando.
· Cuando las baterías estén totalmente cargadas, este LED (4) se encenderá en verde de forma continua.
Si la unidad de los padres está encendida en modo cero emisiones (ZERO) y se coloca sobre
la base de carga,
· El LED indicador de encendido y carga (4) parpadea en amarillo y rojo mientras las baterías de
la unidad de los padres se están cargando.
· Cuando las baterías estén totalmente cargadas, este LED (4) se encenderá en amarillo de
forma continua.
El tiempo aproximado de carga de las baterías de la unidad de los padres es de en torno a 5-8 horas,
dependiendo del estado inicial de carga de las baterías en el momento en el que se inicia el proceso.
Con las pilas totalmente cargadas, la autonomía media de la unidad de los padres será de
6-7 horas y dependerá de la duración de los ciclos de escucha/reposo. La autonomía máxima
será de hasta 10-12 horas en el caso de que la unidad del bebé se encuentre en un entorno
silencioso la mayoría del tiempo.
Cuando el nivel de batería en la unidad de los padres sea bajo, la unidad de los padres emitirá un pitido
de aviso cada 30 segundos y el LED indicador de encendido y carga (4) parpadeará en rojo. Cuando
esto ocurra, coloque la unidad de los padres sobre su base de carga (9) para recargar las baterías. Podrá
seguir usando el vigilabebés mientras la unidad de los padres esté sobre la base de carga.
5.2.4. Paging (búsqueda de la unidad de los padres)
Esta opción sirve para encontrar la unidad de los padres cuando no es posible localizarla.
También es muy útil cuando uno de los padres está en la habitación del bebé y necesita
contactar con el otro.
En la unidad del bebé, mantenga pulsado durante 3 segundos el botón de luz de compañía/
búsqueda de la unidad de los padres (11). La unidad de los padres emitirá entonces un pitido
con tres tonos que puede desactivarse pulsando cualquier botón de la unidad de los padres.
5.2.5. Luz de compañía
La unidad del bebé tiene una luz de compañía (12) que emite una suave luz, ofreciendo confort
a su bebé y permitiéndole ver en una habitación oscura.
Para encender o apagar la luz de compañía, pulse el botón de luz de compañía/búsqueda de
la unidad de los padres (11). Recuerde que para controlar la luz de compañía debe realizar una

8
ESPAÑOL
pulsación corta del botón (11).
5.2.6. Interruptor de elección de modo: cero emisiones (ZERO) y baja radiación (LOW)
La unidad del bebé incluye una tecnología especial de transmisión denominada Cero Emisiones.
Cuando la unidad del bebé está en modo reposo y no se detecta ningún sonido en la estancia
donde está colocada la unidad del bebé, ésta no emite ninguna radiación.
Es posible elegir el modo de comunicación entre las dos unidades mediante el interruptor de
modo de emisión (LOW/ZERO) (13) en la base de la unidad del bebé.
El modo empleado por la unidad del bebé puede ser Baja Radiación o Cero Emisiones. Para
seleccionar el modo utilice el interruptor de Modo (LOW/ZERO) (13).
1) Modo cero emisiones (ZERO)
Ajuste:
Ajuste el interruptor en la parte inferior de la unidad del bebé (13) en la posición “ZERO”. En
cuanto se enciendan ambas unidades (de los padres y del bebé), el LED indicador de encendido
y carga (4) en la unidad de los padres se encenderá en color naranja indicando que el modo
ZERO ha sido seleccionado.
Funcionamiento:
Durante el modo de funcionamiento normal del vigilabebés (LOW), la unidad del bebé envía
periódicamente una señal baliza a la unidad de los padres informando de que está conectada y
funcionando, aunque la unidad del bebé no detecte ningún sonido.
Sin embargo, es posible seleccionar el modo de funcionamiento ZERO, en el que no se
transmitirá esta señal baliza, consiguiendo evitar cualquier emisión mientras el vigilabebés se
encuentra en reposo. Cuando la unidad del bebé no detecte sonido alguno en el entorno se
tendrá un medio con cero emisiones, en el que el vigilabebés no emitirá radiación alguna.
Cuando la unidad del bebé detecte un sonido por encima del umbral de sensibilidad del VOX
(preestablecido), comenzará a transmitir una señal que recibirá la unidad de los padres con la nalidad
de establecer la comunicación entre ambas unidades. Este proceso durará menos de un segundo.
A partir de ese momento la unidad de los padres retransmitirá los sonidos captados por la
unidad del bebé.
NOTA: Indicador de fuera de cobertura
Debido a que la unidad del bebé no emite la señal de baliza periódica cuando se ha
seleccionado el modo “ZERO”, la unidad de los padres es incapaz de detectar si ésta se
encuentra dentro del radio de cobertura o no. Por tanto, es posible que la unidad de los
padres quede fuera del radio de cobertura de la unidad del bebé sin que los padres sean
conscientes de ello.
Se aconseja usar este modo de funcionamiento cuando la unidad de los padres se ubique
en un lugar jo en el que se haya comprobado previamente que la cobertura es correcta,
como puede ser la mesilla de noche. También puede usarse desplazando la unidad de los
padres, siempre que se haya comprobado previamente que la cobertura es correcta en
todo el radio de desplazamiento.
2) Modo normal de funcionamiento o de baja radiación (LOW)
Ajuste:
Ajuste el interruptor en la parte inferior de la unidad del bebé (13) en la posición “LOW”.
Funcionamiento:
Como ya se ha indicado anteriormente, durante el modo de funcionamiento normal del
vigilabebés (LOW), la unidad del bebé envía periódicamente una señal baliza a la unidad de
los padres informando de que está conectada y funcionando, aunque la unidad del bebé no

9
ESPAÑOL
Problema Posible causa – cosas que hacer/revisar
No hay recepción en la unidad de
los padres
· No se ha conectado el adaptador AC/DC en la unidad
del bebé. Conecte el adaptador.
· La unidad del bebé está apagada. Enciéndala.
· La unidad de los padres está apagada. Enciéndala.
· Las baterías de la unidad de los padres se están
agotando o ya se han agotado. Coloque la unidad de los
padres en la base de carga para recargar las baterías.
· La unidad de los padres está fuera del rango de
cobertura de la unidad del bebé. Acerque ambas
detecte ningún sonido. Esta señal tiene una duración de 1 segundo y se emite 4 veces cada
20 segundos. Si la unidad de los padres recibe esta señal, el LED indicador de encendido y
carga (4) permanece encendido en verde para indicar que la unidad se encuentra dentro del
radio de cobertura. De lo contrario, si la unidad de los padres es incapaz de recibir la señal
baliza tras 20 segundos, el LED indicador de encendido y carga (4) parpadeará en rojo y verde
alternativamente emitiendo un pitido con tres tonos a modo de aviso.
Al seleccionar el modo “LOW” se establece una conexión continua de baja potencia entre la unidad
de los padres y la del bebé, por lo que no se produce el retardo en la conexión indicado para el modo
“ZERO” cuando la unidad del bebé detecta un sonido mientras está en modo reposo.
5.2.7. Alarma de fuera de cobertura
Si la conexión entre la unidad de los padres y la unidad del bebé se pierde en cualquier
momento, los dos LEDs indicadores de nivel de sonido de la unidad de los padres parpadearán
alternativamente en rojo durante 20 segundos para indicar que está buscando a la unidad del
bebé. Si tras estos 20 segundos no se reestablece la conexión (no recibe la señal baliza que
envía la unidad del bebé), el LED indicador de encendido y carga (4) parpadeará en rojo y verde
alternativamente mientras la unidad de los padres emite un pitido a modo de aviso.
En este caso, para reestablecer el enlace entre ambas unidades, asegúrese de que la unidad
de los padres se encuentra dentro del radio de cobertura de la unidad del bebé (acerque las
unidades la una a la otra y espere durante unos 5 segundos) y asegúrese de que ambas
unidades están encendidas. Si el enlace no se restablece, signica que las unidades de los
padres y el bebé han perdido su conexión y deberá ser reestablecida.
NOTA:
Debido a que la unidad del bebé no emite la señal de baliza periódica cuando se ha seleccionado
el modo “ZERO”, la unidad de los padres es incapaz de detectar si ésta se encuentra dentro del
radio de cobertura o no. Por tanto, es posible que la unidad de los padres quede fuera del radio
de cobertura de la unidad del bebé sin que los padres sean conscientes de ello.
5.2.8. Conexión de las unidades (emparejamiento)
Si la conexión entre ambas unidades se ha perdido y es imposible restablecerla siguiendo las
indicaciones del apartado anterior, por favor siga los pasos indicados para emparejar la unidad
de los padres con la del bebé: pulse simultáneamente los botones de encendido/apagado de
ambas unidades (1 y 10) durante 3 segundos, con ambas unidades inicialmente apagadas.
Ambas unidades deben enlazarse automáticamente.
5.3. GUÍA DE LOCALIZACIÓN Y CORRECCIÓN DE POSIBLES PROBLEMAS

10
ESPAÑOL
Problema Posible causa – cosas que hacer/revisar
No hay recepción en la unidad de
los padres
unidades la una a la otra y espere durante 5 segundos
hasta que se restablezca el enlace. Empareje de nuevo
ambas unidades en caso de que sea necesario (ver el
apartado 5.2.8.)
· La unidad del bebé no detecta ningún sonido en la
habitación y ha entrado en modo reposo. La transmisión
de sonido se reactivará cuando la unidad del bebé
detecte un sonido por encima del umbral de sensibilidad.
El LED indicador de encendido
y carga (4) en la unidad de los
padres parpadea en verde y rojo
alternativamente y emite un pitido
con tres tonos. No se escuchan los
sonidos captados por la unidad del
bebé.
· La unidad de los padres está fuera del rango de
cobertura de la unidad del bebé. Acerque ambas
unidades la una a la otra y espere durante 5 segundos
hasta que se restablezca el enlace.
·El enlace entre las unidades de los padres y del bebé
se ha perdido. Es necesario emparejar de nuevo las
unidades (ver el apartado 5.2.8.).
· La unidad del bebé está apagada. Enciéndala.
No es posible escuchar al bebé
desde la unidad de los padres, pero
el LED indicador de encendido y
carga (4) está encendido en verde.
· Está seleccionado el nivel mínimo de volumen en la
unidad de los padres. Suba el volumen pulsando el
botón (2).
El LED indicador de encendido
y carga (4) parpadea en rojo y la
unidad de los padres pita cada 30
segundos.
· La carga de las baterías se está agotando. Coloque la
unidad de los padres sobre su base de carga.
La unidad de los padres emite un
sonido alto y estridente.
· Esto suele ocurrir cuando las unidades de los padres
y del bebé están demasiado cerca la una de la otra.
Separe las unidades.
El LED de encendido de cualquiera
de las dos unidades (4 u 11) no se
enciende cuando se conecta a la
red eléctrica
· Compruebe si hay un problema en su red eléctrica.
· Compruebe que el adaptador de corriente AC/DC
está correctamente conectado a la red eléctrica y a la
toma del dispositivo (en el caso de la unidad del bebé)
o la unidad de los padres está correctamente colocada
sobre su base de carga.
· Compruebe que ha conectado la unidad pulsando el
botón de encendido/apagado (1 o 10).
No es posible recargar las baterías · Compruebe que el adaptador de corriente AC/DC está
correctamente conectado a la red eléctrica y la unidad
de los padres está correctamente colocada sobre su
base de carga.
· Está utilizando pilas no recargables. Recuerde que
debe usar únicamente las pilas incluidas u otras
baterías recargables de las mismas características (2 x
AAA 1.2V 800mAh Ni-MH). Por favor, compruebe el tipo
de pilas que está utilizando.

11
ESPAÑOL
6. MANTENIMIENTO
Limpie el vigilabebés con un trapo seco y suave. Nunca debe usar productos de limpieza o
disolventes.
7. ESPECIFICACIONES TÉCNICAS
- Frecuencia: 2.4GHz
- Alcance: hasta 300m en óptimas condiciones y en espacio abierto. Es posible alcanzar hasta
50m en interiores (debido a los obstáculos como paredes, puertas, etc.).
- Unidad del bebé (emisor):
· Adaptador:
Entrada: 100~240V AC, 50/60Hz, 150mA
Salida: 6V DC, 300mA
- Unidad de los padres (receptor):
· Adaptador:
Entrada: 100~240V AC, 50/60Hz, 150mA
Salida: 6V DC, 300mA
· Baterías: 2 x AAA 1.2V 800mAh Ni-MH (incluidas)
- Potencia de transmisión:
· Media: 10mW
· Máxima: 250mW
- Tiempo máximo de funcionamiento con las baterías cargadas (alternando periodos de
escucha/reposo): 6-7h
- Tiempo máximo de funcionamiento con las baterías cargadas (cuando la habitación del bebé
está la mayor parte del tiempo en silencio): 10-12h.
- Rango de temperatura de funcionamiento: 0°C a 50°C
- Rango de humedad relativa de funcionamiento: 20% a 75%
8. INFORMACIÓN SOBRE DESECHO DE LAS PILAS Y EL PRODUCTO
· Recuerde quitar las pilas y deshacerse de ellas de forma responsable al
desechar el vigilabebés.
· No debe mezclar productos que lleven el símbolo del cubo de basura tachado
con su basura doméstica. Para el correcto tratamiento de este tipo de productos,
llévelos a los puntos de recogida designados por las autoridades locales.
Alternativamente puede contactar con el punto de venta donde adquirió el producto.
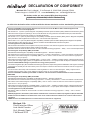
Por medio de la presente Miniland S.A. declara que el “89171 digitalk easy” cumple con
los requisitos esenciales y cualesquiera otras disposiciones aplicables o exigibles a la
Directiva RED 2014/53/UE.

12
ENGLISH
TABLE OF CONTENTS
1 Introduction
2 Content
3 Safety instructions
4 Characteristics of the product
5 Instructions for use
6 Maintenance
7 Technical specications
8 Information on the disposal of the batteries and the product
1. INTRODUCTION
We congratulate you on having acquired the audio digital baby monitor featuring the most
advanced technology. We are sure you will be fully satised with the quality and characteristics
of this product. However, we recommend you read the instructions for use carefully before using
the product to ensure you obtain the best results from your baby monitor.
This simple baby monitor will enable you to receive the sound captured in your baby´s room in
a wireless manner.
2. CONTENT
a) 1 parent unit (receiver)
b) 1 baby unit (transmitter)
c) 1 AC/DC adapter for the baby unit
d) 1 AC/DC adapter with a charger base for the parent unit
e) 2 AAA 1.2V 800 mAh Ni-MH rechargeable batteries for the parent unit
f) 1 instruction manual, quick guide and warranty
- If any of the aforementioned contents are missing, please contact your distributor or
point of sale.
3. SAFETY INSTRUCTIONS
3.1. GENERAL SAFETY INSTRUCTIONS
Read these instructions prior to using your baby monitor for the rst time and keep them for
future consultations.
Certain basic safety precautions need to be followed when using electrical devices:
1. These precautions should be doubled when using the product with children or the elderly or
when using it in the vicinity of the same. Keep it out of the reach of children when it is not in use.
2. This product should not be used as the sole means of monitoring, and should never be used
to replace the responsible supervision of children, adults or property by adults.
3. Children should not be allowed to play with the packaging material, such as plastic bags, for
example. This product contains small pieces. Care should be taken at the time of unpacking and
assembling the product.
4. The baby monitor should only be used with the AC/DC adapters included.
5. The baby unit is not designed for use with batteries, and the AC/DC adapter included should
be used.
6. DO NOT use the product if the cable or plug are damaged. In the event your baby monitor
is not functioning correctly or has been damaged, contact the authorised Miniland technical
department to schedule an inspection and repair, thereby avoiding any potential risks.
7. Never use non-rechargeable batteries in the parent unit. Only use the type of battery
recommended (2 x AAA 1.2 V 800 mAh NiMH). DO NOT attempt to recharge other batteries in
the baby monitor.

13
ENGLISH
8. DO NOT mix old and new batteries and rechargeable and non-rechargeable batteries.
9. Place the baby monitor where the air is circulating freely, and do not place it on bed linen,
blankets or on the edge of a closet, shelf, etc.
10. Place the baby monitor away from sources of heat such as radiators, chimneys, kitchens
and direct sunlight.
11. Keep the baby monitor away from televisions and radios which might cause interference.
12. DO NOT attempt to repair or adjust the electrical or mechanical functions of this device, as
this will render the guarantee invalid.
13. Check the voltage of your home corresponds to that of the apparatus, as indicated in the
product specications.
14. You should always unplug the adapter and remove the batteries if you do not intend to use
the baby monitor for a long period of time. To disconnect the device pull out the plug, taking care
never to pull on the cable itself.
15. This product is not intended for use when it is wet or in conditions of extreme humidity. The
baby monitor and charger should never be placed where it might fall into a sink or any other
recipient containing water. Store the device in a dry place when it is not being used.
16. Prior to disposing of your baby monitor you should remove the batteries and dispose of them
in a responsible manner.
3.2. PRECAUTIONS
· Place the baby monitor out of the reach of children in order to prevent accidents.
· This baby monitor is designed to provide parents with peace of mind when they are unable to
be in the same room as their baby. This product should not be used to replace the responsible
supervision of an adult. One of the parents should stay near the monitor while it is in use. The
baby monitor is not a medical device and should not be entrusted with the wellbeing of the baby.
It is important someone visits the room on a regular basis to check everything is in order.
· Never use this baby monitor in cases where the life or health of the baby or someone else, or
the integrity of a property depends of the functioning of the same. The manufacturer will not be
held liable for any claims in relation to death, personal injury or material damage arising from the
incorrect use of the product.
· The improper use of this wireless baby monitor may result in legal action.
· Use this product in a responsible manner.
3.3. ADVICE ON RADIO INTERFERENCE
This equipment has been tested and complies with the requirements of RED Directive 2014/53/EU.
These requirements are intended to provide reasonable protection against harmful interference
in a residential installation.
If the equipment is not installed and used in accordance with the instructions, harmful interference
may occur in the radio communications.
However, it should be pointed out that it is impossible to guarantee there will be no interference
in a specic installation. If the baby monitor causes interference to the radio or television signal,
which may be resolved by turning it off and on again, the user should attempt to deal with the
interference as specied below:
· Change the position of the receiver (the parent unit) or move it to a different place.
· Increase the distance between the interfering equipment and the baby monitor.
· Plug the equipment into a circuit different to that the receiver is plugged into.
· Contact the MINILAND S.A. customer service department.
This equipment uses specially coated cables in order to ensure compliance with RED Directive
2014/53/EU. Using the device with non-approved equipment or uncoated cables may cause
interference to the radio or television signal.

14
ENGLISH
Any alteration or modication conducted by personnel other than the MINILAND technical
department will render the product guarantee invalid.
3.4. ENERGY CONSUMPTION
The power adapters supplied comply with the European Union eco-design directive (Directive
2005/32/CE).
The consumption of energy is considerably lower than the consumption of other adapters
designed with operation and standby modes.
3.5. PRIOR TO USE
Choosing the right place
· Place the baby unit away from televisions and TV repeaters and radios. The signals generated
by these devices may cause noises or even sounds which are retransmitted on the baby unit. If
this occurs you will need to place the baby unit somewhere else.
· The baby unit should be placed at least 3 metres from the baby´s cot and on a at surface. The
baby unit should never be placed in the cot, on the bed or playground. Ensure the unit, cables
and adapter are all out of the reach of the baby and small children.
· Place the baby unit where the air is circulating freely, and never on eiderdowns or blankets or
on the edge of a closet, shelf, etc
Place the baby monitor away from sources of heat such as radiators, chimneys, kitchens and
direct sunlight.
4. CHARACTERISTICS OF THE PRODUCT
4.1. FEATURES AND CONTROLS OF THE PARENT UNIT (Figure 1)
1. On / Off button
2. Raise volume button
3. Lower volume button
4. On/Off and charge LED indicator: the permanent green light indicates the device is on, while
the ashing green light indicates the batteries are charging.
5. LED low sound level indicator: remains off when no sound is detected from the baby unit, and
ashes red when a sound is detected (when it is low) in the baby´s room.
6. LED high sound level indicator: remains off when the sound level detected in the baby´s room
is low and ashes red when the baby unit detects a loud noise.
7. Neck strap opening
8. Battery compartment (2 x AAA 1.2V 800 mAh Ni-MH rechargeable)
9. Charger base
4.2. FEATURES AND CONTROLS OF THE BABY UNIT (Figure 2)
10. On / Off button
11. Night light button (short touch) / parent unit search (long touch).
12. LED On / night light indicator: lights up green when the baby unit is on and emits a more
powerful white light when the night light is turned on.
13. Emission mode switch (LOW / ZERO)
5. INSTRUCTIONS FOR USE
5.1. PRIOR TO USE: CONNECTION TO THE POWER AND USE OF THE BATTERIES
The parent unit:
The parent unit of this baby monitor is designed to operate with the batteries or AC/DC adapter
included. The device comes with 2 AAA 1.2V 800 mAh Ni-MH rechargeable batteries for the
parent unit. We recommend using the batteries in the parent unit to enable you to hear the baby

15
ENGLISH
unit from anywhere (within the range of the signal of the apparatus).
- The rechargeable batteries should be charged for 16 hours before use for the rst time or when
they have not been used for a long time.
Place the parent unit on the charger base (9) whenever possible in order to keep the batteries
charged at all times.
- Remove the cover to the compartment (8) on the rear of the parent unit by pressing and sliding
it down. Insert the rechargeable batteries in accordance with the correct polarity and replace the
cover (Figure 3).
- Place the parent unit on the charger base (9) (Figure 4).
- Plug the adapter into the mains. The On/Off and charge LED indicator (4) will ash green while
the device is charging. The LED indicator will light up green when the device is fully charged.
The baby unit:
The baby unit is designed to operate with the AC/DC adapter included.
- Connect the adapter to the base of the baby unit (Figure 5).
- Plug the adapter into a mains socket.
5.2. OPERATION
Turning the units on:
· The parent unit: press the on / off button (1) for two seconds. The On/Off and charge LED
indicator (4) will light up green.
· The baby unit: press the on / off button (10) for two seconds. The On / night light indicator (12)
will light up green.
Once the baby monitor has been prepared you will be able to hear the sounds captured in your
baby´s room through the parent unit. You will also be able to see how the LED sound indicators
ash: when the sound captured is low the rst LED indicator (5) will ash red, however when the
sound captured is loud both LED indicators (5 and 6) will ash red.
Turning the units off:
· The parent unit: press the on / off button (1) for two seconds.
· The baby unit: press the on / off button (10) for two seconds.
5.2.1. Sound activation (VOX)
This function activates your baby monitor by sound when it is in standby mode.
If the baby unit does not detect any sound or the sound detected is below the sensitivity threshold
(xed and established during the manufacturing process) for a period of 20 seconds, it will stop
transmitting. Nevertheless, it will continue to capture the sounds in the vicinity using a minimum
amount of energy. The parent unit will enter standby mode and will remain silent.
When the baby unit detects any sound above the device´s sensitivity threshold it will begin to
transmit the signal to the parent unit again.
5.2.2. Volume
You may set the desired volume to listen to your baby using the raise / lower volume buttons (2
and 3) on the front of the parent unit.
Selecting the volume level (9 levels) will not affect the sensitivity of your baby monitor, which features
factory congurations, but only the volume at which you will hear the sounds on the parent unit.
5.2.3. Charge and low battery indicator
The On/Off and charging LED indicator (4) in Parents Unit works as an indicator of the charging
process:

16
ENGLISH
If the parents unit is off and it is placed on the charging base,
· The On/Off and charge LED indicator (4) will ash in red while the parents unit batteries are charging.
· When the batteries are fully charged this LED indicator (4) will light up red.
If the parents unit is ON on low radiation mode (LOW) and it is placed on the charging base:
· The On/Off and charge LED indicator (4) will ash in green while the parents unit batteries are charging.
· When the batteries are fully charged this LED indicator (4) will light up green.
If the parents unit is ON on zero emissions mode (ZERO) and it is placed on the charging base,
· The On/Off and charge LED indicator (4) will ash in yellow and red while the parents unit
batteries are charging.
· When the batteries are fully charged this LED indicator (4) will light up yellow.
The approximate charging time for the parent unit batteries is around 5 to 8 hours, depending on
the battery charge level at the onset of the process.
When the batteries are fully charged the average life of the parent unit is around 6 to 7 hours and
will depend on the listening / standby cycles. The maximum battery life will be around 10 to 12
hours in the event the baby unit remains in a silent environment for most of the time.
When the battery level of the parent unit is low, the parent unit will emit a warning beep every
30 seconds and the LED on / off and charge indicator will ash red. When this occurs, place the
parent unit on the charger base (9) in order to recharge the batteries. You may continue to use
the baby monitor while the parent unit is on the charger base.
5.2.4. Paging (searching for the parent unit)
This option serves to nd the parent unit when it cannot be found. It is also very useful when one
of the parents is in the baby´s room and needs to contact the other parent.
Press the night light / parent unit search button (11) on the baby unit for 3 seconds. The parent unit will
emit a three-tone beep which you can deactivate by pressing any of the buttons on the parent unit.
5.2.5. Night light
The baby unit features a night light (12) which emits a soft glow, providing your baby with comfort
and enabling him / her to see in a dark room.
To turn the night light on or off press the night light / parent unit search button (11). Remember
that the night light is controlled by pressing the button (11) for a short time.
5.2.6. Mode switch: zero emissions (ZERO) and low radiation (LOW)
The baby unit features special transmission technology known as Zero Emissions. When the
baby unit is in standby mode and no sound is detected in the room, this unit emits no radiation.
The mode of communication between the two units may be selected using the emission mode
switch (LOW / ZERO) (13) on the base of the baby unit.
The mode used by the baby unit may be Low Radiation or Zero Emissions. Use the mode switch
(LOW / ZERO) (13) to select the mode.
1) Zero emissions mode (ZERO)
Setting:
Set the switch at the bottom of the baby unit (13) to the “ZERO” position. When both units (the
parents´ and the baby´s) are turned on the On/Off and charge LED indicator (4) on the parent
unit will light up in orange to show the ZERO mode has been selected.
Operation:
During normal baby monitor operations (LOW) the baby unit sends a regular beacon signal to
the parent unit informing that it is connected and operating, even when the baby unit does not
detect any sound.

17
ENGLISH
However, you may select the ZERO operating mode, which does not emit this beacon signal,
thereby reducing emissions to zero while the baby monitor is in standby mode. When the baby
unit detects no sound in the room the average will be zero emissions, whereby the baby monitor
will not emit any radiation whatsoever.
When the baby unit detects a sound above the VOX sensitivity threshold (pre-established), it will
begin to emit a signal to the parent unit as a means of establishing communication between the
two units. This process will last for less than one second.
From this moment on the parent unit will retransmit the sounds captured by the baby unit.
N.B: Out of range indicator
Due to the fact the baby unit does not emit the regular beacon signal when the device is in
the “ZERO” mode, the parent unit is incapable of detecting whether it is within the range
of the signal or not. As such, the parent unit may be out of the range of the signal of the
baby unit without the parents being aware of the fact.
We recommend using this mode of operation when the parent unit is in a xed position
which has been checked beforehand for range of coverage, such as on the bedside table.
It may also be used by moving the parent unit, whenever it has been checked beforehand
that signal is available throughout the radius of movement.
2) Normal operating or low radiation mode (LOW)
Setting:
Set the switch at the bottom of the baby unit (13) to the “LOW” position.
Operation:
As explained previously, during normal baby monitor operations (LOW) the baby unit sends a
regular beacon signal to the parent unit informing that it is connected and operating, even when
the baby unit does not detect any sound. This signal lasts for 1 second and is emitted 4 times
every 20 seconds. If the parent unit receives this signal the On/Off and charge LED indicator (4)
lights up green to show that the unit is within the signal range. On the contrary, if the parent unit is
incapable of receiving the beacon signal after 20 seconds, the On/Off and charge LED indicator
(4) will ash red and green alternately emitting a three-tone warning beep.
On selecting the “LOW” mode a continuous low-power connection is established between the
parent and baby units, reason for which there is no delay in the connection indicated for the
“ZERO” mode when the baby unit detects a sound while in standby mode.
5.2.7. Out of range alert
If the connection between the parent unit and the baby unit is lost at any time, the two sound level
indicators on the parent unit will ash alternately in red for 20 seconds to show it is searching for
the baby unit. If the connection has not been reestablished within 20 seconds (it has not received
the beacon signal sent by the baby unit), the On/Off and charge LED indicator (4) will ash in red
and green alternately while the parent unit emits a warning beep.
This case, in order to reestablish the link between the two units, check the parent unit is within the
signal range of the baby unit (move the two units closer together and wait for around 5 seconds)
and check that both units are turned on. If the connection is not reestablished, this means the
connection between the parent and baby units has been lost and needs to be reestablished.
5.2.8. Connecting the units (paring)
If the connection between the two units has been lost and it proves impossible to reestablish it
following the instructions set forth above, please follow the steps for paring the parent unit to the

18
ENGLISH
Problem Possible cause things to do / check
There is no signal in the parent
unit
· The AC/DC adapter has not been connected to the baby
unit. Connect the adapter.
· The baby unit is off. Turn it on.
· The parent unit is off. Turn it on.
· The parent unit batteries are running low or are already
at. Place the parent unit on the charger base in order to
recharge the batteries.
· The parent unit is out of range of the baby unit. Move
the two units closer together and wait for 5 seconds until
the link is reestablished. Pair both units again if necessary
(see item 5.2.8.)
· The baby unit is not detecting any sound in the room and
has entered standby mode. The transmission of sound will
recommence when the baby unit detects a sound above
the sensitivity threshold.
The On/Off and charge LED
indicator (4) on the parent
unit ashes in green and red
alternately and emits a three-tone
beep. The sounds captured by the
baby unit cannot be heard.
· The parent unit is out of range of the baby unit. Move the
two units closer together and wait for 5 seconds until the
link is reestablished.
· The connection between the parent and baby units has
been lost. The two units need to be paired again (see item
5.2.8.).
· The baby unit is off. Turn it on.
The baby unit cannot be heard
from the parent unit, but the On/
Off and charge LED indicator (4)
is green.
· The volume on the parent unit is turned right down. Raise
the volume by pressing the button (2).
The On/Off and charge LED
indicator (4) is ashing red and
the parent unit beeps every 30
seconds.
· The batteries are running low. Place the parent unit on
the charge base.
The parent unit emits a high and
strident sound.
· This normally occurs when the parent and baby units are
too close together. Move the units further apart.
The On/Off and charge LED
indicator of either unit (4 or 11)
does not light up when connected
to the power mains.
· Check for problems with the power network.
· Check the AC/DC adapter is properly connected to the
power mains and the socket on the device (in the case of
the baby unit) and the parent unit is correctly in position on
the charge base.
· Check the unit has been connected by pressing the on /
off button (1 or 10).
baby unit: press the on / off buttons on both units (1 and 10) simultaneously for 3 seconds, with
both units initially turned off. Both units should connect up automatically.
5.3. GUIDE TO IDENTIFYING AND CORRECTING POTENTIAL PROBLEMS

19
Problem Possible cause things to do / check
The batteries won´t recharge. · Check the AC/DC adapter is properly connected to the
power mains and the parent unit is correctly in position on
the charge base
· You are using non-rechargeable batteries. Remember
you should only use the batteries supplied or other
rechargeable batteries of the same characteristics (2
x AAA 1.2V 800 mAh Ni-MH). Please check the type of
batteries you are using.
ENGLISH
6. MAINTENANCE
Clean the baby monitor with a soft, dry rag. Do not use cleaning products or solvents.
7. TECHNICAL SPECIFICATIONS
- Frequency: 2.4 GHz
- Range: up to 300 m in ideal conditions in an open space. A range of up to 50 m can be obtained
indoors (due to obstacles such as walls, doors, etc.).
- Baby unit (transmitter):
· Adapter:
Input: 100 ~ 240 V AC, 50/60 Hz, 150 mA
Output: 6 V DC, 300 mA
- Parent unit (receiver):
· Adapter:
Input: 100 ~ 240 V AC, 50/60 Hz, 150 mA
Output: 6 V DC, 300 mA
· Batteries: 2 x AAA 1.2V 800 mAh Ni-MH (included)
- Transmission power:
· Average: 10 mW
· Maximum: 250 mW
- Maximum operating time with fully charged batteries (alternating listening / standby periods):
6 to 7 hours
- Maximum operating time with fully charged batteries (when the baby´s room is silent for most
of the time): 10 to 12 hours.
- Operating temperature range: 0° C to 50° C
- Operating relative humidity range: 20% to 75%
8. INFORMATION ON THE DISPOSAL OF THE BATTERIES AND THE PRODUCT
· Remember to remove the batteries and dispose of them in a responsible
manner when disposing of the baby monitor.
· You should not mix products bearing the crossed-out rubbish bin symbol with your
domestic rubbish. These products should be taken to the collection points allocated
by the local authorities for appropriate treatment. Alternatively you may contact the
point of sale where you purchased the product.
Hereby, Miniland S.A. declares that this “89171 digitalk easy” is in compliance with
the essential requirements and other relevant provisions of Directive 2014/53/EU.

20
PORTUGUÊS
ÍNDICE
1 Introdução
2 Conteúdo
3 Instruções de segurança
4 Características do produto
5 Instruções de utilização
6 Manutenção
7 Especicações técnicas
8 Informações sobre descarte das pilhas e do produto
1. INTRODUÇÃO
Parabéns pelo facto de ter adquirido este vigia-bebés digital de áudio, que inclui tecnologia de
última geração. Estamos convencidos de que cará totalmente satisfeito com a qualidade e as
características deste produto. Mesmo assim, recomendamos que leia atentamente as instruções
de utilização antes da sua utilização, para obter os melhores resultados do seu vigia-bebés.
Este simples vigia-bebés digital permitir-lhe-á receber o som captado no quarto do bebé, sem
necessidade de os.
2. CONTEÚDO
a) 1 unidade dos pais (recetor)
b) 1 unidade do bebé (emissor)
c) 1 adaptador AC/DC para a unidade do bebé
d) 1 adaptador AC/DC com base de carga para a unidade dos pais
e) 2 pilhas AAA 1.2V 800mAh Ni-MH recarregáveis para a unidade dos pais
f) 1 manual de instruções, guia rápido e garantia
· Se faltar qualquer um dos elementos acima indicados, entre em contacto com o seu
distribuidor ou ponto de vendas.
3. INSTRUÇÕES DE SEGURANÇA
3.1. INSTRUÇÕES DE SEGURANÇA GERAIS
Leia estas instruções antes de começar a usar o seu vigia-bebés pela primeira vez e guarde-as
para consultas futuras.
Ao usar qualquer aparelho elétrico, devem-se ter cuidados básicos de segurança:
1. Deve intensicar os cuidados quando utilizar o produto com crianças e pessoas idosas ou
quando o utilizar perto das mesmas. Mantenha-o afastado do alcance das crianças quando não
estiver a utilizá-lo.
2. Este produto não deve ser utilizado como único meio de vigilância, não sendo, em caso
nenhum, um substituto da supervisão responsável das crianças, adultos ou propriedades por
parte dos adultos.
3. Não permita que as crianças brinquem com o material de embalagem como, por exemplo,
sacos de plástico. Este produto contém peças de tamanho reduzido. É necessário proceder
cuidadosamente quando se tratar de desempacotar e montar o produto.
4. Só deve usar o vigia-bebés com os adaptadores AC/DC incluídos.
5. A unidade do bebé não foi concebida para ser utilizada com pilhas; utilize o adaptador AC/
DC incluído.
6. NÃO utilize o produto se o cabo ou a cha estiverem danicados. Se o seu vigia-bebés não
funcionar corretamente ou tiver sofrido algum dano, deve entrar em contacto com o serviço técnico
autorizado da Miniland para a sua revisão e reparação, evitando assim qualquer eventual risco.
7. Nunca utilize pilhas não recarregáveis na unidade dos pais. Utilize apenas o tipo de pilhas
La page est en cours de chargement...
La page est en cours de chargement...
La page est en cours de chargement...
La page est en cours de chargement...
La page est en cours de chargement...
La page est en cours de chargement...
La page est en cours de chargement...
La page est en cours de chargement...
La page est en cours de chargement...
La page est en cours de chargement...
La page est en cours de chargement...
La page est en cours de chargement...
La page est en cours de chargement...
La page est en cours de chargement...
La page est en cours de chargement...
La page est en cours de chargement...
La page est en cours de chargement...
La page est en cours de chargement...
La page est en cours de chargement...
La page est en cours de chargement...
La page est en cours de chargement...
La page est en cours de chargement...
La page est en cours de chargement...
La page est en cours de chargement...
La page est en cours de chargement...
La page est en cours de chargement...
La page est en cours de chargement...
La page est en cours de chargement...
La page est en cours de chargement...
La page est en cours de chargement...
La page est en cours de chargement...
La page est en cours de chargement...
La page est en cours de chargement...
La page est en cours de chargement...
La page est en cours de chargement...
La page est en cours de chargement...
La page est en cours de chargement...
La page est en cours de chargement...
La page est en cours de chargement...
La page est en cours de chargement...
La page est en cours de chargement...
La page est en cours de chargement...
La page est en cours de chargement...
La page est en cours de chargement...
La page est en cours de chargement...
La page est en cours de chargement...
La page est en cours de chargement...
La page est en cours de chargement...
La page est en cours de chargement...
La page est en cours de chargement...
La page est en cours de chargement...
La page est en cours de chargement...
La page est en cours de chargement...
La page est en cours de chargement...
La page est en cours de chargement...
La page est en cours de chargement...
-
 1
1
-
 2
2
-
 3
3
-
 4
4
-
 5
5
-
 6
6
-
 7
7
-
 8
8
-
 9
9
-
 10
10
-
 11
11
-
 12
12
-
 13
13
-
 14
14
-
 15
15
-
 16
16
-
 17
17
-
 18
18
-
 19
19
-
 20
20
-
 21
21
-
 22
22
-
 23
23
-
 24
24
-
 25
25
-
 26
26
-
 27
27
-
 28
28
-
 29
29
-
 30
30
-
 31
31
-
 32
32
-
 33
33
-
 34
34
-
 35
35
-
 36
36
-
 37
37
-
 38
38
-
 39
39
-
 40
40
-
 41
41
-
 42
42
-
 43
43
-
 44
44
-
 45
45
-
 46
46
-
 47
47
-
 48
48
-
 49
49
-
 50
50
-
 51
51
-
 52
52
-
 53
53
-
 54
54
-
 55
55
-
 56
56
-
 57
57
-
 58
58
-
 59
59
-
 60
60
-
 61
61
-
 62
62
-
 63
63
-
 64
64
-
 65
65
-
 66
66
-
 67
67
-
 68
68
-
 69
69
-
 70
70
-
 71
71
-
 72
72
-
 73
73
-
 74
74
-
 75
75
-
 76
76


Miniland digitalk easy Manuel utilisateur
- Catégorie
- Babyphones
- Taper
- Manuel utilisateur
dans d''autres langues
- italiano: Miniland digitalk easy Manuale utente
- English: Miniland digitalk easy User manual
- español: Miniland digitalk easy Manual de usuario
- Deutsch: Miniland digitalk easy Benutzerhandbuch
- русский: Miniland digitalk easy Руководство пользователя
- português: Miniland digitalk easy Manual do usuário
- polski: Miniland digitalk easy Instrukcja obsługi
Documents connexes


Autres documents
-
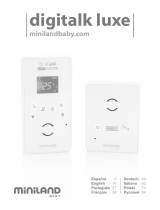 Miniland Baby digitalk luxe Manuel utilisateur
-
Duux DECT baby monitor Manuel utilisateur
-
Philips AVENT SCD 530/00 Manuel utilisateur
-
Philips SCD560/10 Manuel utilisateur
-
-
-
-
-
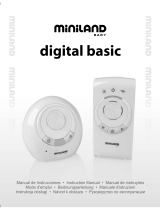 Miniland Baby Digital Basic 89063 Manuel utilisateur
-
VTech Classic Light Manuel utilisateur

