SCS Sentinel AAM0095 Le manuel du propriétaire
- Taper
- Le manuel du propriétaire

FR Notice d’utilisation et d’installation EN Installation and user manual
IT Manuale d’installazione e uso ES Instrucciones de uso e instalación
SolarGate 20W
Kit d’alimentation solaire pour automatisme
Solar power alimentation kit
Kit d’alimentazione solare per automatismo
Kit de energía solar para automatismos
SolarGate 20W AAM0095
V.102017 - IndC
Solaire
Économie
d’énergie
Installation
facile
Ne pas brancher
sur du 230V

3
FR
A- INSTALLATION
123
Installation
plein sud
obligatoire
Le panneau ne doit jamais
être exposé à l’ombre
Chargement : 8h de plein soleil
4
A - Installation ........................................................................................................................................................................... 3
B - Branchement général (multi-marques) .......................................................................................................................... 4
C - Branchement spécifique pour motorisation SCS Sentinel ........................................................................................... 5
D - Utilisation .............................................................................................................................................................................7
E - Aide au dépannage ..............................................................................................................................................................9
F- Assistance téléphonique ......................................................................................................................................................9
G- Garantie...................................................................................................................................................................................9
SOMMAIRE

4FR
B- BRANCHEMENT GÉNÉRAL (MULTI-MARQUES)
+-+-+-
USB
Panneau solaire
Batteries
Vers automatisme
Régulateur
+-+-+-
USB
Panneau solaire
Batteries
Vers automatisme
Régulateur
Selon la marque de votre
automatisme, les connecteurs
fournis par défaut dans le kit
pourront être remplacés. Veillez
à bien respecter les polarités.

5
FR
C- BRANCHEMENT SPÉCIFIQUE AVEC MOTORISATION
SCS SENTINEL
Modèle 1 et 2 - portail battant platine P100 PCB1 - P100 PCB2
Panneau solaire
Batteries
Vers automatisme
+BAT-
AC INPUT
SO+ SO-
SO+ SO-
+BAT-
AC INPUT
SO+ SO-
Panneau solaire
Batteries
Vers automatisme
SO+ SO-

6FR
+-+-+-
USB
Panneau solaire
Batteries
Vers automatisme
-BAT+
AC
Régulateur
Modèle 3 - portail coulissant platine P501 BH
+-+-+-
USB
-BAT+
AC
Panneau solaire
Batteries
Vers automatisme
Régulateur

7
FR
D- UTILISATION
Menu principal
Réglage si nécéssaire
1
2
+-+-+-
USB
Tension
batterie
Allumé = panneau
solaire connecté
État de la batterie
TOUCHE
MENU
(maintenir
pour modifier
le réglage)
Maintenir
la touche
pour remettre
le paramètre
usine
Permet d’activer/
désactiver
manuellement
votre
motorisation
Allumé = charge
Clignote = charge
de maintien
Éteint = pas de charge
Allumé = conso > 400 mA
Éteint = conso < 400 mA
Allumé = motorisation active
USB
+-+-+-
USB
-+-+-
USB
+-+-+-
USB
+-+-+-
USB
-+-+-
USB
Maintenir jusqu’au
clignotement de la
tension
INDEX
ou ou
Maintenir jusqu’à
ce que la tension
devienne fixe
pour valider
Maintenir
la touche pour
remettre le
paramètre usine
12
34

8FR
-+-+-
USB
Cliquer pour
passer d’un
menu à l’autre
-+-+-
USB
Cliquer pour
passer d’un
menu à l’autre
Cliquer pour
passer d’un
menu à l’autre
+-+-+-
USB
Cliquer pour
passer d’un
menu à l’autre
+-+-+-
USB
Cliquer pour
passer d’un
menu à l’autre
= batteries SolarGate
Tension 14,4V
+-+-+-
USB
VOIR INDEX
pour réglage
Écran principal Seuil de la tension de
charge de maintien
Seuil de la tension
d’activation de la
motorisation
VOIR INDEX
pour réglage si changement
autre modèle de batteries
VOIR INDEX
pour réglage
Ne pas modifer ce réglage
VOIR INDEX
pour réglage
= batteries au gel
Tension 14,2V
= batteries humide
Tension 14,6V
12
3
Seuil de la tension de
désactivation de la
motorisation
4
5 6

9
FR
E- AIDE AU DÉPANNAGE
Problème Solution
La tension des batteries est
faible (>22V) et le témoin
est éteint
Déconnecter l’automatisme du régulateur, puis attendre. Ne rebrancher l’automatisme que
lorsque la charge est redevenue normale ou réorienter votre panneau solaire de manière à ce
qu’il soit mieux exposé aux rayons du soleil.
Les batteries ne tiennent pas
la charge
Vérifier la consommation courant au repos de votre automatisme qui doit être < 40 mA, et
vérifier l’exposition du panneau qui ne doit jamais être à l’ombre et orienté plein sud.
F- ASSISTANCE TÉLÉPHONIQUE
Nous vous demandons au préalable de relever la référence de votre matériel sur la notice ou l’emballage de votre produit.
Nous vous conseillons également de brancher votre matériel « en fils volants » sur une table après avoir démonté les
éléments afin de facilement déterminer si c’est le matériel ou l’installation qui pose problème.
En cas de besoin, vous pouvez prendre contact avec notre assistance technique au numéro ci-dessous
0 892 350 490 0,35 €
/ min
Horaire hotline, voir sur le site internet : scs-sentinel.com
G- GARANTIE
N’oubliez pas d’enregistrer votre garantie dans le mois suivant votre achat en vous rendant sur
notre site internet : www.scs-laboutique.com/accountProduct/declaration.
Conservez soigneusement le code-barre ainsi que votre justificatif d’achat, il vous sera demandé
pour faire jouer la garantie.
Il est impératif de garder une preuve d’achat durant toute la période de garantie.
300 Kg
150 Kg

10 EN
A- INSTALLATION
123
Compulsory
southern
exposure
No shadow is requested.
The solar panel works properly
when there is no shade cast
upon it.
Charging : 8 hours of sun exposure
4
A - Installing ............................................................................................................................................................................... 3
B - General wiring (all brands) .............................................................................................................................................. 4
C - Wiring with SCS Sentinel gate openers ..........................................................................................................................5
D - Use .........................................................................................................................................................................................7
E - Aide au dépannage ..............................................................................................................................................................9
F - Warranty .................................................................................................................................................................................9
INDEX

11
EN
A- INSTALLATION
Charging : 8 hours of sun exposure
B- GENERAL WIRING (ALL BRANDS)
+-+-+-
USB
Solar panel
Batteries
Towards the automation
Regulator
+-+-+-
USB
Solar panel
Batteries
Towards the automation
Regulator
According to your automation
brand, the supplied terminals
may have to be replaced by
new ones. Make sure that the
connection is with correct
polarity.

12 EN
C- WIRING WITH SCS SENTINEL GATE OPENER
Models 1 and 2 - Swing gates - Electronic card P100 PCB1 - P100 PCB2
Solar panel
Batteries
Towards the automation
+BAT-
AC INPUT
SO+ SO-
SO+ SO-
+BAT-
AC INPUT
SO+ SO-
Solar panel
Batteries
Towards the automation
SO+ SO-

13
EN
Models 1 and 2 - Swing gates - Electronic card P100 PCB1 - P100 PCB2
+-+-+-
USB
Solar panel
Batteries
Towards the automation
-BAT+
AC
Regulator
Model 3 - sliding gate - electronic card P501 BH
+-+-+-
USB
-BAT+
AC
Solar panel
Batteries
Towards the automation
Regulator

14 EN
D- USING
Main menu
Settings (if necessary)
1
2
+-+-+-
USB
Battery
voltage
ON = connected
solar panel
Battery status
MENU KEYS
(Maintain
to modify the
setting)
Maintain the
button to return
to the factory
defaults
Allow to manually
activate/
deactivate your
automatism
ON = charge
Blinking = float
charging
OFF = no charge
ON = conso > 400 mA
OFF = conso < 400 mA
ON = active motorization
USB
+-+-+-
USB
-+-+-
USB
+-+-+-
USB
+-+-+-
USB
-+-+-
USB
Hold until
voltage flashing
INDEX
or or Hold until the
voltage becomes
fixed
Hold
to reset
12
34

15
FR
-+-+-
USB
Switch from a
setting item to
another
-+-+-
USB
Switch from a
setting item to
another
Switch from a
setting item to
another
+-+-+-
USB
Switch from a
setting item to
another
+-+-+-
USB
Switch from a
setting item to
another
= SolarGate batteries
Voltage 14,4V
+-+-+-
USB
See index for settings
Main screen Voltage threshold of the
float charging
Activation voltage
threshold of the
automatism
See INDEX for settings if
changing of batteries model
See index for settings
Do not modify the setting
See index for settings
= gel batteries
Voltage 14,2V
= flood batteries
Voltage 14,6V
12
3
Deactivation voltage
threshold of the
automatism
4
5 6

16 EN
E- TROUBLESHOOTING
Problem Solution
The battery voltage is low and
the indicator light is OFF
Disconnect the automation from the regulator and wait. Only connect the automation again,
once the batteries charging is back to normal and improve the sun exposure of the solar panel.
The batteries cannot hold
their charge.
Check the stand by power consumption which must reach <40 mA and check the panel sun
exposure. There should not be any shade cast upon it.
F- WARRANTY
Do not forget to register the warranty within the month following the date of purchase on our
website : www.scs-laboutique.com/accountProduct/declaration.
The invoice will be required as proof of purchase date.
300 Kg
150 Kg

17
IT
A- INSTALLAZIONE
123
Esposizione
sud
obbligatoria
Il pannello non deve mai
essere esposto all’ombra
Carica: 8 ore di sole
4
A - Installazione ........................................................................................................................................................................ 3
B - Cablaggio generale (diverse marche) ............................................................................................................................ 4
C - Cablaggio specifiche per motorizzazione SCS Sentinel ..............................................................................................5
D - Uso .........................................................................................................................................................................................7
E - Aiuto alla riparazione .........................................................................................................................................................9
F - Assistenza telefonica ...........................................................................................................................................................9
G - Garanzia .................................................................................................................................................................................9
INDICE

18 IT
B- CABLAGGIO GENERALE (DIVERSE MARCHE)
+-+-+-
USB
Pannello solare
Batterie
Verso l'automatismo
Regolatore
+-+-+-
USB
Pannello solare
Batterie
Verso l'automatismo
Regolatore
A seconda della marca
dell’automazione, i connettori
forniti nel kit possono essere
sostituiti. Assicurarsi di rispettare
la polarità.

19
IT
C- CABBLAGIO SCS SENTINEL
Modello 1 y 2 - cancello a battente platine P100 PCB1 - P100 PCB2
Pannello solare
Baterías
Verso l'automatismo
+BAT-
AC INPUT
SO+ SO-
SO+ SO-
+BAT-
AC INPUT
SO+ SO-
Pannello solare
Baterías
Verso l'automatismo
SO+ SO-

20 IT
+-+-+-
USB
Pannello solare
Batterie
Verso l'automatismo
-BAT+
AC
Regolatore
Modello 3 - cancello scorrevole P501 BH
+-+-+-
USB
-BAT+
AC
Pannello solare
Batterie
Verso l'automatismo
Regolatore

21
IT
D- UTILIZZO
Menu principale
Regolazione se necessario
1
2
+-+-+-
USB
Tensione
batterie
Acceso = pannello
solare conectado
Stato batteria
TASTO
MENU
(Mantenere per
modificare la
regolazione)
Mantenere il
tasto per
rimettere il
parametro lavora
Ti permette di
attivare /
disattivare
manualmente la
vostra
motorizzazione
Acceso = carica
Lampeggia = carica di
mantenimento
Spento = Nessuna
carica
Acceso = conso > 400 mA
Spento = conso < 400 mA
Acceso =
motorizzazione attivare
USB
+-+-+-
USB
-+-+-
USB
+-+-+-
USB
+-+-+-
USB
-+-+-
USB
Mantenere fino al
lampeggiamento
della tensione
INDEX
o o
Mantenere finché
la tensione
ridivenga fissa per
convalidare
Mantenere
il tasto per
rimettere il
parametro lavora
12
34
La page est en cours de chargement...
La page est en cours de chargement...
La page est en cours de chargement...
La page est en cours de chargement...
La page est en cours de chargement...
La page est en cours de chargement...
La page est en cours de chargement...
La page est en cours de chargement...
La page est en cours de chargement...
La page est en cours de chargement...
-
 1
1
-
 2
2
-
 3
3
-
 4
4
-
 5
5
-
 6
6
-
 7
7
-
 8
8
-
 9
9
-
 10
10
-
 11
11
-
 12
12
-
 13
13
-
 14
14
-
 15
15
-
 16
16
-
 17
17
-
 18
18
-
 19
19
-
 20
20
-
 21
21
-
 22
22
-
 23
23
-
 24
24
-
 25
25
-
 26
26
-
 27
27
-
 28
28
-
 29
29
-
 30
30
SCS Sentinel AAM0095 Le manuel du propriétaire
- Taper
- Le manuel du propriétaire
dans d''autres langues
Documents connexes
-
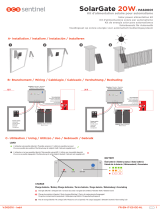 SCS Sentinel AAM0097 Le manuel du propriétaire
-
 SCS Sentinel MCO0093 Automation Kit Manuel utilisateur
-
 SCS Sentinel MCO0035 Le manuel du propriétaire
-
 SCS Sentinel MBA0030 Le manuel du propriétaire
-
 SCS Sentinel MBA0026 Le manuel du propriétaire
-
 SCS Sentinel MCO0039 Le manuel du propriétaire
-
 SCS Sentinel MVE0033 Le manuel du propriétaire
-
 SCS Sentinel MBA0031 Le manuel du propriétaire
-
 SCS Sentinel 3760074133864 Le manuel du propriétaire
-
 SCS Sentinel AudioBell PAF0005 Le manuel du propriétaire


