La page est en cours de chargement...

A Product of
TM
ALL PURPOSE VINYL GARDEN SHEDS
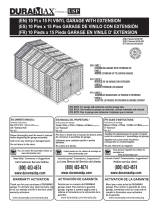
(EN) VINYL GARDEN SHED
(ES) JARDÍN DE VINILO CUBIERTO
(FR) ABRI DE JARDIN DE VINYLE
10.5 Ft x 8 Ft Apex
(EN) OWNER’S MANUAL /
Assembly Instructions ‘10.5 Ft Apex’
Size 10.5 Ft x 8 Ft / 3.2 m x 2.4 m (Approx.)
Ver: 0.0
YouTube
You can watch the assembly videos on
www.duramaxbp.com
WARRANTY ACTIVATION
Thank you for your purchase of DURAMAX
shed. To activate your shed warranty, log
on to our website and fill in the form under
warranty activation.
(800) 483-4674
www.duramaxbp.com
Need Help? Comments or Suggestions
Call Customer Service Hotline.
www.duramaxbp.com/warranty.php
Please thoroughly read the owner’s manual
before beginning the shed assembly.
Call us for any missing or damaged parts.
Do not return to the store.
(ES) MANUAL DEL PROPIETARIO /
Instrucciones de montaje ‘10.5 Pies Apex’
Tamaño 10.5 Pies x 8 Pies / 3.2 Metros x 2.4 Metros (Aproximado.)
Ver: 0.0
Por favor a fondo lea el manual del dueño antes
de comenzar la asamblea de cobertizo.
Llámenos para cualquier perder o partes
dañadas.
No vuelva a la tienda
.
(FR) GUIDE D’INSTRUCTIONS /
Instructions de montage ‘10.5 Pieds Apex’
Mesures 10.5 Pieds x 8 Pieds / 3.2 Mètre x 2.4 Mètre (Approximativ)
.
Ver: 0.0
ACTIVACIÓN DE GARANTÍA
Gracias por su compra de DURAMAX
cobertizo usted. Para activar la garantía
cobertizo, ingrese a nuestra página web y
rellenar el formulario en la activación de la
garantía.
www.duramaxbp.com/warranty.php
ACTIVATION DE LA GARANTIE
Merci pour votre achat de DURAMAX
hangar. Pour activer la garantie de votre
hangar, connectez-vous sur notre site et
remplir le formulaire sous activation
de la garantie.
www.duramaxbp.com/warranty.php
Veuillez lire attentivement le mode d 'emploi
avant de commencer l' assemblage de remise.
Appelez-nous pour toute les pièces
manquantes ou endommagées.
Ne pas retourner au magasin
.
YouTube
YouTube
Usted puede ver los videos de montaje en
www.duramaxbp.com
Vous pouvez regarder les vidéos de
montage sur
www.duramaxbp.com
necesita ayuda? Comentarios, Sugerencias?
La Línea Directa del Servicio del cliente.
(800) 483-4674
www.duramaxbp.com
a besoin d'aide? Commentaires, suggestions?
Hotline service client.
(800) 483-4674
www.duramaxbp.com
(EN) Model # 30116
(ES) Modelo # 30116
(FR) Modèle # 30116

(FR) Dimensions du bâtiment:
Taille
approximative
Stockage
Dimension extérieure
Dimension intérieure
10.5 Pieds x
8 Pieds
79 Carré pieds 480 Pieds cube
Toit de bord au bord
Dimension de base
Ouverture
de porte
3.2 Mètre x
2.4 Mètre
7.3 Mètre carré
13.6 Mètre cube
Largeur
Profondeur
Hauteur
pouce
cm
125 1/2 318.7
pouce
cm
94 3/8
239.7
128 3/8
326.2
98 1/8
249.3
92 1/4
234.4
pouce
cm
123 3/8
313.3
pouce
cm
92 1/4
234.3
60 5/8
154
70
177.8
73
185.5
Mur à mur
Secteur
Volume
(EN) Building Dimensions:
Approximate
Size
Storage
Exterior Dimension
Interior Dimension
10.5 Ft x 8 Ft
79 Sq. Ft
480 Cu.Ft
Roof Edge to Edge
Base Dimension
Door Opening
3.2 m x 2.4 m
7.3 Sq.m
13.6 Cu.m
Width
Depth
Height
inch
cm
125 1/2
318.7
inch
cm
94 3/8
326.2
98 1/8
249.3
92 1/4
234.4
inch cm
123 3/8
313.3
inch
cm
92 1/4
234.3
60 5/8
154
70
177.8
73
185.5
Wall to Wall
Area Volume
128 3/8
239.7
(ES) Dimensiones del edificio:
El Tamaño
aproximado
Área de almacenaje
Dimensión exterior
Dimensión interior
10.5 Pies x 8 Pies
79 Pies
cuadrados
480 Pies
Cúbicos
Borde de la azotea al borde
Dimensión de la base
Abertura de la
puerta
3.2 Metros x
2.4 Metros
7.3 Metros
cuadrados
13.6 Metros
Cúbicos
Anchura
Profundidad
Altura
Pulgada
cm
125 1/2
318.7
cm
94 3/8
239.7
326.2
98 1/8
249.3
92 1/4
234.4
cm
123 3/8
313.3
cm
92 1/4
234.3
60 5/8
154
70
177.8
73
185.5
pared a pared
Área
Volume
Pulgada
Pulgada
Pulgada
128 3/8
• All Weather Durable PVC
• Won’t Dent, Rust, Rot or Mildew
• Tall Walk In Shed
• Never Needs Painting
• 61 Inch Wide Double Doors
• Easy Assembly
• High Wind Tested
• Snow load tested 18lbs/sq.foot
• Pad Lock Ready (Lock not included)
• Foundation frame kit included, Wood or Cement floor needed
• Shatter Proof Window included
(EN) Your Total Solution To Maintenance Free Storage Sheds.
(FR) Votre solution pour un abri de jardin sans entretien.
• Solidité Assurée en Toute Saison
• Ne se cabosse pas, ne rouille pas, ne moisit pas et ne se pique pas
• Déplacement en position debout dans l’abri
• Pas besoin de peinture
• Larges doubles portes de 61’’
• Montage facile
• Testé contre les vents violents (structure fixée au sol suivant les recommandations).
• Charge de neige testé 18lbs/sq.Foot.
• Possibilité d'ajoutyer un cadenas (Verrou non inclus)
• Kit cadre de fondation inclus, Obligation de poser cet abri sur des fondations en béton ou en bois.
• Fenêtre incassable incluse
• PVC durable todo clima
• No se abolla, oxida, no tiene corrosión o moho
• La Caminata alta en la Barraca
• No necesita pintura
• puertas dobles anchas de 61 pulgadas
• la Asamblea Fácil
• Probado contra el fuerteviento
• Carga de nieve probado 18LBS/sq.Foot.
• Cierre con candado (Cierre no incluido)
• Kit de Fundación marco incluido, madera o cemento necesario
• Ventana irrompible incluida
(ES) Su solución total para mantenimiento de cobertizos de almacenamiento gratuito.

1
(EN) Duramax Vinyl Garden Shed
Limited Fifteen Year Warranty
U.S. Polymer Inc. will send a replacement part free of charge, in the event of material defects and or workmanship for a period of fifteen years from the date
of purchase.
This warranty is extended only to the original purchaser. A purchase receipt or other proof of date of original purchase will be required before warranty
service is rendered. In no event shall we pay the cost of flooring, labor, installation or any other costs related thereto.
This warranty only covers failures due to defects in material or workmanship which occurs during normal use and does not extend to color change arising
due to normal weathering or to damage resulting from misuse or neglect, commercial use, failure to follow assembly instructions and the owner’s manual
(including proper anchoring of the shed), painting, forces of nature and other causes which is beyond our control.
Claims under this warranty must be made within the warranty period by calling 1-800-483-4674 or mail in a dated sales slip and clear photograph of the part
to:
U.S. Polymers Inc.1057 S. Vail Ave Montebello, CA 90640, United States of America.
We reserve the right to discontinue or change components. If a component has been discontinued or is not available,
U.S. Polymers, Inc. reserves the right to substitute a component of equal quality as may be compatible.
Limits and Exclusions
There are no express warranties except as listed above. The warrantor shall not be liable for incidental or consequential damages resulting from the use of
this product, or arising out of any breach of this warranty. All express warranties are limited to the warranty period set forth above. Some states do not allow the
exclusion or limitation on how long an implied warranty lasts, so the above limitations may not apply to you.
This warranty gives you specific legal rights and you may also have other rights which vary from state to state or country to country.
(ES) Jardín De Vinilo Cubierto Duramax
Garantía Limitada durante 15 años
U.S. Polymer Inc. enviará una pieza de recambio sin coste alguno en caso de defectos de fábrica o en los materiales durante un periodo de 15 años a
partir de la fecha de adquisición.
Esta garantía se aplica oenicamente al comprador original. Es necesario presentar un recibo u otra prueba de compra antes de prestar los servicios
especificados en esta garantía. En ningoen caso se sufragará el coste de la instalación de suelos, mano de obra, instalación o cualquier otro gasto relacionado.
Esta garantía cubre exclusivamente los defectos de fabricación o en los materiales que aparezcan durante el uso habitual y no se aplica a los cambios de
color causados por la exposición normal a los elementos o a daños ocasionados por un uso inapropiado o negligente, usos comerciales, no seguir las
instrucciones de montaje o el manual del propietario (incluyendo el correcto anclaje del cobertizo), aplicación de pintura, causas naturales o cualquier otra ajena
a nuestro control.
Las reclamaciones cubiertas por la presente garant’a pueden efectuarse dentro del periodo de garantía llamando al teléfono 1-800- 483-4674 o por correo
postal con una prueba de compra fechada y una fotografía nítida de la pieza dañada a:
U.S. Polymers Inc.1057 S. Vail Ave Montebello, CA 90640, United States of America.
Nos reservamos el derecho a abandonar la fabricación de un componente o cambiarlo. En caso de no continuar fabricando un componente o no estar
éste disponible, U.S. Polymers, Inc. se reserva el derecho a sustituirlo por otro componente de idéntica calidad que sea compatible
Límites y Exclusiones
No existe ninguna garantía expresa más alla de las indicadas anteriormente. El garante no aceptará ninguna responsabilidad por daños incidentales o
emergentes ocasionados por el uso de este producto o por cualquier infringimiento de esta garantía. Todas las garantías expresadas se aplican al periodo de
garantía anteriormente señalado. Algunos estados no aceptan exclusiones o limitaciones en la duración de las garantías implícitas, por lo que las limitaciones
anteriormente expresadas pueden no ser de aplicación para usted.
Esta garantía otorga derechos legales específicos. Usted puede disfrutar también de otros derechos que pueden ser diferentes para cada estado o país.
(FR)
Duramax abri de jardin en vynile
Garantie Quinze Ans
U.S. Polymer Inc. remplacera sans frais toute pièce en cas de defaut de fabrication ou de matière pour une periode de quinze ans (A compter de la date
d’achat).
La garantie est seulement étendue à l’acheteur original. Une facture d’achat ou autre preuve confirmant la date de transaction séra exigée avant que le
service de garantie vous soit accordée. Nous ne rembourserons aucun frais liés à l'achat des fondations, de main-d'oeuvre, d'installation ou tout autre cout
exterieur à la garantie.
La garantie s’applique contre tous defauts de fabrication ou de matière dès lors que l’installation est conformé aux preconisations du fabriquant decrites
dans la notice d’assemblage, à l’exception d’une mauvaise utilisation, de l’usure, d'une décoloration liée aux intemperies, d'une utilisation commerciale et
d’incidents materiels exterieurs concernant le dit produit.
Toutes reclamations doivent être faites durant la periode de garantie en telephonant au 1-800-483-4674 ou en expediant une facture d'achat datée et une
photographie de la piece à:
U.S. Polymers, Inc. 1057 S. Vail Ave, Montebello, CA 90640, United States of America.
Nous nous reservons le droit d'annuler ou de changer les pièces si l’une des pièces a été arrétée ou n'est plus disponible. U.S. Polymers Inc. se reserve
le droit de changer une pièce de qualité égale a la pièce d’origine.
Limitation et Exclusions
Il n’y a d’autre garantie excepteé celle mentionnée ci-dessus. Le garant n’est pas responsable des degâts materiels ou des accidents consecutifs à une
installation non conforme aux dispositions légales et reglementaires du pays de mise en service. En aucun cas, cette garantie ne donne droit a des indemnités
ou a des dommages et interets.Toutes garanties sont limiteés pour une periode mentionneé ci-dessus certains pays ne permettent pas la limitation et
l’exclusion concernant la durée de garantie, ceci pourrait donc ne pas s’adresser a vous.
Cette garantie vous donne des droits legaux specifiques et vous pourriez aussi avoir d’autre droits qui varient d’un pays a l’autre.

4
(FR) SÉCURITÉ ET PRÉCAUTIONS
Pour votre propre sûreté, svp lisez et suivez ces instructions avant et pendant le montage.
Safety Premier !
Important
Soin et entretien
Avant de commencer...
NE pas stocker de produits chimiques inflammables, dangereux et piscine dans
votre immeuble.Les combustibles et les produits chimiques doivent être
stockés dans des armoires étanches et isolées. N'appliquer fumeur.
Bien que cette unité n'exige aucun entretien, le soin devrait être pris afin de prolonger la vie de votre hangar.il est
temps pour une fois le montage et mis en place, aucun objectif de réutilisation.
TOIT : Le toit doit être nettoyé avec un balai mou et à long manche afin de le débarrasser des feuilles et de la neige. Une
grande quantité de neige sur le toit peuvent endommager le hangar le rendant peu sûr.
“Ne pas marcher sur des surfaces de toit ! Risque de tomber! ”.
MURS : Ne mettez aucun objet contre les panneaux de mur
PORTES: Assurez-vous que les portes sont fermées afin d’empêcher les risques de dommages liés aux vents forts
PIÈCES DE FIXATION :
Examinez régulièrement votre les vis, boulons, écrous, de votre a b r i . E n c a s d e d o u t e
resserez-les
HUMIDITÉ : Avec les températures changeantes, la condensation s'accumulera à l'intérieur de l'abri. La bonne
ventilation aidera à l'évacuation de l'humidité.
CONSEIL : Un calfeutrage non corrosif est utile afin de renforcer la durée de vie de l'abri.
ATTENTION
Bords
agressifs
1. Vérifiez vos codes de la construction et de l'habitation concernant la pose, l'emplacement, etc.
2. Choisissez un site qui laisse assez d'espace de travail autour de l'abri.
3. Déterminez la surface de l'abri et fixez les système d'ancrage aux fondations.
4. Lisez et analysez le manuel de l'abri glissez dans le paquet.
5. Suivez scrupuleusement toutes les consignes et les dimensions.
6. Suivez les étapes scrupuleusement les étapes de montage afin de monter correctement votre abri.
7. Assurez-vous que toutes les pièces sont présentes avant de débuter le montage.
8. ATTENTION : Suivez les consignes de sécurité afin d'évitez tous dommages physiques ou corporels.
9. LA SURFACE DE POSE DOIT PLANE ET DE NIVEAU : Assurez-vous que les fondations sont posées sur un sol plan et de
niveau. Si le lit de sol est inégal, enlevez le gazon et autres débris et nivelez-la avec une pelle.
10. Classez l'ensemble des pièces par numéro et confrontez -les à la liste de la notice. Soyez sûr que vous avez toutes les pièces
nécessaires pour le montage de votre abri.
1. Portez toujours des gants de travail, de longues manches et des lunettes de protection des yeux
pendant le montage de l'abri Quelques morceaux de l'abri contiennent des bords agressifs et peuvent
causer des dommages.
2. Soyez prudent avec les outils utilisés pour le montage de l'abri.
Familiarisez-vous avec le fonctionnement de toutes machines-outils.
3.Ne laissez pas les enfants et les animaux jouer autour de l'abri lors du
montage, afin d'éviter tous risques d'accidents.
4. Si vous utilisez une échelle, assurez-vous qu'elle soit posée sur un sol plan et de niveau.
Ouvrez-là entiérement et assurez-vous que les verrous de sécurité des charnières sont bien
enclenchés. Ne jamais marcher sur le toit ou tout autre partie de l'abri.
5. N'essayez pas d'assembler l'abri en cas de vent fort. Les panneaux de
l'abri peuvent s'envoler rendant le montage dangeureux.
Portez des lunettes de protection lors de l'utilisation de machine-outils. N'utilisez pas de machine-outils éléctriques
dans un environnement humide afin d’éviter tous chocs éléctriques.
N'utilisez pas de composant de l'abri en tant qu'échelle lors du montage de l'abri.
L'abri doit être construit sur des fondations solides. Une dalle de béton armé ou de dalles de béton de grandes dimensions
(100x100 cm minimum) est recommandé. S'assurer qu'elle est plane et de niveau et permettra le drainage de l'eau. La dalle devra
faire 10 cm de plus que les dimensions extérieures de l'abri. Veuillez vous référer à la première page de votre manuel pour les
dimensions extérieures de l'abri. Le fabricant n'est pas responsable du choix et de la construction des fondations.
Pour une dalle en béton, préparer une couche de graviers de niveau. La dalle doit faire entre 10 et 12.5 cm.
Laissez sécher 1cm pour 10 jours.
Votre abri doit être fermement ancré à la dalle, pour se protéger contre les risques de dommages liés aux vents forts.

5
(EN) Note : Before starting installation, please refer Safety & Precautions.
(ES) Pozor : Antes de comenzar la instalación, consulte Seguridad y Precauciones.
(FR) Note : Avant de commencer l'installation, référez-vous svp au chapitre
Sécurité et Précautions.
Cordless Drill - Philips Head
Screwdriver - Philips Head
Hammer or Rubber mallet
Carpenters Square
8’ Step Ladder
Level - 3ft.
Tape Measure
Caulk Gun
Waterproof Clear Silicon
Hand Gloves
Taladro inalámbrico - cabeza Philips
Destornillador - cabeza Philips
Martillo o mazo de goma
Carpinteros Plaza
Escalera de 8 '
Nivelan - 3ft.
Cinta métrica
Pistola de calafateo
Silicio transparente a prueba de agua
Guantes de la mano
(ES) Equipar con herramienta Usted Necesitará
Perceuse sans fil – Tête Philips
Tournevis - Tête Philips
Marteau ou maillet caoutchouc
Equerre
Escabeau
Niveau - 3ft.
Mètre à ruban
Pistolet à cartouche
Silicone neutre étanche
Gants
(FR) Outils dont vous aurez besoin(non fournis)
(EN) Tools You Will Need
(EN) IMPORTANT: USE HAND GLOVES TO PREVENT INJURY. (ES) IMPORTANTE: GUANTES DE MANO DE USO PARA PREVENIR LA HERIDA.
(FR) IMPORTANT: UTILISER LES GANTS POUR PREVENIR LES ACCIDE NTS.

6
(EN) IMPORTANT: USE HAND GLOVES TO PREVENT INJURY. (ES) IMPORTANTE: GUANTES DE MANO DE USO PARA PREVENIR LA HERIDA.
(FR) IMPORTANT: UTILISER LES GANTS POUR PREVENIR LES ACCIDE NTS.
(EN) Parts List
(ES) La Lista de partes
(FR) Liste des pièces
(EN) Check all parts prior to installation.
(ES) Revise todas las partes antes de la instalación
(FR) Vérifier toutes les pièces avant d'installer.
VBA01 1
VBA02
2
VBA03
2
VBA04
1
VBA05
1
VBA06
1
VCD01
2
VCB03
4
VCB04
2
VRB15
8
VRB07
2
VRB08
2
VRD01
4
VRB09 4
VRB10
4
VJA01
4
VRA08
2
VRA09
2
VRA10
2
VRA11
2
VRA21
1
VRA22
1
(EN)CODE
(ES)CODE
(FR)CODE
(EN)QTY
(ES)QTY
(FR)QTÉ
(EN) PROFILES
(ES) PERFILES
(FR) PROFILES
VRD02
1
VRD03
1
VRA12
2
VRA13
1
VRA23
1
VRA24
1
VRB11 2
VRB12
2
VRB13
6
VRB14
3
CLA1
1
CLB2
4
CLB3 7
CLA4
1
WPA1
11
WPA2
1
RPB1
1
RPB2
2
RPB3
1
RPB4
1
RPB5
2
RPB6
1
FPD1
2
FPD2
2
DL
1
DR
1
(EN)CODE
(ES)CODE
(FR)CODE
(EN)QTY
(ES)QTY
(FR)QTÉ
(EN) PROFILES
(ES) PERFILES
(FR) PROFILES
FDCL
1
FDCR
1
FCC
4
FMC
7
CCF
4
CMF
3
RJ
4
LH
3
RH
3
L
1
R
1
EC2 2
VCQ 2
PPG
67
PPGL
3
PIN
67
PINL
3
FP
28
S1
262
S2
11
S7
82
SBC1
28
PW
28
(EN) ACCESSORIES
(ES) ACCESORIOS
(FR) ACCESSOIRES
(EN)CODE
(ES)CODE
(FR)CODE
(EN)QTY
(ES)QTY
(FR)QTÉ
(EN) PROFILES
(ES) PERFILES
(FR) PROFILES
VFA01
2
VFA02
2
VFA03
2
VFA04
2
VFA05
8
VFA06
3
VFA10
4
VFA15
4
S1
50
S2
22
F1
22
(EN) FOUNDATION
(ES) LA BASE
(FR) FONDATION
(EN)CODE
(ES)CODE
(FR)CODE
(EN)QTY
(ES)QTY
(FR)QTÉ
(EN) PROFILES
(ES) PERFILES
(FR) PROFILES

9
(EN) IMPORTANT: USE HAND GLOVES TO PREVENT INJURY. (ES) IMPORTANTE: GUANTES DE MANO DE USO PARA PREVENIR LA HERIDA.
(FR) IMPORTANT: UTILISER LES GANTS POUR PREVENIR LES ACCIDE NTS.
(EN) 1. It is important that these instructions are followed step by step.
2. All parts are clearly marked and care should be taken to use the correct one.
3. Don’t install under windy conditions.
4. If you are building the shed against a wall,build it 2.5 ft. away then slide it in.
(Only for Duramax foundation & Wooden foundation)
(FR) 1. Il est important que ces instructions soient suivies pas à pas.
2. Toutes les pièces sont clairement identifiées et il faut veiller à utiliser la bonne.
3. Ne pas installer sous conditions de vent.
4. Si vous construisez le hangar contre un mur, le construire à un écart de 2,5 pi, puis le
glisser. (ceci n'est applicable pour la Fondation Duramax Fondation en bois).
(ES) 1. es importante que estas instrucciones se sigan paso a paso.
2. Todo pone piezas son marcados claramente y cuidan debe ser tomado para usar el
corrige uno.
3. No instale las condiciones abajo de mucho viento.
4. Si usted está construyendo la cubierta contra una pared, construirlo 2.5 pies de distancia y
deslícela hacia dentro. (esto sólo es aplicable para la Fundación de Duramax Fundación
madera).
(EN) Foundation
(ES) La base
(FR) Fondation
1
(EN) Set the Torque limit of your Screw drill to #3 or #4 to ensure the screws do not strip the Metal reinforcements.
(ES) Establecer el límite de par de su taladro tornillo de # 3 y # 4 para asegurar los tornillos no tira los refuerzos metálicos.
(FR) Réglez la limite de couple de votre perceuse Vis à n # 3 ou n # 4 pour s'assurer que les vis ne supprime pas les renforts métalliques.
(EN) Note : For plywood cut size, refer to page 54.
(ES) Pozor : Para contrachapado cortado tamaño, consulte la página 54.
(FR) Note : Pour le contreplaqué dimensions, reportez-vous à la page 54.
(EN) Leveled Solid Floor Surface Required
(ES) Nivelado piso sólido superficie requerida
(FR) Surface de plancher solide nivelée requise
VFA01
VFA02
S1
(EN) Note : Make 2 Sets.
(ES) Pozor : Hace dos conjuntos.
(FR) Note : Faire 2 ensembles.
VFA01 (x2)
VFA02 (x2)
S1 (x4)
(EN) DuraMax must be installed on a level wooden platform or a level concrete foundation, that has an outside
dimension of 98 1/4” x 129 3/8”(2497mm x 3287mm).
(ES) DuraMax debe instalarse en una plataforma de madera nivelada o una base de hormigón nivelada, que tenga una
dimensión exterior de 98 1/4” x 129 3/8”(2497mm x 3287mm).
(FR) DuraMax doit être installé sur une plate-forme en bois de niveau ou une fondation en béton de niveau, qui a une
dimension extérieure de 98 1/4” x 129 3/8”(2497mm x 3287mm).
(EN)CODE
(ES)CODE
(FR)CODE
(EN)QTY
(ES)QTY
(FR)QTÉ
VFA01 2
VFA02 2
VFA03 2
VFA04 2
VFA05 8
VFA06 3
VFA10 4
VFA15 4
S1 50
(EN) Parts needed
(ES) Las partes necesitaron
(FR) Pièces nécessaires
1

14
(EN) IMPORTANT: USE HAND GLOVES TO PREVENT INJURY. (ES) IMPORTANTE: GUANTES DE MANO DE USO PARA PREVENIR LA HERIDA.
(FR) IMPORTANT: UTILISER LES GANTS POUR PREVENIR LES ACCIDE NTS.
1
S1
(EN) Front
(ES) Frente
(FR) Avant
(EN)
Left
(ES)
Izquierda
(FR)
Gauche
S1 (x32)
(EN) Base Frame
(ES) Armazón de la base
(FR) Profiles de base
2
(EN)CODE
(ES)CODE
(FR)CODE
(EN)QTY
(ES)QTY
(FR)QTÉ
VBA01 1
VBA02 2
VBA03 2
VBA04 1
VBA05 1
VBA06 1
S1 32
(EN) Parts needed
(ES) Las partes necesitaron
(FR) Pièces nécessaires
VBA06 (x1)
VBA01 (x1)
VBA03 (x2)
VBA02 (x2)
VBA05 (x1)
VBA04 (x1)
VBA06
VBA03
VBA02
VBA05
VBA04
VBA03
VBA02
VFA04
VFA04
VFA03
VFA03
VBA01
VFA01
VFA01
VFA02
VFA02

15
(EN) Two people needed.
(ES) Dos personas que se necesitan.
(FR) Deux personnes nécessaires.
(EN) IMPORTANT: USE HAND GLOVES TO PREVENT INJURY. (ES) IMPORTANTE: GUANTES DE MANO DE USO PARA PREVENIR LA HERIDA.
(FR) IMPORTANT: UTILISER LES GANTS POUR PREVENIR LES ACCIDE NTS.
(EN) Lock the panel into the column from top to bottom.
(ES) Trabe el panel en la columna de arriba a abajo.
(FR) Verrouiller le panneau dans la colonne de haut en bas.
(EN) Column and Panel
Assembly Method
(ES) Columna y el método de
montaje de Panel
(FR)Colonne et méthode de
montage panneau
(EN) Inside View
(ES) Vista Interior
(FR) I’intérier de vue
2 31
5 64
CLICK!
CLA1 1
CLB2 4
CLB3 7
CLA4 1
VCD01 2
VCB03 4
VCB04 2
WPA1 11
WPA2 1
(EN)CODE
(ES)CODE
(FR)CODE
(EN)QTY
(ES)QTY
(FR)QTÉ
CCF 4
CMF 3
S1 46
S2 7
(EN)CODE
(ES)CODE
(FR)CODE
(EN)QTY
(ES)QTY
(FR)QTÉ
(EN) Parts needed
(ES) Las partes necesitaron
(FR) Pièces nécessaires
(EN) Walls & Columns
(ES) Las paredes & las Columnas
(FR) Murs et montants
3
(EN) : All parts are clearly marked and care should be taken to use the correct one.
One shatter proof window panel (WPA2 ) included. This can be used in any of
the wall positions.
(ES) : Todo pone piezas son marcados claramente y cuidan debe ser tomado para usar
el corrige uno.
Un panel de la ventana irrompible (WPA2 ) incluido. Esto se puede utilizar en
cualquiera de las posiciones de la pared.
(FR) : Toutes les pièces sont clairement identifiées et il faut veiller à utiliser la bonne.
Le panneau de fenêtre (WPA2 ) peut-être utilisé sur toutes les face des murs.

16
(EN) IMPORTANT: USE HAND GLOVES TO PREVENT INJURY. (ES) IMPORTANTE: GUANTES DE MANO DE USO PARA PREVENIR LA HERIDA.
(FR) IMPORTANT: UTILISER LES GANTS POUR PREVENIR LES ACCIDE NTS.
CLB2 (x1)
1
2
3
4
CLICK!
3
2
1
(EN) Front
(ES) Frente
(FR) Avant
(EN) Front
(ES) Frente
(FR) Avant
1
2&3
1&2
3&4
(EN) Right
(ES) Correcta
(FR) Partie droite
(EN) Right
(ES) Correcta
(FR) Partie droite
WPA1 (x1)
(EN) Note : Check the stamped label on top of all panels inside.
(ES) Pozor : Revise la etiqueta estampada en la parte superior de todos los
paneles interiores.
(FR) Note : Vérifiez l'étiquette apposée sur tous les panneaux sur la partie
intérieure supérieure.
WPA1
VBA01
VBA01
VBA01
CLB2
CLB2
CLB2
CLB2
CLB2
CLB2
VBA01
VBA02
WPA1
WPA1
WPA1
WPA1
WPA1
S1 (x2)
1
CLB2
(EN) Make sure that, the arrow mark points up.
(ES) Asegúrese de, marca de la flecha apunte hacia arriba.
(FR) Assurez-vous que la flèche pointe vers le haut.
2
CLB2
VBA02
VBA01
3
CLB2
VBA02
S1
CLB2
CLB2

17
(EN) IMPORTANT: USE HAND GLOVES TO PREVENT INJURY. (ES) IMPORTANTE: GUANTES DE MANO DE USO PARA PREVENIR LA HERIDA.
(FR) IMPORTANT: UTILISER LES GANTS POUR PREVENIR LES ACCIDE NTS.
33
3
S1 (x2)
VBA01
2
3
1
CLICK!
S1
(EN) Front
(ES) Frente
(FR) Avant
1&2
3
(EN) Needed to hold the panel at this step.
(ES) Necesario para sostener el panel en este paso.
(FR) Nécessaire pour maintenir le panneau à cette étape.
(EN) Needed to hold the panel at this step.
(ES) Necesario para sostener el panel en este paso.
(FR) Nécessaire pour maintenir le panneau à cette étape.
1
CLB2
(EN) Right
(FR) Partie droite
(ES) Correcta
(EN) Front
(ES) Frente
(FR) Avant
CCF
4
S2 (x1)
CLA1
CLA1
CLA1
CLA1
WPA1
WPA1
WPA1
WPA1
CLA1 (x1)
CLB2
CCF
S2
1
CCF (x1)

18
(EN) IMPORTANT: USE HAND GLOVES TO PREVENT INJURY. (ES) IMPORTANTE: GUANTES DE MANO DE USO PARA PREVENIR LA HERIDA.
(FR) IMPORTANT: UTILISER LES GANTS POUR PREVENIR LES ACCIDE NTS.
(EN) Needed to hold the panel at this step.
(ES) Necesario para sostener el panel en este paso.
(FR) Nécessaire pour maintenir le panneau à cette étape.
5
S1 (x2)
(EN) Right
(FR) Partie droite
(ES) Correcta
(EN) Front
(ES) Frente
(FR) Avant
VCD01
1
CLA1
2
VCD01 (x1)
S1
VCD01
CLA1
S1
CCF
VCD01
1
2
6
S1 (x2)
(EN) Right
(FR) Partie droite
(ES) Correcta
(EN) Front
(ES) Frente
(FR) Avant
WPA1
CLB3
VBA02
VBA02
CLB3 (x1)
WPA1 (x1)
CLB2
CLB2
1 2
3 4
5
CLICK!
CLICK!
WPA1
WPA1
WPA1
WPA1
CLB2
CLB2
CLB3
CLB3
CLB3
S1
5
1&2
3&4
CLICK!
CLICK!

19
(EN) IMPORTANT: USE HAND GLOVES TO PREVENT INJURY. (ES) IMPORTANTE: GUANTES DE MANO DE USO PARA PREVENIR LA HERIDA.
(FR) IMPORTANT: UTILISER LES GANTS POUR PREVENIR LES ACCIDE NTS.
7
(EN) Right
(FR) Partie droite
(ES) Correcta
3
1&2
S1 (x2)
VCB03 (x1)
VCB03
CLB3
WPA1
VCB03
CCF
1
S1
VCB03
CCF
2
VCB03
S1
CLB3
3
CLB2
CLB2
8
CLB3 (x1)
WPA2 (x1)
(EN) Right
(FR) Partie droite
(ES) Correcta
CLB3
3&4
1
2
WPA2
S1 (x3)
S2 (x1)
CMF (x1)
VCB03
CMF
3
S2
CMF
4
VCB03
S1
CLB3
CLB3
VBA03
1 2
WPA1
WPA2
CLB3
CLB3
S1
VBA03

20
(EN) IMPORTANT: USE HAND GLOVES TO PREVENT INJURY. (ES) IMPORTANTE: GUANTES DE MANO DE USO PARA PREVENIR LA HERIDA.
(FR) IMPORTANT: UTILISER LES GANTS POUR PREVENIR LES ACCIDE NTS.
1
2,3&4
VCB04
VCB03
CCF
CLB2
10
9
S1 (x2)
2&4
1
3
1
2
4
CLB3
CLB2
CLB2
VBA04
VBA04
VBA03
S1
WPA1
WPA2
WPA1
CLB2
(EN) Right
(FR) Partie droite
(ES) Correcta
(EN) Back
(ES) Detrás
(FR) Arrière
(EN) Right
(FR) Partie droite
(ES) Correcta
CLB2 (x1)
WPA1 (x1)
VBA03
VBA04
CLB2
CCF
VCB04
2
S1
VCB04
CCF
3
S2
CLB2
CCF
4
1
VCB04
S1
CMF
S2 (x1)
CCF (x1)
S1 (x2)
VCB04 (x1)
3
CLB2
WPA1

28
(EN) IMPORTANT: USE HAND GLOVES TO PREVENT INJURY. (ES) IMPORTANTE: GUANTES DE MANO DE USO PARA PREVENIR LA HERIDA.
(FR) IMPORTANT: UTILISER LES GANTS POUR PREVENIR LES ACCIDE NTS.
(EN) Roof Structures
(ES) Estructuras de techo
(FR) Charpente
4
(EN)CODE
(ES)CODE
(FR)CODE
(EN)QTY
(ES)QTY
(FR)QTÉ
VRB07 2
VRB08 2
VRB09 4
VRB10 4
VRB11 2
VRB12 2
VRB13 6
VRB14 3
VRB15 8
VRA08 2
VRA09 2
VRA10 2
VRA11 2
VRA12 2
VRA13 1
(EN)CODE
(ES)CODE
(FR)CODE
(EN)QTY
(ES)QTY
(FR)QTÉ
VRA21 1
VRA22 1
VRA23 1
VRA24 1
VJA01 4
VRD01 4
VRD02 1
VRD03 1
FPD1 2
FPD2 2
FDCL 1
FDCR 1
FCC 4
FMC 7
RJ 4
(EN)CODE
(ES)CODE
(FR)CODE
(EN)QTY
(ES)QTY
(FR)QTÉ
S1 184
S2 4
S7 82
FP 20
(EN) Parts needed
(ES) Las partes necesitaron
(FR) Pièces nécessaires
1
S1 (x7)
(EN) Front
(ES) Frente
(FR) Avant
1&2
FMC (x7)
1
2
CLB3
CLB3
FMC
FMC
S1
FMC

31
(EN) IMPORTANT: USE HAND GLOVES TO PREVENT INJURY. (ES) IMPORTANTE: GUANTES DE MANO DE USO PARA PREVENIR LA HERIDA.
(FR) IMPORTANT: UTILISER LES GANTS POUR PREVENIR LES ACCIDE NTS.
4
5
(EN) Front & Back Roof Structure Assembly
(ES) Frente y parte posterior del techo estructura de la Asamblea
(FR) Avant et arrière structure de toit Assemblée
VRB07 (x2)
VRB08 (x2)
VJA01 (x2)
S1 (x8)
VRB09 (x4) VRB10 (x4)
S1 (x16)
(EN) Make sure these holes are up.
(ES) Asegúrese de que los orificios estén hacia arriba.
(FR) Assurez-vous que ces trous soient positionnés vers le haut.
S1
VRB07
VRB09
VRB09
VRB10
VRB10
VRB08
S1
VJA01
VRB07
VRB08
S1
VRB07
VRB08
VJA01
(EN) Note : Make 2 Sets.
(ES) Pozor : Hace dos conjuntos.
(FR) Note : Faire 2 ensembles.
(EN) Note : Make 2 Sets.
(ES) Pozor : Hace dos conjuntos.
(FR) Note : Faire 2 ensembles.

32
(EN) IMPORTANT: USE HAND GLOVES TO PREVENT INJURY. (ES) IMPORTANTE: GUANTES DE MANO DE USO PARA PREVENIR LA HERIDA.
(FR) IMPORTANT: UTILISER LES GANTS POUR PREVENIR LES ACCIDE NTS.
6
7
S1 (x4)
RJ (x4)
1 2
S1
VRB08
VRB08
RJ
RJ
FP (x6)
FPD1 (x2)
1&2
S1
VRB07
VRB08
RJ
RJ
S1
1
FP
RJ
VRB08
FPD1
1
FPD1
VRB08
VRB08
FPD1
FP
FP
(EN) Note : Use the same colour Plugs(FP).
(ES) Pozor : Utilice el mismo color (FP).
FR) Note : Utilisez la même couleur (FP).
(EN) Note : Make 2 Sets.
(ES) Pozor : Hace dos conjuntos.
(FR) Note : Faire 2 ensembles.
(EN) Note : Make 2 Sets.
(ES) Pozor : Hace dos conjuntos.
(FR) Note : Faire 2 ensembles.

45
(EN) IMPORTANT: USE HAND GLOVES TO PREVENT INJURY. (ES) IMPORTANTE: GUANTES DE MANO DE USO PARA PREVENIR LA HERIDA.
(FR) IMPORTANT: UTILISER LES GANTS POUR PREVENIR LES ACCIDE NTS.
1
(EN) Back
(ES) Detrás
(FR) Arrière
(EN) Note : 1. Use a screwdriver to align the holes.
2. Insert roof plugs into roof panels only as
indicated.
3. Start from back left side roof panel going right.
(ES) Pozor : 1. Utilizar un destornillador para alinear los agujeros.
2. Inserte tapones de techo en paneles del techo
sólo como se indica.
3. Comience desde el panel del techo del lado
izquierdo hacia la derecha.
(FR) Note : 1. Utilisez un tournevis pour aligner les trous.
2. Inserez les chevilles de plastique dans les
panneaux de toiture uniquement. comme
indiqué.
3. Commencez par le panneau de toit arrière
gauche en partant à droite.
(EN) Left
(ES) pared
(FR) Mur
PIN
PPG
RPB1
(EN) Apply silicone into the holes before inserting the pins (Silicone not included).
(ES) Aplicar silicona en los agujeros antes de insertar los pasadores (Silicona no incluido).
(FR) Appliquez du silicone dans les trous avant d'insérer les chevilles plastiques (silicone non inclus).
(EN) Roof Panels
(ES) Paneles de techo
(FR) Panneaux de toiture
5
PPG (x6)
PIN (x6)
RPB1 (x1)
RPB1 1
RPB2 2
RPB3 1
RPB4 1
RPB5 2
RPB6 1
EC2 2
FP 4
PPG 67
PIN 67
PPGL 3
PINL 3
(EN)CODE
(ES)CODE
(FR)CODE
(EN)QTY
(ES)QTY
(FR)QTÉ
(EN) Parts needed
(ES) Las partes necesitaron
(FR) Pièces nécessaires

46
(EN) IMPORTANT: USE HAND GLOVES TO PREVENT INJURY. (ES) IMPORTANTE: GUANTES DE MANO DE USO PARA PREVENIR LA HERIDA.
(FR) IMPORTANT: UTILISER LES GANTS POUR PREVENIR LES ACCIDE NTS.
3
2
3
RPB2 (x1)
Silicone
(EN) Note : Apply silicone around the roof plugs.
(Silicone not included).
(ES) Pozor : Aplicar silicona alrededor de los tapones de
techo. (Silicona no incluido).
(FR) Note : Appliquer du silicone autour des chevilles de toit.
(silicone non inclus).
(EN) Note : Roof panels are installed by using a ladder inside
of the shed at missing panels.
(ES) Pozor : Los paneles de techo se instalan mediante una
escalera interior del cobertizo en los paneles
que faltan.
(FR) Note : Installez les panneaux de toiture à l'aide
d'une échelle en passant par l'intérieur de l'abri.
PPG (x6)
PIN (x6)
PPG
PIN
(EN) Left
(ES) Izquierda
(FR) Gauche
Silicone
(EN) Back
(ES) Detrás
(FR) Arrière
RPB2

47
(EN) IMPORTANT: USE HAND GLOVES TO PREVENT INJURY. (ES) IMPORTANTE: GUANTES DE MANO DE USO PARA PREVENIR LA HERIDA.
(FR) IMPORTANT: UTILISER LES GANTS POUR PREVENIR LES ACCIDE NTS.
3
3
4
5
6
7
RPB2 (x1)
RPB3 (x1)
RPB4 (x1)
RPB5 (x1)
(EN) Right
(FR) Partie droite
(ES) Correcta
(EN) Right
(FR) Partie droite
(ES) Correcta
PPG (x6)
PIN (x6)
PPG (x8)
PIN (x8)
PPG (x10)
PIN (x10)
PPG (x9)
PPGL (x1)
PIN (x9)
PINL (x1)
PPG
PIN
RPB4
RPB4
PPG
PIN
RPB3
PPG
PIN
(EN) Back
(ES) Detrás
(FR) Arrière
RPB5
PPGL
PINL
PPG
PIN
PPG
PIN
PPG
PIN
RPB2
(EN) Back
(ES) Detrás
(FR) Arrière
(EN) Front
(ES) Frente
(FR) Avant
(EN) Right
(FR) Partie droite
(ES) Correcta
VRD03
/