Energetic Lighting MQTL1222 5CCT 12PK Guide d'installation
- Taper
- Guide d'installation

6 IN LED RECESSED LIGHTING
Thank you for purchasing this product. We’ve created these easy-to-follow instructions to ensure
you spend your time enjoying the product instead of putting it together.
TROUBLESHOOTING/DÉPANNAGE
This fixture is warranted to be free from defects in materials and workmanship for 5 years from the date of original purchase./Ce luminaire est garanti
contre tout défaut, tant dans les matériaux utilisés que dans sa fabrication, et ce, pour une période de 5 ans à compter de la date d'achat initiale.
If it fails to do so, you may return it with proof of purchase to 13445 12th St., Chino, CA 91710 for replacement. You can reach us at
1-866-492-6566./À défaut, vous pouvez le retourner avec la preuve d'achat à 13445 12th St., Chino, CA 91710 for replacement. Vous
pouvez nous contacter à 1-866-492-6566.
WARRANTY/GARANTIE
CUT OUT TEMPLATE/PLANTILLA DE CORTE
Installation Instructions/Instructionsd'installation
PACKAGE CONTENTS/CONTENU DE L’EMBALLAGE
HARDWARE CONTENTS/QUINCAILLERIE INCLUSE
Made in China
Fabriqué en Chine
CARE AND MAINTENANCE/ENTRETIEN
SAFETY INFORMATION/CONSIGNES DE SÉCURITÉ
Ensure power is off before cleaning. Clean with a mild glass cleaner and soft cloth. Apply liquid cleaner to cloth. Do not spray fixture itself.
Assurez-vous que l’alimentation électrique est coupée avant de nettoyer le luminaire. Nettoyez le luminaire à l’aide d’un nettoyant pour vitres doux et
d’un linge doux. Vaporisez le nettoyant liquide sur un linge. Ne le vaporisez pas directement sur le luminaire.
PROBLEM
PROBLÈME POSSIBLE CAUSE
CAUSE POSSIBLE CORRECTIVE ACTION
MESURE CORRECTIVE
Fixture does not light.
Le luminaire ne s’allume pas.
Power is off, incorrect wire connection, or defective
wall switch.
L’alimentation est coupée, des fils sont mal
raccordés ou l’interrupteur mural est défectueux.
Check circuit breaker or wall switch, check wire
splices, or replace wall switch.
Vérifiez le disjoncteur ou l’interrupteur mural, vérifiez
les jonctions des fils ou remplacez l’interrupteur mural.
INSTALLATION OVERVIEW/VUE D’ENSEMBLE DE L’INSTALLATION
INSTALLATION OVERVIEW/VUE D’ENSEMBLE DE L’INSTALLATION
Please read and understand this entire manual before attempting to assemble, operate or install the product.
Assurez-vous de lire et de comprendre l’intégralité du présent manuel avant de tenter d’assembler, d’utiliser ou d’installer l’article.
WARNING/AVERTISSEMENT
• Be sure the electricity to the wires you are working on is shut off. Either remove the fuse or turn off the circuit breaker./ Assurez-vous de fermer l’alimentation
en électricité des fils avec lesquels vous travaillez. Pour ce faire, vous pouvez retirer le fusible ou couper l’alimentation du disjoncteur.
Risk of fire or electric shock. Do not alter, relocate, or remove wiring, lampholders, power supply or any other electrical component. / Risque d’incendie ou
de choc électrique. Ne modifiez pas, ne déplacez pas et ne retirez pas les fils, les douilles, l’alimentation électrique ni tout autre composant électrique.
Risk of fire or electric shock. LED retrofit kit installation requires knowledge of luminaires electrical systems. If not qualified, do not attempt installation.
Contact aqualified electrician. Install this kit only in the luminaires that have the construction features and dimensions shown in the photographs and/or
drawings and where the input rating of the retrofit kit does not exceed the input rating of the luminaire. / Risque d’incendie ou de choc électrique.
L’installation de la trousse de modernisation à DEL nécessite une connaissance des installations électriques des luminaires. Si vous n’êtes pas qualifié, ne
procédez pas à l’installation. Faites appel à un électricien qualifié. Installez cette trousse uniquement dans les luminaires ayant les mêmes caractéristiques
et dimensions que celles qui paraissent dans les photos ou les illustrations. La puissance de la trousse de modernisation ne doit pas excéder celle du
luminaire.
Do not make or alter any open holes in an enclosure of wiring or electrical components during kit installation./Pendant l’installation, ne percez pas l’enveloppe
de protection des fils ou des composants électriques et n’agrandissez pas les trous qui pourraient déjà s’y trouver.
To prevent wiring damage or abrasion, do not expose wiring to edges of sheet metal or other sharp objects. /Afin de prévenir l’abrasion et les dommages
pouvant être causés aux fils, ne les exposez pas aux rebords des tôles ou de tout autre objet tranchant.
This retrofit kit is accepted as a component of a luminaire where the suitability of the combination shall be determined by authorities having jurisdiction. /Cette
trousse de modernisation est approuvée en tant que constituant d’un luminaire où les organismes de contrôle locaux jugeront de la convenance à cette fin
des composants combinés.
•
•
•
•
E2DLS6-82765-L105
AB
x 12 x 12
AA BB
(M4*25mm)
x 24 x 36
1 2
3 4
5 6
B
Select desired color temperature.
Locate a suitable location for the fixture and cut a 6 in round
hole where the LED Ultra- Thin Downlight(A) will be installed.
Ensure this location has access to electrical wire from the
switch (power supply).
Carefully open the hardwire junction box (B)and remove the
appropriate knockout(s).
Using wire nuts(BB),connect supply cable to hardwire
junction box(B) in the following manner: green to ground,
white to white, black to black. Place all wiring connections
back into the hardwire junction box (B) and close the cover.
lnsert the electrical supply cable through the knockout and
secure with a cable connector(sold separately).
Diameter: 6 in.
Diamètre: 16,19 cm
electrical supply cable
BB
knockouts
B
BB
B
3
8
3
8
Insert the hardwire junction box (B) through the mounting
hole established in Step 1.
4
7 8
Connect the LED Ultra-Thin Downlight (A) to the hardwire
junction box(B) by inserting and twisting the male/female
connections of the attached connector cables together.
Push the spring loaded clips on the LED Ultra-Thin
Downlight(A) upwards and insert the base of the LED
Ultra-Thin Downlight(A) into the mounting hole established
in Step 1.Release the clips and the fixture will grip flush with
the ceiling/drywall.
A
B
A
-
 1
1
Energetic Lighting MQTL1222 5CCT 12PK Guide d'installation
- Taper
- Guide d'installation
dans d''autres langues
Autres documents
-
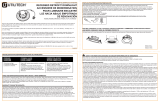 Utilitech UTILITECH Guide d'installation
-
 Utilitech MQTL1114-LED10K9027 Guide d'installation
-
 Utilitech MQTL1117-LED15K9027 Guide d'installation
-
Halo BLD6089SWHR-CA Mode d'emploi
-
Halo SMD6R6950WH Mode d'emploi
-
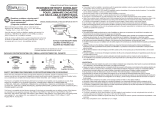 Utilitech DLS30-06F27D1E-WH-F1 Manuel utilisateur
-
 Utilitech DLS30-06N27D1E-WH-6 Mode d'emploi
-
Halo BLD4ACC-2PK Mode d'emploi


