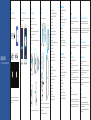
Velleman H4 Plus Mode d'emploi
- Catégorie
- Composants de dispositif de sécurité
- Taper
- Mode d'emploi

QUICK GUIDE
For WiFi / Cellular Smart Home Security System
Install the Hub and accessories to the right places.
Step 4
Installation
Download the App from App Store or Google Play.
*If you bought the bundle kit with HD WiFi Camera, you can add the camera in the
App to control home security and view live video if someone breaks in your home
wherever you are.
Sign up an account, and then sign in the App and follow the instructions on the App to
add the Hub to your account.
Step 1
Download the Alarm App
Step 2
Add the Smart Home Hub to the App
Step 3
Accessories Configuration
HomeCloud System
Test the system with pre-paired accessories
1. Remote Control
Press any button on the remote control to test the connection.
2. Door/Window Contact
Set the Hub into Armed status, trigger the door/window contact by separating the
magnet and transmitter to test the connection.
3. Motion Detector
Set the Hub into Armed status, press the Test button at the back more than twice to test
the connection.
*You can also change the accessory settings and add new accessory in the App.
Test Button
* Please place this unit away from load-bearing walls and operating home appliances,
and elevate it along with your modem or router away from the ground, to ensure the
best possible connectivity.
For more detailed Instruction Manual, please check Help in App.
Wall
Wall
Floor
2.2-2.5m
Smart Hub
Door Contact
PIR Sensor
FR
* Si vous avez acheté l’offre groupée avec la caméra HD Wi-Fi, il est possible d’ajouter la
caméra dans l’application pour contrôler la sécurité de votre résidence et visionner les images
en temps réel, d’où que vous soyez, en cas d’intrusion dans votre domicile.
Téléchargez l’application depuis les magasins d’application « App Store » ou
« Google Play » en effectuant une recherche sur les mots clés « H4 Plus Alarm ».
Étape 1
Téléchargement de l’application Smart Home Alarm
Installez le concentrateur et les accessoires aux bons endroits.
Veuillez éloigner cette unité des murs porteurs et des appareils ménagers en
fonctionnement, placez-le en hauteur avec votre modem ou routeur loin du sol, pour
garantir la meilleure connectivité possible.
Pour obtenir un manuel d’instructions plus détaillé, veuillez consulter la rubrique
d’Aide dans l’application.
Étape 4
Installation
Créez un compte, puis connectez-vous dans l’application et suivez les instructions fournies
dans l’application pour ajouter le concentrateur à votre compte.
Étape 2
Ajout du concentrateurdans l’application
Étape 3
Configuration des accessoires
* Il est possible également de modifier les réglages des accessoires et d’ajouter un nouvel
accessoire dans l’application.
Testez le système préprogrammé avec les accessoires
1. télécommande
Appuyez sur un bouton quelconque de la télécommande pour tester la connexion.
2. contact de porte/fenêtre
Armez le concentrateur, déclenchez un contact de porte fenêtre en éloignant la partie
magnétique et l’émetteur-récepteur pour tester la connexion.
3. détection de mouvement
Armez le concentrateur, appuyez plus de deux fois sur le bouton de test situé à l’arrière
pour tester la connexion.
DE
Installieren Sie den Hub und das Zubehör an den gewünschten Orten.
Stellen Sie dieses Gerät in einiger Entfernung von tragenden Wänden und in Betrieb
befindlichen Haushaltsgeräten auf. Es sollte darüber hinaus zusammen mit dem Router in
einer geeigneten Höhe über dem Boden aufgestellt werden, um eine möglichst gute
Verbindung zu gewährleisten.Für detaillierte Anleitungen siehe Hilfe in App.
Schritt 4
Installation
* Wenn Sie das Bundle zusammen mit einer WLAN-HD-Kamera gekauft haben, können
Sie die App hinzufügen, um Ihre Wohnung zu überwachen und das Livevideo anzusehen,
wenn jemand in Ihre Wohnung einbricht, ganz gleich, wo sie sich aufhalten.
Laden Sie die App vom App Store oder von Google Play herunter, indem Sie nach
„H4 Plus Alarm“ suchen.
Schritt 1
Die Smart Home Alarm App herunterladen
Legen Sie ein Konto an, melden Sie dann die App an und folgen Sie den Anweisungen in
der App, um den Hub zu Ihrem Konto hinzuzufügen.
Schritt 2
Den Hub zur App hinzufügen
Schritt 3
Zubehör konfigurieren
* Sie können in der App die Zubehöreinstellungen ändern und neues Zubehör hinzufügen.
Das vorkonfigurierte System mit Zubehör testen
1. Fernbedienung
Drücken Sie eine Taste auf der Fernbedienung, um die Verbindung zu testen.
2. Tür-/Fensterkontakt
Versetzen Sie den Hub in den Scharf-Modus und lösen Sie den Tür-/Fensterkontakt aus,
indem Sie Kontakt und Sender trennen, um die Verbindung zu testen.
3. Bewegungsmelder
Versetzen Sie den Hub in den Scharf-Modus, drücken Sie die „Testen“-Taste auf der
Rückseite mehr als zweimal, um die Verbindung zu testen.
Hub
Power Supply: DC 12V 500mA
Battery: 3.7V 2200mAh 18650 Rechargeable Lithium Battery
GSM Operating Frequency: 850/900/1800/1900MHz
WiFi: IEEE 802.11b/g/n
Standby Current: <137mA
Alarm Current: <330mA
Internal Siren Volume: 93dB
Optional Accessories: 10 Remote Controls, 50 Sensors
Wireless Radio Frequency: 315 MHz or 433.92MHz
*Only 433.92MHz is available for Europe
ERP(dBm).Max: -8.69
Receiver Category: Category 2 (standard performance level of receiver)
Casing Materials: ABS Plastic
Operating Conditions
Temperature: 0°C ~ +55°C
Relative Humidity: <90% (Non-condensing)
Hub Dimensions: 160 x 160 x 45mm (L x W x H)
Bracket Dimensions: 80 x 80 x 10mm (L x W x H)
Remote Control
Power Supply: DC 3V (CR2025 Lithium Battery x 1pc)
Transmit Current: <8mA
Transmitting Distance: <80m (Open Area/No Interference)
Radio Frequency: 315MHz or 433.92MHz
*Only 433.92MHz is available for Europe
ERP(dBm).Max: -14.81
Housing Material: ABS Plastic
Operating Condition
Temperature: 0°C~+55°C
Relative Humidity: <90% (Non-condensing)
Dimensions: 58 x 31 x 9.5mm (L x W x H)
Door/ Window Sensor
Power Supply: DC 1.5V (1.5V AA LR6 Battery x 1pc)
Static Current: <56uA
Alarm Current: <82mA
Transmitting Distance: <80m (Open Area/No Interference)
Radio Frequency: 315MHz or 433.92MHz
*Only 433.92MHz is available for Europe
ERP(dBm).Max: -12.06
Housing Material: ABS Plastic
Operating Condition
Temperature: 0°C~+55°C
Relative Humidity: <90% (Non-condensing)
Transmitter Dimensions: 71 x 34 x 17.5mm (L x W x H)
Magnet Dimensions: 51 x 12 x 13.5mm (L x W x H)
PIR Motion Detector
Power Supply: DC 3V (1.5V AA LR6 Battery x 2pcs)
Static Current: <18uA
Alarm Current: <22mA
Detection Scope: <8m/110°
Pet Immunity: <25kgs
Transmitting Distance: <80m (Open Area/No Interference)
Radio Frequency: 315MHz or 433.92MHz
*Only 433.92MHz is available for Europe
RP(dBm).Max: -7.44
Housing Material: ABS Plastic
Operating Condition
Temperature: 0°C~+55°C
Relative Humidity: <90% (Non-condensing)
Sensor Dimensions: 108 x 52 x 36.8mm (L x W x H)
Bracket Dimensions: 52 x 30 x 26.5mm (L x W x H)

NL
*Als u de bundel met HD Wi-Fi-camera heeft gekocht, kunt u de camera toevoegen in de app
om thuisbeveiliging de bedienen en waar u ook bent live-video te bekijken als iemand bij u
inbreekt.
Download de app uit App Store of Google Play door te zoeken op het trefwoord
“H4 Plus Alarm”.
Stap 1
Download de Smart Home Alarm-app
Stap 2
Voeg de hub toe aan de app
Installeer de hub en de accessoires op de juiste plaatsen.
Plaats deze eenheid uit de buurt van dragende muren en werkende huishoudelijke
apparatuur en breng hem samen met uw modem of router hoog van de grond aan, om
de best mogelijke connectiviteit te verzekeren.
Ga naar Help in de app voor een meer gedetailleerde Gebruikshandleiding.
Stap 4
Installatie
Registreer een account en meld vervolgens de app aan en volg de instructies in de app om de
hub aan uw account toe te voegen.
Stap 3
Configuratie van accessoires
*U kunt de accessoire-instellingen ook wijzigen en een nieuwe accessoire toevoegen in
de app.
Test het voorgeprogrammeerd systeem met accessoires
1. afstandsbediening
Druk op een willekeurige knop op de afstandsbediening om de verbinding te testen.
2. deur-/raamcontact
Zet de hub in de alarm-aan-status en activeer het deur-/raamcontact door de magneet
en de zeneder te scheiden om de verbinding te testen.
3. bewegingsmelder
Zet de hub in de alarm-aan-status en druk meer dan twee keer op de Testknop aan de
achterkant om de verbinding te testen.
ES
Instale el centro y los accesorios en los lugares adecuados.
Coloque la unidad lejos de muros de carga y electrodomésticos en funcionamiento, y elévelo
por encima del suelo junto a su módem o router para asegurar la mejor conectividad posible.
Para leer un manual de instrucciones más detallado, consulte la Ayuda de la aplicación.
Paso 4
Instalación
*Si ha comprado el paquete con la cámara HD wifi, puede añadir la cámara en la aplicación
para controlar la seguridad del hogar y ver el vídeo en directo si alguien irrumpe en su
hogar esté donde esté usted.
Descargue la aplicación desde App Store o Google Play buscando las palabras clave
“H4 Plus Alarm”
Paso 1
Descargar la aplicación de alarma Smart Home
Registre una cuenta, inicie sesión en la aplicación y siga las instrucciones de la aplicación
para añadir el centro a su cuenta.
Paso 2
Añadir el centro a la aplicación
Paso 3
Configuración de los accesorios
*También puede cambiar los ajustes de los accesorios y añadir accesorios nuevos en la
aplicación.
Probar el sistema preprogramado con los accesorios
1. mando a distancia
Pulse cualquier botón del mando a distancia para probar la conexión.
2. contacto puerta/ventana
Configure el centro en estado armado y dispare el contacto de puerta/ventana
separando el imán y el transmisor para probar la conexión.
3. detector de movimiento
Configure el centro en estado armado y pulse el botón de prueba de la parte trasera
más de dos veces para probar la conexión.
IT
Installare l'hub e gli accessori nei luoghi opportuni.
Per ottenere la migliore connessione possibile, tenere l'unità lontano da muri portanti
ed elettrodomestici e, insieme al modem o router, in alto rispetto al pavimento.
Per istruzioni più dettagliate, accedere alla Guida dell'app.
Fase 4
Installazione
*nel caso sia stato acquistato il kit con telecamera HD WiFi, è possibile aggiungere la
telecamera nell'app per controllare la sicurezza della casa e visualizzare da
qualsiasi luogo il video in tempo reale, se qualcuno s'introduce nell'abitazione.
Scaricare l'app dall'App Store o Google Play cercando le parole chiave
“H4 Plus Alarm”.
Fase 1
Scaricare l'app Smart Home Alarm
Creare un account, accedervi dall'app e seguire le istruzioni per aggiungere l'hub al
proprio account.
Fase 2
Aggiungere l'hub all'app
Fase 3
Configurazione degli accessori
*Le impostazioni degli accessori e l'aggiunta di nuovi accessori possono essere eseguite
tramite
Verifica del sistema pre-programmato con gli accessori
1. telecomando
Premere un pulsante qualsiasi del telecomando per verificare la connessione.
2. contatto porta/finestra
Impostare l'hub nella modalità Inserito, innescare il contatto porta/finestra separando
la calamita e il trasmettitore per verificare la connessione.
3. rilevatore di movimento
Impostare l'hub nella modalità inserito, premere il pulsante Test sul retro più di due volte
per verificare la connessione.
PT
Instale o hub e os acessórios nos lugares adequados.
Coloque esta unidade afastada de paredes estruturais e de eletrodomésticos em operação,
e coloque-o a uma altura relativa do chão, para garantir a melhor ligação possível.
Para obter o manual de instruções mais detalhado, veri que a secção Ajuda na app.
Passo 4
Instalação
*Se comprar o kit com câmara HD WiFi, pode adicionar a câmara na aplicação para
controlar a segurança do lar e ver o vídeo em direto se alguém invadir a sua casa, onde quer
que esteja.
Transfira a aplicação da App Store ou do Google Play procurando pelas palavras-chave
“H4 Plus Alarm”.
Passo 1
Transferir a aplicação de alarme Smart Home
Registe uma conta e, em seguida, inicie a sessão na aplicação. Siga as instruções na aplicação
e adicione o hub à sua conta.
Passo 2
Adicionar o hub à aplicação
Passo 3
Configuração de acessórios
*Pode alterar as configurações de acessórios e adicionar novos acessórios na aplicação.
Teste o sistema pré-programado com acessórios
1. Controlo remoto
Prima qualquer botão do controlo remoto para verificar a ligação.
2. Contacto de porta/janela
Coloque o hub no estado ativado, acione o contacto da porta/janela, separando o íman
do transmissor para testar a ligação.
3. Detetor de movimento)
Coloque o hub no estado ativado, prima duas vezes o botão Teste na parte de trás para
testar a ligação.
RU
Установите контрольную панель и датчики в нужных местах.
Пожалуйста, поставьте это устройство в далеко от несущих стен и работающих
бытовых приборов. Поднимите его, вместе с модемом, или маршрутизатором высоко
от земли, для обеспечения наилучшего подключения.
Для получения более подробного руководства по эксплуатации, пожалуйста,
проверьте раздел "Справка" в Приложении.
Шаг 4
Установка
* Если в Вашем комплекте есть Wi-Fi HD-камера, Вы можете добавить ее в мобильном
приложении, благодаря чему еще больше повысится надежность и комфорт
управления безопасностью Вашего дома. Вы сможете вести видео-мониторинг в
реальном времени, где бы Вы не находились, просматривать Ваш дом в случае
получения тревоги от системы.
Найдите приложение «Smart Home Alarm» в App Store или Google Play,
воспользовавшись поиском, и загрузите его.
Шаг 1
Загрузите приложение Alarm
Прежде чем добавить контрольную панель, зарегистрируйтесь и войдите под своим
аккаунтом в приложение. Далее просто следуйте инструкциям.
Шаг 2
Добавьте контрольную панель в приложении
Шаг 3
Настройка дополнительных аксессуаров
* Вы можете менять настройки для аксессуаров и добавлять в систему новые
устройства через приложение
Проверьте работу системы с заранее запрограммированными аксессуарами
1. Радиобрелок управления
Для проверки соединения нажмите любую кнопку на радиобрелоке.
2. Датчик открытия двери/окна
Для проверки соединения, поставьте сигнализацию на охрану, затем активируйте
датчик, отделив магнит от передатчика.
3. Детектор движения
Установите Концентратор в состояние «Готов», нажмите кнопку тестирования на
задней панели дважды, чтобы проверить соединение.
PL
Umieść centralę oraz akcesoria we właściwych miejscach.
Umieść urządzenie możliwe najdalej od ciężko zbrojonych ścian i pracujących urządzeń
elektrycznych, pamiętaj też , że urządzenie nie powinno być umieszczone na podłodze.
Zapewni to najlepszą jakość połączenia.
Po więcej szczegółów instrukcji , proszę kliknąć Pomoc w aplikacji.
Krok 4
Instalacja
*Jeśli zakupiłeś zestaw z kamerą HD WiFi, możesz dodać kamerę bezpośrednio w aplikacji
„H4 Plus Alarm” w celu monitorowania domu z dowolnego miejsca na świecie.
Pobierz aplikację z Google Play lub APP Store wpisując „Smart Home Alarm”
Krok 1
Pobierz aplikacje
Załóż konto, zaloguj się do niego w aplikacji i w kolejnych krokach dodaj centralę do Twojego
konta.
Krok 2
Dodaj centralę w aplikacji
Krok 3
Konfiguracja akcesoriów
*Ustawienia akcesoriów oraz dodawanie nowych możesz także kontrolować z pozycji aplikacji
Akcesoria z zestawu są już sparowane z centralą, przetestuj ich działanie
1. Pilot
Naciśnij dowolny przycisk, żeby sprawdzić połączenie.
2. Czujnik drzwi/okien
Uzbrój centralę, wzbudź czujnik poprzez rozdzielenie ze sobą dwóch elementów czujnika.
3. Czujnik ruchu
Ustaw centralę w tryb uzbrojony, naciśnij przycisk testowy więcej niż dwa razy, żeby
sprawdzić połączenie między urządzeniami.
CE Declaration of Conformity
According to the EC Council Directive 2014/53/EU Radio Equipment
We Smart Technologies ApS
Nannasgade 28
2200 Copenhagen
Denmark
Declare that the Product detailed below:
Model: H4 Plus WiFi & Cellular Smart Alarm System
is herewith confirmed to comply with the requirements set out in the EC Council
Directive 2014/53/EU Radio Equipment. For the evaluation of the compliance with this
Directive, the following standards were applied:
EN301 489-1 V2.1.1 2017
EN301 489-3 V2.1.1 2017
EN301 489-17 V3.1.1 2017
EN301 489-52 V1.1.0 2016
EN300 220-1 V3.1.1 2017
EN300 220-2 V3.1.1 2017
EN301 511 V12.5.1: 2017
EN300 328 V2.1.1: 2016
EN62311: 2008
EN62368-1: 2014
Brian P. Borghardt
General Manager
Hoofddorp, 2017-8-28
INFORMATION FOR THE USERS
At the end of its life, the device has to be separated from the other waste. Consign the
device and all its components together to a center of electronical and electrotechnical
waste recycling center, designated by your local authorities.
-
 1
1
-
 2
2


Velleman H4 Plus Mode d'emploi
- Catégorie
- Composants de dispositif de sécurité
- Taper
- Mode d'emploi
dans d''autres langues
- italiano: Velleman H4 Plus Guida utente
- español: Velleman H4 Plus Guía del usuario
- Deutsch: Velleman H4 Plus Benutzerhandbuch
- português: Velleman H4 Plus Guia de usuario
- polski: Velleman H4 Plus instrukcja
Autres documents
-
Chuango DWC-102 Manuel utilisateur
-
Avidsen 123980 Manuel utilisateur
-
Avidsen CAMERA SECURITE EXT FIXE Le manuel du propriétaire
-
-
Smanos DB-30 Manuel utilisateur
-
Samsung ET-WV525 Manuel utilisateur
-
-
BRIGHT GS156A-H14 Manuel utilisateur
-
Denver SHA-150 Manuel utilisateur
-
Veho VHS-001-SK Manuel utilisateur