Samsung HW-Q800A Guide d'installation rapide
- Taper
- Guide d'installation rapide
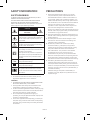
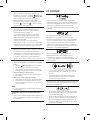
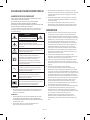
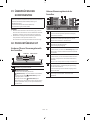
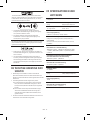
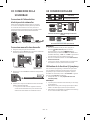
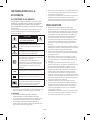
Vous trouverez ci-dessous de brèves informations pour HW-Q800A. Ce manuel décrit le fonctionnement de la barre de son, y compris la configuration du caisson de basses sans fil, les connexions filaires et sans fil. Le manuel couvre les connexions HDMI et optiques, ainsi que les connexions Bluetooth et Wi-Fi avec l'application SmartThings. Il traite de la fonction Q-Symphony avec les téléviseurs Samsung. D'autres fonctions utiles sont traitées, comme l'utilisation d'Alexa et le dépannage.
Vous trouverez ci-dessous de brèves informations pour HW-Q800A. Ce manuel décrit le fonctionnement de la barre de son, y compris la configuration du caisson de basses sans fil, les connexions filaires et sans fil. Le manuel couvre les connexions HDMI et optiques, ainsi que les connexions Bluetooth et Wi-Fi avec l'application SmartThings. Il traite de la fonction Q-Symphony avec les téléviseurs Samsung. D'autres fonctions utiles sont traitées, comme l'utilisation d'Alexa et le dépannage.


-
 1
1
-
 2
2
-
 3
3
-
 4
4
-
 5
5
-
 6
6
-
 7
7
-
 8
8
-
 9
9
-
 10
10
-
 11
11
-
 12
12
-
 13
13
-
 14
14
-
 15
15
-
 16
16
-
 17
17
-
 18
18
-
 19
19
-
 20
20
-
 21
21
-
 22
22
-
 23
23
-
 24
24
-
 25
25
-
 26
26
-
 27
27
-
 28
28
-
 29
29
-
 30
30
-
 31
31
-
 32
32


Samsung HW-Q800A Guide d'installation rapide
- Taper
- Guide d'installation rapide
Vous trouverez ci-dessous de brèves informations pour HW-Q800A. Ce manuel décrit le fonctionnement de la barre de son, y compris la configuration du caisson de basses sans fil, les connexions filaires et sans fil. Le manuel couvre les connexions HDMI et optiques, ainsi que les connexions Bluetooth et Wi-Fi avec l'application SmartThings. Il traite de la fonction Q-Symphony avec les téléviseurs Samsung. D'autres fonctions utiles sont traitées, comme l'utilisation d'Alexa et le dépannage.