AEG 60-14 Warming Drawer Manuel utilisateur
- Taper
- Manuel utilisateur

Warming Drawer
WD60-14
WD60-21
WD60-29

1
EN
Dear Customer:
Before going any further, we want to thank you for
preferring our product. We are sure that this
modern, functional and practical Warming drawer,
manufactured with top quality materials, will fully
meet your expectations.
We ask you to read the instructions in this booklet
very carefully as this will allow you to get the best
results from using your Warming drawer.
KEEP THE DOCUMENTATION OF THIS
PRODUCT FOR FUTURE REFERENCE.
ATTENTION!
To benefit from our guarantee you must send in
the "Guarantee Certificate" and, when requesting
Technical Assistance, you must present the
Warming drawer purchase invoice, stamped and
dated by the shop where you bought the
appliance.
If this requisite is not fulfilled, the guarantee is not
valid.
Always keep the instruction manual handy. If
you lend the Warming drawer to someone else
give them the manual as well!
Environmental protection
Disposal of the packaging
The packaging bears the Green Point mark.
Dispose of all the packaging materials such as
cardboard, expanded polystyrene and plastic
wrapping in the appropriate bins. In this way you
can be sure that the packaging materials will be
re-used.
Disposal of equipment no longer used
According to European Directive 2002/96/EC on
the management of waste electrical and electronic
equipment (WEEE), home electrical appliances
should not be put into the normal systems for
disposal of solid urban waste.
Outdated appliances should be collected
separately to optimise component material
recovery and re-cycling rates and to prevent
potential harm to human health and the
environment. The symbol of a rubbish container
superimposed by a diagonal cross should be put
on all such products to remind people of their
obligation to have such items collected separately.
Consumers should contact their local authorities
or point of sale and request information on the
appropriate places to leave their old home
electrical appliances.
Before disposing of your appliance, render it non-
usable by pulling out the power cable, cutting this
and disposing of it.

2
EN
Contents
Installation instructions ..................................................................................................................... 3
Before installation ............................................................................................................................. 3
Installation ........................................................................................................................................ 3
Electrical Connection ........................................................................................................................ 4
Safety Instructions ............................................................................................................................. 5
Precautions during use ...................................................................................................................... 6
Appliance Description ........................................................................................................................ 7
Main Components ............................................................................................................................ 7
How the Warming drawer works ....................................................................................................... 7
Before using for the first time ............................................................................................................ 8
Control Panel .................................................................................................................................... 8
Using the Warming drawer ............................................................................................................... 8
Selecting function ............................................................................................................................. 8
Heating times .................................................................................................................................... 9
Load capacity .................................................................................................................................... 10
Cleaning and Maintenance ............................................................................................................... 11
Appliance front and control panel ................................................................................................... 11
Interior of the Warming drawer ....................................................................................................... 11
Mat with non-slip surface ................................................................................................................ 11
What should I do if the Warming drawer doesn’t work? ............................................................... 12
Installation ......................................................................................................................................... 25
Combination possibilities ................................................................................................................ 25

3
EN
Installation instructions
Before installation
Check that the input voltage indicated on the
characteristics plate is the same as the voltage of
the power outlet you are going to use.
Open the drawer and take out all the
accessories and remove the packing material.
Attention! The front surface of the crockery
heater may be wrapped in a protective film.
Before using the Warming drawer for the first
time, remove this film carefully.
Make sure that the Warming drawer is not
damaged in any way. Check that the drawer
opens and closes correctly. If you find any
damage, contact the Technical Assistance
Service.
Attention: the power socket should be easily
accessible after the Warming drawer has been
installed.
The Warming drawer should only be built-in in
combination with those appliances indicated by
the manufacturer. If it is fitted in combination
with other appliances, the guarantee is no
longer valid since it is impossible to guarantee
that the Warming drawer will work correctly.
Installation
To build-in the Warming drawer in combination
with another appliance there must be a fixed,
interim shelf in the housing unit to support the
weight of both appliances.
The appliance to be combined with the Warming
drawer will be placed directly on the latter without
any need to have a separating shelf.
To build-in the appliance which is combined with
the Warming drawer, follow the instructions set
out in the respective instructions and fitting
booklet.
The relevant installation dimensions are indicated
in mm in the diagrams shown at the end of this
booklet. Proceed as follows:
1. Place the Warming drawer on the shelf and
slide it towards the interior of the niche in
such a way that it is centred and completely
lined up with the front of the unit.
2. Check that the Warming drawer’s frame is
properly levelled and is sitting evenly on the
shelf.
3. Open the drawer and fix the Warming drawer
to the sides of the unit using the two screws
provided.

4
EN
Installation instructions
Electrical Connection
Electrical installation must be performed by an
electrician qualified in accordance with the
legislation in force.
Before connecting the Warming drawer to the
electric mains, check that the voltage and
frequency of the mains matches that which is
shown on the rating plate located in the heating
block inside.
The electric connection is made via an omnipolar
switch, which is suitable for the intensity to be
tolerated and which has a minimum gap of 3mm
between its contacts, which will ensure
disconnection in case of emergency or when
cleaning the Warming drawer. If a plug is used for
the electric connection, then it must be accessible
after installation.
The connection should include correct earthing, in
compliance with current norms. WARNING: THE
WARMING DRAWER MUST BE EARTHED.
If the flexible supply cable fitted to the Warming
drawer ever needs to be changed, it should be
replaced by an official After Sales Service,
because it requires special tools.
The manufacturer and retailers do not accept
responsibility for any damage that may be
caused to people, animals or property if these
installation instructions are not observed.

5
EN
Safety Instructions
Warning! Before connecting the appliance
compare the power data (voltage and
frequency) indicated on the characteristics
plate with those of the power supply in
question. If these data do not match there may
be problems. In case of doubt, contact an
electrician.
Warning! If the electrical wire plug is removed,
the appliance must be installed and connected
by a technician. Contact a qualified electrician
who knows and respects current safety
standards. The manufacturer cannot be held
responsible for damage resulting from fitting or
connecting errors.
Warning! The electrical safety of the appliance
can only be guaranteed if it is earthed. The
manufacturer cannot be held responsible for
damage resulting from the absence of or
defects in the installation’s protection system
(e.g. electrical shock).
Warning! Only use the appliance once it has
been fitted into its built-in position. Only in this
manner can it be guaranteed that users cannot
access the electrical components.
Warning! Never open up the appliance’s
frame. Possible contacts with electrical
conducting parts or changes to electrical or
mechanical components may represent a
danger to users’ safety and prejudice the
correct working of the appliance.
Warning! Repairs and maintenance, especially
of parts carrying electrical current, must only be
done by technicians authorised by the
manufacturer. The manufacturer and
retailers do not accept responsibility for any
damaged caused to people, animals or
property as a result of repairs and maintenance
carried out by non-authorised personnel.
Warning! Repairs undertaken during the
guarantee period must only be done by
technicians authorised by the manufacturer. If
this is not the case then any damage resulting
from the repair in question is excluded from the
guarantee.
Warning! The appliance must be disconnected
from the electrical current when installation and
repair work is being done. To disconnect the
appliance from the current, one of the following
conditions must apply:
- The switchboard fuses / circuit breakers
must be disconnected.
- The plug should be removed from the
socket. To remove the plug from the socket
do not pull on the electric cable but rather
pull out the plug itself directly.

6
EN
Precautions during use
This appliance complies with current safety
standards. Improper use of the appliance may
put the user at risk.
Read the operating instructions carefully before
using the appliance for the first time. In this
way you will avoid the risk of injuring yourself
or damaging the appliance.
Use the appliance to keep the crockey and the
food warm. Any other type of use is
unacceptable and may be dangerous. The
manufacturer does not accept responsibility for
breakdowns or faults arising from improper or
erroneous use of the appliance.
Depending on the temperature selected and
the operating time, the temperature inside the
appliance may reach 80 ºC. To take crockery
out of the Warming drawer protect your hands
by using oven gloves or an oven cloth.
Take special care with children and do not
allow them to play close to the appliance. If the
appliance is inadvertently switched on it will
heat up and may cause serious burns.
Children should only be allowed to use the
appliance without direct adult supervision if
they have been given instructions on how to
use the appliance safely and how to identify
dangerous situations that may arise if the
appliance is used in an improper manner.
Do not sit or hang on the drawer. The
telescopic runners will be damaged. The
maximum load capacity of the drawer is 25 kg.
Do not store synthetic containers or easily
inflammable objects inside the Warming
drawer. When you switch on the appliance
such containers and objects may melt or catch
fire. Fire danger.
Do not use the appliance to heat up the air
temperature in the kitchen. The high
temperatures reached may cause easily
inflammable objects close to the appliance to
catch fire.
Do not use high pressure or steam jet cleaning
devices. The steam may affect electrical
components and cause a short circuit. The
steam pressure may also cause damage to the
appliance’s surface and components in the
long term.
When you stop using the appliance at the end
of its working life, disconnect it from the power
supply and render the electrical cable unusable
so that the appliance is not a danger if, for
example, children use it for playing.

7
EN
Appliance Description
Main Components
1. On/Off switch (lights up)
2. Function selector
3. Handle
4. Anti-slip mat
How the Warming drawer works
This appliance is equipped with a warm air
circulation system. A fan distributes the heat
generated by an electrical heating element
throughout the interior of the appliance.
The thermostat allows the user to define and
control the temperature wanted for the crockery.
The circulating hot air that is generated heats up
the crockery quickly and evenly.
A metal grille protects both the heating element
and the fan.
The base of the drawer is fitted with a non-slip
mat to prevent plates and dishes sliding around
when the drawer is opened and closed.

8
EN
Use
Before using for the first time
Before using the appliance for the first time you
should clean the interior and the exterior,
following the cleaning instructions given in the
section “Cleaning and Maintenance”.
Then heat the Warming drawer for at least 2
hours. For this, turn the temperature control to the
maximum position (see section ‘Selecting
temperature”).
Make sure the kitchen is well-ventilated when you
are doing this.
The appliance’s parts are protected by a special
product. For this reason, during the first heating
an odour will be released. Both the odour and any
smoke that may form will disappear after a short
time and neither signifies that there is anything
wrong with the connection or the appliance.
Control Panel
The control panel has a function and the on/off
switch. The control panel is only visible when the
drawer is open.
Using the Warming drawer
To use the Warming drawer, proceed as follows:
Put the crockery in the drawer.
Select the function you want by turning the
thermostat control to the desired position.
Switch on the appliance by pressing the switch,
which will light up.
Close the drawer.
Be careful not to use too much force when closing
the drawer since it may open up again.
Before taking out the warm crockery you must
switch off the Warming drawer by pressing the
switch again.
Selecting function
By turning the thermostat control you can select
temperatures between 30 and 85 °C.
Do not force the thermostat control to the left
of the “0” position or to the right of the
maximum position since this may damage the
appliance.
As soon as the temperature selected is reached,
the heating is turned off. When the temperature
drops to a value below that selected, the heating
is turned back on.
The temperature scale is not marked with
absolute temperatures in ºC but instead has
symbols which correspond to the optimum
temperatures for groups of crockery:
Symbol
ºC
Function
30
Defrosting
40
Proving dough
Cups / glasses warming
60
Crockery warming
80
Food warming

9
EN
Use
Heating times
Various factors affect heating times:
Material and thickness of the crockery
Load quantity
How the crockery is arranged
Temperature setting
It is therefore not possible to give any precise
heating times.
However, as a guide, the following times are given
for the thermostat setting and for uniform
heating of the crockery:
Load
Time (min)
Crockery for 6 people
30 – 35
Crockery for 8 people
35 – 40
Crockery for 12 people
40 – 45
As you use the Warming drawer more and more
you will learn the best settings for your crockery.

10
EN
Load capacity
Load capacity depends on the size of the crockery items,
WD60-14
WD60-21
WD60-29
6 persons servings
8 persons servings
12 persons servings
6 x 24cm Dinner Plates
8 x 24cm Dinner Plates
12 x 24cm Dinner Plates
6 x 10cm Soup Bowls
8 x 10cm Soup Bowls
12 x 10cm Soup Bowls
1 x 19cm Serving Dish
1 x 19cm Serving Dish
1 x 19cm Serving Dish
1 x 17cm Serving Dish
1 x 17cm Serving Dish
1 x 17cm Serving Dish
1 x 32cm Meat Plates
2 x 32cm Meat Plates
2 x 32cm Meat Plates
or
or
or
20 dishes with 28 cm
30 dishes with 28 cm
40 dishes with 28 cm
or
or
or
80 espresso coffee cups
120 espresso coffee cups
160 espresso coffee cups
or
or
or
40 tea cups
60 tea cups
80 tea cups
or
or
or
…
…
…

11
EN
Cleaning and Maintenance
Cleaning is the only maintenance action that is
required normally.
Warning! Cleaning must be done with the
Warming drawer disconnected from the
electrical power supply. Remove the plug from
the power socket or disconnect the Warming
drawer power supply circuit.
Do not use aggressive or abrasive cleaning
products, abrasive sponges or pointed
objects since stains or abrasion marks may
appear.
Do not use high pressure or steam jet
cleaning appliances.
Appliance front and control panel
The Warming drawer can be cleaned using just a
damp cloth. If it is very dirty, add a few drops of
washing-up liquid to the washing water.
Wipe the surfaces dry using a dry cloth.
For stainless steel fronted Warming drawers,
special products for treatment of stainless steel
surfaces can be used. These products prevent
the surfaces becoming dirty again for some time.
Apply a thin layer of such a product on the
surface using a soft cloth.
On aluminium fronted Warming drawers use a
gentle glass cleaning product and a soft cloth that
does not release fluff. Wipe horizontally without
pressing on the surface since aluminium is
sensitive to scratches and cuts.
Interior of the Warming drawer
Clean the inside of the Warming drawer regularly
using a damp cloth. If it is very dirty add a few
drops of washing-up liquid to the washing water.
Wipe the surfaces dry using a dry cloth.
Avoid water entering through the air circulation
opening.
Only use the Warming drawer again when it is
completely dry.
Mat with non-slip surface
The non-slip surface mat can be removed to
facilitate cleaning of the drawer.
The mat can be cleaned by hand using hot water
with a few drops of washing-up liquid.
Dry thoroughly.
The non-slip mat should only be replaced when it
is completely dry.

12
EN
What should I do if the Warming drawer doesn’t work?
WARNING! Any type of repair must only be
done by a specialised technician. Any repair
done by a person not authorised by the
manufacturer is dangerous.
Before contacting Technical Assistance, check
on the following:
The crockery doesn’t heat up enough.
Check whether:
- The appliance has been switched on.
- The appropriate temperature has been
selected.
- The air circulation orifices are covered by
the crockery.
- The crockery was left to heat up for
sufficient time.
Heating time depends on several factors, such
as, for example:
- Crockery material type and thickness.
- Quantity of crockery.
- How the crockery is arranged.
The crockery doesn’t heat up at all. Check
whether:
- You can hear the noise of a fan.
If the fan is operating then the heating
element is broken; if the fan is not
operating then the fan is broken.
- The switchboard fuses / circuit breakers
have fused / tripped out.
The crockery is heating up too much.
- The temperature selector is broken.
The on/off switch does not light up.
- The switch’s pilot light has blown.

13
FR
Cher client,
Nous vous remercions tout d'abord de nous avoir
accordé votre préférence. Nous sommes certains
que ce chauffe-vaisselle moderne, fonctionnel et
pratique, fabriqué à partir de matériaux de
première qualité, vous donnera toute satisfaction.
Nous vous demandons une lecture attentive des
instructions de ce manuel. Vous pourrez ainsi
utiliser votre chauffe-vaisselle en obtenant les
meilleurs résultats.
CONSERVEZ TOUTE LA DOCUMENTATION DE
CE PRODUIT POUR LA CONSULTER
ULTÉRIEUREMENT.
ATTENTION !
Pour bénéficier de notre garantie, il est
indispensable de nous retourner le « Certificat de
garantie » et, lors d'une demande d'assistance
technique, de présenter la facture d'achat du
chauffe-vaisselle où figurent la date et le cachet de
l'établissement vendeur.
À défaut, la garantie ne sera pas valable.
Gardez toujours le manuel d'instructions à
portée de main. Si vous cédez l'appareil à un
tiers, remettez-lui également le manuel!
Protection de l'environnement
Élimination de l'emballage
L'emballage est signalé d'un Point vert.
Veuillez utiliser les conteneurs adéquats pour
vous défaire de tous les matériaux d'emballage
comme le carton, le polystyrène expansé et le film
plastique. Ils seront réutilisés pour d'autres
emballages.
Élimination des appareils hors d'usage
La directive européenne 2002/96/CE, concernant
la gestion des résidus d'appareils électriques et
électroniques (RAEE), prévoit que les appareils
électroménagers ne doivent pas être éliminés de
la même façon que les résidus urbains solides.
Les appareils hors d'usage doivent être recueillis
séparément afin d'optimiser la récupération et le
recyclage des matériaux qui les composent et
pour prévenir d'éventuelles atteintes à la santé
publique et à l'environnement. Le symbole
représentant une grande poubelle barrée d'une
croix doit être apposé sur tous les produits de
façon à rappeler l'obligation d'une collecte à part.
Les consommateurs doivent entrer en contact
avec les autorités locales ou les points de vente
pour se renseigner sur le local approprié où ils
peuvent déposer les appareils hors d'usage.
Avant de vous défaire de votre appareil, tirez le
câble d'alimentation, coupez-le et éliminez-le.

14
FR
Sommaire
Instructions d'installation ................................................................................................................ 15
Avant l'installation ........................................................................................................................... 15
Installation ...................................................................................................................................... 15
Branchement électrique .................................................................................................................. 16
Indications de sécurité ..................................................................................................................... 17
Description de l'appareil .................................................................................................................. 19
Composants principaux .................................................................................................................. 19
Principe de fonctionnement ............................................................................................................ 19
Avant la première utilisation............................................................................................................ 20
Tableau de commandes ................................................................................................................. 20
Principe d'utilisation ........................................................................................................................ 20
Sélectionner la température............................................................................................................ 20
Temps de chauffage ....................................................................................................................... 21
Capacité de charge ........................................................................................................................... 22
Nettoyage et entretien ...................................................................................................................... 23
Partie avant de l'appareil et tableau de commandes ...................................................................... 23
Intérieur du chauffe-vaisselle .......................................................................................................... 23
Revêtement antidérapant ............................................................................................................... 23
Que faire en cas de mauvais fonctionnement? .............................................................................. 24
Installation ......................................................................................................................................... 25
Possibilités de combinaison ............................................................................................................ 25

15
FR
Instructions d'installation
Avant l'installation
Vérifiez que la tension d'alimentation de
l'appareil, indiquée sur la plaque des
caractéristiques, correspond à celle de votre
installation.
Ouvrez le tiroir et retirez tous les accessoires
ainsi que le matériel d'emballage.
Attention ! Le devant du chauffe-vaisselle peut
être enveloppé d'une pellicule de protection.
Retirez soigneusement cette pellicule avant la
première utilisation.
Vérifiez que le chauffe-vaisselle n'est pas
endommagé. Assurez-vous que le tiroir s'ouvre
et se ferme correctement. En cas de
détérioration, appelez le Service d'assistance
technique.
Attention : la prise de courant doit rester
facilement accessible après l'installation du
chauffe-vaisselle.
Le chauffe-vaisselle ne peut être encastré et
combiné qu'avec les appareils indiqués par le
fabricant. La garantie n'est pas valable s'il est
monté et combiné avec d'autres appareils, car
il n'est alors pas possible de garantir un
fonctionnement correct.
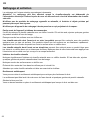
Installation
Pour encastrer le chauffe-vaisselle et le combiner
avec un autre appareil, vous devez utiliser un
étagère intermédiaire fixe, capable de supporter
le poids des deux appareils.
L'appareil combiné avec le chauffe-vaisselle
devra être placé directement sur le chauffe-
vaisselle. Une étagère de séparation n'est pas
nécessaire.
Pour encastrer l'appareil combiné avec le
chauffe-vaisselle, suivez les indications figurant
dans le manuel d'instructions et de montage de
cet appareil.
Les dimensions à prendre en considération pour
l'installation sont indiquées en millimètres dans
les croquis présentés dans les dernières
pages. Procédez de la façon suivante :
1. Placez le chauffe-vaisselle sur l'étagère et
poussez-le vers le fond de façon à ce qu'il
soit bien centré et bord à bord avec l'avant
du meuble.
2. Assurez-vous que la structure du chauffe-
vaisselle est bien à niveau et bien stable sur
l'étagère.
3. Ouvrez le tiroir pour fixer le chauffe-
vaisselle sur les côtés du meuble avec les
deux vis fournies.

16
FR
Instructions d'installation
Branchement électrique
L’installation électrique doit être réalisée par un
électricien qualifié et respecter la législation en
vigueur.
Avant de brancher le chauffe-vaisselle sur
secteur, assurez-vous que la tension et la
fréquence du secteur correspond à ceux indiqués
sur la plaque signalétique se trouvant à l'intérieur
du bloc chauffant.
Le branchement électrique s’effectue avec un
interrupteur omnipolaire approprié pour tolérer
l’intensité et présentant un espacement minimum
de 3 mm entre ses éléments de contact, ceci afin
d’assurer le découplage en cas d’urgence ou lors
de du nettoyage du chauffe-vaisselle. Si vous
utilisez une prise pour le branchement, celle-ci
doit rester accessible après l’installation.
Le branchement doit disposer d’une prise de
terre adéquate et répondant aux normes
actuelles. ATTENTION : LE CHAUFFE-
VAISSELLE DOIT ÊTRE RELIÉ À LA TERRE.
Si le câble d’alimentation flexible du chauffe-
vaisselle a besoin d’être changé, l’opération doit
être réalisée par un employé du service après-
vente car des outils particuliers sont nécessaires.
Le fabricant et les revendeurs déclinent toute
responsabilité en cas de dommages
provoqués par des personnes, des animaux
ou des objets lorsque les instructions
d’installation ne sont pas respectées.

17
FR
Indications de sécurité
Attention ! Avant de brancher l'appareil,
comparez-en les données (tension et fréquen-
ce) indiquées sur la plaque des caractéristiques
avec celles de votre réseau électrique. Elles
doivent correspondre, pour éviter tout problème.
En cas de doute, appelez un électricien.
Attention ! Si la prise de l'appareil doit être
changée, l'installation et le branchement doivent
être effectués par un technicien. Adressez-vous
à un électricien attitré qui respecte les normes
de sécurité. La responsabilité du fabricant n'est
pas engagée pour des dommages provenant
d'une erreur de montage ou de branchement.
Attention ! La sécurité électrique de l'appareil
n'est assurée que s'il est relié à la terre. La
responsabilité du fabricant n'est pas engagée
pour des dommages provenant d'un manque ou
d'un défaut du système de protection de
l'installation (choc électrique par exemple).
Attention ! Ne mettez l'appareil en marche
qu'une fois celui-ci dûment encastré, car c'est la
seule façon d'interdire l'accès aux composants
électriques.
Attention ! N'ouvrez jamais la structure de
l'appareil. D'éventuels contacts avec les pièces
conductrices ou modifications des composants
électriques ou mécaniques peuvent constituer un
danger pour la sécurité de l'utilisateur et
perturber le bon fonctionnement de l'appareil.
Attention ! Les réparations et entretiens, tout
particulièrement sur les pièces sous tension, ne
peuvent être effectués que par des techniciens
agréés par le fabricant. Le fabricant et les
revendeurs déclinent toute responsabilité
pour d'éventuels dommages, causés aux
personnes, aux animaux ou aux biens, qui
découlent de réparations ou entretiens effectués
par des personnes non autorisées.
Attention ! Les réparations au cours de la
période de garantie ne doivent être exécutées
que par des techniciens agréés par le fabricant.
Dans le cas contraire, tout dommage provenant
de ces réparations est exclu de la garantie.
Attention ! L'appareil doit être débranché du
réseau électrique quand sont effectués les
travaux d'installation et de réparation. Pour que
l'appareil soit débranché, vous devez constater
l'une des conditions suivantes :
- Les fusibles/disjoncteur du tableau électrique
sont débranchés.
- L'appareil est débranché de la prise murale,
ce qui doit être fait en tirant sur la prise de
l'appareil et non sur le câble électrique.

18
FR
Précautions pendant l'utilisation
Votre appareil est aux normes de sécurité en
vigueur. Une utilisation inadéquate peut
constituer un danger pour l'utilisateur.
Avant la première utilisation, lisez avec
attention les instructions d'utilisation. Vous
vous protégez et évitez ainsi tout problème.
Le chauffe-vaisselle est exclusivement destiné
à un usage domestique !
Cet appareil n’est pas destiné à être utilisé par
des personnes (y compris des enfants) qui
auraient des capacités physiques, sensorielles
ou mentales diminuées; ou qui ne
possèderaient pas l’expérience et la
connaissance nécessaire, à moins qu’elles ne
soient supervisées ou que des instructions ne
leur aient été fournies par une personne
responsable de leur sécurité, pour l’utilisation
appropriée de l’appareil.
Il est nécessaire de surveiller les enfants pour
s’assurer qu’ils ne jouent pas avec l’appareil.
Attention: au cours de l’utilisation, il est
possible que des parties accessibles
deviennent chaudes. Les jeunes enfants
doivent être tenus à l’écart.
Selon la température et le temps de
fonctionnement sélectionnés, la température à
l'intérieur de l'appareil peut monter jusqu'à
80 ºC. Utilisez des gants de cuisine pour vous
protéger les mains quand vous retirez la
vaisselle de l'intérieur du chauffe-vaisselle.
Faites particulièrement attention aux enfants.
Ne les laissez pas s'approcher de l'appareil.
S'il est mis en marche par inadvertance, il
chauffera et peut provoquer des brûlures
graves.
Les enfants ne peuvent utiliser l'appareil hors
la présence d'un adulte que s'ils ont reçu des
instructions leur permettant de le faire en toute
sécurité et d'identifier les dangers dus à une
mauvaise utilisation.
Le tiroir peut supporter un poids maximum de
25 kg. Prenez garde de ne pas le surcharger,
cela endommagerait les rails télescopiques.
Les récipients et objets synthétiques ou qui
prennent facilement feu ne doivent pas être
rangés dans le chauffe-vaisselle. Si l'appareil
est mis en marche, ils peuvent fondre ou
brûler. Danger d'incendie.
N'utilisez pas votre appareil comme chauffage
de maison. Les hautes températures peuvent
mettre le feu à des objets facilement
inflammables situés près de l'appareil.
N'utilisez pas d'appareils de nettoyage à haute
pression ou qui projettent de la vapeur. La
vapeur peut atteindre les composants
électriques et provoquer un court-circuit. La
pression de la vapeur peut aussi endommager
durablement la surface de l'appareil et ses
composants.
Quand vous cessez définitivement d'utiliser
l'appareil, à la fin de sa vie utile, débranchez-le
du réseau et éliminez le câble électrique pour
éviter le danger que les enfants s'en servent
pour s'amuser.

19
FR
Description de l'appareil
Composants principaux
1. Bouton marche/arrêt (voyant lumineux)
2. Sélecteur de fonction
3. Poignée
4. Revêtement antidérapant
Principe de fonctionnement
Votre appareil est équipé d'un système de
circulation d'air chaud. Un ventilateur distribue la
chaleur, générée par une résistance électrique,
dans tout l'intérieur de l'appareil.
Le thermostat permet de définir et de contrôler la
température souhaitée pour la vaisselle.
La circulation de l'air chaud fait que la vaisselle est
chauffée rapidement et uniformément.
La résistance ainsi que le ventilateur sont protégés
par une grille métallique.
La base du tiroir est équipée d'un revêtement
antidérapant pour empêcher la vaisselle de
glisser quand vous ouvrez ou fermez le tiroir.
La page est en cours de chargement...
La page est en cours de chargement...
La page est en cours de chargement...
La page est en cours de chargement...
La page est en cours de chargement...
La page est en cours de chargement...
La page est en cours de chargement...
La page est en cours de chargement...
-
 1
1
-
 2
2
-
 3
3
-
 4
4
-
 5
5
-
 6
6
-
 7
7
-
 8
8
-
 9
9
-
 10
10
-
 11
11
-
 12
12
-
 13
13
-
 14
14
-
 15
15
-
 16
16
-
 17
17
-
 18
18
-
 19
19
-
 20
20
-
 21
21
-
 22
22
-
 23
23
-
 24
24
-
 25
25
-
 26
26
-
 27
27
-
 28
28


AEG 60-14 Warming Drawer Manuel utilisateur
- Taper
- Manuel utilisateur
dans d''autres langues
- English: AEG 60-14 Warming Drawer User manual