Dynex DX-EBNBC Guide d'installation rapide
- Catégorie
- La mise en réseau
- Taper
- Guide d'installation rapide
Ce manuel convient également à
La page est en cours de chargement...

1
Wireless Enhanced G Notebook Card
Carte sans l G amélioré pour ordinateur portatif
Tarjeta Inalámbrica G Mejorado para
Computadora Portátil
2
QUICK INSTALL GUIDE • Guide d’installation rapide • Guía de instalación rápida
Wireless Enhanced G Notebook Card
Carte sans l G amélioré pour ordinateur portatif
Tarjeta Inalámbrica G Mejorado para Computadora Portátil
Package contents • Contenu de la boîte • Contenido del paquete
Dynex CD
CD Dynex
CD de Dynex
1. Firmly insert the card, label side UP, into your computer’s PC card slot until it stops. The Setup has
nished installing screen opens.
Note: If your system did not prompt you to insert your Card, do so now.
2. Click Yes, I want to restart my computer now, then click Finish. Your computer will restart and the
Dynex Wireless Networking Utility opens.
~continued on back
Insert CD and install software • Contenu de la boîte • Inserte el CD e instale el software
Insert card
Insérez la carte • Inserte la tarjeta
Important Note:
Install the software before inserting the card.
1. Insert the Dynex CD into your notebook’s CD drive. The Dynex Wireless Card Installer screen
opens.
Note: If the Dynex Wireless Card Installer screen does not appear, click My Computer, then
double-click the CD drive where the installation CD has been placed.
2. Click Next. The InstallShield Wizard Welcome screen opens.
3. Click Next. The Choose Destination Location screen opens.
4. Click Next. The Please plug in your Notebook Card now screen open
Note: If at any time during the install a warning appears that the software has not passed Windows® logo testing, it
is safe to click the Continue anyway. This software is designed to run on Windows.
Remarque importante : Installez l’application avant d’insérer la carte.
1. Insérez le disque Dynex dans le lecteur CD de l’ordinateur portatif. La fenêtre de l’application
d'installation de la carte sans l Dynex s'ache.
Remarque : Si la fenêtre de l'application d'installation de la carte sans l Dynex ne s'ache pas, cliquez sur My
Computer (Poste de travail), puis double-cliquez sur le lecteur où le CD d'installation a été inséré.
2. Cliquez sur Next (Suivant). La fenêtre d’accueil InstallShield Wizard (Assistant d’installation InstallShield)
s’ache.
3. Cliquez sur Next (Suivant). La fenêtre Choose Destination Location (Sélection de l'emplacement de
destination) s’ache.
4. Cliquez sur Next (Suivant). La fenêtre Please plug in your Notebook Card now (Veuillez insérer maintenant
votre carte pour ordinateur portatif) s'ache.
Remarque : Si pendant l'installation un avertissement s'ache indiquant que l'application n'a pas été validée lors
du test permettant d'obtenir le logo WindowsMD, vous pouvez cliquer sur Continue anyway (Continuer). Cette
application est conçue pour fonctionner sous Windows.
Nota importante: Instale el software antes de insertar la tarjeta.
1. Inserte el disco Dynex en la unidad de CD de su computadora portátil. Aparecerá la pantalla del “Dynex
Wireless Card Installer” (Instalador de la tarjeta inalámbrica de Dynex).
Nota: Si esta pantalla no aparece, haga clic en My Computer (Mi PC) y luego haga doble clic en la unidad de CD
donde colocó el CD de instalación.
2. Haga clic en Next (Siguiente). Aparecerá la pantalla de bienvenida del InstallShield Wizard (Asistente de
InstallShield).
3. Haga clic en Next (Siguiente). Aparecerá la pantalla “Choose Destination Location” (Elegir la ubicación de
destino).
4. Haga clic en Next (Siguiente). Aparecerá la pantalla “Please plug in your Notebook Card now” (Favor
conecte su tarjeta para computadora portátil ahora).
Nota: Si en cualquier momento durante la instalación aparece una advertencia de que el software no ha pasado la
vericación de logotipo de Windows® aseguró hacer clic en “Continue anyway” (Continuar). Este software está
diseñado para ejecutarse en Windows.
-
 1
1
-
 2
2


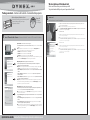
Dynex DX-EBNBC Guide d'installation rapide
- Catégorie
- La mise en réseau
- Taper
- Guide d'installation rapide
- Ce manuel convient également à
dans d''autres langues
- English: Dynex DX-EBNBC Quick setup guide
Documents connexes
-
Dynex DX-EBUSB Guide d'installation rapide
-
-
-
-
-
-
-
-