Dell XPS 17 L701X Guide de démarrage rapide
- Taper
- Guide de démarrage rapide

September 2010
Setting Up and Using 3D TV
This document provides information about setting up and using the 3D TV features available on your computer.
NOTE: To know if your TV supports the 3D features available on your computer, see the system requirements
at www.nvidia.com/3dtv.
Setting Up 3D TV
1 Connect your computer to the 3D TV using a HDMI cable.
NOTE: The HDMI cable transmits both audio and video signals.
2 Set up the HDMI 1.4 3D TV:
a Browse to the TV’s 3D menu settings.
b Set the 3D mode to Automatic.
c Set the eye order for the glasses to default or normal.
NOTE: Do not change the eye order settings when using NVIDIA 3DTV Play as the application
controls the timing of the glasses.

NOTE: If you are unable to view the entire Windows desktop on your TV, use the 3D TV's built-in
options to reduce the display resolution.
NOTE: For more information about configuring the 3D settings, see the documentation that shipped
with your TV.
3 Set your TV as the primary display:
a Right-click the desktop and select NVIDIA Control Panel.
b In the NVIDIA Control Panel window, click Display to expand the selection (if not already expanded)
and then click Set up multiple display.
c In the Verify the display configuration section, right-click the 3D TV and select Make this the Windows
primary display.
4 Set up the NVIDIA 3DTV Play application:
a In the NVIDIA Control Panel window, click Stereoscopic 3D to expand the selection (if not already
expanded) and then click Set up stereoscopic 3D.
b Select the Enable stereoscopic 3D check box. The 3DTV Play setup wizard is displayed.
c Ensure that the 3DTV Play logo appears in the control panel.
5 Change the desktop resolution to match the resolution of the 3D content type:
a In the NVIDIA Control Panel window, click Display to expand the selection (if not already expanded)
and then click Change resolution.
b For 3D gaming, set the resolution to 720p, 1280x720 and refresh rate to 60/59 Hz in HD 3D mode.
For Blu-ray 3D playback, set the resolution to 1080p, 1920x1080 and refresh rate to 24/23 Hz in HD 3D mode.

NOTE: For TVs using PAL system with refresh rates of 50 Hz or 100 Hz, set the resolution to 720p and
refresh rate to 60/59 Hz. For TVs using NTSC system with refresh rates of 60 Hz or 120 Hz, set the
resolution to 720p and refresh rate to 60/59 Hz.
NOTE: The performance of games may reduce when using HD 3D mode even if 3DTV Play is disabled.
To maximize performance, select HD or SD mode when 3DTV Play is disabled.
6 Check the HDMI audio on the TV by playing a video, game, or music and adjusting the volume on the TV.
Using NVIDIA 3DTV Play
The NVIDIA 3DTV Play application installed on your computer allows you to play 3D games, watch Blu-ray 3D
videos and 3D videos from your hard drive, and browse 3D photos.
3D Games
NVIDIA 3DTV Play application supports the same games as NVIDIA 3D Vision.
NOTE: For a list of supported 3D games, go to www.nvidia.com.
Playing Games in 3D
1 Launch the game in full-screen mode.
2 If you see a message stating that the current mode is not HDMI 1.4 compatible, set the in-game resolution
to 720p, 1280x720 in HD 3D mode.

Keyboard Shortcuts
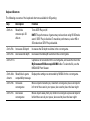
The following are some of the keyboard shortcuts available for 3D gaming:
Keys Description Function
<Ctrl><t> Show/hide
stereoscopic 3D
effects
Turns 3DTV Play on/off.
NOTE: The performance of games may reduce when using HD 3D mode
even if 3DTV Play is disabled. To maximize performance, select HD or
SD mode when 3DTV Play is disabled.
<Ctrl><F4> Increases 3D depth Increases the 3D depth real-time in the current game.
<Ctrl><F3> Decreases 3D depth Decreases the 3D depth real-time in the current game.
<Ctrl><F11> Captures a 3D screenshot of the current game, and saves the file in the
My Documents\NVSteroscopic3D.IMG folder. To view the file, use the
NVIDIA 3D Photo Viewer.
<Ctrl><Alt>
<Insert>
Show/hide in-game
compatibility message
Displays the settings recommended by NVIDIA for the current game.
<Ctrl><F6> Increases
convergence
Moves objects towards you; maximum convergence places all objects
in front of the scene in your space; also used to place the laser sight.
<Ctrl><F5> Decreases
convergence
Moves objects away from you; minimum convergence places all objects
behind the scene in your space; also used to place the laser sight.

Customizing Shortcut Keys
To customize the keyboard shortcuts:
1 Right-click the desktop and select NVIDIA Control Panel.
2 In the NVIDIA Control Panel window, click Stereoscopic 3D to expand the selection (if not already expanded)
and then click Set keyboard shortcuts.
3 Click the box displaying the shortcut you want to change.
4 Press the desired key combination.
5 Click OK to save and exit.
3D Photos
You can view stereoscopic 3D photos using the NVIDIA Photo Viewer available in the NVIDIA 3DTV Play
application. The photo viewer also allows you to edit the 3D effects on the photo.
NOTE: For more information on using the photo viewer and to download 3D photos, go to www.nvidia.com.
Blu-ray 3D
The NVIDIA 3DTV Play application allows you to watch Blu-ray 3D videos at 1080p resolution. For 3D Blu-ray
playback, set the resolution to 1080p, 1920x1080 and refresh rate to 24/23 Hz in HD 3D mode. To watch Blu-ray
3D videos, use the CyberLink Power DVD application installed on your computer.

CyberLink PowerDVD Configuration Options
The CyberLink PowerDVD application detects your 3D TV automatically. The following are the 3D display
configuration options available in PowerDVD:
• Enable Blu-ray Disc 3D playback (enabled by default) — select this option to watch Blu-ray 3D video in 3D
mode; clear this option to watch Blu-ray 3D video in 2D mode.
– 3D display diagonal size (inches) — move the slider to select a range between 0 to 100.
• Enable 3D for video files and DVDs (disabled by default) — select this option to apply the 3D mode based
on the following:
– Use CyberLink TrueTheater 3D — select this option to apply 2D to 3D conversion for DVD playback.
– 3D scene depth — move the slider to select the 3D scene depth.
– Use 3D media file playback — select this option to choose a supported 3D video layout:
(2D Monoscopic/Anaglyph — to watch a 3D video file in 2D mode [left eye image only]; Side by Side;
Over/Under; Auto detection — for H.264 MVC file playback).
• Choose 3D Display — select this option to choose one of the following supported display types:
– Anaglyph Red/Cyan
– 120 Hz Time-sequential 3D LCD (such as NVIDIA 3D Vision Ready LCD + NVIDIA 3D Vision kit or
SAMSUNG UN46C7000 3D LED TV + 3D Shutter Glasses)
– 3D-Ready HDTV (Checkerboard TV + 3D Shutter Glasses)
– Micro-polarizer LCD 3D (Row-interlaced + 3D Glasses)
Click Auto Detect to automatically detect the supported 3D display and diagonal size.

– Swap left and right eye views — this option is available only if your 3D display is supported; this option
is not supported by Anaglyph
NOTE: For more information about using Blu-ray 3D, go to www.nvidia.com.
Support
To see knowledge base articles and frequently asked questions, go to support.nvidia.com.
____________________
Information in this document is subject to change without notice.
© 2010 Dell Inc. All rights reserved. Printed in the Ireland.
Reproduction of these materials in any manner whatsoever without the written permission of Dell Inc. is strictly forbidden.
Trademarks used in this text: Dell™ are trademarks of Dell Inc. Intel
®
is a registered trademark of Intel Corporation in the U.S. and other countries;
Microsoft
®
and Windows
®
are either trademarks or registered trademarks of Microsoft Corporation in the United States and/or other countries;
Blu-ray Disc™ is a trademark of the Blu-ray Disc Association.
Other trademarks and trade names may be used in this document to refer to either the entities claiming the marks and names or their products.
Dell Inc. disclaims any proprietary interest in trademarks and trade names other than its own.


September 2010
3D-tv instellen en gebruiken
In dit document vindt u informatie over het instellen en gebruiken van de 3D-tv-functies op uw computer.
OPMERKING: Zie de systeemeisen op www.nvidia.com/3dtv. als u wilt weten of uw tv de 3D-functies op
uw computer ondersteunt.
3D-tv instellen
1 Sluit uw computer aan op de 3D TV door middel van een HDMI-kabel.
OPMERKING: De HDMI-kabel zendt zowel audio- als videosignalen uit.
2 De HDMI 1.4 3D-tv instellen:
a Blader naar de 3D-menu-instellingen van de tv.
b De 3D-modus instellen op Automatic (Automatisch).
c Stel de oogvolgorde voor de brillen in op default (standaard) of normal (normaal).
OPMERKING: Wijzig de instellingen voor de oogvolgorde niet wanneer u gebruik maakt van
NVIDIA 3DTV Play als de applicatie om de timing van de brillen te beheren.

OPMERKING: Als u niet het hele bureaublad van Windows op uw tv kunt zien, gebruikt u de
ingebouwde opties van de 3D-tv om de schermresolutie te verlagen.
OPMERKING: Zie de documentatie die bij uw tv is meegeleverd voor meer informatie over het
configureren van de 3D-instellingen.
3 Uw tv instellen als de primaire display:
a Klik met de rechtermuisknop op het bureaublad en selecteer NVIDIA Control Panel
(NVIDIA-configuratiescherm).
b Klik in het venster NVIDIA Control Panel (NVIDIA-configuratiescherm) op Display om de selectie
uit te vouwen (als dit nog niet het geval is) en klik vervolgens op Set up multiple display (meerdere
displays instellen).
c Klik met de rechtermuisknop in Verify the display configuration (de displayconfiguratie verifiëren)
op de 3D-tv en selecteer Make this the Windows primary display (Deze display de primaire
Windows-display maken).
4 De NVIDIA 3DTV Play applicatie instellen:
a Klik in het venster NVIDIA Control Panel (NVIDIA-configuratiescherm) op Stereoscopic 3D
(stereoscopisch 3D) om de selectie uit te vouwen (als dit nog niet het geval is) en klik vervolgens op
Set up stereoscopic 3D (stereoscopisch 3D instellen).
b Selecteer het selectievakje Enable stereoscopic 3D (stereoscopisch 3d inschakelen). De 3DTV Play
setupwizard verschijnt.
c Het 3DTV Play-logo moet in het configuratiescherm verschijnen.

5 Pas de resolutie van het bureaublad aan aan de resolutie van het type 3D-inhoud:
a Klik in het venster NVIDIA Control Panel (NVIDIA-configuratiescherm) op Display om de selectie
uit te vouwen (als dit nog niet het geval is) en klik vervolgens op Change resolution (resolutie wijzigen).
b Voor 3D-spellen moet de resolutie worden ingesteld op 720p, 1280x720 en de vernieuwingssnelheid op
60/59 Hz in de HD 3D-modus.
Voor het afspelen van 3D Blu-ray’s moet de resolutie worden ingesteld op 1080p, 1920x1080 en de
vernieuwingssnelheid op 24/23 Hz in de HD 3D-modus.
OPMERKING: Voor tv's die gebruik maken van het PAL-systeem met vernieuwingssnelheden van
50 Hz of 100 Hz, moet de resolutie worden ingesteld op 720p en de vernieuwingssnelheid op 60/59 Hz.
Voor tv's die gebruik maken van het PAL-systeem met vernieuwingssnelheden van 60 Hz of 120 Hz,
moet de resolutie worden ingesteld op 720p en de vernieuwingssnelheid op 60/59 Hz.
OPMERKING: De prestaties van spellen kunnen minder worden wanneer er gebruik wordt
gemaakt van de HD 3D-modus, zelfs als 3DTV Play is uitgeschakeld. Om de prestaties te vergroten,
selecteert u de HD- of SD-modus wanneer 3DTV Play is ingeschakeld.
6 Controleer de HDMI-audio op de tv door een video, spel of muziek af te spelen en het volume op de tv aan
te passen.

NVIDIA 3DTV Play gebruiken
Met de applicatie NVIDIA 3DTV Play op uw computer kunt u 3D-spellen spelen, Blu-ray 3D video's bekijken,
3D-video's vanaf uw vaste schijf bekijken en door 3D-foto's bladeren.
3D-spellen
De applicatie NVIDIA 3DTV Play heeft ondersteuning voor dezelfde spellen als NVIDIA 3D Vision.
OPMERKING: Ga naar www.nvidia.com voor een lijst van ondersteunde 3D-spellen.
Spellen in 3D spelen
1 Start het spel in de volledig-schermmodus.
2 Als er een melding verschijnt waarin staat dat de huidige modus niet compatibel is met HDMI 1.4, moet de
resolutie van het spel worden ingesteld op 720p, 1280x720 in de HD 3D-modus.

Snelkoppelingen voor het toetsenbord
Hieronder vindt u enkele van de toetsenbordsnelkoppelingen die beschikbaar zijn voor 3D-spellen:
Toetsen Beschrijving Function (Functie)
<Ctrl><t> Stereoscopische
3D-effecten tonen/
verbergen
Schakelt 3DTV Play in/uit.
OPMERKING: De prestaties van spellen kunnen minder worden
wanneer er gebruik wordt gemaakt van de HD 3D-modus, zelfs als
3DTV Play is uitgeschakeld. Om de prestaties te vergroten, selecteert
u de HD- of SD-modus wanneer 3DTV Play is ingeschakeld.
<Ctrl><F4> Vergroot de 3D-diepte Vergroot de 3D-diepte in real-time in het huidige spel.
<Ctrl><F3> Verkleint de 3D-diepte Verkleint de 3D-diepte in real-time in het huidige spel.
<Ctrl><F11>
Legt een 3D-screenshot vast van het huidige spel en het bestand wordt
opgeslagen in de map My Documents\NVSteroscopic3D.IMG. Gebruik
de NVIDIA 3D Photo Viewer om bestand te bekijken.
<Ctrl><Alt>
<Insert>
Toont/verbergt de
compabiliteitsmelding
in het spel
Toont de instellingen die door NVIDIA voor het huidige spel worden
aanbevolen.
<Ctrl><F6> Vergroot de
convergentie
Beweegt objecten naar u toe; maximale convergentie plaatst alle
objecten voor de scene in uw ruimte; wordt ook gebruikt om
lasergezicht te plaatsen.
<Ctrl><F5> Verkleint de
convergentie
Beweegt objecten van u af; minimale convergentie plaatst alle
objecten achter de scene in uw ruimte; wordt ook gebruikt om
lasergezicht te plaatsen.

Sneltoetsen aanpassen
Sneltoetsen aanpassen:
1 Klik met de rechtermuisknop op het bureaublad en selecteer NVIDIA Control Panel
(NVIDIA-configuratiescherm).
2 Klik in het venster NVIDIA Control Panel (NVIDIA-configuratiescherm) op Stereoscopic 3D
(stereoscopisch 3D) om de selectie uit te vouwen (als dit nog niet het geval is) en klik vervolgens op
Set keyboard shortcuts (sneltoetsen instellen).
3 Klik op het vak waarin de snelkoppeling wordt weergegeven, die u wilt wijzigen.
4 Druk op de gewenste toetsencombinatie.
5 Klik op OK om op te slaan en af te sluiten.
3D-foto's
U kunt stereoscopische 3D-foto's bekijken met behulp van de NVIDIA Photo Viewer die beschikbaar is in de
applicatie NVIDIA 3DTV Play. Met de fotoviewer kunt u bovendien de 3D-effecten op de foto bewerken.
OPMERKING: Ga naar www.nvidia.com voor meer informatie over het gebruik van de fotoviewer en om
3D-foto's te downloaden.
Blu-ray 3D
Met de applicatie NVIDIA 3DTV Play kunt u Blu-ray 3D-video's bekijken bij een resolutie van 1080p resolutie. Voor
3D-spellen moet de resolutie worden ingesteld op 1080p, 1920x1080 en de vernieuwingssnelheid op 24/23 Hz in de
HD 3D-modus. Gebruik de applicatie CyberLink Power DVD op uw computer om Blu-ray 3D-video's te bekijken.

CyberLink PowerDVD configuratie-opties
De applicatie CyberLink PowerDVD detecteert uw 3D-tv automatisch. Hieronder vindt u de opties voor de
configuratie van de 3D-display die beschikbaar zijn in PowerDVD:
• Enable Blu-ray Disc 3D playback (afspelen van Blu-ray 3D inschakelen) (standaard ingeschakeld) —
selecteer deze optie om Blu-ray 3D-video in de 3D-modus te bekijken; schakel deze optie uit om Blu-ray
3D-video's in de 2D-modus te bekijken.
– 3D display diagonal size (diagonale afmeting van de 3D-display) (in inches) — beweeg de schuifbalk om
een bereik te selecteren tussen 0 en 100.
• Enable 3D for video files and DVDs (3D voor videobestanden en dvd's inschakelen) (standaard
uitgeschakeld) — selecteer deze optie om de 3D-modus toe te passen op basis van het volgende:
– Use CyberLink TrueTheater 3D (CyberLink TrueTheater 3D gebruiken) — selecteer deze optie om de 2D
naar 3D omzetting uit te voeren voor het afspelen van dvd's.
– 3D scene depth (diepte van 3D-scene) — beweeg de schuifbalk om de diepte van de 3D-scene te
selecteren.
– Use 3D media file playback (afspelen van 3D-mediabestand gebruiken) — selecteer deze optie om een
ondersteunde 3D-video-indeling te kiezen:
(2D Monoscopic/Anaglyph (2D monoscopisch/anaglief) — om een 3D-videobestand in de 2D-modus te
bekijken [uitsluitend beeld voor linkeroog]; Side by Side (zijdelings); Over/Under (over/onder); Auto
detection (automatische detectie) — voor afspelen van H.264 MVC-bestanden)
• Choose 3D Display (3D-display kiezen) — selecteer deze optie om een van de volgende ondersteunde
displaytypes te selecteren:
– Anaglyph Red/Cyan (anaglief rood/cyaan)

– 120 Hz Time-sequential 3D LCD (zoals NVIDIA 3D Vision Ready LCD + NVIDIA 3D Vision-kit of SAMSUNG
UN46C7000 3D-led-tv + 3D-shutterbrillen)
– 3D-Ready HDTV (Checkerboard TV + 3D-shutterbrillen)
– Micro-polarizer LCD 3D (Row-interlaced + 3D-brillen)
Klik op Auto Detect (automatisch detecteren) om automatisch de ondersteunde 3D-display en diagonale
afmeting te detecteren.
– Swap left and right eye views (beelden linker- en rechteroog wisselen) — deze optie is uitsluitend
beschikbaar als uw 3D-display wordt ondersteund; deze optie wordt niet ondersteund door Anaglyph
(anaglief)
OPMERKING: Ga naar www.nvidia.com voor meer informatie over het gebruik van Blu-ray 3D.
Ondersteuning
Ga naar support.nvidia.com om artikelen en veelgestelde vragen in de kennisbank te bekijken.
____________________
De informatie in dit document kan zonder voorafgaande kennisgeving worden gewijzigd.
© 2010 Dell Inc. Alle rechten voorbehouden. Gedrukt in Ierland.
Verveelvoudiging van dit materiaal, op welke wijze dan ook, zonder de schriftelijke toestemming van Dell Inc. is strikt verboden.
Handelsmerken die in dit document worden gebruikt: Dell™ is een handelsmerk van Dell Inc. Intel
®
is een gedeponeerd handelsmerk van Intel
Corporation in de VS en andere landen; Microsoft
®
en Windows
®
zijn handelsmerken of gedeponeerde handelsmerken van Microsoft Corporation
in de Verenigde Staten en/of andere landen; Blu-ray Disc™ is een handelsmerk van Blu-ray Disc Association.
Andere handelsmerken en handelsnamen die mogelijk in dit document worden gebruikt, dienen ter aanduiding van de rechthebbenden van die
merken en namen of ter aanduiding van hun producten. Dell Inc. claimt op geen enkele wijze enig eigendomsrecht ten aanzien van andere merken
of handelsnamen dan zijn eigen merken en handelsnamen.

Septembre 2010
Configuration et utilisation de la TV 3D
Ce document offre des informations sur comment configurer et utiliser les fonctions de TV 3D disponibles sur
votre ordinateur.
REMARQUE : pour savoir si votre TV prend en charge les fonctions 3D disponibles sur votre ordinateur,
reportez-vous aux requis système sur www.nvidia.com/3dtv.
Configuration de la TV 3D
1 Connectez votre ordinateur à la TV 3D en utilisant un câble HDMI.
REMARQUE : le câble HDMI transmet à la fois les signaux audios et vidéos.
2 Configurer le HDMI 1.4 3D TV :
a Rendez-vous sur le menu de configuration de la TV 3D.
b Basculez le mode 3D sur Automatique.
c Configurez l'ordre des yeux pour les lunettes sur défaut ou normal.
REMARQUE : ne modifiez pas la configuration de l'ordre des yeux lorsque vous utilisez NVIDIA
3DTV Play car cette application contrôle la fréquence des lunettes.

REMARQUE : si vous ne pouvez pas voir le bureau Windows en entier sur votre TV, utilisez les
options intégrées de la TV 3D pour réduire la résolution d'affichage.
REMARQUE : pour de plus amples informations sur la configuration des paramètres 3D,
reportez-vous à la documentation livrée avec votre TV.
3 Passer votre TV en affichage principal :
a Cliquez droit sur le bureau et cliquez sur Panneau de contrôle NVIDIA.
b Dans le Panneau de contrôle NVIDIA, cliquez sur Affichage pour développer la sélection (le cas échéant)
puis cliquez sur Configurer plusieurs affichages.
c Dans la section Vérifiez la configuration de votre affichage, cliquez droit sur la TV 3D et sélectionnez
Faire de ceci l'affichage principal de Windows.
4 Configurer l'application NVIDIA 3DTV Play :
a Dans le Panneau de contrôle NVIDIA, cliquez sur 3D stéréoscopique pour développer la sélection
(le cas échéant) puis cliquez sur Configurer la 3D stéréoscopique.
b Cochez la case Activer la 3D stéréoscopique. L'assistant de configuration 3DTV Play s'affiche.
c Assurez-vous que le logo 3DTV Play apparaît dans le panneau de configuration.
5 Modifiez la résolution du bureau pour l'adapter à la résolution du type de contenu 3D :
a Dans le Panneau de contrôle NVIDIA, cliquez sur Affichage pour développer la sélection (le cas échéant)
puis cliquez sur Modifier la résolution.
b Pour le jeu 3D, sélectionnez une résolution de 720p, 1280x720 et une fréquence de rafraîchissement de
60/59 Hz en mode 3D HD.
Pour la lecture de Blu-ray 3D, sélectionnez une résolution de 1080p, 1920x1080 et une fréquence de
rafraîchissement de 24/23 Hz en mode 3D HD.

REMARQUE : pour les télévisions utilisant le système PAL supportant des fréquences de
rafraîchissement de 50 Hz ou 100 Hz, sélectionnez une résolution de 720p et une fréquence de
rafraîchissement de 60/59 Hz. Pour les télévisions utilisant le système PAL supportant des
fréquences de rafraîchissement de 60 Hz ou 120 Hz, sélectionnez une résolution de 720p et une
fréquence de rafraîchissement de 60/59 Hz.
REMARQUE : les performances des jeux pourraient être réduites par l'utilisation du mode 3D HD
même si 3DTV Play est désactivé. Pour optimiser les performances, sélectionnez les modes HD ou
SD lorsque 3DTV Play est désactivé.
6 Vérifiez l'audio HDMI sur la TV en lisant une vidéo, jeu ou musique et en ajustant le volume de la TV.
Utilisation de NVIDIA 3DTV Play
L'application NVIDIA 3DTV Play installée sur votre ordinateur vous permet de jouer à des jeux en 3D, de
regarder des vidéos Blu-ray en 3D et des vidéos et photos en 3D depuis votre disque dur.
Jeux 3D
L'application NVIDIA 3DTV Play prend en charge les mêmes jeux que ceux sous NVIDIA 3D Vision.
REMARQUE : pour obtenir la liste des jeux 3D pris en charge, rendez-vous sur www.nvidia.com.
Jouer à des jeux 3D
1 Lancez le jeu en mode plein écran.
2 Si vous voyez un message déclarant que le mode actuel ne prend pas en charge le HDMI 1.4, passez la
résolution du jeu en 720p, 1280x720 dans le mode 3D HD.

Raccourcis clavier
Ci-dessous sont certains des raccourcis claviers disponibles pour le jeu 3D :
Touches Description Fonction
<Ctrl><t> Active ou désactive
les effets 3D
stéréoscopiques
Active ou désactive 3DTV Play.
REMARQUE : les performances des jeux pourraient être réduites par
l'utilisation du mode 3D HD même si 3DTV Play est désactivé. Pour optimiser
les performances, sélectionnez les modes HD ou SD lorsque 3DTV Play
est désactivé.
<Ctrl><F4> Augmente la
profondeur de la 3D
Augmente la profondeur de la 3D en temps réel dans le jeu en cours.
<Ctrl><F3> Réduit la profondeur
de la 3D
Réduit la profondeur de la 3D en temps réel dans le jeu en cours.
<Ctrl><F11> Effectue une capture d'écran 3D du jeu en cours et enregistre le fichier
dans le dossier Mes Documents\NVSteroscopic3D.IMG. Pour voir le
fichier, utilisez le NVIDIA 3D Photo Viewer.
<Ctrl><Alt>
<Insert>
Affiche ou masque
le message de
compatibilité
dans le jeu
Affiche les paramètres recommandés par NVIDIA pour le jeu en cours.
La page est en cours de chargement...
La page est en cours de chargement...
La page est en cours de chargement...
La page est en cours de chargement...
La page est en cours de chargement...
La page est en cours de chargement...
La page est en cours de chargement...
La page est en cours de chargement...
La page est en cours de chargement...
La page est en cours de chargement...
La page est en cours de chargement...
La page est en cours de chargement...
La page est en cours de chargement...
La page est en cours de chargement...
La page est en cours de chargement...
La page est en cours de chargement...
La page est en cours de chargement...
La page est en cours de chargement...
La page est en cours de chargement...
La page est en cours de chargement...
-
 1
1
-
 2
2
-
 3
3
-
 4
4
-
 5
5
-
 6
6
-
 7
7
-
 8
8
-
 9
9
-
 10
10
-
 11
11
-
 12
12
-
 13
13
-
 14
14
-
 15
15
-
 16
16
-
 17
17
-
 18
18
-
 19
19
-
 20
20
-
 21
21
-
 22
22
-
 23
23
-
 24
24
-
 25
25
-
 26
26
-
 27
27
-
 28
28
-
 29
29
-
 30
30
-
 31
31
-
 32
32
-
 33
33
-
 34
34
-
 35
35
-
 36
36
-
 37
37
-
 38
38
-
 39
39
-
 40
40


Dell XPS 17 L701X Guide de démarrage rapide
- Taper
- Guide de démarrage rapide
dans d''autres langues
- italiano: Dell XPS 17 L701X Guida Rapida
- Deutsch: Dell XPS 17 L701X Schnellstartanleitung
- Nederlands: Dell XPS 17 L701X Snelstartgids