Philips FC6141/01 Manuel utilisateur
- Catégorie
- Aspirateurs portables
- Taper
- Manuel utilisateur
Ce manuel convient également à

FC6141


1
10
9
11 12
2
3
4
5
6
7
13
15
8
A
B
14
1


6
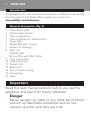
Introduction
Congratulations on your purchase and welcome to Philips! To fully benet
from the support that Philips offers, register your product at
www.philips.com/welcome.
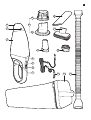
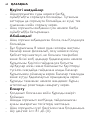
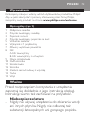
General description (Fig. 1)
1 Detachable nozzle
2 Nozzle release button
3 Dust compartment
4 Dust compartment release button
5 Power light
6 On/off slide with 1 speed
7 Exhaust air openings
8 Filter unit
A. Outer lter
B. Inner lter with lter holder
9 Long crevice tool
10 Large brush tool
11 Crevice tool
12 Brush tool
13 Car cord with car plug
14 Storage bag
15 Hose
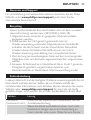
Important
Read this user manual carefully before you use the
appliance and save it for future reference.
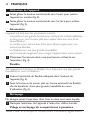
Danger
-
Never vacuum up water or any other liquid. Never
vacuum up ammable substances and do not
vacuum up ashes until they are cold.
ENGLISH

- Never immerse the vacuum cleaner in water or
any other liquid.
Warning
- Do not use the vacuum cleaner if it is damaged.
-
This appliance can be used by children aged from
8 years and above and by persons with reduced
physical, sensory or mental capabilities or lack of
experience and knowledge if they have been given
supervision or instruction concerning use of the
appliance in a safe way and if they understand the
hazards involved. Children shall not play with the
appliance. Cleaning and user maintenance shall not be
made by children without supervision.
- The plug must be removed from the socket-outlet
before cleaning or maintaining the appliance.
Caution
- Always switch off the vacuum cleaner after use.
- Never block the exhaust air openings during
vacuuming.
- Always use the vacuum cleaner with the lter unit
assembled.
- Noise level: Lc = 81 dB(A)
Electromagnetic elds (EMF)
This Philips appliance complies with all applicable standards and
regulations regarding exposure to electromagnetic elds.
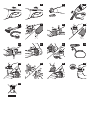
Using the appliance
1 Push the on/off slide forwards to switch on the appliance (Fig. 2).
2 Push the on/off slide backwards to switch off the appliance (Fig. 3).
ENGLISH 7

Accessories
The appliance comes with the following accessories:
- a small and large brush tool to clean delicate surfaces;
- a long and short crevice tool to vacuum corners or narrow gaps;
- a car cord with car plug for unlimited runtime;
- a hose for extended reach;
- a storage bag to store the appliance in your car.
1 Take the accessory you want to use and attach the accessory to
the nozzle of the appliance (Fig. 4).
Hose
This appliance comes with a hose and tube for extended reach during
vacuum cleaning.
1 Insert the appliance end of the hose into the nozzle of the
appliance (Fig. 5).
2 Attach the brush tool or the crevice tool to the attachment end of
the hose for extended reach during vacuum cleaning (Fig. 6).
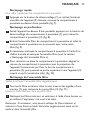
Cleaning
Never immerse the vacuum cleaner in water or any other liquid.
1 Clean the outside of the appliance with a damp cloth.
Emptying and cleaning the dust compartment
Make sure you empty and clean the dust compartment regularly.
Quick cleaning
To empty the dust compartment quickly:
1 Press the nozzle release button (1) and take the detachable nozzle
off the appliance (2). Then shake the contents of the dust
compartment out into a dustbin (Fig. 7).
Thorough cleaning
1 Hold the appliance over a dustbin, press the dust compartment
release button (1) and remove the dust compartment (2) (Fig. 8).
ENGLISH8

2 Removethelterunitfromthedustcompartmentandemptythe
dust compartment by shaking it with your free hand (Fig. 9).
3 If necessary, clean the dust compartment with a damp cloth and
cleanthelterunit(seesection‘Cleaningthelterunit’).
4 To reattach the dust compartment, align the slot on the dust
compartment with the projection on the appliance. First attach the
bottom of the dust compartment (1). Then push the top of the dust
compartment towards the appliance (2) until it locks into place
(‘click’)(Fig.10).
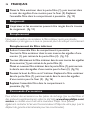
Cleaning the lter unit
Make sure you clean the lter unit regularly.
1 Turntheouterlteranticlockwise(1)andremoveitfromthelter
holder (2) (Fig. 11).
Leave the inner lter attached to the lter holder.
2 Cleantheinnerlterandtheouterlterwithabrushorwitha
normal vacuum cleaner if they are very dirty.
Note: If necessary , you can clean the inner lter and the outer lter in cold
or lukewarm water. Dry the inner and outer lter thoroughly before you use
the lter unit again.
3 Placetheouterlterbackontothelterholder(1)andturnit
clockwisetoattachit(2).Putthelterunitbackintothedust
compartment. (Fig. 12)
Storage
1 You can store the vacuum cleaner and the accessories in the
storage bag. (Fig. 13)
Replacement
We advise you to replace the inner lter after a prolonged period of use
or if you can no longer clean it properly.
ENGLISH 9

Replacing the inner lter
1
Removethelterunitfromthedustcompartment.Turntheouterlter
anticlockwise(1)andremoveitfromthelterholder(2).(Fig.14)
2 Gentlyturntheinnerlteranticlockwise(1)andremoveitfrom
thelterholder(2).Placeanewinnerlteronthelterholder(1)
and turn it clockwise to attach it (2). (Fig. 15)
3 Pushthetipoftheinnerlterinwards.Placetheouterlteronthe
lterholder(1)andturnitclockwisetoattachit(2).(Fig.16)
4 Putthelterunitbackintothedustcompartment(Fig.17).
Ordering accessories
To buy accessories or spare parts (such as lters and additional nozzles),
visit www.shop.philips.com/service or go to your Philips dealer.
You can also contact the Philips Consumer Care Centre in your country
(see the worldwide guarantee leaet for contact details).
Warranty and support
If you need information or support, please visit www.philips.com/support
or read the international warranty leaet.
Recycling
- This symbol means that this product shall not be disposed of with
normal household waste (2012/19/EU) (Fig. 18).
- Follow your country’s rules for the separate collection of electrical and
electronic products. Correct disposal helps prevent negative
consequences for the environment and human health.
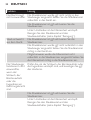
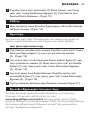
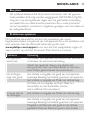
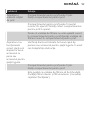
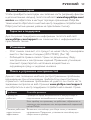
Troubleshooting
This chapter summarises the most common problems you could encounter
with the appliance. If you are unable to solve the problem with the
information below, visit www.philips.com/support for a list of frequently
asked questions or contact the Consumer Care Centre in your country.
ENGLISH10

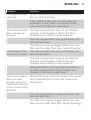
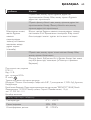
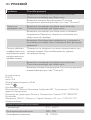
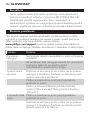
Problem Solution
The appliance does
not work.
Check the capacity of the car battery and check
the car cord connection.
If the appliance still does not work, take the
appliance to your dealer or a service centre
authorised by Philips for examination.
The vacuum cleaner
does not vacuum
properly.
The dust compartment may not be attached
properly to the appliance. Attach the dust
compartment properly to the appliance.
The dust compartment may be full. Empty the
dust compartment.
The lter unit may be clogged. Clean the inner
lter and the outer lter (see chapter ‘Cleaning’).
Dust escapes from
the vacuum cleaner.
The dust compartment may be full. Empty the
dust compartment.
The dust compartment may not be attached
properly to the appliance. Attach the dust
compartment properly to the appliance.
Perhaps the lter unit is not placed properly in
the dust compartment. Place the lter unit
properly in the dust compartment.
The vacuum cleaner
does not work
properly when the
hose, the brush tool
or the crevice tool is
attached.
Check if the hose, the brush head or the crevice
tool is blocked. If this is the case, remove the
obstruction.
The dust compartment may be full. Empty the
dust compartment.
The lter unit may be clogged. Clean the inner
lter and the outer lter (see chapter ‘Cleaning’).
ENGLISH 11

12
Úvod
Blahopřejeme vám k nákupu a vítáme vás ve společnosti Philips.
Abyste mohli plně využít podpory, kterou Philips poskytuje, zaregistrujte
svůj výrobek na adrese www.philips.com/welcome.
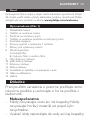
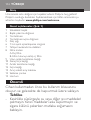
Všeobecný popis (Obr. 1)
1 Odnímatelná hubice
2 Tlačítko pro uvolnění hubice
3 Prachová komora
4 Tlačítko pro otevření prachové komory
5 Kontrolka POWER (zapnutí/vypnutí)
6 Vypínač s jednou rychlostí
7 Výstupní otvory vzduchu
8 Jednotka ltru
A. Vnější ltr
B. Vnitřní ltr s držákem ltru
9 Dlouhá štěrbinová hubice
10 Velká kartáč
11 Nástavec pro štěrbiny
12 Kartáč
13 Kabel se zástrčkou do automobilu
14 Úložné pouzdro
15 Hadice
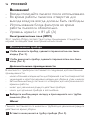
Důležité
Před použitím přístroje si pečlivě přečtěte tuto
uživatelskou příručku a uschovejte ji pro budoucí
použití.
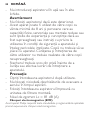
Nebezpečí
- Nikdy nevysávejte vodu nebo jinou tekutinu. Také
nikdy nevysávejte hořlavé látky nebo popel, pokud
není zcela vychladlý.
ČEŠTINA

- Nikdy neponořujte vysavač do vody nebo do jiné
tekutiny.
Varování
- Nepoužívejte vysavač, pokud je poškozený.
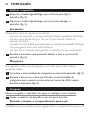
- Děti od 8 let a osoby s omezenými fyzickými,
senzorickými nebo mentálními schopnostmi nebo
nedostatečnou zkušeností či znalostí mohou přístroj
používat jedině v případě, že jsou pod dohledem
nebo byly poučeny o bezpečném používání přístroje
a rozumí všem rizikům spojeným s používáním
přístroje. Čištění a uživatelskou údržbu nesmí
provádět děti bez dozoru.
- Před čištěním nebo údržbou přístroje je nutné
odpojit zástrčku od síťové zásuvky.
Upozornění
- Po použití vysavač vždy vypněte.
- Nikdy neblokujte výstupní otvory vzduchu během
vysávání.
- Vysavač používejte vždy s nasazenou jednotkou
ltru.
- Hladina hluku: Lc = 81 dB (A)
Elektromagnetická pole (EMP)
Tento přístroj Philips odpovídá všem platným normám a předpisům
týkajícím se elektromagnetických polí.
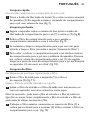
Použití přístroje
1 Zapnětepřístrojposunutímvypínačesměremdopředu(Obr.2).
2 Vypnětepřístrojposunutímvypínačesměremdozadu(Obr.3).
ČEŠTINA 13

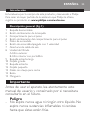
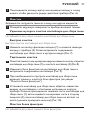
Příslušenství
S přístrojem je dodáváno následující příslušenství:
- malý a velký kartáč pro čištění jemných povrchů
- dlouhý a krátký štěrbinový nástavec pro vysávání rohů a úzkých mezer
- kabel se zástrčkou do automobilu pro neomezený provoz
- hadice pro zvýšený dosah
- úložné pouzdro pro uskladnění přístroje ve vozu.
1 Uchoptepříslušenství,kteréchcetepoužít,aupevnětehonahubici
přístroje(Obr.4).
Hadice
Tento přístroj je dodáván s hadicí a trubicí pro zvýšení dosahu během vysávání.
1 Zasuňtekonechadicedohubicepřístroje(Obr.5).
2 Prozvýšenídosahuběhemvysávánípřipojtekartáčovýnástavec
nebonástavecproštěrbinykekoncihadicepropřipojení
knástavci(Obr.6).
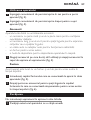
Čištění
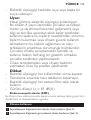
Nikdyneponořujtevysavačdovodynebodojinétekutiny.
1 Vnějšípovrchpřístroječistětenavlhčenýmhadříkem.
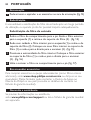
Vyprazdňování a čištění prachové komory
Prachovou komoru vyprazdňujte a čistěte pravidelně.
Rychlé čištění
Rychlé vyprázdnění prachové komory:
1 Stisknětetlačítkoprouvolněníhubice(1)aodnímatelnouhubici
vyjmětezpřístroje(2).Vysypteobsahprachovékomorydo
odpadkovéhokoše(Obr.7).
Důkladné čištění
1 Držtepřístrojnadodpadkovýmkošem,stisknětetlačítkopro
otevřeníprachovékomory(1)avyjměteprachovou
komoru(2)(Obr.8).
ČEŠTINA14

2 Zprachovékomoryvyjmětejednotkultruatřepánímvyprázdněte
prachovoukomoru(Obr.9).
3 Vpřípaděpotřebyvyčistěteprachovoukomorunavlhčenýmhadříkem
avyčistětejednotkultru(vizčást„Čištěníjednotkyltru“).
4 Znovupřipevněteprachovoukomorutak,žepřiložíteotvorna
komořekvýstupkunapřístroji.Nejprvepřipevnětespodníčást
prachovékomory(1).Pakzatlačtejejíhorníčástsměremkpřístroji(2),
dokudnezapadnenamísto(ozvese„klapnutí“)(Obr.10).
Čištění jednotky ltru
Jednotku ltru čistěte pravidelně.
1 Vnějšímltremotočteprotisměruhodinovýchručiček(1)a
vyjmětejejzdržáku(2)(Obr.11).
Vnitřní ltr nechte připevněný k držáku.
2 Vnitřníivnějšíltrvyčistětekartáčkemnebo,pokudjeznačně
znečištěný,pomocíběžnéhovysavače.
Poznámka: V případě potřeby lze vnitřní i vnější ltr vyčistit studenou nebo
vlažnou vodou. Před dalším použitím jednotky ltru vnitřní i vnější ltr
důkladně vysušte.
3 Vložtevnějšíltrzpětdodržáku(1)aotáčenímvesměru
hodinovýchručičekjejpřipevněte(2).Vložtejednotkultruzpětdo
prachovékomory.(Obr.12)
Skladování
1 Vysavačapříslušenstvímůžeteskladovatvúložnémvaku.(Obr.13)
Výměna
Vnitřní ltr doporučujeme vyměnit po delším používání, nebo pokud ho
již nelze řádně vyčistit.
Výměna vnitřního ltru
1 Vyjměteltrzprachovékomory.Vnějšímltremotočteproti
směruhodinovýchručiček(1)avyjmětejejzdržáku(2).(Obr.14)
ČEŠTINA 15

2 Vnitřnímltremjemněotočteprotisměruhodinovýchručiček(1)
avyjmětejejzdržáku(2).Novývnitřníltrvložtedodržáku(1)a
otáčenímvesměruhodinovýchručičekjejpřipevněte(2).(Obr.15)
3 Špičkuvnitřníholtruzatlačtesměremdovnitř.Vnějšíltrvložtedo
držáku(1)aotáčenímvesměruhodinovýchručičekjej
připevněte(2).(Obr.16)
4 Vložtejednotkultruzpětdoprachovékomory(Obr.17).
Objednávání příslušenství
Chcete-li koupit příslušenství nebo náhradní díly (jako ltry nebo další
hubice), navštivte adresu www.shop.philips.com/service nebo se
obraťte na prodejce výrobků Philips. Také můžete kontaktovat středisko
péče o zákazníky společnosti Philips ve své zemi (kontaktní informace
naleznete na záručním listu s celosvětovou platností).
Záruka a podpora
Více informací a podpory naleznete na adrese www.philips.com/
support nebo samostatném záručním listu s celosvětovou platností.
Životní prostředí
- Tento symbol znamená, že výrobek nelze likvidovat s běžným
komunálním odpadem (2012/19/EU) (Obr. 18).
- Dodržujte předpisy vaší země týkající se sběru tříděného odpadu
elektrických a elektronických výrobků. Správnou likvidací pomůžete
zabránit negativním dopadům na životní prostředí a lidské zdraví.
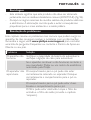
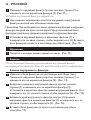
Řešení problémů
V této kapitole jsou shrnuty nejběžnější problémy, se kterými se můžete
u přístroje setkat. Pokud se vám nepodaří problém vyřešit podle
následujících informací, navštivte webové stránky www.philips.com/
support, kde jsou uvedeny odpovědi na nejčastější dotazy, nebo
kontaktujte Středisko péče o zákazníky ve své zemi.
ČEŠTINA16

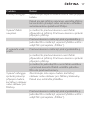
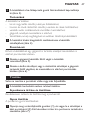
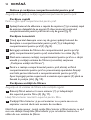
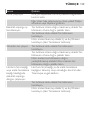
Problém Řešení
Přístroj nefunguje. Zkontrolujte kapacitu baterie vozu a také připojení
kabelu.
Pokud ani pak přístroj nepracuje, vezměte přístroj
ke kontrole k prodejci nebo servisnímu středisku
autorizovanému společností Philips.
Vysavač řádně
nevysává.
Je možné, že prachová komora není řádně
připevněna k přístroji. Prachovou komoru správně
připojte k přístroji.
Prachová komora může být plná. Vyprázdněte ji.
Jednotka ltru může být ucpaná. Vyčistěte vnitřní i
vnější ltr (viz kapitola „Čištění“).
Z vysavače uniká
prach.
Prachová komora může být plná. Vyprázdněte ji.
Je možné, že prachová komora není řádně
připevněna k přístroji. Prachovou komoru správně
připojte k přístroji.
Je možné, že jednotka ltru není řádně umístěna
v prachové komoře. Řádně umístěte jednotku
ltru do prachové komory.
Vysavač nefunguje
správně, pokud je
připojena hadice,
kartáčový nástavec
nebo nástavec pro
štěrbiny.
Zkontrolujte, zda nejsou hadice, kartáčový
nástavec nebo nástavec pro štěrbiny blokovány.
Pokud ano, odstraňte překážku.
Prachová komora může být plná. Vyprázdněte ji.
Jednotka ltru může být ucpaná. Vyčistěte vnitřní i
vnější ltr (viz kapitola „Čištění“).
ČEŠTINA 17

18
Einführung
Herzlichen Glückwunsch zu Ihrem Kauf und willkommen bei Philips!
Um die Unterstützung von Philips optimal nutzen zu können,
registrieren Sie Ihr Produkt bitte unter www.philips.com/welcome.
Allgemeine Beschreibung (Abb. 1)
1 Abnehmbare Düse
2 Entriegelungstaste der Düse
3 Staubkammer
4 Entriegelungstaste für Staubkammer
5 Betriebsanzeige
6 Ein-/Ausschalter mit einer Geschwindigkeit
7 Abluftöffnungen
8 Filtereinheit
A. Staubbeutelhalter
B. Staubbeutel mit Filterhalter
9 Lange Fugendüse
10 Großer Bürstenaufsatz
11 Fugendüse
12 Bürstenaufsatz
13 Autokabel mit Autoadapter
14 Aufbewahrungstasche
15 Schlauch
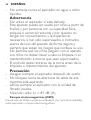
Wichtig
Lesen Sie diese Bedienungsanleitung vor dem
Gebrauch des Geräts aufmerksam durch, und
bewahren Sie sie für eine spätere Verwendung auf.
Gefahr
- Saugen Sie mit diesem Gerät niemals Wasser oder
andere Flüssigkeiten auf. Saugen Sie auch keine
leicht entzündbaren Substanzen auf, und saugen Sie
Asche erst auf, wenn sie völlig ausgekühlt ist.
DEUTSCH

- Tauchen Sie den Staubsauger niemals in Wasser oder
andere Flüssigkeiten.
Warnhinweis
- Verwenden Sie den Staubsauger nicht, wenn
Beschädigungen daran erkennbar sind.
- Dieses Gerät kann von Kindern ab 8 Jahren und
Personen mit verringerten physischen, sensorischen
oder psychischen Fähigkeiten oder Mangel an
Erfahrung und Kenntnis verwendet werden, wenn sie
bei der Verwendung beaufsichtigt werden oder
Anweisung zum sicheren Gebrauch des Geräts
erhalten und die Gefahren verstanden haben. Kinder
dürfen nicht mit dem Gerät spielen. Die Reinigung
und Pege des Geräts darf von Kindern nicht ohne
Aufsicht durchgeführt werden.
- Der Stecker muss vor der Reinigung oder Wartung
des Geräts aus der Buchse gezogen werden.
Achtung
- Schalten Sie den Staubsauger nach jedem
Gebrauch wieder aus.
- Blockieren Sie während des Staubsaugens
keinesfalls die Abluftöffnungen.
- Verwenden Sie den Staubsauger ausschließlich mit
aufgesetzter Filtereinheit.
- Geräuschpegel: Lc = 81 dB(A)
Elektromagnetische Felder
Dieses Philips Gerät erfüllt sämtliche Normen und Regelungen bezüglich
der Exposition in elektromagnetischen Feldern.
DEUTSCH 19

Das Gerät benutzen
1 Schieben Sie den Ein-/Ausschalter nach vorn, um das Gerät
einzuschalten (Abb. 2).
2 Schieben Sie den Ein-/Ausschalter zurück, um das Gerät
auszuschalten (Abb. 3).
Zubehör
Die folgenden Zubehörteile sind im Lieferumfang enthalten:
- ein kleiner und ein großer Bürstenaufsatz zum Reinigen empndlicher
Oberächen;
- eine lange und eine kurze Fugendüse zum Saugen in Ecken und engen
Zwischenräumen;
- ein Autokabel mit einem Autoadapter für unbegrenzte Laufzeit;
- ein Schlauch für eine größere Reichweite;
- eine Aufbewahrungstasche zum Verstauen des Geräts in Ihrem Auto.
1 Nehmen Sie das Zubehörteil, das Sie verwenden möchten,
und bringen Sie es an der Düse des Geräts an (Abb. 4).
Schlauch
Dieses Gerät wird mit einem Schlauch und einem Rohr geliefert,
damit Sie beim Staubsaugen eine größere Reichweite haben.
1 Setzen Sie das geräteseitige Schlauchende in die
Gerätedüse (Abb. 5).
2 Befestigen Sie den Bürstenaufsatz oder die Fugendüse am anderen
Schlauchende, damit Sie beim Staubsaugen eine größere Reichweite
haben (Abb. 6).
Pege
Tauchen Sie den Staubsauger niemals in Wasser oder andere Flüssigkeiten.
1 Reinigen Sie das Gerät von außen mit einem feuchten Tuch.
DEUTSCH20
La page charge ...
La page charge ...
La page charge ...
La page charge ...
La page charge ...
La page charge ...
La page charge ...
La page charge ...
La page charge ...
La page charge ...
La page charge ...
La page charge ...
La page charge ...
La page charge ...
La page charge ...
La page charge ...
La page charge ...
La page charge ...
La page charge ...
La page charge ...
La page charge ...
La page charge ...
La page charge ...
La page charge ...
La page charge ...
La page charge ...
La page charge ...
La page charge ...
La page charge ...
La page charge ...
La page charge ...
La page charge ...
La page charge ...
La page charge ...
La page charge ...
La page charge ...
La page charge ...
La page charge ...
La page charge ...
La page charge ...
La page charge ...
La page charge ...
La page charge ...
La page charge ...
La page charge ...
La page charge ...
La page charge ...
La page charge ...
La page charge ...
La page charge ...
La page charge ...
La page charge ...
La page charge ...
La page charge ...
La page charge ...
La page charge ...
La page charge ...
La page charge ...
La page charge ...
La page charge ...
La page charge ...
La page charge ...
La page charge ...
La page charge ...
La page charge ...
La page charge ...
La page charge ...
La page charge ...
La page charge ...
La page charge ...
La page charge ...
La page charge ...
La page charge ...
La page charge ...
La page charge ...
La page charge ...
La page charge ...
La page charge ...
La page charge ...
La page charge ...
La page charge ...
La page charge ...
La page charge ...
La page charge ...
La page charge ...
La page charge ...
La page charge ...
La page charge ...
La page charge ...
La page charge ...
La page charge ...
La page charge ...
La page charge ...
La page charge ...
La page charge ...
La page charge ...
La page charge ...
La page charge ...
La page charge ...
La page charge ...
La page charge ...
La page charge ...
La page charge ...
La page charge ...
La page charge ...
La page charge ...
La page charge ...
La page charge ...
La page charge ...
La page charge ...
La page charge ...
La page charge ...
-
 1
1
-
 2
2
-
 3
3
-
 4
4
-
 5
5
-
 6
6
-
 7
7
-
 8
8
-
 9
9
-
 10
10
-
 11
11
-
 12
12
-
 13
13
-
 14
14
-
 15
15
-
 16
16
-
 17
17
-
 18
18
-
 19
19
-
 20
20
-
 21
21
-
 22
22
-
 23
23
-
 24
24
-
 25
25
-
 26
26
-
 27
27
-
 28
28
-
 29
29
-
 30
30
-
 31
31
-
 32
32
-
 33
33
-
 34
34
-
 35
35
-
 36
36
-
 37
37
-
 38
38
-
 39
39
-
 40
40
-
 41
41
-
 42
42
-
 43
43
-
 44
44
-
 45
45
-
 46
46
-
 47
47
-
 48
48
-
 49
49
-
 50
50
-
 51
51
-
 52
52
-
 53
53
-
 54
54
-
 55
55
-
 56
56
-
 57
57
-
 58
58
-
 59
59
-
 60
60
-
 61
61
-
 62
62
-
 63
63
-
 64
64
-
 65
65
-
 66
66
-
 67
67
-
 68
68
-
 69
69
-
 70
70
-
 71
71
-
 72
72
-
 73
73
-
 74
74
-
 75
75
-
 76
76
-
 77
77
-
 78
78
-
 79
79
-
 80
80
-
 81
81
-
 82
82
-
 83
83
-
 84
84
-
 85
85
-
 86
86
-
 87
87
-
 88
88
-
 89
89
-
 90
90
-
 91
91
-
 92
92
-
 93
93
-
 94
94
-
 95
95
-
 96
96
-
 97
97
-
 98
98
-
 99
99
-
 100
100
-
 101
101
-
 102
102
-
 103
103
-
 104
104
-
 105
105
-
 106
106
-
 107
107
-
 108
108
-
 109
109
-
 110
110
-
 111
111
-
 112
112
-
 113
113
-
 114
114
-
 115
115
-
 116
116
-
 117
117
-
 118
118
-
 119
119
-
 120
120
-
 121
121
-
 122
122
-
 123
123
-
 124
124
-
 125
125
-
 126
126
-
 127
127
-
 128
128
-
 129
129
-
 130
130
-
 131
131
-
 132
132


Philips FC6141/01 Manuel utilisateur
- Catégorie
- Aspirateurs portables
- Taper
- Manuel utilisateur
- Ce manuel convient également à
dans d''autres langues
- italiano: Philips FC6141/01 Manuale utente
- slovenčina: Philips FC6141/01 Používateľská príručka
- Türkçe: Philips FC6141/01 Kullanım kılavuzu
- română: Philips FC6141/01 Manual de utilizare
Documents connexes
-
Philips FC6141/01 Manuel utilisateur
-
Philips FC6141/61 Manuel utilisateur
-
Philips GC430/27 Une information important
-
-
Philips MINIVAC Manuel utilisateur
-
Philips FC8120/09 Une information important
-
-
Philips FC6145 Manuel utilisateur
-
-
Philips FC6146/02 Manuel utilisateur