La page est en cours de chargement...

MONTANA 12 SLEEPER PROTECT
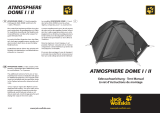
Legen Sie den Inhalt der Tragetasche auf den Boden.
Sortieren Sie die Komponenten wie abgebildet.
Stecken Sie alle Fiberglas- und Stahlstangen wie abgebildet zusammen.
Außenzelt
• Breiten Sie das Außenzelt ach auf dem Boden aus. Vergewissern Sie sich, dass alle Türen und
Reißverschlüsse geschlossen sind.
• Befestigen Sie alle 4 Ecken mit den Heringen.
• Stecken Sie die Fiberglasstangen in die Stangenkanäle.
• Stecken Sie die schwarzen Ellenbogenverbindungen der Stahlstangen auf die Enden der Fi-
berglasstangen.
• Es werden zwei Personen, eine auf jeder Seite des Außenzeltes, um die Stahlstangen anzu-
heben.
• Stecken Sie die Pins der Ring-Pin Steckverbindungen an der Unterkante des Außenzeltes in
die Enden der Stahlstangen.
Jetzt steht das Außenzelt.
Abspannen des Außenzeltes
• Spannen Sie den eingenähten Boden des Außenzeltes so fest wie möglich, indem Sie sie an
allen 4 Ecken mit den Stahlheringen befestigen.
• Alle angebrachten Neonabspannseile müssen so stra wie möglich abgespannt werden, um
eine bestmögliche Wasserableitung zu erreichen.
• Alle Fensterabdeckungen können auch mit Neonabspannseilen und Heringen aufgespannt
werden.
Bitte gehen Sie auf einen weicheren Boden, wenn Sie Schwierigkeiten haben, die Stahlheringe
zu befestigen. Unter der Oberäche des Campingplatzes könnte sich Kies oder Stein benden.
Seiteneingänge
• Verwenden Sie die beiden Türstangen aus Stahl (ohne die schwarzen Ellenbogenverbindun-
gen), um das Vordach aufzustellen.
• Mit Hilfe der zwei neonfarbenen Abspannleinen und Erdnägel an einer entsprechenden Stelle
abspannen. Das Sonnendach ist nun fertig.
Aufbauanleitung
Innenzelt/Schlafkabine
• Breiten Sie ein Innenzelt auf dem Boden aus.
• Tragen Sie es vorsichtig in das aufgebaute Außenzelt.
• Befestigen Sie die beiden hinteren unteren Ecken des Innenzeltbodens mit den Haken an den
beiden inneren Ecken des Außenzeltes.
• Hängen Sie die Knebel an der Rückseite und den Seiten der Kabine in die Ringe am Außenzelt.
• Nehmen Sie den roten Knebel an der oberen Vorderseite des Innenzeltes und hängen Sie ihn
in den mittleren roten Ring am Dach des Außenzeltes ein.
• Hängen Sie die beiden vorderen unteren Ecken der Kabine in die Ringe des Zeltbodens ein.
• Jetzt sind die 4 unteren Ecken des Innenzeltes gesichert.
• Befestigen Sie die beiden vorderen Seiten des Innenzeltes an den Ringen links und rechts am
Außenzelt.
Wiederholen Sie den Vorgang mit dem anderen Innenzelt.
Abbau des Zeltes
• Bauen Sie das/die Innenzelt(e) ab.
• Ziehen Sie alle Heringe heraus und verstauen Sie diese in der kleinsten Tragetasche.
• Lassen Sie alle neonfarbenen Abspannleinen, die an den Fensterabdeckungen und dem Tür-
vordach befestigt sind, an ihrem Platz.
• Entfernen Sie alle Stahlstangen und anschließend die Fiberglasstangen. Verstauen Sie sie in
der mittelgroßen Tragetasche.
Falten und Aufrollen des Außenzeltes
• Legen Sie das Außenzelt so ach wie möglich aus.
• Falten Sie es auf eine für Sie angenehme Weise auf die ursprüngliche Größe zusammen. Die
Länge des Bündels sollte etwas kürzer sein als die Tragetasche.
• Es ist ratsam, die gesamte Luft herauszudrücken, wenn Sie mit dem Falten des Außenzeltes
beginnen.
Falten des Innenzeltes
• Legen Sie das Innenzelt so ach wie möglich aus.
• Falten Sie das Innenzelt so, dass die endgültige Länge etwas kürzer ist als die der Tragetasche.
• Legen Sie das gefaltete Innenzelt bzw. die gefalteten Innenzelte auf das Außenzelt.
• Rollen Sie sowohl das Außenzelt als auch das/die Innenzelt(e) so eng wie möglich zusammen.
• Benutzen Sie die beiden Kompressionsriemen, um das zusammengerollte Außenzelt und das/
die Innenzelt(e) so fest wie möglich zusammenzubinden.
• Verstauen Sie das Außenzelt, das/die Innenzelt(e), alle Stangen und Heringe in der großen
Tragetasche.
Bitte befolgen Sie die Anweisungen zur Pege des Zeltes, wenn Sie zu Hause ankommen.
1
3 42
5 6 7

MONTANA 12 SLEEPER PROTECT
Lay down the contents from the carry bag on the ground. Sort the components as shown.
Assemble all the berglass poles as shown.
Flysheet/Outer Tent
• Spread the ysheet at on the ground. Make sure all the doors are closed and zipped up.
• Peg down all 4 corners with the steel pegs.
• Insert the berglass poles into the sleeves on the roof.
• Fit the black nylon elbows of the steel poles onto the ends of the berglass poles.
• You need two people, one at each side of the ysheet, to lift the steel poles.
• Insert the pin-ring components located at the bottom edge of the ysheet into the ends of the
steel poles.
At this point, the ysheet is up.
Stretching the ysheet
• Stretch and peg down the bottom of the ysheet edges with the steel pegs as tight as possi-
ble.
• All the attached neon guy ropes must be pegged down as tightly as possible to achieve the
best possible water shedding.
• All the window covers can also be stretched open with neon guy ropes and pegs.
Please move to softer ground whenever you nd it dicult to peg down the steel pegs. There
might be gravel or rock beneath the surface of the campsite.
Side entrances
• Use two steel door poles (without the black nylon elbow) to pitch an entrance as a canopy.
• With the help of two neon guy ropes and steel anchors, peg down at appropriate spots. The
sun canopy is now completed.
Inner tent/sleeping cabin
• Spread out an inner tent on the ground.
• Carry it carefully inside the set-up ysheet.
• Secure two rear bottom corners of the inner tent oor to the 2 inner corners of the ysheet
using the hooks.
• Hang the toggles on the back and sides of the cabin into the rings on the ysheet.
• Pick up the toggle at the top front panel of the inner tent and hang it up on the middle red ring
on the roof of the ysheet.
• Hook the two front bottom corners of the cabin to the rings on the bottom of ysheet.
• At this stage, the 4 bottom corners of the inner tent are secured.
• Secure the two front side panels of the inner tent to the rings on the left and right panels of
the ysheet.
Repeat the same procedure with the other inner tent.
Dismantling the tent
• Dismantle the inner tent(s).
• Pull out all the steel stakes and pegs with a claw hammer and store them in the smallest carry
bag.
• Keep all the neon guy ropes that are attached to the window awnings and door canopy in
place.
• Remove all the steel poles, followed by the berglass poles. Store them in the mid-size carry
bay bag.
Folding and rolling the ysheet
• Lay down the ysheet as at as possible.
• Fold it in any way that you are comfortable with to the original size. The length of the bundle
should be slightly shorter than the carry bag.
• It is advisable to press all the air out as you start folding of the ysheet.
Folding the inner tent
• Lay down the inner tent as at as possible.
• Fold the inner tent so the nal length is slightly shorter than the carry bag.
• Lay the folded inner tent(s) on top of the ysheet.
• Roll both the ysheet and the inner tent(s) as tight as possible.
• Use the two compression straps to tie the rolled ysheet and inner tent(s) as tight as possible.
• Stu the ysheet, inner tent(s), all poles, and stakes/pegs into the large carry bag.
Please follow the maintenance procedure of the tent when you arrive home.
Tent set up instructions Instructions de montage
Déposez le contenu du sac de transport sur le sol. Classez les éléments comme indiqué.
Assemblez tous les arceaux en bre de verre comme illustré.
Tente extérieure
• Étendez la tente extérieure à plat sur le sol. Assurez-vous que toutes les portes et fermetures
éclair sont fermées.
• Fixez les 4 coins avec les piquets/sardines
• Insérez les arceaux en bre de verre dans les fourreaux pour arceaux.
• Emboîtez les coudes noirs des barres en acier sur les extrémités des arceaux en bre de verre.
• Il faut deux personnes, une de chaque côté de la tente extérieure, pour soulever les barres
d‘acier.
• Insérez les goupilles « ring & pin » sur le bord inférieur de la tente extérieure dans les extrémi-
tés des barres en acier.
La tente extérieure est à présent en place.
Tendre la tente extérieure
• Tendez le tapis cousu de la tente extérieure aussi fermement que possible en le xant aux 4
coins au moyen des piquets en acier.
• Tous les haubans en néon installés doivent être tendus aussi fermement que possible an
d‘obtenir la meilleure évacuation possible de l‘eau.
• Tous les caches-fenêtres peuvent également être tendus avec des haubans en néon et des
piquets/sardines.
Essayez de vous installer sur un sol plus friable si vous rencontrez des dicultés à xer les pi-
quets en acier. Il pourrait y avoir du gravier ou de la roche sous la surface du camping.
Entrées latérales
• Utilisez les deux barres de porte en acier (sans les coudes noirs) pour monter l‘auvent.
• Tendez l‘auvent à l‘aide des deux cordes d’haubanage de couleur uo et de deux piquets de
terre.
L’auvent est maintenant en place.
Tente intérieure/cabine de couchage
• Étendez la tente intérieure sur le sol.
• Transportez-la avec précaution dans la tente extérieure montée.
• Fixez les deux coins inférieurs arrière du sol de la tente intérieure aux deux coins intérieurs de
la tente extérieure à l‘aide des crochets.
• Accrochez les boucles d’attache due à l‘arrière et sur les côtés de la cabine dans les anneaux
de la tente extérieure.
• Prenez le garrot rouge sur la partie supérieure avant de la tente intérieure et accrochez-le à
l‘anneau rouge central sur le toit de la tente extérieure.
• Accrochez les deux coins inférieurs avant de la cabine dans les anneaux du tapis de sol de la
tente.
• A ce stade, les 4 coins inférieurs de la tente intérieure sont xés.
• Fixez les deux côtés avant de la tente intérieure aux anneaux à gauche et à droite de la tente
extérieure.
Répétez la même procédure avec l‘autre tente intérieure.
Démontage de la tente
• Démontez la/les tente(s) intérieure(s).
• Retirez tous les piquets/sardines et rangez-les dans le plus petit sac de transport.
• Laissez en place toutes les cordes d’haubanage de couleur uo qui sont xées aux caches des
fenêtres et à l‘auvent de la porte.
• Enlevez toutes les barres en acier et ensuite les arceaux en bre de verre. Rangez-les dans le
sac de transport de taille moyenne.
Pliage et enroulement de la tente extérieure
• Étalez la tente extérieure aussi à plat que possible.
• Repliez-la d‘une manière confortable pour vous à sa taille initiale. La longueur du paquet doit
être légèrement plus courte que celle du sac de transport.
• Il est conseillé d‘expulser tout l‘air lorsque vous commencez à plier la tente extérieure.
Pliage de la tente intérieure
• Posez la tente intérieure aussi à plat que possible.
• Pliez la tente intérieure de manière que la longueur nale soit légèrement plus courte que
celle du sac de transport.
• Posez la tente intérieure pliée ou les tentes intérieures pliées sur la tente extérieure.
• Enroulez aussi bien la tente extérieure que la/les tente(s) intérieure(s) le plus étroitement pos-
sible.
• Utilisez les deux sangles de compression pour attacher le plus fermement possible la tente
extérieure et la/les tente(s) intérieure(s) enroulées.
• Rangez la tente extérieure, la ou les tentes intérieures, tous les arceaux et les sardines dans le
grand sac de transport.
Veuillez suivre les instructions d‘entretien de la tente lorsque vous rentrez chez vous.
/