Sherwood RX4508 Manuel utilisateur

Catégorie
Équipement musical supplémentaire
Taper
Manuel utilisateur

Ce manuel convient également à

R X-4508
AM/FM STEREO RECEIVER
RECEPTEUR STEREO AM/FM
RECEPTOR ESTÉREO AM/FM
OPERATING INSTRUCTIONS
GUIDE D’UTILISATION
INSTRUCCIONES DE FUNCIONAMIENTO
2
Safety Information
READ THIS BEFORE OPERATING YOUR UNIT
CAUTION
TO REDUCE THE RISK OF ELECTRIC SHOCK,
DO NOT REMOVE FRONT OR BACK COVER.
NO USER-SERVICEABLE PARTS INSIDE.
REFER SERVICING TO QUALIFIED SERVICE
PERSONNEL.
CAUTION
RISK OF ELECTRIC SHOCK
DO NOT OPEN
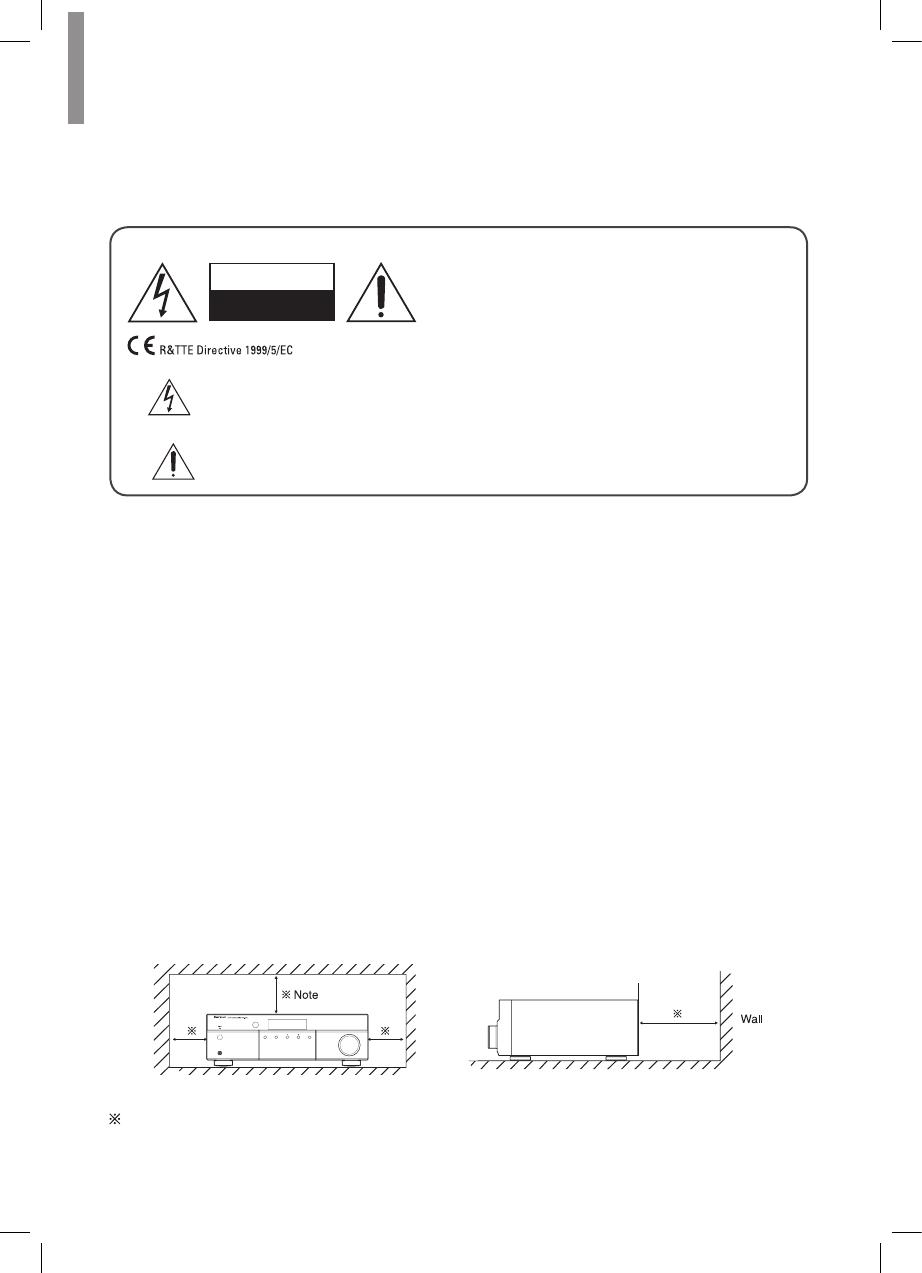
This symbol indicates the presence of uninsulated “dangerous voltage” within
the product’s enclosure that may be of sufcient magnitude to constitute a risk of
electric shock.
This symbol indicates important operating and maintenance (servicing)
instructions in the literature accompanying the appliance.
WARNING
: TO REDUCE THE RISK OF FIRE OR ELECTRIC SHOCK, DO NOT
EXPOSE THIS APPLIANCE TO RAIN OR MOISTURE.
CAUTION
Leave space around the unit for sufcient
ventilation.
Avoid installation in extremely hot or cold
locations, or in an area that is exposed to
direct sunlight or heating equipment.
Keep the unit free from moisture, water, and
dust.
Do not let foreign objects in the unit.
Keep the ventilation openings clear of items,
such as newspapers, linens, or curtains.
Keep open ame from candles or other
sources away from the unit.
Observe the local regulations regarding
disposal of packaging materials, exhausted
batteries and old equipment.
Do not expose the unit to dripping or
splashing, or place objects lled with liquids
such as vases.
Do not let insecticides, benzene, or thinner
come in contact with the unit.
Never disassemble or modify the unit in any
way.
Notes on the AC power cord and the wall
outlet
The unit remains connected to AC power as
long as it is plugged into the wall outlet, even
if the unit has been turned off.
To completely disconnect this product from
AC power, disconnect the plug from the wall
socket outlet.
When setting up this product, make sure
that the AC outlet you are using is easily
accessible.
Disconnect the plug from the wall outlet when
not using the unit for long periods of time.
Caution regarding installation
PHONES
ON / STANDBY
VOLUME
MEMORY TUNE / PRESET INPUT
Do not block ventilation openings or stack other equipment on the top.
Note:
For heat dispersal, do not install this unit in a conned space such as a bookcase or
similar enclosure.
Safety Information
3
English
FCC Notice
This product contains FCC ID: VNH-IKCSR8645.
This equipment has been tested and found to comply with the limits for a Class B digital device,
pursuant to Part 15 of the FCC Rules. These limits are designed to provide reasonable protection
against harmful interference in a residential installation. This equipment generates, uses and can
radiate radio frequency energy and, if not installed and used in accordance with the instructions,
may cause harmful interference to radio communications. However, there is no guarantee
that interference will not occur in a particular installation. If this equipment does cause harmful
interference to radio or television reception, which can be determined by turning the equipment off
and on, the user is encouraged to try to correct the interference by one or more of the following
measures:
Reorient or relocate the receiving antenna.
Increase the separation between the equipment and the receiver.
Connect the equipment to an outlet on a circuit different from that to which the receiver is
connected.
Consult the dealer or an experienced radio/TV technician for help.
This device complies with part 15 of the FCC Rules. Operation is subject to the following two
conditions :
(a) This device may not cause harmful interference, and
(b) This device must accept any interference received, including interference that may cause
undesired operation.
(FCC Part 15.21) Caution: changes or modications not expressly approved by the party
responsible for compliance could void the user’s authority to operate the equipment.
Canada ICES-003 statement
This product contains IC 10581A-IKCSR8645.
This product complies with RSS-210 of Industry Canada.
Operation is subject to the following two conditions:
(1) this product may not cause harmful interference, and (2) this product must accept any
interference received, including interference that may cause undesired operation.
This Class B digital apparatus complies with Canadian ICES-003.
RX-4508 AM/FM STEREO RECEIVER
4
Important Safety Instructions
1 Read these instructions.
2 Keep these instructions.
3 Heed all warnings.
4 Follow all instructions.
5 Do not use this apparatus near water.
6 Clean only with dry cloth.
7 Do not block any ventilation openings. Install in accordance with the manufacturer’s instructions.
8 Do not install near any heat sources such as radiators, heat registers, stoves, or other
apparatus (including ampliers) that produce heat.
9 Do not defeat the safety purpose of the polarized or grounding-type plug. A polarized plug has
two blades with one wider than the other. A grounding type plug has two blades and a third
grounding prong. The wide blade or the third prong is provided for your safety. If the provided
plug does not t into your outlet, consult an electrician for replacement of the obsolete outlet.
10 Protect the power cord from being walked on or pinched particularly at plugs, convenience
receptacles, and the point where they exit from the apparatus.
11 Only use attachments/accessories specied by the manufacturer.
12 Use only with the cart, stand, tripod, bracket, or table specied by the
manufacturer, or sold with the apparatus. When a cart is used, use caution
when moving the cart/apparatus combination to avoid injury from tip-over.
13 Unplug this apparatus during lightning storms or when unused for long periods of
time.
14 Refer all servicing to qualied service personnel. Servicing is required when the apparatus has
been damaged in any way, such as power-supply cord or plug is damaged, liquid has been
spilled or objects have fallen into the apparatus, the apparatus has been exposed to rain or
moisture, does not operate normally, or has been dropped.
5
English
2 SAFETY INFORMATION
5 TABLE OF CONTENTS
6 GETTING STARTED
6 What's Included
7 Installing the Remote Control Battery
7 Operating the Range of the Remote
Control
8 PARTS DESCRIPTION
8 Front Panel
9 Front Display
9 Rear Panel
10 R
emote Control
11 MAKING CONNECTIONS
11 Connecting Speakers
11 Placing Speakers
11 Connecting Speakers
13 Connecting Playback Components
13 Connecting Audio Components
14 Connecting Recording Components
15 Connecting an Antenna
15 Connecting FM Antenna
16 Connecting AM Antenna
17 Connecting Power
18 OPERATING YOUR SYSTEM
18 Listening to Your System
18 Basic Operation
19 Muting the Sound
19 Adjusting the Sound Balance
(Left and Right)
19 Adjusting the Tone (Bass and Treble)
20 Listening to Radio
20 Selecting the Band
20 Manual Tuning
20 Auto Tuning
20 Manual Presetting
21 Auto Presetting
22 Tuning in to Preset Stations
22 Scanning Preset Stations in Sequence
22 Switching FM Stereo/Mono Mode
23 Bluetooth
23 Pairing with the Bluetooth Device
23 Listening to Music on Device
24 Recording
25 Using Other Functions
25 Setting the Sleep Timer
25 Setting the Auto Power Control
25 Adjusting the Brightness of the
Fluorescent Display
26 TROUBLESHOOTING
26 GENERAL
26 SOUND
27 ADDITIONAL INFORMATION
27 Specications
28 Trademarks and Licenses
Table of Contents
6
What's Included
PHONES
ON / STANDBY
VOLUME
MEMORY TUNE / PRESET INPUT
Main unit
S
E
L
T
U
N
E
BASS
BLUETOOTH
DISPLAY
SEARCH
MODE
TREBLE
CD AUX
TONE
DIRECT
MUTE
MEMO/
ENTER
VOLUME
PHONO TUNER
123
456
789
0
A
B
PRESET MO/STSLEEP
DIMMER
SPEAKER
P
R
E
S
E
T
P
R
E
S
E
T
T
U
N
E
L
R
B
A
L
A
N
C
E
POWER
RC-157
S
E
L
Remote control (1 ea) Battery
FM Antenna (1 ea) AM Antenna (1 ea)
Warranty
User Manual (1 ea) Warranty (1 ea)
Getting Started
Getting Started
7
English
Installing the Remote Control Battery
1
Remove the battery cover.
2
Insert two AAA size batteries with the
polarity matched properly.
Always use alkaline batteries, and do not use the rechargeable batteries (Ni-Cd type).
If the batteries run out, remove the old batteries and replace them with new ones within
several minutes.
If the batteries are removed or have been exhausted for a longer period of time, memorized
contents will be cleared. In this case, you should memorize them again.
If the battery is placed incorrectly, it can cause explosion.
Remove the battery if the remote control is not used for a long period of time.
Do not leave the product in a hot or humid place.
Do not handle and store the battery with metallic tools.
Operating the Range of the Remote Control
Use the remote control within a range of about 7 meters (23 feet) and angles of up to 30 degrees
aiming at the remote control sensor.
VOLUME
PHONES
MEMORY TUNE / PRESET INPUT
ON / STANDBY
8
Front Panel
PHONES
ON / STANDBY
VOLUME
MEMORY TUNE / PRESET INPUT
5 6 7 9 10
21 3 4
8
1
ON/STANDBY Button
2
Bluetooth Indicator
3
IR Sensor
4
Display
5
Headphone Connector
6
Memory Button
7
Tune/Preset Select Button
8
Function Buttons
Tuning Up/Down - See page 20.
Preset Up/Down - See page 20.
Auto Tuning - See page 20.
Bluetooth Playback Control - See page 23.
9
Input Selector
10
Volume Control
Parts Description
Parts Description
9
English
Front Display
3 4 5 6
9
21 87
1
Information Display
2
Headphone Indicator
3
Stereo Indicator
4
Tuned indicator
5
Sleep Timer Indicator
6
Preset Indicator
7
Station Memory Indicator
8
Preset Station Indicator
9
Tone Direct Indicator
Rear Panel
1 2 3 4 5
6
1
Radio Antenna Connectors
2
Phono Connectors
3
Audio Input Connectors
4
Audio Output Connectors
5
Speaker Connectors
6
AC Input Cord
RX-4508 AM/FM STEREO RECEIVER
10
R
emote Control
1
Numeric Buttons
2
Preset Button
3
Source Select Buttons
4
Tone Control Button
5
▲/▼ Preset Up/Down Buttons
◄/► Tuning Up/Down Buttons
MEMO/ENTER
Memory/Enter Button
6
Balance Adjust Buttons
7
Bluetooth Button
8
Bass Up/Down Buttons
9
Treble Up/Down Buttons
10
Bluetooth Previous/Rewind Button
11
Bluetooth Next/Fast Forward Button
12
Bluetooth Play/Pause Button
13
Volume Up/Down Buttons
14
Mute Button
15
Mono/Stereo Select Button
16
Sleep Button
17
Dimmer Button
18
Speaker Select Button
19
Power Button
S
E
L
T
U
N
E
BASS
BLUETOOTH
DISPLAY
SEARCH
MODE
TREBLE
CD AUX
TONE
DIRECT
MUTE
MEMO/
ENTER
VOLUME
PHONO TUNER
123
456
789
0
A
B
PRESET MO/STSLEEP
DIMMER
SPEAKER
P
R
E
S
E
T
P
R
E
S
E
T
T
U
N
E
L
R
B
A
L
A
N
C
E
POWER
RC-157
S
E
L
2
4
5
7
8
1
3
15
14
19
18
17
16
13
9
10
11
12
6
11
English
Making Connections
Connecting Speakers
Placing Speakers
Determine the locations for your speaker placement according to their manufacturer’s directions
and the layout of your listening room.
Left and right speakers
Place the speakers with their front
surfaces as ush to the TV or monitor
screen as possible.
Place each speaker so that sound is
aimed at where listener's ears would
be in the main listening position.
Connecting Speaker Wires
1
Strip away approx. 10 mm (3/8 inch) of
wire insulation, and then tightly twist the
wire ends.
2
Loosen the speaker terminal by turning it
counter-clockwise.
3
Insert the bare part of the wire.
4
Tighten the speaker terminal by turning it
clockwise.
Connecting Speakers
Carefully check the left (L) and right (R) channels and the polarities on the speakers being
connected to this receiver.
RX-4508 AM/FM STEREO RECEIVER
12
Speaker A
Right
Speaker A
Left
Speaker B
Right
Speaker B
Left
Rear Panel
Be sure to connect speakers rmly and accurately according to the channel (left and right)
and the polarity (+ and −). If the connections are incorrect, no sound will be produced by the
speakers, and if the polarity of the speaker connection is incorrect, the sound will be unnatural
and tinny.
Be sure to use the speakers with the impedance of 8 ohms or above.
Do not let bare speaker wires touch each other or any metal part of this receiver. This could
damage the main unit and/or the speakers.
Never touch the speaker terminals while the AC input cord is connected to the wall AC outlet.
Doing so could result in electric shock.
Making Connections
13
English
Connecting Playback
Components
Source devices are components from which a
playback signal originates, e.g., a Blu-ray Disc™
or DVD player; a set-top box, or HDTV tuner, etc.
Connecting Audio Components
Audio Connection
Make audio connections from your source devices.
Ensure the left (L) and right (R) channels
and the inputs and outputs are correctly
connected.
To listen to the sound of a connected audio
device, select AUX as the input source.
R
L
TV, DVD Player, etc.
Rear Panel
Phono Connection
You can use the PHONO input jack to connect
turntable.
Turntable with MM type cartridge
Rear Panel
Do not connect the turntable with
MC type cartridge directly. If so, use
a separate head amplier or step-up
transformer.
RX-4508 AM/FM STEREO RECEIVER
14
Listening with Headphones
1
Connect the headphones to the PHONES
jack on the front panel.
PHONES
ON / STANDBY
VOLUME
MEMORY TUNE / PRESET INPUT
PHONES
Be careful not to set the volume too
high when using headphones.
Connecting Recording
Components
You can connect audio recording devices to
the AUX OUT jacks. You can make an audio
recording from the built-in tuner or from an
audio source connected to the main unit.
R L
AUDIO
IN
Rear Panel
Making Connections
15
English
Outdoor Antenna
1
Remove the indoor antenna if it is
connected.
2
Connect the FM outdoor antenna to the
FM antenna terminal.
Rear Panel
Connecting an Antenna
To listen to radio stations, connect the FM wire
antenna and AM loop antenna as illustrated
below.
Connecting FM Antenna
To strengthen the signal reception, extend the
antenna to its full length.
Indoor Antenna
1
Connect the FM indoor antenna to the
FM antenna terminal.
2
Change the position of the antenna until
you get the best reception of your favorite
FM stations.
Rear Panel
RX-4508 AM/FM STEREO RECEIVER
16
Rear Panel
Connecting AM Antenna
1
Assemble the AM loop antenna as
illustrated below.
2
Place the antenna as far as possible from
the main unit, TV set, speaker cords and
the AC input cord, and set the direction
for the best reception.
3
If the reception is poor with the AM loop
antenna, it is recommended to replace it
with an AM outdoor antenna.
Rear Panel
Making Connections
17
English
Connecting Power
Make sure to plug in only after you have
connected all your components to the main
unit. Plug the supplied AC power cord into the
wall outlet.
AC power cord
To the wall outlet
Rear Panel
18
Operating Your System
Listening to Your
System
Basic Operation
You can listen to audio by following the basic
procedures below.
1
Turn on the connected component.
2
Turn on the main unit.
On the main unit, press
ON/STANDBY
.
On the remote control, press
POWER
.
ON / STANDBY
123
A
SPEAKER
POWER
With the receiver in Standby mode, you
can also turn the power on by pressing
an Input Selector button on the remote
control.
3
Select the speakers you want to play.
On the remote control, press
SPEAKER
A
or
SPEAKER B
. "SPK A(or/and)B" is
displayed.
123
456
789
0
A
B
PRESET MO/STSLEEP
DIMMER
SPEAKER
When using the headphone, press the
corresponding speaker button to switch
off both A and B speakers.
4
Select the input source you want to play
back.
On the main unit, press
INPUT
.
Each time the button is pressed, the
display changes in the following order:
FM
AM
CD
AUX
PHONO
Bluetooth AUDIO
On the remote control, press a source
select button.
CD AUX
TONE
DIRECT
MUTE
VOLUME
PHONO TUNER
P
R
E
S
E
T
BLUETOOTH
DISPLAY
SEARCH
MODE
P
R
E
S
E
T
L
R
B
A
L
A
N
C
E
INPUT
5
Start playback of the component you
selected in step 1.
6
During playback, you can adjust the volume
level.
On the main unit, rotate the volume
controller.
On the remote control, press
VOLUME -/+
.
S
E
L
T
U
N
E
BLUETOOTH
DISPLAY
SEARCH
MODE
TONE
DIRECT
MUTE
MEMO/
ENTER
VOLUME
P
R
E
S
E
T
P
R
E
S
E
T
T
U
N
E
L
R
B
A
L
A
N
C
E
S
E
L
Operating Your System
19
English
Muting the Sound
You can mute the sound temporarily by
pressing
MUTE
.
1
Press
MUTE
to mute the sound.
S
E
L
T
U
N
E
BLUETOOTH
DISPLAY
SEARCH
MODE
TONE
DIRECT
MUTE
MEMO/
ENTER
VOLUME
P
R
E
S
E
T
P
R
E
S
E
T
T
U
N
E
L
R
B
A
L
A
N
C
E
S
E
L
2
Press
MUTE
or
VOLUME - / +
to turn on
the sound.
S
E
L
T
U
N
E
BLUETOOTH
DISPLAY
SEARCH
MODE
TONE
DIRECT
MUTE
MEMO/
ENTER
VOLUME
P
R
E
S
E
T
P
R
E
S
E
T
T
U
N
E
L
R
B
A
L
A
N
C
E
S
E
L
Adjusting the Sound Balance
(Left and Right)
1
Adjust the sound volume balance
between the left and right speakers by
pressing
L-BALANCE
or
BALANCE-R
.
The each sound balance level can be
adjusted up to 10.
It is recommended the balance to be
adjusted to 0.
S
E
L
T
U
N
E
BASS
BLUETOOTH
DISPLAY
SEARCH
MODE
TREBLE
MEMO/
ENTER
P
R
E
S
E
T
T
U
N
E
L
R
B
A
L
A
N
C
E
S
E
L
Adjusting the Tone (Bass and Treble)
You can adjust the tone (bass and treble) as
desired.
1
Select the tone control mode by pressing
TONE DIRECT
.
"TON CTRL" is displayed on the
display panel.
S
E
L
T
U
N
E
BLUETOOTH
DISPLAY
SEARCH
MODE
TONE
DIRECT
MUTE
MEMO/
ENTER
VOLUME
P
R
E
S
E
T
P
R
E
S
E
T
T
U
N
E
L
R
B
A
L
A
N
C
E
S
E
L
If you want to listen to a program source
without the tone effect, select the tone
direct mode by pressing TONE DIRECT.
"TON DIR" and "DIR." are displayed on
the display panel.
2
Adjust the tone as desired by pressing
BASS -/+
or
Treble -/+
.
The tone level can be adjusted within
the range of -10 ~ +10 dB.
It is recommended the bass and treble
to be adjusted to 0 dB (at level).
BASS
BLUETOOTH
DISPLAY
SEARCH
MODE
TREBLE
P
R
E
S
E
T
L
R
B
A
L
A
N
C
E
Extreme settings at high volume may
damage your speakers.
RX-4508 AM/FM STEREO RECEIVER
20
Listening to Radio
Selecting the Band
1
Select
FM
or
AM
tuner as the input
source.
On the main unit, press
INPUT
repeatedly.
On the remote control, press
TUNER
repeatedly.
INPUT
CD AUX
TONE
DIRECT
MUTE
VOLUME
PHONO TUNER
0
PRESET MO/STSLEEP
P
R
E
S
E
T
When FM stereo broadcasts are poor,
select FM mono mode to reduce the
noise. For details, see "Switching FM
Stereo/Mono Mode" on page 22.
Manual Tuning
1
Select a desired station.
On the main unit, press
or
repeatedly.
On the remote control, press
TUNE
or
TUNE
► repeatedly.
S
E
L
T
U
N
E
BLUETOOTH
DISPLAY
SEARCH
MODE
TONE
DIRECT
MUTE
MEMO/
ENTER
VOLUME
P
R
E
S
E
T
P
R
E
S
E
T
T
U
N
E
L
R
B
A
L
A
N
C
E
S
E
L
Auto Tuning
1
Press and hold
TUNE ◄
or
TUNE►
for
more than 1 second.
On the main unit, press and hold
or
for more than 1 second.
The tuner keeps searching until a
station with strong signal strength is
found. The display shows the tuned
frequency.
If the found station is not the desired
one, simply repeat this operation.
Stations with weak signal strength are
skipped during auto tuning.
S
E
L
T
U
N
E
BLUETOOTH
DISPLAY
SEARCH
MODE
TONE
DIRECT
MUTE
MEMO/
ENTER
VOLUME
P
R
E
S
E
T
P
R
E
S
E
T
T
U
N
E
L
R
B
A
L
A
N
C
E
S
E
L
Manual Presetting
1
Tune to the desired station with auto or
manual tuning.
2
Press
MEMO/ENTER
.
On the main unit, press
MEMORY
.
"AUTO MEM" blinks on the display
panel.
MEMORY
S
E
L
T
U
N
E
BLUETOOTH
DISPLAY
SEARCH
MODE
TONE
DIRECT
MUTE
MEMO/
ENTER
VOLUME
P
R
E
S
E
T
P
R
E
S
E
T
T
U
N
E
L
R
B
A
L
A
N
C
E
S
E
L
  • Page 1 1
  • Page 2 2
  • Page 3 3
  • Page 4 4
  • Page 5 5
  • Page 6 6
  • Page 7 7
  • Page 8 8
  • Page 9 9
  • Page 10 10
  • Page 11 11
  • Page 12 12
  • Page 13 13
  • Page 14 14
  • Page 15 15
  • Page 16 16
  • Page 17 17
  • Page 18 18
  • Page 19 19
  • Page 20 20
  • Page 21 21
  • Page 22 22
  • Page 23 23
  • Page 24 24
  • Page 25 25
  • Page 26 26
  • Page 27 27
  • Page 28 28
  • Page 29 29
  • Page 30 30
  • Page 31 31
  • Page 32 32
  • Page 33 33
  • Page 34 34
  • Page 35 35
  • Page 36 36
  • Page 37 37
  • Page 38 38
  • Page 39 39
  • Page 40 40
  • Page 41 41
  • Page 42 42
  • Page 43 43
  • Page 44 44
  • Page 45 45
  • Page 46 46
  • Page 47 47
  • Page 48 48
  • Page 49 49
  • Page 50 50
  • Page 51 51
  • Page 52 52
  • Page 53 53
  • Page 54 54
  • Page 55 55
  • Page 56 56
  • Page 57 57
  • Page 58 58
  • Page 59 59
  • Page 60 60
  • Page 61 61
  • Page 62 62
  • Page 63 63
  • Page 64 64
  • Page 65 65
  • Page 66 66
  • Page 67 67
  • Page 68 68
  • Page 69 69
  • Page 70 70
  • Page 71 71
  • Page 72 72
  • Page 73 73
  • Page 74 74
  • Page 75 75
  • Page 76 76
  • Page 77 77
  • Page 78 78
  • Page 79 79
  • Page 80 80
  • Page 81 81
  • Page 82 82
  • Page 83 83
  • Page 84 84
  • Page 85 85
  • Page 86 86
  • Page 87 87
  • Page 88 88

Sherwood RX4508 Manuel utilisateur

Catégorie
Équipement musical supplémentaire
Taper
Manuel utilisateur
Ce manuel convient également à

dans d''autres langues