en Important safety information
6
:Warning – Risk of burns!
■ The appliance becomes very hot. Never
touch the interior surfaces of the cooking
compartment or the heating elements.
Always allow the appliance to cool down.
Keep children at a safe distance.
Risk of serious burns!
■ Accessories and ovenware become very
hot. Always use oven gloves to remove
accessories or ovenware from the cooking
compartment.
Risk of burns!
■ Alcoholic vapours may catch fire in the hot
cooking compartment. Never prepare food
containing large quantities of drinks with a
high alcohol content. Only use small
quantities of drinks with a high alcohol
content. Open the appliance door with care.
Risk of burns!
■ The hotplates and surrounding area
(particularly the hob surround, if fitted)
become very hot. Never touch the hot
surfaces. Keep children at a safe distance.
Risk of burns!
■ The accessible parts become very hot when
in operation. Never touch hot parts. Keep
children at a safe distance.
Risk of burns!
■ Empty cookware becomes extremely hot
when set on a gas hotplate that is in
operation. Never heat up empty cookware.
:Warning – Risk of scalding!
■ The accessible parts become hot during
operation. Never touch the hot parts. Keep
children at a safe distance.
Risk of scalding!
■ When you open the appliance door, hot
steam may escape. Open the appliance
door with care. Keep children at a safe
distance.
Risk of scalding!
■ Water in a hot cooking compartment may
create hot steam. Never pour water into the
cooking compartment when the cooking
compartment is hot.
:Warning – Risk of injury!
■ Scratched glass in the appliance door may
develop into a crack. Do not use a glass
scraper, sharp or abrasive cleaning aids or
detergents.
Risk of injury!
■ Incorrect repairs are dangerous. Repairs
may only be carried out, and damaged
power and gas lines replaced, by an after-
sales engineer trained by us. If the
appliance is faulty, unplug the mains plug or
switch off the fuse in the fuse box. Shut off
the gas supply. Contact the after-sales
service.
Risk of injury!
■ The hinges on the appliance door move
when opening and closing the door, and
you may be trapped. Keep your hands away
from the hinges.
Risk of injury!
■ Faults or damage to the appliance are
dangerous. Never switch on a faulty
appliance. Unplug the appliance from the
mains or switch off the circuit breaker in the
fuse box. Shut off the gas supply. Contact
the after-sales service.
Risk of injury!
■ Unsuitable pan sizes, damaged or
incorrectly positioned pans can cause
serious injury. Observe the instructions
which accompany the cookware.
Risk of injury!
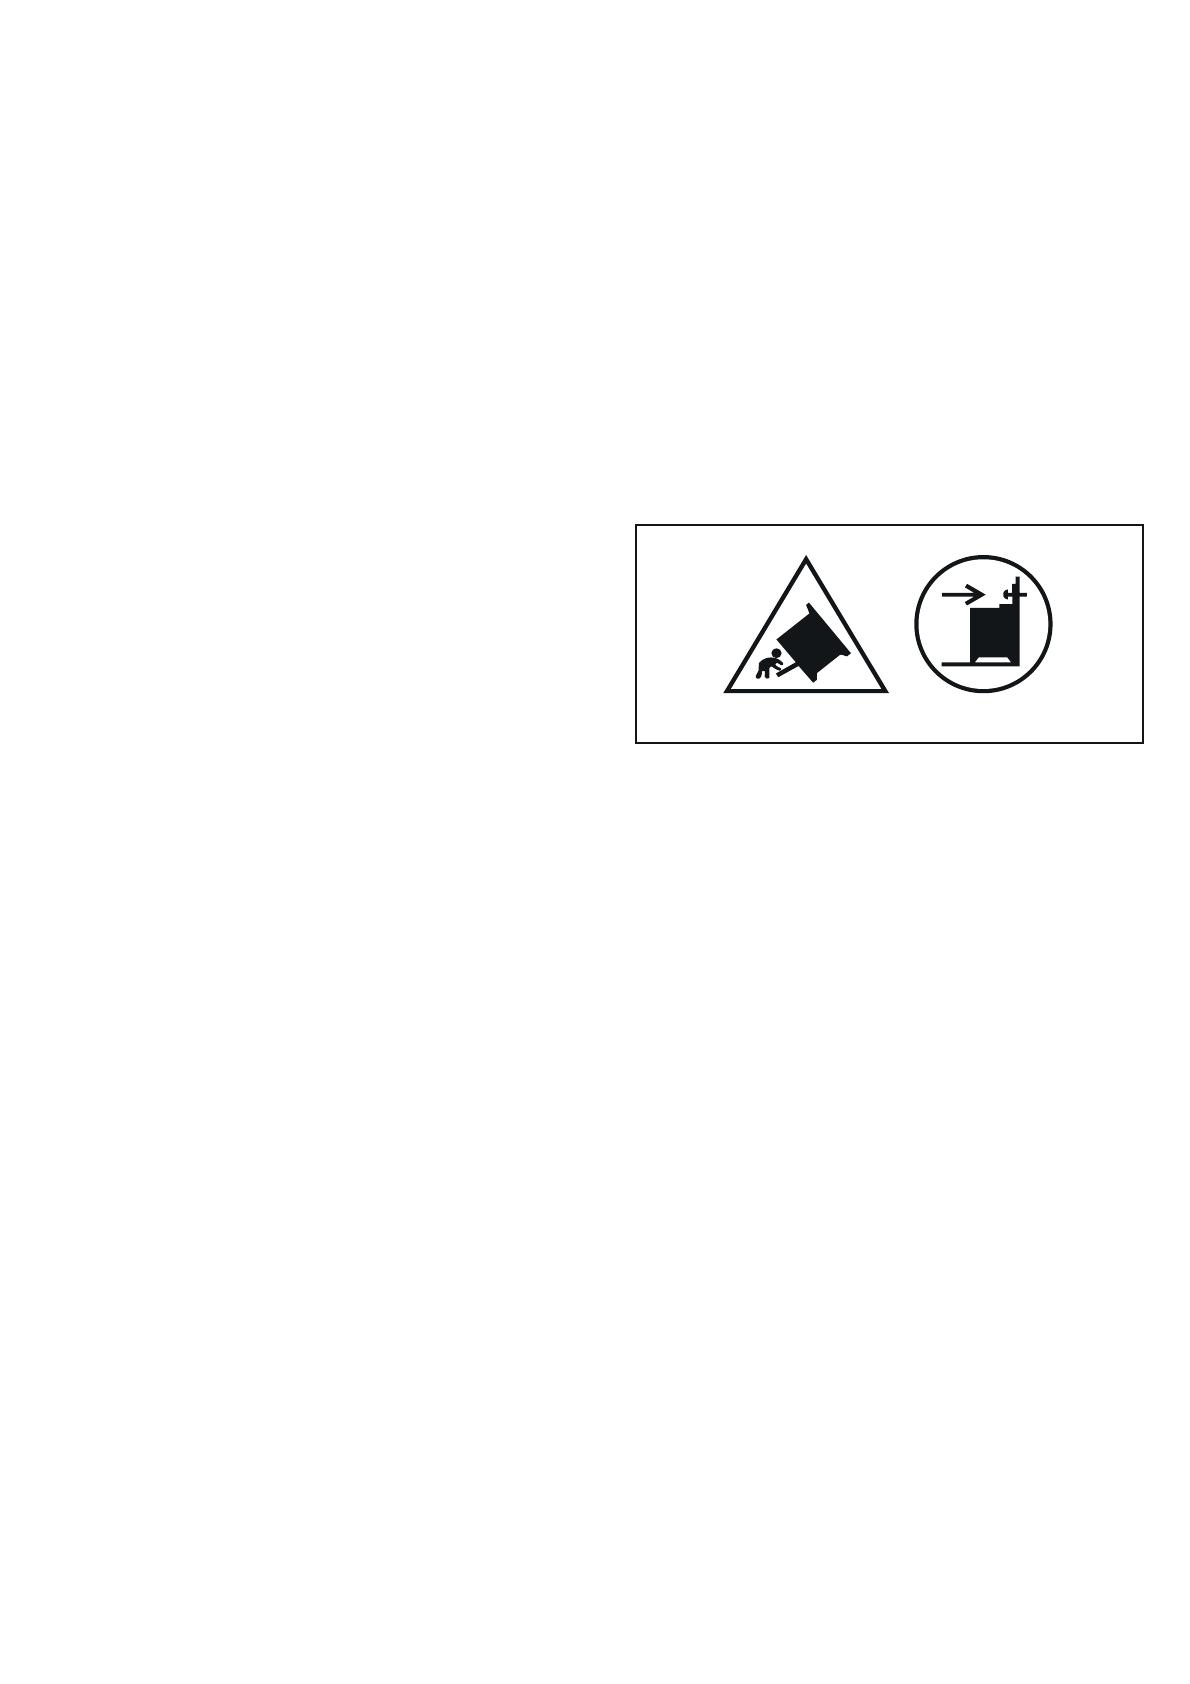
■ If the appliance is placed on a base and is
not secured, it may slide off the base. The
appliance must be fixed to the base.
:Warning – Risk of tipping!
Warning: In order to prevent tipping of the
appliance, this stabilizing means must be
installed. Refer to the instructions for
installation.
:Warning – Risk of electric shock!
■ Incorrect repairs are dangerous. Repairs
may only be carried out and damaged
power cables replaced by one of our
trained after-sales technicians. If the
appliance is defective, unplug the appliance
from the mains or switch off the circuit
breaker in the fuse box. Contact the after-
sales service.
Risk of electric shock and serious injury!
■ The cable insulation on electrical
appliances may melt when touching hot
parts of the appliance. Never bring
electrical appliance cables into contact with
hot parts of the appliance.
Risk of electric shock!
■ Do not use any high-pressure cleaners or
steam cleaners, which can result in an
electric shock.
Risk of electric shock!
■ A defective appliance may cause electric
shock. Never switch on a defective
appliance. Unplug the appliance from the
mains or switch off the circuit breaker in the
fuse box. Contact the after-sales service.
Risk of electric shock!
■ When replacing the cooking compartment
bulb, the bulb socket contacts are live.
Before replacing the bulb, unplug the
appliance from the mains or switch off the
circuit breaker in the fuse box.


