Colourworks CWDIGTIMDISP24 Guide de démarrage rapide
- Taper
- Guide de démarrage rapide

Magnetic
Digital Timer
Countdown range from 99 minutes 59
seconds with alarm.
Count up timer.
Easy to read LCD display.
Battery included.

premuto per far scorrere velocemente le
cifre). Premere START/ STOP per avviare
e per arrestare il timer. L'allarme
suonerà quando il timer raggiungerà
00:00. Per arrestare l'allarme, premere
un pulsante qualsiasi. Per reimpostare il
timer su 00:00, premere
contemporaneamente i pulsanti MIN e
SEC.
ATTENZIONE: NON MANOMETTERE I
COMPONENTI INTERNI DELL'UNITÀ,
PERCHÉ ANNULLERÀ LA GARANZIA.
NON UTILIZZARE NEL FORNO
A MICROONDE.
Conservare queste istruzioni per un
riferimento futuro.
Garanzia: 12 mesi.
Cuidados E Utilização: Limpe apenas
com um pano. Não mergulhe em água.
Retire a tira plástica do compartimento
da pilha antes de utilizar. As pilhas não
devem ser eliminadas juntamente com o
lixo doméstico normal. Não incinere
ANLEITUNG AUF, UM GEGEBENEN-
FALLS ZUKÜNFTIG NACHLESEN ZU
KÖNNEN.
Garantie:12 Monate.
Cuidado Y Uso: Limpie únicamente con
paño húmedo. No la sumerja en agua.
Retire la cinta de plástico del
compartimento de la batería antes de
usarlo. Las baterías no se deben
desechar en la basura general del
hogar. No se deben incinerar las
baterías, ya que pueden explotar bajo
altas temperaturas. Contacte su
autoridad local para más información
relacionada a la depuración y
disposición de baterías.
Instalación de las baterías: Localice el
receptáculo de las baterías que se
encuentra en la parte posterior de la
unidad y gírelo para quitar la tapa de las
baterías. Inserte una batería LR54 /
LR1131. Vuelva a colocar la tapa,
girándola para cerrarla.
Garantía: 12 meses.
Manutenzione E Uso: Pulire solo con
un panno. Non immergere in acqua.
Rimuovere la linguetta di plastica dal
compartimento di batteria prima
dell'uso. Non smaltire le batterie nei
rifiuti domestici. Non incenerire le
batterie, perché esploderanno ad una
temperatura elevata. Rivolgersi alle
autorità locali per informazioni sul riciclo
e sullo smaltimento delle batterie.
Istallazione Delle Batterie: Individuare
il compartimento di batterie sul retro
dell'unità e girare per rimuovere il
coperchio. Inserire una batteria LR54 /
LR1131. Riposizionare il coperchio,
chiudendo il retro.
Funzione Di Timer: Per impostare la
funzione di time up, premere il pulsante
START/ STOP. Premere di nuovo per
arrestare il timer. Per impostare la
funzione di time down, regolare l'orario
utilizzando i pulsanti MIN e SEC (tenere
Care & Use: Wipe clean only. Do not
immerse in water. Remove the plastic
strip from the battery compartment
before use. Batteries must not be
disposed of as household waste. Do not
incinerate batteries, as they will explode
at high temperatures. Contact your local
authority for information concerning
reclamation and disposal of batteries.
Battery Installation: Locate the battery
compartment on the back of the unit
and twist to remove the battery cover.
Insert one LR54 / LR1131 battery.
Replace the cover, twisting back shut.
Timer function:To set the timer up
function, press the START / STOP
button. Press again to pause the timer.
To set the countdown function, adjust
the time using the MIN and SEC buttons
(press and hold to advance the numeral
at a faster rate). Press the START / STOP
button to begin and to pause the timer.
An alarm will sound when the timer
reaches 00:00. To stop the alarm, press
any button. To reset the timer to 00:00
hold both the MIN and SEC buttons
together.
CAUTION: DO NOT TAMPER WITH THE
UNITS INTERNAL COMPONENTS AS
THIS WILL INVALIDATE THE
GUARANTEE. DO NOT USE THIS
PRODUCT IN A MICROWAVE OVEN.
Please retain these instructions for
future reference.
Guarantee:12 months.
Entretien Et Utilisation: Nettoyer avec
un chiffon seulement. Ne pas immerger
dans l'eau. Enlevez la bande de
plastique du compartiment de la pile
avant usage. Les piles ne doivent pas
être éliminées avec les déchets
domestiques. N’incinérez pas les piles,
car elles risquent d’exploser à haute
température. Contactez vos autorités
locales pour obtenir des renseigne-
ments au sujet de la récupération et
l’élimination des piles.
Installation De La Pile: Trouvez le
compartiment à pile à l’arrière de l’unité
et faits tourner pour enlever le couverde
du compartiment. Insérez une pile LR54
/ LR1131. Remettez le couverde et
tournez-le pour refermer
le compartiment.
Fonction de minuterie: Pour régler la
fonction minuterie, appuyez sur la
touche START/STOP. Appuyez une
nouvelle fois pour mettre en pause. Pour
régler la fonction de compte à rebours,
réglez l’heure en utilisant les touches
MIN et SEC (enfoncez et maintenez pour
faire défiler les chiffres plus
rapidement). Appuyez sur la touche
START/STOP pour commencer et pour
mettre la minuterie en pause. Une
alarme retentira lorsque la minuterie
aura atteint 00:00. Pour faire taire
l’alarme, appuyez sur n’importe quelle
touche. Pour régler la minuterie à 00:00,
maintenez les touches MIN et SEC
ensemble.
ATTENTION: ASSUREZ-VOUS DE NE
PAS TOUCHER AUX COMPOSANTS
INTERNES DE L’UNITÉ POUR ÉVITER
D’ANNULER LA GARANTIE. NE PAS
EXPOSER CET ARTICLE À UNE SOURCE
DE CHALEUR DIRECTE ET NE PAS LE
METTRE AU FOUR À MICRO-ONDES.
Garantie:12 mois.
Pflege und Gebrauch: Nur sauber
wischen. Nicht in Wasser legen. Vor
dem ersten Gebrauch den Plastikstreifen
aus dem Batteriefach ziehen. Batterien
dürfen nicht in den hausmüll geworfen
werden. Verbrennen sie batterien nicht,
da diese bei hohen temperaturen
explodieren. Fragen sie ihre örtlichen
behörden bezüglich der wiederverwer-
tung und Entsorgung von batterien.
Einlegen Der Batterie: Das Batteriefach
befindet sich auf der Geräterückseite.
Drehen Sie den Deckel, um ihn
abzunehmen. Legen Sie eine LR54 /
LR1131-Batterie ein. Legen Sie den
Deckel wieder auf und drehen Sie ihn
bis er einrastet.
Timer-Funktion: Zum Einstellen der
Funktion Aufwärts zählen, die Taste
START/ STOP drücken. Erneut drücken,
um den Kurzzeitmesser anzuhalten. Zum
Einstellen der Funktion Abwärts zählen,
die gewünschte Zeit mithilfe der Tasten
MIN und SEC einstellen (Taste drücken
und gedrückt halten, damit die Ziffern
schneller laufen). Die Taste START/
STOP drücken, um den Kurzzeitmesser
einzuschalten und anzuhalten. Es ertönt
ein Signalton, wenn
ACHTUNG: DIE INTERNEN BAUTEILE
DES GERÄTS DÜRFEN NICHT
MANIPULIERT WERDEN, HIERDURCH
ERLISCHT DIE GARANTIE. DIESES
PRODUKT DARF NICHT IN DER
MIKROWELLE BENUTZT WERDEN.
BITTE BEWAHREN SIE DIESE
Función Del Reloj: Para configurar la
función del reloj, pulse el botón
START/STOP. Vuelva a pulsarlo para
detener el reloj. Para configurar la
función de cronómetro de cuenta
regresiva, ajuste la hora usando los
botones MIN y SEC (pulse y sostenga el
botón para avanzar el número más
rápido) Pulse el botón START/ STOP
para iniciar y para pausar el reloj. Sonará
una alarma cuando el reloj llegue
a 00:00. Para detener la alarma, pulse
cualquier botón. Para restablecer el reloj
a la posición 00:00, sostenga los
botones MIN y SEC al mismo tiempo.
PRECAUCIÓN: NO ALTERE LOS
COMPONENTES INTERNOS DE LAS
UNIDADES PORQUE ESO PUEDE
INVALIDAR LA GARANTÍA. NO UTILICE
ESTE PRODUCTO EN UN HORNO A
MICROONDAS. POR FAVOR,
CONSERVE ESTAS INSTRUCCIONES
PARA CONSULTAR EN EL FUTURO.
pilhas, pois explodirão a altas
temperaturas. Contacte a sua autarquia
local para se informar sobre a
recuperação e eliminação de pilhas.
Instalação Da Pilha: Localize o
compartimento da pilha nas costas da
unidade e rode a tampa do mesmo para a
retirar. Introduza uma pilha LR54 / LR1131.
Rode a tampa para a fechar de novo.
Função De Temporizador: Para ajustar
a função de contagem crescente,
pressione o botão START / STOP (Iniciar
/ Parar). Pressione de novo para uma
pausa na contagem do tempo. Para
ajustar a função de contagem
decrescente, ajuste o tempo com os
botões MIN e SEC (pressione
continuamente para fazer avançar o
número mais rapidamente). Pressione o
botão START / STOP para iniciar e
pausar o temporizador. O alarme tocará
quando o temporizador chegar a 00:00.
Para fazer parar o alarme, pressione
qualquer botão. Para repor o
temporizador a 00:00, pressione ao
mesmo tempo os botões MIN e SEC.
ATENÇÃO: NÃO TOQUE NOS
COMPONENTES INTERNOS DA
UNIDADE, POIS ISTO INVALIDARÁ A
GARANTIA. NÃO UTILIZE
MICROONDAS NUM.
Por favor guarde estas instruções para
consulta futura.
Garantia: 12 meses.

WEE/FH0071UZ
#mycolourworks
Lifetime Brands Europe Ltd.
Birmingham, B6 7EU. GB
colourworks.co.uk
es t.1850
premuto per far scorrere velocemente le
cifre). Premere START/ STOP per avviare
e per arrestare il timer. L'allarme
suonerà quando il timer raggiungerà
00:00. Per arrestare l'allarme, premere
un pulsante qualsiasi. Per reimpostare il
timer su 00:00, premere
contemporaneamente i pulsanti MIN e
SEC.
ATTENZIONE: NON MANOMETTERE I
COMPONENTI INTERNI DELL'UNITÀ,
PERCHÉ ANNULLERÀ LA GARANZIA.
NON UTILIZZARE NEL FORNO
A MICROONDE.
Conservare queste istruzioni per un
riferimento futuro.
Garanzia: 12 mesi.
Cuidados E Utilização: Limpe apenas
com um pano. Não mergulhe em água.
Retire a tira plástica do compartimento
da pilha antes de utilizar. As pilhas não
devem ser eliminadas juntamente com o
lixo doméstico normal. Não incinere
ANLEITUNG AUF, UM GEGEBENEN-
FALLS ZUKÜNFTIG NACHLESEN ZU
KÖNNEN.
Garantie:12 Monate.
Cuidado Y Uso: Limpie únicamente con
paño húmedo. No la sumerja en agua.
Retire la cinta de plástico del
compartimento de la batería antes de
usarlo. Las baterías no se deben
desechar en la basura general del
hogar. No se deben incinerar las
baterías, ya que pueden explotar bajo
altas temperaturas. Contacte su
autoridad local para más información
relacionada a la depuración y
disposición de baterías.
Instalación de las baterías: Localice el
receptáculo de las baterías que se
encuentra en la parte posterior de la
unidad y gírelo para quitar la tapa de las
baterías. Inserte una batería LR54 /
LR1131. Vuelva a colocar la tapa,
girándola para cerrarla.
Garantía: 12 meses.
Manutenzione E Uso: Pulire solo con
un panno. Non immergere in acqua.
Rimuovere la linguetta di plastica dal
compartimento di batteria prima
dell'uso. Non smaltire le batterie nei
rifiuti domestici. Non incenerire le
batterie, perché esploderanno ad una
temperatura elevata. Rivolgersi alle
autorità locali per informazioni sul riciclo
e sullo smaltimento delle batterie.
Istallazione Delle Batterie: Individuare
il compartimento di batterie sul retro
dell'unità e girare per rimuovere il
coperchio. Inserire una batteria LR54 /
LR1131. Riposizionare il coperchio,
chiudendo il retro.
Funzione Di Timer: Per impostare la
funzione di time up, premere il pulsante
START/ STOP. Premere di nuovo per
arrestare il timer. Per impostare la
funzione di time down, regolare l'orario
utilizzando i pulsanti MIN e SEC (tenere
Care & Use: Wipe clean only. Do not
immerse in water. Remove the plastic
strip from the battery compartment
before use. Batteries must not be
disposed of as household waste. Do not
incinerate batteries, as they will explode
at high temperatures. Contact your local
authority for information concerning
reclamation and disposal of batteries.
Battery Installation: Locate the battery
compartment on the back of the unit
and twist to remove the battery cover.
Insert one LR54 / LR1131 battery.
Replace the cover, twisting back shut.
Timer function:To set the timer up
function, press the START / STOP
button. Press again to pause the timer.
To set the countdown function, adjust
the time using the MIN and SEC buttons
(press and hold to advance the numeral
at a faster rate). Press the START / STOP
button to begin and to pause the timer.
An alarm will sound when the timer
reaches 00:00. To stop the alarm, press
any button. To reset the timer to 00:00
hold both the MIN and SEC buttons
together.
CAUTION: DO NOT TAMPER WITH THE
UNITS INTERNAL COMPONENTS AS
THIS WILL INVALIDATE THE
GUARANTEE. DO NOT USE THIS
PRODUCT IN A MICROWAVE OVEN.
Please retain these instructions for
future reference.
Guarantee:12 months.
Entretien Et Utilisation: Nettoyer avec
un chiffon seulement. Ne pas immerger
dans l'eau. Enlevez la bande de
plastique du compartiment de la pile
avant usage. Les piles ne doivent pas
être éliminées avec les déchets
domestiques. N’incinérez pas les piles,
car elles risquent d’exploser à haute
température. Contactez vos autorités
locales pour obtenir des renseigne-
ments au sujet de la récupération et
l’élimination des piles.
Installation De La Pile: Trouvez le
compartiment à pile à l’arrière de l’unité
et faits tourner pour enlever le couverde
du compartiment. Insérez une pile LR54
/ LR1131. Remettez le couverde et
tournez-le pour refermer
le compartiment.
Fonction de minuterie: Pour régler la
fonction minuterie, appuyez sur la
touche START/STOP. Appuyez une
nouvelle fois pour mettre en pause. Pour
régler la fonction de compte à rebours,
réglez l’heure en utilisant les touches
MIN et SEC (enfoncez et maintenez pour
faire défiler les chiffres plus
rapidement). Appuyez sur la touche
START/STOP pour commencer et pour
mettre la minuterie en pause. Une
alarme retentira lorsque la minuterie
aura atteint 00:00. Pour faire taire
l’alarme, appuyez sur n’importe quelle
touche. Pour régler la minuterie à 00:00,
maintenez les touches MIN et SEC
ensemble.
ATTENTION: ASSUREZ-VOUS DE NE
PAS TOUCHER AUX COMPOSANTS
INTERNES DE L’UNITÉ POUR ÉVITER
D’ANNULER LA GARANTIE. NE PAS
EXPOSER CET ARTICLE À UNE SOURCE
DE CHALEUR DIRECTE ET NE PAS LE
METTRE AU FOUR À MICRO-ONDES.
Garantie:12 mois.
Pflege und Gebrauch: Nur sauber
wischen. Nicht in Wasser legen. Vor
dem ersten Gebrauch den Plastikstreifen
aus dem Batteriefach ziehen. Batterien
dürfen nicht in den hausmüll geworfen
werden. Verbrennen sie batterien nicht,
da diese bei hohen temperaturen
explodieren. Fragen sie ihre örtlichen
behörden bezüglich der wiederverwer-
tung und Entsorgung von batterien.
Einlegen Der Batterie: Das Batteriefach
befindet sich auf der Geräterückseite.
Drehen Sie den Deckel, um ihn
abzunehmen. Legen Sie eine LR54 /
LR1131-Batterie ein. Legen Sie den
Deckel wieder auf und drehen Sie ihn
bis er einrastet.
Timer-Funktion: Zum Einstellen der
Funktion Aufwärts zählen, die Taste
START/ STOP drücken. Erneut drücken,
um den Kurzzeitmesser anzuhalten. Zum
Einstellen der Funktion Abwärts zählen,
die gewünschte Zeit mithilfe der Tasten
MIN und SEC einstellen (Taste drücken
und gedrückt halten, damit die Ziffern
schneller laufen). Die Taste START/
STOP drücken, um den Kurzzeitmesser
einzuschalten und anzuhalten. Es ertönt
ein Signalton, wenn
ACHTUNG: DIE INTERNEN BAUTEILE
DES GERÄTS DÜRFEN NICHT
MANIPULIERT WERDEN, HIERDURCH
ERLISCHT DIE GARANTIE. DIESES
PRODUKT DARF NICHT IN DER
MIKROWELLE BENUTZT WERDEN.
BITTE BEWAHREN SIE DIESE
Función Del Reloj: Para configurar la
función del reloj, pulse el botón
START/STOP. Vuelva a pulsarlo para
detener el reloj. Para configurar la
función de cronómetro de cuenta
regresiva, ajuste la hora usando los
botones MIN y SEC (pulse y sostenga el
botón para avanzar el número más
rápido) Pulse el botón START/ STOP
para iniciar y para pausar el reloj. Sonará
una alarma cuando el reloj llegue
a 00:00. Para detener la alarma, pulse
cualquier botón. Para restablecer el reloj
a la posición 00:00, sostenga los
botones MIN y SEC al mismo tiempo.
PRECAUCIÓN: NO ALTERE LOS
COMPONENTES INTERNOS DE LAS
UNIDADES PORQUE ESO PUEDE
INVALIDAR LA GARANTÍA. NO UTILICE
ESTE PRODUCTO EN UN HORNO A
MICROONDAS. POR FAVOR,
CONSERVE ESTAS INSTRUCCIONES
PARA CONSULTAR EN EL FUTURO.
pilhas, pois explodirão a altas
temperaturas. Contacte a sua autarquia
local para se informar sobre a
recuperação e eliminação de pilhas.
Instalação Da Pilha: Localize o
compartimento da pilha nas costas da
unidade e rode a tampa do mesmo para a
retirar. Introduza uma pilha LR54 / LR1131.
Rode a tampa para a fechar de novo.
Função De Temporizador: Para ajustar
a função de contagem crescente,
pressione o botão START / STOP (Iniciar
/ Parar). Pressione de novo para uma
pausa na contagem do tempo. Para
ajustar a função de contagem
decrescente, ajuste o tempo com os
botões MIN e SEC (pressione
continuamente para fazer avançar o
número mais rapidamente). Pressione o
botão START / STOP para iniciar e
pausar o temporizador. O alarme tocará
quando o temporizador chegar a 00:00.
Para fazer parar o alarme, pressione
qualquer botão. Para repor o
temporizador a 00:00, pressione ao
mesmo tempo os botões MIN e SEC.
ATENÇÃO: NÃO TOQUE NOS
COMPONENTES INTERNOS DA
UNIDADE, POIS ISTO INVALIDARÁ A
GARANTIA. NÃO UTILIZE
MICROONDAS NUM.
Por favor guarde estas instruções para
consulta futura.
Garantia: 12 meses.
-
 1
1
-
 2
2
-
 3
3
-
 4
4
-
 5
5
-
 6
6
-
 7
7
-
 8
8
-
 9
9
-
 10
10
-
 11
11
-
 12
12


Colourworks CWDIGTIMDISP24 Guide de démarrage rapide
- Taper
- Guide de démarrage rapide
dans d''autres langues
Autres documents
-
Philips HP3631/01 Manuel utilisateur
-
-
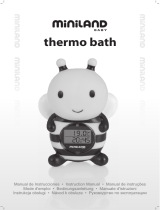 Miniland Baby thermo bath Manuel utilisateur
-
Casio MS-7UC Manuel utilisateur
-
-
Miniland thermo bath magical Manuel utilisateur
-
 Miniland thermo bath bee Manuel utilisateur
-
Casio MS-88EM Manuel utilisateur

