Lindy 200m Fibre Optic DisplayPort 1.2 & USB 2.0 KVM Extender Manuel utilisateur
- Taper
- Manuel utilisateur

© LINDY GROUP - THIRD EDITION (APRIL 2017)
DP 1.4 & USB 2.0 KVM Extender
Fibre Optic MPO/MTP 200m
User Manual English
Benutzerhandbuch Deutsch
Manuel Utilisateur Français
Manuale d’uso Italiano
No. 39380
www.lindy.com
Tested to comply with FCC Standards
For Home and Office Use

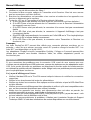
Multi Country Power Supply – Netzteil – Alimentation multi-pays – Alimentatore
ENGLISH – Security Remarks
For safety purposes you must not rebuild or modify the power
supply. Improper use can cause hazards, for which we
assume no liability. Read this manual carefully and keep it.
Insert the required plug into the adapter. The plugs are keyed
to avoid incorrect insertion. Push the adapter firmly towards
the housing, push it down and allow the latch on the power
supply to click into place. To remove, slide the locking button
to the back. Make sure the plug is locked firmly in place before
use.
Never insert the plug separately into a mains socket!
DEUTSCH – Sicherheitshinweise
Aus Sicherheitsgründen darf das Netzteil nicht geöffnet werden. Für Schäden und Gefahren, die durch
unsachgemäße Handhabung entstehen, übernehmen wir keine Haftung. Lesen Sie diese Bedienungsanleitung
sorgfältig und bewahren Sie sie auf.
Stecken Sie den entsprechenden Länderadapter in das Netzteil. Die Konstruktion der Adapter verhindert ein falsches
Einsetzen. Drücken Sie den Adapter fest gegen das Gehäuse und achten Sie darauf, dass der Riegel korrekt
einrastet. Vergewissern Sie sich vor Inbetriebnahme, dass der Adapter fest im Netzteil sitzt. Wenn Sie den Adapter
wieder vom Netzteil abnehmen und durch einen anderen ersetzen wollen, ziehen Sie den Riegel nach hinten und
entnehmen Sie den Stecker-Adapter.
Stecken Sie niemals einen Länderadapter separat in eine Steckdose!
FRANÇAIS
Pour des raisons de sécurité, vous ne devez pas réparer ou modifier ce produit. Si le produit est utilisé à d’autres
fins que celles décrites, il peut être endommagé. Une mauvaise utilisation peut entraîner des risques, pour lesquels
nous déclinons toute responsabilité. Lisez attentivement ces et conservez-les dans un endroit approprié.
Connectez le bon adaptateur dans l’alimentation. La conception de l’adaptateur empêche une mauvaise mise en
place. Poussez l’adaptateur dans son logement jusqu’au blocage. Assurez-vous de la bonne mise en place dans
l’alimentation avant de le brancher. Pour retirer l’adaptateur de l’alimentation, poussez le bouton de verrouillage vers
l’arrière et retirez l’adaptateur secteur.
Ne jamais connecter un adaptateur secteur seul dans une prise de courant !
ITALIANO
Per motivi di sicurezza non smontate o modificate questo prodotto. Se viene utilizzato per altre applicazioni oltre a
quelle descritte, potrebbe subire danni. L’uso improprio può provocare pericoli per i quali siamo esenti da
responsabilità. Leggete con attenzione le istruzioni e conservatele.
Per prima cosa scegliete l’adattatore adatto al vostro paese fra quelli forniti e installatelo nell’alimentatore. Il sistema
di aggancio è studiato in modo da evitare inserimenti scorretti. Tenete saldamente l’alimentatore, posizionate
l’adattatore nella sua sede e ruotatelo facendo attenzione che gli attacchi si aggancino saldamente. Per rimuovere
l’adattatore premete il tasto di rilascio e ruotatelo nella direzione opposta. Prima di ogni utilizzo assicuratevi che
l’adattatore sia sempre agganciato saldamente all’alimentare prima di inserirlo nella presa.
Non inserite mai solo la spina nella presa di corrente!
EN: Make sure the plug is locked firmly before use.
DE
: Stellen Sie sicher, dass der Adapter fest eingerastet ist
bevor Sie das Netzteil verwenden
FR: Assurez-vous du bon verrouillage de la prise avant
toute utilisation de l’alimentation.
IT: Assicuratevi che l’adattatore sia inserito fermamente
nell’alimentatore prima di collegarlo alla presa

User Manual English
Introduction
Thank you for purchasing the LINDY Fibre Optic KVM Extender! This product has been designed
to provide trouble free, reliable operation. It benefits from both a LINDY 2 year warranty and free
lifetime technical support. To ensure correct use, please read this manual carefully and retain it
for future reference.
The Fibre Optic KVM Extender allows you to extend DisplayPort 4K and even higher resolution
signals as well as USB 2.0 signals up to 200m using MPO/MTP fibre cable.
Package Contents
LINDY Fibre Optic DisplayPort Extender (1x Transmitter, 1x Receiver)
2x Multi-Country wall mount power supply 100 - 240VAC / 5V DC, ~3A, with 4 mains adapter
for worldwide use (Euro, UK, US, AUS/CN)
This User Manual
Features & Specifications
Extends DisplayPort and USB 2.0 signals up to 200m
Supports DisplayPort 1.4 and resolutions up to theoretically 7680x4320, HBR3, up to 8.1Gbps
per lane
Supports DisplayPort MST function to attach multiple monitors via MST hub and active
Eyefinity/Collage/Surround DP converters
USB supports almost all USB devices except isochronous ones – webcams and audio
adapters may show incompatibilities and the USB function to fail completely
Supports USB data rates up to 11Mbyte/s. net, approximately ¼ of the USB 2.0 data rate
Auto power save mode when source device is powered off
Auto Laser disable if fibre cable is broken or removed
Uses standard MPO/MTP OM3 Fibre Cable, 12 core method A 1:1
Installation
Pre-Installation Remarks
USB 2.0, DisplayPort and DisplayPort Active adapter cables as well as MPO/MTP cables in
several standard lengths up to 200m can be obtained from LINDY – please check on LINDY
website. For any other tailor made length of the MPO cable please contact LINDY support.
DisplayPort cables should not be longer than 2m, especially for very high resolutions.
Important! Do not bend the MPO fibre cable beyond its minimum bend radius, otherwise the
cable gets irreversibly damaged. Ensure the connectors are always protected from dust. Do not
put heavy load on the cable and regard the maximum tensile force.
Before starting the installation, please ensure that all devices are powered off.
1. Connect your DP and USB source to the Transmitter.
2. Connect your DP output device and USB devices to the Receiver.
3. Remove the Fibre Optic dust covers from the Transmitter and Receiver ports and from your
Fibre Cable – please keep all dust covers in a secure place to protect the ports in case you

User Manual English
want to disconnect!
4. Connect the fibre cable to the optical port on the Transmitter and the Receiver. Please ensure
that the connectors are fully engaged.
5. Plug the power supplies into the transmitter and receiver and power on all your devices starting
from the sink (monitor).
6. All LEDs on Transmitter and Receiver should be lit.
a. If this is not the case ensure that all connectors are fully engaged!
b. If the power LED is not lit the Transmitter or Receiver isn’t powered up or faulty
c. If the Source LED is not lit the connection to the source is not established correctly
d. If the Sink LED is not lit the connection to the Sink device is not established correctly
e. If the USB LED is not lit the connection to the USB Host on TX or the USB devices on
RX are not established correctly
f. If the Fibre LED is not lit the fibre connection between Transmitter and Receiver is not
working.
Remarks
DisplayPort MST Hubs may be used to connect multiple monitors over one extender – please
make sure your DP source supports MST function. MST hubs can be found on the LINDY website.
DisplayPort Active adapters (Eyefinity, Collage or Surround compatible) can be used to convert
to other video interfaces, passive adapter cables will not work.
Troubleshooting
If you are facing problems with the USB connection please make sure you do not use isochronous
USB devices like webcams or USB Audio adapters. You may be able to solve problems by
disabling the audio function of the webcam and/or by reducing the audio resolution of the audio
adapter. However, these problems may persist from time to time for isochronous devices.
There is no display on the screen.
Check the status of the LEDs on TX and RX as mentioned above and check the respective
connections.
Check that the DC plugs and jacks used by external power supplies (both the extender units
and others) are firmly connected.
Check that the fibre connectors are plugged in correctly and that the Fibre Link Status LED is
lit.
Check that the source and display are both powered on and active and are compliant with
each other when you connect them directly without the extender.
Power off all the devices, then power on in this order: first, the transmitter and receiver
modules, then the display and finally the source.
Make sure your MPO/MTP cable has no kink or knot – this may be a clear indication for a
damaged cable.
If you cannot solve the problem don’t hesitate to contact LINDY Technical Support team under
the contact information provided on our websites.

Benutzerhandbuch Deutsch
Einführung
Wir freuen uns, dass Ihre Wahl auf ein LINDY-Produkt gefallen ist und danken Ihnen für Ihr
Vertrauen. Sie können sich jederzeit auf unsere Produkte und einen guten Service verlassen. Für
diesen Extender geben wir eine 2-jährige Herstellergarantie und lebenslangen kostenlosen
technischen Support. Bitte lesen Sie das Handbuch aufmerksam und bewahren Sie es
zusammen mit den anderen aufzuhebenden Komponenten bei der Installation auf.
Dieser Fiber Optic Extender kann USB 2.0- und DisplayPort-Signale mit Auflösungen höher als
4K über optische MPO/MTP-Kabel über Distanzen bis 200m übertragen.
Lieferumfang
LINDY Fiber Optic KVM Extender (1 x Transmitter, 1 x Receiver)
2x Steckernetzteil (5V DC) mit 4 Wechsel-Steckern (Euro, UK, USA und AUS/CN)
Dieses Handbuch
Eigenschaften & Spezifikationen
Überträgt DisplayPort- und USB 2.0-Signale bis max. 200m
Unterstützt DP 1.4 und Auflösungen bis theoretisch 7680x4320, HBR3, bis 8,1Gbit/s. pro Lane
Unterstützt die DP MST-Funktion, mehrere Monitore können über einen MST Hub
angeschlossen werden, sowie aktive Eyefinity/Collage/Surround DP Konverterkabel
Unterstützt USB 2.0, fast alle USB-Geräte außer isochronen - Webcams und Audio-Adapter
können Inkompatibilitäten zeigen und die USB-Funktion beenden
Unterstützt USB-Datenraten bis zu 11Mbyte/s. netto, etwa ¼ der USB 2.0 Daten Rate
Auto Power-save-Modus wenn die angeschlossenen Geräte kein Signal liefern
Automatische Abschaltung der Laser wenn das Glasfaserkabel bricht oder entfernt wird
Verwendet Standard MPO/MTP OM3 Faserkabel, 12-adrig, Methode A, 1:1
Installation
Vorbemerkungen
USB 2.0, DisplayPort und „aktive“ DisplayPort Adapterkabel, sowie MPO/MTP Kabel in
verschiedenen Standardlängen bis 200m erhalten Sie ebenfalls bei LINDY – siehe LINDY-
Website. Kontaktieren Sie für andere maßgeschneiderte Längen der MPO Kabel bitte den LINDY
Support.
Die DisplayPort Kabel sollten nicht länger als 2m sein, vor allem bei sehr hohen Auflösungen.
Wichtig! Das MPO-Glasfaserkabel darf nie unter seinen minimalen Biegeradius gebogen werden
da es sonst irreversibel geschädigt wird. Stellen Sie sicher, dass die Anschlüsse immer vor Staub
geschützt sind. Belasten Sie das Kabel nicht mit großen Lasten und überschreiten Sie die
maximale Zugkraft nicht.
Vor Beginn der Arbeiten schalten Sie die beteiligten Geräte bitte aus.
1. Verbinden Sie Ihre DP- und USB-Quelle mit dem Transmitter (TX).
2. Verbinden Sie Ihr DP-Anzeige-Gerät und Ihre USB-Geräte mit dem Receiver (RX).
3. Entfernen Sie die Staubabdeckungen von den Glasfaseranschlüssen von TX und RX und vom
MPO-Kabel – Bitte bewahren Sie alle Staubschutzkappen an einem sicheren Ort auf, um die

Benutzerhandbuch Deutsch
Anschlüsse später zu schützen, für den Fall, dass Sie wieder trennen möchten!
4. Schließen Sie die Glasfaserkabel an den optischen Anschluss am TX und RX an. Bitte stellen
Sie sicher, dass die Stecker vollständig eingerastet sind.
5. Stecken Sie die Netzteile in TX und RX und schalten Sie alle Geräte ein, beginnend mit dem
Monitor, und abschließend mit den Signalquellen.
6. Alle LEDs am Sender und Empfänger sollten nun leuchten.
a. Wenn dies nicht der Fall ist stellen Sie bitte sicher dass alle Anschlüsse korrekt
eingerastet sind!
b. Wenn die POWER-LED des TX oder RX nicht leuchtet prüfen Sie bitte das Netzteil
c. Wenn die SOURCE-LED nicht leuchtet die DP-Verbindung zur Signalquelle gestört
d. Wenn die SINK-LED nicht leuchtet ist die Verbindung zum Anzeigegerät gestört
e. Wenn die USB-LED nicht leuchtet ist am TX die Verbindung zum USB Host Port gestört
oder am RX die Verbindung zu den SUB Devices
f. Wenn die FIBER-LED nicht leuchtet ist die Glasfaserverbindung zwischen TX und RX
gestört, überprüfen Sie den festen Sitz der Stecker und dass das Kabel keine
mechanischen Beschädigungen wir Knicke aufweist.
Bemerkungen
DisplayPort MST Hubs können verwendet werden um mehrere Monitore anzuschließen – Bitte
stellen Sie sicher, dass Ihre DP-Quelle die MST-Funktion unterstützt. MST-Hubs finden Sie auf
unserer Website.
Aktive DisplayPort-Adapter (Eyefinity, Collage oder Surround kompatibel) können zum
Konvertieren auf andere Video-Interfaces verwendet werden, passive Adapterkabel funktioniert
nicht. Sie finden Sie ebenfalls auf der LINDY Webseite.
Fehlersuche und -behebung
Wenn Sie weiterhin Probleme mit dem USB-Geräten haben stellen Sie bitte sicher, dass Sie keine
isochronen USB-Geräte wie Webcams oder USB-Audio-Adapter verwenden. Sie können diese
Probleme möglicherweise lösen durch Verringerung der Audio-Auflösung des Audio-Adapters
und/oder indem Sie die Audio-Funktion der Webcam deaktivieren. Diese Probleme können
jedoch von Zeit zu Zeit für isochrone Geräte erneut auftreten und die USB-Verbindung abbrechen.
Problem: Es wird kein Bild auf dem Monitor dargestellt.
Überprüfen Sie den Status der LEDs auf TX und RX, wie oben erwähnt, und überprüfen Sie
die jeweiligen Verbindungen.
Überprüfen Sie, dass die DC-Stecker und Buchsen der Netzteile fest verbunden sind.
Überprüfen Sie, dass die Glasfaser-Stecker richtig eingesteckt sind und dass die Faser-Link-
Status-LED leuchtet.
Überprüfen Sie, dass Quelle und Display eingeschaltet und aktiv sind. Prüfen Sie ob sie
zueinander kompatibel sind wenn Sie sie direkt ohne den Extender anschließen.
Schalten Sie alle Geräte aus, dann schalten Sie in dieser Reihenfolge ein: zuerst die Sender
und Empfänger Module, dann das Display und schließlich die Quelle.
Stellen Sie sicher, dass Ihr MPO/MTP-Kabel hat keinen Knick hat – dies ist ein klares Indiz
für ein beschädigtes Kabel.
Wenn Sie das Problem nicht lösen können zögern Sie nicht das LINDY Support-Team unter
die Kontaktinformationen auf unserer Webseite zu kontaktieren.

Manuel Utilisateur Français
Introduction
Nous sommes heureux que votre choix se soit porté sur un produit LINDY et vous remercions de votre
confiance. Vous pouvez compter à tout moment sur la qualité de nos produits et de notre service. Cet
Extender KVM sur Fibre Optique LINDY est soumis à une durée de garantie LINDY de 2 année(s) et
d’une assistance technique gratuite à vie. Merci de lire attentivement ces instructions et de les conserver
pour future référence.
L’Extender KVM sur Fibre Optique vous permet d’étendre les signaux DisplayPort 4K et
résolutions plus élevées ainsi que des signaux USB 2.0 à une distance pouvant aller jusqu’à
200m, en utilisant une fibre optique MPO/MTP.
Contenu
Extender KVM LINDY sur fibre optique x 2 (1 x émetteur ou Transmitter, 1 x récepteur ou
Receiver)
Alimentation multi-pays (5V DC) x 2 - 100 - 240VAC / 5V DC, ~3A, avec 4 adaptateurs secteur
(Euro, UK, US, AUS/CN)
Ce manuel d’utilisateur
Caractéristiques & Spécifications
Etend les signaux DisplayPort et USB 2.0 jusqu’à 200m
Prise en charge DisplayPort 1.4 et résolutions jusqu’à 7680x4320 (théoriquement), HBR3,
jusqu’à 8,1Gbit/s par voie
Prise en charge de la fonction DisplayPort MST pour le raccordement de plusieurs moniteurs
via un hub MST et des convertisseurs actifs Eyefinity/Collage/Surround DP
USB prenant en charge presque tous les périphériques USB – sauf les iscochrones –
webcams et adaptateurs audio pourront être incompatibles et la fonction USB pourra ne plus
fonctionner
Taux de transfert USB jusqu’à 11Mbyte/s., ¼ of du taux de transfert USB 2.0 environ
Mode économie d’énergie lorsque la source est hors tension
Désactivation du laser si la fibre est défectueuse ou retirée
Utilise de la fibre optique MPO/MTP OM3 standard, 12 cœurs méthode A 1:1
Installation
Remarques préalables à l’installation
L’USB 2.0, les câbles DisplayPort et les adaptateurs DisplayPort actifs, ainsi que les fibres as
MPO/MTP en différentes longueurs jusqu’à 200m peuvent être obtenus de LINDY– merci de faire
votre choix sur le site LINDY. Pour d’autres longueurs de fibre MPO (sur mesure), merci de
contacter le support LINDY.
Les câbles DisplayPort ne devraient pas être plus longs que deux mètres, surtout pour les très
hautes résolutions.
Important! Ne pas plier la fibre optique MPO en dessous de rayon de courbure minimum, le cas
échéant la fibre pourra être endommagée de façon irréversible. Assurez-vous de protéger les
connecteurs contre la poussière. Ne pas poser de charge sur le câble et ne pas appliquer de
force de traction sur la fibre.
Merci de vous assurer que tous les appareils sont hors tension avant de débuter l’installation.
1. Connectez vos sources DP et USB au Transmitter.
2. Connectez vos appareils DP et USB en sortie du Receiver.
3. Retirez les capuchons anti-poussière des connecteurs fibre optique du Transmitter et du
Receiver et de votre fibre optique – merci de conserver ces capuchons afin de pouvoir les

Manuel Utilisateur Français
réutiliser en cas de déconnexion des fibres !
4. Connectez la fibre aux ports optique du Transmitter et du Receiver. Merci de vous assurer
que les connecteurs sont bien enfichés.
5. Branchez les alimentations au transmitter et au receiver et mettez tous les appareils sous
tension en démarrant par le moniteur.
6. Toutes les LED sur le Transmitter et le Receiver doivent s’allumées.
a. Si ce n’est pas le cas, assurez-vous que toutes les connexions sont bien réalisées !
b. Si la LED Power n’est pas allumée sur le Transmitter ou sur le Receiver l’alimentation
des appareils sera en cause.
c. Si la LED Source n’est pas allumée, la connexion à la source n’est pas correctement
établie
d. Si la LED Sink n’est pas allumée, la connexion à l’appareil d’affichage n’est pas
correctement établie
e. Si la LED USB n’est pas allumée, la connexion sur l’hôte USB sur le TX ou le périphérique
USB sur le RX n’est pas établie correctement
f. Si la LED Fibre n’est pas allumée, la connexion entre Transmitter et Receiver ne
fonctionne pas.
Remarque
Les hubs DisplayPort MST peuvent être utilisés pour connecter plusieurs moniteurs sur un
extender – merci de vous assurer que votre source DP prend en charge la fonction MST. Les
hubs MST sont disponibles sur le site LINDY.
Les adaptateurs DisplayPort actifs (compatibles Eyefinity, Collage ou Surround) peuvent être
utilisés pour convertir vers d’autres interfaces vidéo, les câbles adaptateurs passifs ne
fonctionnent pas.
Dépannage
Si vous rencontrez des problèmes avec la connexion USB, merci de vous assurer que vous
n’utilisez pas de périphériques USB isochrones, comme des webcams ou des adaptateurs audio
USB. Vous pouvez résoudre ces problèmes en désactivant la fonction audio de la webcam et/ou
en réduisant la qualité audio de l’adaptateur audio. Malgré cela, ces problèmes peuvent persister
pour les périphériques isochrones.
Il n’y a pas d’affichage sur l’écran.
Vérifiez l’état des LED sur le TX et RX comme indiqué ci-dessus et contrôlez les connexions
respectives.
Vérifiez le bon branchement de toutes les alimentations.
Vérifiez que toutes les connexions fibre optique sont bien réalisées et que la LED d’état Fibre
est bien allumée.
Vérifiez que source et affichage sont bien alimentés et actifs et qu’ils sont compatibles entre
eux, en les connectant directement sans utiliser l’extender.
Mettez tous les appareils hors tension, puis démarrez-les dans cet ordre: en premier, les
modules transmitter et receiver, puis l’écran et finalement la source.
Assurez-vous que la fibre optique MPO/MTP n’est pas pliée ou qu’il n’y a pas de nœud – cela
est une indication clair de défaillance de la fibre.
Si vous ne pouvez solutionner le problème, n’hésitez pas à contacter l’équipe du Support
Technique LINDY à l’aide des informations de contact disponibles sur nos sites internet.

Manuale d’uso Italiano
Introduzione
Vi ringraziamo per aver acquistato questo Extender KVM LINDY su fibra ottica. Questo prodotto è stato
progettato per garantirvi la massima affidabilità e semplicità di utilizzo ed è coperto da 2 anni di garanzia
LINDY oltre che da un servizio di supporto tecnico a vita. Per assicurarvi di farne un uso corretto vi
invitiamo a leggere attentamente questo manuale e a conservarlo per future consultazioni.
Questo Extender consente di inviare segnali DisplayPort 4K e USB 2.0 fino a 200m tramite un cavo in
fibra ottica MPO/MTP.
La confezione comprende:
Extender KVM ottico x 2 (trasmettitore e ricevitore)
2 alimentatori Multi-Country montabili a muro da 100 - 240VAC / 5V DC, ~3A, con 4 spine
intercambiabili (Euro, UK, US, AUS/CN)
Questo manuale
Caratteristiche & Specifiche
Estende segnali DisplayPort e USB 2.0 fino a 200m
Supporta segnali DisplayPort 1.4 e risoluzioni fino a 7680x4320, HBR3, 8.1Gbps per lane
Supporta la funzione DisplayPort MST per collegare più monitor tramite hub MST e convertitori attivi
Eyefinity/Collage/Surround DP
Supporta la maggior parte di dispositivi USB fatta eccezione per quelli sincroni come webcam e
adattatori audio che potrebbero risultare incompatibili
Supporta velocità di trasferimento dati USB fino a 11MByte/s
Modalità risparmio energetico automatica quando la sorgente è spenta
Disattivazione automatica del Laser in caso di rottura o disconnessione della fibra
Utilizza cavi in fibra MPO/MTP OM3 standard a 12 core metodo A 1:1
Installazione
Raccomandazioni pre-installazione
LINDY fornisce cavi USB 2.0 e DisplayPort, adattatori attivi DisplayPort e cavi MPO/MTP in diverse
lunghezze standard fino ad un massimo di 200m. Vi preghiamo di far riferimento al nostro sito web per
identificare i prodotti disponibili. Per qualsiasi altra misura di cavo MPO potete contattare il supporto LINDY
e richiedere un taglio su misura.
I cavi DisplayPort collegati a questo extender non dovrebbero essere più lunghi di 2m, specialmente se
utilizzate risoluzioni elevate.
Importante! Non piegate il cavo MPO oltre il suo raggio minimo di curvatura per non rischiare di
danneggiarlo irreparabilmente! Assicuratevi di proteggere i connettori dalla polvere, non schiacciate il cavo
con pesi elevati e fate sempre attenzione a non applicare un’eccessiva forza in trazione quando viene
steso.
Prima di iniziare l’installazione assicuratevi che tutti gli apparati coinvolti siano spenti.
1. Collegate la sorgente dei segnali DP e USB al Trasmettitore.
2. Collegate il monitor DP e i dispositivi USB al Ricevitore.
3. Rimuovete i tappi proteggi polvere dalle porte MPO del trasmettitore e del ricevitore oltre che dai
connettori del cavo in fibra ottica.Vi preghiamo di conservare in un luogo sicuro tutti i tappi per poterli

Manuale d’uso Italiano
riutilizzare nel caso si debba disconnettere il cavo!
4. Collegate il cavo in fibra ottica alle relative porte su Trasmettitore e Ricevitore. Assicuratevi che i
connettori siano inseriti correttamente e a fondo.
5. Collegate gli alimentatori alle due unità trasmittente e ricevente e alimentate tutti i dispositivi partendo
dal lato dello schermo andando verso la sorgente dei segnali.
6. Tutti i LED del Trasmettitore e del ricevitore si dovrebbero accendere.
a. Nel caso questo non accada assicuratevi che tutti i cavi siano ben inseriti!
b. Se il LED Power non si accende sul Trasmettitore o sul Ricevitore verificate che essi siano
correttamente collegati all’alimentazione
c. Se il LED Source non è acceso la connessione alla sorgente non è stabilita correttamente
d. Se il LED Sink non è acceso la connessione con il ricevitore non è stabilita correttamente
e. Se il LED USB LED non è acceso la connessione con l’Host USB Host sul TX o con il dispositivo
USB sull’ RX non è stabilita correttamente
f. Se il LED Fibre non è acceso la connessione fra Trasmettitore e Ricevitore non funziona.
Raccomandazioni
Se utilizzate Hub MST DisplayPort per connettere più schermi tramite un singolo extender assicuratevi
che la sorgente DP supporti la funzione MST. Potete trovare Hub MST adatti a questo utilizzo sul sito web
LINDY.
E’ possibile utilizzare convertitori attivi DisplayPort (compatibili con Eyefinity, Collage o Surround) per
convertire il segnale in diversi formati (gli adattatori passivi non funzionano).
Risoluzione dei problemi
Se riscontrate problemi con l’interfaccia USB assicuratevi di non utilizzare dispositivi isocroni con Webcam
o adattatori Audio USB. Potete risolvere il problema disattivando la funzione audio della webcam e/o
riducendo la risoluzione del convertitore audio. In ogni caso questo problema può ripresentarsi di volta in
volta utilizzando questo tipo di periferiche USB.
Non viene visualizzata nessuna immagine.
Controllate lo stato dei LED sul TX e sull’RX come menzionato sopra e controllate le relative
connessioni.
Controllate che i connettori DC utilizzati dagli alimentatori esterni siano fermamente connessi.
Controllate che i connettori del cavo in fibra sia connesso correttamente e che il LED Fibre sia acceso.
Controllate che la sorgente e lo schermo siano entrambi accesi e che funzionino quando connessi
direttamente uno
Spegnete tutti i dispositivi e riaccendeteli in quest’ordine: prima i moduli trasmettitore e ricevitore, poi
il monitor e da ultimo la sorgente.
Assicuratevi che il vostro cavo MPO/MTP non abbia pieghe o nodi che potrebbero indicare la presenza
di danni alla struttura interna
Nel caso non riusciate a risolvere il problema non esitate a contattare il supporto tecnico LINDY ai
recapiti pubblicati sul nostro sito.

Technical Data, Radio Frequency Energy, Certifications
Technical Data
Dimesnions: approx. 18 x 12 x 3 cm, each TX and RX, without MPO cable
Weight: approx.0.6kg each TX and RX, without accessories
Environmetal conditions: Operating Temp.: -10°C…50°C, Storage -20°C…75°C – For indoor use only
Power consumption: approx.0.5A/2,5W (Transmitter) and 0.8A/4W (Receiver) not including power
consumption of USB devices attached to the Receiver (max. 3A/15W including
USB devices as provided by the power supply)
Power supplies: 2x 100…240VAC / 5V DC ~3A / 1.35/3.5mm Level 6 with 4 adapters for
worldwide use (Euro, UK, USA, AUS/CN
CE Certification
This equipment complies with the requirements relating to Electromagnetic Compatibility Standards.
It has been manufactured under the scope of RoHS compliance.
CE Konformitätserklärung
Dieses Produkt entspricht den einschlägigen EMV Richtlinien der EU.
Diese Geräte wurden unter Berücksichtigung der RoHS Vorgaben hergestellt.
CLASS 1 LASER PRODUCT
MAX OUTPUT ≤ 1mW
Wavelength: 850nm
This Class 1 Laser product is not harmfull under normal conditions.
Dieses Klasse 1 Laser Produkt ist nicht gefährlich unter normalen Bedingungen.
Ce produit Laser de classe 1 n’est pas nocif dans les conditions normales.
Questo prodotto Laser di classe 1 non è nocivo nelle normali condizioni.
FCC Certification
This equipment has been tested and found to comply with the limits for a Class B digital device, pursuant
to part 15 of the FCC Rules. These limits are designed to provide reasonable protection against harmful
interference in a residential installation.
You are cautioned that changes or modification not expressly approved by the party responsible for
compliance could void your authority to operate the equipment.
This device complies with part 15 of the FCC Rules.
Operation is subject to the following two conditions:
1. This device may not cause harmful interference, and
2. This device must accept any interference received, including interference that may cause undesired
operation.

Recycling Information
WEEE (Waste of Electrical and Electronic Equipment),
Recycling of Electronic Products
Europe, United Kingdom
In 2006 the European Union introduced regulations (WEEE) for the collection and recycling of all waste electrical
and electronic equipment. It is no longer allowable to simply throw away electrical and electronic equipment. Instead,
these products must enter the recycling process.
Each individual EU member state has implemented the WEEE regulations into national law in slightly different ways.
Please follow your national law when you want to dispose of any electrical or electronic products. More details can
be obtained from your national WEEE recycling agency.
Germany / Deutschland Rücknahme Elektroschrott und Batterie-Entsorgung
Die Europäische Union hat mit der WEEE Direktive Regelungen für die Verschrottung und das Recycling von Elektro-
und Elektronikprodukten geschaffen. Diese wurden im Elektro- und Elektronikgerätegesetz – ElektroG in deutsches
Recht umgesetzt. Das Entsorgen von Elektro- und Elektronikgeräten über die Hausmülltonne ist verboten! Diese
Geräte müssen den Sammel- und Rückgabesystemen zugeführt werden! Dort werden sie kostenlos entgegen
genommen. Die Kosten für den weiteren Recyclingprozess übernehmen die Gerätehersteller.
LINDY bietet deutschen Endverbrauchern ein kostenloses Rücknahmesystem an, beachten Sie bitte, dass Batterien
und Akkus den Produkten vor der Rückgabe an das Rücknahmesystem entnommen werden müssen und über die
Sammel- und Rückgabesysteme für Batterien separat entsorgt werden müssen. Ausführliche Informationen zu
diesen Themen finden Sie stets aktuell auf der LINDY Webseite im Fußbereich.
France
En 2006, l'union Européenne a introduit la nouvelle réglementation (DEEE) pour le recyclage de tout équipement
électrique et électronique.
Chaque Etat membre de l’ Union Européenne a mis en application la nouvelle réglementation DEEE de manières
légèrement différentes. Veuillez suivre le décret d’application correspondant à l’élimination des déchets électriques
ou électroniques de votre pays.
Italy
Nel 2006 l’unione europea ha introdotto regolamentazioni (WEEE) per la raccolta e il riciclo di apparecchi elettrici ed
elettronici. Non è più consentito semplicemente gettare queste apparecchiature, devono essere riciclate. Ogni stato
membro dell’ EU ha tramutato le direttive WEEE in leggi statali in varie misure. Fare riferimento alle leggi del proprio
Stato quando si dispone di un apparecchio elettrico o elettronico.
Per ulteriori dettagli fare riferimento alla direttiva WEEE sul riciclaggio del proprio Stato.
LINDY Herstellergarantie – Hinweis für Kunden in Deutschland
LINDY gewährt für dieses Produkt über die gesetzliche Regelung in Deutschland hinaus eine zweijährige Hersteller-
garantie ab Kaufdatum. Die detaillierten Bedingungen dieser Garantie finden Sie auf der LINDY Website aufgelistet
bei den AGBs.
Hersteller / Manufacturer (EU):.
LINDY-Elektronik GmbH LINDY Electronics Ltd
Markircher Str. 20 Sadler Forster Way
68229 Mannheim Stockton-on-Tees, TS17 9JY
GERMANY United Kingdom
Email: info@lindy.com , T: +49 (0)621 470050 postmaster@lindy.co.uk , T: +44 (0)1642 754000
LINDY No. 39380
3rd Edition, April 2017
www.lindy.com
-
 1
1
-
 2
2
-
 3
3
-
 4
4
-
 5
5
-
 6
6
-
 7
7
-
 8
8
-
 9
9
-
 10
10
-
 11
11
-
 12
12


Lindy 200m Fibre Optic DisplayPort 1.2 & USB 2.0 KVM Extender Manuel utilisateur
- Taper
- Manuel utilisateur
dans d''autres langues
Documents connexes
-
Lindy 200m Fibre Optic DisplayPort 1.2 Extender Manuel utilisateur
-
Lindy 38204 Manuel utilisateur
-
-
-
-
-
-
-
Lindy 025.38417 1200m Fibre Optic DisplayPort 1.2 Extender Manuel utilisateur
-
