IKEA IBMS 1450 VM Mode d'emploi
- Catégorie
- Micro-ondes
- Taper
- Mode d'emploi
Ce manuel convient également à

Model/Modèle IBMS1450
W10259809A
BUILT-IN MICROWAVE OVEN
Use and Care Guide
For questions about features, operation/performance,
parts, accessories or service, call: 1-866-664-2449.
In Canada, for assistance, installation
or service, call: 1-866-664-2449.
FOUR À MICRO-ONDES ENCASTRÉ
Guide d’utilisation et d’entretien
Au Canada, pour assistance, installation
ou service composez le 1-866-664-2449.
Table of Contents/Table des matières .........................................2

2
TABLE OF CONTENTS
BUILT-IN MICROWAVE OVEN SAFETY.......................................3
Electrical Requirements ...............................................................4
PARTS AND FEATURES................................................................5
Turntable ......................................................................................5
MICROWAVE OVEN CONTROL....................................................5
Display..........................................................................................5
Start..............................................................................................5
Stop..............................................................................................6
Add 30 Seconds...........................................................................6
Selector Dial .................................................................................6
Settings Dial .................................................................................6
Clock ............................................................................................6
Tones............................................................................................6
Control Lock.................................................................................6
Cooling Fan ..................................................................................6
MICROWAVE OVEN USE ..............................................................7
Food Characteristics....................................................................7
Cooking Guidelines......................................................................7
Cookware and Dinnerware ..........................................................8
Aluminum Foil and Metal .............................................................8
Microwave Cooking Power..........................................................8
Manual Cooking ...........................................................................9
Doneness .....................................................................................9
Cook .............................................................................................9
Reheat ........................................................................................10
Defrost........................................................................................10
Popcorn, Baked Potatoes and Dinner Plate..............................11
MICROWAVE OVEN CARE..........................................................12
General Cleaning........................................................................12
TROUBLESHOOTING ..................................................................13
ASSISTANCE OR SERVICE.........................................................14
In the U.S.A. ...............................................................................14
In Canada ...................................................................................14
Replacement Parts.....................................................................14
WARRANTY ..................................................................................15
TABLE DES MATIÈRES
SÉCURITÉ DU FOUR À MICRO-ONDES ENCASTRÉ...............17
Spécifications électriques ..........................................................19
PIÈCES ET CARACTÉRISTIQUES ..............................................20
Plateau rotatif .............................................................................20
TABLEAU DE COMMANDE DU FOUR À MICRO-ONDES .......20
Affichage.....................................................................................21
Start (mise en marche) ...............................................................21
Stop (arrêt)..................................................................................21
Add 30 Seconds (ajouter 30 secondes).....................................21
Bouton Selector (sélecteur)........................................................21
Bouton Settings (réglages).........................................................21
Horloge .......................................................................................21
Signaux sonores.........................................................................21
Verrouillage des commandes.....................................................21
Ventilateur de refroidissement ...................................................21
UTILISATION DU FOUR À MICRO-ONDES ...............................22
Caractéristiques des aliments....................................................22
Guide de cuisson........................................................................22
Ustensiles de cuisson et vaisselle..............................................23
Papier d’aluminium et métal.......................................................23
Puissance de cuisson des micro-ondes....................................23
Cuisson manuelle.......................................................................24
Degré de cuisson .......................................................................24
Cuisson.......................................................................................24
Réchauffage ...............................................................................25
Décongélation ............................................................................26
Maïs éclaté, pommes de terre au four et assiettée ...................27
ENTRETIEN DU FOUR À MICRO-ONDES .................................28
Nettoyage général ......................................................................28
DÉPANNAGE.................................................................................29
ASSISTANCE OU SERVICE.........................................................30
Au Canada..................................................................................30
Pièces de rechange....................................................................30
GARANTIE.....................................................................................31

3
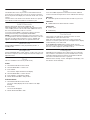
BUILT-IN MICROWAVE OVEN SAFETY
You can be killed or seriously injured if you don't immediately
You
can be killed or seriously injured if you don't
follow
All safety messages will tell you what the potential hazard is, tell you how to reduce the chance of injury, and tell you what can
happen if the instructions are not followed.
Your safety and the safety of others are very important.
We have provided many important safety messages in this manual and on your appliance. Always read and obey all safety
messages.
This is the safety alert symbol.
This symbol alerts you to potential hazards that can kill or hurt you and others.
All safety messages will follow the safety alert symbol and either the word “DANGER” or “WARNING.”
These words mean:
follow instructions.
instructions.
DANGER
WARNING
When using electrical appliances basic safety precautions should be followed, including the following:
IMPORTANT SAFETY INSTRUCTIONS
SAVE THESE INSTRUCTIONS
WARNING: To reduce the risk of burns, electric
shock, fire, injury to persons, or exposure to excessive
microwave energy:
■ Read all instructions before using the microwave oven.
■ Read and follow the specific “PRECAUTIONS TO
AVOID POSSIBLE EXPOSURE TO EXCESSIVE
MICROWAVE ENERGY” found in this section.
■ The microwave oven must be grounded. Connect only
to properly grounded outlet. See “GROUNDING
INSTRUCTIONS” found in this section and in the
provided Installation Instructions.
■ Install or locate the microwave oven only in
accordance with the provided Installation Instructions.
■ Some products such as whole eggs in the shell and
sealed containers – for example, closed glass jars –
are able to explode and should not be heated in the
microwave oven.
■ Use the microwave oven only for its intended use as
described in this manual. Do not use corrosive
chemicals or vapors in the microwave oven. This type
of oven is specifically designed to heat, cook, or dry
food. It is not designed for industrial or laboratory use.
■ As with any appliance, close supervision is necessary
when used by children.
■ Do not operate the microwave oven if it has a
damaged cord or plug, if it is not working properly, or
if it has been damaged or dropped.
■ The microwave oven should be serviced only by
qualified service personnel. Call an authorized service
company for examination, repair, or adjustment.
■ See door surface cleaning instructions in the
“Microwave Oven Care” section.
■ To reduce the risk of fire in the oven cavity:
– Do not overcook food. Carefully attend the microwave oven
when paper, plastic, or other combustible materials are placed
inside the oven to facilitate cooking.
– Remove wire twist-ties from paper or plastic bags before
placing bags in oven.
– If materials inside the oven ignite, keep oven door closed, turn
oven off, and disconnect the power cord, or shut off power at
the fuse or circuit breaker panel.
– Do not use the cavity for storage purposes. Do not leave
paper products, cooking utensils, or food in the cavity when
not in use.
■ Liquids, such as water, coffee, or tea are able to be overheated
beyond the boiling point without appearing to be boiling. Visible
bubbling or boiling when the container is removed from the
microwave oven is not always present. THIS COULD RESULT
IN VERY HOT LIQUIDS SUDDENLY BOILING OVER WHEN
THE CONTAINER IS DISTURBED OR A SPOON OR OTHER
UTENSIL IS INSERTED INTO THE LIQUID.
To reduce the risk of injury to persons:
– Do not overheat the liquid.
– Stir the liquid both before and halfway through heating it.
– Do not use straight-sided containers with narrow necks.
– After heating, allow the container to stand in the microwave
oven for a short time before removing the container.
– Use extreme care when inserting a spoon or other utensil into
the container.
■ Oversized foods or oversized metal utensils should not be
inserted in the microwave oven as they may create a fire or risk
of electric shock.
■ Do not clean with metal scouring pads. Pieces can burn off the
pad and touch electrical parts involving a risk of electric shock.

4
Electrical Requirements
Observe all governing codes and ordinances.
Required:
■ A 120 Volt, 60 Hz, AC only, 15- or 20-amp electrical supply
with a fuse or circuit breaker.
Recommended:
■ A time-delay fuse or time-delay circuit breaker.
■ A separate circuit serving only this microwave oven.
IMPORTANT SAFETY INSTRUCTIONS
SAVE THESE INSTRUCTIONS
■
Do not use paper products when appliance is operated in
convection, combination, grill or “PAN BROWN” mode (on
models with such features).
■
Do not store any materials, other than manufacturer’s
recommended accessories, in this oven when not in use.
■
Do not store anything directly on top of the microwave oven
when the microwave oven is in operation.
■
Do not cover or block any openings on the microwave
oven.
■
Do not store this microwave oven outdoors. Do not use the
microwave oven near water - for example, near a kitchen
sink, in a wet basement, or near a swimming pool, or
similar locations.
■
Do not immerse cord or plug in water.
■
Keep cord away from heated surfaces.
■
Do not let cord hang over edge of table or counter.
■
Do not mount over a sink.
■
Do not cover racks or any other part of the oven with metal
foil. This will cause overheating of the oven.
PRECAUTIONS TO AVOID POSSIBLE EXPOSURE TO
EXCESSIVE MICROWAVE ENERGY
(a) Do not attempt to operate this oven with the door open
since open-door operation can result in harmful exposure
to microwave energy. It is important not to defeat or
tamper with the safety interlocks.
(b) Do not place any object between the oven front face and
the door or allow soil or cleaner residue to accumulate on
sealing surfaces.
(c) Do not operate the oven if it is damaged. It is particularly
important that the oven door close properly and that there
is no damage to the:
(1) Door (bent),
(2) Hinges and latches (broken or loosened),
(3) Door seals and sealing surfaces.
(d) The oven should not be adjusted or repaired by anyone
except properly qualified service personnel.
Electrical Shock Hazard
Plug into a grounded 3 prong outlet.
Do not remove ground prong.
Do not use an adapter.
Do not use an extension cord.
Failure to follow these instructions can result in death,
fire, or electrical shock.
WARNING
GROUNDING INSTRUCTIONS
SAVE THESE INSTRUCTIONS
■
For all cord connected appliances:
The microwave oven must be grounded. In the event of
an electrical short circuit, grounding reduces the risk of
electric shock by providing an escape wire for the electric
current. The microwave oven is equipped with a cord
having a grounding wire with a grounding plug. The plug
must be plugged into an outlet that is properly installed
and grounded.
WARNING: Improper use of the grounding plug can
result in a risk of electric shock. Consult a qualified
electrician or serviceman if the grounding instructions are
not completely understood, or if doubt exists as to whether
the microwave oven is properly grounded.
Do not use an extension cord. If the power supply cord is
too short, have a qualified electrician or serviceman install
an outlet near the microwave oven.
This device complies with Part 18 of the FCC Rules.

5
PARTS AND FEATURES
This manual may cover several different models. The model you have purchased may have some or all of the features shown here. The
appearance of your particular model may differ slightly from the illustrations in this manual.
Turntable
The turntable can rotate in either direction to help cook food
more evenly. For best cooking results, do not operate the
microwave oven without having the turntable in place. See
“Assistance or Service” to reorder any of the parts.
To Install: Place the turntable on the support. Fit the raised,
curved lines in the center of the turntable bottom between the
three spokes of the hub. The rollers on the support should fit
inside the turntable bottom ridge.
MICROWAVE OVEN CONTROL
Display
When power is first supplied to the microwave oven, a “:” will
appear in the display.
When the microwave oven is in use, the display shows cooking
power, quantities, weights and/or prompts. When the microwave
oven is not in use, the display shows the time of day.
Start
The START button begins any function. If cooking is interrupted,
touching START will resume the preset cycle.
NOTE: To avoid unintentional operation of the microwave oven,
a cooking function cannot be started if the microwave oven door
has been closed for about 5 minutes or more. “DOOR” will
appear in the display until the door is opened and closed.
A. Trim
B. Control panel
C. Door lock system
D. Microwave oven light
(inaccessible–in ceiling)
E. Glass turntable
F. Turntable support, rollers and hub
G. Door handle
H. Window
I. Cooking guide label
J. Model and serial number plate
K. Frame
L. Microwave inlet cover
A B C
I H G
J
K
L
D
E
F
A. Turntable
B. Support
C. Hub
A
B
C
SELECTOR
OFF
MANUAL
DEFROST
REHEAT
COOK
DINNER
PLATE
BAKED
POTATOES
POPCORN
SET
CLOCK
STOP
CONTROL
LOCK
FOOD
CLASS
POWER
SETTINGS
START
ADD 30 SECONDS
CUPS
OZ
LBS
PIECES SERVINGS

6
Stop
The STOP button clears any incorrect command and cancels
most functions except for the Control Lock. It will not erase the
time of day unless the display is in Set Clock mode. See “Clock”
section.
The microwave oven will also turn off when the door is opened.
Close the door and touch START to resume the cycle.
Add 30 Seconds
With the SELECTOR dial turned to MANUAL, the
ADD 30 SECONDS control automatically starts the microwave
oven at 100% power for 30 seconds. Each additional touch of
the control will add 30 seconds of cook time.
Cook time may be added to a manual cooking cycle at the
current power level by touching ADD 30 SECONDS.
NOTE: To avoid unintentional operation of the microwave oven,
a cooking function cannot be started if the microwave oven door
has been closed for about 5 minutes or more. “DOOR” will
appear in the display until the door is opened and closed.
Selector Dial
Use the SELECTOR dial to enter programming modes, or
standby mode.
Settings Dial
Use the SETTINGS dial to select options, set the clock, set cook
time and cook power, select food type and amount/weight, and
adjust doneness.
Clock
This is a standard 12-hour clock (12:00-11:59).
To Set:
1. Turn SELECTOR dial to SET CLOCK.
2. Turn SETTINGS dial to set the hour.
3. Press START.
The “minutes” digits will flash in the display.
4. Turn SETTINGS dial to set the minutes.
5. Press START to complete the setting.
6. Return SELECTOR dial to OFF position.
To Cancel Clock:
1. Turn SELECTOR dial to SET CLOCK.
The clock-setting display will show, with the hour digits
flashing.
2. Press STOP.
The clock will disappear.
3. Return SELECTOR dial to OFF.
Tones
Tones are audible signals that cannot be turned off, and their
volume cannot be changed. These tones indicate the following:
One tone
■
Reminder, repeat each minute after the end-of-cycle tones
Two tones
■
Hidden feature has been entered or exited
Three tones
■
End of cycle
■
Invalid entry
Control Lock
The Control Lock shuts down the panel controls to avoid
unintended use of the microwave oven.
When the control panel is locked, none of the controls will
function. If a control is pressed, “LOC” will appear in the display
and invalid entry tones will sound.
To Lock/Unlock Control: Before locking, make sure the
microwave oven is off. Press and hold STOP for 3 seconds until
the tone sounds. Repeat to unlock the controls.
Cooling Fan
Depending on the length of the cooking cycle, the cooling fan
may continue to run after that cycle has ended. This is normal,
and helps eliminate moisture that may accumulate inside the
microwave oven before the door is opened.
While the fan is running, “COOL” will appear in the display. The
fan will turn off automatically.

7
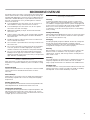
MICROWAVE OVEN USE
A magnetron in the microwave oven produces microwaves which
reflect off the metal floor, walls and ceiling and pass through the
turntable and appropriate cookware to the food. Microwaves are
attracted to and absorbed by fat, sugar and water molecules in
the food, causing them to move, producing friction and heat
which cooks the food.
■
To avoid damage to the microwave oven, do not lean on or
allow children to swing on the microwave oven door.
■
To avoid damage to the microwave oven, do not operate
microwave oven when it is empty.
■
Baby bottles and baby food jars should not be heated in
microwave oven.
■
Clothes, flowers, fruit, herbs, wood, gourds, paper, including
brown paper bags and newspaper, should not be dried in
microwave oven.
■
Paraffin wax will not melt in the microwave oven because it
does not absorb microwaves.
■
Use oven mitts or pot holders when removing containers from
microwave oven.
■
Do not overcook potatoes. At the end of the recommended
cook time, potatoes should be slightly firm. Let potatoes
stand for 5 minutes. They will finish cooking while standing.
■
Do not cook or reheat whole eggs inside the shell. Steam
buildup in whole eggs may cause them to burst, requiring
significant cleanup of microwave oven cavity. Cover poached
eggs and allow a standing time.
Food Characteristics
When microwave cooking, the amount, size and shape, starting
temperature, composition and density of the food affect cooking
results.
Amount of Food
The more food heated at once, the longer the cook time needed.
Check for doneness and add small increments of time if
necessary.
Size and Shape
Smaller pieces of food will cook more quickly than larger pieces,
and uniformly shaped foods cook more evenly than irregularly
shaped food.
Starting Temperature
Room temperature foods will heat faster than refrigerated foods,
and refrigerated foods will heat faster than frozen foods.
Composition and Density
Foods high in fat and sugar will reach a higher temperature, and
will heat faster than other foods. Heavy, dense foods, such as
meat and potatoes, require a longer cook time than the same size
of a light, porous food, such as cake.
Cooking Guidelines
Covering
Covering food helps retain moisture, shorten cook time and
reduce spattering. Use the lid supplied with cookware. If a lid is
not available, wax paper, paper towels or plastic wrap approved
for microwave ovens may be used. Plastic wrap should be turned
back at one corner to provide an opening to vent steam.
Condensation on the door and cavity surfaces is normal during
heavy cooking.
Stirring and Turning
Stirring and turning redistribute heat evenly to avoid overcooking
the outer edges of food. Stir from outside to center. If possible,
turn food over from bottom to top.
Arranging
If heating irregularly shaped or different sized foods, arrange the
thinner parts and smaller sized items toward the center. If
cooking several items of the same size and shape, place them in
a ring pattern, leaving the center of the ring empty.
Piercing
Before heating, use a fork or small knife to pierce or prick foods
that have a skin or membrane, such as potatoes, egg yolks,
chicken livers, hot dogs, and sausage. Prick in several places to
allow steam to vent.
Shielding
Use small, flat pieces of aluminum foil to shield the thin pieces of
irregularly shaped foods, bones and foods such as chicken
wings, leg tips and fish tail. See “Aluminum Foil and Metal” first.
Standing Time
Food will continue to cook by the natural conduction of heat even
after the microwave cooking cycle ends. The length of standing
time depends on the volume and density of the food.

8
Cookware and Dinnerware
Cookware and dinnerware must fit on the turntable. Always use
oven mitts or pot holders when handling because any dish may
become hot from heat transferred from the food. Do not use
cookware and dinnerware with gold or silver trim. Use the
following chart as a guide, then test before using.
To Test Cookware or Dinnerware for Microwave Use:
1. Place cookware or dinnerware in microwave oven with
1 cup (250 mL) of water beside it.
2. Cook at 100% cooking power for 1 minute.
Do not use cookware or dinnerware if it becomes hot and the
water stays cool.
Aluminum Foil and Metal
Always use oven mitts or pot holders when removing dishes from
the microwave oven.
Aluminum foil and some metal can be used in the microwave
oven. If not used properly, arcing (a blue flash of light) can occur
and cause damage to the microwave oven.
OK for Use
Racks and bakeware supplied with the microwave oven (on some
models), aluminum foil for shielding, and approved meat
thermometers may be used with the following guidelines:
■
To avoid damage to the microwave oven, do not allow
aluminum foil or metal to touch the inside cavity walls,
ceiling or floor.
■
Always use the turntable.
■
To avoid damage to the microwave oven, do not allow
contact with another metal object during microwave cooking.
Do Not Use
Metal cookware and bakeware, gold, silver, pewter, non-
approved meat thermometers, skewers, twist ties, foil liners
such as sandwich wrappers, staples and objects with gold or
silver trim or a metallic glaze should not be used in the
microwave oven.
Microwave Cooking Power
Many recipes for microwave cooking specify which cooking
power to use by percent or name. For example,
70%=Medium-High.
Use the following chart as a general guide for the suggested
cooking power of specific foods.
MATERIAL RECOMMENDATIONS
Aluminum Foil,
Metal
See “Aluminum Foil and Metal” section.
Browning Dish Bottom must be at least 3/16" (5 mm)
above the turntable. Follow manufacturer’s
recommendations.
Ceramic Glass,
Glass
Acceptable for use.
China,
Earthenware
Follow manufacturer’s recommendations.
Melamine Follow manufacturer’s recommendations.
Paper: Towels,
Dinnerware,
Napkins
Use nonrecycled and those approved by
the manufacturer for microwave oven use.
Plastic: Wraps,
Bags, Covers,
Dinnerware,
Containers
Use those approved by the manufacturer
for microwave oven use.
Pottery and Clay Follow manufacturer’s recommendations.
Silicone
Bakeware
Follow manufacturer’s recommendations.
Straw, Wicker,
Wooden
Containers
Do not use in microwave oven.
Wax Paper Acceptable for use.
PERCENT/NAME USE
100%, High
(default setting)
Quick heating convenience foods and
foods with high water content, such as
soups, beverages and most vegetables.
90% Cooking small, tender pieces of meat,
ground meat, poultry pieces and fish fillets.
Heating cream soups.
80% Heating rice, pasta or stirrable casseroles.
Cooking and heating foods that need a
cook power lower than high. For example,
whole fish and meat loaf.
70%,
Medium-High
Reheating a single serving of food.
60% Cooking sensitive foods such as cheese
and egg dishes, pudding and custards.
Cooking non-stirrable casseroles, such as
lasagna.
50%, Medium Cooking ham, whole poultry and pot
roasts.
Simmering stews.
40% Melting chocolate.
Heating bread, rolls and pastries.
30%, Medium-
Low, Defrost
Defrosting bread, fish, meats, poultry and
precooked foods.
20% Softening butter, cheese, and ice cream.
10%, Low Taking chill out of fruit.

9
Manual Cooking
Cook time may be set in the following increments, in minutes and
seconds:
To Use:
1. Place food on the turntable, and close the door.
2. Turn SELECTOR dial to MANUAL.
Turn SETTINGS dial to set cook time. See chart for time
increments.
If cooking at 100% power, skip Step 3.
3. Press POWER button.
The display will show the default power of 100%.
Turn SETTINGS dial to select cook power
4. Press START.
The display will count down the cook time.
When the cycle ends, “END” will appear in the display, and
the end-of-cycle tones will sound, followed by reminder
tones.
5. Press STOP to clear the display and/or stop reminder tones.
6. Return SELECTOR dial to OFF.
Doneness
For most automatic cooking functions, the doneness of a
particular food item can be adjusted by turning the SETTINGS
dial. Increasing or decreasing the doneness adds time to, or
subtracts time from the cooking cycle.
For up to 20 seconds after cooking has started, turning the
SETTINGS dial will change the doneness value. There are 5
settings: default, “Hi 1,” “Hi 2,” “L 1” and “L 2.” The display
shows “----” for the default setting.
Doneness cannot be adjusted for Defrost functions or for the
Popcorn function.
Doneness cannot be decreased for Boneless Chicken Breasts
function.
Cook
Times and cooking power have been preset for certain
microwavable foods. Use the following chart as a guide.
To Use Cook:
1. Place food on the turntable.
2. Turn SELECTOR dial to COOK.
3. Press FOOD CLASS control.
The display will show “Fc1” for the first food type.
Press FOOD CLASS repeatedly until the desired food class is
displayed. See chart.
4. Turn SETTINGS dial to the desired amount or weight.
5. Press START.
Doneness may be adjusted within 20 seconds after touching
START by turning the SETTINGS dial.
The display will count down the cook time.
When the cycle ends, “END” will appear in the display, and
the end-of-cycle tones will sound, followed by reminder
tones.
6. Press OFF or open the door to clear the display and/or stop
reminder tones.
7. Return SELECTOR dial to OFF.
INCREMENT TIME SETTING
0:05 0:05-1:00
0:15 1:15-3:00
0:30 3:30-6:00
1:00 7:00-30:00
5:00 35:00-90:00
FOOD NO. QUANTITY/INSTRUCTIONS
Canned
Vegetables
1 1-4 cups (250 mL-1 L)/
Place in microwave-safe container.
Cover with plastic wrap and vent. Stir
and let stand 2-3 minutes after cooking.
Cereal 2 1-4 servings/
Use instant cereal. Follow instructions on
package. Use microwave-safe bowls
with high sides.
Boneless
Chicken
Breasts
3 1-4 pieces, 6 oz (170 g) each/
Place in microwave-safe dish. Add 2 tbs
(30 mL) water. Cover with plastic wrap
and vent. Let stand in microwave oven
for 3 minutes after cooking.
Fresh
Vegetables
4 1-4 cups (250 mL-1 L)/
Place in microwave-safe container. Add
2-4 tbs (30-60 mL) water. Cover with
plastic wrap and vent. Stir and let stand
2-3 minutes after cooking.
Frozen
Entrée
5 10 or 20 oz (283 or 567 g)/
Remove from package. Loosen cover on
three sides. If entree is not in microwave-
safe container, place on plate, cover with
plastic wrap and vent.
Frozen
Vegetables
6 1-4 cups (250 mL-1 L)/
Remove from package. Place in
microwave-safe container. Cover with
plastic wrap and vent. Stir and let stand
2-3 minutes after cooking.
Rice 7 0.5-2 cups (125-500 mL) dry rice (Use
medium or long grain rice.)/
Follow measurements on package for
ingredient amounts. Place rice and liquid
in microwave-safe dish. Cover with
loose-fitting lid. Let stand 5 minutes after
cooking, or until liquid is absorbed. Stir.

10
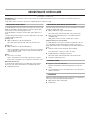
Reheat
Times and cooking power have been preset for reheating specific
food types. Use the following chart as a guide.
*For smaller rolls, 2 rolls may be counted as 1 piece.
To Use Reheat:
1. Place food on the turntable.
2. Turn SELECTOR dial to REHEAT.
3. Press FOOD CLASS control.
The display will show “Fc1” for the first food type.
Press FOOD CLASS repeatedly until the desired food class is
displayed. See chart.
4. Turn SETTINGS dial to the desired amount or weight.
5. Press START.
Doneness may be adjusted within 20 seconds after touching
START by turning the SETTINGS dial.
The display will count down the cook time.
When the cycle ends, “END” will appear in the display, and
the end-of-cycle tones will sound, followed by reminder
tones.
6. Press OFF or open the door to clear the display and/or stop
reminder tones.
7. Return SELECTOR dial to OFF.
To Reheat Manually: Follow instructions in “Manual Cooking”
section, and use 70% cooking power. See “Microwave Cooking
Power” chart.
Defrost
The automatic defrost function can be used, or the microwave
oven can be manually set to defrost.
■
Unwrap foods and remove lids (e.g. fruit juice containers)
before defrosting.
■
Shallow packages will defrost more quickly than deep blocks.
■
Separate food pieces as soon as possible during or at the
end of cycle for more even defrosting.
■
Use small pieces of aluminum foil to shield parts of food such
as chicken wings, leg tips and fish tails. See “Aluminum Foil
and Metal” first.
The automatic defrost function should not be used for food left
outside the freezer for more than 20 minutes and frozen ready-
made food.
Times and cooking power have been preset for defrosting certain
food types. Use the following chart as a guide.
To Use the Defrost Control:
1. Place food on the turntable.
2. Turn SELECTOR dial to DEFROST.
3. Press FOOD CLASS control.
The display will show “Fc1” for the first food type.
Press FOOD CLASS repeatedly until the desired food class is
displayed. See chart.
4. Turn SETTINGS dial to the desired weight.
5. Press START.
The display will count down the cook time.
When the cycle ends, “END” will appear in the display, and
the end-of-cycle tones will sound, followed by reminder
tones.
6. Press OFF or open the door to clear the display and/or stop
reminder tones.
7. Return SELECTOR dial to OFF.
To Defrost Manually: Follow instructions in “Manual Cooking”
section, and use 30% cooking power. See “Microwave Cooking
Power” chart.
FOOD NO. QUANTITY/INSTRUCTIONS
Baked Goods 1 1-6 pieces, 2 oz (57 g) each*/
Place on paper towel.
Beverage 2 1 or 2 cups, 8 oz (250 mL) each/
Do not cover. The diameter of the cup’s
opening will affect how the liquid heats.
Beverages in cups with smaller
openings may heat faster.
Casserole
(refrigerated)
3 1-4 cups (250 mL-1 L)/
Place in microwave-safe container and
cover with plastic wrap. Stir and let
stand 2-3 minutes after reheating.
Pizza
(refrigerated)
4 1-3 pieces, 3 oz (85 g) each/
Place on paper towel or paper plate.
Sauce 5 1-4 cups (250 mL-1 L)/
Place in microwave-safe container.
Cover with plastic wrap and vent. Stir
and let stand 2-3 minutes after
reheating.
Soup 6 1-4 cups (250 mL-1 L)/
Place in microwave-safe container.
Cover with plastic wrap and vent. Stir
and let stand 2-3 minutes after
reheating.
FOOD NO. QUANTITY/INSTRUCTIONS
Bread
(dinner rolls, muffins,
buns, bread slices,
bread loaf)
1 0.1-2.0 lbs (45-900 g)/
Place on paper towel. Do not
cover.
Fish/Seafood
(fillets, steaks, whole
shellfish)
2 0.2-4.4 lbs (90 g-2 kg)/
Remove wrap and place in
microwave-safe baking dish.
Do not cover.
Meat
(ground, steaks, roasts,
stew, chops, ribs)
3 0.2-6.6 lbs (90 g-3 kg)/
Remove wrap and place in
microwave-safe baking dish.
Do not cover.
Poultry
(whole chicken,
chicken pieces,
Cornish hens, turkey
breast)
4 0.2-6.6 lbs (90 g-3 kg)/
Remove wrap and place
breast side up in microwave-
safe baking dish. Do not
cover.

11
Popcorn, Baked Potatoes and Dinner Plate
NOTE: During Popcorn function, as with all microwave cooking
functions, the microwave oven should be attended at all times.
Listen for popping to slow to 1 pop every 1 or 2 seconds, then
stop the cycle.
Use the following chart as a guide for the SELECTOR dial modes.
*To avoid damage to the microwave oven, do not use regular
paper bags or glassware. For best cooking results, do not try to
pop unpopped kernels. Use fresh bags of popcorn for optimal
results. Cooking results may vary by brand and fat content. For
bag sizes not listed in this section, follow directions on package.
If using a microwave popcorn popper, follow manufacturer’s
instructions.
To Use Popcorn:
1. Place popcorn bag on the turntable, correct side up, as
indicated on the package.
2. Turn SELECTOR dial to POPCORN.
The display will show “3.0.” Turning the SETTINGS dial will
change the selection to “3.5.”
3. Press START.
The display will count down the popping time.
When the cycle ends, “END” will appear in the display, and
the end-of-cycle tones will sound, followed by reminder
tones.
4. Press STOP or open the door to clear the display and/or stop
reminder tones.
5. Return the SELECTOR dial to OFF.
To Use Baked Potatoes:
1. Place food on the turntable, and close the door.
2. Turn SELECTOR dial to BAKED POTATO.
3. Turn SETTINGS dial to select number of potatoes.
4. Press START.
Doneness may be adjusted during the first 20 seconds of
cooking by turning the dial. See “Doneness” section.
The display will count down the cook time.
When the cycle ends, “END” will appear in the display, and
the end-of-cycle tones will sound, followed by reminder
tones.
5. Press STOP or open the door to clear the display and/or stop
reminder tones.
6. Return the SELECTOR dial to OFF.
To Use Dinner Plate:
1. Place food on the turntable, and close the door.
2. Turn SELECTOR dial to DINNER PLATE.
3. Press START.
Doneness may be adjusted during the first 20 seconds of
cooking by turning the dial. See “Doneness” section.
The display will count down the reheat time.
When the cycle ends, “END” will appear in the display, and
the end-of-cycle tones will sound, followed by reminder
tones.
4. Press STOP or open the door to clear the display and/or stop
reminder tones.
5. Return the SELECTOR dial to OFF.
FOOD SERVING SIZE INSTRUCTIONS
Popcorn* 3.0 or 3.5 oz (85 or
99 g)
Pop only one package at a
time.
Baked
Potatoes
1-4 medium,
10-13 oz (283-369 g)
each, similar in size
Pierce each one several
times with a fork. Place on
paper towel, around
turntable edges, at least 1"
(2.5 cm) apart. Let stand
5 minutes after cooking.
Dinner
Plate
1 serving (1 plate),
8-16 oz (227-454 g)
Place food on plate, cover
with plastic wrap and vent.

12
MICROWAVE OVEN CARE
General Cleaning
IMPORTANT: Before cleaning, make sure all controls are off and the microwave oven is cool. Always follow label instructions on
cleaning products.
Soap, water and a soft cloth or sponge are suggested unless otherwise noted.
MICROWAVE OVEN CAVITY
To avoid damage to the microwave oven cavity, do not use soap-
filled scouring pads, abrasive cleaners, steel-wool pads, gritty
washcloths or some recycled paper towels.
To avoid damage to stainless steel models, rub in direction of
grain.
The area where the microwave oven door and frame touch when
closed should be kept clean.
Average soil
■
Mild, nonabrasive soaps and detergents:
Rinse with clean water and dry with soft, lint-free cloth.
Heavy soil
■
Mild, nonabrasive soaps and detergents:
Heat 1 cup (250 mL) of water for 2 to 5 minutes in microwave
oven. Steam will soften soil. Rinse with clean water and dry
with soft, lint-free cloth.
Odors
■
Lemon juice or vinegar:
Heat 1 cup (250 mL) of water with 1 tbs (15 mL) of either
lemon juice or vinegar for 2 to 5 minutes in microwave oven.
Microwave Inlet Cover
To avoid arcing and microwave oven damage, the microwave
inlet cover (see “Parts and Features”) should be kept clean.
■
Wipe with wet cloth.
MICROWAVE OVEN DOOR AND EXTERIOR
The area where the microwave oven door and frame touch when
closed should be kept clean.
■
Mild, nonabrasive soaps and detergents:
Rinse with clean water and dry with soft, lint-free cloth.
■
Glass cleaner and paper towels or nonabrasive plastic
scrubbing pad:
Apply glass cleaner to towel, not directly to surface.
Stainless Steel (on some models)
To avoid damage to microwave oven door and exterior, do not
use soap-filled scouring pads, abrasive cleaners, steel-wool
pads, gritty washcloths or some paper towels. Rub in direction of
grain.
■
Stainless Steel Cleaner and Polish (not included):
See “Assistance or Service” section to order.
■
Liquid detergent or all-purpose cleaner:
Rinse with clean water and dry with soft, lint-free cloth.
■
Vinegar for hard water spots
CONTROL PANEL
■
Sponge or soft cloth and water:
Dampen sponge with water and wipe panel. Dry with soft
cloth.
■
To avoid damage to the control panel, do not use chemical or
abrasive cleansers.
TURNTABLE
Replace turntable immediately after cleaning. Do not operate the
microwave oven without the turntable in place.
■
Mild cleanser and scouring pad
■
Dishwasher

13
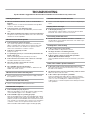
TROUBLESHOOTING
Try the solutions suggested here first in order to avoid the cost of an unnecessary service call.
Nothing will operate
■
Has a household fuse blown, or has a circuit breaker
tripped?
Replace the fuse or reset the circuit breaker. If the problem
continues, call an electrician.
■
Is the microwave oven wired properly?
See Installation Instructions provided with your microwave
oven.
■
Does the household power supply come from an inverter?
The power source for this microwave oven is also an inverter,
and the two are incompatible.
Microwave oven will not operate
■
Is the magnetron working properly?
Try to heat 1 cup (250 mL) of cold water for 2 minutes at
100% cooking power. If water does not heat, try the steps
below. If microwave oven still does not operate, call for
service. See “Assistance or Service” section.
■
Is the door completely closed?
Firmly close door.
■
Is a packaging spacer (on some models) attached to the
inside of the door?
Remove packaging spacer, then firmly close door.
■
Is the electronic microwave oven control set correctly?
See “Microwave Oven Control” section.
■
On some models, is the Control Lock set?
See “Control Lock” section.
■
Does “DOOR” appear in the display?
Open and close the microwave oven door, and then touch
START. See “Start” section.
Microwave oven makes humming noise
■
This is normal and occurs when the power supply switches
the magnetron on and off.
Microwave oven door looks wavy
■
This is normal and will not affect performance.
Turntable will not operate
■
Is the turntable properly in place?
Make sure turntable is correct side up and is sitting securely
on the turntable support. See “Turntable” section.
■
Is the turntable support operating properly?
Remove turntable. Remove and clean turntable hub, support
and rollers. Replace hub, support and turntable. Place 1 cup
(250 mL) of water on the turntable, then restart the microwave
oven. If it still is not working, call for service. See “Assistance
or Service” section. Do not operate the microwave oven
without turntable and turntable support working properly.
Turntable alternates rotation directions
■
This is normal and depends on motor rotation at beginning of
cycle.
Display shows messages
■
Is the display showing “:”?
There has been a power failure, or the clock time has been
turned off. See “Clock” section to reset clock.
Fan running slower than usual
■
Has the microwave oven been stored in a cold area?
The fan will run slower until the microwave oven warms up to
normal room temperature.
Cooking times seem too long
■
Is the cooking power set properly?
See “Microwave Cooking Power” section.
■
Are large amounts of food being heated?
Larger amounts of food need longer cooking times.
■
Is the incoming voltage less than that specified in
“Built-In Microwave Oven Safety?”
Have a qualified electrician check the electrical system in the
home.
Radio, TV or cordless phone interference
■
Is the radio or TV receiver near the microwave oven?
Move the receiver away from the microwave oven, or adjust
the radio or TV antenna.
■
Are the microwave oven door and sealing surfaces clean?
Make sure these areas are clean.
■
Is the cordless phone frequency 2.4 GHz?
Some 2.4 GHz-based cordless phones and home wireless
networks may experience static or noise while the microwave
oven is on. Use a corded phone, a different frequency
cordless phone, or avoid using these items during microwave
oven operation.

14
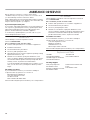
ASSISTANCE OR SERVICE
Before calling for assistance or service, please check
“Troubleshooting.” It may save you the cost of a service call. If
you still need help, follow the instructions below.
When calling, please know the purchase date and the complete
model and serial number of your appliance. This information will
help us to better respond to your request.
If you need replacement parts
If you need to order replacement parts, we recommend that you
use only factory specified
parts. Factory specified parts will fit
right and work right because they are made with the same
precision used to build every new IKEA
®
appliance.
To locate factory specified parts in your area, call us or your
nearest designated service center.
In the U.S.A.
Call the Whirlpool Customer eXperience Center
toll free: 1-866-664-2449.
Our consultants provide assistance with:
■ Features and specifications on our full line of appliances.
■ Installation information.
■ Use and maintenance procedures.
■ Accessory and repair parts sales.
■ Specialized customer assistance (Spanish speaking, hearing
impaired, limited vision, etc.).
■ Referrals to local dealers, repair parts distributors, and
service companies. Whirlpool designated service technicians
are trained to fulfill the product warranty and provide after-
warranty service, anywhere in the United States.
To locate the Whirlpool designated service company in your
area, you can also look in your telephone directory Yellow
Pages.
For further assistance
If you need further assistance, you can write to Whirlpool
Corporation with any questions or concerns at:
IKEA Brand Home Appliances
Customer eXperience Center
553 Benson Road
Benton Harbor, MI 49022-2692
Please include a daytime phone number in your correspondence.
In Canada
Call the Whirlpool Canada LP Customer eXperience Centre toll
free: 1-866-664-2449.
Our consultants provide assistance with:
■
Features and specifications on our full line of appliances.
■
Use and maintenance procedures.
■
Accessory and repair parts sales.
■
Referrals to local dealers, repair parts distributors, and
service companies. Whirlpool Canada LP designated service
technicians are trained to fulfill the product warranty and
provide after-warranty service, anywhere in Canada.
For further assistance
If you need further assistance, you can write to Whirlpool
Canada LP with any questions or concerns at:
Customer eXperience Centre
Whirlpool Canada LP
1901 Minnesota Court
Mississauga, Ontario L5N 3A7
Please include a daytime phone number in your correspondence.
Replacement Parts
Cleaning Supplies
Turntable
Part Number 8205676
Turntable Support and Rollers
Part Number 8205538
Turntable Hub
Part Number 8205539
Heavy Duty Degreaser
Part Number 31552
All-Purpose Appliance Cleaner
Part Number 31682
Stainless Steel Cleaner and
Polish
Part Number 31462

15
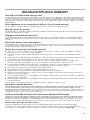
IKEA MAJOR APPLIANCE WARRANTY
How long is the IKEA limited warranty valid?
This limited warranty is valid for five years from the date of purchase, when this major appliance is operated and maintained according
to instructions attached to or furnished with the product, unless the appliance is named LAGAN in which case this limited warranty is
valid for one year from the date of purchase. This limited warranty is valid only in the United States or Canada and applies only when the
major appliance is used in the country in which it was purchased. Proof of original purchase date is required to obtain service under this
limited warranty.
Which appliances are not covered by the IKEA five (5) year limited warranty?
For major appliances named “LAGAN,” this limited warranty is valid for one year from the date of purchase.
Who will execute the service?
This limited warranty is provided by Whirlpool Corporation or Whirlpool Canada LP (hereafter “Whirlpool”). Service must be provided by
a Whirlpool designated service company.
What does this limited warranty cover?
The limited warranty will pay for factory specified parts and repair labor to correct defects in materials or workmanship that existed
when the major appliance was purchased. The exceptions are specified under the headline “What is not covered under this limited
warranty?”.
What will be done to correct the problem?
The designated service company will examine the product and decide, at its sole discretion, if it is covered under this limited warranty.
If considered covered, the designated service company will then repair the defect. Your sole and exclusive remedy under this limited
warranty shall be product repair as provided herein.
What is not covered under this limited warranty?
■ Service calls to correct the installation of your major appliance, to instruct you on how to use your major appliance, to replace or
repair house fuses, or to correct house wiring or plumbing.
■ Service calls to repair or replace appliance light bulbs, air filters or water filters. Consumable parts are excluded from warranty
coverage.
■ Replacement parts or repair labor if this major appliance is used for other than normal, single-family household use or when it is used
in a manner that is inconsistent to published user or operator instructions and/or installation instructions.
■ Damage resulting from accident, alteration, misuse, abuse, fire, flood, acts of God, improper installation, installation not in
accordance with electrical or plumbing codes, or use of consumables or cleaning products not approved for use.
■ Cosmetic damage, including scratches, dents, chips or other damage to the finish of your major appliance, unless such damage
results from defects in materials or workmanship and is reported within 30 days from the date of purchase.
■ Any food loss or medicine loss due to refrigerator or freezer product failures.
■ Pick up and delivery. This major appliance is intended to be repaired in your home.
■ Repairs to parts or systems resulting from unauthorized modifications made to the appliance.
■ Expenses for travel and transportation for product service if your major appliance is located in a remote area where service by an
authorized servicer is not available.
■ The removal and reinstallation of your major appliance if it is installed in an inaccessible location or is not installed in accordance with
published installation instructions.
■ Replacement parts or repair labor on major appliances with original model/serial numbers that have been removed, altered or cannot
be easily determined.
The cost of repair or replacement under these excluded circumstances shall be borne by the customer.
Disclaimer of Implied Warranties
IMPLIED WARRANTIES, INCLUDING ANY IMPLIED WARRANTY OF MERCHANTABILITY OR IMPLIED WARRANTY OF FITNESS FOR
A PARTICULAR PURPOSE, ARE LIMITED TO FIVE YEARS (ONE YEAR FOR MAJOR APPLIANCES NAMED “LAGAN”) OR THE
SHORTEST PERIOD ALLOWED BY LAW. Some states and provinces do not allow limitations on the duration of implied warranties of
merchantability or fitness, so this limitation may not apply to you. This warranty gives you specific legal rights, and you also may have
other rights that vary from state to state or province to province.
Limitation of Remedies; Exclusion of Incidental and Consequential Damages
YOUR SOLE AND EXCLUSIVE REMEDY UNDER THIS LIMITED WARRANTY SHALL BE PRODUCT REPAIR AS PROVIDED HEREIN.
WHIRLPOOL SHALL NOT BE LIABLE FOR INCIDENTAL OR CONSEQUENTIAL DAMAGES. Some states and provinces do not allow
the exclusion or limitation of incidental or consequential damages, so these limitations and exclusions may not apply to you. This
warranty gives you specific legal rights, and you also may have other rights that vary from state to state or province to province.
How to reach us if you need our service
If outside the 50 United States and Canada, contact your authorized IKEA retailer to determine if another warranty applies.
If you need service, please read the Installation Instructions and/or the “Troubleshooting” section of the Use & Care Guide before
contacting us. If you need additional help, do not hesitate to contact us in the U.S.A. and Canada at 1-866-664-2449.
2/09

16
Keep this book and your sales slip together for future
reference. You must provide proof of purchase or installation
date for in-warranty service.
Write down the following information about your major appliance
to better help you obtain assistance or service if you ever need it.
You will need to know your complete model number and serial
number. You can find this information on the model and serial
number label located on the product.
Dealer name____________________________________________________
Address ________________________________________________________
Phone number__________________________________________________
Model number __________________________________________________
Serial number __________________________________________________
Purchase date __________________________________________________

17
SÉCURITÉ DU FOUR À MICRO-ONDES ENCASTRÉ
Risque possible de décès ou de blessure grave si vous ne
suivez pas immédiatement les instructions.
Risque possible de décès ou de blessure grave si vous
ne suivez pas les instructions.
Tous les messages de sécurité vous diront quel est le danger potentiel et vous disent comment réduire le risque de blessure et
ce qui peut se produire en cas de non-respect des instructions.
Votre sécurité et celle des autres est très importante.
Nous donnons de nombreux messages de sécurité importants dans ce manuel et sur votre appareil ménager. Assurez-vous de
toujours lire tous les messages de sécurité et de vous y conformer.
AVERTISSEMENT
DANGER
Voici le symbole d’alerte de sécurité.
Ce symbole d’alerte de sécurité vous signale les dangers potentiels de décès et de blessures graves à vous
et à d’autres.
Tous les messages de sécurité suivront le symbole d’alerte de sécurité et le mot “DANGER” ou
“AVERTISSEMENT”. Ces mots signifient :
Lors de l’utilisation de tout appareil ménager électrique on doit observer certaines précautions de sécurité fondamentales, dont
les suivantes :
IMPORTANTES INSTRUCTIONS DE SÉCURITÉ
CONSERVEZ CES INSTRUCTIONS
AVERTISSEMENT : Pour réduire le risque de
brûlures, de choc électrique, d’incendie, de blessures et
l’exposition excessive à l’énergie des micro-ondes :
■ Lire la totalité des instructions avant d’utiliser le four à
micro-ondes.
■ Lire et observer les instructions spécifiques de
“PRÉCAUTIONS CONTRE LE RISQUE D’EXPOSITION
EXCESSIVE À L’ÉNERGIE DES MICRO-ONDES” dans
cette section.
■ Le four à micro-ondes doit être relié à la terre. Brancher
l’appareil uniquement sur une prise de courant
convenablement reliée à la terre. Voir les “INSTRUCTIONS
DE LIAISON À LA TERRE” présentées dans cette section
et dans les instructions d'installation fournies.
■ Installer ou placer le four à micro-ondes uniquement selon
les instructions d’installation fournies.
■ Certains produits, comme les oeufs entiers dans leur
coquille et les récipients fermés – par exemple les bocaux
en verre fermés – peuvent exploser et on ne doit pas les
faire chauffer dans le four à micro-ondes.
■ Utiliser le four à micro-ondes uniquement pour les
applications auxquelles il est destiné, telles qu’elles sont
décrites dans ce manuel. Ne pas utiliser de vapeurs ou de
produits chimiques corrosifs dans le four à micro-ondes. Ce
type de four est spécifiquement conçu pour chauffer, cuire
ou sécher des aliments. Il n’est pas conçu pour des
applications industrielles ou de laboratoire.
■ Comme pour tout appareil ménager, les enfants ne
devraient utiliser ce four que sous une supervision
adéquate.
■ Ne pas faire fonctionner le four à micro-ondes si le cordon
d’alimentation ou la fiche de branchement est endommagé,
s’il ne fonctionne pas correctement, s’il a subi des
dommages ou s’il est tombé.
■ Tous les travaux de service doivent être exécutés
exclusivement par un personnel d’entretien qualifié.
Contacter un centre de service autorisé pour les opérations
d’inspection, de réparation ou de réglage.
■ Voir les instructions de nettoyage de la surface de la porte
à la section “Entretien du four à micro-ondes”.
■ Pour réduire le risque d’incendie dans la cavité du four :
– Ne pas faire cuire les aliments excessivement. Surveiller
attentivement le four à micro-ondes après y avoir placé
des produits en papier, en plastique ou autres matériaux
combustibles pour faciliter la cuisson des aliments.
– Enlever les attaches métalliques des sachets en papier
ou en plastique avant de placer de tels sachets dans le
four.
– En cas d’inflammation de matériaux placés à l’intérieur
du four, maintenir la porte du four fermée, arrêter le four,
débrancher le four, ou interrompre l’alimentation
électrique au niveau du tableau de distribution (fusible ou
disjoncteur).
– Ne pas utiliser la cavité du four comme espace de
rangement. Ne pas laisser dans le four des produits en
papier, ustensiles de cuisine ou produits alimentaires,
lorsqu’il n’est pas utilisé.
■ Les aliments trop volumineux ou des ustensiles en métal
de grande taille ne doivent pas être insérés dans le four à
micro-ondes car ils peuvent créer un incendie ou un risque
de choc électrique.

18
IMPORTANTES INSTRUCTIONS DE SÉCURITÉ
CONSERVEZ CES INSTRUCTIONS
■ Les liquides tels que l’eau, le café ou le thé peuvent
trop chauffer – au-delà du point d’ébullition – sans
sembler bouillir. Il n’y a pas toujours des bulles ou une
ébullition lorsqu’on retire le récipient du four à
micro-ondes. À CAUSE DE CECI, DES LIQUIDES
TRÈS CHAUDS POURRAIENT DÉBORDER
LORSQU’ON BOUGE LE RÉCIPIENT OU QUE L’ON
UTILISE UNE CUILLÈRE OU UN AUTRE USTENSILE
POUR LE REMUER.
Pour réduire le risque de blessures corporelles :
– Ne pas trop faire chauffer le liquide.
– Remuer le liquide avant et pendant le chauffage.
– Ne pas utiliser de récipients à parois droites avec des
ouvertures étroites.
– Une fois chaud, laisser le récipient dans le four à
micro-ondes un moment avant de le retirer.
– Faire très attention lorsqu’on utilise une cuillère ou un
autre ustensile dans le récipient.
■ Ne pas nettoyer avec des tampons métalliques à récurer.
Des pièces peuvent se détacher du tampon en brûlant et
venir en contact avec des pièces électriques qui pourraient
causer un risque de choc électrique.
■ Ne pas utiliser de produits en papier lorsque l’on fait
fonctionner l’appareil au mode de convection, en combiné,
ou mode de gril ou “PAN BROWN” (brunissage à la poêle)
(sur les modèles équipés de ces caractéristiques).
■ Ne pas remiser des matériaux autres que les accessoires
recommandés par le fabricant dans ce four lorsqu'il n'est
pas utilisé.
■ Veiller à ne rien remiser directement sur le four lorsqu'il est
en service.
■ Ne pas couvrir ni obstruer toute ouverture sur le four à
micro-ondes.
■ Ne pas remiser ce four à micro-ondes à l'extérieur. Ne pas
utiliser le four à micro-ondes à proximité d'eau - par
exemple, près d'un évier de cuisine, dans un sous-sol
humide ou près d'une piscine ou à un emplacement
similaire.
■ Ne pas immerger le cordon ou la fiche de branchement
dans l'eau.
■ Garder le cordon d'alimentation loin des surfaces
chauffées.
■ Ne pas laisser le cordon d'alimentation pendre sur le bord
d'une table ou d'un comptoir.
■ Ne pas faire le montage au-dessus d'un évier.
■ Ne pas couvrir les grilles ou autre partie du four avec du
papier métallique. Cette action causera un surchauffage du
four.
PRÉCAUTIONS CONTRE LE RISQUE D’EXPOSITION
EXCESSIVE À L’ÉNERGIE DES MICRO-ONDES
(a) Ne pas tenter de faire fonctionner ce four lorsque la porte
est ouverte, car ceci pourrait susciter une exposition
dangereuse à l’énergie des micro-ondes. Il est important
de ne pas entraver le fonctionnement correct du dispositif
de verrouillage de sécurité.
(b) Ne pas placer d’objet entre la surface avant du four et la
porte, et ne jamais laisser des souillures ou résidus de
produits de nettoyage s’accumuler sur les surfaces
d’étanchéité.
(c) Ne pas faire fonctionner le four lorsqu’il est endommagé. Il
est particulièrement important que la porte du four ferme
convenablement et que les composants suivants ne soient
pas endommagés :
(1) Porte (déformation),
(2) Charnières et dispositif de verrouillage (brisés ou
desserrés),
(3) Joints de porte et surfaces d’étanchéité.
(d) Seul un personnel d’entretien qualifié est habilité à
exécuter des réparations ou réglages sur cet appareil.

19
Spécifications électriques
Observer les dispositions de tous les codes et règlements en
vigueur.
Nécessaire :
■ Une alimentation électrique de 120 volts, 60 Hz, CA
seulement, 15 ou 20 ampères, protégée par un fusible ou
un disjoncteur.
Recommandé :
■ Un fusible temporisé ou un disjoncteur temporisé.
■ Un circuit distinct exclusif à ce four à micro-ondes.
AVERTISSEMENT
Risque de choc électrique
Brancher sur une prise à 3 alvéoles reliée à la terre.
Ne pas enlever la broche de liaison à la terre.
Ne pas utiliser un adaptateur.
Ne pas utiliser un câble de rallonge.
Le non-respect de ces instructions peut causer
un décès, un incendie ou un choc électrique.
INSTRUCTIONS DE LIAISON À LA TERRE
CONSERVEZ CES INSTRUCTIONS
■
Pour tout appareil ménager connecté par un cordon
de courant électrique :
Il faut que le four à micro-ondes soit relié à la terre. En
cas de court-circuit électrique, la liaison à la terre réduit le
risque de choc électrique car le courant électrique
dispose d’un itinéraire direct d’acheminement à la terre.
Le four à micro-ondes est doté d’un cordon de courant
électrique qui comporte un fil de liaison à la terre, avec
broche de liaison à la terre. On doit brancher la fiche sur
une prise de courant convenablement installée et reliée à
la terre.
AVERTISSEMENT : L’utilisation incorrecte du
dispositif de liaison à la terre peut susciter un risque de choc
électrique. L’utilisateur qui ne comprend pas bien les
instructions de liaison à la terre, ou qui n’est pas certain que
le four à micro-ondes soit convenablement relié à la terre,
devrait consulter un électricien qualifié.
Ne pas utiliser un câble de rallonge. Si le cordon de
courant électrique est trop court, demander à un
électricien qualifié d’installer une prise de courant à
proximité du four à micro-ondes.
Ce dispositif est conforme à la section 18 des règlements FCC.

20
PIÈCES ET CARACTÉRISTIQUES
Ce manuel peut couvrir différents modèles. Le modèle que vous avez acheté peut avoir certaines ou toutes les caractéristiques
énumérées. L’apparence des caractéristiques illustrées ici peut ne pas correspondre exactement à celle de votre modèle.
Plateau rotatif
Le plateau rotatif tourne dans les deux sens pour permettre une
cuisson plus uniforme. Pour les meilleurs résultats de cuisson, ne
pas faire fonctionner le four à micro-ondes sans que le plateau
rotatif ne soit en place. Voir “Assistance ou service” pour passer
une nouvelle commande de pièces.
Installation : Placer le plateau rotatif sur le support. Insérer les
protubérances arrondies au centre du dessous du plateau rotatif
entre les trois rayons de l’axe. Les roulettes sur le support
devraient se loger à l’intérieur du pourtour cranté du dessous du
plateau rotatif.
TABLEAU DE COMMANDE DU FOUR À MICRO-ONDES
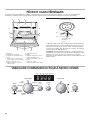
A. Garniture
B. Tableau de commande
C. Système de verrouillage de la
porte
D. Lampe du four à micro-ondes
(inaccessible - dans le plafond)
E. Plateau rotatif en verre
F. Support, roulettes et axe du
plateau rotatif
G. Poignée de la porte
H. Hublot
I. Étiquette du guide de cuisson
J. Plaque signalétique des
numéros de modèle et de série
K. Cadre
L. Couvercle - orifice
d’introduction des micro-ondes
A B C
I H G
J
K
L
D
E
F
A. Plateau rotatif
B. Support
C. Axe
A
B
C
SELECTOR
OFF
MANUAL
DEFROST
REHEAT
COOK
DINNER
PLATE
BAKED
POTATOES
POPCORN
SET
CLOCK
STOP
CONTROL
LOCK
FOOD
CLASS
POWER
SETTINGS
START
ADD 30 SECONDS
CUPS
OZ
LBS
PIECES SERVINGS
La page est en cours de chargement...
La page est en cours de chargement...
La page est en cours de chargement...
La page est en cours de chargement...
La page est en cours de chargement...
La page est en cours de chargement...
La page est en cours de chargement...
La page est en cours de chargement...
La page est en cours de chargement...
La page est en cours de chargement...
La page est en cours de chargement...
La page est en cours de chargement...
-
 1
1
-
 2
2
-
 3
3
-
 4
4
-
 5
5
-
 6
6
-
 7
7
-
 8
8
-
 9
9
-
 10
10
-
 11
11
-
 12
12
-
 13
13
-
 14
14
-
 15
15
-
 16
16
-
 17
17
-
 18
18
-
 19
19
-
 20
20
-
 21
21
-
 22
22
-
 23
23
-
 24
24
-
 25
25
-
 26
26
-
 27
27
-
 28
28
-
 29
29
-
 30
30
-
 31
31
-
 32
32


IKEA IBMS 1450 VM Mode d'emploi
- Catégorie
- Micro-ondes
- Taper
- Mode d'emploi
- Ce manuel convient également à
dans d''autres langues
- English: IKEA IBMS 1450 VM User guide
Documents connexes
-
IKEA IBMS1456 XS Mode d'emploi
-
-
-
-
-
-
-
-
-