
TOOLS REQUIRED
(Purchase separately)
• Screwdriver
IMPORTANT SAFETY INSTRUCTIONS
• Whenusingproduct,basicprecautionsshouldalwaysbe
followed,includingthefollowing:
• Heedallwarnings,includingbelowwarningsAND
thoseincludedonproduct.
• HALO®recessedluminaires(xtures)aredesignedto
meetthelatestNECrequirementsandareUL/cUL
listedinfullcompliancewithUL1598.Before
attemptinginstallationofanyrecessedlighting
luminairecheckyourlocalelectricalcode.Thiscode
setsthewiringstandardsforyourlocalityandshould
becarefullystudiedbeforestarting.
• Readandfollowtheseinstructions.
• Riskofre.MINIMUM90°CSUPPLYCONDUCTORS.
Ifuncertain,consultanelectrician.
• Riskofelectricshock.Toavoidpossibleelectrical
shock,besurethatpowersupplyisturnedoffat
fuseboxorcircuitbreakerbeforeinstallingor
servicingxture.
CAUTION
• ConnectxturetoacompatibleACpowersource.(Fixture
isuniversalvoltage120V-277V,50-60Hz.)
Anyotherconnectionvoidsthewarranty.
• Fixtureshouldbeinstalledbypersonswith
experienceinbuildingwiringorbyaqualied
electrician.Theelectricalsystem,andthemethod
ofelectricallyconnectingthexturetoit,mustbein
accordancewiththeNationalElectricalCodeand
localbuildingcodes.
• ThisdevicecomplieswithPart15oftheFCCRules.
Operationissubjecttothefollowingtwoconditions:
(1)thisdevicemaynotcauseharmfulinterference,
and(2)thisdevicemustacceptanyinterference
received,includinginterferencethatmaycause
undesiredoperation.
SAVE THESE INSTRUCTIONS AND WARNINGS.
ML56 LED Light Module
Instruction Manual
PACKAGING CONTENTS /CONTENIDO DEL PAQUETE
Module de Lumière LED ML56
Instrucciones
Módulo de Luz DEL ML56
Directives
HALO
®
Cooper Lighting 1121 Highway 74 South Peachtree City, Georgia 30269
HERRAMIENTAS NECESARIAS
(se compran por separado)
•Destornillador
INSTRUCCIONES IMPORTANTES DE SEGURIDAD
•Alutilizarelproducto,siempresedebenseguirlas
precaucionesbásicas,incluídolosiguiente:
•Tengaencuentatodaslasadvertencias,incluyendo
lasadvertenciasacontinuaciónYaquellasincluidas
enelproducto.
•Laluminarias(accesorios)empotradasHALO®están
diseñadasparacumplirconlosrequisitosNECmás
recientesyestáncatalogadasporUL/cULencompleto
cumplimientoconUL1598.Antesdecomenzarla
instalacióndesuluminariaempotradaveriqueelcódigo
local.Estecódigojalosestándaresdecableadosdesu
localidadydebeserestudiadocuidadosamenteantesde
comenzar.
•Leaysigaestasinstrucciones.
•Riesgodeincendio.UTILICECONDUCTORESDE
SUMINISTROQUESOPORTENUN
•MÍNIMODE90°C.Sinoestáseguroconsulteaun
electricista.
•Riesgodedescargaeléctrica.Paraevitarunadescarga
eléctrica,asegúresequeel
•suministroeléctricoestédesconectadoenlacajade
fusiblesointerruptoresdecircuitoantesdeinstalarodar
mantenimientoalaccesorio.
PRECAUCIÓN
•Conecteelaparatoafuentedeenergíacompatiblecon
AC.(Accesorioesuniversaltensiónde120V-277V,50-
60Hz).Cualquierotrotipodeconexiónanula
lagarantía.
•Elaccesoriodebeserinstaladoporpersonascon
experienciaencableadodomésticooporunelectricista
calicado.Elsistemaeléctricoyelmétodode
conexióneléctricadelaccesoriodebecumplirconel
Códigoeléctriconacionalyloscódigoslocalessobre
edicios.
•Estedispositivocumpleconparte15delasreglasdeFFC.
SUoperaciónestásujeta
•alassiguientecondiciones:(1)Estedispositivonopuede
causarinterferenciadañina,y(2)estedispositivopuede
recibirinterferencia,incluyendoaquellaquepuedecausar
unaoperaciónnodeseadadeldispositivo.
GUARDE ESTAS INSTRUCCIONES Y ADVERTENCIAS.
OUTILS REQUIS
(à acheter séparément)
•Tournevis
IMPORTANTES INSTRUCTIONS DE SÉCURITÉ
Desprécautionsdebasedoiventêtresuivieslorsde
l’utilisationdeceproduit,incluant:
•Respecteztouslesavertissements,ycomprisles
avertissementsci-dessousETceuxquisontinscritssur
l’étiquetted’avertissement.
•LesluminairesencastrésHALO
®
sontconçuspourêtre
conformesauxexigencesduCodenationaldel’électricité
etsonthomologuésUL/cULenpleineconformitéavec
UL1598.Avantdecommencerl’installationd’unéclairage
encastréquelconque,vériezvotrecodeélectriquelocal.
Cecodeétablitlesnormesdecâblagepourvotrelocalité
etdoitêtreétudiéattentivementavantdecommencer.
•Lisezetsuivezcesinstructions.
•Risqued’incendie.FILSD’ALIMENTATIONDE90ºC
MINIMUM.Sivousn’êtespassûr,consultezunélectricien.
•Risquedechocélectrique.Pourévitertoutepossibilitéde
chocélectrique,vériezquel’alimentationestcoupéeau
coffretdefusiblesouaudisjoncteuravantl’installation
oul’entretienduluminaire.
PRÉCAUTION
•Raccorderl‘appareilàunesourced’alimentation
ACcompatibles.(Luminaireestuniverselletension
120V-277V,50-60Hz).Touteautreconnexionannulela
garantie.
•L’appareild’éclairagedoitêtreinstalléparunélectricien
ouunepersonnechevronnéeencâblagedomestique.Le
systèmeélectriqueetlaméthodedeconnexionélectrique
del’appareild’éclairagedoiventêtreconformesauCode
nationaldel’électricitéetauxcodeslocauxdubâtiment.
•Cetappareilestconformeauchapitre15desrèglements
FCC.Lamiseestoeuvreestsousréservedesdeux
conditionssuivantes:(1)Cetappareilneprovoquepasde
brouillagenuisible,et(2)Cetappareildoitacceptertoute
interférencereçue,notammentl’interférencequipourrait
provoquerunfonctionnementindésirable.
CONSERVEZ CES INSTRUCTIONS ET CES
AVERTISSEMENTS.
705294
ML56 LED Light Module
page 1
Questions?/¿Preguntas?/Questions ? 1-800-334-6871 [email protected]
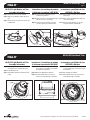
A.ML56LEDmoduleandconnector
MóduloML56LEDyconector
ModuleàML56DELetconnecteur
D.ML56LEDTrim(soldseparately)
MolduraparaLEDML56
(vendidoporseparado)
GarnitureàDELML56
(venduséparément)
B.#8-32Selftappingscrew(included)
Tornillomecánico#8-32(incluido)
Visdemécanique#8-32(inclus)
C.#8-32HexNut
Tuercahexagonal#8-32(incluido)
Écrouhexagonal#8-32(inclus)
B
C

HALO
HALO
®
®
ML56 LED Downlight Trim
page 2
ML56 LED Directional Trim
ML56 LED Light Module and Trim
Assembly Instructions
Step 1:Rotatesideclips(3)ontrimoutwards.
Step 2:AlignpostonLEDlightmodulewithsloton
trim.
Step 3:Rotatesideclips(3)intoplacetosecuretrim
toLEDmodule.
Instructions d’assemblage du module
d’éclairage et garniture à DEL ML56
Étape 1:Tournezlespinceslatérales(3)surla
garnitureversl’extérieur.
Étape 2:Alignezlepoteausurlemoduled’éclairageà
DELaveclafentesurlagarniture.
Étape 3:Tournezlespinceslatérales(3)enplace
pourfixerlagarnitureaumoduleàDEL.
Instrucciones para Módulo de Luz
LED ML56 y Moldura
Paso 1:Rotelosganchoslaterales(3)delamoldura
haciaafuera.
Paso 2:AlineeelpostedelmódulodeluzLEDconla
ranuradelamoldura.
Paso 3:Girelosganchoslaterales(3)asusitioy
asegurelamolduraalmóduloLED.
Step 1 Step 3Step 2
ML56 LED Light Module and Trim
Assembly Instructions
Step 1:AlignrectangularnotchofML56with
rectangularpostonreceivingendoftrim.
Step 2:LowerML56intotrim.
Step 3:RotateML56clockwiseuntilfirmlysecured
totrim.
Instructions d’assemblage du module
d’éclairage et garniture à DEL ML56
Étape 1:Alignezl’encocherectangulaireduML56
aveclepoteaurectangulairesurl’extrémité
deréceptiondelagarniture.
Étape 2:AbaissezleML56danslagarniture.
Étape 3:TournezleML56danslesenshoraire
jusqu’àcequ’ilsoitbienfixéàlagarniture.
Instrucciones para Módulo de Luz
LED ML56 y Moldura
Paso 1:AlineelamuescarectangulardelML56con
elposterectangularenelextremodeacople
delamoldura.
Paso 2:BajeelML56enlamoldura.
Paso 3:RoteelML56hacialaderechahastaque
quedebienajustadoalamoldura.
Step 2
Step 3
Step 1
705294
Cooper Lighting 1121 Highway 74 South Peachtree City, Georgia 30269

HOUSINGS
• TheML560seriescomeswithadedicatedLED
connectorasaHighEfcacyLuminaire(compliantwith
CaliforniaTitle24andIECC)andisULListed
forinstallationintoHalo
®
H750ICAT,H750RICAT,H750T
andH750TCPseries,H2750ICAT,H550ICAT,H550RICAT
recessedLEDhousings.
• TheML560seriesalsoincludesanE26Edisonscrew
baseadaptertoretrotstandardscrewbasehousings.
TheML560isULListedandClassiedforretrotinthe
followinghousingslistedbelow.
• HousingcompatibilityintheML56Systemisdetermined
bytheML56trimdimensions.ML56trimsareavailable
in5”and6”aperture(5”=59xxseriesand6”=69xx
seriestrims).RefertoML56TRIMSaslistedbelow.
(Note“X”inthetrimmodelnumberdenotesnishcode.)
HOUSINGS - Halo and All-Pro UL Listed Compatibility
6” Trims: 691X, 692X, 693X, 694X, 695X, 696X
(Noteshallowhousingsforusewith691X,694X,696Xtrims
only)
HALO - 6” LED Housings with LED luminaire connector -
high-efficacy compliant
Standard Housings
H750ICAT,H750RICAT,H750T,H750TCP,H750TD010,
H750RTD010,H750TCPD010,H750RINTD010
Shallow Housings
H2750ICAT
HALO and All-Pro - 6” Incandescent E26 Screwbase
Housings
Standard Housings
H7ICAT,H7RICAT,H7ICT,H7RICT,H7ICATNB,H7ICTNB,
H7T,H7RT,H7TNB,H7TCP,H7UICT,H7UICAT
EI700AT,EI700RAT,EI700,EI700R,EI700ATNB,EI700NB,
EI700U,EI700UAT,ET700,ET700R
Shallow Housings
H27ICAT,H27RICAT,H27ICT,H27RICT,H27T,H27RT
EI2700AT,EI2700,EI2700R,ET2700,ET2700R
Halo LED Retrofit Enclosures
ML7BXRFK,ML7E26RFK
5” Trims: 591X, 592X, 593X, 594X, 595X, 596X
(Noteshallowhousingsforusewith591X,594X,596Xtrims
only)
HALO - 5” LED Housings with LED luminaire connector -
high-efficacy compliant
H550ICAT,H550RICAT
HALO and All-Pro - 5” Incandescent E26 Screwbase
Housings
Standard Housings
H5ICAT,H5RICAT,H5T,H5RT,H5TM
EI500AT,EI500RAT,ET500,ET500R
Shallow Housings
H25ICAT
HOUSINGS - UL Classified for retrofit compatibility
6” Trims: 691X, 692X, 693X, 694X, 695X, 696X
(Noteshallowhousingsforusewith691X,694X,696Xtrims
only)
Juno
®
StandardHousings:IC22,IC22R,IC22W,IC22S,IC23,IC23W,
TC2,TC2R,IC2
ShallowHousings(usewith691X,694X,696Xtrimsonly):
IC21,IC21R
Capri
StandardHousings:CR1,PR1,QL1
ShallowHousings(usewith691X,694X,696Xtrimsonly):
HALO
®
ALOJAMIENTOS
• ElML560vieneconunConectorLEDespecialparael
CumplimientodelTitulo24deCaliforniayestá
homologadoporULparalainstalaciónenalojamientos
deLEDHalo
®
empotradosH750ICAT,H750RICAT,
H750T,H750TCP,H2750ICAT,H550ICAT,yH550RICAT.
• ElML560tambiénincluyeunadaptadordebaseEdison
paraadaptaralojamientosICATdebasecon
roscaestándar.ElML560estáhomologadoyclasicado
porULparaadaptarseenlossiguientesalojamientos.
• CompatibilidaddelaViviendaenelSistemadeML56
estádeterminadaporlasdimensionesdelajusteML56.
ML56ajustesestándisponiblesen5“y6”deapertura
(5”=59xxseriesy6”=69xxadornosdelaserie).
ConsulteML56MICenestedocumento.(Nota:“X”enel
númerodemodeloindicaajustenaldelcódigo.)
ALOJAMIENTOS - Halo y All-Pro de compatibilidad UL
6” Moldura: 691X, 692X, 693X, 694X, 695X, 696X
(Tengaencuentaalojamientosdepocaprofundidadparasu
usocon691X,694X,696Xmoldurasolamente)
HALO - 6” LED con conector alojamientos luminaria LED
- de alta eficacia cumple
Alojamientos estándar
H750ICAT,H750RICAT,H750T,H750TCP,H750TD010,
H750RTD010,H750TCPD010,H750RINTD010
Alojamientos de poca profundidad
H2750ICAT
HALO and All-Pro - 6” Incandescente E26 alojamientos
tornillo de la base
Alojamientos estándar
H7ICAT,H7RICAT,H7ICT,H7RICT,H7ICATNB,H7ICTNB,
H7T,H7RT,H7TNB,H7TCP,H7UICT,H7UICAT
EI700AT,EI700RAT,EI700,EI700R,EI700ATNB,EI700NB,
EI700U,EI700UAT,ET700,ET700R
Alojamientos de poca profundidad
H27ICAT,H27RICAT,H27ICT,H27RICT,H27T,H27RT
EI2700AT,EI2700,EI2700R,ET2700,ET2700R
De Halo LED Retrofit Cajas
ML7BXRFK,ML7E26RFK
5” Moldura: 591X, 592X, 593X, 594X, 595X, 596X
(Tengaencuentaalojamientosdepocaprofundidadparasu
usocon591X,594X,596Xmoldurasolamente)
HALO - 5” LED con conector alojamientos luminaria LED
- de alta eficacia cumple
H550ICAT,H550RICAT
HALO and All-Pro - 5” Incandescente E26 alojamientos
tornillo de la base
Alojamientos estándar
H5ICAT,H5RICAT,H5T,H5RT,H5TM
EI500AT,EI500RAT,ET500,ET500R
Alojamientos de poca profundidad
H25ICAT
ALOJAMIENTOS - UL clasificados para la modificación
de compatibilidad
6” Moldura: 691X, 692X, 693X, 694X, 695X, 696X
(Tengaencuentaalojamientosdepocaprofundidadparasu
usocon691X,694X,696Xmoldurasolamente)
Juno
®
Alojamientosestándar:IC22,IC22R,IC22W,IC22S,IC23,IC23W,
TC2,TC2R,IC2
Alojamientosdepocaprofundidad(utilizarcon691X,694X,696X
moldurassólo):IC21,IC21R
Capri
Alojamientosestándar:CR1,PR1,QL1
Alojamientosdepocaprofundidad(utilizarcon691X,694X,696X
moldurassólo):R9ASIC/PS9RM
BOÎTIERS
• LeproduitML560estdotéd’unconnecteurDELdédié
répondantàlanormedutitre24etrépertorié
ULpouruneinstallationdansdesboitiersencastrés
DELdesHalo
®
H750ICAT,H750RICAT,H750T,
H750TCP,H2750ICAT,H550ICAT,etH550RICAT.
• LeproduitML560comprendégalementunadaptateur
debaseEdisons’adaptantauxboitiersàculotsà
visclassiquesdelaCIAT.Leproduitdepostcâblage
ML560estrépertoriéetclassiéULpourles
boitierssuivants:
• LacompatibilitédelogementdanslesystèmeML56
estdéterminéeparlesdimensionsdenitionML56.
ML56versionssontdisponiblesen5“et6”ouverture
(5po=59xxsérieset6po=69xxversionsdelasérie).
Reportez-vousàML56MICdansleprésentdocument.
(Notez«X»danslenumérodemodèleindiquegarniture
nitiondecode.)
BOÎTIERS - Halo et All-Pro Compatibilité UL
6 po Garnitures: 691X, 692X, 693X, 694X, 695X, 696X
(Notezboîtierspeuprofondspouruneutilisationavec691X,
694X,696Xlesgarnituresseulement)
HALO - 6 po LED avec connecteur boîtiers luminaire LED
- haute efficacité conformes
Les boîtiers standard
H750ICAT,H750RICAT,H750T,H750TCP,H750TD010,
H750RTD010,H750TCPD010,H750RINTD010
Boîtiers Shallow
H2750ICAT
HALO and All-Pro - 6 po à incandescence E26 boîtiers
Voleuse à Culot Vissable
Les boîtiers standard
H7ICAT,H7RICAT,H7ICT,H7RICT,H7ICATNB,H7ICTNB,
H7T,H7RT,H7TNB,H7TCP,H7UICT,H7UICAT
EI700AT,EI700RAT,EI700,EI700R,EI700ATNB,EI700NB,
EI700U,EI700UAT,ET700,ET700R
Boîtiers Shallow
H27ICAT,H27RICAT,H27ICT,H27RICT,H27T,H27RT
EI2700AT,EI2700,EI2700R,ET2700,ET2700R
Halo LED Retrofit boîtiers
ML7BXRFK,ML7E26RFK
5 po Garnitures: 591X, 592X, 593X, 594X, 595X, 596X
(Notezboîtierspeuprofondspouruneutilisationavec591X,
594X,596Xlesgarnituresseulement)
HALO - 5 po LED avec connecteur boîtiers luminaire LED
- haute efficacité conformes
H550ICAT,H550RICAT
HALO and All-Pro - 5 po à incandescence E26 boîtiers
Voleuse à Culot Vissable
Les boîtiers standard
H5ICAT,H5RICAT,H5T,H5RT,H5TM
EI500AT,EI500RAT,ET500,ET500R
Boîtiers Shallow
H25ICAT
BOÎTIERS - Homologué UL pour la rénovation de
compatibilité
6 po Garnitures: 691X, 692X, 693X, 694X, 695X, 696X
(Notezboîtierspeuprofondspouruneutilisationavec691X,
694X,696Xlesgarnituresseulement)
Juno
®
Lesboîtiersstandard:IC22,IC22R,IC22W,IC22S,IC23,IC23W,
TC2,TC2R,IC2
BoîtiersShallow(utiliseravec691X,694X,696Xlesgarnitures
seulement):IC21,IC21R
Capri
Lesboîtiersstandard:CR1,PR1,QL1
BoîtiersShallowutiliseravec691X,694X,696Xlesgarnitures
seulement):R9ASIC/PS9RM
Cooper Lighting 1121 Highway 74 South Peachtree City, Georgia 30269
705294
ML56 LED Light Module
page 3

HALO
®
705294
R9ASIC/PS9RM
Elco: HL7ICA(EL7ICA)
Lithonia Lighting
®
StandardHousings:LC6,L7X
ShallowHousing(usewith691X,694X,696Xtrimsonly):L7XP
Thomas: PS1
Commercial Electric: C7ICA,H3
Progress:
StandardHousing:P87-AT†
ShallowHousing(usewith691X,694X,696Xtrimsonly):
P86TG
Lightolier
®
: 1104ICS†,1104ICR†
† Requires replacement of torsion springs with Friction Clips.
Order Friction Clip Kit separately: ML56CLIP
5” Trims: 591X, 594X, 596X
Juno
®
StandardHousings:IC20,IC25S,IC25W,TC20
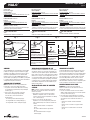
DIMMING
TheHaloLEDluminairecanbedimmed,howeverupdates
indimmertechnologyandspecialconditionsmayapply
dependingonthedimmertypebeingused.Forthelatest
informationregardingdimmersforusewiththisLED
luminaire,pleaseseetheHaloLEDDimmingReference
Sheetatwww.cooperlighting.com.Inaddition,youmaywish
toconsultthedimmermanufacturerfortheirlatestdimmer
congurationsandproductinformation.
GROUND WIRE ATTACHMENT
NOTE:Groundwiremustbesecurelyinstalledtothe
housing.Threeconnectionmethodsshownabove.
1. ForgroundconnectionfromLEDmoduletohousing,
useprovidedgreengroundwire(factoryinstalled)as
shownin(Fig.1).
2. Connectopenendofgroundwiretohousing.
Connectiontohousingmayvarydepending
onmodel.Threeconnectionmethodsare
describedbelow.
- Useexistingscrewinsidehousing(Fig.2).
- Usesupplied#8nutonexistingstud(Fig.3).
- Usesupplied#8screwinexistinghole(Fig.4).
Elco: HL7ICA(EL7ICA)
Lithonia Lighting
®
Alojamientosestándar:LC6,L7X
Alojamientosdepocaprofundidad(utilizarcon691X,694X,696X
moldurassólo):L7XP
Thomas: PS1
Commercial Electric: C7ICA,H3
Progress:
Alojamientosestándar:P87-AT†
Alojamientosdepocaprofundidad(utilizarcon691X,694X,696X
moldurassólo):P86TG
Lightolier
®
: 1104ICS†,1104ICR†
† Requiere el reemplazo de los resortes de torsión con clips de
fricción. Orden de fricción Clip kit por separado: ML56CLIP
5” Moldura: 591X, 594X, 596X
Juno
®
Alojamientosestándar:IC20,IC25S,IC25W,TC20
REGULADOR DE INTENSIDAD DE LUZ
ElsistemadeiluminaciónLEDdeHalosepuedenregular,
sinembargo,cambiosenlatecnologíadereguladorylas
condicionesespecialespuedenaplicarsedependiendodel
tipodereductordeluzqueseutiliza.Paraobtenerlaúltima
informaciónconrespectoalosamortiguadoresparaeluso
conestaluminariaLED,consulteelHaloLEDdeatenuación
enlaHojadereferenciawww.cooperlighting.com.Además,
esposiblequedeseeconsultaralfabricantedelregulador
desusúltimasconguracionesdeintensidaddeluzyde
informacióndelproducto.
INSTALACIÓN DEL CABLE DE CONEXIÓN
A TIERRA
NOTA:elcabledeconexiónatierradebeserinstalado
rmementeenelalojamiento.Arribasemuestrantres
métodosdeconexión.
1.Pararealizarlaconexiónatierradesdeelmódulo
LEDhastaelalojamiento,utiliceelcableverdede
conexiónatierraproporcionado(instaladoenlafábrica)
comosemuestra(Fig.1).
2. Conecteelotroextremodelcableverdeal
alojamiento.Laconexiónalalojamientopuedevariar
segúnelmodelo.Abajosedescribentresmétodosde
conexión.
- Utiliceeltornilloexistenteenelalojamiento
(Fig.2).
- Uselatuerca#8incluidaenlavigaexistente
(Fig.3).
- Useeltornillo#8incluidoenelagujero
existente(Fig.4).
Elco: HL7ICA(EL7ICA)
Lithonia Lighting
®
Lesboîtiersstandard:LC6,L7X
BoîtiersShallow(utiliseravec691X,694X,696Xlesgarnitures
seulement):L7XP
Thomas: PS1
Commercial Electric: C7ICA,H3
Progress:
Lesboîtiersstandard:P87-AT†
BoîtiersShallow(utiliseravec691X,694X,696Xlesgarnitures
seulement):P86TG
Lightolier
®
: 1104ICS†,1104ICR†
† Nécessite le remplacement des ressorts de torsion avec clips
de friction. Commandez CLIP friction Kit séparément: ML56CLIP
5” Trims: 591X, 594X, 596X
Juno
®
Lesboîtiersstandard:IC20,IC25S,IC25W,TC20
GRADATION DE LUMIèRE
LeluminaireDELHalopeutêtreatténuée,toutefoismises
àjourenmatièredetechnologieetgradateurconditions
spécialespeuvents’appliquerselonletypegradateurutilisé.
Pourlesdernièresinformationsconcernantlesgradateurs
pouruneutilisationavecceluminaireLED,s’ilvousplaît
voirleHaloLEDgradationFichederéférenceàwww.
cooperlighting.com.Enoutre,vouspouvezconsulterle
fabricantvariateurdelumièrepourleurscongurationsplus
récentesgradateursetinformationssurlesproduits.
INSTALLATION DU FIL DE TERRE
REMARQUE :Leldeterredoitêtreinstalléde
manièresécuritairesurleboîtier.Ci-dessussonttrois
méthodesdeconnexion.
1.Pourunraccordementdemiseàlaterredumodule
àDELauboîtier,utilisezleldeterrevertfourni(installé
àl’usine)commeillustré(Fig.1).
2.Raccordezl’autreextrémitéduldeterreauboîtier.
Leraccordementauboîtierpeutvarierselonlemodèle.
Troisméthodesderaccordementsontillustréesci-
dessous.
- Utilisezlavisexistanteàl’intérieurduboîtier
(Fig.2).
- Utilisezl’écrouno8fournisurlegoujonexistant
(Fig.3).
- Utilisezlavisno8fourniedansletrouexistant
(Fig.4).
ML56 LED Light Module
page 4
Fig.3*
#1
#2
#3
Threadedstudin
sidewallofhousing
Posteroscadoenla
paredlateraldel
alojamiento
Goujonletésurla
paroilatérale
#1
#2
#3
#8Nut
Tuerca#8
L’écrouno8
Groundwire
Elcablede
conexiónatierra
Leldeterre
Fig.4*
#1
#2
#3
#1
#2
#3
Groundwire
Elcablede
conexiónatierra
Leldeterre
Existinghole
Agujero
existente
Trouexistant
Fig.1
Groundwire
Elcabledeconexión
atierra
Leldeterre
Fig.2*
#1
#2
#3
Ceilingthicknessadjustmentslot
(oneofthreeslotsinsidehousing)
Ranuradeajustedelgruesodel
techo(unadetresranuras)
Réglagedelafenteselon
l’épaisseurduplafond(unedes
troisfentes)
Groundwire
Elcabledeconexión
atierra
Leldeterre
*Viewfrominsidethehousing
*Vistainternadelalojamiento
*Vuedel’intérieurduboîtier

RETROFIT INSTALLATION INTO E26 EDISON
SCREW BASE RECESSED HOUSINGS
NOTE:ConrmhousingiscompatiblewithML560series
modules.Alistingofthemostcommonhousingsisprovided
intheHOUSINGSsectionoftheseinstructions.
1. Removemountingbracketandplatefrominside
existingrecessedhousing(ifinstalled).
2. Releasesocketfromplate(ifinstalled).
3. ScrewEdisonbaseadapterintoexistingEdison
basesocketinhousing(Fig.5).
4. InsertorangeLEDconnectorfromLEDadapterinto
orangesocketinthemodule(Fig.6).
Important:Orangeconnectormustbefullyinsertedprior
toinstallingconnectioncapinStep5and6.
5. SlideconnectorcapdownoverLEDconnector(Fig.7).
6. Twistcapclockwisetolock.
Note: Ifhousingdoesnothavetorsionspringreceiving
brackets,refertoalternateinstallationsectioninthese
instructions.
7. Squeezethetorsionspringstogetherasshownand
installintotorsionspringbracketsinsiderecessed
housing(Fig.8).
8. Carefullyroutewiresintoxtureandpushmodule
upushtoceilingsurface.
HALO
®
INSTALACIÓN ADAPTADA EN ALOJAMIENTO
EMPOTRADO DE BASE CON ROSCA
EDISON E26
NOTA:Conrmequeelalojamientoescompatiblecon
elmódulodeluzML560.Sepresentaunalista
delosalojamientosmáscomunesenlasección
“ALOJAMIENTOS”deestasinstrucciones.
1. Quiteelsoportedemontajeylaplacadeadentro
delalojamientoempotradoexistente(siinstalado).
2. Quiteelportalámparasdelaplaca(siinstalado).
3. AdaptadordebaseconroscaEdisonenenchufede
baseEdisonenalojamiento(Fig.5).
4. InsertelaclavijaanaranjadadeladaptadorLEDen
eloricioanaranjadodelmódulo(Fig.6).
Importante: Laclavijaanaranjadadebeinsertarse
completamenteantesdeinstalarlatapadeconexiónenel
Paso5y6.
5. DeslicelatapadeconexiónsobreelconectorLED
(Fig.7).
6. Girelatapahacialaderechaparaasegurarla.
Nota: Silaviviendanotienesoportesderesortedetorsión
quereciben,consultelaseccióndeinstalaciónalternativoen
estasinstrucciones.
7. Pincezlesressortsdetorsionensembletelqu’illustré,et
installezlessupportsdesressortsdetorsionàl’intérieur
duboîtierencastré(Fig.8).
8. Soigneusementpasserleslsdansl‘appareilet
poussezlemoduleestparfaitementalignéeàlasurface
duplafond.
INSTALLATION DE POSTCÂBLAGE DANS
LE BOITIER ENCASTRÉ À BASE VISSÉE
EDISON E26
REMARQUE :Vériezqueleboîtierestcompatible
aveclemoduleàML560.Unelistedesboitiers
lespluspopulairesestfournieauchapitre«BOITIERS»
danslesprésentesinstructions.
1. Retirezlabrideetlaplaquedemontagede
l’intérieurduboîtierencastréexistant(siinstallé).
2. Retirezladouilledelaplaque(siinstallée).
3. Vissezl’adaptateurdebaseEdisondansunedouille
àvisd’Edisonexistanteduboitier(Fig.5).
4. Insérezlacheorangedel’adaptateurdeDELdans
ladouilleorangedumodule(Fig.6).
Important :Lacheorangedoitêtrecomplètementinsérée
avantl’installationducapuchondeconnexionàl’étape5
et6.
5. Faitesglisserlecapuchondeconnexionsurle
connecteurdeDEL(Fig.7).
6. Tournezlecapuchonversladroitepourlebloquer.
Remarque : Silelogementnedisposepasdecrochets
àressortdetorsiond’accueil,reportez-vousàlasection
d’installationdesecoursdanscesinstructions.
7. Pressezlesressortsdetorsionensembletel
qu’illustré,etinstallezlesbridesàressortdetorsionà
l’intérieurduboîtierencastré(Fig.8).
8. Faitespasserleslssoigneusementdansl’appareil
d’éclairageetpoussezlemoduleverslehautjusqu’àce
qu’ilafeurelasurfaceduplafond.
ML56 LED Light Module
page 5
LEDConnectorCap
TapadelconectorLED
Cachedeconnecteur
DEL
E26Edisonscrewbase
EdisonE26conbasede
rosca
E26àvisEdisondebase
Connectorcap
Tapadelconector
Cachedeconnecteur
LEDConnector
ConectordelLED
ConnecteurDEL
LEDConnector
ConectordelLED
ConnecteurDEL
Fig.5 Fig.6
Fig.7
Fig.8
705294
Cooper Lighting 1121 Highway 74 South Peachtree City, Georgia 30269

ALTERNATIVE INSTALLATION WITH FRICTION
CLIP BLADES
For 6” housings without torsion spring receiving
brackets ML56CLIP friction clip blades may be used (see
page 1 in the HOUSINGS section of these instructions for
a listing of the most common housings):
1. Removetorsionspringbracketscompletely(keep
screws)(seeFig.9).
2. Installthetrimtothemodule
3. Locatefrictionclipwith“6”cutout(seeFig.10).
4. Attachfrictioncliptobasewith“6”(usescrew
fromStep1)(seeFig.10).
5. Repeat1-3forsecondclip.
6. Ifusingfrictionclips,squeezeopposingblades
togetheruntilclipstinsidehousingthencarefully
insertML560intohousingallowingspringstoexpandto
holdML560inhousing.
INSTALACIÓN ALTERNATIVA CON HOJAS DE
CLIPS DE FRICCIÓN
Para 6” viviendas sin resorte de torsión que reciben
los soportes ML56CLIP hojas clip de fricción se
puede utilizar (Véase la página 1 en la sección de
ALOJAMIENTOS de estas instrucciones para obtener un
listado de los alojamientos más comunes):
1. Retirecompletamentelossoportesderesorte
detorsión(guardeeltornillo)(seeFig.9).
2. Instalarlamolduraenelmódulo.
3. Ubiqueelsujetadordefricciónconelrecorte
marcadocomo“6”(vealaFig.10).
4. Fijeelsujetadordefricciónalabaseconlamarca
“6”(utiliceeltornillodelpaso1)(vealaFig.10).
5. Repitalospasos1al3parael2ºsujetador.
6. Sivousutilisezdeslamesdefriction,presseradverse
lamesensemblejusqu’àcequeleslamess’adapterà
l’intérieurdulogement,puisinsérezsoigneusement
dansleboîtierpermettantML560ressortsd’étendre
àtenirML560danslelogement.
INSTALLATION DE REMPLACEMENT AVEC
LAMES CLIP DE FRICTION
Pour 6 po boîtiers sans ressort de torsion supports
récepteurs de lames ML56CLIP clips de friction peut être
utilisé (reportez-vous à la page 1 de la section BOÎTIERS
de ces instructions pour consulter la liste des boîtiers
les plus courants) :
1. Retirezcomplètementlessupportsderessortde
torsion(conservezlesvis)(seeFig.9).
2. Installerlagarnituresurlemodule.
3. Repérezl’attachedefrictionavecladécoupe
enformede«6»(seeFig.10).
4. Fixezl’attachedefrictionàlabaseavec
lerepère«6»(utilisezlavisdel’étape1)
(seeFig.10).
5. Répétezlesétapes1à3pourla2eattache.
6. Sivousutilisezdeslamesdefriction,serrezleslames
l’unecontrel’autrejusqu’àcequ’ellesrentrentdans
leboîtier,puisinsérezsoigneusementlemodèleML560
dansleboîtierenpermettantauxressortsdese
déployerpourmaintenirleML560dansleboîtier.
HALO
®
ML56 LED Light Module
page 6
Torsion Springs and Brackets
Resortes de torsión y soportes
Ressorts de torsion et autres supports
6" Housings using Friction Clip Blades
Alojamientos de 6” con paletas de sujeción de fricción
Boîtiers de 6 po (15,2 cm) avec lames d’attache de friction
Frictionclipinstallationfor6”housingsintheoutwardposition
Instalacióndesujetadordefricciónparaalojamientosde6”enla
posiciónhaciaafuera
Installationdesattachesdefrictionpourlesboîtiersde6popositionnés
versl’extérieur
TorsionSpringBracket
TorsiónsoportedePrimavera
Supportderessortdetorsion
Fig.9 Fig.10
705294
Cooper Lighting 1121 Highway 74 South Peachtree City, Georgia 30269

HALO
®
ML56 LED Light Module
page 7
INSTALLATION INTO HALO® H27050x,
H550x and H750x SERIES LED
(non-screw base) HOUSINGS
NOTE:MaybeusedtomeetCaliforniaTitle24and
InternationalEnergyConservationCodeHighEfcacy
Compliance.
1. InsertorangeLEDconnectorfrommoduleintoHalo
recessedxtureconnector(Fig.11).
2. Squeezetorsionspringstogetherasshownand
installintotorsionspringbracketsinsiderecessed
housing(Fig.8).
3. Carefullyroutewiresintoxtureandpushmodule
upushtoceilingsurface.
REPLACING LED MODULE
1. Withngertips,pulldownrmlyontrimringuntil
moduleisremovedfromthehousing.
2. SqueezetorsionspringstogethertoremoveLED
module.Ifusingfrictionblades,pullmoduleoutof
housingslowly.
3. DisconnectLEDmodulewiringfromrecessedcan
(LEDconnectororscrew-inEdisonbase).
INSTALACIÓN EN ALOJAMIENTOS
(SIN BASE CON ROSCA) DE LED HALO®
SERIE H27050x, H550x AND H750x
NOTA:Puedeutilizarseparacumplirconloestablecidoen
elTítulo24delaComisióndeEnergíadeCaliforniaydel
CódigoInternacionaldeAltaEcienciaenlaConservación
deEnergía.
1. InsertenaranjaLEDdelconectordelmóduloenel
conectordelaccesorioempotradoHalo(Fig.11).
2. Presioneambosresortesdetorsiónparajuntarlos
comosemuestra,einstálelosenlossoportespara
ellosqueseencuentrandentrodelalojamiento
empotrado(Fig.8).
3. Concuidadoguíeloscablesenelaccesorioy
empujeelmódulohaciaarribaparaquequedealrasdel
techo.
REMPLAZO DEL MÓDULO LED O DE LOS
AROS DE ADORNO
1. Conlasyemasdelosdedos,tirermementehacia
abajohastaqueelmóduloseseparedel
alojamiento.
2. Presioneambosresortesdetorsiónparajuntarlosy
quitarelmóduloLED.Siestáutilizandosujetadores
defricción,tiredelmódulolentamentepararetirarlo
delalojamiento.
3. DesconecteelcabledelmóduloLEDdelalata
empotrada(ConectorLEDobaseEdisonenroscable).
INSTALLATION DANS BOÎTIERS (SANS
CULOT À VIS) DE SÉRIES H27050x,
H550x ET H750x DE HALO®
REMARQUE : Peutêtreutilisépourlaconformitéàlahaute
efcacitéselonleCaliforniaTitle24etl’InternationalEnergy
ConservationCode.
1. InsérezLEDorangeconnecteurdumoduledansle
connecteurHaloluminaireencastré(Fig.11).
2. PressezlesRL7ressortsdetorsionensembletel
qu’illustré,etinstallezlesbridesàressortdetorsion
àl’intérieurduboîtierencastré(Fig.8).
3. Faitespasserleslssoigneusementdansl’appareil
d’éclairageetpoussezlemoduleverslehautjusqu’àce
qu’ilafeurelasurfaceduplafond.
REPLACER LE MODULE DEL OU LES
GARNITURES
1. Duboutdesdoigts,tirezfermementsurl’anneau
degarniturejusqu’àretirerlemoduleduboîtier.
2. Pressezlesressortsdetorsionensemblepour
retirerlemoduleDEL.Sivousutilisezdesattachesde
friction,sortezdoucementlemoduleduboîtier.
3. DébranchezlecâblagedumoduleDELduboîtier
encastré(ConnecteurDELoudouilleEdisonàvis).
Fig.11
705294
Cooper Lighting 1121 Highway 74 South Peachtree City, Georgia 30269

HALO
®
ML56 LED Light Module
page 8
5-YEAR LIMITED WARRANTY
THEFOLLOWINGWARRANTYISEXCLUSIVEANDIN
LIEUOFALLOTHERWARRANTIES,
WHETHEREXPRESS,IMPLIEDORSTATUTORY
INCLUDING,BUTNOTLIMITEDTO,ANY
WARRANTYOFMERCHANTABILITYORFITNESSFOR
ANYPARTICULARPURPOSE.
CooperLighting,LLC(“CooperLighting”)warrants
tocustomersthat,foraperiodofveyearsfromthe
dateofpurchase,HaloML560seriesproductswill
befreefromdefectsinmaterialsandworkmanship.
TheobligationofCooperLightingunderthis
warrantyisexpresslylimitedtotheprovisionof
replacementproducts.Thiswarrantyisextended
onlytotheoriginalpurchaseroftheproduct.A
purchaser’sreceiptorotherproofofdateoforiginal
purchaseacceptabletoCooperLighting.Thisis
requiredbeforewarrantyperformanceshallbe
rendered.ThiswarrantydoesnotapplytoCooper
Lightingproductsthathavebeenalteredorrepaired
orthathavebeensubjectedtoneglect,abuse,
misuseoraccident(includingshippingdamages).
Thiswarrantydoesnotapplytoproductsnot
manufacturedbyCooperLightingwhichhavebeen
supplied,installed,and/orusedinconjunctionwith
CooperLightingproducts.Damagetotheproduct
causedbyreplacementbulbsorcorrosionor
discolorationofbrasscomponentsarenotcovered
bythiswarranty.
LIMITATION OF LIABILITY:
INNOEVENTSHALLCOOPERLIGHTINGBELIABLE
FORSPECIAL,INDIRECT,INCIDENTAL,
ORCONSEQUENTIALDAMAGES(REGARDLESSOF
THEFORMOFACTION,WHETHERIN
CONTRACT,STRICTLIABILITY,ORINTORT
INCLUDINGNEGLIGENCE),NORFORLOST
PROFITS;NORSHALLTHELIABILITYOFCOOPER
LIGHTINGFORANYCLAIMSORDAMAGEARISING
OUTOFORCONNECTEDWITHTHESETERMS
ORTHEMANUFACTURE,SALE,DELIVERY,USE,
MAINTENANCE,REPAIRORMODIFICATIONOF
COOPERLIGHTINGPRODUCTS,ORSUPPLYOFANY
REPLACEMENTPARTSTHEREFORE,EXCEEDTHE
PURCHASEPRICEOFCOOPERLIGHTINGPRODUCTS
GIVINGRISETOACLAIM.NOLABORCHARGESWILL
BEACCEPTEDTOREMOVEORINSTALLFIXTURES.
Toobtainwarrantyservice,pleasecontactCooper
Lighting,LLC,at1-800-334-6871,press
option2forCustomerService,orviae-mail
[email protected]andinclude
thefollowinginformation:
•Name,addressandtelephonenumber
•Dateandplaceofpurchase
•Catalogandquantitypurchase
•Detaileddescriptionofproblem
Allreturnedproductsmustbeaccompaniedbya
ReturnGoodsAuthorizationNumberissuedbythe
Companyandmustbereturnedfreightprepaid.
AnyproductreceivedwithoutaReturnGoods
AuthorizationNumberfromtheCompanywillbe
refused.
CooperLighting,LLCisnotresponsiblefor
merchandisedamagedintransit.Repairedor
replacedproductsshallbesubjecttotheterms
ofthiswarrantyandareinspectedwhenpacked.
Evidentorconcealeddamagethatismadeintransit
shouldbereportedatoncetothecarriermakingthe
deliveryandaclaimledwiththem.
Reproductions of this document without prior written
approval of Cooper Lighting, LLC are strictly prohibited.
For assistance, call 1-800-334-6871 or e-mail us at
GARANTIA LIMITADA DE 5 AÑOS
LASIGUIENTEGARANTÍAESEXCLUSIVAYREEMPLAZA
ATODASLASDEMÁSGARANTÍAS,YASEANIMPLÍCITAS,
EXPLÍCITASOESTATUTARIAS,INCLUIDAS,ENTREOTRAS,
LASGARANTÍASDECOMERCIABILIDADEIDONEIDADPARA
UNFINPARTICULAR.
CooperLighting,LLC(“CooperLighting”)garantizaa
susclientesquelosproductosdeCooperLightingno
presentarándefectosenlosmaterialesyenlafabricación
duranteunperíododecincoañosdesdelafechadecompra.
LaobligacióndeCooperLightingsegúnestagarantíase
limitaexpresamentealsuministrodelosproductosde
reemplazo.Estagarantíaseextiendesóloparaelcomprador
originaldelproducto.Unrecibodecomprauotrapruebade
lafechadecompraoriginalaceptableparaCooperLighting.
Estoesnecesarioparalaejecucióndelagarantía.
EstagarantíanoseaplicaalosproductosdeCooper
Lightingquehayansidoalteradosoreparadosoque
estuvieronsujetosanegligencia,abuso,malusooaccidente
(inclusolosdañosduranteelenvío).Estagarantíanose
aplicaalosproductosCooperLightingnofabricadospor
CooperLightingquehayansidosuministrados,instalados
outilizadosjuntoconlosproductosCooperLighting.Los
dañosdelproductocausadosporbombillasdereemplazo,
corrosiónodecoloracióndeloscomponentesdelatónno
estáncubiertosporestagarantía.
LIMITACIÓN DE RESPONSABILIDAD:
COOPERLIGHTINGNOSERÁRESPONSABLELEGALEN
NINGÚNCASODEDAÑOSINDIRECTOS,ACCIDENTALESO
RESULTANTES(SINIMPORTARLAACCIÓNLEGAL,YASEA
PORCONTRATO,RESPONSABILIDADESTRICTAODEFORMA
EXTRACONTRACTUALINCLUYENDOLA
NEGLIGENCIA),NIPORTAMPOCODELAPÉRDIDADE
GANANCIAS;COOPERLIGHTING
TAMPOCOSEHACERESPONSABLEPORDAÑOSQUESURJAN
OESTÉNCONECTADOSCONESTOSTÉRMINOSOCONLA
FABRICACIÓN,VENTA,ENTREGA,USO,MANTENIMIENTO,
REPARACIÓNO
MODIFICACIÓNDELOSPRODUCTOSDECOOPERLIGHTINGO
DELSUMINISTRODECUALQUIER
PIEZADEREPUESTOQUEEXCEDAELPRECIODECOMPRA
DELOSPRODUCTOSDECOOPERLIGHTINGQUEORIGINAN
UNRECLAMO.NOSEACEPTARÁNCARGOSPORMANODE
OBRAPARAQUITAROINSTALARLOSACCESORIOS.
Paraobtenerelserviciodelagarantíacomuníquesecon
CooperLighting,LLC,al1-800-334-6871,presionela
opción2paraelServicioalCliente,oporcorreoelectrónico
a[email protected]eincluyala
siguienteinformación:
•Nombre,direcciónynúmerodeteléfono
•Fechaylugardecompra
•Catálogoycantidaddelacompra
•Descripcióndetalladadelproblema
Todoslosproductosdevueltosdebenestaracompañados
porunNúmerodeautorización
deproductosdevueltosemitidoporlacompañíaydeben
devolverseconeteprepagado.
SerechazarátodoproductorecibidosinunNúmerode
autorizacióndeproductosdevueltos
desdelacompañía.
CooperLighting,LLCnosehaceresponsableporla
mercancíadañadaduranteeltransporte.
Losproductosreparadosoreemplazadosestaránsujetos
alostérminosdeestagarantíayseinspeccionanalser
empacados.Eldañoevidenteyocultoqueseprovoque
duranteeltransportesedebeinformardeinmediatoal
transportistaquerealizalaentregaysedebe
presentarunreclamo.
La reproducción de este documento sin la aprobación previa
por escrito de Cooper Lighting, LLC está estrictamente
prohibida.
Para solicitar ayuda, llame al 1-800-334-6871 o envíe un
correo electrónico a [email protected].
GARANTIE LIMITÉE DE 5 ANS
LAPRÉSENTEGARANTIECONSTITUELASEULEGARANTIEPOUR
CEPRODUITETPRÉVAUTSURTOUTEAUTREGARANTIE,QU’ELLE
SOITEXPRESSEOUTACITEYCOMPRIS,SANS
TOUTEFOISS’YLIMITER,TOUTEGARANTIEDEQUALITÉ
MARCHANDEETPOURUN
USAGEPARTICULIER.
CooperLighting,LLC(«CooperLighting»)garantitàsesclients,
pendantunepériodedecinqansàcompterdeladated’achat,
quesesproduitsCooperLightingsontexemptsdetoutdéfaut
dematériauxetdefabrication.Envertudelaprésentegarantie,
l’obligationdeCooperLightingselimiteexpressémentàfournir
desproduitsderemplacement.Laprésentegarantien’est
proposéequ’àl’acheteurinitialduproduit.CooperLighting
requiertunreçuouautrepreuved’achatqu’ellejugera
acceptablesurlequelestindiquéeladatedel’achatinitial.Cette
preuved’achatestrequisepourobtenirl’exécutiondelagarantie.
Lagarantienes’appliquepasauxproduitsCooperLighting
quiontétémodiésouréparés,ouquiontfaitl’objetd’une
négligenceoud’unusageabusifouinapproprié,ouquiont
étéendommagésenraisond’unaccident(ycomprisdurantle
transport).Cettegarantienes’appliquepasauxproduitsquine
sontpasfabriquésparCooperLightingetquiontétéfournis,
installéset/ouutilisésavecdesproduitsCooperLighting.Les
dommagesauproduitcausésparuneampoulederechangeoula
corrosion,etladécolorationdespiècesdelaiton
nesontpascouvertsparcettegarantie.
LIMITATION DES RESPONSABILITÉS :
COOPERLIGHTINGNESERAENAUCUNCASTENURESPONSABLE
DESDOMMAGESSPÉCIAUX,INDIRECTS,ACCESSOIRESET
CONSÉCUTIFS(QUELLEQUESOITLARAISON,MÊMESICETTE
RESPONSABILITÉREPOSESURUNCONTRAT,LARESPONSABILITÉ
STRICTE,OUDESDÉLITS,YCOMPRISLANÉGLIGENCE),NIPOUR
LAPERTEDEPROFITS,ETMÊMESILA
RESPONSABILITÉDECOOPERLIGHTINGPOURDES
RÉCLAMATIONSOUDESDOMMAGESFAITSUITEÀLAPRÉSENTE
GARANTIEOUESTLIÉEAUXMODALITÉSDESPRÉSENTES,ÀLA
FABRICATION,ÀLAVENTE,ÀLALIVRAISON,ÀL’UTILISATION,À
L’ENTRETIEN,ÀLA
RÉPARATION,OUÀLAMODIFICATIONDEPRODUITSCOOPER
LIGHTING,OUÀLAFOURNITUREDETOUTEPIÈCEDERECHANGE
CONNEXE,LECOÛTDESDOMMAGESNEPEUTDÉPASSERLE
COÛTD’ACHATDUPRODUITCOOPERLIGHTINGFAISANTL’OBJET
DELARÉCLAMATIONAUTITREDELAPRÉSENTEGARANTIE.
AUCUNFRAISDEMAIN-D’OEUVRENESERAREMBOURSÉPOUR
ENLEVEROUINSTALLERUNLUMINAIRE.
Pourfaireuneréclamationautitredelagarantie,veuillez
appelerCooperLighting,LLC,au18003346871,enchoisissant
l’option2pourleServiceàlaclientèle,ouenvoyeruncourriel
à[email protected]etfournirles
renseignementsci-après:
•Nom,adresseetnumérodetéléphone
•Dateetlieudel’achat
•Numérodecatalogueetquantitéachetée
•Descriptiondétailléeduproblème
Toutproduitretournédoitcomporterunnumérod’autorisationde
retourdeproduitfourniparl’entrepriseetêtreexpédiéportpayé.
Nousrefuseronstoutproduitquin’estpasaccompagnéd’un
numérod’autorisationderetourdeproduitfourniparl’entreprise.
CooperLighting,LLCn’estpasresponsabledelamarchandise
endommagéedurantletransport.Lesproduitsréparésou
remplacésserontsoumisauxmodalitésdelaprésentegarantie
etserontinspectésaumomentd’êtreemballés.Toutdommage
apparentounonsurvenantpendantletransportdoitêtresignalé
immédiatementautransporteureffectuantlalivraisonetune
réclamationdoitêtreadresséeàcedernier.
La reproduction de ce document est strictement interdite sans
l’autorisation préalable par écrit de Cooper Lighting, LLC.
Pour assistance, appelez le 1-800-334-6871 ou envoyez-nous un
courriel à [email protected].
Imprimé au Chine
705294
Cooper Lighting 1121 Highway 74 South Peachtree City, Georgia 30269
-
 1
1
-
 2
2
-
 3
3
-
 4
4
-
 5
5
-
 6
6
-
 7
7
-
 8
8


Halo ML5606830 Mode d'emploi
- Taper
- Mode d'emploi
dans d''autres langues
Documents connexes
-
Halo 592H Mode d'emploi
-
-
Halo RL560WH9930 Mode d'emploi
-
-
-
-
-
-
-
Autres documents
-
Metalux 22LCRL3040C Mode d'emploi
-
Metalux RT22MPC3040 Manuel utilisateur
-
 Halo Lighting H7ICAT Guide d'installation
-
 All-Pro MSLED Mode d'emploi
-
CREE LIGHTING LR4 Series Guide d'installation
-
 Cooper Lighting Solutions LVL20UG Manuel utilisateur
-
Cree DRDL4-05727009-12DE26-1C100 Guide d'installation
-
-
Lightolier CorePro LED Downlight Install Instructions
-
Asus ET2700INKS Manuel utilisateur


