La page est en cours de chargement...

Dress Kit
Kit robe
Vestido kit
June 18, 2015 81529-25751-R1 ©2015 DELTA ENTERPRISE CORP.
Consumer Care:
www.DeltaChildren.com
Delta Children’s Products
114 West 26th Street
New York, NY 10001
Tele.212-645-9033
Need Help?
Please visit www.DeltaChildren.com/assembly-videos to
watch our easy and effective assembly videos
Besoin d’aide?
Veuillez visiter www.DeltaChildren.com/assembly-videos
pour regarder nos vidéos faciles et efficaces concernant
l’assemblage
Necesita ayuda?
Por favor, visite www.DeltaChildren.com/assembly-videos
para que vea nuestros videos que muestran como ensamblar
de una manera efectiva y fácil.
Style #:
Lot:
Date:
___________
___________
___________
REV
Read all instructions before assembly and use.
KEEP INSTRUCTIONS FOR FUTURE USE.
ADULT ASSEMBLY REQUIRED
Due to the presence of small parts during assembly, keep out of
reach of children until assembly is complete.
Lisez toutes les instructions avant l’assemblage et
l’utilisation. CONSERVEZ LES INSTRUCTIONS
POUR UN USAGE ULTERIEUR.
L’ASSEMBLAGE DOIT ETRE FAIT
PAR UN ADULTE
A cause de la presence de petites pieces, pendant l’assemblage gardez
hors de portee des enfants jusqu'a ce que celui-ci soit termine.
Lea todas las instrucciones antes de ensamblar
y usar. MANTENGA LAS INSTRUCCIONES
PARA SU USO FUTURO.
DEBE SER ENSAMBLADO POR
UN ADULTO
Debido a la presencia de piezas pequeñas durante el ensamblaje,
mantenga fuera del alcance de los niños hasta que complete el
ensamblaje.
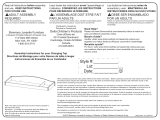
When contacting Delta Consumer Care please reference the above information. Before contacting Delta Consumer Care
please ensure that the information above matches the information found on the label on the ”Back Rail”, please reference the
information found on the product when contacting Delta Consumer Care.
Lorsque vous contactez le Service client de Delta, veuillez faire référence aux informations ci-dessus. Avant de contacter le
Service client de Delta, veuillez vous assurer que les informations ci-dessus correspondent aux informations indiquées sur
l’étiquette qui se trouve sur ”Montant arrière”; veuillez faire référence aux informations indiquées sur le produit lorsque vous
contactez le Service client de Delta.
Al contactar al servicio al cliente de Delta, entregue la información anteriormente mencionada. Antes de contactar al servicio
de atención al cliente de Delta, asegúrese de que la información anteriormente mencionada calza con la que aparece en la
etiqueta en Riel Trasero; al contactar al centro de atención al cliente de Delta, mencione la información que aparece en el
producto.
To register your product for important safety alerts and updates to your product please visit www.DeltaChildren.com and click
on Product Registration.
Pour enregistrer votre produit afin de recevoir des alertes de sécurité et des mises à jour importantes relatives à votre
produit, veuillez visiter le site www.DeltaChildren.com, puis cliquer sur Enregistrement de produits.
Para registrar su producto a fin de recibir importantes alertas y actualizaciones de seguridad, visite www.DeltaChildren.com y
haga clic en Registro de Productos (Product Registration).
This product is not intended for institutional or commercial use.
Ce produit ne pas destine a un usage institutionnel ou commercial.
Este producto no esta hecho para uso institucional o comercial.
Conforms to
ASTM F2388
Safety Standards
A

PG#2
WARNING
FALL HAZARD - To prevent death or serious injury, always keep child within arm’s reach.
Read all instructions before use of the changing table.
KEEP THESE INSTRUCTIONS IN A SAFE PLACE FOR FUTURE USE.
Inspect the changing table periodically. Do not use the changing table if it is damaged or broken.
Contact Delta Children's Products with any questions.
Tighten all loose screws and bolts before each use.
The maximum recommended weight of the child is 30lbs for the changing table.
Always secure the dress kit to the changing surface using the screws provided. See Instructions.
Secure the Dress Kit only to Delta Children's Products item 81545.
The changing pad used should be 32" x 16" with a maximum thickness of 1".
RISQUE DE CHUTE – Afin de prévenir tout risque de décès ou de blessure grave, toujours
demeurer à portée de bras de l’enfant placé sur la table à langer.
Bien lire toutes les instructions avant d’utiliser la table à langer
CONSERVER CES INSTRUCTIONS DANS UN ENDROIT SÛR POUR RÉFÉRENCE
ULTÉRIEURE.
Inspecter régulièrement la table à langer. Ne pas l’utiliser si elle est endommagée ou brisée. Si
vous avez des questions contactez Delta Children's Products.
Serrer tous les boulons et vis desserrés avant chaque usage.
Le poids maximum recommandé est de 30 livres (13,6kg).
Toujours fixer la table à langer à la surface de la table à langer en utilisant les vis fournies.
Consulter les directives. La table à langer doit être fixé à seulement Delta Children's Products
produit 81545.
Le coussin à langer doit mesurer 32 po x 16 po et avoir une épaisseur maximale de 1 po
AVERTISSEMENT
PELIGRO DE CAIDAS - Para prevenir la muerte o lesiones graves, mantenga al niño al alcance
de sus manos. Lea todas las instrucciones antes de usar el cambiador.
COLOQUE ESTAS INSTRUCCIONES EN UN LUGAR SEGURO PARA SU USO FUTURO.
Inspeccione este cambiador periodicamente. No use el cambiador si esta dañado o roto.
Póngase en contacto con Delta Children's Products para formular preguntas.
Apriete los tornillos y pernos flojos antes de cada uso.
El paso maximo recomendado 30 libras (13.6 g).
Coloque siempre el kit de vestir a la superficie cambiando con los tornillos suministrados. ea las
Instrucciones.Asegure el kit de vestido sólo al producto Delta Children's Products 81545.
La almohadilla usada debe ser 32 x 16 pulgadas con un grosor máximo de 1 pulgada.
ADVERTENCIA

NOTES ON ASSEMBLY:
-During the assembly process whenever using screws or bolts, check each by placing the screw/bolt on the diagram of the item which is
drawn actual size and design. Be sure to use the proper size and shape specified in the instructions.
-To assemble this unit you may be required to place the unit on it’s side and face. It is strongly recommended that assembly is done on a
soft, non-abrasive surface to avoid damaging the finish.
NOTES ON CARE AND MAINTENANCE:
- Do not scratch or chip the finish.
- Inspect the product periodically, contact Delta Children’s Products for replacement parts or questions.
- Do not store the product or any parts in extreme temperatures and conditions such as a hot attic or a damp, cold basement. These
extremes can cause a loss of structural integrity.
-To preserve the luster of the high quality finish on your product, it is recommended to place a doily or felt pad under any items you place
on the finish.
-Clean with a damp cloth, then a dry cloth to preserve the original luster and beauty of this fine finish.
-Do not use abrasive chemicals.
-Do not spray cleaners directly onto furniture.
-Lift slightly when moving on carpeting to prevent leg breakage.
-Use of a vaporizer near furniture will cause wood to swell and finish to peel.
NOTES ON USE:
Keep children and others safe by following these simple rules:
- Do not allow any child to play on furniture
- Do not allow climbing on any piece of furniture.
- Do not allow hanging from any piece of furniture.
- Always monitor your child’s activity when in the nursery.
PG#3
INFORMACIÓN SOBRE EL MONTAJE:
-Durante el proceso de montaje, ya utilice pernos o tornillos, compruebe cada uno de ellos colocando el perno/tornillo en el diagrama del
artículo donde está dibujado el tamaño y el diseño real. Asegúrese de que utiliza el tamaño y la forma adecuada que especifican las
instrucciones.
-Para montar esta unidad, puede que se le solicite que coloque la unidad de lado y de cara. Se recomienda encarecidamente que realice el
montaje sobre una superficie no abrasiva para evitar dañar el acabado.
REMARQUES SUR L’ASSEMBLAGE :
-Lors de l’assemblage, quand vous utilisez vis ou boulons, verifiez chaque piece en placant le vis/boulon sur le diagramme de la piece
concernee qui est dessine en taille et forme reelle. Assurez vous d’utiliser la taille et la forme exacte comme il est specifie dans les
instructions.
-Pour assembler cet element vous pourriez avoir besoin de le placer sur le cote lateral et sur le cote frontal. Il est fortement recommandé de
faire l’assemblage sur une surface lisse, non abrasive pour eviter d’endommager les finitions.
REMARQUES SUR LE SOIN ET L’ENTRETIEN :
-Ne pas rayer ou ebrecher la finition.
-Examinez de pres le produit regulierement, contactez Delta Childrens Products pour les pieces de rechange ou pour poser des questions.
-Ne pas ranger le produit ou des pieces a des temperatures extremes ou dans des conditions comme un grenier chaud ou une cave froide
et humide. Ces extremes peuvent causer une perte de l’integrite de la structure du produit
-Pour préserver le lustre original et la beauté de ce fini raffiné nettoyer avec un chiffon humide, puis un chiffon sec.
-Ne pas utiliser des produits chimiques abrasifs
-Ne pas pulveriser un nettoyant directement sur le meuble, pulveriser sur le torchon et puis appliquer sur le meuble. Testez le produit
nettoyant sur un endroit discret avant de l’utiliser sur la totalite du meuble
-Lors d’un deplacement sur une moquette ou tapis, soulevez legerement le meuble pour eviter de casser les pieds.
-L’utilisation d’un vaporisateur pres du meuble causera le gonflement du bois et l’ecaillage de la finition.
REMARQUES SUR L’UTILISATION :
Assurez la securite des enfants et des autres en suivant ces simples regles :
-Ne pas autoriser les enfants a jouer sur un meuble.
-Ne pas autoriser l’escalade d’aucun meuble.
-Ne pas autoriser a se suspendre d’aucun meuble.
-Toujours surveiller l’activite de votre enfant lors qu’il se trouve dans sa chambre.
INFORMACIÓN SOBRE EL USO:
Mantenga a los niños y otras personas a salvo siguiendo estas sencillas reglas:
- No permita que ningún niño juegue sobre muebles.
- No permita que nadie trepe sobre un mueble.
- No permita que nadie se cuelgue de un mueble.
- Vigile siempre la actividad de su hijo cuando se encuentre en su cuarto.
NOTAS SOBRE SU CUIDADO Y MANTENIMIENTO
- No arañe ni desconche el acabado.
- Inspeccione el producto con regularidad, póngase en contacto con Delta Children’s Products para el recambio de partes o para formular
preguntas.
- No guarde el producto ni ninguna de sus partes a temperaturas ni en condiciones extremas como un ático caluroso o un sótano húmedo
y frío. Estos extremos pueden provocar una pérdida de integridad estructural.
-Para preservar el brillo del acabado de alta calidad que recubre su producto, se recomienda que coloque un paño o una almohadilla de
fieltro debajo de cualquier objeto que coloque sobre el acabado.
-Límpielo con un trapo húmedo y luego con uno seco para preservar el brillo y la belleza originales de este fino acabado.
-No utilice productos químicos abrasivos.
-No pulverice limpiadores directamente sobre el mueble.
-Elévelo ligeramente cuando lo mueva sobre alfombras o moqueta para evitar que se rompan las patas.
-El uso de vaporizadores cerca de muebles puede provocar que la madera se hinche y acabe desconchándose.

#4 - (2) M3 x 32mm DOWEL
(2) GOUJONS M3 x 32mm
(2) PASADOR M3 x 32mm
#3 - (2) CAM LOCK
(2) VIS D’ASSEMBLAGE RAPIDE
(2) CERRADURA DE LEVA
#2 - (2) CAM BOLT
(2) GOUJON D’ASSEMBLAGERAPIDE
(2) CERROJO DE LEVA
#7 - (1) RIGHT SIDE
(1) CÔTÉ DROIT
(1) LADO DERECHO
Part #25749
#8 - (1) LEFT SIDE
(1) CÔTÉ GAUCHE
(1) LADO ISQUIERDO
Part #25748
#9 - (1) FRONT RAIL
(1) TRAVERSE AVANT
(1) BARANDA DELANTERA
Part #25747
#10 - (1) BACK RAIL
(1) TRAVERSE ARRIÈRE
(1) BARANDA DE ATRAS
Part #25746
#5 - (4) M6 x 35mm Bolt
(4) Boulons M6 x 35mm
(4) Pernos M6 x 35mm
#6 - (1) CENTER RAIL
(1) CENTRE FERROVIAIRE
(1) CENTRO DE FERROCARRIL
Part #25750
NOTE: FASTENERS ARE SHOWN FULL SIZE
REMARQUE: LES DISPOSITIFS DE FIXATION SONT
MONTRÉS EN TAILLE RÉELLE
NOTA: LOS PERNOS SE MUESTRAN EN TAMAÑO REAL
THE FOLLOWING TOOLS AND PARTS ARE REQUIRED:
OUTILS ET PIÈCES NÉCESSAIRES
SE NECESITAN LAS SIGUIENTES HERRAMIENTAS Y PIEZAS:
M4 Hex Wrench (Provided)
M4 Clé À Six Pans (Fournie)
M4 Llave Hexagonal (se Incluye)
Phillips Screwdriver (Not Provided)
Tournevis ‘Phillips’(Non prévu)
Destornillador ‘Phillips’ (No siempre)
#11 - (4) M4 x 38mm SCREW
(4) VIS M4 x 38mm
(4) TORNILLO M4 x 38mm
PG#4
Hardware kit Part # 23291 for color 251.
Ensemble de quincaillerie Élément #23291 pour couleur251
Pieza número # 23291 para el color 251
CAUTION: DO NOT USE A POWER SCREWDRIVER THEY CAN CAUSE
SCREWS TO BREAK OR STRIP.
ATTENTION: NE PAS UTILISER UN TOURNEVIS ÉLECTRIQUE CARLEVIS
PEUVENT CASSER OU PERDRE LEURS FILETS.
PRECAUCIÓN: NO USE UN DESTORNILLADOR ELÉCTRICO PORQUEPU-
EDEN HACER QUE LOS TORNILLOS SE ROMPAN O RUEDEN.
Drill: Only use to drill holes do not use to
Install screws or bolts
Perceuse : utiliser uniquement pour percer
desTrous, et non pour poser des vis ou
des Boulons.
El taladro: sólo uso para taladrar
hoyos. NoUtilice instalar los t
ornillo
s ni
los cerrojos

How to use the cam lock system
comment utiliser le système de verrouillage à came
cómo utilizar la leva de bloqueo
PG#5

STEP #1
STEP #1
ÉTAPE N°1
PASO #1
ÉTAPE N
O
1
PASO #1
PART#5
PIÈCENO5
PIEZA #5
PART#5
PIÈCENO5
PIEZA #5
PART#7
PIÈCE NO7
PIEZA #7
PART#9
PIÈCE NO9
PIEZA #9
PART#8
PIÈCE NO8
PIEZA #8
PG#6
Center Rail can be placed in either the right or left set of pre drilled holes.
Centre ferroviaire peut être placé soit dans la droite ou à gauche
un ensemble de pré trous forés.
Centro de ferrocarril se puede colocar en la derecha o la
izquierda un conjunto de agujeros perforados previamente.
#5 - (2) M6 x 35mm Bolt
(2) Boulons M6 x 35mm
(2) Pernos M6 x 35mm
1.Attach right side (part #7) insert (1) m6x35mm bolt (part #5)
into the threaded insert in the right end of front rail (part #9).
Tighten using m4 allen wrench.
2. Repeat with left side (part #8).
1.Connectez côté droit (pièce n ° 7) insert (1) m6x35mm
boulon (pièce n ° 5) dans l'insert fileté à l'extrémité droite du
rail avant (pièce n ° 9). Serrer l'aide de m4 clé allen.
2. Répétez avec le côté gauche (pièce n ° 8).
1.Conecte lado derecho (Pieza 7) inserto (1) m6x35mm
tornillo (pieza # 5) en el inserto roscado en el extremo
derecho de la barra de carga (Pieza 9). Apriete con la llave
Allen M4.
2. Repita con el lado izquierdo (Pieza 8).

STEP #2
ÉTAPE N°2
PASO #2
A
ÉTAPE NO 2
PASO #2
STEP #2
1.Refer to page 5 for instructions on how to use
the cam lock system.
2. Insert (1) cam locks (part #3) into the holes on
the side of the center rail (part #6). Insert Cam
Bolt (Part #2) into Front Rail (Part #9).
3. Line up the cam bolt (part #2) and dowel (part
#4) at the back of the front rail; from step #1 with
the holes in the end of the center rail (part #6).
Insert and turn the cam lock clockwise to tighten
using a phillips screwdriver.
1.Voir à la page 5 pour obtenir des instructions sur la
façon d'utiliser le système de verrouillage à came.
2. Insert (1) serrures (pièce n ° 3) dans les trous sur le
côté de la glissière médiane (pièce n ° 6). Insert le
boulon à came (pièce n ° 2) en rail avant (pièce n ° 9).
3. Alignez le boulon à came (pièce n ° 2) et la broche
(pièce n ° 4) à l'arrière du rail avant; de l'étape n ° 1
avec les trous dans la fin de la glissière médiane (pièce
n ° 6). Insérer et tourner la came de verrouillage dans le
sens horaire pour serrer l'aide d'un tournevis cruciforme.
1.See en la página 5 para obtener instrucciones sobre cómo
utilizar la leva de bloqueo.
2. Inserte (1) cerraduras (Pieza 3) en los orificios en el lado
del carril del centro (Pieza 6). Inserte (1) perno de leva (Pieza
2) barra de carga (Pieza 9).
3. Alinear el perno de leva (Pieza 2) y la pasador (Pieza 4) en
la parte posterior del riel frontal, el paso # 1 con los agujeros
en el extremo del carril centro (punto 6). Inserte y gire la leva
de la derecha para apretar con un destornillador.
PART #3
PIÈCE NO3
PIEZA #3
PART #2
PIÈCE NO2
PIEZA #2
PART #4
PIÈCE NO4
PIEZA #4
PART #6
PIÈCE NO6
PIEZA #6
PG#7
#2 - (1) CAM BOLT
(1) GOUJON D’ASSEMBLAGERAPIDE
(1) CERROJO DE LEVA
#4 - (1) M3 x 32mm DOWEL
(1) GOUJONS DE M3 x 32mm
(1) PASADOR M3 x 32mm
#3 - (1) CAM LOCK
(1) VIS D’ASSEMBLAGE RAPIDE
(1) CERRADURA DE LEVA

FINAL ASSEMBLY
ASSEMBLAGE FINAL
ESEMBLAJE FINAL
ASSEMBLED DRESS KIT
LA TABLE À LANGER MAINTENANT ASSEMBLÉE
EQUIPÓ DE ENSEMBLAJE
DRESSER UNIT
LA COMMODE
LA COMMODA
FINAL ASSEMBLY
1. Set the Assembled Dress Kit on the top of the Dresser as
shown.
2. Insert (4) M4 x 38mm screws (Part #11) through the back of
the Dress Kit, into the pre drilled holes the dresser.
3. Tighten with a Phillips Screwdriver.
PART#11
PIÈCENO11
PIEZA #11
PG#8
ASSEMBLAGE FINAL
1. Placer la Table à Langer maintenant assemblée sur ledessus de la
commode.
2. Insérer (4) vis m4 x 38mm (pièce no11) à partir del’arrière de la
table à langer, jusque dans les trous deguidage que l’on vient de
percer dans la commode.
3. Serrer au moyen d’un tournevis phillips.
ESEMBLAJE FINAL
1. Poner el equipó de ensemblaje ensima del cambiador.
2.Inserta (4) tornillos m4 x 38 mm (pieza #11) en laparte de atras
en los wecos pilót.
3.Apriete con destornillador phillips.
ASSEMBLY FROM STEP #2
ASSEMBLÉE DE L’ÉTAPE N
O
2
ENSEMBLAJE DEL PASO #2
STEP #3
ÉTAPE N°3
PASO #3
1. Insert Cam Bolt (Part #2) into Back Rail (Part #10).
2. Line up the dowels (part #1) at the back of the assembly from step #2 with the holes in the face of
the back rail (part #10).
3. Insert (1) m6 x 35mm bolt (part #5) through each hole in the back of the back rail and into the
holes in the sides from step #2.
4.Refer to page 5 for instructions on how to use the cam lock system.
5.Tighten with a phillips screwdriver.
Part #5
Pièce No5
Pieza #5
Part#4
Pièce No4
Pieza #4
Part#2
Pièce No2
Pieza #2
Part#3
Pièce No3
Pieza #3
1. Insert le boulon à came (pièce n ° 2) en rail arrière (pièce n °10).
2. Alignez les chevilles (pièce n ° 1) à l'arrière de l'assemblage de l'étape n ° 2 trous with the dans
le visage de la traverse arrière (pièce n ° 10).
3. Insert (1) M6 x 35mm boulon (pièce n ° 5) dans chaque trou à l'arrière de the back ferroviaire et
dans les petits trous pré-percés sur les côtés de l'étape n ° 2.
4.Refer à la page 5 pour obtenir des instructions sur la façon d'utiliser le système de verrouillage à
came.
5.Serrez avec un tournevis cruciforme.
1. Inserte (1) perno de leva (Pieza 2) barra trasero (Pieza 10).
2. Alinee las clavijas (Pieza 1) en la parte posterior de la asamblea desde el paso # 2 agujeros
conel en la cara del travesaño trasero (Pieza 10).
3. Insertar (1) M6 x 35mm perno (Pieza # 5) en cada agujero en la parte posterior de theback
ferrocarril y pequeños agujeros piloto en los lados de la etapa 2.
4.Referirse en la página 5 para obtener instrucciones sobre cómo utilizar la leva de bloqueo.
5.Apriete con un destornillador Phillips
#3 - (1) CAM LOCK
(1) VIS D’ASSEMBLAGE RAPIDE
(1) CERRADURA DE LEVA
#2 - (1) CAM BOLT
(1) GOUJON D’ASSEMBLAGERAPIDE
(1) CERROJO DE LEVA
#4 - (1) M3 x 32mm DOWEL
(1) GOUJONS
M3 x 32mm
(1) PASADOR M3 x 32mm
#5 - (2) M6 x 35mm Bolt
(2) Boulons M6 x 35mm
(2) Pernos M6 x 35mm
Part #5
Pièce No5
Pieza #5
#11 - (4) M4 x 38mm SCREW
(4) VIS M4 x 38mm
(4) TORNILLO M4 x 38mm
/