
© Arlo Technologies, Inc. Arlo, Arlo logo, and Every Angle Covered are
trademarks of Arlo Technologies, Inc. App Store is a service mark of Apple Inc.
Google Play and the Google Play logo are trademarks of Google LLC. Any other
trademarks are for reference purposes.
Si ce produit est vendu au Canada, vous pouvez accéder à ce document en
français canadien à arlo.com/docs.
(If this product is sold in Canada, you can access this document in Canadian
French at arlo.com/docs.)
For regulatory compliance information including the EU Declaration of
Conformity, visit www.arlo.com/about/regulatory/.
Arlo Technologies Intl. Ltd
Ground Floor, Building 3
University Technology Centre
Curraheen Road, Cork T12 EF21
Ireland
Arlo Technologies, Inc.
2200 Faraday Avenue, Suite 150
Carlsbad, CA 92008 USA
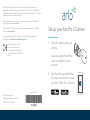
1. Insert the battery into your
camera.
Leave the case off until the
camera is added to your
account.
2. Use the Arlo app and follow
the setup instructions to add
your Pro 3 Wire-Free Camera.
Set up your Arlo Pro 3 Camera
August 2019

-
 1
1
-
 2
2


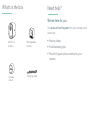
dans d''autres langues
- English: Arlo VMS4240P-100NAS User manual
Documents connexes
-
Arlo ASB1201P-100NAS Mode d'emploi
-
Arlo VMC2020 Mode d'emploi
-
Arlo VMS5240200NAS Guide de démarrage rapide
-
-
-
-
-
-
Arlo Chime Guide de démarrage rapide
-

