La page est en cours de chargement...

Read all instructions before assembling and using product.
IMPORTANT - Keep instructions for future use.
Lisez toutes les instructions avant d'assembler et d'utiliser le produit.
IMPORTANT - Conservez les instructions pour une utilisation future. 0222R2-657
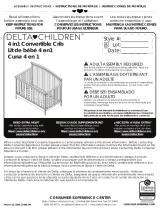
Owner’s Manual
SYNERGY
Convertible Crib
Scan the QR code to register your product
https://dreamonme.com/customercare/registration/

SAFE SLEEP TIPS
Adult Assembly
Required.
DO NOT use the
product if it is
damaged, broken,
and/or components are
missing or broken.
To protect your parts
during assembly,
please place them on a
soft surface.
Contact Dream On
Me in case of any
assistance needed.
Small parts may
present choking
hazard prior to
assembly.
Please read the
instructions
thoroughly. Identify all
parts & hardware.
Do Not Use Power
Drills or Drivers.
To clean surface, use
only water on a damp
cloth. Do not use
window cleaner or
cleaning abrasive as it
will scratch the surface
and could damage the
protective coating.
For a Safe and
comfortable Sleep
experience, we
suggest using Dream
On Me Greenguard
Gold Certified
Full-Size Mattress.
0-6
2www.dreamonme.com/help

…. for choosing Dream On Me and congratulations on joining our family;
a family that has been transforming lives for over 30 years!
We appreciate your feedback and wish you the very best in the
coming years with your new addition. If you have any questions
or concerns please don’t hesitate to reach out to us. One of our
trusted Customer Care representatives will be happy to assist you.
Thank you again for entrusting us to provide you with safe,
and affordable baby products and accessories.
THANK YOU...
LIMITED WARRANTY:
• Dream On Me warrants its product to be free from defects in material and
workmanship and agrees to remedy any such defect.
• This warranty covers 1 year from the date of original purchase.
• This warranty is valid only upon presentation of proof of purchase.
• This is solely limited to the repair or replacement of defective furniture
components and no assembly labor is included.
• This warranty does not apply to any product which has been improperly
assembled, subjected to misuse or abuse or which has been altered or
repaired in any way.
• This warranty gives you specific legal rights and you may also have other
rights which vary from State to State.
www.dreamonme.com/help 3

WARNINGS
www.dreamonme.com/help
4
• FAILURE TO FOLLOW THESE WARNINGS AND ASSEMBLY INSTRUCTIONS COULD RESULT IN
SERIOUS INJURY OR DEATH.
• TO REDUCE THE RISK OF SIDS, PEDIATRICIANS RECOMMEND HEALTHY INFANTS BE PLACED
ON THEIR BACKS TO SLEEP, UNLESS OTHERWISE ADVISED BY YOUR PHYSICIAN.
• CHECK THIS PRODUCT FOR DAMAGED HARDWARE, LOOSE JOINTS, MISSING PARTS OR
SHARP EDGES BEFORE AND AFTER ASSEMBLY AND FREQUENTLY DURING USE.
• DO NOT USE THIS CRIB IF ANY PARTS ARE MISSING, DAMAGED OR BROKEN. CONTACT
DREAM ON ME - 1532 S. WASHINGTON AVE, PISCATAWAY, NJ 08854 FOR REPLACEMENT
PARTS.
• DO NOT USE A WATER MATTRESS WITH THIS CRIB.
• IF REFINISHING, USE A NON-TOXIC FINISH SPECIFIED FOR CHILDREN’S PRODUCTS.
STRANGULATION HAZARD:
• STRINGS CAUSE STRANGULATION! DO NOT PLACE ITEMS WITH A STRING AROUND A CHILD’S
NECK, SUCH AS HOOD STRINGS OR PACIFIER CORDS. DO NOT SUSPEND STRINGS OVER A
CRIB OR ATTACH STRINGS TO TOYS.
• TO HELP PREVENT STRANGULATION TIGHTEN ALL FASTENERS. A CHILD CAN TRAP PARTS OF
BODY OR CLOTHING ON LOOSE FASTENERS.
• DO NOT PLACE CRIB NEAR WINDOW WHERE CORDS FROM BLINDS OR DRAPES MAY
STRANGLE A CHILD.
• INFANTS CAN SUFFOCATE ON SOFT BEDDING.
• NEVER ADD A PILLOW, COMFORTER OR PADDING.
• NEVER PLACE ADDITIONAL PADDING UNDER INFANT.
• NEVER USE PLASTIC SHIPPING BAGS OR ANY PLASTIC FILM AS MATTRESS COVERS,
BECAUSE THEY CAN CAUSE SUFFOCATION.
• INFANTS CAN SUFFOCATE IN GAPS BETWEEN CRIB SIDES AND A MATTRESS THAT IS TOO
SMALL. ANY MATTRESS USED IN THIS CRIB MUST BE AT LEAST 27-1/4 IN (69 CM) BY 51-5/8
IN (131 CM), WITH A THICKNESS NOT EXCEEDING 6 IN (15CM) AND A MINIMUM THICKNESS
OF 4 IN (10 CM). THE DIMENSIONS OF THE MATTRESS SHALL BE TAKEN FROM SEAM TO
SEAM OR EDGE TO EDGE WHERE APPROPRIATE.
FALL HAZARD:
• WHEN CHILD IS ABLE TO PULL TO STANDING POSITION, SET MATTRESS TO LOWEST
POSITION AND REMOVE BUMPER PADS, LARGE TOYS AND OTHER OBJECTS THAT COULD
SERVE AS STEPS FOR CLIMBING OUT. AFTER RAISING SIDE, MAKE SURE LATCHES ARE
SECURE (DISREGARD FOR NON-DROP SIDE CRIB).
• DO NOT LEAVE CHILD IN CRIB WITH SIDES LOWERED. BE SURE SIDE IS IN RAISED AND
LOCKED POSITION WHENEVER CHILD IS IN CRIB (DISREGARD FOR NON-DROP SIDE CRIB).
• STOP USING CRIB WHEN CHILD BEGINS TO CLIMB OUT OR REACHES THE HEIGHT OF 35 IN
(89 CM).
•WHEN STORING CRIB USE CAUTION AS EXTREME CHANGES IN TEMPERATURE OR HUMIDITY
CAN COMPROMISE THE CRIB MAKING IT EXTREMELY DANGEROUS TO YOUR CHILD.
• USE CAUTION WHEN A VAPORIZER OR HUMIDIFIER IS IN USE. ALWAYS AIM VAPOR AWAY
FROM THE CRIB AS WELL AS ANY OTHER WOODEN FURNITURE. PROLONGED PERIODS OF
HUMIDITY IN STORAGE AS WELL AS IN THE HOME CAN COMPROMISE THE CRIB.
• AVOID USING VAPORIZERS AND HUMIDIFIERS FOR PROLONGED PERIODS OF TIME.
• FOLLOW DUCTS IN CRIB.

www.dreamonme.com/help 5
WARNINGS (cont.)
• Do not use this crib if you cannot exactly follow the accompanying instructions.
• Do not use this crib for a child who can climb out of it or who is taller than 90 cm.
• Do not place in or near this crib any cord, strap or similar item that could become
wrapped around a child’s neck.
• Do not place this crib near a window or a patio door where the child could reach
the cord of a blind or curtain and be strangled.
• Check this crib regularly before using it and do not use it if any parts are loose or
missing or if there are any signs of damage. Do not substitute parts. Contact the
manufacturer if replacement parts or additional instructions are needed.
• Use a crib mattress that is no thicker than 15 cm and is of such a size that, when
it is pushed firmly against any side of crib, it does not leave a gap of more than 3
cm between the mattress and any part of the sides of the crib.
• Children can suffocate on soft bedding. Do not place pillows, comforters or soft
mattress in this crib.
WARNING
• Ne pas utiliser le lit a moins d’ ètre en mesure de suivre précisément les
instructions qui l’ accompagnent.
• Ne pas uliliser le lit si l’ enfant est capable d’ en sortir on mesure plus de 90 cm.
• Ne pas mettre dans le lit on à proximité de celui-ci des cordes, courroies on
objects semblables qui risqueraient de s’enrouler autour du cou de l’ enfant.
• Ne pas placer le lit près d’ une fenètre on d’ une porte-fenètre on l’ enfant
pourrait se saisir de codes d’ un store ou d’ un rideau et s’ etrangler.
• Vérifier régulièrement le lit préabablement à son utilisations et ne pas l’ utiliser en
cas de détection d’ une pièce desserrée, de pièce manquante ou de tout signe
de dommages. Ne pas substituer une pièce a une autre. Communiquer avec le
fabricant pour obtenir, au besoin, une pièce de rechange ou des instructions
supplémentaires.
• Utiliser un matelas pour lit d’ enfant dont l’ épaisseur est d’ au plus 15 cm et
dont la superficie perment d’ empêcher, lorsqu’il est poussé fermement contre
un côté quelconque du lit, qu’un espace de plus de 3 cm soit créé entre le
matelas et une partie quelconque de tout côté.
• L’ enfant peut s’ étouffer en présence d’ articles de literie mous. Ne pas mettre
dans le lit d’ oreiller, d’ édredon ou de matelas mou.
MISE EN GARDE

PARTS
www.dreamonme.com/help
6
If there are any missing parts, please contact Dream On Me before using the
product.
Footboard
1 2 3
Right Front Leg Left Front Leg
Headboard
4 5 6
Right Rear Leg Left Rear Leg

www.dreamonme.com/help 7
PARTS (cont.)
If there are any missing parts, please contact Dream On Me before using the
product.
Mattress Support
7
Bottom Bar
9
8Side Panel (×2)
(Keep the part (9) for Day bed and
Toddler Bed Conversion)

www.dreamonme.com/help
8
Bolt 2-1/5” (×8)
ABolt 3” (×8)
B
Barrel Nuts (×16)
CAllen Key
D
Bolt 3/4” (×4)
EWooden Dowels 1-1/5” (×2)
F
HARDWARE
If there are any missing parts, please contact Dream On Me before using the
product.
Screw Driver (NOT INCLUDED)
Tools Needed:

www.dreamonme.com/help 9
Barrel Nuts (×4)
C
Bolt 3” (×4)
B
(2)
(8)
(5)
(B)
(C)
(C)
(C)
(C)
(B) (B)
(B)
1
CRIB ASSEMBLY - RIGHT LEGS ASSEMBLY
1a. Align the Right Front Leg
(2) and Right Rear Leg (5)
towards the Side Panel (8).
1b. Insert the Bolts (B) inside
the holes provided at the
top and the lower end.
Similarly insert the Barrel
Nuts (C) from bottom.
1c. Tighten the Bolts (B) into
the Barrel Nuts (C) using
the Allen Key (D) provided.

www.dreamonme.com/help
10
Barrel Nuts (×4)
C
Bolt 3” (×4)
B
(B)
(C)
(C)
(C)
(C)
(B) (B)
(B)
(3)
(8)
(6)
2
CRIB ASSEMBLY - LEFT LEGS ASSEMBLY
2a. Align the Left Front Leg (3)
and Left Rear Leg (6)
towards the Side Panel (8).
2b. Insert the Bolts (B) inside
the holes provided at the
top and the lower end.
Similarly, insert the Barrel
Nuts (C) from bottom.
2c. Tighten the Bolts (B) into
the Barrel Nuts (C) using
the Allen Key (D) provided.

www.dreamonme.com/help 11
Barrel Nuts (×4)
C
Bolt 2-1/5” (×4)
A
(4)
(A)
(A)
(C)
(C)
(A)
3
CRIB ASSEMBLY - SIDE PANEL ASSEMBLY
3a. To assemble the side
panels to the Crib,
align them to the
Headboard (4) as
shown in figure.
3b. Insert the Bolts (A)
inside the holes
provided at the top
and the lower end of
the Side Panels (8).
Similarly, insert the
Barrel Nuts (C) from
bottom and top of
the Headboard, as
shown in the picture.
3c. Tighten the Bolts (A)
into the Barrel Nuts
(C) using the Allen
Key (D) provided.

www.dreamonme.com/help
12
Bolt 3/4” (×4)
EAllen Key
D
(7)
(E)
4
CRIB ASSEMBLY - MATTRESS SUPPORT ASSEMBLY
4a. Attach all the corners of
the Mattress Support
Panel (7) to the Headboard
(4) and Side Panels (8) as
shown in the diagram.
4b. Insert the Bolts (E) and
tighten it using the Allen
Key (D).
NOTE:
1. The Lowest position of the
Mattress Support Panel
will be for Toddlers (babies
who can stand up and
walk), Mid position is for
Infant babies who start to
turn and sit up, and the
Highest Position is for
newborn babies.
2. Ensure that the Mattress
Support Panel is flat side
up and not at a slant.

www.dreamonme.com/help 13
Barrel Nuts (×4)
C
Bolt 2-1/5” (×4)
A
(1)
5
CRIB ASSEMBLY - FOOTBOARD ASSEMBLY
5a. Align the Footboard (1)
to the Side Panels as
shown in the diagram.
5b. Insert the Bolts (A)
inside the holes
provided at the top and
the lower end. Similarly,
insert the Barrel Nuts
(C) from bottom.
5c. Ensure that the
alignment is right and
Panels are firm before
you start using the crib.
Do not overtighten.
(A)
(C)
(1)
(A)
(A)
(A)
(A)

www.dreamonme.com/help
14
• FAILURE TO FOLLOW THESE WARNINGS AND ASSEMBLY INSTRUCTIONS
COULD RESULT IN SERIOUS INJURY OR DEATH FROM ENTRAPMENT OR
STRANGULATION.
• DO NOT PLACE BED NEAR WINDOWS WHERE CORDS FROM BLINDS OR
DRAPES MAY STRANGLE A CHILD.
• THE MATTRESS INTENDED FOR USE ON THIS BED SHALL BE A FULL-SIZE CRIB
MATTRESS HAVING THE DIMENSIONS OF 51-5/8 IN (1310 MM) IN LENGTH AND
27-1/4 IN (690 MM) IN WIDTH AND THICKNESS OF 4 IN (100 MM) OR A GREATER
THICKNESS AS SPECIFIED BY THE MANUFACTURER.
• THE MINIMUM AGE OF THE INTENDED USER SHALL NOT BE LESS THAN 15
MONTHS AND THE MAXIMUM WEIGHT SHALL NOT BE GREATER THAN 50 LBS.
(22.7 KG).
WARNING
For Toddler Bed Use
• LE NON-RESPECT DE CES AVERTISSEMENTS ET INSTRUCTIONS DE MONTAGE
POURRAIT ENTRAÎNER DES BLESSURES GRAVES OU LA MORT PAR PIÉGEAGE
OU STRANGULATION.
• NE PAS PLACER LE LIT PRÈS DE FENÊTRES O LES CORDONS DES STORES OU
DES RIDEAUX PEUVENT ÉTRANGLER UN ENFANT.
• LE MATELAS DESTINÉ À ÊTRE UTILISÉ SUR CE LIT DOIT ÊTRE UN MATELAS
POUR BERCEAU DE GRANDE TAILLE AYANT LES DIMENSIONS DE 51-5/8 PO
(1310 MM) DE LONGUEUR ET 27-1/4 PO (690 MM) DE LARGEUR ET D'ÉPAISSEUR
DE 4 IN (100 MM) OU UNE PLUS GRANDE ÉPAISSEUR TEL QUE SPÉCIFIÉ PAR LE
FABRICANT.
• L'ÂGE MINIMUM DE L'UTILISATEUR PRÉVU NE DOIT PAS ÊTRE INFÉRIEUR À 15
MOIS ET LE POIDS MAXIMUM NE DOIT PAS ÊTRE SUPÉRIEUR À 50 LBS. (22,7 KG).
MISE EN GARDE
Applicable aux lits pour tout-petit

www.dreamonme.com/help 15
Barrel Nuts (×2)
C
Bolt 2-1/5” (×2)
A
(A) (C)
(9)
(F)
1
CONVERSION MODES - DAYBED ASSEMBLY
1a. In order to convert the
crib to a Daybed, you
must first remove the
Footboard of the crib.
1b. Insert the Barrel Nuts (C)
at both sides of and below
the Bottom Bar (9).
1c. Insert the bolt (A) into the
holes provided at the
lower end of the Side
Panels and tighten them
using Allen Key (D).
Guard Rail (NOT INCLUDED, SOLD SEPARATELY)
NOTE:
*Make sure mattress support is at
the lowest position.
Wooden Dowels 1-1/5” (×2)
F
(9)

www.dreamonme.com/help
16
2
CONVERSION MODES - TODDLER BED ASSEMBLY
2a. In order to convert the crib to a
Toddler Bed, you must first
remove the Footboard of the
crib.
2b. Then attach the Stabilizer Bar
and Toddler Guard Rail.
2c. Insert the Barrel Nuts (C) at
both sides of and below the
Bottom Bar (9). Insert the bolt
(A) into the holes provided at
the lower end of the Side
Panels and tighten them using
Allen Key (D).
2d. Make sure to follow the
complete instructions provided
with the Toddler Guard Rail
(SOLD SEPERATELY).
Guard Rail (NOT INCLUDED, SOLD SEPARATELY)
NOTE:
*Make sure mattress support is at
the lowest position.
*Make sure to use Toddler Guard
Rail that is included with Dream
On Me Universal Toddler Guard
Rail (SKU- 692) to convert the crib
to a toddler bed.
Barrel Nuts (×2)
C
Bolt 2-1/5” (×2)
AWooden Dowels 1-1/5” (×2)
F
(A) (C)
(9)
(F)
(9)

www.dreamonme.com/help 17
3
CONVERSION MODES - FULL SIZE BED ASSEMBLY
3a. In order to convert the crib to
a Full-Size bed, you must
first remove the Footboard of
the crib.
3b. Remove the Mattress
Support Panel, followed by
Left and Right Panels.
3c. Make sure to follow the
complete instructions
provided with Bed Rails.
Bed Rails (NOT INCLUDED, SOLD SEPARATELY)
NOTE:
*Make sure to use the
Dream On Me Universal
Bed Rails (SKU-849) in
order to convert the crib
to a Full-size Bed with
Footboard.
*Do not put the mattress
directly on the wooden
slats, use either a Bunky
Board, Particleboard, or
low-profile Boxspring
before placing the
mattress.

www.dreamonme.com/help
18
FURNITURE CARE INSTRUCTIONS
ROOM CLIMATE CONTROL:
• Wood, when first cut contains more than 50 percent water. When it is prepared for
furniture construction it is placed in a Kiln and the moisture content is brought down
to 8 to 10 percent. Wood is porous and responds to its environment. If the room has
high humidity it will absorb it and expand and if the humidity is low it will lose
moisture and shrink.
• It is important that the humidity levels in the room be controlled from extremes of
too much humidity or too little. Furniture should not be placed close to the
air-conditioning outlets, fire places, radiators, space heaters, humidifiers or
dehumidifiers. Exposure to extreme variations of temperature and humidity can
damage any fine wood product.
THE IDEAL ENVIRONMENT FOR FINE FURNITURE:
• Fine wood furniture will have fewer problems when its environment is controlled at a
temperature between 65 and 75 degrees and a relative humidity between 35 and 40
percent. Wood placed in an environment outside of those limits can and will shrink
or expand and may develop some small cracks which are not material or structural
defects.
STICKING DOORS AND DRAWERS:
• With the minor changes in temperature and humidity, doors and drawers may swell
and be difficult to open or close. Tolerances have been built into the units but
extreme conditions may still cause sticking. This will adjust back to normal over
time but until it does consider using a dehumidifier or rub candle wax or paraffin on
sides that stick.
AVOID DIRECT SUNLIGHT:
• Keep the furniture out of direct sunlight. Ultraviolet rays will fade colors and in some
cases darken them. It can also cause crazing or hair line cracks in the finish. White
finishes will yellow naturally over time and exposure to direct sunlight will hasten
this natural process along with some woods darkening naturally over time; this is
not considered to be a quality defect.
PROPER STORAGE:
• If you need to put your furniture in storage for any period of time do not store them
in a damp basement or hot dry attic. Allow air movement around the furniture and
do not stack anything on it.

FURNITURE CARE INSTRUCTIONS (cont.)
IN GENERAL:
• Protect furniture surface from hot or extremely cold items.
• Use coasters under hot or cold beverages.
• Do not use synthetic fabric under accessories or lamps.
• Protect tops from pens, markers and crayons.
• Oils from potpourri and other scented items can damage the finish of the furniture.
• Do not drag items across the surface of the furniture.
• Allow the surface to breath by rotating your accessories and lamps.
• Do not over polish the furniture, do it only two or three times a year. Over polishing
can distort the natural finish of the product.
• Do not wax the furniture, as wax build up can destroy natural finish of the product.
• When moving furniture always lift the unit. Do not push or drag it to avoid damage
to legs.
• Keep the furniture level so doors and drawers open and close freely.
• Clean with a damp, not wet, cloth. Use only a mild soap. Do not use the abrasive
cleaners.
• Do not scratch or chip the finish.
• Inspect the product periodically, contact Dream On Me for replacement parts or
questions.
• Do not store the product or any parts in extreme temperatures and conditions such
as a hot attic or a damp, cold basement. These extremes can cause a loss of
structural integrity.
• To preserve the luster of the high-quality finish on your product, it is recommended
to place a doily or felt pad under any items you place on the finish.
• Clean with a damp cloth, then a dry cloth to preserve the original luster and beauty
of this fine finish.
• Do not use abrasive chemicals.
• Do not spray cleaners directly onto furniture.
• Lift slightly when moving on carpeting to prevent leg breakage.
• Use of a vaporizer near furniture will cause wood to swell and to peel.
YOU DID IT!
Congratulations Mom & Dad!
It's time to create your dream nursery. A safe, elegant
handcrafted crib that grows with your little one.

1532 S. WASHINGTON AVENUE
PISCATAWAY, NJ 08854
www.dreamonme.com
Follow Us @dreamonmeinc
to get your nursery featured on our social media.
Enter our monthly giveaway!
Scan the QR code to register.
Chat with us!
Scan the QR code to Live Chat.
/