

Contact Us!
ameriwoodhome.com
PEOPLE NEEDED FOR ASSEMBLY: 2
ESTIMATED ASSEMBLY TIME: 1-2 HOUR
Helpful Hints

P
P
P
P
ameriwoodhome.com
Read through each step carefully and follow the proper order
Separate and count all your parts and hardware
Give yourself enough room for the assembly process
Have the following tools: Flat Head Screwdriver, #2 Phillips Head
Screwdriver and Hammer
Caution: If using a power drill or power screwdriver for screwing,
please be aware to slow down and stop when screw is tight.
Failure to do so may result in stripping the screw.
P
Before You Start
Cam Lock Fastening System

ameriwoodhome.com
Board Identification
Not Actual Size
Top panel
T1900013010KX Bottom panel
T1900013020KX
C
Left side panel
T1900013030KX
D
Right side panel
T1900013040KX
E
Left partition
T1900013050KX
F
Right partition
T1900013060KX
G
Big shelf
T1900013070KX
H
Small shelf
T1900013080KX
QTY:2PCS

ameriwoodhome.com
Board Identification
Not Actual Size
I
Door
T1900013090KX
QTY:2PCS
J
Back panel
T1900013100KX
K
Bottom front support
T1900013110KX
L
Bottom rear support
T1900013120KX
M
Bottom left support
T1900013130KX
N
Bottom right support
T1900013140KX

ameriwoodhome.com
Board Identification
Not Actual Size
F
I
I
K
M
N

Part List
ameriwoodhome.com
Hardware Bag Reference Number:
21900013COM0KX
Actual Size
Not Actual Size
× 6
Screw
TKX1337
Ø3X15mm
× 28
Ø8X30 mm
1× 8
Ø4X32mm
3
Wood dowel
TKX1005 Screw
TKX1456
2
Cam bolt
TKX1270
M6X20mm
× 26
4
× 26
Ø15X12 mm
Cam lock
TKX1010
5× 8
Ø21mm
Cam cover
TKX1063
6× 12
Shelf support
TKX1174
Ø5 x 16mm
7× 6
Back plate clamp
TKX1559
8
× 1
Glue
TKX1014
9× 3
Rubber pad
TKX1379
10
Warning label
TKX3014
× 1
11

1.1 Attach (4) to (A) & (B) as illustrated. Do NOT over tighten.
ameriwoodhome.com
STEP 1
M6X20mm
× 22
4
4
4
4
4
4
4
4
4
4
4

ameriwoodhome.com
STEP 2
2.1 Attach (1) to (K), (L), (M) & (N) as illustrated.
2.2 Attach (4) to (K), (M) & (N) as illustrated.
L
N
× 12
Ø8X30 mm
1
M6X20mm
× 4 9
4
1
1
4
4
4
4
1
1
1
1
1
1

ameriwoodhome.com
STEP 3
E
3.1 Attach (1) to (C), (D), (E) & (F) as illustrated.
× 16
Ø8X30 mm
1
1
1
1
1
1
1
1
1
9

ameriwoodhome.com
STEP 4
× 8
Ø15X12 mm
5× 8
Ø21mm
69
5
6
D
F
4.1 Attach (A) to (C), (D), (E) & (F) with (5) as illustrated.
4.2 Use (6) to cover cam lock holes as illustrated.
Proper orientation of CAM LOCK

ameriwoodhome.com
STEP 5
D
F
J
5.1 Insert (J) as illustrated.

ameriwoodhome.com
STEP 6
6.1 Attach (B) to (C), (D), (E) & (F) with (2) as illustrated.
× 8
Ø4X32mm
29
2
2
2
2
D
F
2

ameriwoodhome.com
STEP 7
× 4
Ø15X12 mm
59
7.1 Attach (L) to (M) & (N) with (5) as illustrated.
7.2 Attach (K) to (M) & (N) with (5) as illustrated.
Proper orientation of CAM LOCK
N
5
5

ameriwoodhome.com
STEP 8
8.1 Attach (B) to sample from previous step with (5) as illustrated.
L
N
× 14
Ø15X12 mm
59
Proper orientation of CAM LOCK
5

ameriwoodhome.com
STEP 9
× 6
Ø3X15mm
3× 6
8
8
3
9.1 Attach (8) to (A) & (B) with (3) as illustrated.

ameriwoodhome.com
STEP 10
H
F
10.1 Insert (7) to (C),(D),(E) & (F) as illustrated.
10.2 Insert and put (G) & (H) on (7) as illustrated.
× 12
Ø5 x 16mm
7
7
7
&

ameriwoodhome.com
STEP 11
11.1 Press the pin on top slider then slide it down as illustrated.
I
× 2

ameriwoodhome.com
STEP 12
12.1 Insert the guide wheel of (I) into the bottom rail on (B) as illustrated.
12.2 Tilt the door inward then press the pin on top slider and slide upward. Make sure the top
slider stay inside the the upper rail.
12.3 Attach (10) to (I) as illustrated.
× 3
10

ameriwoodhome.com
STEP 13
× 1
11
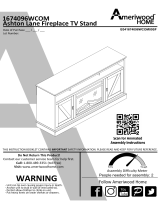
WARNING
Risk of death or serious injury. This unit must be placed against
a fixed in place wall at least as tall as television.
13.1 Apply the warning label (11) to the center of the top panel as shown, ensure the TV
covers the label in use.
You will not be able to remove the label after it is applied to the top panel.
11
La page est en cours de chargement...
La page est en cours de chargement...
La page est en cours de chargement...
La page est en cours de chargement...
La page est en cours de chargement...
La page est en cours de chargement...
La page est en cours de chargement...
La page est en cours de chargement...
-
 1
1
-
 2
2
-
 3
3
-
 4
4
-
 5
5
-
 6
6
-
 7
7
-
 8
8
-
 9
9
-
 10
10
-
 11
11
-
 12
12
-
 13
13
-
 14
14
-
 15
15
-
 16
16
-
 17
17
-
 18
18
-
 19
19
-
 20
20
-
 21
21
-
 22
22
-
 23
23
-
 24
24
-
 25
25
-
 26
26
-
 27
27
-
 28
28


dans d''autres langues
- español: Dorel Home 1900013COM
Documents connexes
-
 Dorel Home 3863013COM Assembly Manual
-
Dorel Home 8644918COM Assembly Instructions
-
 Dorel Home 9930931COM Assembly Manual
-
 Dorel Home 2869872COM Assembly Manual
-
 Dorel Home 5047296COM Assembly Manual
-
 Dorel Home HD81977 Mode d'emploi
-
 Dorel Home HD09458 Guide d'installation
-
 Dorel Home HD41131 Mode d'emploi
-
 Dorel Home 3799341COM Assembly Manual
-
 Dorel Home 1674096WCOM Assembly Manual


