Ameriwood Home 9100222COM Manuel utilisateur
- Taper
- Manuel utilisateur

9100222COM
5DrawerDresser
B349100222COM0
THISINSTRUCTIONBO OKLETCONTAINS
IMPORTANT
SAFETYINFORMATION.PLEASEREADANDKEEPFORFUTUREREFERENCE.
DateofPurchase___/___/___
LotNumber:
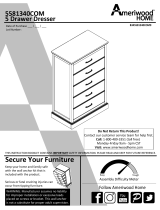
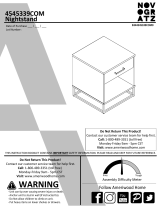
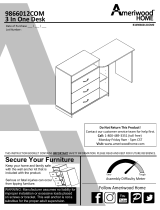
DoNotReturnThisProduct!
Contactourcustomerserviceteamforhelpfirst.
Call:1‐800‐489‐3351(tollfree)
Monday‐Friday9am‐5pmCST
Visit:www.ameriwoodhome.com
AssemblyDifficulty Meter
Easy
Tough
Keepyourhomeandfamilysafe
withthewallanchorkitthatis
includedwiththeproduct.
Seriousorfatalcrushinginjuriescan
occurfromtippingfurniture.
WARNING:Manufacturerassumesnoliability
forimproperinstallation orexcessiveloads
placedonscrewsorbracket.Thiswallanchor
isnotasubstituteforproperadultsupervision.

ContactUs!
HelpfulHints
2
DoNOTreturnthisproduct!
Contactourfriendlycustomerserviceteamfirstforhelp.
Callus!
1‐800‐489‐3351
Monday‐Friday
9am‐5pmCST
Visitameriwoodhome.comtoviewthe
limitedwarrantyvalidintheU.S.andCanada.
AssemblyTips
‐Openyouritemintheareayouplantokeepittoavoidexcessivehea vylifting.
‐Identify,sortandcountthe partsbeforeattemptingassembly.
‐Compressiondowelsarelightlytappedinwithahammer.
‐Slidesarelabeledwitha
R
(right)and
L
(left)forproperplacement.
‐MakesuretoalwaysfacethepointonthetopoftheCamLocktowardsthe
outeredge.
‐Useallthenailsprovidedforthebackpanelandspreadthemoutequally.
‐Backpanelmustbeusedtomakesureyourunitissturdy.
‐Do
NOTuseharshchemicalsorabrasivecleanersonthisitem.
‐Neverpush,pull,ordragyourfurniture.
Tube
You
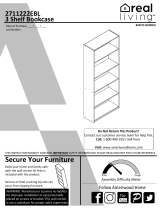
PEOPLENEEDEDFORASSEMBLY:2
ESTIMATEDASSEMBLYTIME:1HOUR

3
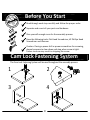
BeforeYouStart
Q
u
i
c
k
T
i
p
A
s
s
e
m
b
l
y
CamLockFasteningSystem
ThisCamLockFasteningSystem willbeusedthroughouttheassemblyprocess.
1
3
2
4
Readthrougheachstepcarefullyandfollowtheproperorder
Separateandcountallyourpartsandhardware
Giveyourselfenoughroomfortheassemblyprocess
Havethefollowingtools:FlatHeadScrewdriver,#2PhillipsHead
ScrewdriverandHammer
Caution:Ifusingapowerdrillorpowerscrewdriverforscrewing,
pleasebeawaretoslowdownandstopwhenscrewistight.
Failuretodosomayresultinstrippingthescrew.

4
BeforeYouStart
Q
u
i
c
k
T
i
p
A
s
s
e
m
b
l
y

5
BoardIdentification
Notactualsize
LeftPanel
39100222010
RightPanel
39100222020
Top
39100222030
Bottom
39100222040
DrawerBack(x5)
39991167067890B
DrawerBottom(x5)
39991341068910D
Support(x4)
39100222060
DrawerFront(x5)
39100222080
DrawerSide(x10)
39991167346200C
This piece is paperboard construction.
It is not made from wood, but is
required for the assembly of your unit.
BackPanel
K910000000
A
B
C
D
J
F
H
DWR
SIDE
DWR
BACK
DWR
BTM

6
BoardIdentification
Notactualsize
D
DWR
BACK
DWR
BTM
DWR
SIDE
DWR
SIDE
A
B
C
H
J
F
F
F
F
This piece is paperboard construction.
It is not made from wood, but is
required for the assembly of your unit.

7
PartList
ActualSize
(x12)
#A22610
cambolt
(x12)
#A22620
camlock
(x12)
#A21670
wooddowel
(x4)
#A23030
confirmatscrew
(x50)
#A11080
7/16"flatheadscrew
(x50)
#A12120
7/16"round
headscrew
(x10)
#A52365
knob
(x10)
#A17400
7/8"bolt
(x20)
#A21970
drivefastener
(x12)
#A12420
5/8"round
headscrew
1
2
3
4
5
7
9
8
6
11
10
(x40)
#A21110
nail
Note: Your model may
contain extra hardware.

8
PartList
NotActualSize
16
15
14
(x10)
#A54520
drawerbracket
(x4)
#A54800
footbracket
(x4)
#A44320
foot
(x5)
drawerslidekit
#A56770
rightdrawermember
leftdrawermember
rightcabinetmember
leftcabinetmember
12a
12b
12c
12d
(x1)
#A84050
Safety Bracket Kit
12
16d
16c
16b
16a
13
17
(x5)
#A54900
drawerbrace

9
STEP
1
Proper orientation of CAM LOCK
Tip
Assembly
Quick
(x4)
#A22610
1
2
3
5
(x2)
#A22620
(x2)
#A21670
(x15)
#A11080
(x5)
#A56770
leftcabinetmember
Markedwitha"L"
1
2
3
16a
2
16a
5
3
1
1
1
5
5
5
5
5
5
5
5
5
5
5
5
5
5
5
A

10
STEP2
Proper orientation of CAM LOCK
Tip
Assembly
Quick
1
2 3
5
(x4)
#A22610
(x2)
#A22620
(x2)
#A21670
(x15)
#A11080
(x5)
#A56770
rightcabinetmember
Markedwitha"R"
1
2
3
16b
3
1
1
1
5
5
5
5
5
5
5
5
5
5
5
5
5
5
5
2
16b
5
B

11
STEP3
2 3
(x8)
#A22620
(x8)
#A21670
Proper orientation of CAM LOCK
Tip
Assembly
Quick
2
2
3
3
x4
F

12
STEP
4
U
N
L
O
C
K
L
O
C
K
A
F
F
F
B
F

13
STEP
5
1
(x4)
#A22610
1
12b
12a
(x1)
#A84050
1
1
1
12a
12b
C
Donotfullytightenscrew.

14
STEP
6
U
N
L
O
C
K
L
O
C
K
finishededge
A
B
C

15
STEP
7
4
(x4)
#A23030
4
4
4
4
A
D
B
finishededge

16
STEP8
10
14
15
(x12)
#A12420
(x4)
#A54800
(x4)
#A44320
D
14
15
10
10
Attach foot brackets (14) to bottom (D) with
screws (10) as shown. Screw a foot (15)
into each foot bracket (14) as shown.

17
STEP9
11
(x40)
#A21110
11
Carefullyturnyourunitoveronit'sfrontside.
Attachedthebackpanelasshownnailingstraightintotherawedges.
Assurethattheunitissquare.
Distancefromcornertocornermustbeequalasshown.
IMPORTANT!
THEBACKPANELISASTRUCTURALPARTOFTHISUNIT
ANDMUSTBEINSTALLEDPROPERLY.
J
D
B
Flushthebottomedgeoftheback
panel(J)withthebottomedgeof
thebottom(D).

18
STEP10
7
(x20)
#A12120
(x10)
#A54520
13
DWR
SIDE
DWR
SIDE
x5
x5
1313
7
7
7
7

19
STEP
11
6
(x20)
#A12120
7
Centerthegrooveinthedrawersideswiththegrooveinthedrawerfront(H).
7
7
7
H
DWR
SIDE
DWR
SIDE
x5

20
STEP12
"finishedsurface"
H
DWR
BTM
DWR
SIDE
DWR
SIDE
x5
La page charge ...
La page charge ...
La page charge ...
La page charge ...
La page charge ...
La page charge ...
La page charge ...
La page charge ...
La page charge ...
La page charge ...
La page charge ...
La page charge ...
La page charge ...
-
 1
1
-
 2
2
-
 3
3
-
 4
4
-
 5
5
-
 6
6
-
 7
7
-
 8
8
-
 9
9
-
 10
10
-
 11
11
-
 12
12
-
 13
13
-
 14
14
-
 15
15
-
 16
16
-
 17
17
-
 18
18
-
 19
19
-
 20
20
-
 21
21
-
 22
22
-
 23
23
-
 24
24
-
 25
25
-
 26
26
-
 27
27
-
 28
28
-
 29
29
-
 30
30
-
 31
31
-
 32
32
-
 33
33


Ameriwood Home 9100222COM Manuel utilisateur
- Taper
- Manuel utilisateur
dans d''autres langues
Documents connexes

Autres documents
-
 Dorel Home 4545339COM Manuel utilisateur
-
 Dorel Home HD80037 Guide d'installation
-
 Dorel Home 3243222EBL Assembly Manual
-
 Dorel Home 5392500COM Mode d'emploi
-
 Dorel Home 5581500COM1 Mode d'emploi
-
 Dorel Home 2711222EBL Assembly Manual
-
Ameriwood HD63722 Guide d'installation
-
 Dorel Home 9716335COM Assembly Manual
-
 Dorel Home 8379341COM Assembly Manual
-
 Whalen 1049034 / CSC65FP-30BI-2 Manuel utilisateur


