Beko SIM 3122 T Manuel utilisateur

Catégorie
Fers
Taper
Manuel utilisateur
Steam
Iron
User Manual
SIM 3122 T - SIM 3124 D - SIM 3126 R
EN - FR - ES - PL - RO - IT - MK - SQ - SR - RU
01M-8814923200-2021-07
01M-8814933200-2021-07
01M-8814943200-2021-07
ENGLISH
7-
17
FRANÇAIS
18-
29
ESPAÑOL
30-
43
POLSKI
44-
58
ROMANIAN
59-
72
ITALIANO
73-
86
МАКЕДОНСКИ
87-
100
SHQIPTARE
101-
112
СРПСКИ
113-
123
РУССКИЙ
124-
139
2 /
EN
Steam
Iron
/
User
Manual
CONTENTS
o·
::
C',
-
-----
,
1
10
11
9
8
r
h
l.!
:
C
,
i,;,
'd
5
4
3
7
6
2
4
EN
CLEANING
AND
CARE
SELF-
CLEAN
FR
NETTOYAGE
ET
ENTRETIEN
AUTO-
NETTOYAGE
ES
LIMPIEZA
Y
CUIDADOS
AUTOLIMPIEZA
PL
CZYSZCZENIE
I
KONSERWACJA
SAMOCZYSZCZENIE
RO
CURĂ
AREA
ȘI
ÎNGRIJIREA
AUTOCURĂȚARE
IT
PULIZIA
E
CURA
AUTOPULITURA
MK
ЧИСТЕЊЕ И ОДРЖУВАЊЕ
САМОСТОЈНО ЧИСТЕЊЕ
SQ
PASTRIMI
DHE
MIRËMBAJTJA
VETË
PASTRIM
SR
ČIŠĆENJE
I
ODRŽAVANJE
SAMOČIŠĆENJE
RU
ОЧИСТКА И УХОД
САМОЧИСТКА
EN
OPERATION
SHOCK
STEAM
AUTOMATIC
SHUTDOWN
FR
FONCTIONNEMENT
FONCTION
PRESSING
ARRÊT
AUTOMATIQUE
ES
FUNCIONAMIENTO
DESCARGA
DE
VAPOR
APAGADO
AUTOMÁTICO
PL
OBSŁUGA
UDERZENIE
PARY
AUTOMATYCZNE
WYŁĄCZANIE
RO
UTILIZARE
JET
DE
ABUR
OPRIRE
AUTOMA
IT
UTILIZZO
PULIZIA E
MANUTENZIONE
SPEGNIMENTO
AUTOMATICO
MK
РАКУВАЊЕ
СОЗДАВАЊЕ ПАРЕА
АВТОМАТСКО
ИСКЛУЧУВАЊЕ
SQ
FUNKSIONIMI
SHOK
AVULLI
MBYLLJE
AUTOMATIKE
SR
RUKOVANJE
ŠOK
PARA
AUTOMATSKO
ISKLUČIVANJE
RU
ЭКСПЛУАТАЦИЯ
УДАР ПАРОМ
АВТОМАТИЧЕСКОЕ
ОТКЛЮЧЕНИЕ
1
2
3
2
1
4
5
6
7
8
9
10
11
12
30
sec.
Auto-
Off
8
min.
Auto-
Off
30
sec.
Auto-
Off
5
13
1
2
3
1 hour
1
2
3
2
2
3
1
1
4
5
6
1
2
1 hour
6
Please
read
this
user
manual
first!
Dear
Customers,
Thank you for selecting a Beko product. We hope that you get the best results from your
product which has been manufactured with high quality and state-of-the-art technology.
Therefore, please read this entire user manual and all other accompanying documents
carefully before using the product and keep it as a reference for future use. If you handover
the product to someone else, give the user manual as well. Follow all warnings and
information in the user manual.
Meanings
of
the
symbols
Following
symbols
are
used
in
the
various
section
of
this
manual:
This product
has
been
produced
in
environmentally-friendly, state-of-the-art
facilities.
WARNING:
Risk
or
burning
and
scalding due to steam.
WARNING:
Warning
for
hot
sur-
faces.
A
WARNING:
Warnings for dan-
gerous situations
concerning the
safety of life and property.
C
Important
information
and
useful
hints about usage.
1.
2.
3.
4.
5.
6.
7.
8.
9.
Power cable
Iron
base
plate
Water tank
Thermostat indicator and Auto-Off light
Temperature adjustment knob
Soleplate
Water spray nozzle
Water refill lid
Steam adjustment / Self- Clean button
10.
Water
spraying
button
11.
Shock
steam
button
Technical
data
Technical
and
design
modification
rights
are
reserved.
The values which are declared in the markings affixed on your appliance or the other printed documents supplied with it
represent the values which were obtained in the laboratories pursuant to the pertinent standards. These values may vary
according to the usage of the appliance and ambient conditions.
8 /
EN
Steam
Iron
/
User
Manual
SIM
3122
T
SIM
3124
D
SIM
3126
R
Voltage
220
-
240 V~
50
-
60
Hz
Power
consumption
2200
W
2400
W
2200-2600
W
Shock
steam
amount
up
to
140
g/min
up
to
145
g/min
up
to
150
g/min
Continuous amount
of steam
up
to
25
g/min
up
to
30
g/min
up
to
35
g/min
Insulation
class
I
1
Important safety and environmental
instructions
This section contains safety instructions that will
help protect from risk of personal injury or prop-
erty damage.
Failure to follow these instructions invalidates the
granted warranty.
1.1
General
safety
This appliance complies with the international
safety standards.
This appliance may be
used
by
children
who
are
at the age of 8 or over and the people whose
physical, perceptive
or
mental
skills
are
impaired
or who are inexperienced or not knowledge-
able about the appliance as long as they are
supervised or informed and made understood
the safe use of the appliance and the encoun-
tered
dangers. Children
should
not
play
with
the
appliance. Cleaning
and
user
maintenance
pro-
cedures should not be performed by children
unless they are controlled by their elders.
Steam
Iron
/
User
Manual
9 /
EN
1
Important safety and environmental
instructions
Do not leave the product unattended while it is
plugged in.
Unplug the product before filling the water res-
ervoir with water.
Operate and store the appliance on a stable
surface.
When the appliance is placed on its base plate,
ensure that the surface beneath the plate is
level.
Do not use the appliance if the power cable or
the appliance itself is damaged. Contact an au-
thorised service.
If the appliance is
dropped
or
leaks
water
or
has
other failures, contact the authorised service.
Do not use the appliance until it is repaired.
When the appliance is not in use or left to cool
down keep the appliance and power cable out
of reach of children under 8 years old.
The
appliance
is
not
suitable
for
using
outdoors.
10 /
EN
Steam
Iron
/
User
Manual
1
Important safety and environmental
instructions
Only use the original parts or parts recom-
mended by the manufacturer.
Do
not
attempt
to
dismantle
the
appliance.
Your mains power supply should comply with
the information supplied on the rating plate of
the appliance.
The mains supply of the appliance must be se-
cured with a minimum 16 A fuse.
Use
the
appliance
with
a
grounded
outlet
only.
Do
not
use
the
appliance
with
an
extension
cord.
Do not pull the power cable when unplugging
the appliance.
Unplug
the
appliance
before
cleaning
it.
Do not wrap the cable around the appliance.
Do
not
touch
the appliance or its plug with wet or
damp hands when the appliance is plugged in.
The soleplate and its surrounding area can be
extremely hot. Contacting hot surfaces may
cause burns.
Steam
Iron
/
User
Manual
11 /
EN
1
Important safety and environmental in-
structions
Therefore while or just after using the appliance,
pay attention not to touch the hot surfaces.
Never use the appliance in or near to combusti-
ble or inflammable places and materials.
If
you
keep
the
packaging
materials, store
them
out of the reach of children.
1.2 Compliance with the WEEE Directive and Disposing of the
Waste Product:
This product complies with EU WEEE Directive (2012/19/EU). This product bears a classifica-
tion symbol for waste electrical and electronic equipment (WEEE).
This symbol indicates that this product shall not be disposed with other
household wastes at the end of its service life. Used device must be returned
to offical collection point for recycling of electrical and electronic devices. To
find these collection systems please contact to your local authorities or re-
tailer
where
the
product
was
puchased. Each
household
performs
important
role
in
recovering
and
recycling
of
old
appliance.
Appropriate
disposal
of
used
appliance helps prevent potential negative consequences for the environment and human
health.
1.3
Compliance
with
RoHS
Directive
The
product
you
have
purchased
complies
with
EU
RoHS
Directive
(2011/65/EU). It
does
not
contain harmful and prohibited materials specified in the Directive.
1.4
Package
Information
Packaging materials of the product are manufactured from recyclable materials
in accordance with our National Environment Regulations. Do not dispose of the
packaging
materials
together
with
the
domestic
or
other
wastes. Take
them
to
the
packaging material collection points designated by the local authorities.
12 /
EN
Steam
Iron
/
User
Manual
2
Operation
2.1
Intended
use
This appliance is intended only for household use and ironing; it is not suitable for profes-
sional use.
2.2 Initial
use
Prior to initial use, fill twice and vaporize to remove the manufacturing residues. Meanwhile,
use shock steam button (11) frequently.
2.3 Refilling the water reservoir
2.4 Setting the temperature
2.5
Temperature
and
steam
settings
table
When
setting
the
temperature
of
the
appliance,
consider
the
following
table.
Steam
Iron
/
User
Manual
13 /
EN
Fabric
Type
Temperature
control
Temperautre
requirement
Silk
Low
temperature
Wool
••
Medium
temperature
Cotton,
linen
•••
High
temperature
Linen - Jean
Max
High
temperature
C
After the appliance is plugged in, set the temperature according to the
type of your fabric by turning the temperature adjustment knob (5) in
clockwise direction (see. 2.5).
-
Thermostat
indicator
light
(4)
will
light
up.
When the appliance reaches the set temperature, thermostat indicator
light (4) will turn off and the appliance is ready to use.
C
Your appliance is designed for use with tap water. If your tap water is ex-
cessively hard, we recommend you to use a mixture of tap water with
potable water.
C
You
can
smell
a
mild
odour
or
see
white
sediments
coming
out
of
the
sole-
plate holes. After performing vaporizing process twice, such odours and
sediments will disappear. Also water droplets may form within the water
reservoir; this is normal.
2
Operation
2.6 Steam ironing
2.7
Shock
steam
2.8
Vertical
steam
14 /
EN
Steam
Iron
/
User
Manual
A
WARNING:
Hold
the
appliance
15-30
cm
away
from
the
garment
and
curtains.
During the ironing if the thermostat indicator light (4) turns on, before
proceeding with the shock steam process wait for the light to turn off.
Never
direct
this
steam
to
people
or
pets.
A
WARNING:
Wait for a few seconds before pressing the shock steam button (11)
again. Pressing the button repeatedly may cause water come through
the soleplate (6) together with steam.
At the start of ironing, the first few presses may not produce shock
steam. To produce shock steam, temperature knob should be at
or
higher
position.
In
order
to
use
the
shock
steam
feature
the
thermostat
indicator
light
(4)
should
be
turned
off.
A
WARNING:
For ironing with steam, temperature adjustment knob should be between
“ and “max” position.
Turn
the
steam
adjustment
button(9)
to
desired
steam
level.
A
WARNING:
Before
ironing
first
check
the
label
of
the
garment.
C
If
you
don’t
know
the
fabric
of
your
garment,
first
iron
an
invisible
part
of
your garment and determine a correct ironing temperature for it.
In order to prevent the bright stains that may form on the synthetic
fabrics
such
as
silk, iron
on
the
reverse
side
of
the
fabric. Do
not
use
the
water spraying feature in order to prevent the stain formation.
2
Operation
2.9
Spraying
water
2.10 Dry ironing
In order to make dry ironing, set the steam setting button (9) to the
position.
2.11 Anti-dripping system
This iron is equipped with drip stop function: the iron automatically stops steaming when the
temperature is too low to prevent water from dripping out of the soleplate.
With the anti-dripping system, you can perfectly iron even the most delicate fabrics.
2.12
Automatic
Shutdown
(Auto-Off)
Steam
Iron
/
User
Manual
15 /
EN
C
In
case
of
automatic
turn
off
the
auto-off
light
(4)
flashes.
If the appliance is moved in horizontal position it will be turned on.
It may take 60 seconds for the soleplate (6) to reach the previously set
temperature.
C
Having water in the appliance would be advantageous; you may use the
water spraying button (10) when necessary.
C
You
can
easily
remove
creases
using
the
water
spraying
feature.
3
Cleaning
and
maintenance
3.1
Cleaning
3.2
Anti-Calc
system
A special filter inside the water tank softens the water and prevents scale build-up in the
soleplate. The filter is permanent and does not need replacing.
3.3 Self clean
3.4
Storage
If you do
not intend
to
use the
appliance for
a long
time, store it
carefully.
Before lifting
the
appliance
unplug
it
and
then
let
it
cool
completely.
Empty
the
water
reservoir.
Keep
the
appliance
and
its
accessories
in
their
original
packages.
Store it in a cool, dry place.
Always
keep
the
appliance
out
of
the
reach
of
children.
3.5
Handling
and
transportation
During handling and transportation, carry the appliance in its original packaging. The
packaging of the appliance protects it against physical damages.
Do
not
place
heavy
loads
on
the
appliance
or
the
packaging. The
appliance
may
be
damaged.
Dropping
the
appliance
will
render
it
non-operational
or
cause
permanent
damage.
For commissioning, general use and cleaning, please observe the instructions
on pages 5-6 of this operating manual.
16 /
EN
Steam
Iron
/
User
Manual
C
The self-cleaning feature cleans inside the soleplate, removing impurities.
We recommend using it every 10-15 days.
A
WARNING:
When
you
are
finished
with
ironing, unplug
the
appliance. You
can
drain
the water in the reservoir by opening the refill lid (8) and tilting the iron
to the front.
Do
not
use
gasoline, solvent
and
abrasive
cleaning
agents
or
hard
brush
to clean the appliance.
4
Troubleshooting
Steam
Iron
/
User
Manual
17 /
EN
Problem
Possible
Reason
Solution
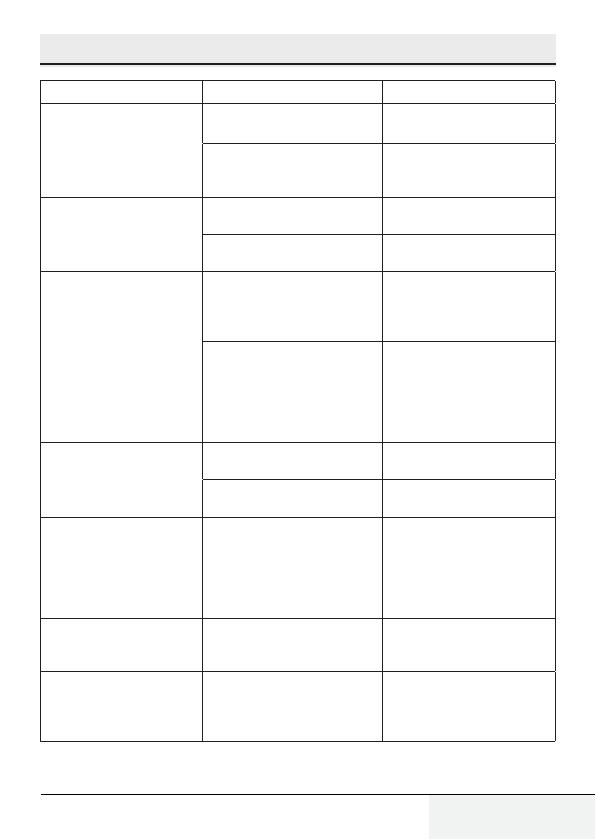
Although the appliance is
plugged in, soleplate (6) does
not heat up.
The appliance may be connected
improperly
Check
the
plug
and
power
cable
(1)
of
the
appliance.
Temperature adjustment knob (5)
may be at the Min. position.
Turn
the
temperature
adjustment
knob in the clockwise direction
up to the steam sign.
The
appliance
does
not
gener-
ate steam.
The water reservoir may not have
enough water.
Fill the water reservoir with water
up to Max level.
Steam setting button (9) may be at
without-steam position.
Switch the steam setting button
to the steam position.
Shock
Steam
Vertical
Steam
does not function.
These functions may have been
used
too
frequently
in
a
very
short
period of time.
Keep
ironing
at
a
horizontal
posi-
tion and wait for a while before
using
the
shock
steam
function
again.
Soleplate
(6)
may
not
be
hot
enough.
Turn the Temperature adjust-
ment knob (5) in the clockwise
direction up to the steam sign.
Seat the appliance in a vertical
position and wait for the sole-
plate to heat up.
Water
drops
fall
down
onto
the
fabric during ironing.
You
may
not
have
securely
closed
the water refill lid (8).
Close
the
water
refill
lid
securely.
You may be using the shock steam
at temperature level or ••.
Increase
the
temperature
level.
During ironing, sediments and
residues fall down from the
soleplate (6).
If
the
water
you
use
for
your
appli-
ance is too hard, such sediments
may form.
Use the self-clean function for
once
or
a
few
times.
For
the
sub-
sequent ironings fill the water
reservoir of the appliance with a
mixture of tap water and potable
water.
The
appliance
drops
water
after it cools down or stored.
You
may
have
left
the
appliance
on a horizontal position while
there is water in its reservoir.
Empty
the
water
reservoir.
Stains
at
the
soleplate
(6).
Wet garments might have been
ironed and the soleplate (6) has
had lime stains.
After the appliance cools
enough, wipe the soleplate with
a microfiber knitted or cotton
cloth soaked in vinegar.
Avant
toute
chose,
veuillez
lire
ce
manuel
d'utilisation
!
Chers
clients,
Merci d'avoir choisi les produits Beko. Nous espérons que ce produit, fabriqué dans des
installations modernes et soumis à un processus de contrôle qualité rigoureux, vous offre
les meilleures performances possibles. C’est pourquoi nous vous recommandons, avant
d’utiliser ce produit, de lire attentivement ce manuel et tous les autres documents fournis et
de les conserver soigneusement pour toute consultation future. Si vous confiez le produit à
quelqu’un d’autre, n’oubliez pas de lui remettre également le manuel d’utilisation. Veillez à
bien respecter les consignes et les instructions figurant dans le manuel d’utilisation.
Signification
des
symboles
Les
symboles
suivants
sont
repris
tout
au
long
de
ce
manuel:
Ce
produit
a
été
fabriqué
dans
des
usines
écologiques
et
modernes.
AVERTISSEMENT:
Risque de
brûlure et d’ébouillantage par la
vapeur.
AVERTISSEMENT:
Avertissement
en cas de contact avec une sur-
face brûlante.
A
AVERTISSEMENT:
Avertissement
sur les situations dangereuses
concernant la sécurité des biens
et des personnes.
C
Informations importantes et
conseils utiles sur l’utilisation de
l’appareil.
1.
2.
3.
4.
Câble d'alimentation
Base
du
fer
à
repasser
Réservoir d’eau
Indicateur
du
thermostat
et
voyant
d’arrêt automatique
Bouton
de
réglage
de
la
température
Semelle
Buse
de
pulvérisation
d’eau
Trappe
de
remplissage
du
réservoir
d’eau
Réglage de la vapeur / Bouton d’auto-
nettoyage
5.
6.
7.
8.
9.
10.
Bouton
de
pulvérisation
d’eau
11.
Bouton fonction Pressing / Jet de
vapeur
Données
techniques
Droit
de
modifications
techniques
ou
de
conception réservé.
Les
valeurs
indiquées
sur
les
inscriptions
apposées
sur
votre
appareil
ou
les
autres
documents
fournis
avec
le
produit
sont
des
valeurs
obtenues
en
conditions
de
laboratoire, conformément
aux
normes
en
vigueur. Ces
valeurs
peuvent
varier
selon
l’utilisation de l’appareil et les conditions environnantes.
Fer
vapeur
/
Manuel
d’utilisation
19 /
FR
SIM
3122
T
SIM
3124
D
SIM
3126
R
Tension
220
-
240 V~
50
-
60
Hz
Consommation
d’énergie
2200
W
2400
W
2200-2600
W
Fonction pressing /
Jet de vapeur
jusqu’à
140
g/min
jusqu’à
145
g/min
jusqu’à
150
g/min
Débit
vapeur
jusqu’à
25
g/min
jusqu’à
30
g/min
jusqu’à
35
g/min
Classe
d’isolement
I
1
Instructions
importantes
pour
la
sécurité
et
l'environnement
Cette section contient les consignes de sécurité
qui aident à se prémunir contre les risques de
dommages corporels ou de dégâts matériels.
Le non-respect de ces consignes annule la ga-
rantie.
1.1
Consignes
générales
de
curité
Cet appareil est conçu selon les normes inter-
nationales de sécurité.
Cet appareil peut être utilisé par des enfants âgés
d’au
moins
8 ans
et
par des personnes ayant des
capacités physiques, sensorielles ou mentales
réduites ou nuées
d’expérience ou de
connais-
sance,
s’ils
(si
elles)
sont
correctement
surveil(es)
ou si des instructions relatives à l’utilisation de
l’appareil en
toute curité
leur ont
été
données
et si les risques encourus ont été appréhendés.
Les
enfants
ne
doivent
pas
jouer
avec
l’appareil.
Le
nettoyage
et
l’entretien
par
l’usager
ne
doivent
pas
être effects par des enfants sans surveillance.
20 /
FR
Fer
vapeur
/
Manuel
d’utilisation
  • Page 1 1
  • Page 2 2
  • Page 3 3
  • Page 4 4
  • Page 5 5
  • Page 6 6
  • Page 7 7
  • Page 8 8
  • Page 9 9
  • Page 10 10
  • Page 11 11
  • Page 12 12
  • Page 13 13
  • Page 14 14
  • Page 15 15
  • Page 16 16
  • Page 17 17
  • Page 18 18
  • Page 19 19
  • Page 20 20
  • Page 21 21
  • Page 22 22
  • Page 23 23
  • Page 24 24
  • Page 25 25
  • Page 26 26
  • Page 27 27
  • Page 28 28
  • Page 29 29
  • Page 30 30
  • Page 31 31
  • Page 32 32
  • Page 33 33
  • Page 34 34
  • Page 35 35
  • Page 36 36
  • Page 37 37
  • Page 38 38
  • Page 39 39
  • Page 40 40
  • Page 41 41
  • Page 42 42
  • Page 43 43
  • Page 44 44
  • Page 45 45
  • Page 46 46
  • Page 47 47
  • Page 48 48
  • Page 49 49
  • Page 50 50
  • Page 51 51
  • Page 52 52
  • Page 53 53
  • Page 54 54
  • Page 55 55
  • Page 56 56
  • Page 57 57
  • Page 58 58
  • Page 59 59
  • Page 60 60
  • Page 61 61
  • Page 62 62
  • Page 63 63
  • Page 64 64
  • Page 65 65
  • Page 66 66
  • Page 67 67
  • Page 68 68
  • Page 69 69
  • Page 70 70
  • Page 71 71
  • Page 72 72
  • Page 73 73
  • Page 74 74
  • Page 75 75
  • Page 76 76
  • Page 77 77
  • Page 78 78
  • Page 79 79
  • Page 80 80
  • Page 81 81
  • Page 82 82
  • Page 83 83
  • Page 84 84
  • Page 85 85
  • Page 86 86
  • Page 87 87
  • Page 88 88
  • Page 89 89
  • Page 90 90
  • Page 91 91
  • Page 92 92
  • Page 93 93
  • Page 94 94
  • Page 95 95
  • Page 96 96
  • Page 97 97
  • Page 98 98
  • Page 99 99
  • Page 100 100
  • Page 101 101
  • Page 102 102
  • Page 103 103
  • Page 104 104
  • Page 105 105
  • Page 106 106
  • Page 107 107
  • Page 108 108
  • Page 109 109
  • Page 110 110
  • Page 111 111
  • Page 112 112
  • Page 113 113
  • Page 114 114
  • Page 115 115
  • Page 116 116
  • Page 117 117
  • Page 118 118
  • Page 119 119
  • Page 120 120
  • Page 121 121
  • Page 122 122
  • Page 123 123
  • Page 124 124
  • Page 125 125
  • Page 126 126
  • Page 127 127
  • Page 128 128
  • Page 129 129
  • Page 130 130
  • Page 131 131
  • Page 132 132
  • Page 133 133
  • Page 134 134
  • Page 135 135
  • Page 136 136
  • Page 137 137
  • Page 138 138
  • Page 139 139
  • Page 140 140

Beko SIM 3122 T Manuel utilisateur

Catégorie
Fers
Taper
Manuel utilisateur