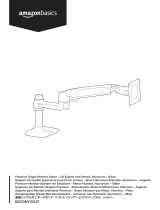
Amazon B010QZCT5W Manuel utilisateur
- Catégorie
- Supports muraux à panneau plat
- Taper
- Manuel utilisateur

AmazonBasics Wall Mount Arm
Bras de montage mural AmazonBasics
AmazonBasics Wandmontagearm
Braccio per montaggio a parete AmazonBasics
Brazo para montaje en pared AmazonBasics
亚马逊倍思壁挂式支臂
Amazonベーシック 壁掛けアーム
B010QZCT5W

English ..................................... 3
Français ................................... 15
Deutsch ................................... 27
Italiano ..................................... 39
Español .................................... 51
.......................................... 63
....................................... 75

3
Instruction Manual • English
AmazonBasics Wall Mount Arm
Contents
Make sure that the package contains the following parts:
gg
Base
(1 pc)
Upper arm
(1 pc)
Lower arm
(1 pc)
Lag bolt
M8 x 80 mm
(2 pc)
Concrete anchor
M8 x 80mm
(2 pc)
Top and bottom
base cover
(2 pc)
Bracket cover
(1 pc)
M4 × 10 mm knob
(4 pcs)
M4 x 10 mm
(4 pcs)
M3 x 6 mm
(1 pc)
Cable tie
(2 pcs)
4 mm Allen wrench
(1 pc)
2.5 mm hex wrench
(1 pc)
Instruction manual

4
Tools needed
Supported monitor weights
Your wall mount arm supports a monitor of the following weight: 5 to 25 lbs (2.3 to 11.3 kg)
Stud
Finder
Pencil Tape measure
Level
Phillips
screwdriver
Hammer
Socket wrench
with 13mm socket
Wood Stud Mounting, Ø 3/16” (5mm)
Concrete Wall Mounting, Ø 3/8” (10mm)
Drill
Safety goggles

5
Monitor adjustments
Your wall mount arm lets you adjust the monitor viewing angle, height, tilt, and orientation
(portrait or landscape).
Viewing angle Height* Tilt Orientation
*NOTE: The height range may decrease by up to 4.5” (11.4 cm) when the arm is adjusted to hold over 20 lbs. (9 kg).
Assembly Instructions
Step 1: Choose a mounting location.
Decide the height where you want to mount the base. Keep in mind that your monitor can:
• Move down 8.3 in. (20.7 cm) and up 4.7 in. (11.9 cm) from the base.
• Move 20.7 in. (52.6 cm) to the left and right of the base.
• Extend out from the wall up to 25.7 in. (65.3 cm) and atten 3.9 in. (9.9 cm) from the wall.
Step 2: Choose your wall type.
You can mount the arm to a:
• Wood stud wall. Go to “Wood stud wall mount” on page 6.
OR
• Concrete wall. Go to “Concrete wall mount” on page 7.
180°
180°
360°
13 in.
(33.0 cm)
70°
5°

6
Wood stud wall mount
Step A: Use a stud nder to locate a stud, then use a level and pencil to mark the center with a
vertical line.
Step B: Align the base with the center of the stud, then mark the top and bottom holes with a pencil.
• Step C: Use a 3/16” (5 mm) bit to drill holes that are 3.1 in. (80 mm) deep in the places you
marked in the previous step.

7
Step D: Align the base with the holes, then use a socket wrench with a 13 mm socket to insert the
two M8 × 80 mm lag bolts.
Step E: Continue to “Step 3: Determine the orientation of the monitor” on page 10.
Concrete wall mount
WARNING: Mounting holes must be located within solid concrete, not mortar or covering material. If you drill into an
area of concrete that is not solid, reposition mounting holes until both anchors can be fully inserted into solid concrete.
Anchors that are not fully set in solid concrete will not support the applied load resulting in an unstable, unsafe condition
which could lead to personal injury and/or property damage. Consult a construction professional if you have any doubt
about what this means in regard to your particular situation.
Step A: Use a level and pencil to draw a vertical line where you want to locate the mount.

8
Step B: Align the base with the vertical line, then mark the top and bottom holes with a pencil.
Step C: Use a 3/8” (10 mm) masonry bit to drill 3-1/8” holes in the places you marked in the previous
step.

9
Step D: Use a hammer to insert the concrete anchors. They should be ush against the wall.
Step E: Align the base with the holes, then use a socket wrench with a 13 mm socket to insert the
two M8 × 80 mm lag bolts.

10
Step 3: Determine the orientation of the monitor
You can mount the monitor in a locked portrait or landscape orientation, or you can leave the
monitor free to rotate 360°.
• If you want the monitor to rotate freely, do not insert the M3 x 6 mm screw.
• If you want the monitor in a locked orientation, insert the M3 x 6 mm screw into the front of the
plate on the upper arm.
NOTE: If you insert the screw, then want to change the monitor’s orientation after you mount the monitor to the upper
arm, you need to remove the monitor from the upper arm and insert or remove the M3 x 6 mm screw.
Step 4: Determine the orientation of the monitor
Attach the upper arm to the back of your monitor with either the M4 × 10 mm screws and a Phillips
screwdriver or the M4 × 10 knobs. Hand-tighten the knobs.
NOTE: If a stand is attached to the monitor, remove the stand.
Caution: The mounting screw holes on the back of the monitor
may require screws of a different type or length than the provided
M4 × 10 mm screws or knobs.
• Using screws of that are too big in diameter will damage the
screw holes on the monitor.
• Using screws that are too small or too short may cause the
monitor to fall off the arm.
• Using screws that are too long may damage the interior of the
monitor.
Before you attach the monitor to the upper arm, make sure that
the provided screws or knobs t the screw holes on the back of
the monitor. If the provided screws or knobs do not t, refer to the
documentation that came with the monitor for the correct screw
type and size.

11
M4 × 10 mm screws OR M4 × 10 mm knobs
Caution: The upper arm is under tension and will move
up rapidly, on its own, as soon as the attached monitor is
removed. For this reason, remove the upper arm, lay the
monitor face down on a soft surface, then remove the monitor.
Failure to follow this instruction may result in serious personal
injury or equipment damage.
Step 5: Attach the base covers and lower arm.
Step A: Slide the top and bottom base covers onto the base until they snap into place.
Step B: Slide the lower arm onto the base.
Step C: Slide the upper arm over the lower arm, then insert the bracket cover into the top of the
upper arm. The cover should snap into place.
NOTE: To remove the bracket cover, use a athead screwdriver to pry off the cover.

12
NOTE: If you want the arm to be shorter, attach the upper arm directly to the base.
Step 6: Attach the base covers and lower arm.
Route the monitor cables along the upper arm, then loosely secure the cables to the upper arm with
the cable ties. Do not over-tighten the ties. If the ties are too tight and you try to remove them, you
may damage the monitor cables.
Squeeze the tabs on the lower arm cover to remove the cover, route the monitor cables along
the bottom of the lower arm, then replace the covers.
Caution: Before you tighten the cable ties, adjust your monitor to
the highest position. This will leave enough slack in the cables for
monitor movement/height adjustment.

13
Step 7: Adjust your wall mount arm’s tension.
You can adjust the vertical, tilt, and arm tension so that the monitor stays in place when you move it.
Adjusting the vertical tension
Tilt the monitor down to access the screw. If the monitor is rising up, loosen the screw by
turning it to the left. If the monitor is falling down, tighten the screw by turning it to the right.
Caution: Do not over-tighten the screw. You might damage the
monitor or your wall mount arm.
Adjusting the tilt tension
If the monitor is falling forward (screen goes down), loosen the screw by turning it to the left. If
the monitor is falling back (screen goes up), tighten the screw by turning it to the right.
Caution: Do not remove the screw. The monitor might fall.
Do not over-tighten the screw. You might damage the monitor or
your wall mount arm.

14
Adjusting the arm tension
To make the arm easier to move, loosen the screws by turning them to the left. To make the
arm harder to move, tighten the screws by turning them to the right.
Caution: Do not remove the screws. The monitor might fall.
Do not over-tighten the screws. You might damage the monitor or
your wall mount arm.
Safety and Compliance
IMPORTANT: This product will need tension adjustments after installation is complete. Make
sure that all equipment is properly installed on the product before attempting range of motion
or tension adjustments. Any time equipment is added or changed on this product resulting in a
different mounted weight, you should repeat the adjustment steps to ensure safe and optimum
operation. This product should move smoothly and easily through the full range of motion and
stay where you set it. If movement is dif cult or the product does not stay where you set it,
follow the adjustment instructions to loosen or tighten the tension to create a smooth, easy
motion. Depending on your product and the adjustment, it may take many turns to notice a
difference.
© 2015 Amazon.com, Inc. or its affiliates. All Rights reserved. Amazon and the AmazonBasics logo are trademarks of
Amazon.com, Inc. or its affiliates. Made in China

15
Manuel d’instructions • Français
Bras de montage mural AmazonBasics
Contenu
Assurez-vous que l'emballage contient les pièces suivantes:
g
Base
(1)
Bras supérieur
(1)
Bras inférieur
(1)
Tire-fond
M8 x 80 mm
(2)
Ancrage pour béton
M8 x 80 mm
(2)
Couvercles supérieur
et inférieur de la base
(2)
Couvercle
du support
(1)
Bouton M4 × 10 mm
(4)
M4 x 10 mm
(4)
M3 x 6 mm
(1)
Attache de câble
(2)
Clé mâle à six pans
de 4 mm
(1)
Clé hexagonale de 2,5mm
(1)
Manuel d’instructions

16
Outillage nécessaire
Poids d'écran supportés
Votre bras de montage mural supporte un écran d'un poids compris dans les valeurs suivantes: 2,3
à 11,3 kg (5 à 25 lb)
Localisateur
de montants
Crayon Ruban à mesurer
Niveau
Tournevis
cruciforme
Marteau
Clé à douille
de 13 mm
Montage sur montant, Ø 5 mm (3/16 po)
Montage sur mur en béton,
Ø 10 mm (3/8 po)
Perceuse
Lunettes de protection

17
Ajustements de l'écran
Votre bras de montage mural vous permet d'ajuster l'angle de visionnement, la hauteur, l'inclinaison
et l'orientation (portrait ou paysage) de l'écran.
Angle de visualisation Hauteur* Inclinaison Orientation
* REMARQUE : La plage de hauteur peut être diminuée de 11,4 cm (4,5 po) quand le bras est ajusté pour soutenir plus
de 9 kg (20 lb).
Instructions d'assemblage
Étape1: Choix d'un emplacement de montage.
Décidez de la hauteur à laquelle vous voulez monter la base. N’oubliez pas que l'écran peut:
• se déplacer vers le bas de 20,7 cm (8,3 po) et vers le haut de 11,9 cm (4,7 po) de la base.
• se déplacer de 52,6 cm (20,7 po) sur la gauche et la droite de la base.
• se déployer jusqu'à 65,3 (25,7 po) et se rétracter à 9,9cm (3,9 po) du mur.
Étape2: Choix du type de mur.
Vous pouvez montez le bras sur :
• un mur à structure de bois. Rendez-vous à « Montage sur mur à structure de bois » à la 18.
OU
• Mur en béton. Rendez-vous à « Montage sur mur en béton » à la page 19.
180˚
180˚
360˚
33 cm
(13 po)
70°
5°

18
Montage sur mur à structure de bois
Étape A : Recherchez un montant à l'aide d'un localisateur de montants et tracez une ligne verticale
au centre avec un niveau et un crayon.
Étape B : Alignez la base sur le centre du montant et marquez les trous du haut et du bas à l'aide
d'un crayon.
Étape C : Aux emplacements marqués à l'étape précédente, percez des trous d'une profondeur de
80 mm (3,1 po) avec un foret de 5 mm (3/16 po).

19
Étape D : Alignez la base sur les trous et introduisez les deux tire-fonds M8 × 80 mm à l'aide d'une
clé à douille de 13 mm.
Étape E : Continuez avec « Étape3: Détermination de l’orientation de l’écran » à la on page 21.
Montage sur mur en béton
AVERTISSEMENT: Les trous de montage doivent se trouver dans le béton plein, et non sur le mortier ou sur le matériau
de revêtement. Si vous percez dans une zone de béton non plein, repositionnez les trous de montage jusqu'à ce que
les deux ancrages puissent être entièrement introduits dans du béton plein. Les ancrages qui ne sont pas entièrement
placés dans du béton plein ne supporteront pas la charge appliquée et provoqueront une condition instable et
dangereuse pouvant entraîner des blessures ou des dégâts matériels. Consultez un professionnel du bâtiment en cas de
doute sur ce que cela signi e dans votre cas particulier.
Étape A : Tracez une ligne verticale sur l'emplacement d'installation du support à l'aide d'un niveau
et d'un crayon.

20
Étape B : Alignez la base sur la ligne verticale et marquez les trous du haut et du bas à l'aide d'un
crayon.
Étape C : Aux emplacements marqués à l'étape précédente, percez des trous de 80 mm (3,1 po)
avec un foret de maçonnerie de 10 mm (3/8 po).
La page est en cours de chargement...
La page est en cours de chargement...
La page est en cours de chargement...
La page est en cours de chargement...
La page est en cours de chargement...
La page est en cours de chargement...
La page est en cours de chargement...
La page est en cours de chargement...
La page est en cours de chargement...
La page est en cours de chargement...
La page est en cours de chargement...
La page est en cours de chargement...
La page est en cours de chargement...
La page est en cours de chargement...
La page est en cours de chargement...
La page est en cours de chargement...
La page est en cours de chargement...
La page est en cours de chargement...
La page est en cours de chargement...
La page est en cours de chargement...
La page est en cours de chargement...
La page est en cours de chargement...
La page est en cours de chargement...
La page est en cours de chargement...
La page est en cours de chargement...
La page est en cours de chargement...
La page est en cours de chargement...
La page est en cours de chargement...
La page est en cours de chargement...
La page est en cours de chargement...
La page est en cours de chargement...
La page est en cours de chargement...
La page est en cours de chargement...
La page est en cours de chargement...
La page est en cours de chargement...
La page est en cours de chargement...
La page est en cours de chargement...
La page est en cours de chargement...
La page est en cours de chargement...
La page est en cours de chargement...
La page est en cours de chargement...
La page est en cours de chargement...
La page est en cours de chargement...
La page est en cours de chargement...
La page est en cours de chargement...
La page est en cours de chargement...
La page est en cours de chargement...
La page est en cours de chargement...
La page est en cours de chargement...
La page est en cours de chargement...
La page est en cours de chargement...
La page est en cours de chargement...
La page est en cours de chargement...
La page est en cours de chargement...
La page est en cours de chargement...
La page est en cours de chargement...
La page est en cours de chargement...
La page est en cours de chargement...
La page est en cours de chargement...
La page est en cours de chargement...
La page est en cours de chargement...
La page est en cours de chargement...
La page est en cours de chargement...
La page est en cours de chargement...
La page est en cours de chargement...
La page est en cours de chargement...
La page est en cours de chargement...
La page est en cours de chargement...
-
 1
1
-
 2
2
-
 3
3
-
 4
4
-
 5
5
-
 6
6
-
 7
7
-
 8
8
-
 9
9
-
 10
10
-
 11
11
-
 12
12
-
 13
13
-
 14
14
-
 15
15
-
 16
16
-
 17
17
-
 18
18
-
 19
19
-
 20
20
-
 21
21
-
 22
22
-
 23
23
-
 24
24
-
 25
25
-
 26
26
-
 27
27
-
 28
28
-
 29
29
-
 30
30
-
 31
31
-
 32
32
-
 33
33
-
 34
34
-
 35
35
-
 36
36
-
 37
37
-
 38
38
-
 39
39
-
 40
40
-
 41
41
-
 42
42
-
 43
43
-
 44
44
-
 45
45
-
 46
46
-
 47
47
-
 48
48
-
 49
49
-
 50
50
-
 51
51
-
 52
52
-
 53
53
-
 54
54
-
 55
55
-
 56
56
-
 57
57
-
 58
58
-
 59
59
-
 60
60
-
 61
61
-
 62
62
-
 63
63
-
 64
64
-
 65
65
-
 66
66
-
 67
67
-
 68
68
-
 69
69
-
 70
70
-
 71
71
-
 72
72
-
 73
73
-
 74
74
-
 75
75
-
 76
76
-
 77
77
-
 78
78
-
 79
79
-
 80
80
-
 81
81
-
 82
82
-
 83
83
-
 84
84
-
 85
85
-
 86
86
-
 87
87
-
 88
88
Amazon B010QZCT5W Manuel utilisateur
- Catégorie
- Supports muraux à panneau plat
- Taper
- Manuel utilisateur
dans d''autres langues
- italiano: Amazon B010QZCT5W Manuale utente
- English: Amazon B010QZCT5W User manual
- español: Amazon B010QZCT5W Manual de usuario
- Deutsch: Amazon B010QZCT5W Benutzerhandbuch
- 日本語: Amazon B010QZCT5W ユーザーマニュアル
Autres documents
-
Amazon Basics Bras de support Simple à fixation Manuel utilisateur
-
AmazonBasics B01KBEOGZ4 Manuel utilisateur
-
 AmazonBasics B010QZD6I6 Manuel utilisateur
-
 AmazonBasics PBH-994 Manuel utilisateur
-
 AmazonBasics B07QNY2G4T Manuel utilisateur
-
Konig Electronic TVS-KN-AVS502 Le manuel du propriétaire
-
Konig Electronic TVS-KN-FSB112B Manuel utilisateur
-
 Bell'O Digital 7835B Mode d'emploi
-
PERLESMITH PSCMF1 Guide d'installation
-
PERLESMITH PSLFK3 Guide d'installation


