Danfoss CF-MC Master Controller Guide d'installation
- Taper
- Guide d'installation

088U0200 / 088U0205
Instruction CF-MC Master Controller
Instruktion CF-MC Hauptregler
Vejledning CF-MC Masterregulator
Instruction Régulateur principal CF-MC
Bruksanvisning CF-MC Master Controller
SE

Instruction CF-MC Master Controller
1
VI.UH.K2.80
Produced by Danfoss Floor Heating Hydronics 01.2006
Instruction . . . . . . . . . . . . . . . . . . . . . . . . . . . . 3
Instruktion . . . . . . . . . . . . . . . . . . . . . . . . . . . 13
Vejledning . . . . . . . . . . . . . . . . . . . . . . . . . . . 24
Instruction . . . . . . . . . . . . . . . . . . . . . . . . . . . 34
Bruksanvisning .........................44
SE

Instruction CF-MC Master Controller
2
VI.UH.K2.80
Produced by Danfoss Floor Heating Hydronics 01.2006

Instruction CF-MC Master Controller
3
VI.UH.K2.80
Produced by Danfoss Floor Heating Hydronics 01.2006
1. Introduction ................................................................................................ 4
2. CF2 System Overview ................................................................................ 4
3. Functional Overview .................................................................................. 4
4. Mounting ..................................................................................................... 5
4.1 Wall ......................................................................................................................... 5
4.2 DIN-Rail ................................................................................................................. 5
5. Installation Procedure (Sequential) ........................................................ 5
5.1 24V Actuators ...................................................................................................... 5
5.2 Relays for Pump & Boiler Control ................................................................. 5
5.3 Input for Global Standby ................................................................................ 6
5.4 Input for Heating & Cooling........................................................................... 6
5.5 Wiring ..................................................................................................................... 6
5.6 Power Supply ...................................................................................................... 6
5.7 External Antenna (CF-EA) .............................................................................. 7
5.8 More (2-3) Master Controllers ....................................................................... 7
5.9 Other System Components ........................................................................... 7
5.10 Transmission Test (Link Test) ....................................................................... 8
6. Con guration .............................................................................................. 8
6.1 Actuator Outputs ............................................................................................... 8
6.2 Relays for Pump & Boiler Control ................................................................. 9
6.3 Input for Global Standby and Heating & Cooling .................................. 9
6.4 Relays on more (2-3) Master Controllers ................................................... 10
7. Replacing / Resetting the Master Controller ........................................ 11
7.1 When? .................................................................................................................... 11
7.2. How? .................................................................................................................... 11
8. Speci cations .............................................................................................. 12
9. Troubleshooting ......................................................................................... 12
10. Figures and illustrations ......................................................................... A-B
Index

Instruction CF-MC Master Controller
4
VI.UH.K2.80
Produced by Danfoss Floor Heating Hydronics 01.2006
• The Master Controller, CF-MC, is a part of the new trend-setting CF2 wire-
less hydronic oor heating control system from Danfoss. Based on 2-way
wireless communication technology CF2 o ers high transmission safety,
easy wireless installation, a high level of individual room temperature
control, and thus optimal comfort and improved energy e ciency.
• The system has a variety of bene cial features and easily accessed applica-
tion functionalities. This includes a Master Controller, CF-MC, with short-
circuit protected outputs, regulation by ON/OFF or Pulse Width Modula-
tion (PWM) principles, global standby, separate relays for both pump
and boiler control, self-diagnostic program and error indication, wireless
transmission (link) test possibility on each type of Room Thermostat, easy
wireless system access and extended functionality via the optional Remote
Controller, and Repeater Unit for extended wireless range.
a) Master Controller, CF-MC
b) Room Thermostats, CF-RS, -RP, -RD and -RF
c) Remote Controller, CF-RC
d) Repeater Unit, CF-RU
e) External Antenna, CF-EA
1. Introduction
2. CF2 System Overview - g. 1
3. Functional Overview - g. 2
Menu selection button
Menu LEDs
Output and con guration selection button
OK button
Output LEDs
Output cable xing
Relays for pump and boiler
Input for heating/cooling (external ON/OFF switch)
Input for global standby (8°C) (external ON/OFF switch)
Power supply (230V)
Front cover release
External antenna connection

Instruction CF-MC Master Controller
5
VI.UH.K2.80
Produced by Danfoss Floor Heating Hydronics 01.2006
4. Mounting
4.1 Wall
• Remove the front cover ( g. 3)
• Mount with screws and wall plugs ( g. 4)
4.2 DIN-Rail
• Mount DIN-rail parts ( g. 5)
• Click on DIN-rail ( g. 6)
• Release from DIN-rail ( g. 7)
Note: The Master Controller should be mounted in an horizontal upright position
5. Installation Procedure (Sequential)
Important Note: Complete all the installations on the Master Controller
described below before connecting to a 230V power supply !
5.1 24V Actuators
• Connect the two actuator wires to an output ( g. 8)
• Fix the cable
Round cable ( g. 9)
Squared/ at cable ( g. 10)
Note: If NC (normally closed) actuators are installed for ON/OFF regulation, no
further actuator output con guration is needed (see 6.1) !
5.2 Relays for Pump & Boiler Control
• Pump: Connect the live wire (L) across the Pump Relay from an external
power supply. Make sure the power supply is switched o . Then connect
the live wire, and complete other connections to the pump in accordance
with existing law. ( g. 11)
• Fix the cable ( g. 12)
• Boiler: Connect the live wire (L) across the Boiler Relay from an external
power supply. Make sure the power supply is switched o . Then connect
the live wire, and complete other connections to the boiler in accordance
with existing law.
Note: The relays for pump and boiler are potential free contacts and can thus
NOT be used as direct power supply. Max. load is 230V and 8A / 2A (inductive) !

Instruction CF-MC Master Controller
6
VI.UH.K2.80
Produced by Danfoss Floor Heating Hydronics 01.2006
5.3 Input for Global Standby
• Connect the two wires from an external switch (ON/OFF) to the two termi-
nals for the Global Standby input. ( g. 13)
When this switch is closed (ON) the system will override the current set
point for all the room thermostats and change it to 8°C
• Fix the cable. ( g. 14)
Note: The Global Standby ensures a set room temperature xed at 8°C for all
Room Thermostats, but it can be changed with the Remote Controller, CF-RC.
5.4 Input for Heating & Cooling
• Connect the two wires from an external switch (ON/OFF) to the two termi-
nals for the heating and cooling input. ( g. 15)
When this switch is closed (ON) the system will switch from heating to
cooling mode.
• Fix the cable. ( g. 16)
Note #1: When the system is in cooling mode the actuator output will be acti-
vated (ON when NC actuators / OFF when NO actuators) when the temperature
in a room exceeds the set point.
Note #2: When the system is in cooling mode an independent dew-point alarm
function should be installed.
Danfoss o ers the below listed components (see example g. 17)
EDA-24V: Electronic dew-point alarm - 088H3001
EDA-S: Dew-point sensor - 088H3011
TWA-A: 24V-NO actuator – 088H3111
RA-C 20: Danfoss cooling valve* - 013G3096
• This valve must be dimensioned according to the placement on the
primary side if the application structure in the example is chosen!
5.5 Wiring
5.6 Power Supply
• When all actuators, pump and boiler controls and other inputs are in-
stalled, connect the Master Controller’s power supply plug to a 230V
power supply. ( g. 18)
Note: If the power supply plug is removed from the power supply cable dur-
ing installation make sure that the connection is made according to existing
law/legislation.
L
N
L
N
91087654321
Actuator outputsRelays
Input
Global Standby
Heating/Cooling
External
Antenna

Instruction CF-MC Master Controller
7
VI.UH.K2.80
Produced by Danfoss Floor Heating Hydronics 01.2006
5.7 External Antenna (CF-EA)
Note: The External Antenna is installed as diverter when there is NO transmis-
sion possible through a large building, heavy construction or metal barrier, e.g.
if the Master Controller is located in a metal cabinet/box
• Remove the plastic cover from the antenna connection on the Master
Controller. ( g. 19)
• Connect the External Antenna. ( g. 20)
• Place the External Antenna on the other side of the transmission barrier
away from the Master Controller.
5.8 More (2-3) Master Controllers
Notes: Master Controller #1 should be the one connected to the local supplying
pump.
Up to 3 Master Controllers can be connected in one system.
If there are 2 or 3 Master Controllers, connect them to a 230V power sup-
ply within a distance from Master Controller #1 that allows simultaneous
handling of all the Master Controllers
Activate Install mode on Master Controller #1( g. 21)
• Use the menu selection button to select the Install mode. Install LED
ashes
• Activate Install mode by pressing OK . Install LED goes ON
Initiate installation on Master Controller #2 or #3( g. 22)
• Activate installation to Master Controller #1 by pressing OK
• Install LED and ickers during communication
and goes OFF when installation is complete
• Relocate Master Controller #2 and/or #3 if necessary. Link test will be
initiated automatically on reconnection to 230V power supply
• If Master Controller #2 and/or #3 has it’s own pump, the relays for pump
and boiler must be con gured accordingly (see 6.4)
Note: Later removal of Master Controller #2 or #3 from Master Controller #1 can
only be done by resetting Master Controller #1 (see 7.2)
5.9 Other System Components
Note: The Installation procedure of other system components to the Master
Controller (Room Thermostats, Remote Controller, and Repeater Unit ; see 2.) is
described in the enclosed instructions for these system components. Please see
these instructions for speci c installation procedures

Instruction CF-MC Master Controller
8
VI.UH.K2.80
Produced by Danfoss Floor Heating Hydronics 01.2006
5.10 Transmission Test (Link Test)
Note: The transmission test (link test) between the Master Controller and other
system components, is initiated from the other system components like Room
Thermostats, Repeater Unit, Remote Controller, etc.
Please see the enclosed instruction for these components for transmission test
(link test) procedures.
Room Thermostats:
When the transmission test (link test) from a Room Thermostat is received
by the Master Controller, the assigned output(s) will ash. This makes it pos-
sible to identify the outputs to which a Room Thermostat has been assigned
(Fig. 23 -
)
6. Con guration
6.1 Actuator Outputs
Activate Output mode on Master Controller ( g. 23)
• Use the menu selection button to select the Output mode. Output LED
ashes
• Activate Output mode by pressing OK . Output LED goes ON
Select the output con guration
• Press the output selection button and toggle between the possible out-
put con gurations - the output LEDs will be ON – indicated below:
• 1 LED: The outputs are con gured to NC actuators with ON/OFF regulation
(default)
• 2 LEDs: The outputs are con gured to NO actuators with ON/OFF regula-
tion
• 3 LEDs: The outputs are con gured to NC actuators with Pulse Width
Modulation (PWM) regulation for oor heating
• 4 LEDs: The outputs are con gured to NO actuators with Pulse Width
Modulation (PWM) regulation for oor heating
• 5 LEDs: A Remote Controller is installed, and it is not possible to change
settings from the Master Controller
• Activate selected output con guration by pressing OK
Note: During periods with no output activations the Master Controller will run a
valve motion program every 2 weeks and it will last for up to 12
minutes. Individual output con guration is possible with Remote Controller,
CF-RC, see separate instruction.

Instruction CF-MC Master Controller
9
VI.UH.K2.80
Produced by Danfoss Floor Heating Hydronics 01.2006
6.2 Relays for Pump & Boiler Control
Activate Relay mode on Master Controller ( g. 23)
• Use the menu selection button to select the Relay mode. Relay LED
ashes
• Activate Relay mode by pressing OK . Relay LED goes ON
Select the Relay con guration
• Press the output selection button and toggle between the possible
Relay con gurations - the output LEDs will be ON – indicated below:
• NO LEDs: The relays are not used
• 1 LED: Pump control
• 2 LEDs: Boiler control
• 3 LEDs: Pump and boiler control
• 4 LEDs: Pump control with 2min. start/stop delay
• 5 LEDs: Pump and boiler control, with 2min. start/stop delay on pump
(default)
• Activate selected relay con guration by pressing OK
Note: If the pump relay is active, the Master Controller will run a pump motion
program every 3rd day and it will last for one minute.
6.3 Input for Global Standby and Heating & Cooling
Activate Input mode on Master Controller ( g. 23)
• Use the menu selection button to select the Input mode. Input LED
ashes
• Activate Input mode by pressing OK . Input LED goes ON
Select the Input con guration
• Press the output selection button and toggle between the possible
Input con gurations - the output LEDs will be ON – indicated below:
• 1 LED: The input ports are not used
• 2 LEDs: The Master Controller will switch to cooling mode when the input
for heating/cooling is activated ( g. 2 - )
• 3 LEDs: The Master Controller will switch to a xed set room temperature
at 8 °C for all Room Thermostats when the input for global standby is
activated ( g. 2 - )
• 4 LEDs: The Master Controller will switch to cooling mode when the input
for heating/cooling is activated ( g. 2 - ). In heating mode the Master
Controller will switch to a xed set room temperature at 8 °C for all Room
Thermostats when the input for global standby is activated ( g. 2 - )
(default)
• Activate selected input con guration by pressing OK

Instruction CF-MC Master Controller
10
VI.UH.K2.80
Produced by Danfoss Floor Heating Hydronics 01.2006
6.4 Relays on more (2-3) Master Controllers
Note: If more Master Controllers are connected to Master Controller #1 in
one system their relays for pump and boiler control should be con gured
separately !
Activate Relay mode on Master Controller #2/#3 ( g. 23)
• Use the menu selection button to select the Relay mode. Relay LED
ashes
• Activate Relay mode by pressing OK . Relay LED goes ON
Select the Relay con guration
• Press the output selection button and toggle between the possible
Relay con gurations - the output LEDs will be ON – indicated below:
Uses pump and boiler connected to Master Controller #1:
• NO LEDs: The relays are not used (default)
If local manifold and pump are separate:
• 1 LED: Pump control
• 4 LEDs: Pump control with 2min. start/stop delay
• Activate selected relay con guration by pressing OK

Instruction CF-MC Master Controller
11
VI.UH.K2.80
Produced by Danfoss Floor Heating Hydronics 01.2006
7. Replacing/Resetting the Master Controller
7.1 When?
• If the Master Controller in an existing CF2-system is reset to factory set-
tings or replaced with another Master Controller, it is necessary to reset
all the other CF2-system components also, in order to be able to re-install
them to the reset or replaced Master Controller, CF-MC !
7.2 How?
Note: The Master Controller should only be “Reset” to factory settings if the
normal in- and uninstallation procedures can not be followed!
Resetting the Master Controller, CF-MC - g.23:
• Disconnect the 230V power supply to the Master Controller until the
power LED
is OFF
• Press and hold at the same time the menu selection button , the OK
button , and the output selection button
• Reconnect the 230V power supply to the Master Controller and release
the three buttons when the power LED and all the output LEDs
are ON
• The Master Controller is reset when all output LEDs then goes OFF
Resetting the Room Thermostats, CF-RS, -RP, -RD and -RF – g 24:
• Remove the Room Thermostat from the back plate and disconnect
one of the batteries
• Press and hold the push button (Link test) and reconnect the
battery
• Release the push button when the red LED has been On and O
again
• The Room Thermostat is now Reset and ready for installation to a
Master Controller, CF-MC
Resetting the Remote Controller, CF-RC – g 25:
• At the same time, activate the Soft key 1 , the soft key 2 and the
down selector
• The Remote Controller requests con rmation before resetting.
Con rmation with “yes” Resets the Remote Controller
• By con rming Reset with “yes” the Remote Controller is now ready for
installation to a Master Controller, CF-MC
Resetting the Repeater Unit, CF-RU – g 26:
• Disconnect the Repeater Unit from the 230V power supply
• Press and hold the push button (Link test) and reconnect the 230V
power supply
• Release the push button when the red LED has been On and O
again
• The Repeater Unit is now Reset and ready for installation to a
Master Controller, CF-MC

Instruction CF-MC Master Controller
12
VI.UH.K2.80
Produced by Danfoss Floor Heating Hydronics 01.2006
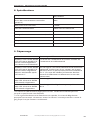
8. Speci cations
Transmission frequency
868.42MHz
Transmission Range
In normal constructions (up to)
30m
Transmission power
<1mW
Supply Voltage
230V a.c.
Actuator outputs
10 x 24V d.c.
Max. continued output load (total)
35VA
Relays
230V a.c./8 (2) A
Ambient temperature
0-50°C
IP class
30
Error indication Possible Causes
Output LED(s), alarm LED
and output menu LED
ash. Buzzer is ON*
Output or actuator is short-circuited or
the actuator is disconnected
Output LED(s), alarm
LED and input menu LED
ash. Buzzer ON after 12
hours**
No wireless signal from Room Thermostat
connected to this or these outputs or the
temperature in the according room is be-
low 5°C. (Try to verify the function of the
room thermostat by making a link test)
Output LEDs 1-4, alarm
LED and input LED ash
No signal from the Remote Controller
Output LEDs 1-5, alarm
LED and input menu LED
ash
No signal from Master Controller #2 or #3
* Buzzer is shut o by pressing OK. The error indication continues until the error
is xed
** If the Room Thermostat signal is lost, the Master Controller output will be
activated 15 minutes every hour for frost protection until the error is xed
9. Troubleshooting

Instruktion CF-MC Hauptregler
13
VI.UH.K2.80
Hergestellt von Danfoss Floor Heating Hydronics 01.2006
1. Einführung ................................................................................................... 14
2. CF2 Systemübersicht ................................................................................. 14
3. Funktionsübersicht .................................................................................... 14
4. Montage ....................................................................................................... 15
4.1 Wand ...................................................................................................................... 15
4.2 DIN-Schiene ......................................................................................................... 15
5. Installationsverfahren (der Reihenfolge nach) ..................................... 15
5.1 24 V-Stellantriebe .............................................................................................. 15
5.2 Relais für Pumpen- und Thermenregelung .............................................. 16
5.3 Eingang für Standby ......................................................................................... 16
5.4 Eingang für Heizen und Kühlen ................................................................... 17
5.5 Verdrahtung......................................................................................................... 17
5.6 Stromversorgung .............................................................................................. 17
5.7 Externe Antenne (CF-EA) ................................................................................ 17
5.8 Weitere (2-3) Hauptregler ............................................................................... 18
5.9 Andere Systemkomponenten ....................................................................... 18
5.10 Funk- Verbindungstest .................................................................................. 18
6. Kon guration .............................................................................................. 19
6.1 Ausgänge der Stellantriebe ........................................................................... 19
6.2 Relais für Pumpen- und Heizungsregelung ............................................ 20
6.3 Eingang für globalen Standby und Heizen/ Kühlen ............................ 20
6.4 Relais auf weiteren (2-3) Hauptregler........................................................ 21
7. Ersetzen/Zurücksetzen des Hauptreglers ............................................. 22
7.1 Wann? .................................................................................................................... 22
7.2 Wie? ........................................................................................................................ 22
8. Technische Daten ....................................................................................... 23
9. Fehlersuche ................................................................................................ 23
10. Abbildungen ............................................................................................. A-B
Inhaltsverzeichnis

Instruktion CF-MC Hauptregler
14
VI.UH.K2.80
Hergestellt von Danfoss Floor Heating Hydronics 01.2006
• Der Hauptregler CF-MC ist Teil des neuen, funkgesteuerten
CF 2 - Regelungssystems für Warmwasser-Fußbodenheizungen. Das
System arbeitet übertragungssicher mit einer 2-Wege-Kommunika-
tion auf der 868 MHz-Frequenz. Die Installation ist denkbar einfach.
Für die Raumtemperaturregelung stehen Raumthermostate in ver-
schiedenen Ausführungen zur Verfügung. Dies bietet optimalen
Komfort und verbessert die Energiee zienz.
• Das System verfügt über verschiedene nützliche Eigenschaften und
bietet einen leichten Zugri auf die Anwendungsfunktionen. Dazu
gehören der Hauptregler CF-MC mit kursschlusssicheren Ausgängen,
Regelung durch EIN/AUS oder Pulsweitenmodulation (PWM), Stand-
by- Betrieb, getrennte Relais für sowohl die Pumpen- als auch die
Heizungsregelung. Ein Selbstdiagnosepogramm mit Fehleranzeige
sowie Funk-Verbindungstests zwischen den Raumthermostaten und
dem Hauptregler sichern die korrekte Funktion. Leichten Zugang zum
System bietet die als Zubehör erhältliche Fernbedienung.
Signalverstärker erweitern den Funkbereich .
a) Hauptregler, CF-MC
b) Raumthermostate, CF-RS, CF-RP, CF-RD und CF-RF
c) Fernbedienung, CF-RC
d) Signalverstärker, CF-RU
e) Externe Antenne, CF-EA
1. Einführung
2. CF2-Systemüberblick - Fig. 1
3. Funktionsübersicht - Fig. 2
Taste zur Menüauswahl
Menü-LEDs
Taste für Ausgangs- und Kon gurationsauswahl
OK-Taste
Ausgangs-LEDs
Ausgangskabelbefestigung
Relais für Pumpe und Heizung
Eingang für Heizen/Kühlen (externer EIN/AUS-Schalter)
Eingang für Standby (Absenkung auf 8 °C) (externer EIN/AUS-
Schalter)
Stromversorgung (230 V)

Instruktion CF-MC Hauptregler
15
VI.UH.K2.80
Hergestellt von Danfoss Floor Heating Hydronics 01.2006
4. Montage
4.1 Wand
• Entfernen Sie die vordere Abdeckung (Fig. 3).
• Befestigen Sie das Gerät mit Schrauben und Dübeln (Fig. 4).
4.2 DIN-Schiene
• Befestigen Sie die Teile der DIN-Schiene (Fig. 5).
• Lassen Sie die DIN-Schiene einrasten (Fig. 6).
• Lösen des Gerätes von der DIN-Schiene (Fig. 7).
Anmerkung: Der Hauptregler sollte horizontal (in aufrechter Lage) montiert
werden.
Lösevorrichtung der vorderen Abdeckung
Externer Antennenanschluss
5. Installationsverfahren (der Reihenfolge nach)
Wichtige Anmerkung: Schließen Sie alle Installationen am Hauptregler
entsprechend der folgenden Beschreibung ab, bevor Sie ihn an eine 230 V-
Stromquelle anschließen!
5.1 24V-Stellantriebe
• Schließen Sie die zwei Kabel des Stellantriebs an einen Ausgang an
(Fig. 8).
• Befestigen Sie das Kabel.
Rundes Kabel (Fig. 9)
Flaches Kabel (Fig. 10)
Anmerkung: Bei Verwendung von NC-Stellantrieben (NC = stromlos geschlos-
sen) zur EIN-AUS-Reglung kann der Stellantrieb ohne Änderungen angeschlos-
sen werden. Beim Einsatz von NO-Stellantrieben (NO = stromlos o en) muss der
Ausgang kon guriert werden (siehe 6.1).

Instruktion CF-MC Hauptregler
16
VI.UH.K2.80
Hergestellt von Danfoss Floor Heating Hydronics 01.2006
5.2 Relais für die Pumpen- und Heizungsregelung
Pumpe: Stellen Sie sicher, dass die Stromversorgung ausgeschaltet ist.
Verbinden Sie den stromführenden Leiter (L) von der Stromversorgung über
das Pumpenrelais hin zur Umwälzpumpe. Verbinden Sie nun die übrigen
Leiter (N,
) mit der Umwälzpumpe gemäß den VDE-Richtlinien (Fig. 11 und
Verdrahtungsschema, Abschnitt 5.5). Befestigen Sie nun das Kabel mit der
Klemmschelle (Fig. 12).
Heizung: Stellen Sie sicher, dass die Stromversorgung ausgeschaltet ist.
Verbinden Sie den stromführenden Leiter (L) von der Stromversorgung
über das Heizungsrelais bis hin zur Heizung. Verbinden Sie nun die übrigen
Leiter (N, ) mit der Heizung gemäß den VDE-Richtlinien (Fig. 11 und
Verdrahtungsschema, Abschnitt 5.5). Befestigen Sie nun das Kabel mit der
Klemmschelle (Fig. 12).
Anmerkung: Die Relais für Pumpe und Heizung sind potentialfreie Kontakte
und können daher NICHT als direkte Stromquelle verwendet werden. Die max.
Belastung beträgt 230 V und 8 A / 2 A (induktiv)!
5.3 Eingang für Standby
• Schließen Sie die zwei Kabel eines externen Schalters (EIN/AUS) an die
zwei Anschlussklemmen für den Eingang des globalen Standby an
(Fig. 13).
Wenn dieser Schalter geschlossen ist (EIN), ignoriert das System den ak-
tuellen Sollwert aller Raumthermostate und ändert ihn auf 8 °C.
• Befestigen Sie das Kabel (Fig. 14).
Anmerkung: Der Standby-Betrieb stellt eine feste Raumtemperatur von 8 °C für
alle Raumthermostate sicher. Diese Einstellung kann mit Hilfe der Fernbedie-
nung CF-RC geändert werden.

Instruktion CF-MC Hauptregler
17
VI.UH.K2.80
Hergestellt von Danfoss Floor Heating Hydronics 01.2006
5.4 Eingang für Heizen/Kühlen
• Schließen Sie die zwei Kabel eines externen Schalters (EIN/AUS) an die
zwei Anschlussklemmen für das Heizen und Kühlen an (Fig. 15). Wenn
dieser Schalter geschlossen ist (EIN), schaltet das System vom Heiz- in den
Kühlmodus.
• Befestigen Sie das Kabel (Fig. 16).
Anmerkung Nr. 1: Wenn sich das System im Kühlmodus be ndet, wird der Aus-
gang des Stellantriebs aktiviert (EIN bei NC-Stellantrieben/AUS bei NO-
Stellantrieben), sobald die Raumtemperatur den Sollwert überschreitet.
Anmerkung Nr. 2: Wenn sich das System im Kühlmodus be ndet, sollte ein un-
abhängiger Taupunktmelder zur Taupunktüberwachung installiert werden.
Danfoss bietet die folgenden Komponenten an (siehe Beispiel in Fig. 17).
EDA-24 V: Elektronischer Taupunktmelder - 088H3001
EDA-S: Taupunktfühler- 088H3011
TWA-A: 24 V-NO-Stellantrieb – 088H3111
RA-C 20: Danfoss NC Kühlventil* - 013G3096
• Das Ventil muss entsprechend des Einbauortes ausgelegt werden, sofern
die in Fig. 17 dargestellte Anordnung gewählt wird.
5.5. Verdrahtung
5.6 Stromversorgung
Wenn die Stellantriebe, Pumpen- und Heizungsregelung sowie alle anderen
notwendigen elektrischen Ein- und Ausgänge installiert sind, verbinden
Sie den Netzstecker des Hauptregler CF-MC mit einer 230 V- Stromquelle
(Steckdose, Fig. 18).
Anmerkung: Bitte beachten Sie bei jeder elektrischen Installation die VDE-
Richtlinien. Sollten Sie eine andere elektrische Verbindung als das am CF-MC
vorinstallierte Kabel mit Stecker verwenden, so beachten Sie in jedem Falle die
VDE-Richtlinien.
5.7 Externe Antenne (CF-EA)
Anmerkung: Die externe Antenne wird verwendet, wenn eine Funkübertra-
gungdurch große Gebäude, dicke Wände oder Metallsperren NICHT möglich ist,
z. B. wenn sich der Hauptregler in einem Verteilerschrank aus Metall be ndet.
• Entfernen Sie die Kunststo abdeckung vom Antennenanschluss am
Hauptregler (Fig. 19).
• Schließen Sie die externe Antenne an (Fig. 20).
• Platzieren Sie die externe Antenne an geeigneter Stelle, um den Empfang
zu verbessern (z.B. außerhalb des metallischen Verteilerschranks).
Die Antenne ist senkrecht zu montieren.
L
N
L
N
91087654321
StellantriebausgängeRelais
Eingang
Standby-Betrieb
Heizen/Kühlen
Externe
Antenne
V

Instruktion CF-MC Hauptregler
18
VI.UH.K2.80
Hergestellt von Danfoss Floor Heating Hydronics 01.2006
5.8 Weitere (2-3) Hauptregler
Anmerkungen: Die Umwälzpumpe der Fußbodenheizung sollte an Hauptregler
1 angeschlossen werden.
Es können bis zu 3 Hauptregler in einem System verwendet werden.
Der Anschluss weiterer Hauptregler sollte möglichst in der Nähe von
Haupt-regler 1 erfolgen, so dass alle Hauptregler gleichzeitig bedient
werden können.
Aktivieren Sie den Installationsmodus an Hauptregler 1 (Fig. 21)
• Verwenden Sie die Taste zur Menüauswahl , um den Installationsmodus
zu wählen. Die Installations-LED blinkt.
• Aktivieren Sie den Installationsmodus, indem Sie auf OK drücken . Die
Installations-LED wechselt zu EIN.
Initiieren Sie die Installation von bis zu 2 weiteren Hauptreglern
(Fig. 22)
• Aktivieren Sie die Installation zu Hauptregler 1, indem Sie auf OK
drücken.
• Die Installations-LEDs und ackern während der Kommunikation und
wechseln auf AUS, sobald die Installation abgeschlossen ist.
• Sofern erforderlich, platzieren Sie Hauptregler 2 und/ oder 3 an einen
anderen Ort. Sobald die Verbindung zur 230 V-Stromversorgung wieder
hergestellt ist, wird der Verbindungstest automatisch initiiert.
• Hauptregler 2 und /oder 3 über eine eigene Pumpe verfügt, sollten Sie die
Relais für Pumpen- und Heizungsregelung entsprechend kon gurieren
(siehe Abschnitt 6.4).
Anmerkung: Die spätere Entfernung von Hauptregler 2 oder 3 vom Hauptregler
1 kann nur durch Zurücksetzen von Hauptregler 1 erfolgen (siehe Abschnitt 7.2).
5.9 Andere Systemkomponenten
Anmerkung: Das Installationsverfahren anderer Systemkomponenten zum
Hauptregler (Raumthermostate, Fernbedienung und Signalverstärker, siehe
Abschnitt 2), ist in der Anleitung für diese Systemkomponenten beschrieben.
Spezi sche Installationsverfahren nden Sie in den betre enden Instruktionen.
5.10 Funk-Verbindungstest
Anmerkung: Der Funk-Verbindungstest zwischen dem Hauptregler und an-
deren Systemkomponenten wird von den anderen Systemkomponenten wie
Raumthermostate, Signalverstärker, Fernbedienung usw. aus initiiert.
Die Instruktionen zu diesen Komponenten enthalten Angaben darüber, wie mit
dem Funk-Verbindungstest verfahren wird.
Raumthermostate:
Wenn der Hauptregler das Testsignal (Verbindungstest) eines Raumther-
mostaten empfängt, blinken die LED der zugeordneten Ausgänge. So
können die Ausgänge identi ziert werden, die diesem Raumthermostat
zugeordnet sind (Fig. 23 - )

Instruktion CF-MC Hauptregler
19
VI.UH.K2.80
Hergestellt von Danfoss Floor Heating Hydronics 01.2006
6. Kon guration
6.1 Ausgänge der Stellantriebe
Aktivieren Sie den Ausgangsmodus am Hauptregler (Fig. 23)
• Verwenden Sie die Taste zur Menüauswahl , um den Ausgangsmodus zu
wählen. Die Ausgangs-LED blinkt.
• Aktivieren Sie den Ausgangsmodus, indem Sie auf OK drücken. Die
Ausgangs-LED wechselt zu EIN.
Wählen Sie die Ausgangskon guration
• Drücken Sie die Taste , um zur gewünschten Kon guration zu gelangen.
Die möglichen Einstellungen sind durch die Anzahl der LED’s gekenn-
zeichnet:
• 1 LED: Die Ausgänge sind auf NC-Stellantriebe mit EIN/AUS-Regelung
kon guriert (Standard).
• 2 LED: Die Ausgänge sind auf NO-Stellantriebe mit EIN/AUS-Regelung
kon guriert.
• 3 LED: Die Ausgänge sind auf NC-Stellantriebe mit Pulsweitenmodulation
(PWM) für Fußbodenheizungen kon guriert.
• 4 LED: Die Ausgänge sind auf NO-Stellantriebe mit Pulsweitenmodulation
(PWM) für Fußbodenheizungen kon guriert.
• 5 LED: Eine Fernbedienung ist installiert, und vom Hauptregler aus kön-
nen keine Einstellungen geändert werden.
• Aktivieren Sie die gewählte Ausgangskon guration, indem Sie auf OK
drücken .
Anmerkung: In Zeiträumen, in denen keine Ausgänge aktiviert werden,
lässt der Hauptregler alle 2 Wochen für 12 Minuten ein Ventilbewegungs-
programm ablaufen.
Mit der Fernbedienung CF-RC, können die Ausgänge individuell kon guriert
werden, siehe separate Instruktion.
La page est en cours de chargement...
La page est en cours de chargement...
La page est en cours de chargement...
La page est en cours de chargement...
La page est en cours de chargement...
La page est en cours de chargement...
La page est en cours de chargement...
La page est en cours de chargement...
La page est en cours de chargement...
La page est en cours de chargement...
La page est en cours de chargement...
La page est en cours de chargement...
La page est en cours de chargement...
La page est en cours de chargement...
La page est en cours de chargement...
La page est en cours de chargement...
La page est en cours de chargement...
La page est en cours de chargement...
La page est en cours de chargement...
La page est en cours de chargement...
La page est en cours de chargement...
La page est en cours de chargement...
La page est en cours de chargement...
La page est en cours de chargement...
La page est en cours de chargement...
La page est en cours de chargement...
La page est en cours de chargement...
La page est en cours de chargement...
La page est en cours de chargement...
La page est en cours de chargement...
La page est en cours de chargement...
La page est en cours de chargement...
La page est en cours de chargement...
La page est en cours de chargement...
La page est en cours de chargement...
La page est en cours de chargement...
La page est en cours de chargement...
La page est en cours de chargement...
La page est en cours de chargement...
La page est en cours de chargement...
-
 1
1
-
 2
2
-
 3
3
-
 4
4
-
 5
5
-
 6
6
-
 7
7
-
 8
8
-
 9
9
-
 10
10
-
 11
11
-
 12
12
-
 13
13
-
 14
14
-
 15
15
-
 16
16
-
 17
17
-
 18
18
-
 19
19
-
 20
20
-
 21
21
-
 22
22
-
 23
23
-
 24
24
-
 25
25
-
 26
26
-
 27
27
-
 28
28
-
 29
29
-
 30
30
-
 31
31
-
 32
32
-
 33
33
-
 34
34
-
 35
35
-
 36
36
-
 37
37
-
 38
38
-
 39
39
-
 40
40
-
 41
41
-
 42
42
-
 43
43
-
 44
44
-
 45
45
-
 46
46
-
 47
47
-
 48
48
-
 49
49
-
 50
50
-
 51
51
-
 52
52
-
 53
53
-
 54
54
-
 55
55
-
 56
56
-
 57
57
-
 58
58
-
 59
59
-
 60
60


Danfoss CF-MC Master Controller Guide d'installation
- Taper
- Guide d'installation
dans d''autres langues
Documents connexes
-
Danfoss CF-EA External Antenna (2m) Guide d'installation
-
-
-
-
-
-
-
-
-
Danfoss HC-Z Guide d'installation


