La page est en cours de chargement...

LED.com
© 2023 Current Lighting Solutions, LLC. All rights reserved. Information and specifications subject to change
without notice. All values are design or typical values when measured under laboratory conditions.
Page 1 of 3
(Rev 05/30/23)
IND502-Lumination-LRX Series-EMBB-Installation-Guide_R01
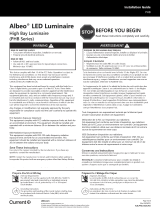
Installation Guide
IND502 | A-1003897
Lumination® LED Luminaire
EMBB Accessory
(LRX Series)
BEFORE YOU BEGIN
Read these instructions completely and carefully.
WARNING/AVERTISSEMENT
RISK OF ELECTRIC SHOCK
• Turn power o before inspection, installation or removal.
• Install this kit only in the luminaires that has the construction
features and dimensions shown in the photographs and/or
drawings.
• Installation of this retrot assembly requires a person familiar
with the construction and operation of the luminaire’s electrical
system and the hazard involved. If not qualied, do not attempt
installation. Contact a qualied electrician.
• To prevent wiring damage or abrasion, do not expose wiring to
edges of sheet metal or other sharp objects.
• Do not make or alter any open holes in an enclosure of wiring or
electrical
• components during kit installation.
RISQUES DE DÉCHARGES ÉLECTRIQUES
• Coupez l’alimentation avant d’inspecter, installer ou déplacer le luminaire.
• Risques d’incendie ou choc L’installation de trousses de mise à niveau au
• DEL nécessite des connaissances des systèmes électriques d’éclairage.
• Risque d’incendie ou d’électrocution. N’ installer cette trousse que sur des
luminaires qui ont les caractéristiques de construction et les dimensions
telles que montrées sur les photographies et dessins présentés.
• Pour prévenir les dommages ou l’abrasion de ls électriques, ne pas
exposer les ls aux arêtes de pièce de tôlerie ou n’importe quels autres
objets tranchant.
• Ne pas percer ou altérer les trous d’un boitier contenant l ou composant
électrique durant l’installation.
Save These Instructions
Use only in the manner intended by the manufacturer.
If you have any questions, contact the manufacturer.
NOTE: LRX products are suitable for indoor covered
ceiling wet location applications.
Les produits de LRX sont appropriés pour les endroits
humides couverts au plafond.
The retrot kit is accepted as a component of a
luminaire where the suitability of the combination
shall be determined by UL or authorities having
jurisdiction.
Wear work gloves to prevent dirt and oil from being
transferred to the luminaire.
CAUTION/ATTENTION
• Fixture may fall down if not installed properly,
follow installation instructions.
• Wear safety glasses and proper aid during installation and
maintenance.
• Use only UL certied wire, wire connectors, minimum 18AWG,
minimum rated 75°C.
• Le luminaire peut tomber s’il nest pas installé correctement, suivre les
instructions d’installation.
• Porter des lunettes de sécurité et les aides appropriées lors de
l’installation et de l’entretien.
• N’utilisez que des ls approuvés par UL pour les entrées/sorties de
connexion. Calibre minimum 18 AWG (0.75mm
2
) et température minimale
de 75°C.
Prepare Electrical Wiring
Electrical Requirements
• The luminaire LRX*******MDEL must be supplied with
120-277VAC, 50/60 HZ.
• The luminaire LRX*******PHEL must be supplied with
120VAC 50/60 HZ.
• Connected to an individual properly groundedbranch
circuit, protected by a 15 or 20 amperecircuit breaker.
Use min. 75°C supply conductor.
Grounding Instructions
The grounding and bonding of the overall system shall
be done in accordance with National Electric Code (NEC)
Article 600 and local codes.

LED.com
© 2023 Current Lighting Solutions, LLC. All rights reserved. Information and specifications subject to change
without notice. All values are design or typical values when measured under laboratory conditions.
Page 2 of 3
(Rev 05/30/23)
IND502-Lumination-LRX Series-EMBB-Installation-Guide_R01
Lumination® (LRX - Series) Installation Guide
Fixture Requirements
The LED retrot luminaire must be connected to the mains supply according to its ratings on the product label.
Component ListTools Required
• LRX EMBB Fixture
• Installation Instructions
The components have been properly packed
to avoid damage during transit. Inspect the
components to conrm there is no physical
damage. Do not install damaged components
Installation
LRX EMBB xture is one component of LRX EMBB new construction or retrot system. Before install the xture, please
conrm that the required new frame or EMBB kit has been received already. Verify the junction box and bracket are
metal and are constructed similarly to the illustration at below. For more detail on install process, please refer to the
installations in LRX EMBB New Construction(IND342) and LRX EMBB Retrot: LRXEMBBKIT07HE/LRXEMBBKIT07/
LRXEMBBKIT10(IND343).
1
Bracket
Ensure that the power to the unit is turned o. Use
proper lockout and tagout procedures.
2
LRX Round frame shown above.
NOTE: For 1000/650lm and 4000/3000lm, default output
lumen is 1000lm and 4000lm respectively. Push switch up
or left to activate 650lm and 3000lm respectively.
Suitable Frame Bracket Hole Suitable
Fixture
Size (in.) Shape Dimensions (in.) Size (in.)
4Round 12.60 x 7.64 x 3.54 4.20-5.50 LRXR4xxxxxxx
6Round 12.60 x 7.64 x 3.54 5.91-6.50 LRXR6xxxxxxx
8 Round 15.55 x 11.34 x 3.54 7.68–8.27 LRXR8xxxxxxx
4 Square 12.60 x 7.64 x 3.54 4.20-5.50 LRXS4xxxxxxx
6 Square 13.35 x 11.34 x 3.54 5.95-7.50 LRXS6xxxxxxx
8Square 13.35 x 11.34 x 3.54 7.95-9.50 LRXS8xxxxxxx
Lumens Setting Switch

LED.com
© 2023 Current Lighting Solutions, LLC. All rights reserved. Information and specifications subject to change
without notice. All values are design or typical values when measured under laboratory conditions.
Page 3 of 3
(Rev 05/30/23)
IND502-Lumination-LRX Series-EMBB-Installation-Guide_R01
Lumination® (LRX - Series) Installation Guide
This device complies with Part 15 of the FCC Rules. Operation is subject to the following two conditions: (1) This device may not cause harmful interference, and (2) this
device must accept any interference received, including interference that may cause undesired operation. CAN ICES-005 (A) / NMB-005 (A).
Note: This equipment has been tested and found to comply with the limits for a Class A digital device, pursuant to part 15 of the FCC Rules. These limits are designed to
provide reasonable protection against harmful interference when the equipment is operated in a commercial environment. This equipment generates, uses, and can radiate
radio frequency energy and, if not installed and used in accordance with the instruction manual, may cause harmful interference to radio communications. Operation of this
equipment in a residential area is likely to cause harmful interference in which case the user will be required to correct the interference at his own expense.
Connect the quick connectors in same color of LRX
EMBB xture and LRXEMBBKIT07(or LRXEMBBKIT07HE,
or LRXEMBBKIT10) and close quick connector box well.
NOTE: For phase cut dimming product, dimming leads (violet and
pink wires) are disconnected. Dimming compatibility for both 0-10V
and phase cut, please refer to website: LED.com
4
Springs up
Box closed
Load springs into upright position by twisting the
springs upward and carefully insert the xture
to the hole of the frame. Ensure xture is secure.
• All kit and frame will be completely attached to ceiling.
5
Springs up
Box closed
Attach the test switch to the LRXEMBB xture or junction box. If the xture is 6” or 8”, rst remove the nut from
the end of test switch, and put test switch through the hole of xture, then thread nut to test switch. If the
xture is 4”, mount to the junction box and provided exible conduit for remote mounting of the test switch.
NOTE: For phase cut dimming product, dimming leads (violet and pink wires) are open.
3
Tighten nut on
inside of housing
Remove nut from
test switch
Attach to housing
4"
Tighten nut on
inside of housing
Remove nut from
test switch
Attach to housing
4"
Tighten nut on
inside of housing
Remove nut from
test switch
Attach to housing
4"
Tighten nut on
inside of housing
Remove nut from
test switch
Attach to housing
4"
CAUTION/ATTENTION
RISK OF PERSONAL INJURY - Operators shall ensure no appendages
are in the path of the torsion springs as they are a pinch hazard when
released. The springs will release when the arm is exed downward. Be
cautious that no body part is in the path of the spring when released.
RISQUE DE BLESSURE CORPORELLE - Les techniciens veilleront à ce qu’aucun
appendice ne se trouve sur le chemin des ressorts de torsion, car ils présentent un
risque de pincement lorsqu’ils sont libérés. Les ressorts seront libérés au moment
de échir le bras vers le bas. Faites attention à ce qu’aucune partie du corps ne se
trouve sur le chemin du ressort à sa libération.
/