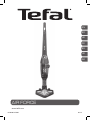
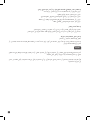
Tefal TY8463KL Le manuel du propriétaire
- Taper
- Le manuel du propriétaire

AIR FORCE
www.tefal.com
EN
KO
HK
FR
RU
UK
AR
NC00903460/02 03/18

Min
Max
14
9a
9b
9c
9d
2a
2b
2c
2
4
3
5
1
11d
11c
15
11
11a
11
12
10
6
8
9
13
7
11b*

12
2
1
Push
12H
Min
Max
1
2
Min
Max
2
1
1
2
2
1
1
2
1
2
1
1
5
9
13
17
21
2
6
10
14
18
22
3
7
11
15
19
23
4
8
12
16
20

1
Page
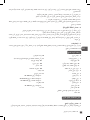
SECURITY ADVICE ................................................................................................................................................................... 2
1. Precautions before use ....................................................................................................................................................................... 2
2. Electric power source .......................................................................................................................................................................... 3
3. Repairs ...................................................................................................................................................................................................... 3
DESCRIPTION ................................................................................................................................................................................. 3
BEFORE FIRST USE ................................................................................................................................................................... 3
1. How to assemble the appliance ...................................................................................................................................................... 3
2. Charging the battery ........................................................................................................................................................................... 4
3. Turning on the appliance .................................................................................................................................................................. 4
4. Storage ..................................................................................................................................................................................................... 5
CLEANING AND MAINTENANCE .............................................................................................................................. 5
1. Cleaning the dust tray ......................................................................................................................................................................... 5
2. Cleaning the foam rubber motor protection lter ................................................................................................................... 5
3. Vacuum cleaner care and maintenance ....................................................................................................................................... 6
BATTERIES ......................................................................................................................................................................................... 6
1. Battery replacement ............................................................................................................................................................................ 6
2. Throwing away the appliance .......................................................................................................................................................... 6
ENVIRONMENT ............................................................................................................................................................................. 6
REPAIRS ................................................................................................................................................................................................ 7
GUARANTEE..................................................................................................................................................................................... 7
CONTENTS

2
For your safety, this appliance complies with applicable rules and regulations (Low Tension Guidelines, Electro-
magnetic Compatibility, Environmental Regulations...).
• This appliance is not intended to be used by persons (including child-
ren) with reduced physical, sensory or mental capacities or lack of
experience and knowledge, unless they are supervised or have been
given instructions beforehand concerning use of the appliance by a
person responsible for their safety.
Children should be supervised to ensure they do not play with the
appliance.
• This appliance can be used by children aged from 8 years and above
and persons with reduced physical, sensory or mental capabilities
or lack of experience and knowledge if they have been given super-
vision or instruction concerning use of the appliance in a safe way
and understand the hazards involved. Children shall not play with
the appliance. Cleaning and user maintenance shall not be made by
children without supervision. Keep the device and its cord away from
children.
• Do not use the appliance if: the cord is damaged. In order to avoid all
danger, the cord winding system and the cord itself of your vacuum
cleaner must necessarily be replaced by a Tefal Authorized Service
Centre only.
1. Precautions before use
• Your vacuum cleaner is an electric appliance: it must always be used under normal conditions. Use and store the
appliance away from children’s reach. Never leave the appliance on and unattended. Never hold the end of the
vacuum tube near your eyes or ears.
• Never vacuum wet surfaces or liquids, no matter what their nature; hot substances; ultra-ne substances such
as plaster, cement or ashes; large cutting waste materials such as glass; toxic products such as solvents or paint
strippers; aggressive products such as acids or strong cleaners; or gasoline or alcohol-based ammable or explo-
sive materials.
• Never submerge the product or charge it under water or under any other liquid. Never spray water on the ap-
pliance or on the charger.
• Do not store the appliance outdoors and keep it in a cool, dry place at all times.
• Do not place the appliance near a heat source (ovens, electric heaters or hot radiators).
• Do not expose the batteries to a room temperature above 104ºF (40°C).
• Do not take the vacuum cleaner apart while it is on.
• Never use your vacuum cleaner without the dust tray and the foam rubber motor protection lter.
• Do not use the appliance:
- If it fell and shows visible signs of deterioration or functional anomalies.
- If the charger or the charger cable are damaged.
In any of these cases, do not try to take the appliance apart. Rather, take it to the authorized Tefal Service Center
nearest to your home, because special tools will be needed in order to safely carry out any repairs.
SECURITY ADVICE

3
• Repairs must only be carried out by specialists using original replacement parts.
• To attempt the repair of an electronic appliance at home may be hazardous to the user.
• Only use original, guaranteed Tefal replacement parts (lters, batteries...).
• This appliance is intended for domestic use only. In case it is used inappropriately, not following the given ins-
tructions, Tefal will not be subject to any liabilities whatsoever.
• The vacuuming tube located at the height of the vacuum head must be checked regularly. If it is damaged, the
appliance should not be used.
2. Electric power source
• Make sure that the voltage indicated on the rating plate of the charger corresponds to that of your power source.
• Never unplug the charger by pulling the electric cord.
• If the charger cord is damaged or if the charger itself does not function properly, do not use any other charger,
dierent from the model provided by the manufacturer, and contact the Tefal Consummer Service or go to the
authorized Service Center nearest to your home.
3. Repairs
Repairs must only be carried out by specialists using original replacement parts. To attempt the repair of an elec-
tronic appliance at home may be hazardous to the user, and will invalidate the guarantee.
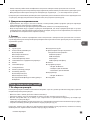
DESCRIPTION
1. Ergonomic handle
2. Stop/Start button
2.a Stop position
2.b “Min” position
2.c “Max”position
3. Light “MAX” speed signal
4. Light charge signals
5. Neck
6. Main body
7. Locking screw
8. Air outlet grill
9. Dust tray
9.a Dust receiver
9.b Dust separator
9.c Foam rubber motor protection lter
9.d Lid
10. Connection tube
11. Delta vacuum head with integrated
electro-brush
11.a Electro-brush
11.b LED*
11.c Latches
11.d Trap
12. Wheels
13. Charger
- 12V: ref. RS-RH5155*
- 12V / Korea : ref RS-RH5203*
- 12V / H-K : ref RS-RH5380*
14. Batteries
- 12V: ref. RS-RH5157*
15. Tool
BEFORE FIRST USE
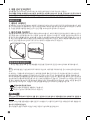
1. How to assemble the Appliance
Unpack your appliance and throw away any tags attached. Make sure to keep your guarantee and read the instruc-
tions carefully before using the appliance for the rst time.
• Remove the screw from the neck and leave the nut in its place.
• Fix the neck by carefully inserting it in the upper portion of the main body (g.1).
• Insert the locking screw (7) into the neck and screw it tightly using the tool provided with the appliance (g.2).
• Fix the Delta vacuum head (11) by locking it into place in the lower portion of the main body (g.3).
• Fix the dust tray on the main body of the appliance (g 19).
Please note : In order to detach the Delta vacuum head, press the ejection button located at the back of the main
body (g.4) and pull to remove.
* May vary according to model

4
EN
2. Charging the battery
IMPORTANT: Use only the original charger provided with the appliance (see DESCRIPTION chapter). Do not
charge the appliance at temperatures lower than 32ºF (0ºC) or higher than 104ºF (40°C). Using a universal
charger will automatically invalidate the guarantee.
Before you use your vacuum cleaner for the rst time, you must charge the battery completely (for 12 hours
maximum).
While the battery is being charged, the Stop/Start button must be in the Stop position (2.a)
• Place the vacuum cleaner near an electric power point.
• Plug the charger in and connect it to the vacuum cleaner using the socket located at the back of the neck (g.5).
• The charge signal (4) located at the front of the main body will light. Leave the vacuum cleaner to charge. Once
the charge cycle is completed (after about 12 hours), the light charge signal will turn o automatically.
The vacuum cleaner can stay connected to the charger permanently, without any hazard. Keep in mind, however,
that if you decide to keep the charger connected it might become slightly hot. This would be a completely normal
phenomenon.
It is advisable to charge the vacuum cleaner immediately after each use in order to always have it available with
a fully charged battery. Thus, you will gain the maximum benet from its cleaning and autonomous performance
functions. However, in case you plan to be absent for a long period of time (on vacation, for example), it is advi-
sable to unplug the charger for, in this case, the autonomous performance function could be diminished due to
automatic power loss.
3. Turning on the appliance
Unplug the charger cord from the vacuum cleaner. Hold the vacuum cleaner by the handle and slide the Stop/Start
button downwards, towards one of the two following speeds (g.6):
• « Min » : Used to vacuum clean thick or delicate rugs and carpets (2.b), as well as fragile surfaces.
Please note : always make sure that the wheels located at the back of the base are clean.
• « Max » : Used for optimum vacuum performance on all oor types, and in case of strong dirt marks (2.c).
Speed 1
« Min »
Speed 2
« Max »
12 Volts Up to 25 minutes Up to 15 minutes
USING THE ELECTRO-BRUSH
The electro-brush is a rotating, motorized brush that guarantees maximum cleaning eectiveness by allowing the
appliance to suck up dirt and clean in depth. The bristles, located all along the brush, remove threads, hair and fur
that might be caught on the surface of rugs and carpets.
Please note: If the vacuum head adheres too closely to the surface you are cleaning, change the speed to « Min ».
ATTENTION: Do not vacuum large fragments of broken objects, as they could block and damage the brush.
Do not use the electro-brush on long hair carpets, on animal fur, or on fringes.
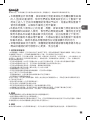
REMOVING AND CLEANING THE ELECTRO-BRUSH
ATTENTION: Always turn o the appliance and unplug it before storing or cleaning.
Using the tool provided with the appliance (15), press in the two latches located on each side of the lower side
of the Delta head (g.7). Lift the trap located on top of the electro-brush (g.8). Remove the electro-brush and its
lateral bearing in order to clean them (g.9). Carefully remove any threads, hair, fur, etc. from the electro-brush.
Once clean, replace the electro-brush and its lateral bearing (g.11), then replace the trap over it (g.12). Finally,
using the tool provided with the appliance, close both latches (g.13).

5
FOR YOUR SAFETY
• Do not touch any rotating parts before you turn o and unplug the vacuum cleaner.
• Do not use the appliance on wet surfaces.
• Do not immerse the appliance in water.
ELECTRO-BRUSH MALFUNCTION
The electro-brush does not function properly or makes an unusual sound
• Either the rotating brush or the axis is blocked: turn o the appliance and clean them.
• The brush is worn out: visit an authorized Service Center in order to have the brush changed.
• The belt is worn out: if the belt makes noise, it means that it is slipping because it’s worn out. Visit an authorized
Service Center in order to have the belt changed.
The electro-brush stops while you are vacuuming
• The thermal security feature has been activated: Turn o the vacuum cleaner by moving the Stop/Start button to
the Stop position (2.a) and unplug it. Check to see if any solid object is blocking the rotation of the brush. If this
is the case, remove the object and clean the electro-brush (g.10), then you may keep using the vacuum cleaner.
The electro-brush moves with diculty
If you nd that your vacuum cleaner slides with diculty along surfaces, progressively reduce the speed until you
reach the « Min » position (2.b). If the problem persists, take your appliance to the authorized Tefal Service Center
nearest to your home.
See the list of authorized Tefal Service Centers or contact the Tefal Consummer Service department.
4. Storage
After use, turn o your vacuum cleaner by moving the Stop/Start button to the Stop position (2a). Now you may
store your appliance vertically wherever you like, thanks to the parking position.
To place the vacuum cleaner in the parking position: Place the neck vertically in order to block the appliance.
To continue using the vacuum cleaner: Take it by the handle and make it swing backwards in order to unblock it
and leave the parking position.
CLEANING AND MAINTENANCE
IMPORTANT: Always turn o the appliance and unplug it before storing or cleaning.
1. Cleaning the dust tray (9)
1.a Fast emptying
Whenever the dust tray is full, empty it as follows: remove the tray by sliding it downwards (g.14), place it over
a bin and press the “Push” button in order to open the trap and empty the tray’s contents (g.15). Close the trap
(g.16) and replace the dust tray on the main body of your appliance (g.19).
1.b Complete cleaning procedure
It is advisable to clean the dust tray regularly.
• Remove the dust tray (g.14), then separate each of its components (9).
• Remove the foam rubber motor protection lter (9c).
• Place the dust receiver (9a), the dust lter (9b) and the lid (9d) under warm water (g.20); then let them stand to
dry or dry them with a dry cloth.
• Wash the foam rubber motor protection lter (see paragraph 2).
• Once the components of the dust tray are all dry, reassemble them; do the same with the extra foam rubber motor
protection lter (9c) provided as a supplement with your appliance.
• Close the dust tray and reposition it on the main body of your appliance (g.19).
2. Cleaning the foam rubber motor protection lter (9c)
ATTENTION: Never use your vacuum cleaner without the foam rubber motor protection lter.

6
EN
In order to maintain the high performance level of your appliance, do not vacuum ultra-ne substances such as
plaster, cement or ashes, and clean the foam rubber motor protection lter at least once a month. If you perceive
that your vacuum cleaner is performing under regular average level, we recommend that you clean the foam
rubber motor protection lter more frequently.
• Remove the dust tray lid (9d) and then remove the foam rubber motor protection lter (9c) (g.21).
• Clean the foam rubber motor protection lter (9c) with warm, soapy water.
Rinse and let dry for at least 12 hours before replacing the lter on the appliance (g.22).
IMPORTANT: In order to assure optimal motor protection, make sure that the foam rubber lter is comple-
tely dry before replacing it on the appliance. You will need to let it dry for at least 12 hours before reinser-
ting it into the dust tray. An extra foam rubber motor protection lter is provided with your vacuum cleaner
so that you may use the appliance while the rst lter is still drying.
ATTENTION: Never place the dust tray components or the foam rubber motor protection lter in an auto-
matic dishwasher.
3. Vacuum cleaner care and maintenance
Wipe the main body of the appliance with a soft, damp cloth; then dry it with a dry cloth (g.23).
IMPORTANT: Do not use detergents, or aggressive or abrasive products. The transparent color of the dust
tray and/or of the separator lid may change with time; however, this will not modify the performance of
the appliance.
BATTERIES
1. Battery replacement
This appliance contains nickel-metal hydride (NiMh) accumulators which are, for safety reasons, only accessible
to professional engineers. When the battery is no longer capable of retaining its charge, the NiMh block must be
removed. In order to replace the accumulators, please visit the authorized Service Center nearest to your home.
2. Throwing away the appliance
It is important that you remove the batteries before throwing away your appliance. In order to do this, visit an
authorized Service Center or proceed as follows: disconnect the appliance from the electricity network, dismount
the neck from the main body removing the central screw, and then remove the ve (5) assembly screws located at
the back of the neck (g.24). Carefully lift the upper cover of the neck and unscrew the two electric circuit screws,
then unplug the battery block by pulling the plug (g.25). Do not throw the battery bloc into the waste bin; take
it to the authorized Tefal Service Center nearest to your home or to a place specially designated to process such
type of waste.
24 25
ENVIRONMENT
• According to current regulation, any appliance that is out of service must be taken to an authorized Service
Center, where it will be safely disposed of.

7
Warning
Do not place a block of rechargeable batteries with non-rechargeable batteries.
If you wish to change the batteries, visit an authorized Service Center.
The batteries are designed to be used indoors only. Do not immerse them in water. Handle the batteries with care.
Do not place the batteries in your mouth. Do not let the batteries come in contact with other metal objects such
as rings, nails or screws. Be careful not to provoke internal short-circuits in the batteries by inserting metal objects
through their extremities. If a short-circuit does occur, the temperature of the batteries could rise dangerously, cau-
sing serious burns or even catching re. If the batteries start leaking, do not rub your eyes or mucous membranes.
Wash your hands and rinse your eyes with clean water. If irritation persists, consult your physician.
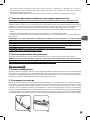
Let’s help protect the environment!
Your appliance contains numerous useful or recyclable materials.
Take the appliance to a collection spot so that it can be disposed of properly.
REPAIRS
IMPORTANT: If you notice that your vacuum cleaner is not functioning properly, before any revision, turn
it o by placing the Stop/Start button in the Stop position.
Repairs should only be carried out by specialists using original replacement parts. To attempt the repair of an
electronic appliance at home may be hazardous to the user.
If your vacuum cleaner does not start
Make sure that the charger is completely unplugged from the appliance. If it is, it means that the appliance is not
charged, so proceed to charge it.
If your appliance does not vacuum
• The electro-brush is dirty: clean it.
• The separator is clogged up: remove the dust tray and clean the separator.
If your vacuum cleaner seems less ecient, makes noise or whistles
• The tube or the hose are partially clogged up: unclog them.
• The dust receiver is full: empty and clean it.
• The dust tray is not well positioned: place it correctly.
• The Delta vacuum head is dirty: demount the electro-brush and clean it.
• The foam rubber motor protection lter is saturated: clean it.
If the separator gets lled with dust
• The separator sometimes accumulates dust. Make sure that nothing is blocking the duct between the separator
and the dust tray.
• The dust tray opening is blocked: Remove the dust tray, empty it and clean the opening.
The vacuum head moves with diculty
Lower the vacuum speed by moving the appropriate switch button.
If the problem persists, take your vacuum cleaner to the authorized Tefal Service Center nearest to your home. See
the list of authorized Tefal Service Centers or contact the Tefal Consummer Service department.
GUARANTEE
This appliance is intended for domestic use only. In case it is used inappropriately, not following the given instruc-
tions, Tefal will not be subject to any liabilities whatsoever and the guarantee will be invalidated.
Read the instructions before using the appliance for the rst time: using the appliance in any way dierent from
the one indicated here would free Tefal of all liabilities.

8
KO
페이지
안전 주의 사항 ...................................................................................... 9
1. 사용전주의사항 ........................................................................................................................ 9
2. 전원관련 ................................................................................................................................. 10
3. 제품수리 ................................................................................................................................. 10
각부 명칭 ........................................................................................... 10
사용 전 주의사항 ................................................................................. 10
1. 제품조립하기 .......................................................................................................................... 10
2. 배터리충전하기 ....................................................................................................................... 11
3. 청소기사용하기 ....................................................................................................................... 11
4. 제품보관하기 .......................................................................................................................... 12
세척 및 관리 ....................................................................................... 12
1. 먼지통세척하기 ....................................................................................................................... 12
2. 필터세척하기 .......................................................................................................................... 13
3. 청소기관리및보관하기 ............................................................................................................ 13
배터리 관리 ........................................................................................ 13
1. 배터리교체하기 ....................................................................................................................... 13
2. 폐가전처리하기 ....................................................................................................................... 13
환경 보호 ............................................................................................ 13
제품 수리 ............................................................................................ 14
제품 보증 ............................................................................................ 14
차 례

9
안전 주의 사항
본제품은고객의안전을위해현재시행중인표준법규및기술법규(저전압지침,전자기기적합성,환경요소등)
에의거하여제작되었습니다.
•본제품은어린이를비롯하여신체,지각또는판단능력에장애가
있는분,제품에대한지식이나사용경험이부족한분은보호자의
감독아래서사용하거나사용전에그들의안전에대한책임이있
는사람으로부터사용법에대한설명을들은후에사용할수있도
록지도하여주십시오.
어린이들이제품을함부로가지고놀지못하도록감독하시고각별
히주의시켜주시기바랍니다.
•본제품은8세이상의어린이부터사용하실수있으며신체,지각
또는판단능력에장애가있는분,제품에대한지식이나사용경험
이부족한분은보호자의감독아래서사용하거나안전하게사용할
수있는사용법에대한설명과위험에대한이해가있는경우에사
용하실수있습니다.어린이들은본제품을가지고놀수없습니다.
어린아이가보호자의감독없이본제품의청소및유지관리를하지
않도록하시기바랍니다.본제품과본제품의코드를어린이의손
이닿지않는곳에보관하시기바랍니다.
•제품의코드가손상되어있을때에는제품을사용하지마시기바랍
니다.안전을위해서청소기의코드감김장치와코드는반드시테팔
공식서비스센터에서만교체하시기바랍니다.
1. 사용 전 주의 사항
사용설명서를 주의 깊게 읽어 보시고, 잘 보관하시기 바랍니다
•
본제품은전기제품입니다:반드시안전한조건하에서사용하시기바랍니다.제품을어린아이들의손이닿지
않는곳에보관하십시오.제품의전원을켜둔채로방치하지마십시오.청소기호스끝부분이나흡입면을절대
로눈이나귀가까이에대지마십시오.
•어떤성분의액체이건표면이젖어있거나물기가있는곳에서는제품을사용하지마십시오.
•뜨거운물체,석고혹은시멘트가루,재와같은미세한가루물질;깨진유리처럼절단면이크고뾰족한물질;
용해제나페인트제거액같은유독성물질;산성이나세척액같은부식성물질;석유또는알코올성분이함유
되어있어쉽게불꽃을일으키는가연성및폭발성물질을흡입하지않도록주의하십시오
•제품본체나충전기를물이나기타액체류등에절대로담그지마시고,충전기에물이튀지않도록주의하십
시오.
•제품을실외에두지마시고바람이잘통하고건조한장소에보관하십시오.
•제품을열기나화기가까이에두지마십시오(오븐,난방기구또는온풍기)
•실내온도가40°C이상되는곳에충전기를두지마십시오.
•청소기작동중에제품을분해하지마십시오.
•먼지통과필터가장착되지않은상태에서는절대로청소기를작동하지마십시오.
•다음의경우에는제품을사용하지마십시오.
-청소기가넘어져눈에보일정도로파손되었거나비정상적으로작동할때
-충전기또는충전기코드가파손되었을경우
어떤경우에도청소기를임의로분해하지마십시오.
가까운공인테팔서비스센터로보내서안전하게수리받으시기바랍니다.

10
KO
* 제품 모델에 따라 구성품과 기능이 달라질 수 있습니다.
•제품수리는숙련된전문가가정품을사용하여안전하게이루어집니다.
•전기제품을임의로수리하실경우심각한부상을입으실수있습니다.
•본제품은인증받은테팔정품(필터,충전기등)만을사용하며,가정용으로제작되었습니다.어떤경우에도상
업적목적등의부적절한방법으로사용하여서는안됩니다.또한사용설명서를따르지않고임의로조작,사용
하여발생한고장에대해서는당사가책임지지않으며,품질보증수리혜택을받으실수없습니다.
•청소기헤드상단의고무튜브상태를정기적으로점검하시기바랍니다.튜브가망가졌을때는제품의사용을
중단하십시오.
2. 전원 관련
•가정내사용전압과제품충전기전면에표시된전압이일치하는지반드시확인하십시오.
•코드를뽑을때절대로전선을잡아당겨뽑지마십시오.
•충전기코드가손상되었거나정상적으로충전이되지않을때,테팔에서제공하는충전기이외다른충전기는
절대로사용하지마시고가까운테팔서비스센터에의뢰하여주십시오.
3. 제품 수리
제품수리는공인된서비스센터에서만진행됩니다.소비지가임의로제품을수리하는경우는매우위험하며,품
질보증수리혜택을받으실수없습니다.
각부 명칭
1. 인체공학적손잡이
2.ON/OFF전원버튼
2.aOFF(꺼짐)
2.bMIN(약)
2.cMAX(강)
3.MAX(강)표시등
4.충전표시등
5.핸들
6.본체
7.핸들과본체연결잠금나사
8.배기구
9.먼지통
9.a먼지통본체
9.b먼지분리기
9.c필터
9.d먼지통덮개
10.본체연결호스
11.델타헤드
11.a전기회전브러시
11.bLED조명*
11.c잠금장치
11.d고정장치
12.이동바퀴
13.충전기
-12V:ref.RS-RH5155*
-12V/Korea:refRS-RH5203*
-12V/H-K:refRS-RH5380*
14.배터리
-12V:ref.RS-RH5157*
15.나사조임도구
사용 전 주의사항
1. 제품 조립하기
포장을풀고제품을꺼낸후,제품에부착된라벨을모두제거하십시오.제품보증서는잘보관하시고,제품사용
전에사용설명서를주의깊게잘읽어보시기바랍니다.
•핸들에있는나사를풀어주시고너트는그대로두십시오.
•핸들을본체상단부에맞춰끼우십시오.(그림1)
•핸들과본체를연결하는나사(7)를끼우고,동봉된나사조임도구를사용해조여주십시오.(그림2)
•델타헤드(11)를본체하단부에맞춰바르게끼워주십시오.(그림3)
•먼지통을본체의위치에맞게그림과같이끼워주십시오.(그림19)
주의:델타헤드를분리하실때에는,본체뒷면의버튼을누른채(그림4)위로들어올리십시오.
2. 배터리 충전하기
주의:제품과 함께 동봉된 정품 충전기만 사용하십시오 (각부 명칭 페이지를 참고하여 주십시오). 0ºC 이하 또는
40°C 이상의 온도에서는 절대로 충전하지 마십시오. 정품 충전기를 사용하지 않고 발생한 문제에 대해서는 무상
보증수리 혜택을 받으실 수 없습니다.

청소기를 처음 사용하실 때에는 배터리를 완충(12시간 정도)하셔야 합니다
충전하실때에는,반드시전원버튼을OFF(꺼짐)모드에두십시오.(2.a)
•청소기를전기콘센트가까이에두십시오.
•핸들뒤편의충전기용단자에충전기코드를꽂고,충전기플러그를콘센트에꽂으십시오.(그림5)
•배터리가완전히방전된상태에서는약12시간충전후완충상태가됩니다.충전이진행되면청소기를그대
로두십시오.
어댑터가연결되면,앞면의충전표시등(4)에약12시간동안불이들어옵니다.완충상태에서도충전표시등이점
등될수있으며,이는제품의불량이아닌정상적인현상입니다.청소기를사용하신후곧바로충전해두시면항상
충전된상태의배터리로사용하실수있습니다.
청소기를항상충전상태로두어도위험하지않습니다.충전과정에서제품이약간뜨거워질수도있지만,이는
정상적인현상입니다.
완충상태에서는최상의기능으로제품을사용하실수있습니다.장기간집을비우실때에는(출장,휴가등)자가방
전으로인하여작동시간이줄어들수있으므로충전기코드를빼두시는것이좋습니다.
3. 청소기 사용하기
청소기에서충전기코드를뽑아주십시오.충전기가콘센트나본체에연결되어있는경우,정상적으로작동이되지
않습니다.청소기손잡이를잡고전원버튼을아래로밀어두가지위치중선택하십시오.(그림6)
•<<MIN(약)>>:두툼한깔개나극세사러그혹은카페트등표면이손상되기쉬운바닥에적합합니다(2.b).
주의:항상바닥의뒷부분에있는바퀴가깨끗한지확인하십시오.
•<<MAX(강)>>:모든형태의바닥에사용하실수있으며강력한흡입이가능합니다.더러움이심한바닥청소
에사용하십시오(2.c).
MIN(약) MAX(강)
12V 25분 15분
전기회전 브러시 사용법
전기회전브러시는청소효과를극대화해주는전동식회전브러시로,바닥에깔린깊숙한먼지및오염물질제
거에탁월합니다.촘촘하게부착되어있는솔이깔개및카페트에묻어있는가는실이나머리카락,동물의털까지
말끔하게제거해줍니다.
주의:청소중에델타헤드가흡입면에심하게밀착될경우스위치를“MIN(약)”으로바꿔주십시오.
절단면이 크고 날카롭게 깨진 물체는 흡입하지 마십시오. 흡입구를 막히게 하는 원인이 되며 브러시와 연결호스를
손상 시킵니다. 실이 긴 카페트, 동물털로 만든 제품, 커튼 가장자리나 태슬 장식(장식술)에는 사용하지 마십시오.
모서리가 날카로운 곳에서의 잦은 사용은 연결 호스 손상이 될 수 있으니 주의 하시기 바랍니다.
전기 회전 브러시 손질 및 세척
손질이나 세척시에는 반드시 청소기 전원을 끄고 플러그를 뽑아주십시오.
델타헤드아래면을보시면양쪽에걸쇠가있습니다.동봉된나사조임도구(15)를사용하여이걸쇠를아래로당
겨주십시오.(그림7).전기회전브러시를덮고있는고정장치를위로들어올리십시오.(그림8).전기회전브러시
를세척하시려면회전브러시를분리해주십시오.이때뾰족한도구를이용하여분리해주십시오.(그림9)실,머
리카락,동물의털등브러시에붙은이물질을제거하십시오.(그림11).제거후,전기회전브러시를끼우십시오.(
그림11).고정장치를살짝눌러브러시를고정하십시오.(그림12).나사조임도구를사용하여양쪽걸쇠를위로올
려서잠그십시오.(그림13).
안전을 위한 주의사항
•전원이켜진상태에서델타헤드의회전부분은절대로만지지마십시오.만져야할때에는반드시전원을끄
고플그러를뽑으십시오
•물기가있는바닥에서청소기를사용하지마십시오.
•청소기를절대물에담그지마십시오.
11

12
KO
전기 회전 브러시 문제해결
전기 회전 브러시의 성능이 저하되었거나 비정상적인 소음이 난다.
•전기회전브러시나흡입구가막혔는지확인:전원을끄고브러시에묻은이물질을제거하십시오.
•브러시가마모되었는지확인:공인테팔서비스센터로연락해서브러시를교체하십시오.
•벨트가마모되었는지확인:전기회전브러시내부에장착된벨트가마모되어서미끄러지면소음이발생될수
있습니다.공인테팔서비스센터로연락해서벨트를교체하십시오.
청소 도중에 전기 회전 브러시가 멈춘다
•열전도안전장치가작동되는지확인:전원(2.a)버튼을작동해청소기전원을끄고플러그를뽑아주십시오.딱딱
한물체가입구를막아브러시회전을방해하지않는지확인하십시오.이런경우에이물질을제거하고브러시
를깨끗하게손질(그림10)하신후청소기를다시작동하십시오.
전기 회전 브러시가 부드럽게 회전하지 않는다.
•청소기가앞으로부드럽게나아가지않을경우,속도를<<MIN(약)>>(2.b)으로전환하여흡입력을완화시켜
주십시오.문제가계속될때에는,가까운공인테팔서비스센터를방문하시기바랍니다.공인테팔서비스센터
목록을참고하시어연락하십시오.
4. 제품 보관하기
사용후에는반드시전원버튼을정지위치(2a)에두고전원을끄십시오.제품에지지대가장착되어있어원하는
곳에수직으로세워보관하실수있습니다.
셀프스탠딩으로청소기보관하기;청소기를사용하지않으실때수직으로세우면,지지대가잠금역할을하여바
로세워두실수있습니다.
다시사용하실때:청소기를잡고뒤쪽으로약간기울이면서돌리면지지대가풀리면서제품을사용하실수있습
니다.
세척 및 제품 관리
주의:제품을 세척하거나 보관하기 전에 항상 전원을 끄고 플러그를 뽑으십시오.
1. 먼지통 세척하기(9)
1.a 먼지통 즉시 비우기
먼지통이꽉차있을때에는,다음의방법으로비워주십시오.:먼지통을아래로밀어본체에서분리하시고(그림
14),쓰레기통위에서,먼지통에있는‘push’버튼을눌러뚜껑을열고먼지를비우십시오(그림15).뚜껑을덮고(그
림16)청소기본체에먼지통을다시끼우십시오.(그림14)
1.b 세척과정
먼지통은정기적으로세척해주시기바랍니다.
•먼지통을본체에서분리(그림14)한다음,먼지통의뚜껑,필터등구성품들을각각분리합니다(9)
•필터를분리하십시오(9c).
•먼지통본체(9a),먼지분리기(9b),먼지통덮개(9d)를따뜻한물에세척하십시오.세척후세워서건조시키거
나마른수건으로물기를제거해주십시오.
•필터를세척하십시오.(필터세척하기참조)
•분리한구성품들을완전하게건조한후,다시조립하십시오.제공된교체용필터(9c)를장착하십시오.
•먼지통을닫고본체에다시끼우십시오.(그림19)
2. 필터 세척하기(9c)
주의:필터를 장착하지 않은 상태에서는 절대로 청소기를 사용하지 마십시오.
청소기성능을최상의상태로유지하시려면,석고나시멘트,재같은미세한가루는흡입하지마시고,최소한달
에한번필터를세척하십시오.청소기의성능이떨어질경우에는,필터를더욱자주세척하시는것이좋습니다.
•먼지통덮개(9d)를열고필터를꺼내십시오.(그림21)
•필터(9c)를따뜻한비눗물로세척하십시오.깨끗하게헹군후,최소12시간이상건조하신후재사용하십시
오.(그림22)
주의: 최적의 상태에서 모터를 사용하시려면, 필터를 완전히 건조시킨 후 재사용하십시오. 완전건조에는 최소 12
시간이 소요됩니다. 본 제품에는 필터가 완전히 건조될 동안 사용하실 수 있는 여분의 필터가 제공됩니다.
경고:먼지통이나 덮개, 필터 등 구성품들을 절대 세척기에서 세척하지 마십시오.

3. 제품 관리 및 보관하기
본체를물에젖은부드러운천으로닦으신후마른천으로한번더닦아주십시오.(그림23)
주의:제품을 닦으실 때 세제나 부식성 물질, 연마제 등은 사용하지 마십시오. 먼지통, 먼지 분리기 및 뚜껑 등의 투
명색이 시간이 지나면서 불투명하게 변할 수 있습니다. 그러나 제품 성능에는 영향을 미치지 않습니다.
배터리 관리
1. 배터리 교체하기
본제품에는니켈-수소합금(NiMh)배터리가장착되어있으며,반드시숙련된전문가가취급하여야합니다.배터
리가더이상충전되지않을때에는니켈-수소합금(NiMh)배터리팩을제거한후교체해주셔야합니다.배터리
등구성품일체를교환하실때에는반드시공인테팔서비스센터로문의하시기바랍니다.
2. 폐가전제품 처리하기
제품을폐기하시기전에반드시배터리팩을분리하셔야합니다.배터리팩을안전하게분리하기위해서는반드시
공인테팔서비스센터를방문하시거나다음의순서에따라작업하시기바랍니다.제품을전원장치와분리하기위
해반드시플러그를뽑으십시오.본체연결나사를푼후핸들을본체와분리하십시오.핸들뒤편에있는다섯개
의조립나사(5)를풀고배터리팩을당기듯이빼내서분리하십시오.(그림25).배터리팩을휴지통에버리시면안
됩니다.;공인테팔서비스센터로가져가시거나배터리수거함에버리시기바랍니다.
24 25
환경 보호를 우선합니다
•폐가전제품은환경보호및자원재활용을위한현행규정에따라공인된서비스센터에서폐기해야합니다.
경고
방전된배터리를충전가능한배터리로교체하지마십시오.배터리를교체하시려면당사서비스센터에문의하십
시오.
이배터리는가정용으로제작되었습니다.배터리를절대로물에담그지마시고조심해서취급하시기바랍니다.
배터리를입에넣으면위험합니다.배터리가반지,못이나나사등기타금속물질에닿지않도록주의하십시오.
배터리양쪽끝에금속물질을삽입하면배터리내부에서합선될수있습니다.합선이되면배터리온도가급격하게
상승하여매우위험하며화상을입을수도있고,화재가발생할수도있습니다.만약배터리누수액을손으로만졌
을경우,절대로눈을비비거나코속을후벼점막을만지는등의행동을하지마십시오.흐르는깨끗한물에손과
눈을닦아헹구어주십시오.이물감이계속남아있을때에는반드시의사의진료를받으십시오.
환경보호에 동참해 주세요.
본제품의부속품들은재활용이가능합니다.
반드시분리수거하여폐기하시기바랍니다.
제품 수리
주의:청소기가 효과적으로 작동하지 않을 경우, 점검하시기 전에 반드시 작동버튼을 정지 상태에 두어 전원을 끄
십시오.
제품의수리는테팔정품부품을사용해전문가가수행합니다.사용자가임의로직접수리할경우매우위험합니다
청소기가 작동하지 않는다.
플러그를뽑고충전이제대로되었는지확인:작동이가능하도록충전하십시오.
13

14
KO
흡입이 되지 않는다.
•전기회전브러시가더러워졌는지확인:오염물질을제거하고세척하십시오.
•먼지분리기가막혔는지확인:먼지통을비우고먼지분리기를세척하십시오.
흡입력이 약해졌고 소음과 이상음이 들린다
•연결호스나튜브가막혔는지확인:막힌부분의이물질을제거하십시오.
•먼지통이꽉찼는지확인:먼지통을비우고세척하십시오.
•먼지통이제대로장착되지않았는지확인:먼지통을자리에맞게다시끼우십시오.
•델타헤드의더러움이심한지확인:전기회전브러시를분리하고세척하십시오.
•필터표면에먼지등의더러움이심한지확인:따뜻한비눗물로세척후완전건조시켜주십시오.
먼지 분리기가 먼지로 가득 찼다.
•먼지분리기에먼지가쌓였는지확인:먼지분리기와먼지통사이의연결구를막고있는이물질을제거하십시오.
•먼지통입구가막혔는지확인:먼지통을빼내고먼지를비운후세척하십시오.
델타 헤드 움직임이 둔해졌다.
동작버튼을눌러흡입력을약한쪽으로조절하십시오.문제가계속될경우,공인테팔서비스센터를방문하십시
오.
첨부된서비스센터는안내문을참고하시거나고객센터로연락하시기바랍니다.
제품 보증
본제품은가정용으로제작되었습니다.어떠한경우에도상업적목적을위해부적절한방법으로사용하여서는안
됩니다.
또한사용설명서에따르지않고임의로사용하여발생한고장에대해서는본사가책임지지않으며,품질보증혜
택도받으실수없습니다.
제품을사용하시기전에사용설명서를잘읽으시기바랍니다.설명서와다른방법으로제품을조작하여발생한결
함에대해서는테팔이법적으로책임지지않습니다.

15
頁數
安全建議.............................................................................................................................................................................................. 16
1. 使用前須知事項 ................................................................................................................................................................... 16
2. 電源 ..................................................................................................................................................................................................... 16
3. 維修 ..................................................................................................................................................................................................... 17
說明........................................................................................................................................................................................................... 17
首次使用之前................................................................................................................................................................................ 17
1. 如何組裝吸塵機 ................................................................................................................................................................... 17
2. 充電 ..................................................................................................................................................................................................... 17
3. 開動吸塵機 ................................................................................................................................................................................. 18
4. 存放吸塵機 ................................................................................................................................................................................. 18
清潔與保養........................................................................................................................................................................................ 19
1. 清潔塵盤 ....................................................................................................................................................................................... 19
2. 清潔保護馬達海棉過濾器 ......................................................................................................................................... 19
3. 吸塵機的護理與保養 ...................................................................................................................................................... 19
電池........................................................................................................................................................................................................... 19
1. 更換電池 ....................................................................................................................................................................................... 19
2. 棄置吸塵機 ................................................................................................................................................................................. 19
環境保護.............................................................................................................................................................................................. 20
維修............................................................................................................................................................................................................ 20
保用............................................................................................................................................................................................................ 21
內容

16
HK
安全建議
為確保安全,本吸塵機已符合適用的規則和規例(低電壓指引、電磁相容和環境規例等等)。
• 本吸塵機並非供身體、感官或智力弱能者或缺乏有關經驗和知識
的人(包括兒童)使用,除非他們是在負責其安全的人士監督下使
用或上述人士已就本吸塵機的使用給予指示。兒童必需在監督下
使用本吸塵機,以確保不會將之用作戲耍。
• 本產品可供八歲及以上的兒童、身體、感官或智力弱能者或缺乏
有關經驗和知識的人使用,惟他們必需受過指導,懂得完全安全
使用本產品及知道本產品會涉及的危險,並且在監督之下使用。
不得讓兒童將本產品用作戲耍。不得由兒童在沒有監督下清潔及
保養本產品。請將本產品及電源線放在兒童接觸不到的地方。
• 若電源線損毀切勿使用。吸塵機的電源線捲線器和電源線本身必
需由好運達的認可服務中心更換,免生危險。
1. 使用前須知事項
• 本吸塵機是一種電器:任何時候均須在正常情況下使用。使用本吸塵機時不要讓兒童觸摸,請將之存放在
兒童觸摸不到的地方。切勿讓吸塵機開動而置之不顧。切勿將吸管口放近眼或耳。
• 切勿吸濕的表面、任何性質的液體、熱的物質、超滑物質(例如灰漿、水泥和灰燼)、大件尖銳廢物(例
如玻璃)、毒性產品(例如溶劑和脫漆劑)、侵蝕性產品(例如酸劑和強力清潔劑)、汽油、含酒精的易
燃物質及會爆炸物質。
• 切勿將本吸塵機浸入水或任何液體中或在水中或任何液體中充電,切勿將水潑向吸塵機或充電器。
• 切勿將本吸塵機存放在戶外,任何時候必須將吸塵機存放在清涼乾爽的地方。
• 切勿將本吸塵機放近發熱源(例如焗爐、電暖爐或供暖裝置)。
• 切勿將電池置於華氏104度(攝氏40度)以上的室內溫度。
• 吸塵機開動時切勿將之拆開。
• 若沒有安裝集塵器和保護馬達海棉過濾器,切勿使用本吸塵機。
• 在以下情況下切勿使用本吸塵機:
- 若吸塵機被推跌,並且有看得見的損毀跡象或不能正確運作。
- 若充電器或充電器電源線損毀。
若有以上情況,切勿自行拆開吸塵機,請將之送往就近的好運達服務中心,因為任何維修均需要採用特別
的工具才能安全進行。
• 修理必需交由專業人士利用原裝零件進行。
• 用戶在家自行修理電器可能會產生危險。
• 請只使用品質獲保證的好運達配件(例如過濾器和電池等等)。
• 本吸塵機只供家居用途,若使用不當或不依照說明書的指引使用,好運達不會承擔任何責任。
• 必須定期檢查插在吸頭頂部的吸管,若有損毀,切勿使用本吸塵機。
2. 電源
• 檢查充電器標籤上標示的電壓是否跟您家的電源電壓相同。
• 拔掉充電器的插頭時切勿拉扯電源線借力。
• 若充電器電源線損毀或充電器本身運作不正常,切勿使用跟製造商供應的型號不同的其他充電器。請聯絡
好運達服務中心或將本吸塵機携往最近您家的認可服務中心。
3. 維修
維修必需交由專業人士利用原裝零件進行。用戶在家自行修理電器可能會產生危險,保用會因而取消。

17
產品說明
1. 舒適手柄
2. 停止/啟動開關掣
2.a 停止狀態
2.b “Min”(最低)
2.c “Max”(最高)
3. Max”(最高)速度顯示燈
4. 充電指示燈
5. 長柄
6. 主體
7. 固定螺絲
8. 出氣格柵
9. 集塵盤
9.a 集塵器
9.b 灰塵分離器
9.c 保護馬達海綿過濾器
9.d 蓋
10. 接駁喉管
11. 三角電動刷吸咀
11.a 電動刷
11.b LED*
11.c 閂
11.d 活板門
12. 輪子
13. 充電器
- 12伏特:編號RS-RH5155*
- 12伏特 / Korea : 編號 RS-RH5203*
- 12伏特 / H-K : 編號 RS-RH5380*
14. 電池組
- 12伏特:編號RS-RH5157*
15. 工具
首次使用之前
1. 組裝機器
打開包裝,去掉所有標簽。保留保用證,在首次使用吸塵器前請仔細閱讀使用說明書。
• 將螺絲從長柄中擰出,螺母留在螺孔中。
• 將長柄小心地插入機器主體上端並固定(圖1)。
• 將固定螺絲(7)插入長柄,用隨機所附的螺絲刀擰緊螺(圖2)。
• 將三角形吸塵頭(11)嵌入機器主體下端並固定(圖3)。
• 將集塵盤固定入機器主體(圖19)。
備註:拔出三角形吸塵頭時,按壓主體背後的彈出按鈕(圖4),然後從主體中拔出吸塵頭。
2. 電池組充電
重要事項:只能使用吸塵器本身配置的充電器 (請查看”產品說明”章節) 。不要在華氏32度(攝氏0度)以下
和華氏104度(攝氏40度)以上的環境下充電。如果用萬用充電器充電,保用將會失效。
首次使用之前必須將吸塵器充滿電(需時約12小時)。
充電時,開關掣應處於停止狀態(2.a)
• 將吸塵器放在電源插座附近。
• 將充電器插上電源,並利用長柄後面的插孔將充電器接駁吸塵器(圖5)。
• 位於主體前面的充電指示燈(4)會亮起。讓吸塵器充電。充電指示燈將於充電完成後(需時約12小時)自動熄
滅 。
吸塵器可以一直處於充電狀態,沒有任何危險。不過,讓吸塵器一直處於充電狀態的話機體會微微發熱,這
是完全正常的現象。
建議每次使用後立刻充電,使吸塵器的電池經常充滿電,發揮最佳的清潔和自動性能功能。不過,如果您
會有一段長時間不使用吸塵器(例如放假),建議您拔掉充電器的插頭,因為自動損失能量會削弱自動性能功
能。
3. 操作吸塵器
從吸塵器拔掉充電器的電源線。握住吸塵器手柄,向下輕推啟動/停止開關掣,選擇以下兩種吸塵速度(圖6)
的其中一種:
• « 最低 » : 以清潔厚或易損毀的地毯 (2.b)和易損表面。備註:請經常將吸塵器底後部的輪子保持乾凈。
• « 最高 » : 最適用於清潔各種地面和頑固污漬(2.c)。
* 視乎型號
La page est en cours de chargement...
La page est en cours de chargement...
La page est en cours de chargement...
La page est en cours de chargement...
La page est en cours de chargement...
La page est en cours de chargement...
La page est en cours de chargement...
La page est en cours de chargement...
La page est en cours de chargement...
La page est en cours de chargement...
La page est en cours de chargement...
La page est en cours de chargement...
La page est en cours de chargement...
La page est en cours de chargement...
La page est en cours de chargement...
La page est en cours de chargement...
La page est en cours de chargement...
La page est en cours de chargement...
La page est en cours de chargement...
La page est en cours de chargement...
La page est en cours de chargement...
La page est en cours de chargement...
La page est en cours de chargement...
La page est en cours de chargement...
La page est en cours de chargement...
La page est en cours de chargement...
La page est en cours de chargement...
La page est en cours de chargement...
La page est en cours de chargement...
La page est en cours de chargement...
La page est en cours de chargement...
La page est en cours de chargement...
La page est en cours de chargement...
-
 1
1
-
 2
2
-
 3
3
-
 4
4
-
 5
5
-
 6
6
-
 7
7
-
 8
8
-
 9
9
-
 10
10
-
 11
11
-
 12
12
-
 13
13
-
 14
14
-
 15
15
-
 16
16
-
 17
17
-
 18
18
-
 19
19
-
 20
20
-
 21
21
-
 22
22
-
 23
23
-
 24
24
-
 25
25
-
 26
26
-
 27
27
-
 28
28
-
 29
29
-
 30
30
-
 31
31
-
 32
32
-
 33
33
-
 34
34
-
 35
35
-
 36
36
-
 37
37
-
 38
38
-
 39
39
-
 40
40
-
 41
41
-
 42
42
-
 43
43
-
 44
44
-
 45
45
-
 46
46
-
 47
47
-
 48
48
-
 49
49
-
 50
50
-
 51
51
-
 52
52
-
 53
53


Tefal TY8463KL Le manuel du propriétaire
- Taper
- Le manuel du propriétaire
dans d''autres langues
- English: Tefal TY8463KL Owner's manual
- русский: Tefal TY8463KL Инструкция по применению