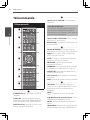
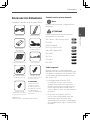
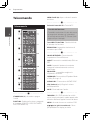
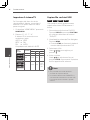
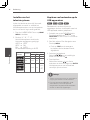
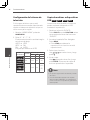
Pioneer dcs 424 Le manuel du propriétaire
- Catégorie
- Lecteurs DVD
- Taper
- Le manuel du propriétaire
Ce manuel convient également à


2
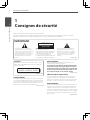
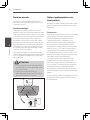
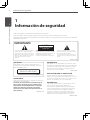
Safety Information
Safety Information
1
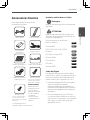
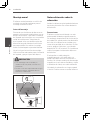
Operating Environment
Operating environment temperature and humidity:
+5 °C to +35 °C (+41 °F to +95 °F); less than 85 %RH
(cooling vents not blocked)
Do not install this unit in a poorly ventilated area, or in
locations exposed to high humidity or direct sunlight (or
strong artificial light)
D3-4-2-1-7c*_A1_En
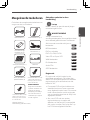
The exclamation point within an equilateral
triangle is intended to alert the user to the
presence of important operating and
maintenance (servicing) instructions in the
literature accompanying the appliance.
The lightning flash with arrowhead symbol,
within an equilateral triangle, is intended to
alert the user to the presence of uninsulated
“dangerous voltage” within the product’s
enclosure that may be of sufficient
magnitude to constitute a risk of electric
shock to persons.
CAUTION:
TO PREVENT THE RISK OF ELECTRIC
SHOCK, DO NOT REMOVE COVER (OR
BACK). NO USER-SERVICEABLE PARTS
INSIDE. REFER SERVICING TO QUALIFIED
SERVICE PERSONNEL.
CAUTION
RISK OF ELECTRIC SHOCK
DO NOT OPEN
IMPORTANT
D3-4-2-1-1_A1_En
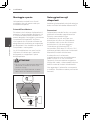
WARNING
This equipment is not waterproof. To prevent a fire or
shock hazard, do not place any container filled with
liquid near this equipment (such as a vase or flower pot)
or expose it to dripping, splashing, rain or moisture.
D3-4-2-1-3_A1_En
WARNING
Before plugging in for the first time, read the following
section carefully.
The voltage of the available power supply differs
according to country or region. Be sure that the
power supply voltage of the area where this unit
will be used meets the required voltage (e.g., 230 V
or 120 V) written on the rear panel.
D3-4-2-1-4*_A1_En
VENTILATION CAUTION
When installing this unit, make sure to leave space
around the unit for ventilation to improve heat radiation
(at least 10 cm at top, 10 cm at rear, and 10 cm at each
side).
WARNING
Slots and openings in the cabinet are provided for
ventilation to ensure reliable operation of the product,
and to protect it from overheating. To prevent fire
hazard, the openings should never be blocked or
covered with items (such as newspapers, table-cloths,
curtains) or by operating the equipment on thick carpet
or a bed.
D3-4-2-1-7b*_A1_En
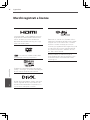
CAUTION
This product is a class 1 laser product classified
under the Safety of laser products, IEC 60825-1:2007.
CLASS 1 LASER PRODUCT
D58-5-2-2a_A1_En
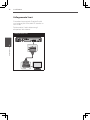
Thank you for buying this Pioneer product.
Please read through these operating instructions so you will know how to operate your model properly.
After you have finished reading the instructions, put them away in a safe place for future reference.
1
Safety Information

3Safety Information
1
Safety Information
WARNING
To prevent a fire hazard, do not place any naked flame
sources (such as a lighted candle) on the equipment.
D3-4-2-1-7a_A1_En
If the AC plug of this unit does not match the AC
outlet you want to use, the plug must be removed
and appropriate one fitted. Replacement and
mounting of an AC plug on the power supply cord of
this unit should be performed only by qualified
service personnel. If connected to an AC outlet, the
cut-off plug can cause severe electrical shock. Make
sure it is properly disposed of after removal.
The equipment should be disconnected by removing
the mains plug from the wall socket when left unused
for a long period of time (for example, when on
vacation).
D3-4-2-2-1a_A1_En
CAUTION
The STANDBY/ON switch on this unit will not
completely shut off all power from the AC outlet.
Since the power cord serves as the main disconnect
device for the unit, you will need to unplug it from the
AC outlet to shut down all power. Therefore, make
sure the unit has been installed so that the power
cord can be easily unplugged from the AC outlet in
case of an accident. To avoid fire hazard, the power
cord should also be unplugged from the AC outlet
when left unused for a long period of time (for
example, when on vacation).
D3-4-2-2-2a*_A1_En
This product is for general household purposes. Any
failure due to use for other than household purposes
(such as long-term use for business purposes in a
restaurant or use in a car or ship) and which requires
repair will be charged for even during the warranty
period.
K041_A1_En
Information for users on collection and disposal of old equipment and used batteries
These symbols on the products, packaging, and/or accompanying documents mean
that used electrical and electronic products and batteries should not be mixed with
general household waste.
For proper treatment, recovery and recycling of old products and used batteries,
please take them to applicable collection points in accordance with your national
legislation.
By disposing of these products and batteries correctly, you will help to save valuable
resources and prevent any potential negative effects on human health and the
environment which could otherwise arise from inappropriate waste handling.
For more information about collection and recycling of old products and batteries,
please contact your local municipality, your waste disposal service or the point of sale
where you purchased the items.
These symbols are only valid in the European Union.
For countries outside the European Union:
If you wish to discard these items, please contact your local authorities or dealer and
ask for the correct method of disposal.
K058a_A1_En
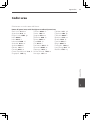
Symbol examples
for batteries
Symbol for
equipment
Pb
POWER-CORD CAUTION
Handle the power cord by the plug. Do not pull out the
plug by tugging the cord and never touch the power
cord when your hands are wet as this could cause a
short circuit or electric shock. Do not place the unit, a
piece of furniture, etc., on the power cord, or pinch the
cord. Never make a knot in the cord or tie it with other
cords. The power cords should be routed such that they
are not likely to be stepped on. A damaged power cord
can cause a fire or give you an electrical shock. Check
the power cord once in a while. When you find it
damaged, ask your nearest PIONEER authorized
service center or your dealer for a replacement.
S002*_A1_En

4
Safety Information
Safety Information
1
These symbols are only valid in the European
Union.
For countries outside the European Union:
If you wish to discard these items, please
contact your local authorities or dealer and ask
for the correct method of disposal.This device is
equipped with a portable battery or accumulator.
Safe way to remove the battery or the battery
from the equipment:
Remove the old battery pack, follow the steps
in reverse order than the assembly. To prevent
contamination of the environment and bring on
possible threat to human and animal health, the
old battery or the battery put in the appropriate
container at designated collection points. Do
not dispose of batteries or battery together with
other waste. It is recommended that you use
local, free reimburse ment system batteries and
accumulators.
The battery shall not be exposed to excessive
heat such as sunshine, fire or the like.
Copyrights
It is forbidden by law to copy, broadcast, show,
broadcast via cable, play in public, or rent
copyrighted material without permission. This
product features the copy protection function
developed by Rovi Corporation. Copy protection
signals are recorded on some discs. When
recording and playing the pictures of these
discs picture noise will appear. This product
incorporates copyright protection technology
that is protected by U.S. patents and other
intellectual property rights. Use of this copyright
protection technology must be authorized by
Rovi Corporation, and is intended for home and
other limited viewing uses only unless otherwise
authorized by Rovi Corporation. Reverse
engineering or disassembly is prohibited.
CONSUMERS SHOULD NOTE THAT NOT ALL
HIGH DEFINITION TELEVISION SETS ARE
FULLY COMPATIBLE WITH THIS PRODUCT
AND MAY CAUSE ARTIFACTS TO BE
DISPLAYED IN THE PICTURE. IN CASE OF
525 OR 625 PROGRESSIVE SCAN PICTURE
PROBLEMS, IT IS RECOMMENDED THAT THE
USER SWITCH THE CONNECTION TO THE
‘STANDARD DEFINITION’ OUTPUT. IF THERE
ARE QUESTIONS REGARDING OUR TV SET
COMPATIBILITY WITH THIS MODEL 525p AND
625p UNIT, PLEASE CONTACT OUR CUSTOMER
SERVICE CENTER.
This item incorporates copy protection
technology that is protected by U.S. patents
and other intellectual property rights of
Rovi Corporation. Reverse engineering and
disassembly are prohibited.

5Safety Information
1
Safety Information
Notes on Copyrights
• Many DVD discs are encoded with copy
protection. Because of this, you should only
connect your player directly to your TV, not
to a VCR. Connecting to a VCR results in a
distorted picture from copy-protected discs.
• Under the U.S. Copyright laws and Copyright
laws of other countries, unauthorized
recording, use, display, distribution, or
revision of television programmes, videotapes,
BD-ROM discs, DVDs, CDs and other
materials may subject you to civil and/or
criminal liability.

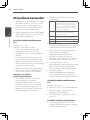
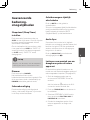
6 Contents
1
2
3
4
5
6
7
1
Safety Information
2 CAUTION
4 Copyrights
2
Preparation
8 Unique Features
8 Playable Discs
9 Supplied Accessories
10 Playable les
12 Front panel
13 Rear panel
14 Remote Control
3
Installation
16 Assemble the speakers
16 Speaker Setup
17 Connecting the cord
18 Wall mounting
18 Additional notes on speaker
19 Positioning the System
20 Connections to Your TV
20 HDMI OUT Connection
21 Video Connection
22 Scart Connection
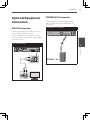
23 Optional Equipment Connection
23 AUX IN Connection
23 PORTABLE IN Connection
24 USB Connection
24 Antenna Connection
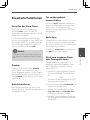
25 Adjust the Initial Settings
25 To display and exit the Initial
Settings Menu
25 Initial Settings Menu
25 Digital Audio Out settings
25 Video Output settings
26 Language settings
26 Display settings
26 Options settings
4
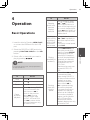
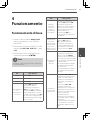
Operation
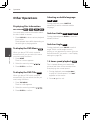
27 Basic Operations
28 Other Operations
28 Displaying Disc Information
on-screen
28 To display the DVD Menu
28 To display the DVD Title
28 Selecting a subtitle language
28 Switches Audio
28 Switches Angle
28 1.4 times speed playback
29 Last Scene Memory
29 A-B Repeat
29 Creating a program list
30 Other functions available from the
program menu
30 Searching a disc
30 Viewing photo les as a slide show
30 Listening to music during slide
show
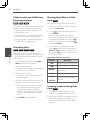
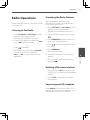
31 Radio Operations
31 Listening to the Radio
31 Presetting the Radio stations

7Contents
1
2
3
4
5
6
7
31 Deleting all the saved stations
31 Improving poor FM reception
32 Seeing information about a radio
station
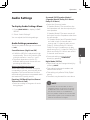
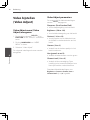
33 Audio Settings
33 To display Audio Settings Menu
33 Audio Settings parameters
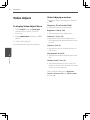
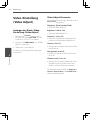
34 Video Adjust
34 To display Video Adjust Menu
34 Video Adjust parameters
35 Advanced Operations
35 Sleep Timer Setting
35 Dimmer
35 Screen Saver
35 Turn o the sound temporarily
35 Audio Sync
35 Listening to music from your
portable player or external device
36 Setting the TV system
36 Copying les on to USB devices
37 Recording audio CD tracks on to
USB devices
38 Karaoke
38 Using karaoke
39 Extra functions for karaoke
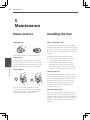
5
Maintenance
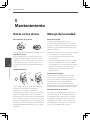
40 Notes on Discs
40 Handling the Unit
6
Troubleshooting
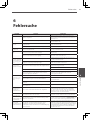
41 Troubleshooting
7
Appendix
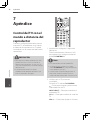
42 Operating the TV with the player’s
remote control
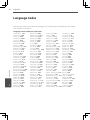
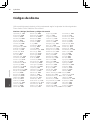
44 Language Codes
45 Area Codes
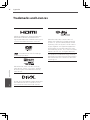
46 Trademarks and Licences
47 Specications

8 Preparation
Preparation
2
2
Preparation
Unique Features
Portable In
Listens to music from your portable device.
(MP3, Notebook, etc)
USB Direct Recording
Records music from CD to your USB
device.
Playable Discs
DVD-Video
• DVD‑Videodiscs
• DVD‑R/‑RW/‑RDLand
DVD+R/+RW/+R DL discs
recorded in the Video mode
DVD VR
DVD-R/-RW/-R DL discs
recorded in the VR mode
Video CD
Video CDs (including Super
VCDs)
CD(R/RW)
• AudioCDs
• CD‑R/‑RW/‑ROMdiscs
containing music recorded in
the CD-DA format
JPEG
JPEG files recorded on
DVD-R/-RW/-R DL discs,
CD-R/-RW/-ROM discs
DivX
DivX video files recorded on
DVD-R/-RW/-R DL discs,
CD-R/-RW/-ROM discs
WMA
WMA files recorded on
DVD-R/-RW/-R DL discs,
CD-R/-RW/-ROM discs
MP3
MP3 files recorded on
DVD-R/-RW/-R DL discs,
CD-R/-RW/-ROM discs
•
Only the discs that have been nalized
can be played.
• ThisunitisnotcompatibletoCPRM.
Discs that cannot be played
• Blu‑raydiscs
• HDDVDs
• AVCHD
• AVCREC
• DVD‑Audiodiscs
• DVD‑RAMdiscs
• SACDs
• CD‑G
• Discsrecordedwithpacketwriting
• Programsthatcanberecordedonly
once and that are (already) recorded on
a DVD-R/-RW/-R DL

9Preparation
2
Preparation
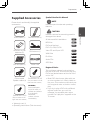
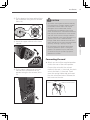
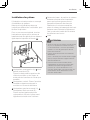
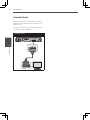
Supplied Accessories
Please check and identify the supplied
accessories.
VIDEO cable (1) Remote Control (1)
AAA/R03 dry cell
batteries (2)
FM Antenna (1)
Non-skid pads (1) Power cord
Colour-coded
Speaker cables (4)
Screws M4 x 16 (16)
(They are used to fix to the
base and lower cabinet.)
WARNING
Store small parts
out of the reach of
children and infants.
If accidentally
swallowed,
contact a doctor
immediately.
Screws M4 x 12 (8)
(They are used to fix the
upper and lower cabinet.)
•Warrantycard(1)
•Operatinginstructions(Thisdocument)
Symbol Used in this Manual
NOTE
Indicates special notes and operating
features.
CAUTION
Indicate cautions for preventing possible
damages from abuse.
All discs and file listed below
ALL
MP3 files
MP3
DVD and finalized
DVD
DVD+R/+RW/-R/-RW
Video CD and Super VCD
VCD
WMA files
WMA
DivX files
DivX
Audio CDs
ACD
JPEG files
JPEG
Regional Codes
This unit has a regional code printed on
the rear of the unit. This unit can play only
DVD discs labeled same as the rear of the
unit or “All”.
• MostDVDdiscshaveaglobewithone
or more numbers in it clearly visible on
the cover. This number must match your
unit’s regional code; or the disc cannot
play.
• IfyoutrytoplayaDVDwithadifferent
regional code from your unit, the
message “Incompatible disc region
number Can’t play disc” appears on the
TV screen.

10 Preparation
Preparation
2
Playable les
• OnlydiscsrecordedinISO9660Level1,
Level 2 and Joliet can be played.
• FilesprotectedbyDRM(DigitalRights
Management) cannot be played.
• Filesotherthantheonesbelow(WMV,
MPEG4-AAC, etc.) are not guaranteed
to play.
Supported video le formats
DivX
Extension: .divx .avi
Resolution: up to 720 x 480
• DivXisamediatechnologycreated
by DivX, Inc. DivX media files contain
image data.
• DivXfilesmayalsoincludesuch
advanced playback functions as menu
screens and selection of multiple
subtitle languages/audio tracks.
• FilesnotcontainingDivXvideosignals
cannot be played, even if they have the
extension “.avi”.
Displaying external subtitle les
• Thefontsetslistedbelowareavailable
for external subtitle files. You can see
the proper font set on-screen by setting
the Subtitle Language on page 26 to
match the subtitle file.
• Thisplayersupportsthefollowing
language groups:
Group 1
Afrikaans (af), Basque (eu), Catalan (ca),
Danish (da), Dutch (nl), English (en), Faroese
(fo), Finnish (fi), French (fr), German (de),
Icelandic (is), Irish (ga), Italian (it), Norwegian
(no), Portuguese (pt), Rhaeto-Romanic (rm),
Scottish (gd), Spanish (es), Swedish (sv)
Group 2
Albanian (sq), Croatian (hr), Czech (cs),
Hungarian (hu), Polish (pl), Romanian (ro),
Slovak (sk), Slovenian (sl)
Group 3
Bulgarian (bg), Byelorussian (be), Macedonian
(mk),Russian (ru), Serbian (sr), Ukrainian (uk)
Group 4
Hebrew (iw), Yiddish (ji)
Group 5
Turkish (tr)
• Someexternalsubtitlefilesmaybe
displayed incorrectly or not at all.
• Forexternalsubtitlefilesthefollowing
subtitle format filename extensions are
supported (please note that these files
are not shown within the disc navigation
menu): .srt, .sub, .ssa, .smi
• Thefilenameofthemoviefilehasto
be repeated at the beginning of the
filename for the external subtitle file.
• Thenumberofexternalsubtitlefiles
which can be switched for the same
movie file is limited to a maximum of 10.

11Preparation
2
Preparation
Supported image le formats
JPEG
Extension: .jpg .jpeg
• Resolution:Upto3072x2048pixels
• ThisplayersupportsbaselineJPEG.
• ThisplayersupportsExifVer.2.2.
Supported audio le formats
• ThisplayerdoesnotsupportVBR
(Variable Bit Rate) and lossless
encoding.
Windows Media™ Audio (WMA)
Extension: .wma
• Samplingfrequencies:32kHz,44.1kHz
and 48 kHz
• Bitrate:Upto192kbps
• Thisplayersupportsfilesencoded
using Windows Media Player Ver. 7/7.1,
Windows Media Player for Windows XP
andWindowsMediaPlayer9Series.
• WindowsMediaiseitheraregistered
trademark or trademark of Microsoft
Corporation in the United States and/or
other countries.
• Thisproductincludestechnologyowned
by Microsoft Corporation and cannot
be used or distributed without a license
from Microsoft Licensing, Inc.
MPEG-1 Audio Layer 3 (MP3)
Extension: .mp3
• Samplingfrequencies:32kHz,44.1kHz
and 48 kHz
• Bit‑rates:128kbpsorhigher
recommended
• ThisPlayersupportsID3tagVer1.1.
Compatible USB Devices
• MP3Player:FlashtypeMP3player.
• USBFlashDrive:Devicesthatsupport
USB 2.0 or USB 1.1.
• TheUSBfunctionofthisunitdoesnot
support some USB devices.
USB device requirement
• Deviceswhichrequireadditional
program installation connected to a
computer, are not supported.
• DonotextracttheUSBdevicewhilein
operation.
• ForalargecapacityUSB,itmay
take longer than a few minute to be
searched.
• Topreventdataloss,backupalldata.
• IfyouuseaUSBextensioncableorUSB
hub, the USB device is not recognized.
• UsingNTFSfilesystemisnot
supported. (Only FAT(16/32) file system
is supported.)
• Thisunitisnotsupportedwhenthetotal
number of files is 600 or more.
• ExternalHDD,Cardreaders,Locked
devices, or hard type USB devices are
not guaranteed to support.
• USBportoftheunitcannotbe
connected to PC. The unit can not be
used as a storage device.
• Somecopyright‑protectedfilescannot
be played.
• Themaximumdisplayablenumberof
characters for the folder and file names
on the Disc Navigator is 14.
• Theorderofthefolderandfilenames
displayed on the Disc Navigator is
dependant on the time and date when
the folders or files were created on the
USB device.

12 Preparation
Preparation
2
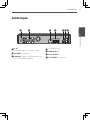
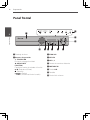
1
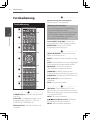
Disc Tray
2
Operation buttons
STANDBY/ON
Switches the unit ON or OFF.
OPEN/CLOSE
FUNCTION
Changes the input source or function.
(PLAY/PAUSE)
(STOP)
(SKIP)
– TUNE +
(Radio tuning)
3
ECHO VOL
4
MIC VOL
5
MIC 1, 2
6
Remote Sensor
7
PORTABLE IN
8
USB
port
9
Display window
a
Volume control
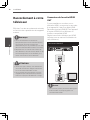
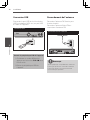
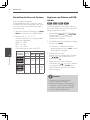
Front panel
1
2
3
4
56789a

13Preparation
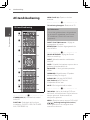
2
Preparation
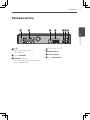
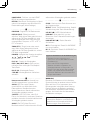
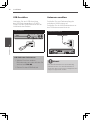
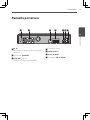
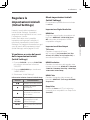
Rear panel
1
AC IN
Plug into the power source.
2
SPEAKERS
connectors
3
HDMI OUT
(type A)
Connects to TV with HDMI inputs.
4
Scart connector
5
VIDEO OUTPUT
6
AUX (L/R) INPUT
7
FM ANTENNA
connector
1 2 3 4 5 6 7

14 Preparation
Preparation
2
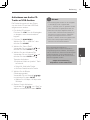
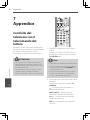
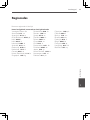
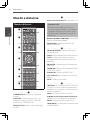
Remote Control
Remote control
1
2
3
4
5
6
7
• • • • • • • • • • • • •1 • • • • • • • • • • • •
STANDBY/ON (
) :
Switches the unit ON or
OFF.
FUNCTION :
Selects the function and input
source. (DVD/CD, USB, FM TUNER, AUX,
PORTABLE IN)
OPEN/CLOSE (
) :
Opens and closes the
disc tray.
• • • • • • • • • • • • 2 • • • • • • • • • • • •
TV CONTROL buttons :
Controls the TV.
Controlling the TV
You can control the sound level, input
source, and power switching of Pioneer
TVs as well (See page 42 for details).
DIRECT FUNCTION buttons :
Changes input
source or function.
RESOLUTION :
Sets the output resolution
for HDMI.
• • • • • • • • • • • • 3 • • • • • • • • • • • •
SOUND RETRIEVER :
Switches Sound
Retriever setting.
NIGHT :
Switches the night mode ON or OFF.
SLEEP :
Sets the system to turn off
automatically at a specified time.
EQUALIZER :
Chooses sound impressions.
SURROUND:
Switches between 5 Speaker
Mode and Dolby Pro Logic II.
AUDIO SYNC :
Switches AUDIO SYNC.
VOL (Volume) (+/–) :
Adjusts speaker
volume.
MUTE :
Mutes the sound.
• • • • • • • • • • • • 4 • • • • • • • • • • • •
TOP MENU :
If the current DVD title has
a menu, the title menu appears on the
screen. Otherwise, the disc menu may not
appear.
MENU :
Accesses the menu on a DVD disc.
/ / / (up/down/left/right) :
Used to
navigate on-screen displays.
ENTER :
Acknowledges menu selection.

15Preparation
2
Preparation
HOME MENU :
Press to display/hide HOME
MENU.
RETURN :
Moves backwards in the menu or
exits the Initial Settings menu.
• • • • • • • • • • • • 5 • • • • • • • • • • • •
PROGRAM :
Registers FM radio stations.
DISPLAY (RDS) :
Accesses On-Screen
Display. When this button is pressed
while the FM tuner is selected, the Display
window on the unit will switch as follows:
Frequency
→
PTY
→
RT
→
PS
→
Frequency
ZOOM (PTY) :
Will zoom in or zoom out.
When this button is pressed while the FM
tuner is selected, the PTY value will switch.
DIMMER :
Adjusts the display brightness.
(
),
(
) :
Searches
backward or forward.
PLAY (
d
) :
Starts playback.
PREV (
), NEXT (
) :
Goes to next or
previous title/chapter/track/file.
PAUSE (
) :
Pauses playback.
STOP (
) :
Stops playback or recording.
• • • • • • • • • • • • 6 • • • • • • • • • • • •
0 to 9 numerical buttons :
Selects
numbered options in a menu.
AUDIO :
For discs or files including multiple
audio streams/channels, the audio stream/
channel can be changed during playback.
SUBTITLE :
On DVD-Video or DivX discs
containing subtitles in multiple languages,
the subtitle can be changed during
playback.
ANGLE :
On DVD-Video discs featuring
multiple angle, the angle can be changed
during playback.
• • • • • • • • • • • • 7 • • • • • • • • • • • •
CLEAR :
Removes a track number on the
Program List.
REPEAT :
Select Title Repeat, Chapter
Repeat or Track Repeat.
USB REC (
) :
USB Direct Recording.
KARAOKE :
Press to display the Karaoke
Settings screen.
KARAOKE REC (
) :
Starts recording
KARAOKE.
KEY
:
Lowers the key for KARAOKE by a
semitone.
KEY
:
Raises the key for KARAOKE by a
semitone.
Put the battery into the remote control
• Makesureforthe+(plus)and–(minus)
on the battery to be matched on the remote
control.
• Thebatteriesincludedwiththeunitareto
check initial operations; they may not last
over a long period. We recommend using
alkaline batteries that have a longer life.
WARNING
Do not use or store batteries in direct
sunlight or other excessively hot place,
such as inside a car or near a heater.
This can cause batteries to leak, overheat,
explode or catch fire. It can also reduce the
life or performance of batteries.
When disposing of used batteries, please
comply with governmental regulations or
environmental public institution’s rules
that apply in your country/area.

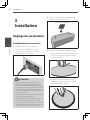
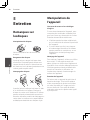
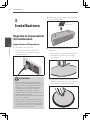
16 Installation
Installation
3
Assemble the speakers
Speaker Setup
1.
Connect the wires to the player.
Insert the cables connected to the
player to the same colored connector
on the speaker.
CAUTION
• ThesespeakerterminalscarryHAZARDOUS
LIVE voltage. To prevent the risk of electric
shock when connecting or disconnecting
the speaker cables, disconnect the power
cord before touching any uninsulated parts.
• Donotconnectanyspeakersotherthan
those supplied to this system.
• Donotconnectthesuppliedspeakersto
any amplifier other than the one supplied
with this system. Connection to any other
amplifier may result in malfunction or fire.
2.
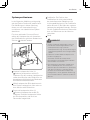
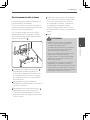
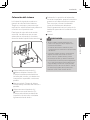
Attach the non-skid pads to the base of
each speaker.
3.
Mount the front/surround speaker.
1
Pass the speaker cable through the
cable hole on the side of the base.
2
Insert the lower cabinet to the base
so that the cable hole is positioned at
the backside.
3
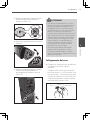
Installation

17Installation
3
Installation
3
Fix the base to the lower cabinet from
the underside, using the four screws
(M4 x 16).
4
Insert the upper cabinet to the lower
cabinet.
5
Fix the upper cabinet and the lower
cabinet from the backside of the
speaker using the two screws (M4 x
12).
CAUTION
• Becarefulnottotightenscrewsexcessively.
If excessive force is used to tighten screws,
the threads of screw and/or nut may be
damaged. Use a middle-sized manual
screwdriver during assembly. Do not use
power screwdrivers or oversized screwdrivers
that may exert excessive force on the screws
and nuts. Confirm that no foreign matter is
stuck to the base or the lower cabinet during
assembly. If the unit is assembled with
foreign matter stuck between the base and
lower cabinet, the unit may not be assembled
securely, resulting in tipping or falling.
• Donotstandonthespeakerstandbase
of the tall speaker to push or swing the
speaker. The speaker may fall and break,
or someone may be injured. Pay special
attention to children.
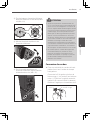
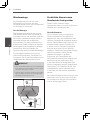
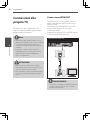
Connecting the cord
1.
Attach one end of the supplied speaker
cord to the rear of the each speaker.
Connect the wire with the colored
marker to the red (+) terminal; the plain
wiretotheblack(–)terminal.Press
down the spring-loaded tab and insert
the wire, as shown below. Release the
tab to secure the wire.
Red (+)
Black (–)
Red colored marker

18 Installation
Installation
3
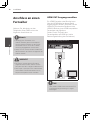
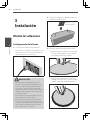
Wall mounting
The center speaker have a mounting hole
which can be used to mount the speaker
on the wall.
Before mounting
Remember that the speaker system is
heavy and that its weight could cause the
screws to work loose, or the wall material
to fail to support it, resulting in the speaker
falling. Make sure that the wall you intend
to mount the speakers on is strong enough
to support them. Do not mount on plywood
or soft surface walls.
Mounting screws are not supplied. Use
screws suitable for the wall material and
support the weight of the speaker.
CAUTION
• Ifyouareunsureofthequalitiesand
strength of the wall, consult a professional
for advice.
• Pioneerisnotresponsibleforanyaccidents
or damage that result from improper
installation.
5 mm to 7 mm
Mounting screw
(not supplied)
5 mm
10 mm
Additional notes on speaker
Install the main front left and right
speakers at an equal distance from the TV.
Precautions:
The center speaker supplied with this
system are magnetically shielded. However,
depending on the installation location,
color distortion may occur if the speaker is
installed extremely close to the screen of
a television set. If this case happens, turn
the power switch of the television set OFF,
and turn it ON after 15 min. to 30 min. If
the problem persists, place the speaker
system away from the television set.
The subwoofer is not magnetically shielded
and so should not be placed near a TV or
monitor. Magnetic storage media (such as
floppy discs and tape or video cassettes)
should also not be kept close to the
subwoofer.
Do not attach the subwoofer to a wall or
ceiling. They may fall off and cause injury.

19Installation
3
Installation
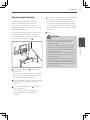
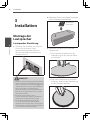
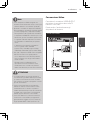
Positioning the System
The following illustration shows an
example of positioning the system.
Note that the illustrations in these
instructions differ from the actual unit for
explanation purposes.
For the best possible surround sound, all
the speakers other than the subwoofer
should be placed at the same distance
from the listening position (
).
Front left speaker (L)/ Front right
speaker (R):
Place the front speakers to the sides of
the monitor or screen and as flush with
the screen surface as possible.
Center speaker: Place the center speaker
below or in front of the monitor or
screen.
Surround left speaker (L)/ Surround
right speaker (R):
Place these speakers behind your
listening position, facing slightly
inwards.
Subwoofer: The position of the subwoofer
is not so critical, because low bass
sounds are not highly directional. But
it is better to place the subwoofer near
the front speakers. Turn it slightly toward
the center of the room to reduce the wall
reflections.
Unit
CAUTION
• Becarefultomakesurechildrendonot
put their hands or any objects into the
*subwoofer duct.
*subwoofer duct: A hole for plentiful bass
sound on subwoofer cabinet (enclosure).
• Placethecentrespeakeratasafedistance
from the child’s reach.
Otherwise it may result in the speaker falling
down and causing personal injury and/or
property damage.
• Thespeakerscontainmagnetparts,socolor
irregularity may occur on the TV screen
(CRT) or PC monitor screen. Please use the
speakers away from the TV screen (CRT) or
PC monitor screen.

20 Installation
Installation
3
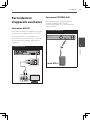
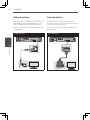
Connections to Your
TV
Make one of the following connections,
depending on the capabilities of your
existing equipment.
NOTE
• DependingonyourTVandotherequipment
you wish to connect, there are various ways
you could connect the player. Use only one
of the connections described in this manual.
• PleaserefertothemanualsofyourTV,
Stereo System or other devices as necessary
to make the best connections.
CAUTION
• Makesuretheunitisconnecteddirectlyto
the TV. Tune the TV to the correct video input
channel.
• DonotconnectyourunitviayourVCR.
The image could be distorted by the copy
protection system.
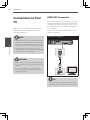
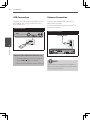
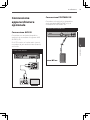
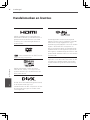
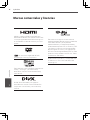
HDMI OUT Connection
If you have a HDMI TV or monitor, you can
connect it to this unit using a HDMI cable.
Connect the HDMI OUT jack on the unit to
the HDMI IN jack on a HDMI compatible
TV or monitor.
Set the TV’s source to HDMI (refer to TV’s
Owner’s manual).
HDMI OUT Connection
TIP
You can fully enjoy digital audio and video
signals together with this HDMI connection.
La page charge ...
La page charge ...
La page charge ...
La page charge ...
La page charge ...
La page charge ...
La page charge ...
La page charge ...
La page charge ...
La page charge ...
La page charge ...
La page charge ...
La page charge ...
La page charge ...
La page charge ...
La page charge ...
La page charge ...
La page charge ...
La page charge ...
La page charge ...
La page charge ...
La page charge ...
La page charge ...
La page charge ...
La page charge ...
La page charge ...
La page charge ...
La page charge ...
La page charge ...
La page charge ...
La page charge ...
La page charge ...
La page charge ...
La page charge ...
La page charge ...
La page charge ...
La page charge ...
La page charge ...
La page charge ...
La page charge ...
La page charge ...
La page charge ...
La page charge ...
La page charge ...
La page charge ...
La page charge ...
La page charge ...
La page charge ...
La page charge ...
La page charge ...
La page charge ...
La page charge ...
La page charge ...
La page charge ...
La page charge ...
La page charge ...
La page charge ...
La page charge ...
La page charge ...
La page charge ...
La page charge ...
La page charge ...
La page charge ...
La page charge ...
La page charge ...
La page charge ...
La page charge ...
La page charge ...
La page charge ...
La page charge ...
La page charge ...
La page charge ...
La page charge ...
La page charge ...
La page charge ...
La page charge ...
La page charge ...
La page charge ...
La page charge ...
La page charge ...
La page charge ...
La page charge ...
La page charge ...
La page charge ...
La page charge ...
La page charge ...
La page charge ...
La page charge ...
La page charge ...
La page charge ...
La page charge ...
La page charge ...
La page charge ...
La page charge ...
La page charge ...
La page charge ...
La page charge ...
La page charge ...
La page charge ...
La page charge ...
La page charge ...
La page charge ...
La page charge ...
La page charge ...
La page charge ...
La page charge ...
La page charge ...
La page charge ...
La page charge ...
La page charge ...
La page charge ...
La page charge ...
La page charge ...
La page charge ...
La page charge ...
La page charge ...
La page charge ...
La page charge ...
La page charge ...
La page charge ...
La page charge ...
La page charge ...
La page charge ...
La page charge ...
La page charge ...
La page charge ...
La page charge ...
La page charge ...
La page charge ...
La page charge ...
La page charge ...
La page charge ...
La page charge ...
La page charge ...
La page charge ...
La page charge ...
La page charge ...
La page charge ...
La page charge ...
La page charge ...
La page charge ...
La page charge ...
La page charge ...
La page charge ...
La page charge ...
La page charge ...
La page charge ...
La page charge ...
La page charge ...
La page charge ...
La page charge ...
La page charge ...
La page charge ...
La page charge ...
La page charge ...
La page charge ...
La page charge ...
La page charge ...
La page charge ...
La page charge ...
La page charge ...
La page charge ...
La page charge ...
La page charge ...
La page charge ...
La page charge ...
La page charge ...
La page charge ...
La page charge ...
La page charge ...
La page charge ...
La page charge ...
La page charge ...
La page charge ...
La page charge ...
La page charge ...
La page charge ...
La page charge ...
La page charge ...
La page charge ...
La page charge ...
La page charge ...
La page charge ...
La page charge ...
La page charge ...
La page charge ...
La page charge ...
La page charge ...
La page charge ...
La page charge ...
La page charge ...
La page charge ...
La page charge ...
La page charge ...
La page charge ...
La page charge ...
La page charge ...
La page charge ...
La page charge ...
La page charge ...
La page charge ...
La page charge ...
La page charge ...
La page charge ...
La page charge ...
La page charge ...
La page charge ...
La page charge ...
La page charge ...
La page charge ...
La page charge ...
La page charge ...
La page charge ...
La page charge ...
La page charge ...
La page charge ...
La page charge ...
La page charge ...
La page charge ...
La page charge ...
La page charge ...
La page charge ...
La page charge ...
La page charge ...
La page charge ...
La page charge ...
La page charge ...
La page charge ...
La page charge ...
La page charge ...
La page charge ...
La page charge ...
La page charge ...
La page charge ...
La page charge ...
La page charge ...
La page charge ...
La page charge ...
La page charge ...
La page charge ...
La page charge ...
La page charge ...
La page charge ...
La page charge ...
La page charge ...
La page charge ...
La page charge ...
La page charge ...
La page charge ...
La page charge ...
La page charge ...
La page charge ...
La page charge ...
La page charge ...
La page charge ...
La page charge ...
La page charge ...
La page charge ...
La page charge ...
La page charge ...
-
 1
1
-
 2
2
-
 3
3
-
 4
4
-
 5
5
-
 6
6
-
 7
7
-
 8
8
-
 9
9
-
 10
10
-
 11
11
-
 12
12
-
 13
13
-
 14
14
-
 15
15
-
 16
16
-
 17
17
-
 18
18
-
 19
19
-
 20
20
-
 21
21
-
 22
22
-
 23
23
-
 24
24
-
 25
25
-
 26
26
-
 27
27
-
 28
28
-
 29
29
-
 30
30
-
 31
31
-
 32
32
-
 33
33
-
 34
34
-
 35
35
-
 36
36
-
 37
37
-
 38
38
-
 39
39
-
 40
40
-
 41
41
-
 42
42
-
 43
43
-
 44
44
-
 45
45
-
 46
46
-
 47
47
-
 48
48
-
 49
49
-
 50
50
-
 51
51
-
 52
52
-
 53
53
-
 54
54
-
 55
55
-
 56
56
-
 57
57
-
 58
58
-
 59
59
-
 60
60
-
 61
61
-
 62
62
-
 63
63
-
 64
64
-
 65
65
-
 66
66
-
 67
67
-
 68
68
-
 69
69
-
 70
70
-
 71
71
-
 72
72
-
 73
73
-
 74
74
-
 75
75
-
 76
76
-
 77
77
-
 78
78
-
 79
79
-
 80
80
-
 81
81
-
 82
82
-
 83
83
-
 84
84
-
 85
85
-
 86
86
-
 87
87
-
 88
88
-
 89
89
-
 90
90
-
 91
91
-
 92
92
-
 93
93
-
 94
94
-
 95
95
-
 96
96
-
 97
97
-
 98
98
-
 99
99
-
 100
100
-
 101
101
-
 102
102
-
 103
103
-
 104
104
-
 105
105
-
 106
106
-
 107
107
-
 108
108
-
 109
109
-
 110
110
-
 111
111
-
 112
112
-
 113
113
-
 114
114
-
 115
115
-
 116
116
-
 117
117
-
 118
118
-
 119
119
-
 120
120
-
 121
121
-
 122
122
-
 123
123
-
 124
124
-
 125
125
-
 126
126
-
 127
127
-
 128
128
-
 129
129
-
 130
130
-
 131
131
-
 132
132
-
 133
133
-
 134
134
-
 135
135
-
 136
136
-
 137
137
-
 138
138
-
 139
139
-
 140
140
-
 141
141
-
 142
142
-
 143
143
-
 144
144
-
 145
145
-
 146
146
-
 147
147
-
 148
148
-
 149
149
-
 150
150
-
 151
151
-
 152
152
-
 153
153
-
 154
154
-
 155
155
-
 156
156
-
 157
157
-
 158
158
-
 159
159
-
 160
160
-
 161
161
-
 162
162
-
 163
163
-
 164
164
-
 165
165
-
 166
166
-
 167
167
-
 168
168
-
 169
169
-
 170
170
-
 171
171
-
 172
172
-
 173
173
-
 174
174
-
 175
175
-
 176
176
-
 177
177
-
 178
178
-
 179
179
-
 180
180
-
 181
181
-
 182
182
-
 183
183
-
 184
184
-
 185
185
-
 186
186
-
 187
187
-
 188
188
-
 189
189
-
 190
190
-
 191
191
-
 192
192
-
 193
193
-
 194
194
-
 195
195
-
 196
196
-
 197
197
-
 198
198
-
 199
199
-
 200
200
-
 201
201
-
 202
202
-
 203
203
-
 204
204
-
 205
205
-
 206
206
-
 207
207
-
 208
208
-
 209
209
-
 210
210
-
 211
211
-
 212
212
-
 213
213
-
 214
214
-
 215
215
-
 216
216
-
 217
217
-
 218
218
-
 219
219
-
 220
220
-
 221
221
-
 222
222
-
 223
223
-
 224
224
-
 225
225
-
 226
226
-
 227
227
-
 228
228
-
 229
229
-
 230
230
-
 231
231
-
 232
232
-
 233
233
-
 234
234
-
 235
235
-
 236
236
-
 237
237
-
 238
238
-
 239
239
-
 240
240
-
 241
241
-
 242
242
-
 243
243
-
 244
244
-
 245
245
-
 246
246
-
 247
247
-
 248
248
-
 249
249
-
 250
250
-
 251
251
-
 252
252
-
 253
253
-
 254
254
-
 255
255
-
 256
256
-
 257
257
-
 258
258
-
 259
259
-
 260
260
-
 261
261
-
 262
262
-
 263
263
-
 264
264
-
 265
265
-
 266
266
-
 267
267
-
 268
268
-
 269
269
-
 270
270
-
 271
271
-
 272
272
-
 273
273
-
 274
274
-
 275
275
-
 276
276
-
 277
277
-
 278
278
-
 279
279
-
 280
280


Pioneer dcs 424 Le manuel du propriétaire
- Catégorie
- Lecteurs DVD
- Taper
- Le manuel du propriétaire
- Ce manuel convient également à
dans d''autres langues
- italiano: Pioneer dcs 424 Manuale del proprietario
- English: Pioneer dcs 424 Owner's manual
- español: Pioneer dcs 424 El manual del propietario
- Deutsch: Pioneer dcs 424 Bedienungsanleitung
- Nederlands: Pioneer dcs 424 de handleiding
Documents connexes
Autres documents
-
LG MDS715 Manuel utilisateur
-
LG HT355SD-F2 Manuel utilisateur
-
LG HT355SD Le manuel du propriétaire
-
-
LG MDS715 Le manuel du propriétaire
-
-
-
LG HT805PM Mode d'emploi
-
-