Hilti XBT 4000-A Mode d'emploi
- Catégorie
- Perceuses électriques
- Taper
- Mode d'emploi

XBT 4000-A
Operating instructions en
Mode d’emploi fr
zh
ja
ko
ar
Printed: 25.11.2015 | Doc-Nr: PUB / 5071410 / 000 / 02

XBT 4000-A
1
Printed: 25.11.2015 | Doc-Nr: PUB / 5071410 / 000 / 02

2
1
3
1
4
XBT 4000-A
5 6
8
7
Printed: 25.11.2015 | Doc-Nr: PUB / 5071410 / 000 / 02

9
Printed: 25.11.2015 | Doc-Nr: PUB / 5071410 / 000 / 02

1
en
ORIGINAL OPERATING INSTRUCTIONS
XBT4000-A drill
1. General information
1.1 Signal words
-CAUTION-
Used to draw attention to a potentially dangerous situ-
ation which could lead to minor personal injury or dam-
age to the equipment or other property.
-NOTE-
Used to draw attention to an instruction or other useful
information.
1.2 Pictograms
Contents Page
1. General information 1
2. Description 2
3. Insert tools and accessories 2
4. Technical data 3
5. Safety rules 4
6. Before use 6
7. Operation 6
8. Care and maintenance 8
9. Troubleshooting 9
10. Disposal 9
11. Manufacturer's warranty – tools 10
12. Declaration of conformity (original) 10
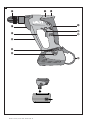
Operating controls and components
On / off switch (with electronic speed control)
Lockbutton for sustained operation
Chuck
Cooling air exit
Rating plate
Gearing
Scaffold hook
Belt hook
Motor
Grip
Battery release button
Motor cooling air intake
These numbers refer to the corresponding illustra-
tions. The illustrations can be found on the fold-out
cover pages. Keep these pages open while studying the
operating instructions.
In these operating instructions, the designation “the tool”
always refers to the XBT 4000-A with battery fitted.
Location of identification data on the tool
The type designation, item number, year of manufacture
and revision level are printed on the type plate on the tool.
The serial number can be found on the left side of the
motor housing. Make a note of this information in your
operating instructions and always refer to it when
making an enquiry to your Hilti representative or service
department.
Type: XBT 4000-A
Serial no.:
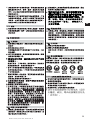
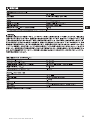
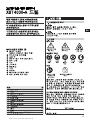
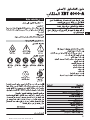
Warning signs
Symbols
Obligation signs
It is essential that the operating instructions
are read before the tool is operated for the
first time.
Always keep these operating instructions
with the tool.
Ensure that the operating instructions are
with the tool when it is given to other per-
sons.
General warning Warning: electricity
Warning: caustic
substances
Read the operating
instructions before
use.
Return waste material
for recycling.
Wear eye
protection
Wear
breathing
protection
Wear ear
protection
Wear
protective
gloves
Safety helmet
must be worn
Printed: 25.11.2015 | Doc-Nr: PUB / 5071410 / 000 / 02

2
en
2. Description
The XBT 4000-A is a cordless drill for professional use.
For maximum efficiency and comfort, we recommend
using the pistol grip to hold the tool in line with the
forearm . The motor cooling air is drawn in though
the slits and expelled from the outlet. The drill is suit-
able for left- and right-handed use. Its nonslip rubber-
padded grip reduces fatigue.
Use as intended
The XBT 4000-A is a cordless drill for drilling in steel.
It is suitable for use on any type of building site, e.g.
shipyards, oil platforms, etc. Its main application is
drilling painted steel (4.0mm diameter with TX-BT 4/7-
80 / 110 / 150 step drill bit). Only the specified tools
and batteries may be used.
● Manipulation or modification of the tool is not per-
missible.
● To avoid the risk of injury, use only original Hilti
accessories and ancillary equipment.
● Observe the information printed in the operating
instructions concerning operation, care and
maintenance.
● The tool and its ancillary equipment may present
hazards when used incorrectly by untrained per-
sonnel or not as directed.
The following items are supplied in a cardboard box:
– Drill with chuck
– Operating Instructions
Main features of the tool
– Vibration-absorbing grip (synthetic rubber)
– Smooth speed control
– Gearing with permanent lubrication
– Automatic cut-out carbon brushes
– Scaffold hook and belt hook
(pivoting and removable)
– Lockbutton for sustained operation
– Cooling air guidance (air exit)
3. Tools and accessories
Item Designation Item number
Step drill bit TX-BT 4/7-80 377079/9
Step drill bit TX-BT 4/7-110 377080/7
Step drill bit TX-BT 4/7-150 377081/5
Centering device X-BT CD 18/24 378885/8
Charger C7/24
Battery SFB 185
Belt hook
Scaffold hook
Belt adapter SFB 180/185 BAP
Printed: 25.11.2015 | Doc-Nr: PUB / 5071410 / 000 / 02

3
en
4. Technical data
XBT 4000-A drill
Rated voltage 18 V DC
–––
- - -
Drill bit diameter 5 mm (main applications 4 mm dia.)
Torque < 6 Nm
Speed 0–4000 r.p.m.
Speed control Electronic, using ON/OFF switch
Dimensions (L×W×H) 250×69×265 mm
Weight in accordance with EPTA-procedure 01/2003 2.5 kg
Gearing section sealed to prevent ingress of dust and permanently lubricated to avoid the need for maintenance
-NOTE-
The vibration emission level given in this information sheet has been measured in accordance with a standardised
test given in EN 60745 and may be used to compare one tool with another. It may be used for a preliminary assess-
ment of exposure. The declared vibration emission level represents the main applications of the tool. However if
the tool is used for different applications, with different accessories or poorly maintained, the vibration emission
may differ. This may significantly increase the exposure level over the total working period. An estimation of the
level of exposure to vibration should also take into account the times when the tool is switched off or when it is
running but not actually doing the job. This may significantly reduce the exposure level over the total working
period. Identify additional safety measures to protect the operator from the effects of vibration such as: maintain
the tool and the accessories, keep the hands warm, organisation of work patterns.
Noise and vibration information (measured to EN 60745):
Typical A-weighted sound power level: 86 dB (A)
Typical A-weighted sound pressure level: 75 dB (A)
For the given sound power level as per EN 60745, the tolerance is 3 dB.
Triaxial vibration value (vibration vector sum)
Measured in accordance with EN 60745-2-1 prAA: 2005
Drilling in metal, (a
h, D
) < 2.5 m/s
2
Uncertainty (K) for triaxial vibration value 1.5 m/s
2
Battery SFB 185
Rated voltage 18 V DC
–––
- - -
Capacity 18 V × 3,0 Ah = 54 Wh
Weight 1.15 kg
Temperature monitoring yes
Type of cell SCB C nickel metal hydride
Number of cells 15
Specifications are subject to change without notice
Printed: 25.11.2015 | Doc-Nr: PUB / 5071410 / 000 / 02

4
en
5. Safety rules
5.1 General safety rules
-WARNING- Read all instructions!
Failure to follow
all instructions listed below may result in electric shock,
fire and/or serious injury. The term "power tool" in all
of the warnings listed below refers to your mains oper-
ated (corded) power tool or battery operated (cord-
less) power tool.
SAVE THESE INSTRUCTIONS
5.1.1 Work area
a) Keep the work area clean and well lit.
Cluttered
and dark areas invite accidents.
b) Do not operate power tools in explosive atmos-
pheres, such as in the presence of flammable liq-
uids, gases or dust.
Power tools create sparks
which may ignite the dust or fumes.
c)Keep children and bystanders away while operat-
ing a power tool.
Distractions can cause you to lose
control.
5.1.2 Electrical safety
a) Power tool plugs must match the outlet. Never
modify the plug in any way. Do not use any adapter
plugs with earthed (grounded) power tools.
Unmod-
ified plugs and matching outlets will reduce risk of
electric shock.
b) Avoid body contact with earthed or grounded sur-
faces such as pipes, radiators, ranges and refrig-
erators.
There is an increased risk of electric shock
if your body is earthed or grounded.
c) Do not expose power tools to rain or wet condi-
tions.
Water entering a power tool will increase the
risk of electric shock.
d) Do not abuse the cord. Never use the cord for car-
rying, pulling or unplugging the power tool. Keep
cord away from heat, oil, sharp edges or moving
parts.
Damaged or entangled cords increase the
risk of electric shock.
e) When operating a power tool outdoors, use an
extension cord approved for outdoor use.
Use of
a cord suitable for outdoor use reduces the risk of
electric shock.
5.1.3 Personal safety
a) Stay alert, watch what you are doing and use com-
mon sense when operating a power tool. Do not
use a power tool while you are tired or under the
influence of drugs, alcohol or medication.
A moment
of inattention while operating power tools may result
in serious personal injury.
b) Use safety equipment. Always wear eye protec-
tion.
Safety equipment such as dust mask, non-
skid safety shoes, hard hat, or hearing protection
used for appropriate conditions will reduce per-
sonal injuries.
c) Avoid accidental starting. Ensure the switch is in
the off position before plugging in.
Carrying pow-
er tools with your finger on the switch or plugging
in power tools that have the switch on invites acci-
dents.
d) Remove any adjusting key or wrench before turn-
ing the power tool on.
A wrench or a key left attached
to a rotating part of the power tool may result in
personal injury.
e) Do not overreach. Keep proper footing and bal-
ance at all times.
This enables better control of the
power tool in unexpected situations.
f) Dress properly. Do not wear loose clothing or jew-
ellery. Keep your hair, clothing and gloves away
from moving parts.
Loose clothes, jewellery or long
hair can be caught in moving parts.
g) If devices are provided for the connection of dust
extraction and collection facilities, ensure these
are connected and properly used.
Use of these
devices can reduce dust related hazards.
5.1.4 Power tool use and care
a) Do not force the power tool. Use the correct pow-
er tool for your application.
The correct power tool
will do the job better and safer at the rate for which
it was designed.
b) Do not use the power tool if the switch does not
turn it on and off.
Any power tool that cannot be
controlled with the switch is dangerous and must
be repaired.
c) Disconnect the plug from the power source and/or
the battery pack from the power tool before mak-
ing any adjustments, changing accessories, or
storing power tools.
Such preventive safety mea-
sures reduce the risk of starting the power tool acci-
dentally.
d) Store idle power tools out of the reach of children
and do not allow persons unfamiliar with the pow-
er tool or these instructions to operate the power
tool.
Power tools are dangerous in the hands of
untrained users.
e) Maintain power tools. Check for misalignment or
binding of moving parts, breakage of parts and
any other condition that may affect the power tool's
operation. If damaged, have the power tool repaired
before use.
Many accidents are caused by poorly
maintained power tools.
f) Keep cutting tools sharp and clean.
Properly main-
tained cutting tools with sharp cutting edges are less
likely to bind and are easier to control.
g) Use the power tool, accessories and tool bits etc.,
in accordance with these instructions and in the
manner intended for the particular type of power
tool, taking into account the working conditions
and the work to be performed.
Use of the power
tool for operations different from those intended
could result in a hazardous situation.
Printed: 25.11.2015 | Doc-Nr: PUB / 5071410 / 000 / 02

i)
Dust from material such as paint containing lead,
some wood species, minerals and metal may be
harmful. Contact with or inhalation of the dust may
cause allergic reactions and/or respiratory diseases
to the operator or bystanders. Certain kinds of dust
are classified as carcinogenic such as oak and beech
dust especially in conjunction with additives for
wood conditioning (chromate, wood preservative).
Material containing asbestos must only be treated
by specialists.
Where the use of a dust extraction
device is possible it shall be used. To achieve a
high level of dust collection, use a suitable vacu-
um cleaner of the type recommended by Hilti for
wood dust and/or mineral dust together with this
tool. Ensure that the workplace is well ventilated.
The use of a dust mask of filter class P2 is recom-
mended. Follow national requirements for the mate-
rials you want to work with.
5.2.2 Power tool use and care
a) Secure the workpiece. Use clamps or a vice to hold
the workpiece in place.
The workpiece is thus held
more securely than by hand and both hands remain
free to operate the tool.
b) Ensure that the insert tools used are equipped with
the appropriate connection end system and that
they are properly fitted and secured in the chuck
.
c) Hold tool by insulated gripping surfaces when per-
forming an operation where the cutting tool may
contact hidden wiring or its own cord.
Contact with
a “live” wire will make exposed metal parts of the
tool “live” and shock the operator.
5.2.3 Electrical safety
a) Before beginning work, check the working area (e.g.
with a metal detector) to ensure that no concealed
electric cables or gas and water pipes are present.
External metal parts of the tool may become live if,
for example, an electric cable is damaged inadvertenly.
This presents a serious risk of electric shock.
5.2.4 Work area
a) Ensure that the workplace is well lit.
b) Ensure that the workplace is well ventilated.
Poor-
ly ventilated workplaces may be injurious to the
health due to exposeure to dust.
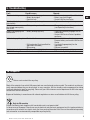
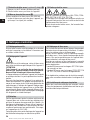
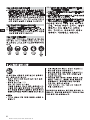
5.2.5 Personal protective equipment
The user and any other persons in the vicinity must
wear suitable eye protection, a hard hat, ear protection
and protective gloves when the tool is in use. Breath-
ing protection must be worn if no dust removal sys-
tem is used.
Wear eye
protection
Wear
breathing
protection
Wear ear
protection
Wear
protective
gloves
Safety helmet
must be worn
5
en
5.1.5 Battery tool use and care
a) Ensure the switch is in the off position before insert-
ing battery pack.
Inserting the battery pack into
power tools that have the switch on invites acci-
dents.
b) Recharge only with the charger specified by the
manufacturer.
A charger that is suitable for one
type of battery pack may create a risk of fire when
used with another battery pack.
c) Use power tools only with specifically designated
battery packs.
Use of any other battery packs may
create a risk of injury and fire.
d) When battery pack is not in use, keep it away from
other metal objects like paper clips, coins, keys,
nails, screws, or other small metal objects that
can make a connection from one terminal to anoth-
er.
Shorting the battery terminals together may
cause burns or a fire.
e) Under abusive conditions, liquid may be ejected
from the battery; avoid contact. If contact acci-
dentally occurs, flush with water. If liquid contacts
eyes, additionally seek medical help.
Liquid eject-
ed from the battery may cause irritation or burns.
5.1.6 Service
a) Have your power tool serviced by a qualified repair
person using only genuine replacement parts.
This
will ensure that the safety of the power tool is main-
tained.
5.2 Additional safety precautions
5.2.1 Personal safety
a) Wear ear protectors.
Exposure to noise can cause
hearing loss.
b)Avoid contact with rotating parts. Switch the tool
on only once it has been brought into the working
position close to the workpiece.
Touching rotating
parts, especially rotating drill bits, discs or blades,
etc., may lead to injury.
c) Breathing protection must be worn when the tool
is used without a dust removal system for work
that creates dust.
d)Avoid unintentional starting. Do not carry the tool
with your finger on the on / off switch. Use the trans-
port safety switch (forward / reverse switch in the
middle position) when the tool is not in use, dur-
ing pauses between work, before maintenance,
when changing bits and during transport.
e)Operate the tool only as directed and only when it
is in faultless condition.
f) Wear protective gloves when changing insert tools.
The insert tool may become hot during use.
g) The tool is not intended for use by children, by
debilitated persons or those who have received
no instruction or training.
h) Children must be instructed not to play with the
tool.
Printed: 25.11.2015 | Doc-Nr: PUB / 5071410 / 000 / 02

7. Operation
-CAUTION-
– The tool and the drilling operation emit noise. Exces-
sive noise may damage the hearing. Wear ear protec-
tion.
– The drilling procedure may cause the material to splin-
ter. Splintering material may cause injury to the body,
respiratory passages and the eyes. Wear eye protec-
tion, breathing protection and a safety helmet.
– The chuck has rough surface. A rotating chuck can
cause hand injuries. Use protective gloves.
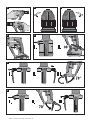
7.1 Quick-release chuck
7.1.1 Opening the quick-release chuck
1. Open the quick-release chuck by turning the sleeve
until the insert tool can be fitted or removed.
7.1.2 Closing the quick-release chuck
1. Fit the insert tool into the chuck.
2. Tighten the chuck by turning the chuck sleeve firmly.
6
en
6. Before use
A new battery must be charged correctly for the first
time before use:
– charged normally for 24 hours with the SFC 7/18 H
charger, or
– charged for 12 hours using the conditioning function
of the SFC 7/18, C7/24 or TCU 7/36 charger. This will
ensure that the cells form correctly. Incorrect initial
charging may have a permanent, negative effect on
battery capa city.
-NOTE-
– The tool may be used only with SFB 185 batteries.
– Battery performance drops at low temperatures.
– Batteries should be stored at room temperature.
– Never store batteries where they are exposed to the
heat of the sun, on a radiator, behind a motor vehicle
windscreen or at a window.
– Never use the battery until the cells become fully dis-
charged. Change to the second battery as soon as a
drop in performance is noticed and recharge the bat-
tery immediately so that it is ready for re-use.
– Use TX-BT 4/7-80 /110 / 150 step drill bits only.
Since it cannot be charged via the belt adapter, always
insert the battery straight into the charger.
7.2 Switching on and off
Switch the drill off to avoid damage if a jammed bit
stalls the motor for more than 2 or 3 seconds.
1. The speed can be varied continuously between 0
and the maximum by pressing the ON/OFF switch
slowly.
7.3 Selecting sustained operation
The lockbutton for sustained operation can be used to
keep the motor running continuously at the optimum
speed with appropriate cooling.
Switch the drill off to avoid damage if a jammed bit
stalls the motor for more than 2 or 3 seconds.
1. Press the ON/OFF switch and hold it in.
2. Press the lockbutton.
3. Release the ON/OFF switch.
4. Release the lockbutton.
7.4 Ending sustained operation
1. Press the ON/OFF switch fully. The lockbutton will
5.2.6 Battery tool use and care
a)Ensure that the outer surfaces of the battery are
clean and dry before inserting it in the corresponding
charger.
b)Check that the battery is securely attached to the
tool.
A falling battery could injure you or other per-
sons.
c)The batteries must be disposed of correctly on
reaching the end of their life (see section 10).
d)Do not charge or continue to use damaged batter-
ies (e.g. batteries with cracks, broken parts, bent
or pushed-in and/or pulled-out contacts).
Printed: 25.11.2015 | Doc-Nr: PUB / 5071410 / 000 / 02

7
en
spring back to its original position so that sustained
operation is ended.
7.5 Belt hook
This can be used to hang the drill from a belt in a posi-
tion close to the body. The hook's ideal position is 30°
above the horizontal.
1. Remove the battery.
2. Press the button I.
3. Lift the belt hook until it engages 30° above the hor-
izontal II.
Left-handed users can fit the belt hook on the other side
of the drill.
1. Press the button I.
2. Lower the belt hook 70° below the horizontal I.
3. Pull the belt hook out of its guide.
4. Push the belt hook into the guide on the other side of
the drill II. For this purpose, the scaffold hook must
lie against the battery, so that the guide slots in the
motor housing and scaffold hook are vertically aligned
to allow the pins to be secured III.
5. Lift the belt hook again until it engages in the hori-
zontal position III.
-NOTE-
Make sure that the belt hook is securely fixed.
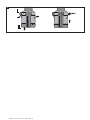
7.6 Scaffold hook
This hook provides a convenient means of temporarily
hanging the drill from neighbouring scaffolding, e.g. to
free the hands for other tasks. It can be completely
removed if not required.
7.6.1 Removing the scaffold hook
1. Remove the battery.
2. Press the button I.
3. Lower the belt hook 70° below the horizontal II.
4. Pull the belt hook out of its guide III.
5. Remove the scaffold hook III.
6. Push the belt hook into the guide III.
7. Lift the belt hook again until it engages in the hori-
zontal position II.
7.6.2 Fitting the scaffold hook
1. Press the button I.
2. Lower the belt hook 70° below the horizontal II.
3. Pull the belt hook out of its guide III.
4. Fit the scaffold hook. For this purpose the scaffold
hook must lie against the battery, so that the guide
slots in the motor housing and scaffold hook are ver-
tically aligned to allow the pins to be secured.
5. Push the belt hook into the guide III.
6. Lift the belt hook again until it engages in the hori-
zontal position II.
7. Push the battery into the tool.
-NOTE-
Check that the scaffold hook is securely engaged.
Use the scaffold hook only for as long as necessary.
Lay the tool down in a secure position when it is no
longer in use.
7.7 Removing the battery (2-fingered operation)
1. Press both release buttons.
2. Pull the battery downwards out of the drill.
7.8 Inserting the battery
Use the Hilti SFB 185 battery only.
1. Push the battery into the drill from below until heard
to engage.
7.9 Charging the battery
Use only the Hilti, C7/24, C7/36-ACS, SFC 7/18H, SFC
7/18 or TCU 7/36 charger.
Incorrect use may lead to electric shocks, overheating
of the battery or leakage of a caustic liquid from the bat-
tery.
Read the operating instructions for the charger before
beginning charging.
Printed: 25.11.2015 | Doc-Nr: PUB / 5071410 / 000 / 02

8
en
8. Care and maintenance
8.1 Care of insert tools
Remove any dirt adhering to the surface of the insert
tools and protect them from corrosion by rubbing them
with an oily cloth from time to time.
8.2 Care of the tool
Before cleaning, remove the battery from the tool in
order to prevent inadvertent starting.
-CAUTION-
Keep the power tool, especially its grip surfaces,
clean and free from oil and grease. Do not use clean-
ing agents which contain silicone.
The outer casing of the tool is made from impactre-
sistant plastic. Sections of the grip are made from a
synthetic rubber material. Never operate the tool when
the ventilation slots are blocked. Clean the ventilation
slots carefully using a dry brush. Do not permit for-
eign objects to enter the interior of the tool. Clean the
outside of the tool at regular intervals with a slightly
damp cloth. Do not use a spray, steam pressure clean-
ing equipment or running water for cleaning. This may
negatively affect the electrical safety of the tool.
8.3 Maintenance
Check all external parts of the tool for damage at reg-
ular intervals and check that all controls operate fault-
lessly. Do not operate the tool when parts are damaged
or when the controls do not operate faultlessly. If nec-
essary, have the tool repaired at a Hilti service centre.
Electrical parts of the tool may be repaired only by
trained electrical specialists.
8.4 Care of the battery
Keep the electrical contacts free from dust, oil and
grease. If necessary, use a clean cloth to clean the con-
tact surfaces.
Do not operate the tool until the battery is completely
discharged as this may damage the battery cells.
Recharge the battery as soon as a drop in performance
is noticed.
At monthly intervals or, at the latest, when battery
capacity drops significantly, the battery should be con-
ditioned as follows:
– by charging with the SFC 7/18 H charger for 24 hours
in normal charging mode, or
– by charging with the C7/24, SFC 7/18 or TCU 7/36
charger for 12 hours in conditioning mode.
If, after conditioning, battery capacity is still unsatis-
factory, we recommend returning the battery to Hilti
for diagnosis.
8.5 Checking the tool after care and maintenance
After carrying out care and maintenance work on the
tool, check that all protective and safety devices are fit-
ted and that they function faultlessly.
Printed: 25.11.2015 | Doc-Nr: PUB / 5071410 / 000 / 02

9
en
9. Troubleshooting
Fault Possible cause Remedy
Chuck not rotating. - Battery not fully engaged. - Battery must engage with audible click.
- Battery discharged. - Battery must be charged
- Electrical fault. - Contact Hilti Service Centre.
Speed suddenly drops - Battery nearly discharged. - Replace with a charged battery.
substantially.
Battery becomes - Battery not in good condition. - Charge battery in conditioning mode.
discharged more quickly (see Operating Instructions)
than usual.
Battery not engaging with - Battery locking lugs dirty. - Clean lugs so battery engages with an
audible click. audible click.
- Contact Hilti Service Centre if problem
continues.
Drill or battery getting hot. - Electrical fault. - Switch drill off immediately.
Remove battery and contact Hilti Service
Centre.
- Drill overloaded (limit specified for - Use the drill appropriately for the
application exceeded). application.
- Bit jamming. - Release jammed bit.
Bit slipping in chuck. - Chuck insufficiently tightened. - Tighten chuck appropriately.
Belt hook coming off. - Hook not correctly attached. - Refer to the Operating Instructions.
10. Disposal
Return waste material for recycling.
Most of the materials from which Hilti power tools are manufactured can be recycled. The materials must be cor-
rectly separated before they can be recycled. In many countries, Hilti has already made arrangements for taking
back your old electric tools for recycling. Please ask your Hilti customer service department or Hilti sales repre-
sentative for further information.
Dispose of the battery in accordance with national regulations or return used batteries to Hilti for recycling.
Only for EU countries
Disposal of electric tools together with household waste is not permissible!
In observance of European Directive on waste electrical and electronic equipment and its implementation in
accordance with national law, electric tools that have reached the end of their life must be collected separately
and returned to an environmentally compatible recycling facility.
Printed: 25.11.2015 | Doc-Nr: PUB / 5071410 / 000 / 02

10
en
12. EC declaration of conformity (original)
Designation: Battery-powered drill
Type: XBT4000-A
Year of design: 2002
11. Manufacturer's warranty – tools
Please contact your local Hilti representative if you have
questions about the warranty conditions.
We declare, on our sole responsibility, that this prod-
uct complies with the following directives and stan-
dards: until until 19th April 2016: 2004/108/EC, from
20th April 2016: 2014/30/EU, 2006/42/EC, 2006/66/EC,
2011/65/EU, EN 60745‑1,EN 60745‑2‑1, EN ISO
12100.
Technical documentation filed at:
Hilti Entwicklungsgesellschaft mbH
Zulassung Elektrowerkzeuge
Hiltistrasse 6
86916 Kaufering
Deutschland
Hilti Corporation, Feldkircherstrasse 100,
FL-9494 Schaan
Paolo Luccini Tassilo Deinzer
Head of BA Executive Vice President
Quality and Process Management Business Unit
Business Area Power Tools & Acessories
Electric Tools & Accessories
05/2015 05/2015
Printed: 25.11.2015 | Doc-Nr: PUB / 5071410 / 000 / 02

11
fr
NOTICE ORIGINALE
Perceuse XBT4000-A
1. Consignes générales
1.1 Mot signalant un danger
-ATTENTION-
Pour attirer l'attention sur une situation pouvant pré-
senter des dangers susceptibles d'entraîner des bles-
sures corporelles légères ou des dégâts matériels.
-NOTA-
Pour des conseils d'utilisation et autres informations
utiles.
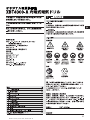
1.2 Pictogrammes
Sommaire Page
1. Consignes générales 11
2. Description 12
3. Outils et accessoires 12
4. Caractéristiques techniques 13
5. Consignes de sécurité 14
6. Mise en marche 16
7. Utilisation 17
8. Nettoyage et entretien 18
9. Guide de dépannage 19
10. Recyclage 19
11. Garantie constructeur des appareils 20
12. Déclaration de conformité (original) 20
Organes de commande et éléments de l'appareil
Interrupteur de commande
(avec variateur de vitesse électronique)
Bouton de blocage pour fonctionnement en
continu
Mandrin
Guidage contrôlé de l'air de refroidissement
(sortie d'air)
Plaque signalétique
Engrenage
Crochet pour échafaudages
Patte d'accrochage à la ceinture
Moteur
Poignée
Bouton de déverrouillage du bloc-accus
Entrée/aspiration de l'air de refroidissement du
moteur
Ces chiffres renvoient aux illustrations correspon-
dant au texte et se trouvant sur les pages rabattables.
Pour lire le mode d'emploi, rabattre ces pages de maniè-
re à voir les illustrations. Dans le texte du présent mode
d'emploi, le terme "appareil" désigne toujours la per-
ceuse XBT4000-A avec bloc-accus inséré.
Emplacement des détails d'identification sur
l'appareil
La désignation du modèle, le code d'article, l'année de
fabrication et l'état technique de votre appareil figu-
rent sur sa plaque signalétique. Son numéro de série
figure sur le côté gauche du carter-moteur. Inscrivez
ces renseignements dans votre mode d'emploi et réfé-
rez-vous y toujours pour communiquer avec notre
représentant ou votre agence Hilti.
Type: XBT 4000-A
N° de série:
Symboles d'avertissement
Symboles
Symboles d'obligation
Avant de mettre cet appareil en service,
lire absolument son mode d'emploi et bien
respecter toutes les consignes.
Le présent mode d'emploi doit toujours
accompagner l'appareil.
Ne pas prêter ou céder l'appareil à un
autre utilisateur sans lui fournir le mode
d'emploi.
Mode d'emploi
Avertissement
danger général
Avertissement tension
électrique dangereuse
Avertissement
matières
corrosives
Lire le mode
d'emploi avant
d'utiliser l'appareil
Recycler les déchets
Porter des
lunettes de
protection
Porter un
masque respi-
ratoire léger
Porter un
casque
antibruit
Porter des
gants de
protection
Porter un
casque de
protection
Printed: 25.11.2015 | Doc-Nr: PUB / 5071410 / 000 / 02

12
fr
2. Description
La XBT4000-A est une perceuse sans fil destinée à un
usage professionnel. Pour atteindre une maniabilité
optimale, nous recommandons de l'utiliser à l'hori-
zontale . L'air nécessaire au refroidissement du
moteur est aspiré par les ouïes d'aération et rejeté par
la lumière de sortie. L'appareil convient aux droitiers
comme aux gauchers. La poignée en élastomère est
ergonomique : elle réduit la fatigue et empêche la main
de glisser.
Utilisation conforme à l'usage prévu
La XBT 4000-A est une perceuse sans fil destinée au
perçage de l'acier.
L'appareil peut être utilisé sur des chantiers de tout
type : chantiers navals, plateformes pétrolières, etc.
L'application principale est le perçage de l'acier peint.
(∅ 4,0 mm avec foret étagé TX-BT 4/7-80/110/150).
Utiliser uniquement les outils et blocs-accus prévus.
● Toute manipulation ou modification de l'appareil est
interdite.
● Pour éviter tout risque de blessure, utiliser unique-
ment les accessoires et adaptateurs Hilti d'origine.
● Bien respecter les consignes concernant l'utilisation,
le nettoyage et l'entretien de l'appareil qui figurent
dans ce mode d'emploi.
● L'appareil et ses accessoires peuvent s'avérer dan-
gereux s'ils sont utilisés de manière incorrecte par
du personnel non qualifié ou de manière non confor-
me à l'usage prévu.
L'appareil est fourni dans une boîte qui contient:
– la perceuse avec son mandrin
– le mode d'emploi
Principales caractéristiques de l'appareil
– Poignée antivibratoire (élastomère)
– Variateur électronique de vitesse
– Graissage permanent de l'engrenage
– Charbons autodéclenchants
– Crochet pour échafaudages et patte d'accrochage à
la ceinture (orientables et interchangeables)
– Bouton de blocage pour fonctionnement en continu
– Guidage contrôlé de l'air de refroidissement (sortie
d'air)
3. Outils et accessoires
Article Désignation Code de l'art.
Foret étagé TX-BT 4/7-80 377079/9
Foret étagé TX-BT 4/7-110 377080/7
Foret étagé TX-BT 4/7-150 377081/5
Dispositiv de centrage X-BT CD 18/24 378885/8
Chargeur C7/24
Bloc-accus SFB 185
Patte d'accrochage à la ceinture
Crochet pour échafaudages
Adaptateur accrochable à la ceinture SFB 180/185 BAP
Printed: 25.11.2015 | Doc-Nr: PUB / 5071410 / 000 / 02

13
fr
4. Caractéristiques techniques
Appareil XBT4000-A
Tension nominale 18 V
–––
- - -
Diamètre du foret 5 mm (application principale : ∅ 4 mm)
Couple de serrage < 6 Nm
Vitesse de rotation à vide 0 – 4000 tr/min.
Variateur de vitesse électronique, intégré à l'interrupteur Marche/Arrêt
Dimensions (L× l × h) 250× 69 × 265 mm
Poids selon la procédure EPTA 01/2003: 2,5 kg
Etanchéité à la poussière et lubrification permanente de l'engrenage (pas d'entretien)
-NOTA-
Le niveau de vibrations mentionné dans ces instructions a été mesuré conformément à un procédé de mesure nor-
malisé selon EN 60745 et peut être utilisé comme base de comparaison entre outils électroportatifs. Il permet
également de procéder à une évaluation préalable des sollicitations vibratoires. Le niveau de vibrations mentionné
correspond aux principales applications de l'outil électroportatif. Ce niveau peut néanmoins différer si l'outil élec-
troportatif est utilisé pour d'autres applications, avec des outils à monter différents ou que l'entretien s'avère insuf-
fisant. Ceci peut augmenter considérablement les sollicitations vibratoires dans tout l'espace de travail. Pour une
évaluation précise des sollicitations vibratoires, il convient également de prendre en compte les temps durant les-
quels l'appareil est arrêté ou marche à vide. Ceci peut sensiblement réduire les sollicitations vibratoires dans tout
l'espace de travail. Par ailleurs, il convient de prendre des mesures de sécurité supplémentaires en vue de proté-
ger l'utilisateur des effets des vibrations, telles que : bien entretenirl'outil électroportatif ainsi que les outils à mon-
ter, maintenir les mains chaudes, optimiser l'organisation des opérations.
Valeurs de bruit et de vibrations (mesurées selon EN 60745) :
Niveau de puissance acoustique
pondéré (A) type : 86 dB (A)
Niveau de pression acoustique d'émission
pondéré (A) type : 75 dB (A)
Pour le niveau sonore selon EN 60745, l'incertitude est de 3 dB.
Valeurs de vibrations triaxiales (somme vectorielle des vibrations)
mesurées selon EN 60745-2-2 prAB: 2005
Perçage dans le métal (a
h, D
) < 2,5 m/s
2
Incertitude (K) des valeurs de vibrations triaxiales: 1,5 m/s
2
Bloc-accus SFB 185
Tension nominale 18 V
–––
- - -
Capacité du bloc-accus 18 V × 3,0 Ah = 54 Wh
Poids 1,15 kg
Contrôle de température oui
Type d'élément nickel-hydrure métallique, modèle SCB C
Bloc de 15 éléments
Sous réserve de modifications techniques
Printed: 25.11.2015 | Doc-Nr: PUB / 5071410 / 000 / 02

14
fr
5. Consignes de sécurité
5.1 Indications générales de sécurité
ATTENTION ! Lire toutes les indications.
Le non-res-
pect des instructions indiquées ci-après peut entraî-
ner un choc électrique, un incendie et / ou de graves
blessures sur les personnes. La notion d'«outil élec-
troportatif» mentionnée par la suite se rapporte à des
outils électriques raccordés au secteur (avec câble de
raccordement) et à des outils électriques à batterie
(sans câble de raccordement).
GARDER PRECIEUSEMENT CES INSTRUCTIONS DE
SECURITE.
5.1.1 Place de travail
a) Maintenez l'endroit de travail propre et bien éclai-
ré.
Un lieu de travail en désordre ou mal éclairé aug-
mente le risque d'accidents.
b) N'utilisez pas l'appareil dans un environnement
présentant des risques d'explosion et où se trou-
vent des liquides, des gaz ou poussières inflam-
mables.
Les outils électroportatifs génèrent des
étincelles risquant d'enflammer les poussières ou
les vapeurs.
c)Tenez les enfants et autres personnes éloignés
durant l'utilisation de l'outil électroportatif.
En cas
d'inattention vous risquez de perdre le contrôle sur
l'appareil.
5.1.2 Sécurité relative au système électrique
a) La fiche de secteur de l'outil électroportatif doit
être appropriée à la prise de courant. Ne modifiez
en aucun cas la fiche. N'utilisez pas de fiches
d'adaptateur avec des appareils avec mise à la
terre.
Les fiches non modifiées et les prises de cou-
rant appropriées réduisent le risque de choc élec-
trique.
b) Evitez le contact physique avec des surfaces mises
à la terre tels que tuyaux, radiateurs, fours et réfri-
gérateurs.
Il y a un risque élevé de choc électrique
au cas où votre corps serait relié à la terre.
c) N'exposez pas l'outil électroportatif à la pluie ou
à l'humidité.
La pénétration d'eau dans un outil
électroportatif augmente le risque d'un choc électrique.
d) N'utilisez pas le câble à d'autres fins que celles
prévues, n'utilisez pas le câble pour porter l'ap-
pareil ou pour l'accrocher ou encore pour le débran-
cher de la prise de courant. Maintenez le câble
éloigné des sources de chaleur, des parties grasses,
des bords tranchants ou des parties de l'appareil
en rotation.
Un câble endommagé ou torsadé aug-
mente le risque d'un choc électrique.
e) Au cas où vous utiliseriez l'outil électroportatif à
l'extérieur, utilisez une rallonge homologuée pour
les applications extérieures.
L'utilisation d'une ral-
longe électrique homologuée pour les applications
extérieures réduit le risque d'un choc électrique.
5.1.3 Sécurité des personnes
a) Restez vigilant, surveillez ce que vous faites. Faites
preuve de bon sens en utilisant l'outil électropor-
tatif. N'utilisez pas l'appareil lorsque vous êtes fati-
gué ou après avoir consommé de l'alcool, des
drogues ou avoir pris des médicaments.
Un moment
d'inattention lors de l'utilisation de l'appareil peut
entraîner de graves blessures sur les personnes.
b) Portez des équipements de protection. Portez tou-
jours des lunettes de protection.
Le fait de porter
des équipements de protection personnels tels que
masque anti-poussières, chaussures de sécurité anti-
dérapantes, casque de protection ou protection acous-
tique suivant le travail à effectuer, réduit le risque de
blessures.
c) Evitez une mise en service par mégarde. Assurez-
vous que l'interrupteur est effectivement en posi-
tion d'arrêt avant de mettre la fiche de la prise de
courant.
Le fait de porter l'appareil avec le doigt sur
l'interrupteur ou de brancher l'appareil sur la source
de courant lorsque l'interrupteur est en position de
fonctionnement, peut entraîner des accidents.
d) Enlevez tout outil de réglage ou toute clé avant de
mettre l'appareil en fonctionnement.
Une clé ou un
outil se trouvant sur une partie en rotation peut cau-
ser des blessures.
e) Ne surestimez pas vos capacités. Veillez à garder
toujours une position stable et équilibrée.
Ceci vous
permet de mieux contrôler l'appareil dans des situa-
tions inattendues.
f) Portez des vêtements appropriés. Ne portez pas de
vêtements amples ni de bijoux. Maintenez cheveux,
vêtements et gants éloignés des parties de l'appa-
reil en rotation.
Des vêtements amples, des bijoux
ou des cheveux longs peuvent être happés par des
pièces en mouvement.
g) Si des dispositifs servant à aspirer ou à recueillir
les poussières doivent être utilisés, vérifiez que
ceux-ci sont effectivement raccordés et qu'ils sont
correctement utilisés.
L'utilisation de tels disposi-
tifs réduit les dangers dus aux poussières.
5.1.4 Utilisation et emploi soigneux de l'outil
électroportatif
a) Ne surchargez pas l'appareil. Utilisez l'outil élec-
troportatif approprié au travail à effectuer.
Avec l'ou-
til électroportatif approprié, vous travaillerez mieux
et avec plus de sécurité à la vitesse pour laquelle il
est prévu.
b) N'utilisez pas un outil électroportatif dont l'inter-
rupteur est défectueux.
Un outil électroportatif qui
ne peut plus être mis en ou hors fonctionnement est
dangereux et doit être réparé.
c) Retirer la fiche de la prise de courant et / ou le bloc-
accu de l'appareil, avant d’effectuer des réglages
sur l’appareil, de changer les accessoires ou de
Printed: 25.11.2015 | Doc-Nr: PUB / 5071410 / 000 / 02

15
fr
ranger l’appareil.
Cette mesure de précaution empêche
une mise en fonctionnement par mégarde.
d) Gardez les outils électroportatifs non utilisés hors
de portée des enfants. Ne permettez pas l'utilisa-
tion de l'appareil à des personnes qui ne se sont
pas familiarisées avec celui-ci ou qui n'ont pas lu
ces instructions.
Les outils électroportatifs sont dan-
gereux lorsqu'ils sont utilisés par des personnes non
initiées.
e) Prenez soin des outils électroportatifs. Vérifiez que
les parties en mouvement fonctionnent correcte-
ment et qu'elles ne sont pas coincées, et contrôlez
si des parties sont cassées ou endommagées de
telle sorte que le bon fonctionnement de l'appareil
s'en trouve entravé. Faites réparer les parties endom-
magées avant d'utiliser l'appareil.
De nombreux
accidents sont dus à des outils électroportatifs mal
entretenus.
f) Maintenez les outils de coupe aiguisés et propres.
Des outils soigneusement entretenus avec des bords
tranchants bien aiguisés se coincent moins souvent
et peuvent être guidés plus facilement.
g) Utilisez les outils électroportatifs, les accessoires,
les outils à monter etc. conformément à ces ins-
tructions et aux prescriptions en vigueur pour ce
type d'appareil. Tenez compte également des condi-
tions de travail et du travail à effectuer.
L'utilisation
des outils électroportatifs à d'autres fins que celles
prévues peut entraîner des situations dangereuses.
5.1.5 Utilisation et emploi soigneux des appareils
sans fil
a) Vérifiez que l’appareil est effectivement en posi-
tion d’arrêt avant de monter l’accumulateur.
Le fait
de monter un accumulateur dans un outil électro-
portatif en position de fonctionnement peut causer
des accidents.
b) Ne chargez les accumulateurs que dans des char-
geurs recommandés par le fabricant.
Un chargeur
approprié à un type spécifique d’accumulateur peut
engendrer un risque d’incendie lorsqu’il est utilisé
avec d’autres accumulateurs.
c) Dans les outils électroportatifs, n’utilisez que les
accumulateurs spécialement prévus pour ceux-ci.
L’utilisation de tout autre accumulateur peut entraî-
ner des blessures et des risques d’incendie.
d) Tenez l’accumulateur non-utilisé à l’écart de toutes
sortes d’objets métalliques tels qu’agrafes, pièces
de monnaie, clés, clous, vis ou autres, étant don-
né qu’un pontage peut provoquer un court-circuit.
Un court-circuit entre les contacts d’accu peut pro-
voquer des brûlures ou un incendie.
e) En cas d’utilisation abusive, du liquide peut sor-
tir de l’accumulateur. Evitez tout contact avec ce
liquide. En cas de contact par mégarde, rincez soi-
gneusement avec de l’eau. Au cas où le liquide
rentrerait dans les yeux, consultez en plus un méde-
cin.
Le liquide qui sort de l’accumulateur peut entraî-
ner des irritations de la peau ou causer des brûlures.
5.1.6 Service
a) Ne faites réparer votre outil électroportatif que par
un personnel qualifié et seulement avec des pièces
de rechange d'origine.
Ceci permet d'assurer la sécu-
rité de l'appareil.
5.2 Consignes de sécurité spécifiques au produit
5.2.1 Sécurité des personnes
a)Porter un casque antibruit.
Le bruit peut entraîner
des pertes auditives.
b)Eviter de toucher des pièces en rotation. Brancher
l'appareil uniquement dans l'espace de travail..
c)Si l'appareil fonctionne sans dispositif d'aspira-
tion de la poussière et si le travail effectué déga-
ge de la poussière, porter un masque respiratoi-
re léger.
d)Éviter tout démarrage intempestif de l’appareil,
ne jamais le porter branché au secteur avec le doigt
sur l’interrupteur Marche/Arrêt. Si vous n’utilisez
pas l’appareil pendant une pause, avant tout entre-
tien, remplacement d’outil ou pendant le trans-
port, placer l’interrupteur sur Arrêt (avec l’inver-
seur du sens de rotation droite/gauche en position
médiane).
e)Utiliser l’appareil uniquement s’il est dans un état
impeccable et seulement conformément à l’usa-
ge prévu.
f) Utilisez les gants de protection pour changer d'ou-
til. L'appareil peut être très chaud après utilisation.
g)L'appareil n'est pas destiné à être utilisé par des
enfants ou des personnes affaiblies sans encadre-
ment.
h)Avertir les enfants et veiller à ce qu'ils ne jouent
pas avec l'appareil.
i)
Les poussières de matériaux telles que des pous-
sières de peinture au plomb, de certains types de bois,
minéraux et métaux, peuvent être nocives pour la
santé. Le contact ou l'aspiration des poussières peut
provoquer des réactions allergiques et/ou des mala-
dies respiratoires de l'utilisateur ou de toute person-
ne se trouvant à proximité. Certaines poussières, telles
que des poussières de chêne ou de hêtre, sont consi-
dérées comme cancérigènes, en particulier lorsqu'elles
sont combinées à des additifs destinés au traitement
du bois (chromate, produit de protection du bois).
Les matériaux contenant de l'amiante doivent seule-
ment être manipulés par un personnel spécialisé.
Un
dispositif d'aspiration doit être utilisé dans la mesu-
re du possible. Pour une aspiration optimale de la
poussière, utiliser de préférence l'aspirateur mobi-
le approprié pour bois et/ou poussières minérales
recommandé par Hilti, qui est spécialement étudié
pour cet outil électroportatif. Veiller à ce que la pla-
ce de travail soit bien ventilée. Il est recommandé
de porter un masque anti-poussière de la classe
de filtre P2. Respecter les prescriptions locales
en vigueur qui s'appliquent aux matériaux tra-
vaillés.
Printed: 25.11.2015 | Doc-Nr: PUB / 5071410 / 000 / 02

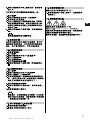
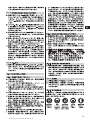
5.2.5 Equipement de protection individuel
L'utilisateur et les personnes se trouvant à proximité
pendant l'utilisation de l'appareil doivent porter des
lunettes de protection adaptées, un casque de protec-
tion, un casque antibruit, des gants de protection et,
lorsqu'ils n'utilisent pas de dispositif d'aspiration de
la poussière, un masque respiratoire léger.
16
fr
6. Mise en marche
Avant d'utiliser un bloc-accus neuf, il est impératif de
le charger correctement.
– pendant 24 heures avec le chargeur SFC 7/8 H (char-
ge normale) ou bien
– pendant 12 heures avec le chargeur SFC 7/18, C7/24
ou TCU 7/36 avec la fonction de régénération afin
que les éléments puissent se former correctement.
La capacité d'un bloc-accus neuf qui n'aurait pas été
chargé correctement la première fois peut se trou-
ver affectée durablement.
-NOTA-
– L'appareil doit être utilisé seulement avec le bloc-
accus SFB 185.
– À basse température, la capacité du bloc-accus chute.
– Stocker le bloc-accus à température ambiante.
– Ne jamais conserver le bloc-accus à un endroit expo-
sé au soleil, sur un appareil de chauffage ou derriè-
re des vitres.
– Ne pas attendre que l'appareil ne fonctionne plus
pour remplacer le bloc-accus. Le remplacer et utili-
ser le deuxième bloc-accus avant que le premier ne
soit complètement déchargé. Recharger le premier
bloc immédiatement pour qu'il soit de nouveau dis-
ponible.
– Utilisez seulement des forets étagés TX-BT 4/7-80 /
110 / 150.
Le bloc-accus ne peut pas être rechargé avec l'adap-
tateur accrochable à la ceinture ; pour le recharger, tou-
jours l'insérer dans le chargeur.
Porter des
lunettes de
protection
Porter un
masque respi-
ratoire léger
Porter un
casque
antibruit
Porter des
gants de
protection
Porter un
casque de
protection
5.2.6 Utilisation et emploi soigneux des appareils
sans fil
a)Vérifier que les surfaces extérieures du bloc-accus
sont propres et sèches avant de l’insérer dans le
chargeur correspondant pour le (re)charger.
b)Vérifier que le bloc-accus tient bien dans l’appa-
reil.
Toute chute du bloc-accus pourrait être dan-
gereuse pour vous et/ou des tierces personnes.
c)Une fois usagés, les blocs-accus doivent être éli-
minés ou recyclés dans les règles (voir Chapitre
10).
d)Les blocs-accus endommagés (par exemple des
blocs-accus fissurés, dont certaines pièces sont
cassées, dont les contacts sont déformés, rentrés
et / ou sortis) ne doivent plus être chargés ni uti-
lisés.
5.2.2 Utilisation et emploi soigneux de l'outil
électroportatif
a)Bloquer la pièce travaillée. Pour ce faire, utiliser
un dispositif de serrage ou un étau, pour mainte-
nir la pièce travaillée en place.
Elle sera ainsi mieux
tenue qu'à la main, et les deux mains restent alors
libres pour commander la machine.
b)Vérifier que les outils sont bien munis du système
d'emmanchement adapté à l'appareil et qu'ils sont
toujours correctement verrouillés dans le mandrin.
c)Tenir fermement l'appareil par les poignées iso-
lées si des câbles ou gaines électriques cachés ou
le câble d'alimentation risquent d'être endomma-
gés par l'appareil.
En cas de contact avec des câbles
ou gaines conductrices, les pièces métalliques non
protégées de l'appareil sont mises sous tension et
l'utilisateur est exposé à un risque de choc élec-
trique.
5.2.3 Sécurité relative au système électrique
a) Avant de commencer, vérifier que l’espace de tra-
vail ne comporte pas de câbles ou gaines élec-
triques, conduites de gaz ou d'eau cachés, par
exemple à l'aide d'un détecteur de métaux.
Tou-
te pièce métallique extérieure à l'appareil peut deve-
nir conductrice, par exemple si un câble électrique
est endommagé par inadvertance. Ceci représente
un danger sérieux d’électrocution.
5.2.4 Place de travail
a) Veiller à ce que l'espace de travail soit correcte-
ment éclairé.
b) Veiller à ce que l'espace de travail soit bien ven-
tilé.
Un espace de travail mal ventilé peut être nocif
pour la santé en raison des nuisances dues à la
poussière.
Printed: 25.11.2015 | Doc-Nr: PUB / 5071410 / 000 / 02
La page charge ...
La page charge ...
La page charge ...
La page charge ...
La page charge ...
La page charge ...
La page charge ...
La page charge ...
La page charge ...
La page charge ...
La page charge ...
La page charge ...
La page charge ...
La page charge ...
La page charge ...
La page charge ...
La page charge ...
La page charge ...
La page charge ...
La page charge ...
La page charge ...
La page charge ...
La page charge ...
La page charge ...
La page charge ...
La page charge ...
La page charge ...
La page charge ...
La page charge ...
La page charge ...
La page charge ...
La page charge ...
La page charge ...
La page charge ...
La page charge ...
La page charge ...
La page charge ...
La page charge ...
La page charge ...
La page charge ...
La page charge ...
La page charge ...
La page charge ...
La page charge ...
La page charge ...
-
 1
1
-
 2
2
-
 3
3
-
 4
4
-
 5
5
-
 6
6
-
 7
7
-
 8
8
-
 9
9
-
 10
10
-
 11
11
-
 12
12
-
 13
13
-
 14
14
-
 15
15
-
 16
16
-
 17
17
-
 18
18
-
 19
19
-
 20
20
-
 21
21
-
 22
22
-
 23
23
-
 24
24
-
 25
25
-
 26
26
-
 27
27
-
 28
28
-
 29
29
-
 30
30
-
 31
31
-
 32
32
-
 33
33
-
 34
34
-
 35
35
-
 36
36
-
 37
37
-
 38
38
-
 39
39
-
 40
40
-
 41
41
-
 42
42
-
 43
43
-
 44
44
-
 45
45
-
 46
46
-
 47
47
-
 48
48
-
 49
49
-
 50
50
-
 51
51
-
 52
52
-
 53
53
-
 54
54
-
 55
55
-
 56
56
-
 57
57
-
 58
58
-
 59
59
-
 60
60
-
 61
61
-
 62
62
-
 63
63
-
 64
64
-
 65
65


Hilti XBT 4000-A Mode d'emploi
- Catégorie
- Perceuses électriques
- Taper
- Mode d'emploi