Mr. Heater BIG Buddy MH18B Manuel utilisateur
- Catégorie
- Chauffe-eau
- Taper
- Manuel utilisateur
Ce manuel convient également à
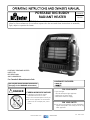
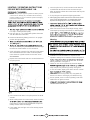
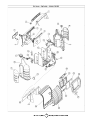
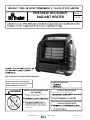
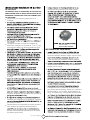
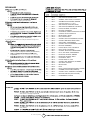
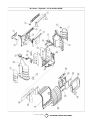
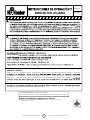
Vous trouverez ci-dessous une brève information pour Radiant Heater Big Buddy MH18B. Il s'agit d'un radiateur au propane portable conçu pour une utilisation récréative et commerciale. Il est équipé d'une sécurité contre le monoxyde de carbone, et est prévu pour un usage extérieur uniquement. Il peut être utilisé avec des bouteilles de propane jetables de 1 lb ou des bouteilles rechargeables à distance de 20 lb. L'appareil dispose de plusieurs réglages de chaleur. Il est recommandé d'utiliser uniquement des accessoires de la marque Mr. Heater.
Vous trouverez ci-dessous une brève information pour Radiant Heater Big Buddy MH18B. Il s'agit d'un radiateur au propane portable conçu pour une utilisation récréative et commerciale. Il est équipé d'une sécurité contre le monoxyde de carbone, et est prévu pour un usage extérieur uniquement. Il peut être utilisé avec des bouteilles de propane jetables de 1 lb ou des bouteilles rechargeables à distance de 20 lb. L'appareil dispose de plusieurs réglages de chaleur. Il est recommandé d'utiliser uniquement des accessoires de la marque Mr. Heater.


-
 1
1
-
 2
2
-
 3
3
-
 4
4
-
 5
5
-
 6
6
-
 7
7
-
 8
8
-
 9
9
-
 10
10
-
 11
11
-
 12
12
-
 13
13
-
 14
14
-
 15
15
-
 16
16
-
 17
17
-
 18
18
-
 19
19
-
 20
20


Mr. Heater BIG Buddy MH18B Manuel utilisateur
- Catégorie
- Chauffe-eau
- Taper
- Manuel utilisateur
- Ce manuel convient également à
Vous trouverez ci-dessous une brève information pour Radiant Heater Big Buddy MH18B. Il s'agit d'un radiateur au propane portable conçu pour une utilisation récréative et commerciale. Il est équipé d'une sécurité contre le monoxyde de carbone, et est prévu pour un usage extérieur uniquement. Il peut être utilisé avec des bouteilles de propane jetables de 1 lb ou des bouteilles rechargeables à distance de 20 lb. L'appareil dispose de plusieurs réglages de chaleur. Il est recommandé d'utiliser uniquement des accessoires de la marque Mr. Heater.