Toro French Decal Kit, TimeCutter Z Riding Mowers Guide d'installation
- Taper
- Guide d'installation

Form No. 3354-294 Rev A
French Decal Kit
For TimeCutter Z Riding Mowers
Model No. 110-6506
Installation Instructions
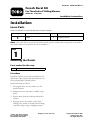
Installation
Loose Parts
Use the chart below to verify that all parts have been shipped.
Step
Description
Qty.
Use
1
Decals
6
Install the decals.
Note: Visit www .T oro .com and do wnload the F renc h Operator’ s Manual that cor responds to the model
and serial n umber of the product this kit is installed on.
Step
1
Installing the Decals
Parts needed for this step:
6
Decals
Procedure
Install the decals in the positions indicated in the
table belo w . Place eac h F renc h decal directly o v er
the cor responding US English decal.
Install eac h decal as follo ws:
1. T horoughly clean the area where y ou will
install the decal.
2. Dampen the area with w ater or mildly soapy
w ater .
3. P eel the decal from the bac king and install it
in place .
4. Squeeg ee across the surface of the decal,
star ting at the center of the decal and w orking
to w ard the edg es , using o v erlapping strok es .
© 2005—The Toro® Company
8111 Lyndale Avenue South
Bloomington, MN 55420
Register at www.Toro.com. Original Instructions (EN)
Printed in the USA.
All Rights Reserved

Location US English
French
On right-hand
top of mower
deck
92–7109
93–7009
On the top of
the left side of
the mower deck,
remove 92–7108
and then apply
93–7317.
92–7108
93–7317
On the front of
the right side of
the mower deck,
remove 98–3798
and then apply
99–8939.
98–3798
99–8939
On right-hand
top of mower
deck
92–1122
110–1868
Under seat base
106–8716 106–8717
2

107–7398 (English)
On console
107–2514 (French)
3


Form No. 3354 -294 Rev A
Kit autocollants français
Tondeuses autoportées TimeCutter™ Z
N° de modèle 110 -6506
Instructions d'installation
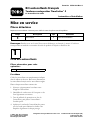
Mise en service
Pièces détachées
Reportez -vous au tableau ci -dessous pour vérier si toutes les pièces ont été expédiées.
Étape
Description
Qté
Utilisation
1
Autocollants
6
Pose des autocollants
Remarque: R endez -v ous sur le www .T oro .com et téléc harg ez, en français , le manuel de l’utilisateur
cor respondant au modèle et au n uméro de série du produit sur lequel est installé ce kit.
1
Pose des autocollants
Pièces nécessaires pour cette
opération :
6
Autocollants
Procédure
Collez les autocollants aux emplacements indiqués
dans le tableau ci -dessous . R ecouvrez directement
les autocollants français sur les autocollants anglais .
Placez c haque autocollant comme suit:
1. Netto yez soigneusement la surface a v ant
d’apposer l’autocollant.
2. Humidifiez la surface a v ec de l’eau pure ou de
l’eau légèrement sa v onneuse .
3. Ôtez la pellicule de protection au dos de
l’autocollant, puis placez l’autocollant à
l’endroit prévu.
4. Aplatissez la surface de l’autocollant du centre
v ers les bords pour éliminer les bulles d’air .
Empiétez légèrement à c haque passag e .
© 2005—The Toro® Company
8111 Lyndale Avenue South
Bloomington, MN 55420
Enregistrez votre produit à www.Toro.com
Traduction du texte d'origine (FR)
Printed in the USA.
Tous droits réservés

Emplacement
Anglais Français
En haut à droite
du plateau de
coupe
92–7109
93–7009
En haut à gauche
du plateau de
coupe, enlevez
l’autocollant
92–7108
puis collez le
93–7317.
92–7108
93–7317
En haut à droite
du plateau de
coupe, enlevez
l’autocollant
98–3798
puis collez le
99–8939.
98–3798
99–8939
En haut à droite
du plateau de
coupe
92–1122
110–1868
Sous la base
du siège
106–8716 106–8717
2

107–7398 (Anglais)
Sur la console
107–2514 (Français)
3

-
 1
1
-
 2
2
-
 3
3
-
 4
4
-
 5
5
-
 6
6
-
 7
7
-
 8
8


Toro French Decal Kit, TimeCutter Z Riding Mowers Guide d'installation
- Taper
- Guide d'installation
dans d''autres langues
Documents connexes
-
Toro French Decal Kit, TimeCutter ZX Riding Mowers Guide d'installation
-
Toro French Decal Kit, TimeCutter Z Riding Mowers Guide d'installation
-
-
-
-
-
-
-