
IBM Remote Supervisor
Adapter II SlimLine
Installation
This document provides the instructions necessary to configure BIOS, install the daemon, and install the
firmware for the IBM
®
Remote Supervisor Adapter II SlimLine on your server. After you complete the
installation, refer to the IBM Remote Supervisor Adapter II SlimLine documentation CD for the User's
Guide.
Obtaining the daemon and firmware files
To locate the daemon and firmware files along with the associated Readme instructions, go to the Web
address that corresponds to your server:
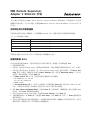
Table 1. Support Web site for each server
Server Web address
ThinkServer TS100 http://www-947.ibm.com/systems/support/oem/index.html
ThinkServer TD100 and
TD100x
http://www-947.ibm.com/systems/support/oem/td100.html
ThinkServer RS110 http://www-947.ibm.com/systems/support/oem/rs110.html
ThinkServer RD120 http://www-947.ibm.com/systems/support/oem/rd120.html
You will need these files to complete the “Installing the daemon and firmware files” on page 2 procedure.
Configuring the server BIOS
The server BIOS must be configured prior to installing the daemon and update for your operating
system. Follow these steps to configure the BIOS.
1. Turn on the server.
2. To enter the Configuration/Setup Utility, turn on the server and press the F1 key when prompted
during the power-on procedure.
3. If the RSA II adapter is physically installed correctly, there will be an RSA II Settings option on the
first Configuration/Setup Utility screen. If the RSA II Settings option is not displayed on the first
screen, look under Advanced Setup. Select this option and press Enter.
4. At the DHCP Control field, select the correct field for your network settings from the following
options:
v Try DHCP then use static IP
v Use static IP configuration
v DHCP enabled
5.
At the OS USB Selection field, use the left and right arrow keys to select Other OS for a server
running a Microsoft
®
Windows
®
operating system or Linux for a server running a Linux operating
system.
6. Select Save Values and Reboot RSA II and press Enter. A pop-up window indicates that the RSA II
settings have been saved. Press Enter to close this window.
7. Return to the Configuration/Setup Utility window and select Save Settings and press Enter.
8. Press Enter on the confirmation pop-up window; then, select Exit Setup and press Enter. Press Enter
again to confirm exiting system setup.
9. The adapter is now properly configured for your operating system and the server will automatically
reboot. Proceed with the installation of the operating system and refer to “Installing the daemon and
firmware files” on page 2 when you are ready to install.
(1P) P/N: 54Y6198

Installing the daemon and firmware files
For instructions on how to obtain the daemon and firmware files, see “Obtaining the daemon and
firmware files” on page 1.
1. Follow the daemon Readme instructions for your machine type and operating system to install the
daemon.
2. Follow the update Readme instructions for your machine type and operating system to install the
firmware.
Trademarks
v IBM is a trademark of International Business Machines Corporation in the United States, other
countries, or both.
v Lenovo and the Lenovo logo are trademarks of Lenovo in the United States, other countries, or both.
v Linux is a trademark of Linus Torvalds in the United States, other countries, or both.
v Microsoft and Windows are trademarks of the Microsoft group of companies.
v Other company, product, or service names may be trademarks or service marks of others.
First edition (March 2009)
© Copyright Lenovo 2009. All rights reserved.
LENOVO products, data, computer software, and services have been developed exclusively at private expense and
are sold to governmental entities as commercial items as defined by 48 C.F.R. 2.101 with limited and restricted rights
to use, reproduction and disclosure.
LIMITED AND RESTRICTED RIGHTS NOTICE: If products, data, computer software, or services are delivered
pursuant a General Services Administration ″GSA″ contract, use, reproduction, or disclosure is subject to restrictions
set forth in Contract No. GS-35F-05925.

IBM Remote Supervisor
Adapter II SlimLine
Installation
Le présent document fournit les instructions requises pour la configuration du BIOS, l’installation du
démon et l’installation du microprogramme pour la carte IBM Remote Supervisor Adapter II SlimLine sur
votre serveur. Une fois l’installation terminée, utilisez le CD de la documentation IBM Remote Supervisor
Adapter II SlimLine pour consulter le guide d’utilisation (disponible en anglais).
Fichiers du démon et du microprogramme
Pour localiser les fichiers du démon et du microprogramme ainsi que le fichier readme associé, accédez
au site Web correspondant à votre serveur :
Tableau 1. Site Web de support pour chaque serveur
Serveur Adresse Web
ThinkServer TS100 http://www-947.ibm.com/systems/support/oem/index.html
ThinkServer TD100 et TD100x http://www-947.ibm.com/systems/support/oem/td100.html
ThinkServer RS110 http://www-947.ibm.com/systems/support/oem/rs110.html
ThinkServer RD120 http://www-947.ibm.com/systems/support/oem/rd120.html
Vous aurez besoin de ces fichiers pour exécuter la procédure décrite à la section «Installation des fichiers
du démon et du microprogramme», à la page 2.
Configuration du BIOS du serveur
Le BIOS du serveur doit être configuré avant d’installer le démon et la mise à jour pour votre système
d’exploitation. Procédez comme suit pour configurer le BIOS :
1. Mettez le serveur sous tension.
2. Pour accéder à l’utilitaire de configuration, appuyez sur F1 lorsque vous y êtes invité au cours de la
mise sous tension.
3. Si la carte RSA II est correctement installée physiquement, une option RSA II Settings doit figurer sur
le premier écran de l’utilitaire de configuration. Si l’option RSA II Settings n’est pas affichée sur le
premier écran, recherchez-la sous Advanced Setup. Sélectionnez cette option, puis appuyez sur
Entrée.
4. Dans la zone DHCP Control, sélectionnez l’option appropriée pour vos paramètres réseau :
v Try DHCP then use static IP
v Use static IP configuration
v DHCP enabled
5. Dans la zone OS USB Selection, utilisez les touches fléchées vers la gauche et la droite pour
sélectionner Other OS si vous avez un serveur s’exécutant sous Microsoft Windows ou Linux si vous
disposez d’un serveur s’exécutant sous Linux.
6. Sélectionnez Save Values and Reboot RSA II puis appuyez sur Entrée. Une fenêtre en incrustation
vous indique que les paramètres RSA II ont été sauvegardés. Appuyez sur Entrée pour fermer cette
fenêtre.
7. Revenez à la fenêtre de l’utilitaire de configuration et sélectionnez Save Settings, puis appuyez sur
Entrée.
8. Dans la fenêtre en incrustation de confirmation, appuyez sur Entrée, puis sélectionnez Exit Setup et
appuyez de nouveau sur Entrée. Confirmez que vous souhaitez quitter l’utilitaire de configuration du
système en appuyant encore une fois sur Entrée.

9. La carte est maintenant correctement configurée pour votre système d’exploitation et le serveur va
être automatiquement redémarré. Poursuivez en procédant à l’installation du système d’exploitation ;
pour ce faire, reportez-vous à la section «Installation des fichiers du démon et du microprogramme».
Installation des fichiers du démon et du microprogramme
Pour plus d’informations sur l’accès à ces fichiers, voir «Fichiers du démon et du microprogramme», à la
page 1.
1. Suivez les instructions du fichier readme associé au fichier du démon pour installer ce dernier.
2. Suivez les instructions du fichier readme associé à la mise à jour pour installer le microprogramme.
Marques
v IBM est une marque d’International Business Machines Corporation aux Etats-Unis et/ou dans certains
autres pays.
v Lenovo et le logo Lenovo sont des marques de Lenovo aux Etats-Unis et/ou dans certains autres pays.
v Linux est une marque de Linus Torvalds aux Etats-Unis et/ou dans certains autres pays.
v Microsoft et Windows sont des marques de Microsoft.
v Les autres noms de sociétés, de produits et de services peuvent appartenir à des tiers.
Première édition - avril 2009
© Copyright Lenovo 2009.

IBM Remote Supervisor
Adapter II SlimLine
installieren
In diesem Dokument finden Sie die Anweisungen, die Sie zum Konfigurieren des BIOS und zum Instal-
lieren des Dämons sowie der Firmware für den IBM
®
Remote Supervisor Adapter II SlimLine auf Ihrem
Server benötigen. Lesen Sie nach Abschluss der Installation die Informationen im Benutzerhandbuch auf
der Dokumentations-CD zum IBM Remote Supervisor Adapter II SlimLine.
Dämon- und Firmwaredateien abrufen
Rufen Sie die entsprechende Webadresse zu Ihrem Server auf, um nach den Dämon- und Firmware-
dateien sowie den zugehörigen Readme-Anweisungen zu suchen:
Tabelle 1. Unterstützungswebsite für die einzelnen Server
Server Webadresse
ThinkServer TS100 http://www-947.ibm.com/systems/support/oem/index.html
ThinkServer TD100 und
TD100x
http://www-947.ibm.com/systems/support/oem/td100.html
ThinkServer RS110 http://www-947.ibm.com/systems/support/oem/rs110.html
ThinkServer RD120 http://www-947.ibm.com/systems/support/oem/rd120.html
Sie benötigen diese Dateien, um den im Abschnitt „Dämon- und Firmwaredateien installieren” auf Seite 2
beschriebenen Vorgang abzuschließen.
Server-BIOS konfigurieren
Das Server-BIOS muss konfiguriert werden, bevor Sie den Dämon und die Aktualisierung für das
Betriebssystem installieren. Gehen Sie zum Konfigurieren des BIOS wie folgt vor.
1. Schalten Sie den Server ein.
2. Um auf das Konfigurationsdienstprogramm zuzugreifen, schalten Sie den Server ein, und drücken Sie
die Taste F1, wenn Sie während des Startens dazu aufgefordert werden.
3. Wenn der RSA II-Adapter physisch richtig installiert ist, wird die Option RSA II Settings in der ers-
ten Anzeige des Konfigurationsdienstprogramms angezeigt. Wird die Option RSA II Settings nicht in
der ersten Anzeige angezeigt, suchen Sie unter Advanced Setup. Wählen Sie diese Option aus, und
drücken Sie die Eingabetaste.
4. Wählen Sie im Feld DHCP Control aus den folgenden Optionen das richtige Feld für Ihre Netzein-
stellungen aus:
v Try DHCP then use static IP (DHCP versuchen, dann statisches IP verwenden)
v Use static IP configuration (statische IP-Konfiguration verwenden)
v DHCP enabled (DHCP aktiviert)
5. Wählen Sie im Feld OS USB Selection mit der Links- und der Rechtspfeiltaste Other OS für einen
Server aus, der unter einem Microsoft
®
Windows
®
-Betriebssystem ausgeführt wird, oder Linux für
einen Linux-Server.
6. Wählen Sie Save Values and Reboot RSA II aus, und drücken Sie die Eingabetaste. Ein Dialogfenster
gibt an, dass die RSA II-Einstellungen gespeichert wurden. Drücken Sie die Eingabetaste, um dieses
Fenster zu schließen.
7. Kehren Sie zum Fenster mit dem Konfigurationsdienstprogramm zurück, wählen Sie Save Settings
aus, und drücken Sie die Eingabetaste.

8. Drücken Sie die Eingabetaste im Bestätigungsdialogfenster, wählen Sie dann Exit Setup aus und
drücken Sie die Eingabetaste. Drücken Sie erneut die Eingabetaste, um das Verlassen der System-
konfiguration zu bestätigen.
9. Der Adapter ist jetzt ordnungsgemäß für Ihr Betriebssystem konfiguriert, und der Server wird auto-
matisch erneut gestartet. Fahren Sie mit der Installation des Betriebssystems fort, und lesen Sie die
Informationen unter „Dämon- und Firmwaredateien installieren”, wenn Sie für die Installation bereit
sind.
Dämon- und Firmwaredateien installieren
Anweisungen dazu, wie Sie die Dämon- und Firmwaredateien abrufen können, finden Sie im Abschnitt
„Dämon- und Firmwaredateien abrufen” auf Seite 1.
1. Folgen Sie den Anweisungen in der Readme-Datei zum Dämon zu Ihrem Maschinentyp und Ihrem
Betriebssystem, um den Dämon zu installieren.
2. Folgen Sie den Anweisungen in der Readme-Datei zur Aktualisierung zu Ihrem Maschinentyp und
Ihrem Betriebssystem, um die Firmware zu installieren.
Marken
v IBM ist eine Marke der International Business Machines Corporation in den USA und/oder anderen
Ländern.
v Lenovo und das Lenovo Logo sind Marken von Lenovo in den USA und/oder anderen Ländern.
v Linux ist eine Marke von Linus Torvalds in den USA und/oder anderen Ländern.
v Microsoft und Windows sind Marken der Microsoft-Unternehmensgruppe.
v Weitere Unternehmens-, Produkt- oder Servicenamen können Marken anderer Hersteller sein.
Erste Ausgabe (April 2009)
© Copyright Lenovo 2009.

Installazione di IBM Remote
Supervisor Adapter II
SlimLine
Questo documento fornisce le istruzioni necessarie per configurare il BIOS, installare il daemon e
installare il firmware per IBM
®
Remote Supervisor Adapter II SlimLine sul proprio server. Una volta
completata l’installazione, fare riferimento al CD di documentazione di IBM Remote Supervisor Adapter
II SlimLine relativo alla Guida per l'utente.
Come ottenere i file del daemon e del firmware
Per individuare i file del daemon e del firmware insieme alle istruzioni del Readme associate, accedere
all’indirizzo Web corrispondente al proprio server:
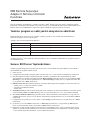
Table 1. Sito Web di supporto per ciascun server
Server Indirizzo Web
ThinkServer TS100 http://www-947.ibm.com/systems/support/oem/index.html
ThinkServer TD100 e TD100x http://www-947.ibm.com/systems/support/oem/td100.html
ThinkServer RS110 http://www-947.ibm.com/systems/support/oem/rs110.html
ThinkServer RD120 http://www-947.ibm.com/systems/support/oem/rd120.html
Tali file saranno necessari per completare la procedura “Installazione dei file del daemon e del firmware”
on page 2.
Configurazione del BIOS del server
Il BIOS del server deve essere configurato prima di installare il daemon e aggiornato per il proprio
sistema operativo. Per configurare il BIOS, attenersi alla seguente procedura.
1. Accendere il server.
2. Per accedere a Configuration/Setup Utility, accendere il server e premere il tasto F1 quando viene
richiesto, durante la procedura di accensione.
3. Se l’adattatore RSA II è fisicamente inserito in modo adeguato, la prima schermata di
Configuration/Setup Utility riporterà un’opzione RSA II Settings. Se l’opzione RSA II Settings non
viene visualizzata sulla prima schermata, consultare Advanced Setup. Selezionare questa opzione e
premere Invio.
4. Nel campo DHCP Control, selezionare il campo corretto per le proprie impostazioni di rete dalle
seguenti opzioni:
v Try DHCP then use static IP
v Use static IP configuration
v DHCP enabled
5. Nel campo OS USB Selection, utilizzare i tasti freccia destra e sinistra per selezionare Other OS per
un server su cui è in esecuzione un sistema operativo Microsoft
®
Windows
®
o Linux per un server su
cui è in esecuzione un sistema operativo Linux.
6. SelezionareSave Values and Reboot RSA II e premere Invio. Una finestra a comparsa indica che le
impostazioni RSA II sono state salvate. Premere Invio per chiudere questa finestra.
7. Tornare alla finestra Configuration/Setup Utility e selezionare Save Settings; quindi, premere Invio.
8. Premere Invio nella finestra di conferma a comparsa, quindi selezionare Exit Setup e premere Invio.
Premere nuovamente Invio per confermare l’uscita dalla configurazione di sistema.

9. L’adattatore è ora configurato correttamente per il proprio sistema operativo e il server verrà riavviato
automaticamente. Continuare con l’installazione del sistema operativo e fare riferimento a
“Installazione dei file del daemon e del firmware” per iniziare l’installazione.
Installazione dei file del daemon e del firmware
Per istruzioni su come ottenere i file del daemon e del firmware, consultare “Come ottenere i file del
daemon e del firmware” on page 1.
1. Seguire le istruzioni del Readme del daemon per il proprio tipo di macchina e sistema operativo per
installare il daemon.
2. Seguire le istruzioni del Readme dell’aggiornamento per il proprio tipo di macchina e sistema
operativo per installare il firmware.
Marchi
v IBM è un marchio di International Business Machines Corporation negli Stati Uniti e/o in altri paesi.
v Lenovo e il logo Lenovo sono marchi di Lenovo negli Stati Uniti e/o in altri paesi.
v Linux è un marchio di Linus Torvalds negli Stati Uniti e/o in altri paesi.
v Microsoft e Windows sono marchi del gruppo di società Microsoft.
v Nomi di altri servizi, prodotti o società potrebbero essere marchi o marchi di servizio di terze parti.
Prima edizione (marzo 2009)
© Copyright Lenovo 2009.
LENOVO products, data, computer software, and services have been developed exclusively at private expense and
are sold to governmental entities as commercial items as defined by 48 C.F.R. 2.101 with limited and restricted rights
to use, reproduction and disclosure.
LIMITED AND RESTRICTED RIGHTS NOTICE: If products, data, computer software, or services are delivered
pursuant a General Services Administration ″GSA″ contract, use, reproduction, or disclosure is subject to restrictions
set forth in Contract No. GS-35F-05925.

IBM Remote Supervisor
Adapter II SlimLine
IBM
®
II SlimLine BIOS
IBM II SlimLine CD
README
Web
1. Web
Web
ThinkServer TS100 http://www-947.ibm.com/systems/support/oem/index.html
ThinkServer TD100
TD100x
http://www-947.ibm.com/systems/support/oem/td100.html
ThinkServer RS110 http://www-947.ibm.com/systems/support/oem/rs110.html
ThinkServer RD120 http://www-947.ibm.com/systems/support/oem/rd120.html
2
BIOS
BIOS
BIOS
1.
2. Configuration/Setup Utility
F1
3. RSA II RSA II Settings
Configuration/Setup Utility RSA II Settings
Advanced Setup Enter
4. DHCP Control
v DHCP IP
v IP
v DHCP
5. OS USB Selection Microsoft
®
Windows
®
Other OS Linux
Linux ¡

6. Save Values and Reboot RSA II Enter RSA II
Enter
7. Configuration/Setup Utility Save Settings Enter
8. Enter Exit Setup
Enter Enter
9.
1
1. README
2. README
v IBM International Business Machines Corporation
v Lenovo Lenovo Lenovo
v Linux Linus Torvalds
v Microsoft Windows Microsoft Corporation
v
1 1 2009.4
© Copyright Lenovo 2009. All rights reserved.

IBM Remote Supervisor
Adapter II SlimLine 3!
L .-!-B -v! BIOS 8:Om, pU; 3!Og, IBM
®
Remote Supervisor Adapter II SlimLinek
_~n& 3!OB % JdQ vCgW! kX 3mUOY. 3!& OaQ D!B IBM Remote Supervisor
Adapter II SlimLine .- CD! VB gk 3m-& |mOJC@.
pU W _~n DO ^b
pU W _~n DOz Xg Readme DO; #8Ai gkZG -v! XgOB % VRN L?OJC@.
%
1.
" -vG vx % gL.
-v % VR
ThinkServer TS100 http://www-947.ibm.com/systems/support/oem/index.html
ThinkServer TD100 W TD100x http://www-947.ibm.com/systems/support/oem/td100.html
ThinkServer RS110 http://www-947.ibm.com/systems/support/oem/rs110.html
ThinkServer RD120 http://www-947.ibm.com/systems/support/oem/rd120.html
2 dLvG :pU W _~n DO 3!; ANCz& OaOAi L/Q DOL JdUOY.
-v BIOS 8:
gkZ n5 <&! BB pU; 3! W w%L. Ob |! -v BIOS& 8:X_ UOY. Y= \h& v
`O) BIOS& 8:OJC@.
1. -v& QJC@.
2. -v& R D C? ANCz _! ARA.! %CGi F1 0& -/ Configuration/Setup UtilityN in
!JC@.
3. RSA II npM! CY
#T 3!Gn V8i 9 x0 Configuration/Setup Utility -i! RSA II Settings
IGL %CKOY. 9 x0 -i! RSA II Settings IGL %CGv J8i F!! VB Advanced
Setup; 1COm Enter 0& )#JC@.
4. DHCP Control JeG Y= IG _!- W.v) 3$! {UQ Je& 1COJC@.
v Try DHCP then use static IP
v Use static IP configuration
v DHCP enabled
5. OS USB Selection Je!
- ^J W @%J -l% 0& gkO) Other OS(Microsoft
®
Windows
®
n5 <&!- G`GB -vG fl) GB Linux(Linux n5 <&!- G`GB -vG fl)& 1CO
JC@.
6. Save Values and Reboot RSA II& 1COm Enter 0& )#JC@. RSA II 3$LzeGz=;
K.B Kw "L %CKOY. Enter 0& -/ L "; ]8JC@.
7. Configuration/Setup Utility "8N 9F!- Save Settings& 1COm
Enter 0& )#JC@.

8. .N Kw "!- Enter 0& )% Y= Exit Setup; 1COm Enter 0& )#JC@. YC Qx Enter
0& -/ C:[ 3$>a& .NOJC@.
9. n5 <&! kQ npM 8:L CY#T OaGm -v! Z?8N YCC[KOY. 3! Xq! Oa
Gi :pU W _~n D
O 3!;& |mO) 3!& x`OJC@.
pU W _~n DO 3!
pU W _~n DO; ^B f}! |Q vCgW: 1 dLvG :pU W _~n DO ^b;& |mOJC
@.
1. p( 8Tz n5 <&! XgOB pU Readme vCgW! {s pU; 3!OJC@.
2. p( 8Tz n5 <&! XgOB w%L. Readme vCgW! {
s w%L.& 3!OJC@.
s%
v IBM: L9 GB b8 9!!- gkGB International Business Machines CorporationG s%TOY.
v Lenovo W Lenovo NmB L9 GB b8 9!!- gkGB LenovoG s%TOY.
v LinuxB L9 GB b8 9!!- gkGB Linus TorvaldsG s%TOY.
v Microsoft W WindowsB Microsoft group of companiesG s%TOY.
v b8 8g, &0 W -q: L
': Xg 8gG s% GB -q:%TOY.
JG(2009b 3y)
LENOVO &0, %LM, D;M RA.~n W -q:B N# qk8N8 3_Gzm, 48 C.F.R.2.101! $GH gk 0q8N-
$N b|! GEGg, gk, 9& W x3R fl!B F!G &Q{N G.! {kKOY.
&Q{N G.: GSA(General Services Administration) h`! {s &xG
B &0, %LM D;M RA.~n GB -q:G gk,
9& GB x3R fl!B h`- x# GS-35F-05925! mCH &QgWL{kKOY.
© Copyright Lenovo 2009.

Instalación de IBM Remote
Supervisor Adapter II
SlimLine
Este documento proporciona las instrucciones necesarias para configurar el BIOS, instalar el daemon e
instalar el firmware de IBM
®
Remote Supervisor Adapter II SlimLine en el servidor. Después de
completar la instalación, consulte la publicación Guía del usuario en el CD de documentación de IBM
Remote Supervisor Adapter II SlimLine.
Obtención de los archivos del daemon y del firmware
Para localizar los archivos del daemon y del firmware junto con las instrucciones del Readme asociado,
consulte la dirección web correspondiente a su servidor:
Tabla 1. Sitio web de soporte de cada servidor
Servidor Dirección web
ThinkServer TS100 http://www-947.ibm.com/systems/support/oem/index.html
ThinkServer TD100 y TD100x http://www-947.ibm.com/systems/support/oem/td100.html
ThinkServer RS110 http://www-947.ibm.com/systems/support/oem/rs110.html
ThinkServer RD120 http://www-947.ibm.com/systems/support/oem/rd120.html
Estos archivos son necesarios para finalizar el procedimiento de “Instalación de los archivos del daemon
y del firmware” en la página 2.
Configuración del BIOS del servidor
Deberá configurar el BIOS del servidor antes de instalar el daemon y actualizar el sistema operativo. Siga
estos pasos para configurar el BIOS.
1. Encienda el servidor.
2. Para entrar en el programa Configuration/Setup Utility, encienda el servidor y pulse la tecla F1
cuando se le solicite durante el procedimiento de encendido.
3. Si el adaptador RSA II está correctamente instalado físicamente, existirá una opción RSA II Settings
(Valores de RSA II) en la primera pantalla del programa Configuration/Setup Utility. Si no aparece la
opción RSA II Settings en la primera pantalla, mire bajo Advanced Setup (Configuración avanzada).
Seleccione esta opción y pulse Intro.
4. En el campo DHCP Control (Control de DHCP), seleccione el campo correcto para sus valores de red
entre las opciones siguientes:
v Try DHCP then use static IP (Probar DHCP y después usar IP estática)
v Use static IP configuration (Utilizar configuración IP estática)
v DHCP enabled (DHCP habilitado)
5. En el campo OS USB Selection (Selección USB de SO), utilice las teclas de flecha izquierda y derecha
para seleccionar Other OS (Otro SO) para un servidor que utilice el sistema operativo Microsoft
®
Windows
®
,oLinux para un servidor que utilice el sistema operativo Linux.
6. Seleccione Save Values and Reboot RSA II (Guardar valores y reiniciar RSA II) y pulse Intro. Una
ventana emergente indicará que se han guardado los valores de RSA II. Pulse Intro y cierre esta
ventana.
7. Vuelva a la ventana del programa Configuration/Setup Utility y seleccione Save Settings (Guardar
valores) y pulse Intro.
8. Pulse Intro en la ventana emergente de confirmación, seleccione Exit Setup (Salir de la configuración)
y pulse Intro. Pulse Intro de nuevo para confirmar que desea salir de la configuración del sistema.

9. El adaptador está ahora configurado correctamente para el sistema operativo y se reiniciará
automáticamente el servidor. Proceda con la instalación del sistema operativo y consulte “Instalación
de los archivos del daemon y del firmware” cuando esté preparado para la instalación.
Instalación de los archivos del daemon y del firmware
Para obtener instrucciones sobre cómo obtener los archivos del daemon y del firmware, consulte
“Obtención de los archivos del daemon y del firmware” en la página 1.
1. Siga las instrucciones del Readme del daemon para instalar el daemon para el tipo de máquina y
sistema operativo.
2. Siga las instrucciones del Readme de actualización para instalar el firmware para el tipo de máquina y
sistema operativo.
Marcas registradas
v IBM es una marca registrada de International Business Machines Corporation en los Estados Unidos
y/o en otros países.
v Lenovo y el logotipo de Lenovo son marcas registradas de Lenovo en los Estados Unidos y/o en otros
países.
v Linux es una marca registrada de Linus Torvalds en los Estados Unidos y/o en otros países.
v Microsoft y Windows son marcas registradas del grupo de empresas Microsoft.
v Otros nombres de empresas, productos o servicios pueden ser marcar registradas o marcas de servicio
de terceros.
Primera edición (marzo de 2009)
© Copyright Lenovo 2009.

IBM Remote Supervisor
Adapter II SlimLine w
σ≤úb°AW IBM
®
Remote Supervisor Adapter II SlimLine tm BIOSBwn{íHw
ΘnⁿCb¿wßA\ IBM Remote Supervisor Adapter II SlimLine σ≤ CD ñu
ΓUvC
on{íMΘ
YnMΣn{íBΘAH÷p Readme ⁿA⌡Pz°A∩⌠}G
ϕ
1.
C@°AΣ⌠
°A ⌠}
ThinkServer TS100 http://www-947.ibm.com/systems/support/oem/index.html
ThinkServer TD100 M TD100x http://www-947.ibm.com/systems/support/oem/td100.html
ThinkServer RS110 http://www-947.ibm.com/systems/support/oem/rs110.html
ThinkServer RD120 http://www-947.ibm.com/systems/support/oem/rd120.html
znoα¿ 2 ywn{íMΘz{C
tm°A BIOS
z²tm°A BIOSAαwn{í≤s@tCϕUCBJtm BIOSC
1. }°AqC
2. YniJ Configuration/Setup UtilityA}°AqAMßb}≈{íX{úA÷U F1 ΣC
3. pGwgTw RSA II tdA@
Configuration/Setup Utility eñπ @ RSA II Set-
tings ∩CpG@eñSπ RSA II Settings ∩Ad Advanced Setup ºUO
∩C∩o∩AMß÷ Enter ΣC
4. b DHCP Control μñAqUC∩ñ∩z⌠⌠]wTμG
v Try DHCP then use static IP
v Use static IP configuration
v DHCP enabled
5. b OS USB Selection μñA¬ΦVΣMkΦ
VΣ∩ Other OS]A≤⌡μ Microsoft
®
Win-
dows
®
@t°A Linux]A≤⌡μ Linux @t°AC
6. ∩ Save Values and Reboot RSA IIAMß÷ Enter ΣCX{@{°íAⁿXwgxs RSA
II ]wC÷ Enter Σ÷¼o°íC
7. Configuration/Setup Utility °íAMß∩ Save SettingsAA÷ Enter ΣC
8. bT{{°íñA÷ Enter ΣFMß
∩ Exit SetupAA÷ Enter ΣCA÷@U Enter ΣT{n
⌠t]wC
9. z{bwgTa@ttmtdA°AN½s}≈C≥⌡μ@twAbz
wA\ 2 ywn{íMΘzC

wn{íMΘ
÷p≤on{íMΘⁿA\ 1 yon{íMΘzC
1. ϕz≈¼M@tAn{í Readme ⁿAwn{íC
2. ϕz≈¼M@tA≤s Readme ⁿAwΘC
v IBM O International Business Machines Corporation bⁿΩM]ΣLΩaaC
v Lenovo M Lenovo xO Lenovo bⁿΩM]ΣLΩaaC
v Linux O Linus Torvalds bⁿΩM]ΣLΩaaC
v Microsoft M Windows O Microsoft XUqC
v ΣLqBúAWAiα
OTAxC
@]2009 3 δ
© Copyright Lenovo 2009.

IBM Remote Supervisor
Adapter II SlimLine Ürününün
Kurulması
Bu belgede BIOS’u yapılandırmak ve yardımcı programı ve IBM
®
Remote Supervisor Adapter II SlimLine ürününe
ilişkin sabit yazılımı sunucunuza kurmak için gereken yönergeler yer almaktadır. Kuruluş işlemi tamamlandıktan sonra
Kullanıcı Kılavuzu için IBM Remote Supervisor Adapter II SlimLine belgelerinin CD’sine başvurun.
Yardımcı program ve sabit yazılım dosyalarının edinilmesi
İlişkili Readme (Beni oku) yönergeleriyle birlikte yardımcı program ve sabit yazılım dosyalarını bulmak için
sunucunuza karşılık gelen web adresine gidin:
Çizelge 1. Her sunucuya ilişkin destek web sitesi
Sunucu Web adresi
ThinkServer TS100 http://www-947.ibm.com/systems/support/oem/index.html
ThinkServer TD100 ve TD100x http://www-947.ibm.com/systems/support/oem/td100.html
ThinkServer RS110 http://www-947.ibm.com/systems/support/oem/rs110.html
ThinkServer RD120 http://www-947.ibm.com/systems/support/oem/rd120.html
“Yardımcı program ve sabit yazılım dosyalarının kurulması” sayfa 2 yordamını tamamlamak için aşağıdaki dosyalara
gereksiniminiz olacak.
Sunucu BIOS’unun Yapılandırılması
Yardımcı programı kurup işletim sistemini güncellemeden önce sunucu BIOS’unu yapılandırmanız gerekir. BIOS’u
yapılandırmak için aşağıdaki adımları izleyin.
1. Sunucuyu açın.
2. Configuration/Setup Utility olanağına girmek için sunucuyu açın ve açılış sırasında istendiğinde F1 tuşuna basın.
3. RSA II bağdaştırıcısı fiziksel olarak doğru biçimde takıldıysa, görüntülenen ilk Configuration/Setup Utility
(Yapılandırma/Ayar Yardımcı Programı) ekranında RSA II Settings (RSA II Ayarları) seçeneği görüntülenir. RSA
II Settings seçeneği ilk ekranda görüntülenmezse, Advanced Setup (Gelişmiş Ayar) seçeneğinin altına bakın. Bu
seçeneği belirleyin ve Enter tuşuna basın.
4. DHCP Control (DHCP Denetimi) alanında ağ ayarlarınıza ilişkin doğru alanı aşağıdaki seçeneklerden belirleyin:
v DHCP’yi dene ve daha sonra statik IP’yi kullan
v Statik IP yapılandırmasını kullan
v DHCP etkin
5. OS USB Selection (İS USB Seçimi) alanında, Microsoft
®
Windows
®
işletim sistemini kullanan ya da Linux işletim
sistemini kullanan Linux için Other OS (Diğer İS) seçeneğini belirlemek üzere sol ve sağ ok tuşlarını kullanın.
6. Save Values and Reboot RSA II (Değerleri Kaydedin ve RSA II Ürününü Yeniden Başlatın) seçeneği belirleyin
ve Enter tuşuna basın. Açılan pencerede RSA II ayarlarının kaydedildiği belirtilir. Pencereyi kapatmak için Enter
tuşuna basın.
7. Configuration/Setup Utility penceresine dönün ve Save Settings (Ayarları Kaydet) seçeneğini belirleyin ve Enter
tuşuna basın.
8. Açılan onay penceresinde Enter tuşuna basın ve Exit Setup (Ayardan Çık) seçeneğini belirleyip Enter tuşuna
basın. Sistem ayarlarından çıkmayı onaylamak için Enter tuşuna yeniden basın.
9. Bağdaştırıcı şu anda işletim sisteminiz için doğru olarak yapılandırılmış oldu ve sunucu otomatik olarak yeniden
yüklenecek. İşletim sisteminin kuruluşu ile devam edin ve ürünü kurmaya hazır olduğunuzda “Yardımcı program
ve sabit yazılım dosyalarının kurulması” sayfa 2 başlıklı konuya bakın.

Yardımcı program ve sabit yazılım dosyalarının kurulması
Yardımcı program ve sabit yazılım dosyalarının nasıl edinilmesi gerektiğine ilişkin yönergeler için, bkz. “Yardımcı
program ve sabit yazılım dosyalarının edinilmesi” sayfa 1.
1. Yardımcı programı kurmak için makine tipiniz ve işletim sisteminizle ilgili olan yardımcı program Readme
(Benioku) dosyasındaki yönergeleri izleyin.
2. Sabit yazılımı kurmak için makine tipiniz ve işletim sisteminizle ilgili olan güncelleme Readme (Benioku)
dosyasındaki yönergeleri izleyin.
Ticari Markalar
v IBM, International Business Machines Corporation’ın ABD’de ve/veya diğer ülkelerdeki ticari markasıdır.
v Lenovo ve Lenovo logosu, Lenovo’nun ABD’de ve/veya diğer ülkelerdeki ticari markalarıdır.
v Linux, Linus Torvalds’un ABD’de ve/veya diğer ülkelerdeki ticari markasıdır.
v Microsoft ve Windows, Microsoft şirketler grubunun ticari markalarıdır.
v Diğer şirket, ürün ya da hizmet adları ilgili şirketlerin ticari markaları ya da hizmet markaları olabilir.
Birinci basım (Mart 2009)
© Copyright Lenovo 2009.
-
 1
1
-
 2
2
-
 3
3
-
 4
4
-
 5
5
-
 6
6
-
 7
7
-
 8
8
-
 9
9
-
 10
10
-
 11
11
-
 12
12
-
 13
13
-
 14
14
-
 15
15
-
 16
16
-
 17
17
-
 18
18


Lenovo ThinkServer RS110 Guide d'installation
- Taper
- Guide d'installation
- Ce manuel convient également à
dans d''autres langues
- italiano: Lenovo ThinkServer RS110 Guida d'installazione
- English: Lenovo ThinkServer RS110 Installation guide
- español: Lenovo ThinkServer RS110 Guía de instalación
- Deutsch: Lenovo ThinkServer RS110 Installationsanleitung
- 日本語: Lenovo ThinkServer RS110 インストールガイド
- Türkçe: Lenovo ThinkServer RS110 Yükleme Rehberi
Documents connexes
-
Lenovo ThinkServer TD100x Manual D'utilisation
-
Lenovo ThinkServer RS110 Manual D'utilisation
-
-
Lenovo ThinkServer TS100 Manual D'installation
-
Lenovo ThinkServer RD120 Type 6444 Manual D'installation
-
Lenovo THINKSERVER RS210 6531 Manual D’installation Et D’utilisation
-
Lenovo ThinkServer 4010 Manual D'utilisation
-
Lenovo ThinkServer RD240 Manual D'utilisation
-
Lenovo THINKSERVER TD200x 3822 Manual D’installation Et D’utilisation
-
Lenovo ThinkServer TD200 3809 Manual D'installation