Pfaff tipmatic 1151 Le manuel du propriétaire
- Catégorie
- Machines à coudre
- Taper
- Le manuel du propriétaire
Ce manuel convient également à
La page est en cours de chargement...
La page est en cours de chargement...
La page est en cours de chargement...
La page est en cours de chargement...
La page est en cours de chargement...
La page est en cours de chargement...
La page est en cours de chargement...
La page est en cours de chargement...
La page est en cours de chargement...

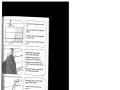
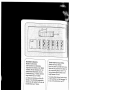
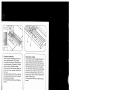
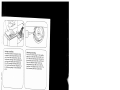
,1
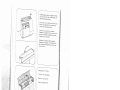
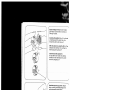
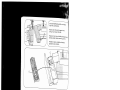
Remplissage
de
Ia
canette
a
partir
d’une
deuxième
bobine:
•
Tourner
l’/nterrupteur
généraL
Basculer
le
guide4il
127
vers
‘avant.
Passer
le
fil
par
le
guide
fil
125
puis,
selon
le
dessin,
dans
le
guide4il
127,
entre
ce
guide
et
le
ressort
de
tension
N.
Enrouler
le
fil
de
quelques
tours
sur
a
canette
et
Ta
pous
ser
vers
Ia
droite.
Appuyer
sur
le
rheostat
et
bobiner.
Pousser
a
canette
garnie
vers
a
gauche:
Ia
retirei
tirer
le
fil
vers
‘avant
et
le
couper
sur
le
coupe-fil
0.
Important:
Veiller
a
ce
que
es
fentes
de
maintien
du
fil
de
Ia
bobine
passee
sur
a
broche
se
trouvent
a
droite.
Avvolgere
Ia
spolina
da
un
secondo
rocchetto:
•
loser/re
linterruttore
principale.
Spostare
in
avanti
Ia
guida
127
per
To
spolatore.
Tenere
il
fib
nella
guida
125
e,
come
mdi
cato
nel
disegno,
nebba
guida
127
facendo
attenzione
che
ii
fib
passi
tra
Ia
guida
e
Ia
mofla
di
tensione
N.
Avvolgere
ora
ii
fib
alcune
vo[te
attorno
alla
spolina.
Premere
Ia
spolina
verso
destra.
Azionare
II
reo
stato
e
avvolgere
Ta
bobina.
Premere
Ia
spolina
piena
verso
sinistra,
toglierla,
tirare
ml
fib
in
avanti
a
reciderlo
nel
tagbia
fib
0.
Importante:
quando
si
usano
rocchetb
con
intaglio
fermafili,
occorre
inserire
Ia
parte
intagliata
verso
destra.
Nähwerk
einschalten:
Handrad
festhal
ten
und
Scheibe
103
nach
hinten
drehen.
Dann
Handrad
nach
vorne
drehen,
bis
es
einrastet.
Engaging
the
sewing
mechanism:
Hold
the
hand
wheel
firmly
and
turn
disk
103
toward
the
back,
then
turn
the
hand
wheel
forward
again
until
it
snaps
in.
Embrayage
dii
mécanisme
Retenir
le
volant
et
tourner
le
disque
103
vers
‘ar
rière.
Tourner
le
vobant
vers
‘avant
jusqu’a
ce
qu’ib
s’encbenche.
nserimento
meccanismo
di
cucito:
tenere
fermo
1
vobantino
e
girare
ii
disco
103
verso
dietro.
Girare
quindi
ii
vobantino
in
avanti
finchè
s’innesta.
-‘
4
-
--
?
4-
-
4’
4
-—-
,,
4
-
V
7
La page est en cours de chargement...

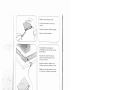
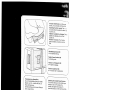
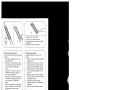
Remplissage
de
Ia
canette
avec
le
fil
d’aiguille:
•
Thurner
I?nterrupteur
généra/
Embrayé
entramnement
double,
Relever
le
pied
pres—
seur
a
aiguille
en
position
haute.
Placer
Ia
canette
sur
le
dévidoir
119.
Débrayer
le
mécanisme.
Passer
le
fit
d’aiguille
sous
le
pied
presseur,
vers
Ia
droite
par
le
passe-
fit
127
avant
de
i’enrouler
de
quetques
tours
sur
Ia
canette
et
de
pousser
cetle-ci
vers
Ia
droite.
Appuyer
sur
le
rheostat
et
bobiner.
Pousser
Ia
canette
garnie
vers
Ia
gauche,
I’enlever
et
tirer
le
fit
vers
avant
puis,
le
couper
sur
le
coupe-fit
N.
4
Avvolgere
Ia
spolina
attraverso
I’ago:
•
Inserire
I’interruttcre
principale.
lnserito
doppio
trasoorto.
Alzare
it
piedino.
Posi
zione
ago
superiore.
Inserire
Ia
spolina
sulto
spolatore
119.
Disinserire
ii
mecca
nismo
di
cucito.
Portare
it
fib
superiore
sotto
it
piedino
verso
destra
attraverso
Ia
guida
127
(vedere
disegno).
Avvolgere
it
fib
alcune
volte
attorno
alta
spotina
e
pre
merba
quindi
verso
destra.
Azionare
it
reo
stato
e
bobinare.
Premere
Ia
spohna
piena
verso
sinistra,
toglierla,
tirarla
in
avanti
e
recidere
ii
fib
net
tagliafibo
“N”.
Ndhwerk
einschalten:
Handrad
festhal
ten
und
Scheibe
103
nach
hinten
drehen.
Dann
Handrad
nach
vorne
drehen,
bis
es
einrastet.
Engaging
the
sewing
mechanism:
Hold
the
hand
wheel
firmly
and
turn
disk
103
toward
the
back,
then
turn
the
hand
wheel
forward
again
until
it
snaps
in.
Embrayage
du
mécanisme
Retenir
le
volant
et
tourner
le
disque
103
vers
‘ar
rière.
Tourner
le
volant
vers
I’avant
Jusqu’à
ce
qu’iI
s’enclenche.
Inserimento
meccanismo
di
cucito:
tenere
fermo
ii
volantino
e
girare
it
disco
103
verso
dietro.
Girare
quindi
it
volantino
in
avanti
finchè
s’innesta.
9
3
I
U
-
I
.,
La page est en cours de chargement...
La page est en cours de chargement...
La page est en cours de chargement...

13
4
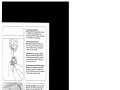
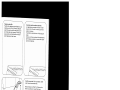
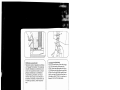
ken,
Einfädler
nach
vorn
an
die
Nadel
schwen
Push
the
threader
forward
against
the
needle.
Basculer
l’enfileur
vers
l’avant
par
l’aiguille.
Far
girare
I’infilatore
in
avanti
verso
‘ago.
gen.
Den
Faden
von
unten
in
den
Haken
R
han-
Place
the
thread
in
hook
R
form
below.
Accrocher
le
fil
den
bas
sur
le
crochet
R.
Agganciare
il
fib
da
sotto
net
gancio
R.
4
Einfädter
nach
hinten
schwenken,
den
Faden
dabei
loslassen
und
den
Einfädler
hochgleiten
lassen.
Dann
den
Faden
ganz
durch
das
Nadeböhr
ziehen.
Turn
the
threader
to
the
left,
letting
go
of
the
thread
at
the
same
time,
and
allow
the
threader
to
move
upwards.
Pull
the
thread
fully
through
the
needle
eye.
/
Basculer
l’enfileur
vers
l’arriëre
en
làchant
le
fit
et
en
laissant
glisser
l’enfileur
vers
le
haut.
Ensuite
faire
passer
le
fit
par
be
chas
de
l’aiguille.
Girare
l’infilatore
verso
dietro
e
rilasciarlo
contemporaneamente
e
lasciare
che
ritorni
in
sü.
Tirare
quindi
il
fib
completa
mente
attraverso
a
cruna
dell’ago.
La page est en cours de chargement...

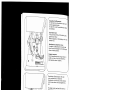
N
ken.
Nähfläche
107
an
die
Maschine
schwen
II
free
arm.
Swing
work
support
107
back
against
the
Remettre
en
place
a
bolte
de
rangement
107
contre
le
bras.
china.
Avvicinare
ii
piano
variabile
107
alla
mac-
4
•
Hauptschalter
104
ausscha)ten.
Stoff
unter
den
NähfuL
legen.
N
•
Switch
off
master
switch
104.
Place
fabric
under
the
sewing
foot.
seur.
•
Tournar
I’interrupteur
général
104
‘Arrêt’
Placer
du
tissu
sous
le
pied
pres
•
Disinserire
I’interruttore
principale
104.
Porre
(a
stoffa
sotto
ii
piedino,
4
Beim
Einlegen
extrem
dicker
Stofflagen
Hebel
114
höher
anheben.
lever
114
To
insert
extra-thick
fabric
plies
raise
Pour
les
tissus
trés
épais,
ever
davantage
le
levier
114.
In
caso
di
spessori
di
stoffa
estremamente
grossi
alzare
ulteriormente
Ia
eva
114.
4
•
Hauptschalter
einschalten.
Stoffdrückerhebe
7
114
senken,
(N
st
die
Stellung
zum
Stopien).
•
Switch
on
master
switch.
Lower
presser
bar
lifter
114.
(N
shows
the
darning
position).
•
Tourner
/‘interrupteurgénéraL
Descendre
le
levier
114.
Pour
a
reprisage,
utiliser
a
position
N.
I
•
Inserire
linterruttore
princiaIe.
Abbas
sare
Ia
lava
114
(N
corrisponde
alla
posizione
per
rammendo).
15
La page est en cours de chargement...

Tensions
des
fils:
Position
de
réglage
normale
dans
a
plage
blanche,
entre
3
et
5.
Tension
d’autant
plus
forte
que
le
chiffre
est
élevé.
ContrO
er
a
l’aide
du
point
zigzag.
Coudre
quel
ques
points.
Les
fils
doivent
se
nouer
dens
l’épaisseur
des
tissus.
4
Controllo
della
tensione
del
fib:
La
regolazione
normale
Si
trova
nel
set-
tore
da
3-5.
Piü
alto
il
numero
piü
forte
sara
a
tensione.
II
controllo
viene
fatto
con
lo
zig-zag
piü
largo.
Cucire
una
breve
cucitura.
Lannodarnento
dei
fill
deve
awenire
al
centro
dello
spes
sore
del
materiale.
/1vvw\1
4
I
Stoffdrückerhebel
114
hochstelien.
Stoff
nach
hinten
herausnehmen.
Raise
presser
bar
lifter
114.
Rernove
the
fabric
by
pulling
it
toward
the
back.
Relever
le
levier
114.
Degager
le
tissu
vers
I’arrière.
Alzare
Ia
leva
alzapiedino
114.
Togliere
a
stoffa
verso
dietro.
Fadenabschneider
N.
Fäden
einlegen
und
nach
unten
ziehen.
Thread
cutter
N.
Draw
the
threads
into
the
slot
and
pull
them
downwards.
Coupe-fil
N.
Coucher
les
fils
dans
a
fente
et
es
tirer
vers
le
bas.
Tagliafibo
N.
Inserire
I
fiji
e
tirarli
verso
II
basso.
17
La page est en cours de chargement...

4
Stichlänge
einstelien:
Die
Zahien
auf
dem
Stichlängen-Einsteller
106
geben
die
Stichlänge
in
mm
an.
Der
Einstellbereich
ist
0
bis
6
mm.
Die
gewünschte
Stichlänge
wird
an
die
Em
steilmarkierung
N
gedreht.
Die
Abbildung
0
unten
zeigt
die
Einstel
lung
des
Stichlängen-Einstellers
zum
Nähen
der
rot
abgebildeten
Stretchstiche
auf
den
Tasten.
Regulating
the
stitch
length
The
numbers
on
stitch
length
control
106
indicate
the
stitch
length
in
millimeters.
The
stitch
length
range
is
0
to
6
mm.
Turn
the
control
to
set
the
number
indicating
the
stitch
length
at
mark
N.
Fig.
0
(bottom)
shows
how
to
set
the
stitch
length
control
for
sewing
stretch
stitches
(red
stitch
symbols
on
push
but-
tons).
Reglage
de
Ia
longueur
du
point:
Les
chiffres
sur
le
disque
106
indiquent
Ia
longueur
du
point
en
mm.
La
longueur
du
point
est
réglable
entre
0
et
6
mm.
La
longueur
do
point
choisie
est
indiquee
face
au
repére
N.
Lillustration
0
(en
bas)
montre
le
réglage
du
regle-point
pour
Ia
couture
des
points
elastiques
marques
en
rouge
sur
les
tou
ches.
Regolazione
della
Iunghezza
del
punto:
I
numeri
sul
bottone
regolatore
della
un
ghezza
del
punto
106
corrispondono
alla
lunghezza
del
punto
in
mm.
La
regola
zione
si
estende
da
0
a
6
mm.
La
lun
ghezza
del
punto
desiderata
si
regola
sulla
marcatura
N.
La
figura
0
sotto
mostra
Ia
regolazione
del
bottone
regolatore
per
cucire
i
punti
flexi
(stretch)
raffigurati
in
rosso
sui
tasti.
19
La page est en cours de chargement...
La page est en cours de chargement...
La page est en cours de chargement...

E
F
r
E
L
F
K
Point
de
surjet
Point
bord
coquille
Point
d’épi
Point
élastique
décoratif
M
Point
nid
d’äbeille
Point
élastique
Touches:
A,
B,
C
Touches
boutonniere
La
touche
B
sort
également
a
débrayer
es
touches
enfoncées
et
a
déporter
le
point
a
gauche
(voir
page
27).
D
Triple
point
zigzag
élastique,
2
mm
Point
zigzag
2
mm
Triple
point
zigzag
élastique,
3,5
mm
Point
zigzag
3,5
mm
Triple
point
zigzag
élastique,
5
mm
Point
zigzag
5
mm
G
Triple
couture
droite
élastique
Point
droit
Point
pullover
Point
invisible
Point
do
surjet
fermé
Point
d’assemblage
H
Dans
le
couvercle,
vous
trouverez
le
tableau
de
programmes
illustrant
los
points
et
los
combinaisons
de
points.
Dans
le
tableau
sur
les
pages
80à
83,
vous
trouverez
les
indications
correspon
dantes
pour
Ia
couture.
Sur
le
modèle
1171,
ii
faut
débrayer
le
règ
b-point
pour
points
décoratifs
si
‘on
veut
coudre
les
points
reproduits
sur
les
tou
ches.
Pour
ce
faire,
régler
le
point
blanc
face
au
repére
de
réglage,
page
28.
J
I
tasti
automat
ici:
A,
B,
C:
tasti
per
occhiello
automatico,
II
tasto
B
serve
inoltre
come
tasto
di
annullamento
dei
tasti
inseriti
e
per
a
posizione
delrago
a
sinistra
(vedi
pag.
27).
D
punto
a
zig-zag
stretch
tripbo
2
mm
punto
a
zig-zag
2
mm
punto
a
zig-zag
stretch
tripbo
3,5
mm
punto
a
zig-zag
3,5
mm
punto
a
zig-zag
stretch
tripbo
5
mm
punto
a
zig-zag
5
mm
G
punto
dritto
stretch
triplo
punto
drifto
H
punto
pullover
punto
invisible
I
punto
overlock
chiuso
punto
giuntura
K
punto
overlock
orb
a
conchiglia
L
punto
piuma
punto
elastico
ornamentale
M
punto
nido
d’ape
punto
elastico
Nel
coperchio
della
macchina
a
raffigurata
una
tabella
dei
programmi
con
i
punti
e
le
relative
combinazioni.
Nella
tabella
a
pagine
84-87troverete
le
relative
istru
zioni
per
l’applicazione.
Per
cucire
i
punti
dei
tasti
automatici
nel
Modello
1171
bisogna
disinnestare
prima
ii
regolatore
punto
ornamentale
ruotando
ii
punto
bianco
sotto
Ia
marca
di
registra
zione
(vedi
pag.
28).
23

H
Selecting
utility
stitches
(white
symbols>
Push
the
button
required
and
set
the
stitch
length
between
1
and
6.
All
zigzag,
and
utility
stitches
are
halved
in
width
when
button
G
is
pressed.
4--
I
punti
utili:
(simboli
bianchi>
Premere
il
tasto
e
regolare
Ia
lunghezza
del
punto
desiderata
tra
1-6.
Tutti
i
punti
a
zig-zag,
elastici
e
stretch
vengono
dimezzati
nella
loro
larghezza,
se
si
preme
in
aggiunta
ii
tasto
G.
)
Nutzstiche
einstellen:
(weile
Symbole)
Taste
tippen
und
die
gewunschte
Stich
lange
zwischen
1
und
6
einstellen.
Alle
Zickzack-
und
Nutzstiche
werden
durch
zusàtzliches
Tippen
der
Taste
G
in
der
Breite
halbiert.
4
Reglage
des
points
utilitaires:
(symboles
blancs)
Appuyer
sur
a
touche
et
regler
Ia
Ion
gueur
de
point
désirée
entre
1
et
6.
En
appuyant
également
sur
Ia
touche
G,
tous
les
points
zigzag
et
utilitaires
sent
réduits
de
moitié.
24

Réglage
des
points
elastiques:
(symboles
rouges)
Appuyer
sur
a
touche
et
régler
le
règle
point
de
Ia
Iongueur
de
points
sur
a
sym
bole
rouge,
jusqu’ä
Ia
butée.
Tous
es
points
élastiques
soot
réduits
de
motie
en
appuyant
sur
Ia
touche
G.
25
Stretchstiche
einstellen:
(rote
Symbole)
Taste
tippen
und
Stichlangen-Einsteller
bis
zum
Anschlag
auf
rotes
Symbol
stel
en.
Alle
Stretchstiche
werden
durch
zusätzli
ches
Tippen
der
Taste
G
in
der
Breite
hal
biert.
Selecting
stretch
stitches
(red
symbols)
Push
the
button
required
and
turn
the
stitch
length
control
as
far
as
it
will
go
(red
symbol>.
By
also
pressing
button
G,
all
stretch
stit
ches
can
be
halved
in
width.
4
Regolazione
dei
punti
flexi
(stretch):
(simboli
rossi)
Premere
il
tasto
e
girare
il
regolatore
per
Ia
lunghezza
del
punto
fino
all’arresto
sul
simbolo
rosso.
Tutti
i
punti
flexi
si
dimezzano
in
ar
ghezza,
premendo
in
aggiunta
il
tasto
G.

Nutz-
unci
Stretchstich-Kombination
4n
Die
Stichkombinationen
sind
auf
der
Programmtabelle
im
Klappdeckel
angeg
ben
und
am
Ende
dieser
Anleitung
mit
Nähhinweisen.
Zum
Beispiel
der
Elasti
sche-Blindstich:
Taste
M
und
F
gleichzej
tig
tippen.
Stichlãnge
zwischen
1
und
4
whIen.
Utihty-
and
stretch-stitch
combina
tions
The
various
stitch
combinations
are
shown
in
the
chart
on
the
inside
of
the
hinged
top
cover
and
at
the
end
of
this
booklet,
together
with
sewing
instruc
tions.
For
example,
if
you
want
to
sew
an
elastic
blindstitch,
push
buttons
M
and
F,
select
a
stitch
length
between
1
and
4.
Points
utilitaires
et
elastiques
combines:
Les
combinaisons
de
points
possibles
sont
indiquees,
avec
des
conseils
et
idées,
sur
le
tableau
des
points
a
Ia
fin
cie
ce
mode
d’emploi.
Pour
le
point
invisible
élastique,
par
exemple,
il
faut
enfoncer
les
touches
F
et
M
et
choisir
une
longueur
de
point
entre
1
et
4.
Le
combinazioni
dei
punti
utili
con
i
punti
flexi
(stretch>:
Le
combinazioni
dei
punti
sono
indicate
sulla
tabella
dei
programmi
nel
coperchio
e
al
termine
di
questo
libretto,
con
con
sigh
per
il
cucito.
Ad
esempio
il
punto
invisibile
elastico:
tasto
M
e
F
premuti
insieme.
Sceghiere
lunghezza
del
punto
tra
1
e
4.
26
\

4
N
C?D
__
ri
>
LJ
i
H
4
Stichiage
einstellen
bei
Geradstich:
Stichiage
links:
Taste
B
tippen
Stichiage
Mitte:
Taste
G
tippen
Stichlage
rechts:
Taste
H
und
I
tippen
4
Selecting
the
needle
position
for
straight
stitching
Left
needle
position:
push
button
B
Central
needle
position:
push
button
G
Right
needle
position:
push
buttons
H
and
Deport
du
point
droit:
Deport
a
gauche:
appuyer
sur
Ia
touche
B
Deport
au
milieu:
appuyer
sur
Ia
touche
G
Deport
a
droite:
appuyer
sur
les
touches
H
et
J
Regolazione
della
posizione
d’ago
nella
cucitura
diritta:
Posizione
ago
sinistra:
premere
tasto
B
Posizione
ago
centro:
premere
tasto
G
Posizione
ago
destra:
premere
tasti
H
e
I
27

flflfl]]fflTj--N
4
Thumb
wheel
for
fancy
stitches
(Models
with
fancy
stitches):
Every
fancy
stitch
is
provided
with
a
letter.
Select
the
fancy
stitch
from
the
table.
Set
the
correspondin9
letter
at
mark
“0”
by
turning
thumb
wheel
N.
Select
a
stitch
length
between
0,5
and
1.
For
sewing
utility
stitches,
thumb
wheel
N
for
fancy
stitches
must
be
disengaged.
To
do
so,
set
the
white
dot
at
mark
“0’.
Regolatore
punti
ornamentali
(Modelli
con
punti
ornamentali):
Ad
ogni
punto
ornamentale
corrisponde
una
lettera.
Scegliere
il
punto
secondo
Ia
riproduzione
nella
tabella.
Col
selettore
di
registrazione
,,N”
ruotare
Ia
lettera
deside
rata
sotto
a
marca
di
registrazione
,,0”.
Regolare
Ia
lunghezza
del
punto
deside
rata
tra
0,5—1.
Per
cucire
con
i
punti
comuni
disinserire
ii
regolatore
“N”
dei
punti
ornamentali.
Allo
scopo
ruotare
il
punto
bianco
sotto
a
marca
di
registrazione
“0”
/
o.U
f
-r
I
4
Einstellrad
für
Zierstiche
(Modelle
mit
Zierstichen):
Jedem
Zierstich
ist
em
Buchstabe
zugeordnet.
Den
Zierstich
auf
der
Tabelle
auswählen.
Mit
dem
Einstellrad
,,N”
den
entsprechenden
Buchstaben
unter
die
Einstellmarkierung
,,0”
drehen.
Die
Stich
lange
zwischen
0,5
und
1
wählen.
Zum
Náhen
der
Nutzstiche
mul,
das
Em
stellrad
,,N”
der
Zierstiche
ausgeschaltet
werden.
Dazu
den
weifen
Punkt
unter
die
Emnstellmarkierung
,,0”
drehen.
4
Disque
de
reglage
des
points
d’orne
mentation
(Modèle
avec
points
d’orne
mentation):
Chaque
point
d’ornementation
est
désigné
par
une
lettre-code.
A
l’aide
du
disque
,,N”
placer
Ia
lettre-code
du
motif
désiré
sous
le
repère
,,0”.
Régler
Ia
Ion
gueur
de
point
désirée
entre
0,5
et
1.
Pour
pouvoir
coudre
les
points
utilitaires,
debrayer
le
disque
de
reglage
,,N”
des
points
d’ornementation
en
placant
le
point
blanc
de
ce
disque
sous
le
repère
,,0”.
28
La page est en cours de chargement...
La page est en cours de chargement...
La page est en cours de chargement...

32
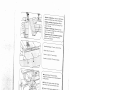
Positionnement
haut
et
bas
de
l’aiguifle:
Après
le
dernier
point
de
Ia
couture,
l’ai
guille
s’arrète
toujours
en
haut.
En
enfon
cant
Ia
touche
“aiguille en
bas”,
Ia
lampe
témoin
N
s’allume.
at
I’aiguille
s’immobi
use,
a
chaque
arrét
de
a
machine,
en
bas
dans
l’ouvrage
(pour
coudre
es
coins
at
tourner
l’ouvrage).
En
appuyant
a
nouveau
sur
cette
méme
touche,
Ia
lampe-témoin
s’éteint,
l’aiguille
monte
at
s’immobilise
en
position
haute
a
chaque
arrêt
de
Ia
machine.
La
touche
peut
ëtra
enfoncée
même
en
cours
de
couture.
Selection
électronique
de
Ia
vitesse
finale:
On
pourra
diminuer
Ia
vitesse
finale
de
Ia
couture
a
Ia
moitié
en
enfoncant
Ia
touche
“Couture
vitesse
réduite”.
Ce
faisant,
Ia
lampe-témoin
0
s’allume.
En
enfonçant
une
nouvelle
fois
cette
touche,
Ia
lampe
témoin
s’éteint
et
Ia
machine
coud
a
Ia
vitesse
finale maximala.
A
toutes
las
vitesses,
Ia
force
de
pénétra
tion
de
I’aiguille
est
garantia.
Travaux
de
bâtissage:
Enfoncer
a
touche
“point
béti”
at
Ia
lam
pa-témoin
P
s’allume.
Abaisser
Ia
griffe
(voir
page
44)
at
fixer
le
pied
a
repriser
(voir
page
39).
Mettra
a
tissu
sous
le
pied
prasseur.
Chaque
fois
qua
I’on
appuie
sur
Ia
pédale
et
Ia
relãche,
Ia
machine
coud
un
point.
Faire
passer
Ia
matière
sous
le
pied
pres
seur
at
I’arrèter
a
Ia
longueur
de
point
voulue
at
appuyer sur
Ia
pédale
at
a
ralâ
cher.
Répéter
continuellement
cette
opér
tion
da
couture.
Après
avoir
tarminé
le
bétissaga,
Iâcher
Ia
pédale
at
enfoncer
Ia
touche
“point
bâti”.
Ce
faisant,
a
lampe
témoin
P
s’étaint.
Poussar
Ia
bouton
abaisse-griffe
vers
Ia
gauche.
Rafermer
le
cache
121.
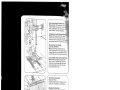
Contrôle
electronique
du
fil
de
canette
La
lampa-témoin
rouge
111
commence
a
clignoter
Iorsque
Ia
fil
de
canette
s’épuise.
La
lampe-témoin
s’éteint lorsqu’une
canatte
garnie
est
mise
an
place
at
qua
l’on
continua
a
coudra.
Important:
La
cache
121
doit
toujours
étra
farmé.
4
tiptronic
Organes
de
commande
electroniques
La page est en cours de chargement...
La page est en cours de chargement...

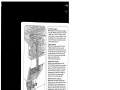
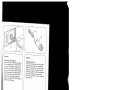
II
piano
di
lavoro
variabile
e
gli
acces
son:
II
piano
di
lavoro
pub
essere
to[to
(N).
Aprire
ii
piano
di
lavoro,
togliere
II
casset
tine
degli
accessori
R
Sotto
ii
cassettino
degli
accessori
si
trova
uno
scomparto
per
accessori
0.
Figura
Q
mostra
come
siste
mare
piedini,
aghi
e
spoline.
0
pied
presseur
normal
1
pied
pour
points
décoratifs,
avec
entralnement
supérieur
2
pied
pour
points
décoratifs,
sans
entrainement
supérieur
3
pied
a
point
invisible
et
pour
surjet
4
pied
pour
poser
es
fermetures
a
glissière
et
pour
piqüres
au
bord
5
pied
a
boutonnières
6
pied
a
repriser
7
pied
ourleur
8
guide-bord
o
piedino
normale
1
piedino
per
ricamo
per
doppio
trasporto
2
piedino
per
ricamo
(senza
doppio
trasporto)
3
piedino
per
punto
invisibile
e
per
Overlock
4
piedino
per
cerniere
lampo
5
piedino
per
occhielli
6
piedino
per
rammendo
7
piedino
orlatore
8
lineale
Verwandlungsnähfläche
und
Zubehör:
Nähfläche
kann
herausgenommen
werden
N.
Nähfläche
öffnen,
Zubehbrkästchen
P
herausnehmen.
Unter
dem
Zubehörkäst
chen
ist
em
Zubehärfach
0.
Abbildung
Q
zeigt,
wie
NähfüRe,
Nadeln
und
Spulen
eingeordnet
werden
müssen.
o
Normalndhful
1
Zierstichfu6
für
Obertransport
2
Zierstichful?,
nicht
für
Obertransport
3
Blindstich-
und
0verlockful?
4
Reilverschlul-
und
Kantenful
5
KnopflochfuR
6
Stopffu1,
7
Säumer
8
Lineal
j
Detachable
work
support
and
accessories:
The
work
support
can
be
lifted
out
(N).
Open
its
lid
and
take
out
accessory
box
R
Underneath
the
box
is
an
accessory
com
partment
0.
Illustration
Q
shows
how
to
arrange
sewing
feet,
needles
and
bobbins
in
the
accessory
box.
O
Ordinary
sewing
foot
1
Fancy-stitch
foot
for
top
feed
2
Fancy-stitch
foot
(without
top
feed)
3
Blindstitch
and
overlock
foot
4
Zip
foot
5
Buttonhole
foot
6
Darning
foot
7
Hemmer
8
Edge
guide
BoIte
de
rangement
et
accessoires:
Enlever
Ia
boite
de
rangement
N,
I’ouvrir
et
enlever
Ia
bolte
d’accessoires
P
Sous
celle-ci
se
trouve
le
casier
0.
Figure
Q
vous
montre
comment
ranger
Ies
pieds
presseurs,
les
aigullles
et
les
canettes.
35
La page est en cours de chargement...

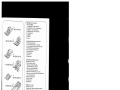
Nähfüle
(Normalzubehör)
0
Normalnähfu8
1
Zierstichfult,
für
Obertransport
2
ZierstichfuB
nicht
für
Obertransport
3
Blindstich-
und
Overlocktull,
4
ReiBverschlul,-
und
Kantenfuf
5
KnopflochfuE,
6
StopffuZ
7
Säumer
8
lineal
Sewing
feet
(standard
accessories)
o
Ordinary
sewing
foot
1
Fancy-stitching
foot,
for
top
feed
2
Fancy-stitching
foot
(without
top
feed)
3
Blindstitching
or
overlock
foot
4
Zip-
and
edge-stitching
foot
5
Buttonhole
foot
6
Darning
foot
7
Hemmer
8
Edge
guide
Semelles
de
pieds
presseurs
(accessoires
courants)
O
pied
presseur
normal
1
pied
pour
points
décoratifs,
avec
entrainement
supérieur
2
pied
pour
points
décoratifs,
sans
entralnement
supérleur
3
pied
a
point
invisible
et
pour
surjet
4
pied
pour
poser
es
fermetures
a
glissibre
et
pour
piqüres
au
bord
5
pied
a
boutonnières
6
pied
repriser
7
pied
ourleur
B
guide-bord
Piedini
(di
corredo)
o
piedino
normale
1
piedino
per
ricamo
per
doppio
trasporto
2
piedino
per
ricamo
(senza
doppio
trasporto)
3
piedino
per
punto
invisibile
a
per
Overlock
4
piedino
per
cerniere
lampo
a
per
impunture
su
bordi
5
piedino
per
occhielli
6
piedino
per
rammendo
7
piedino
orlatore
8
lineale
7
98-694
818-00
6
93-035
960-91
98-694
816-00
4W
2
98-694
897-00
4
98-694
884-00
5
98-694
882-00
37

4
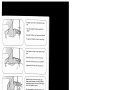
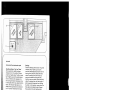
Overlock
stitching
(0):
Turn
screw
P
to
set
guide
Q
to
the
far
right.
The
fabric
runs
along
guide
edge
R.
Piedino
per
punto
irivisibile
e
per
Overlook:
Punto
invisibile
(N):
Portare
con
vite
P
Ia
guida
Q
verso
sinistra.
La
guida
viene
quindi
regolata
per
Ia
corretta
dntrata
delI’ago.
La
piegatura
della
stoffa
scorre
lungo
ii
bordo
di
guida
R.
Cucitura
Overlook
(0):
Spostare
con
Ia
vite
P
Ia
guida
Q
a
destra
fino
alI’arresto.
La
stoffa
scorre
lungo
il
bordo
di
guida
R.
4
4
Blindstich-
und
Overlockfu1:
Blindstichnähen
(N):
Mit
Schraube
P
die
Fuhrung
Q
nach
links
stellen.
Die
Fuhrung
wird
dann
für
den
Nadeleinstich
reguliert.
An
der
Fuhrungskante
R
läuft
der
Bruch
des
Oberstoffes
entlang.
Blindstitching
and
overlook
foot
Blindstitching
(N):
turn
screw
P
to
set
guide
Q
at
the
left.
The
guide
is
then
adjusted
according
to
the
needle
penetra
tions.
The
folded
edge
of
the
material
runs
along
guide
edge
R.
Overlocknhen
(0):
Mit
Schraube
P
die
Führung
Q
bis
zum
Anschlag
nach
rechts
drehen.
Der
Stoff
läuft
an
der
Fuhrungs
kante
R
entlang.
4
Pied
a
point
invisible
et
pour
surjet:
Couture
au
point
invisible
(N):
Déplacer
le
guide
Q
a
gauche
par
Ia
vis
R
Le
guide
est
régle
pour
Ia
pénétration
de
laiguille
dans
le
tissu.
La
cassure
du
tissu
supérieur
longe
le
bord
du
guide
R.
Couture
au
point
de
surjet
(0):
Tourner
le
guide
Q
par
Ia
vis
P
vers
Ia
droite
jusquà
Ia
butée.
Le
tissu
longe
le
bord
R
du
guide.
38

Pied
a
repriser:
Lever
Ia
barre
a
aiguille.
Deplacer
l’étrier
P
vers
I’arrière
et
le
maintenir.
Introduire
le
tenon
de
Ia
semelle
dans
le
trou
N;
a
fourche
R
entoure
a
barre
du
pied
pres
seur;
introduire
le
pied
jusqu’a
Ia
butée.
Làcher
létrier
P;
ii
Se
pose
stir
Ia
vis
de
maintien
Q,
Ensuite
resserrer
Ia
vis
0.
En
reprisant
de
Ia
lame,
enfiler
le
fil
de
lame
dans
le
guide
S.
Stopffu(:
Die
Nadel
hochstellen.
Den
Bugel
P
nach
hinten
drücken
und
festhalten.
Den
Stift
des
FuIes
in
die
Bohrung
N
einführen,
die
Gabel
R
greift
dabei
urn
die
Stoffdrücker
stange,
und
den
FuB
bis
zurn
Anschlag
einsetzen.
Den
Bugel
P
loslassen,
wobei
er
sich
auf
die
Halteschraube
Q
Iegt.
Die
Schraube
0
festdrehen.
Bairn
Stopfen
mit
Wolle
wird
der
Woilfa
den
in
die
Führung
S
gezogen.
Darning
foot:
Position
the
needle
up.
Push
bar
P
to
the
back
and
hold
it
there.
Fit
the
pin
of
the
foot
in
hole
N:
at
the
same
time,
fork
R
engages
the
presser
baG
and
push
the
foot
fully
in.
Let
go
of
bar
P,
which
then
rests
on
retaining
screw
0.
Tighten
screw
0.
For
wool
darning
the
woollen
thread
is
pulled
into
guide
S.
4
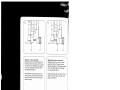
II
piedino
da
rammendo:
Alzare
‘ago.
Premere
Ia
staffa
P
verso
dietro
e
tenerla
ferma.
Inserire
il
perno
del
piedino
riel
foro
N,
Ia
forcella
R
si
aggan
cia
in
tal
rnaniera
sulla
barra
premistoffa,
quindi
innestare
il
piedino
fino
all’arresto.
Rilasciare
Ia
staffa
P
che
si
appoggeré
sulla
vite
di
fissaggio
0.
Awitare
Ia
vite
0.
Rammendando
con
lana
infilarla
nella
guida
S.
J
39

Zipper
foot
(edge
sewing
foot
(N):
The
zipper
foot
is
secured
on
the
left
or
right,
depending
on
the
side
of
the
zip
to
be
sewn
(N)
Edge
guide
(0):
Push
the
edge
guide
into
hole
0,
set
the
required
edge
distance
and
tighten
it
there.
II
piedino
per
cerniere
lampo
(piedino
per
impunture
su
bordi)
(N):
II
piedino
per
cerniere
si
innesta
a
destra
o
sinistra
a
seconda
della
parte
della
cer
niera
da
cucire.
ReUverschIu(ful
(KantenfuiM
(N):
Der
ReiRverschlulfu
wird
für
die
jewei
lige
Rei1verschluBhälfte
links
oder
rechts
eingerastet.
FUhrungslineal
(0):
Das
Lineal
in
die
Bohrung
Q
schieben
und
nach
Einstellen
des
gewünschten
Abstan
des
Schraube
P
festdrehen.
4
Pied
pour
fermeture
a
glissiere
(Pied
a
piquer
au
bord
avec
guide-bord)
(N):
Déplacer
Ia
semelie
du
pied
vers
Ia
gauche
ou
vers
Ia
droite
et
I’encliqueter
dans
cette
position.
Guide-bord
(0):
Glisser
le
guide-bord
dans
le
trou
Q
régler
Ia
distance
souhaitée
et
resserrer
ensuite
Ia
vis
R
Lineale
di
guida
(0):
Infilare
il
lineale
nel
foro
Q
e
awitare
Ia
vite
P
dopo
aver
regolato
Ia
distanza
desi
derata.
40

Réglage
de
Ia
boutonniere:
Appuyer
sur
Ia
touche
C.
Regler
a
tension
du
fil
daiguille
dans
a
zone
boutonnières
sur
3.
Fixer
a
semelle
boutonniere.
Régler
Ia
densite
des
points
clans
Ia
zone
bouton
nière
N.
Introduire
le
fil
de
passe
dans
Ia
semelle
comme
suit:
Coucher
le
fit
sur
le
crochet
arrière
et
le
pincer
dans
le
pince
fil
0.
Pendant
a
couture
Ia
flèche
P
cou
lisse
le
long
de
l’échelle
graduée
R.
Ainsi,
il
est
possible
de
determiner
Ia
Iongueur
‘e
Ia
boutonniere
Utiliser
du
fit
a
coudre
N
Knopfloch
einstellen:
Taste
C
tippen.
Oberfadenspannung
in
den
Knopflochbereich
bei
3
stellen.
KnopflochfuI
anbringen.
Stichdichte
im
Knopflochbereich
N
einstellen,
Einlauffa
den
wie
folgt
irn
Nähful
eintegen:
Faden
über
die
hintere
Nocke
legen,
straff
ziehen
und
in
der
vorderen
Nocke
0
em
klemmen.
Beim
Nähen
läuft
der
Pfeil
P
an
der
Skala
R
entlang.
Dadurch
kann
die
Knopfloch
lange
bestimmt
werden.
Zum
Knopflochnähen
feines
Nahgarn
ver
wenden.
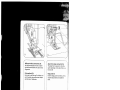
Buttonhole
setting:
Push
button
C.
Set
the
needle
thread
ten
sion
at
range
3
for
buttonhole
sewing.
Attach
the
buttonhole
foot.
Set
the
stitch
density
at
range
N.
Insert
a
gimp
thread
in
the
sewing
foot
as
shown
in
the
illustra
tion:
Place
the
thread
over
the
back
ridge,
and
pull
it
taut
so
that
it
is
hold
in
tab
0
at
the
front.
During
sewing,
arrow
P
runs
along
scale
R.
This
is
how
the
buttonhole
length
is
determined.
For
sewing
buttonholes
use
light
sewing
thread.
J
4
N
Regolazione
per
l’occhiello:
Premere
it
tasto
C.
Regolare
Ia
tensione
superiore
net
settore
occhiello
3.
Appli
care
it
piedino
per
occhielli.
Fittezza
del
punto
net
settore
per
occhietli
N.
Inserire
come
segue
it
fib
rinforzo:
appoggiare
it
fib
sopra
ii
gancio
poste
riore,
tenderlo
bene
e
fissarlo
net
gancio
anteriore
0.
Cucendo,
Ia
freccia
P
scorre
lungo
Ia
scala
R.
In
tale
maniera
si
pub
determinare
con
esattezza
Ia
lunghezza
detl’occhiello.
Usare
per
l’occhiello
del
filato
fine.
I
J
41
La page est en cours de chargement...

2
3
4
5
6
4
\
2
3
4
5
6
N
)
Zeichnungen
sind
ohne
NShfuI.
Drawings
do not
include sewing
foot.
Les
illustrations
ne
montrent
pas
Ia
semelle
du
pied
presseur.
disegni
sono eseguiti
senza
piedino.
Confezionare
occhielli:
Spostare
a
feritoia
in
avanti
sino
all’
Execution
do
boutonnières:
Tirer
a
semelle
mobile
vers
‘avant
jusqu’à
Ia
butée.
Executer
Ia
premiere
Ièvre
a
Ia
Ion
gueur désirée.
[Ti
Appuyer
sur
a
touche
B
et
a
mainte
nir
pendant
4
a
6
points
d’arrêt.
Main
tenir
Ia
matière.
[Ti
Relâcher
Ia
touche.
Appuyer
sur
Ia
touche
A.
Executer
Ia
deuxième
lèvre
dans
Ia
memo
Ion
gueur
quo
Ia
premiere.
ETJ
Appuyer
sur
Ia
touche
B
et
Ia
mainte
nir
pendant
4
a
6
points
d’arrêt.
Main
tenir
a
matiére.
[Ti
Relâcher
Ia
touche.
Brider
par
quelques
points
de
nouage.
Enlever
a
matjère.
Tenir
le
fil
do
passe
légerement
tendu
at
le
couper.
Ouvrir
Ia
boutonnièr.
arresto.
Cucire
Ia
prima
costina
nella
lunghezza
desiderata.
[Ti
Premendo
II
tasto
B,
cucire
4—6
punti
di
travetta.
II
lavoro
va
tenuto
nel
frat
tempo
fermo.
[Ti
Rilasciare
1
tasto
B.
Premere
II
tasto
A.
Cucire
Ia
seconda
costina
nella
stessa
Iunghezza
della
prima.
[Ti
Premere
II
tasto
B
e
tenerlo premuto,
mentre
Si
cucioni
4—6
punti
di
travetta.
[Ti
Rilasciare
il
tasto.
Cucire alcuni
punti
di
fissaggio.
Togliere
il
tessuto.
Tirare
II
cordoncino
e
tagliarlo.
Aprire
I’occhiello
con
ii
taglia-asole.
mportant!
Sur
es
modèles
tipmatic,
l’aiguille
est
a
placer
en
haut
Iorsque
le
symbole
[Ti
apparait
dans
Ia
description
de
I’opération
de
couture.
Attenzione!
Nei
modelli
Tipmatic
I’ago
deve
essere
portato
in
posizione
superiore
nei
punti
dove
appare
nelle
istruzioni
di
cucito
1
simbolo
[Ti.
Nous
recommandons
d’exécuter
une
bou
tonnière
a
titre
d’essai
sur
le
vétement
dvant
de
commencer
a
coudre
es
bouton
P
ores.
Si
consiglia
di
eseguire
un
campione
primo
di
cucire
sul
capo.
43
La page est en cours de chargement...
La page est en cours de chargement...
La page est en cours de chargement...
La page est en cours de chargement...
La page est en cours de chargement...
La page est en cours de chargement...
La page est en cours de chargement...
La page est en cours de chargement...
La page est en cours de chargement...
La page est en cours de chargement...
La page est en cours de chargement...
La page est en cours de chargement...
La page est en cours de chargement...
La page est en cours de chargement...
La page est en cours de chargement...
La page est en cours de chargement...
La page est en cours de chargement...
La page est en cours de chargement...
La page est en cours de chargement...
La page est en cours de chargement...
La page est en cours de chargement...
La page est en cours de chargement...
La page est en cours de chargement...
La page est en cours de chargement...
La page est en cours de chargement...
La page est en cours de chargement...
La page est en cours de chargement...
La page est en cours de chargement...
La page est en cours de chargement...
La page est en cours de chargement...
La page est en cours de chargement...
La page est en cours de chargement...
La page est en cours de chargement...
La page est en cours de chargement...
La page est en cours de chargement...
La page est en cours de chargement...
La page est en cours de chargement...
La page est en cours de chargement...
La page est en cours de chargement...
La page est en cours de chargement...
La page est en cours de chargement...
La page est en cours de chargement...
La page est en cours de chargement...
La page est en cours de chargement...
-
 1
1
-
 2
2
-
 3
3
-
 4
4
-
 5
5
-
 6
6
-
 7
7
-
 8
8
-
 9
9
-
 10
10
-
 11
11
-
 12
12
-
 13
13
-
 14
14
-
 15
15
-
 16
16
-
 17
17
-
 18
18
-
 19
19
-
 20
20
-
 21
21
-
 22
22
-
 23
23
-
 24
24
-
 25
25
-
 26
26
-
 27
27
-
 28
28
-
 29
29
-
 30
30
-
 31
31
-
 32
32
-
 33
33
-
 34
34
-
 35
35
-
 36
36
-
 37
37
-
 38
38
-
 39
39
-
 40
40
-
 41
41
-
 42
42
-
 43
43
-
 44
44
-
 45
45
-
 46
46
-
 47
47
-
 48
48
-
 49
49
-
 50
50
-
 51
51
-
 52
52
-
 53
53
-
 54
54
-
 55
55
-
 56
56
-
 57
57
-
 58
58
-
 59
59
-
 60
60
-
 61
61
-
 62
62
-
 63
63
-
 64
64
-
 65
65
-
 66
66
-
 67
67
-
 68
68
-
 69
69
-
 70
70
-
 71
71
-
 72
72
-
 73
73
-
 74
74
-
 75
75
-
 76
76
-
 77
77
-
 78
78
-
 79
79
-
 80
80
-
 81
81
-
 82
82
-
 83
83
-
 84
84
-
 85
85
-
 86
86
-
 87
87
-
 88
88
-
 89
89
-
 90
90


Pfaff tipmatic 1151 Le manuel du propriétaire
- Catégorie
- Machines à coudre
- Taper
- Le manuel du propriétaire
- Ce manuel convient également à
dans d''autres langues
- italiano: Pfaff tipmatic 1151 Manuale del proprietario
- English: Pfaff tipmatic 1151 Owner's manual
- Deutsch: Pfaff tipmatic 1151 Bedienungsanleitung
Documents connexes
-
Pfaff tipmatic 1115 Le manuel du propriétaire
-
-
-
-
-
-
-
-
-
Autres documents
-
Bernina Bernette 100 Le manuel du propriétaire
-
-
-
-
SINGER Serenade Tempo deel 1 Le manuel du propriétaire
-
-