LIVARNO 416203 Le manuel du propriétaire
- Taper
- Le manuel du propriétaire

WASCHTISCH-ARMATUR /
BASIN MIXER TAP / MITIGEUR DE LAVABO
IAN 416203_2210
BASIN MIXER TAP
GB Assembly, operating and safety instructions Page 5
DE / AT / CH Montage-, Bedienungs- und Sicherheitshinweise Seite 10
OWIM GmbH & Co. KG
Stiftsbergstraße 1
74167 Neckarsulm
GERMANY
Model-No.: HG06201-GB / HG06203-GB
Version: 06 / 2022
Last Information Update · Stand der Informationen: 02 / 2022
Ident.-No.: HG06201-GB / HG06203-GB022022-GB
WASCHTISCH-ARMATUR
Montage-, Bedienungs- und Sicherheitshinweise
BASIN MIXER TAP
Assembly, operating and safety instructions
IAN 377402_2110 IAN 377402_2110
377402_2110_V1.0_livh_Einhebel-Waschtischmischer-A_cover_GB.indd 1-4377402_2110_V1.0_livh_Einhebel-Waschtischmischer-A_cover_GB.indd 1-4 25.02.22 12:5025.02.22 12:50
WASCHTISCH-ARMATUR
Bedienungsanleitung
BASIN MIXER TAP
User manual
MITIGEUR DE LAVABO
Manuel d’utilisation
WASTAFELKRAAN
Gebruikershandleiding
BATERIA UMYWALKOWA
Instrukcja obsługi
UMYVADLOVÁ BATERIE
Návod k použití
BATÉRIA NA UMÝVADLO
Používateľská príručka
GRIFERÍA PARA LAVABO
Manual del usuario
ARMATUR TIL HÅNDVASK
Brugsvejledning
MISCELATORE PER LAVABO
Manuale di istruzioni
MOSDÓ CSAPTELEP
Használati útmutató
ARMATURA ZA UMIVALNIK
Navodila za uporabo
MIJEŠALICA
Korisnički priručnik
BATERIE LAVOAR
Manual de utilizare
СМЕСИТЕЛ ЗА МИВКА
Ръководство за потребителя
ΜΠΑΤΑΡΊΑ ΜΠΑΝΊΟΥ
Εγχειρίδιο χρήστη

DE/AT/CH Bedienungsanleitung Seite 5
GB/IE User manual Page 11
FR/BE Manuel d’utilisation Page 17
NL/BE Gebruikershandleiding Pagina 24
PL Instrukcja obsługi Strona 30
CZ Návod k použití Strana 36
SK Používateľská príručka Strana 42
ES Manual del usuario Página 48
DK Brugsvejledning Side 54
IT Manuale di istruzioni Pagina 60
HU Használati útmutató Oldal 66
SI Navodila za uporabo Stran 72
HR Korisnički priručnik Stranica 79
RO Manual de utilizare Pagina 85
BG Ръководство за потребителя Страница 91
GR Εγχειρίδιο χρήστη Σελίδα 99

25
26
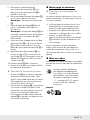
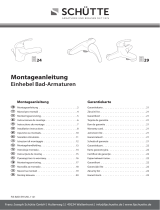
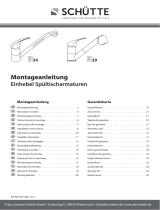
Sie benötigen · You need · Vous avez besoin · U hebt nodig · Potrzebne będą · Potřebujete ·
Potrebujete · Necesita · Du skal bruge følgende · Vi servono · Szükséges · Potrebujete · Trebate ·
Veți avea nevoie de · Нуждаете се от · Χρειάζεστε

25
26


25
26

5 DE/AT/CH
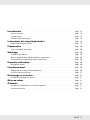
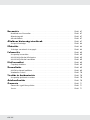
Einleitung ............................................................ Seite 6
Bestimmungsgemäße Verwendung ......................................... Seite 6
Liste der Teile .......................................................... Seite 6
Technische Daten ....................................................... Seite 6
Allgemeine Sicherheitshinweise . . . . . . . . . . . . . . . . . . . . . . . . . . . . . . . . . . Seite 7
Trinkbarkeit von Leitungswasser ............................................ Seite 7
Vorbereitung ........................................................ Seite 8
Benötigtes Werkzeug und Material......................................... Seite 8
Montage ............................................................. Seite 8
Armatur installieren ..................................................... Seite 8
Excenter-Ablaufgarnitur anbringen ......................................... Seite 8
Excenter-Ablaufgarnitur verwenden......................................... Seite 8
Erste Verwendung.................................................. Seite 8
Armatur durchspülen .................................................... Seite 8
Bedienung ........................................................... Seite 8
Temperaturbegrenzung einstellen .......................................... Seite 8
Wasserspar-Funktion .................................................... Seite 9
Reinigung und Wartung ........................................... Seite 9
Armatur pflegen und reinigen ............................................. Seite 9
Entsorgung .......................................................... Seite 9
Garantie ............................................................. Seite 10
Abwicklung im Garantiefall ............................................... Seite 10
Service ............................................................... Seite 10

6 DE/AT/CH
WASCHTISCH-ARMATUR
Einleitung
Wir beglückwünschen Sie zum Kauf Ihres neuen
Produkts, im Folgenden nur „Produkt“ genannt.
Sie haben sich damit für ein hochwertiges
Produkt entschieden. Die Bedienungsanleitung
ist fester Bestandteil dieses Produkts. Sie enthält
wichtige Hinweise zu Bedienung, Sicherheit,
Gebrauch und Entsorgung. Machen Sie sich vor
der Verwendung des Produkts mit dem Produkt
und allen Bedien- und Sicherheitshinweisen
vertraut. Lesen Sie dazu aufmerksam die
folgenden Bedien- und Sicherheitshinweise.
Verwenden Sie das Produkt nur wie beschrieben
und für die angegebenen Einsatzbereiche.
Heben Sie diese Anleitung gut auf. Händigen Sie
alle Unterlagen bei Weitergabe des Produkts an
Dritte unbedingt mit aus.
Bestimmungsgemäße
Verwendung
Dieses Produkt ist für alle druckfesten
Warmwassersysteme wie Zentralheizung,
Durchlauferhitzer, Druckboiler o.ä. geeignet.
Nicht geeignet ist es für Niederdruck-
Warmwasserbereiter wie z.B. Holzoder
Kohlebadeöfen, Öl- oder Gasbadeöfen, offene
Elektrospeicher. Im Zweifelsfall wenden Sie sich
bitte an einen Installateur oder Fachberater.
Eine andere Verwendung als zuvor beschrieben
oder eine Veränderung des Produkts ist nicht
zulässig und führt zur Beschädigung. Darüber
hinaus können weitere lebensgefährliche
Gefahren und Verletzungen die Folgen sein.
Das Produkt ist nur zur Eigenanwendung, nicht
für den medizinischen oder kommerziellen
Gebrauch vorgesehen. Für durch unsachgemäße
Verwendung entstandene Schäden übernimmt
der Hersteller keine Haftung.
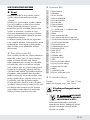
Liste der Teile
[1] 1 Armaturenkörper
[2] 1 Sockel
[3] 1 Dichtungsring
[4] 1 Kunststoffunterlegscheibe
[5] 1 Metall-Unterlegscheibe
[6] 1 Metall-Stab
[7] 1 Kunststoffmutter
[8] 2 Flexschläuche
(1 x Warmwasser, 1 x Kaltwasser)
[9] 1 Innensechskantschlüssel
[] 1 Stöpsel
[] 1 Oberer Teil des Exzenters
[] 1 Obere Exzenterdichtung (Schaumstoff)
[] 1 Untere Exzenterdichtung (Plastik)
[] 1 Unterer Teil des Exzenters
[] 1 Exzentermutter
[] 1 Kugelstange
[] 1 Exzenterverbindung
[] 1 Zugstange (Teil 2)
[] 1 Zugstange (Teil 1)
[] 1 Einstellhebel
[] 1 Arretierungsschraube
[] 1 Abdeckkappe
[] 1 Kartuschen-Abdeckring
[] 1 Kartuschen-Sicherungsring
[] 1 Einstellring
[] 1 Kartusche
[] 1 Mischdüse
[] 1 Schlüssel für Mischdüse
Technische Daten
Anschlüsse: G3⁄8" (ca. 17 mm)
Mutter
(Wasseranschluss): ca. 19 mm

7 DE/AT/CH
Allgemeine
Sicherheitshinweise
WARNUNG!
LEBENSUND
UNFALLGEFAHR FÜR
KLEINKINDER UND KINDER!
Lassen Sie Kinder niemals unbeaufsichtigt
mit dem Verpackungsmaterial. Es besteht
Erstickungsgefahr. Halten Sie das Produkt
von Kindern fern. Das Produkt ist kein
Spielzeug.
VORSICHT VOR
ELEKTRISCHEM SCHLAG
Undichtigkeiten oder Wasseraustritt können
zu Lebensgefahr durch elektrischen Schlag
führen. Prüfen Sie alle Verbindungen
sorgfältig auf Dichtigkeit. Stellen Sie zudem
sicher, dass alle Leitungen von elektrischen
Geräten korrekt und sicher installiert sind.
VORSICHT! VERLETZUNGSGEFAHR!
Stellen Sie sicher, dass alle Teile
unbeschädigt und sachgerecht montiert
sind. Bei unsachgemäßer Montage besteht
Verletzungsgefahr. Bitte beachten Sie,
dass Unterlegscheiben und Dichtungen
Verschleißteile sind, welche von Zeit zu Zeit
ausgetauscht werden müssen. Beschädigte
Teile können die Sicherheit und Funktion
beeinflussen.
ACHTUNG! GEFAHR DER
SACHBESCHÄDIGUNG! Lassen Sie
die Montage nur durch fachkundige
Personen durchführen. Undichtigkeiten
oder Wasseraustritt können zu erheblichen
Sachschäden an Gebäude oder Hausrat
führen. Prüfen Sie daher alle Verbindungen
sorgfältig auf Dichtigkeit.
Achten Sie darauf, dass alle Dichtungen
den korrekten Sitz haben, um Wasseraustritt
durch Undichtigkeit zu verhindern.
VORSICHT! VERBRÜHUNGSGEFAHR!
Achten Sie bei der Warmwassereinstellung
darauf, dass die Temperatur des Wassers
nicht zu heiß eingestellt ist.
Machen Sie sich vor der Installation mit
allen Gegebenheiten vor Ort vertraut, z.B.
Wasseranschluss und Absperrvorrichtung.
Bitte lesen Sie diese Bedienungsanleitung vor
Montage und Gebrauch aufmerksam durch.
Bewahren Sie alle Sicherheitshinweise und
Anweisungen für die Zukunft auf!
Trinkbarkeit von
Leitungswasser
oInformieren Sie sich bei Ihren örtlichen
Behörden über die Trinkbarkeit des Wassers
in Ihrer Stadt / Gemeinde.
Generell gilt für die Trinkbarkeit von
Leitungswasser folgende Empfehlung:
Lassen Sie Wasser aus Leitungen eine kurze
Zeit laufen, wenn es länger als vier Stunden
in den Leitungen stagniert hat. Verwenden
Sie kein Stagnationswasser zur Zubereitung
von Speisen und Getränken, besonders
nicht bei der Ernährung von Säuglingen.
Andernfalls können gesundheitliche
Beschwerden auftreten. Frisches Wasser
können Sie daran erkennen, dass es
spürbar kühler die Leitung verlässt, als
Stagnationswasser.
Verwenden Sie kein Stagnationswasser
aus verchromten Leitungen zur Ernährung
und/oder zur Körperpflege, wenn Sie
gegen Nickel allergisch sind. Solches
Wasser kann stark nickelhaltig sein und eine
allergische Reaktion hervorrufen.
Nutzen Sie kein Trinkwasser aus
Bleileitungen für die Zubereitung von
Säuglingsnahrung und / oder während
der Schwangerschaft für die Zubereitung
von Lebensmitteln. Blei wird ins Trinkwasser
abgegeben und ist für Säuglinge und
Kleinkinder besonders gesundheitsschädlich.

8 DE/AT/CH
Vorbereitung
Benötigtes Werkzeug und
Material
Die genannten Werkzeuge und Materialien
sind nicht im Lieferumfang enthalten. Es
handelt sich hierbei um unverbindliche
Angaben und Werte zur Orientierung.
Die Beschaffenheit des Materials richtet sich
nach den individuellen Gegebenheiten vor
Ort.
− Rohrzange/
verstellbarer Schraubenschlussel
− Abdichtungsband
− Schlitzschraubendreher
− Philips-schraubendreher
Montage
Armatur installieren
Stellen Sie die Haupt-Wasserzufuhr ab,
um Wasseraustritt durch Undichtigkeit
zu verhindern. Lassen Sie das restliche
Leitungswasser ablaufen.
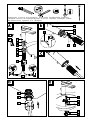
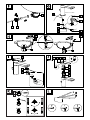
oInstallieren Sie die Armatur, wie in Abbildung
A–D dargestellt.
m VORSICHT! Verbiegen Sie die
Flexschläuche nicht und bringen Sie sie
nicht unter Spannung. Ansonsten besteht die
Gefahr der Sachbeschädigung.
Excenter-Ablaufgarnitur
anbringen
oInstallieren Sie die Zugstangen-
Ablaufgarnitur, wie in Abbildung E–G
dargestellt.
Excenter-Ablaufgarnitur
verwenden
oSiehe Abb. H.
Erste Verwendung
Armatur durchspülen
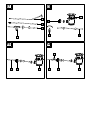
oUm mögliche Verunreinigungen zu
beseitigen, muss die Armatur vor dem ersten
Gebrauch gespült werden. Gehen Sie dazu
wie folgt vor (s. Abb. I):
1. Schrauben Sie die Mischdüse [] ab.
2. Öffnen Sie die Haupt-Wasserzufuhr und
lassen Sie das Wasser zwei Minuten lang
laufen.
3. Schrauben Sie die Mischdüse []
anschließend wieder an.
Bedienung
Hinweis: Spülen Sie nach längerem
Nichtgebrauch der Armatur die Leitungen
zunächst gründlich durch, um Trinkwasser-
Stagnation und Rückstände aufzulösen.
oÖffnen Sie die Haupt-Wasserzufuhr.
oHeben Sie den Einstellhebel [] an und
schwenken Sie ihn nach rechts oder
links, um die Stärke bzw. Temperatur des
Wasserflusses zu regulieren.
Heißwasser:
oSchwenken Sie den Einstellhebel [] nach
links.
Kaltwasser:
oSchwenken Sie den Einstellhebel [] nach
rechts.
oPrüfen Sie den Betrieb der Mischbatterie.
Schwenken Sie dafür den Einstellhebel [] in
alle erlaubten Positionen. Bitte prüfen Sie die
Anschlüsse regelmäßig auf Dichtigkeit.
Temperaturbegrenzung
einstellen
Die Kartusche [] dieser Armatur verfügt über
eine Temperaturbegrenzung. Diese Funktion ist
werksseitig nicht aktiviert (neutrale Einstellung).
m VORSICHT! Verändern Sie die Einstellung
der Temperaturbegrenzung erst, nachdem
Sie die Armatur montiert haben.
1. Stellen Sie die Haupt-Wasserzufuhr ab.
2. Entfernen Sie die Abdeckkappe [],
vorsichtig mit einem kleinen, flachen
Schraubendreher (s. Abb. J).
3. Lösen Sie die Arretierungsschraube [] mit
einem Innensechskantschlüssel [9] durch
Drehen gegen den Uhrzeigersinn.

9 DE/AT/CH
m VORSICHT! Schraube nicht vollständig
herausdrehen, nur lösen, bis sich der
Einstellhebel [] leicht abnehmen lässt.
4. Entnehmen Sie den Einstellhebel [].
5. Lösen Sie den Kartuschen-Abdeckring []
von Hand und schrauben Sie dann den
Kartuschen- Sicherungsring [] mit Hilfe
einer Rohrzange ab.
6. Ziehen Sie nun den Einstellring [] mit Hilfe
eines Schraubendrehers nach oben.
Hinweis: Entfernen Sie nicht die Kartusche
[].
7. Platzieren Sie den Einstellring [] in
gewünschter Position, wie in Abbildung K
dargestellt.
Hinweis: Der Einstellring [] kann den
Drehwinkel des Griffs einschränken, sodass
die Durchflussmenge von Warmwasser
begrenzt werden kann.
8. Ziehen Sie den Kartuschen-Sicherungsring
[] mit Hilfe der Rohrzange wieder auf dem
Armaturenkörper [1] fest. Befestigen Sie den
Kartuschen-Abdeckring [] von Hand.
9. Setzen Sie den Einstellhebel [] wieder
auf den Armaturenkörper [1] und ziehen
Sie die Arretierungsschraube [] mit einem
Innensechskantschlüssel [9] durch Drehen im
Uhrzeigersinn fest.
10. Drücken Sie die Abdeckkappe [] in die
Öffnung.
11. Stellen Sie die Haupt-Wasserzufuhr an und
überprüfen Sie die Temperaturbegrenzung.
Wasserspar-Funktion
oDie Kartusche [] dieser Armatur verfügt
über eine Wasserspar-Funktion. Diese
Funktion begrenzt die Menge des
Wasserdurchflusses. Dadurch können Sie bis
zu 50 % Wasser einsparen (siehe Abb. L).
oHeben Sie den Einstellhebel [], bis Sie
einen leichten Widerstand spüren. Dieser
Widerstand sorgt für einen Stopp bei halber
Öffnung und begrenzt so ganz einfach den
Wasserdurchfluss.
oWenn Sie die Durchflussmenge erhöhen
wollen, bewegen Sie den Einstellhebel []
mit leichtem Druck über den Widerstand
hinaus.
Reinigung und Wartung
Armatur pflegen und reinigen
Beachten Sie, dass Sanitärarmaturen einer
besonderen Pflege bedürfen. Beachten Sie
daher die folgenden Anweisungen:
Verwenden Sie keine ätzenden oder
alkoholhaltigen Mittel zur Reinigung, da
diese das Produkt beschädigen könnten.
oReinigen Sie Ihre Armaturen nur mit klarem
Wasser, milden Reinigungsmitteln und einem
weichen Tuch bzw. Leder.
oSchrauben Sie die Mischdüse [] in
regelmäßigen Abständen heraus und
entfernen Sie kalkhaltige Rückstände oder
Fremdkörper.
Bei Nichtbeachtung der Pflegeanleitung muss mit
Schäden an der Oberfläche gerechnet werden.
Garantieansprüche können dann nicht geltend
gemacht werden.
Entsorgung
Die Verpackung besteht aus umweltfreundlichen
Materialien, die Sie über die örtlichen
Recyclingstellen entsorgen können.
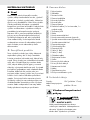
Beachten Sie die Kennzeichnung
der Verpackungsmaterialien bei
der Abfalltrennung, diese sind
gekennzeichnet mit Abkürzungen
(a) und Nummern (b) mit folgender
Bedeutung: 1–7: Kunststoffe/20–22:
Papier und Pappe/80–98:
Verbundstoffe.
Produkt:

10 DE/AT/CH
Das Produkt inkl. Zubehör und die
Verpackungsmaterialien sind recyclebar
und unterliegen einer erweiterten
Herstellerverantwortung.
Entsorgen Sie diese getrennt, den abgebildeten
Info-tri (Sortierinformation) folgend, für eine
bessere Abfallbehandlung.
Das Triman-Logo gilt nur für Frankreich.
Möglichkeiten zur Entsorgung des
ausgedienten Produkts erfahren Sie bei
Ihrer Gemeinde oder Stadtverwaltung.
Garantie
Das Produkt wurde nach strengen
Qualitätsrichtlinien hergestellt und vor der
Auslieferung sorgfältig geprüft. Im Falle von
Material- oder Herstellungsfehlern haben
Sie gegenüber dem Verkäufer des Produkts
gesetzliche Rechte. Ihre gesetzlichen Rechte
werden in keiner Weise durch unsere unten
aufgeführte Garantie eingeschränkt.
Die Garantie für dieses Produkt beträgt 3 Jahre
ab Kaufdatum. Die Garantiezeit beginnt mit dem
Kaufdatum. Bewahren Sie den Originalkaufbeleg
an einem sicheren Ort auf, da dieses Dokument
als Nachweis des Kaufs erforderlich ist.
Alle Schäden oder Mängel, die bereits zum
Zeitpunkt des Kaufs vorhanden sind, müssen
unverzüglich nach dem Auspacken des Produkts
gemeldet werden.
Sollte das Produkt innerhalb von 3 Jahren
ab Kaufdatum einen Material- oder
Herstellungsfehler aufweisen, werden wir
es – nach unserer Wahl – kostenlos für Sie
reparieren oder ersetzen. Die Garantiezeit
verlängert sich durch einen stattgegebenen
Gewährleistungsanspruch nicht. Dies gilt auch für
ersetzte und reparierte Teile.
Diese Garantie erlischt, wenn das Produkt
beschädigt oder unsachgemäß verwendet oder
gewartet wurde.
Die Garantie deckt Material- und
Herstellungsfehler ab. Diese Garantie
erstreckt sich weder auf Produktteile, die
normalem Verschleiß unterliegen, und somit als
Verschleißteile gelten (z. B. Batterien, Akkus,
Schläuche, Farbpatronen), noch auf Schäden an
zerbrechlichen Teilen, z. B. Schalter oder Teile
aus Glas.
Abwicklung im Garantiefall
Um eine schnelle Bearbeitung Ihres Anspruchs
zu gewährleisten, beachten Sie die folgenden
Hinweise:
Halten Sie den Originalkaufbeleg und die
Artikelnummer (IAN 416203_2210) als
Nachweis für den Kauf bereit.
Sie finden die Artikelnummer auf dem
Typenschild, einer Gravur auf dem Produkt, der
Startseite der Bedienungsanleitung (unten links)
oder als Aufkleber auf der Rück- oder Unterseite
des Produkts.
Sollten Funktionsfehler oder sonstige Mängel
auftreten, wenden Sie sich zunächst telefonisch
oder per E-Mail an die unten aufgeführte
Serviceabteilung.
Sobald das Produkt als defekt erfasst wurde,
können Sie es kostenlos an die Ihnen mitgeteilte
Service-Anschrift zurücksenden. Stellen
Sie sicher, dass Sie den Originalkaufbeleg
(Kassenbon) sowie eine kurze, schriftliche
Beschreibung beilegen, in der die Einzelheiten
des Defekts und der Zeitpunkt des Auftretens
dargelegt sind.
Service
Service Deutschland
Tel.: 0800 5435 111
Service Österreich
Tel.: 0800 292726
Service Schweiz
Tel.: 0800562153

11 GB/IE
Introduction ......................................................... Page 12
Intended use........................................................... Page 12
Parts list .............................................................. Page 12
Technical data ......................................................... Page 12
General safety instructions........................................ Page 12
Potability of mains water ................................................. Page 13
Preparation ......................................................... Page 13
Required tools and material ............................................... Page 13
Installation .......................................................... Page 13
Installing the tap........................................................ Page 13
Attaching the pop-up waste ............................................... Page 14
Using the pop-up waste .................................................. Page 14
First use .............................................................. Page 14
Flushing the tap ........................................................ Page 14
Operation............................................................ Page 14
Setting the temperature limiter ............................................. Page 14
Water-saving function ................................................... Page 14
Cleaning and maintenance ........................................ Page 15
Tap care and cleaning................................................... Page 15
Disposal.............................................................. Page 15
Warranty ............................................................ Page 15
Warranty claim procedure................................................ Page 16
Service ............................................................... Page 16

12 GB/IE
BASIN MIXER TAP
Introduction
Congratulations on the purchase of your new
product, hereafter referred to only as “the
product”.
You have chosen a high-quality product. The user
manual forms an integral part of this product.
It contains important information on operation,
safety, use and disposal. Prior to use of the
product, familiarise yourself with the product and
all operation and safety notes. For this purpose,
carefully read the following operation instructions
and safety notes.
Only use the product as described and for the
applications stated. Keep this manual in a safe
place. If you hand the product on to third parties,
all documentation must be passed on as well.
Intended use
This product is suitable for all pressure-tight hot
water systems such as central heating boilers,
instantaneous water heaters, pressurised boilers
and the like. It is not suitable for low-pressure
water heaters such as wood or coal burning
bath geysers, oil or gas bath geysers, open
electrically heated water tanks. If in doubt
please seek the advice of a plumber or heating
engineer. Any use other than that described here
or modification to the product is not permitted
and may lead to damage to persons or property.
There is also the risk of injury and loss of life. The
product is intended for personal use only and not
for medical or commercial use. The manufacturer
accepts no liability for loss or damage arising
from improper use.
Parts list
[1] 1 Tap body
[2] 1 Base
[3] 1 O-ring
[4] 1 Plastic washer
[5] 1 Metal washer
[6] 1 Metal rod
[7] 1 Plastic nut
[8] 2 Flexible hoses
(1 x hot water, 1 x cold water)
[9] 1 Hexagon key
[] 1 Plug
[] 1 Upper eccentric section
[] 1 Upper Eccentric seals (foam)
[] 1 Lower Eccentric seals (plastic)
[] 1 Lower eccentric section
[] 1 Eccentric nut
[] 1 Knee joint bar
[] 1 Eccentric joint
[] 1 Pull-rod (Part 2)
[] 1 Pull-rod (Part 1)
[] 1 Control lever
[] 1 Locking screw
[] 1 Cap
[] 1 Cartridge end ring
[] 1 Cartridge locking ring
[] 1 Setting ring
[] 1 Cartridge
[] 1 Mixer nozzle
[] 1 Key for mixer nozzle
Technical data
Connections: G3⁄8" (approx.17 mm)
Water connection nut: approx. 19 mm
General safety
instructions
WARNING! RISK
OF LOSS OF LIFE OR
ACCIDENT TO INFANTS AND
CHILDREN!
Never leave children unsupervised with the
packaging materials. Danger of suffocation.
Keep the product away from children. The
product is not a toy.

13 GB/IE
CAUTION – RISK OF
ELECTRIC SHOCK!
Leaks or the escape of water can lead to
danger to life from electric shock. Check all
connections for leaks carefully. In addition,
ensure that all cables from electrical devices
are correctly and safely installed.
CAUTION! RISK OF INJURY! Please
ensure that no parts are damaged and that
all parts are correctly assembled. Incorrect
assembly could lead to injury. Please note
that seals are wear parts and therefore will
require to be replaced from time to time.
Damaged parts could adversely affect safety
and proper function.
CAUTION! RISK OF DAMAGE TO
PROPERTY! Have the installation done by
experienced persons only. Leaks or escape
of water can lead to serious damage to
buildings or household fittings and furniture.
Check all connections for leaks carefully.
Ensure that all seals are correctly seated to
prevent leakage of water.
CAUTION! DANGER OF SCALDING!
When making the hot water setting please
ensure that the temperature of the water is
not too high.
Before installation, make yourself familiar
with all the existing services, e.g. water
connection and stopcocks.
Please read carefully through these
operating instructions before installing and
using the product. Keep all the safety advice
and instructions in a safe place for future
reference!
Potability of mains water
oFind out about the potability of your mains
water supply. Your local water authority or
water supply company will be able to inform
you.
The following general
recommendations apply to the
potability of the water from your
pipework:
Let the water run freely for a short time if
it has been stagnating in the pipework for
more than four hours. Do not use any of this
stagnant water in the preparation of food
or for drinking. This applies particularly as
far as babies and infants are concerned.
Failure to observe this advice may result in
risks to health. Fresh water can be readily
distinguished from stagnant as fresh water is
noticeably cooler.
Do not use stagnant water from chromium-
plated pipework for the preparation of food
or for drinking or for personal hygiene if you
are allergic to nickel. This water may contain
high quantities of nickel and trigger an
allergic reaction.
Do not use water from lead pipework for
preparing food or drink for babies or infants.
Do not use it for preparing food or drink
during pregnancy. Lead dissolves in drinking
water and is particularly damaging to the
health of babies and young children.
Preparation
Required tools and material
The tools and materials specified are
not included. This information and these
values are non-binding and they are only
for guidance. The nature of the material
is determined by the individual local
conditions.
− spanner or adjustable wrench
− sealing tape
− small flat (slotted) screwdriver
− Philips screwdriver
Installation
Installing the tap
Turn off the main water supply to prevent
serious leakage of water. Allow any
remaining water in the pipework to drain.
oInstall the tap as shown in Figs. A–D.
m CAUTION! Do not bend the hoses or place
them under tension. Otherwise material
damage could result.

14 GB/IE
Attaching the pop-up waste
oInstall the pop-up waste as shown in
Fig.E–G.
Using the pop-up waste
oSee Fig.H.
First use
Flushing the tap
oThe tap must be flushed through before first
use to remove any dirt. To do this, follow
these steps (see Fig. I):
1. Screw the mixer nozzle [] off.
2. Open the main water supply and allow the
water to run for two minutes.
3. Then screw the mixer nozzle [] on again.
Operation
Note: If the tap has not been used for a long
period flush the pipes through thoroughly in
order to avoid stagnation and build-up of
residues in the drinking water supply.
oOpen the main water supply.
oLift the control lever [] and swivel it to
the right or left to regulate the strength or
temperature of the water flow.
Hot water:
oSwivel the control lever [] to the left.
Cold water:
oSwivel the control lever [] to the right.
oCheck that the mixer tap is working properly.
To do this, swivel the control lever [] into
all the possible positions. Please check the
connections regularly for leaks.
Setting the temperature
limiter
The cartridge [] in this unit has a temperature
limiter. This function is not activated in the factory
(neutral setting).
m CAUTION! Change the temperature limiter
setting only after the tap has been installed.
1. Turn off the main water supply.
2. Remove the cap [] carefully by a small flat
screwdriver (see Fig.J).
3. Release the locking screw [] by turning it
anticlockwise using a hexagon socket screw
key [9].
m CAUTION! Do not take the screw
completely out; just loosen it until the control
lever [] can be easily taken off.
4. Take off the control lever [].
5. Loosen the cartridge end ring [] by hand,
then screw off the cartridge locking ring []
by using a pipe wrench.
6. Now pull the setting ring [] upwards with
the help of a screwdriver.
Note: Do not remove the cartridge [].
7. Place the setting ring [] in the desired
position as shown in Fig.K.
Note: The setting ring [] can limit the
turning angle of the handle, so that the
amount of hot water can be limited.
8. Tighten the cartridge locking ring [] onto
the tap body [1] again by using a pipe
wrench, then tighten the cartridge end ring
[] by hand.
9. Place the control lever [] back on to the
tap body [1] and tighten the locking screw
[] by turning it clockwise using a hexagon
key [9].
10. Press the cap [] into the opening.
11. Turn on the main water supply and check the
temperature limiter.
Water-saving function
oThe cartridge [] in this tap has a water
saving function. This feature limits the water
flow through the tap. This means you can
save up to 50% water (see fig.L).
oLift the control lever [] until you notice a
slight resistance. This resistance will cause
a stop in case of partial opening and will
therefore simply limit the flow of water.
oIf you want to increase the flow rate, exert
slight pressure on the control lever [] until
you overcome the resistance.

15 GB/IE
Cleaning and maintenance
Tap care and cleaning
Please note that sanitary fittings require special
care and attention. Therefore you should follow
the following advice:
Never use corrosive or alcohol-based
materials for cleaning, as these could
damage the product.
oClean your fittings with clean water, mild
detergent and a soft cloth or leather only.
oScrew out the mixer nozzle [] at regular
intervals and remove lime deposits or foreign
bodies.
Non-observance of the above care advice can
be expected to result in damage to the surface
of the fittings. In this event your rights under the
warranty may be invalidated.
Disposal
The packaging is made of environmentally
friendly materials, which may be disposed of
through your local recycling facilities.
Observe the marking of the packaging
materials for waste separation, which
are marked with abbreviations (a)
and numbers (b) with following
meaning: 1–7: plastics/20–22: paper
and fibreboard/80–98: composite
materials.
Product:
The product incl. accessories and packaging
materials are recyclable and are subject to
extended producer responsibility.
Dispose them separately, following the illustrated
Info-tri (sorting information), for better waste
treatment.
The Triman logo is valid in France only.
Contact your local refuse disposal
authority for more details of how to
dispose of your wornout product.
Warranty
The product has been manufactured to strict
quality guidelines and meticulously examined
before delivery. In the event of material or
manufacturing defects you have legal rights
against the retailer of this product. Your legal
rights are not limited in any way by our warranty
detailed below.
The warranty for this product is 3 years from the
date of purchase. The warranty period begins
on the date of purchase. Keep the original sales
receipt in a safe location as this document is
required as proof of purchase.
Any damage or defects already present at the
time of purchase must be reported without delay
after unpacking the product.
Should the product show any fault in materials
or manufacture within 3 years from the date of
purchase, we will repair or replace it – at our
choice – free of charge to you. The warranty
period is not extended as a result of a claim
being granted. This also applies to replaced and
repaired parts.
This warranty becomes void if the product
has been damaged, or used or maintained
improperly.
The warranty covers material or manufacturing
defects. This warranty does not cover product
parts subject to normal wear and tear, thus
considered consumables (e.g. batteries,
rechargeable batteries, tubes, cartridges), nor
damage to fragile parts, e.g. switches or glass
parts.

16 GB/IE
Warranty claim procedure
To ensure quick processing of your claim,
observe the following instructions:
Make sure to have the original sales receipt and
the item number (IAN 416203_2210) available
as proof of purchase.
You can find the item number on the rating plate,
an engraving on the product, on the front page
of the user manual (bottom left), or as a sticker
on the rear or bottom of the product.
If functional or other defects occur, contact
the service department listed below either by
telephone or by e-mail.
Once the product has been recorded as
defective you can return it free of charge to the
service address that will be provided to you.
Ensure to enclose the proof of purchase (sales
receipt) and a short, written description outlining
the details of the defect and when it occurred.
Service
Service Great Britain
Tel.: 08000569216
Service Ireland
Tel.: 1800 200736

17 FR/BE
Introduction ......................................................... Page 18
Utilisation prévue ....................................................... Page 18
Liste des pièces......................................................... Page 18
Caractéristiques techniques ............................................... Page 18
Instructions de sécurité générales................................ Page 18
Potabilité de l’eau du robinet .............................................. Page 19
Préparation ......................................................... Page 20
Outils et matériel nécessaires.............................................. Page 20
Montage ............................................................. Page 20
Installation du robinet.................................................... Page 20
Mise en place de la bonde d‘évacuation excentrique........................... Page 20
Utilisation de la bonde d‘évacuation excentrique .............................. Page 20
Première utilisation................................................. Page 20
Rinçage du robinet...................................................... Page 20
Fonctionnement ..................................................... Page 20
Réglage de la limitation de la température ................................... Page 20
Fonction d’économie d’eau ............................................... Page 21
Nettoyage et entretien ............................................ Page 21
Entretien et nettoyage du robinet ........................................... Page 21
Mise au rebut........................................................ Page 21
Garantie ............................................................. Page 22
Procédure de réclamation au titre de la garantie............................... Page 23
Service après-vente ..................................................... Page 23

18 FR/BE
MITIGEUR DE LAVABO
Introduction
Nous vous félicitons pour l‘achat de votre
nouveau produit, ci-après dénommé uniquement
«le produit».
Vous avez opté pour un produit de grande
qualité. Le manuel d’utilisation fait partie
intégrante de ce produit. Il contient des
informations importantes sur le fonctionnement,
la sécurité, l’utilisation et la mise au rebut. Avant
d’utiliser le produit, familiarisez-vous avec le
produit et toutes les notes de fonctionnement et
de sécurité. À cet effet, lisez attentivement les
instructions d’utilisation et les notes de sécurité
suivantes.
Utilisez uniquement le produit comme décrit et
pour les applications indiquées. Conservez ce
manuel en lieu sûr. Si vous remettez le produit à
des tiers, tous les documents doivent également
être remis.
Utilisation prévue
Ce produit convient à tout type de système
d’eau chaude résistant à la pression tel que le
chauffage central, un chauffe-eau instantané, un
chauffe-eau à pression, etc. Il ne convient pas
aux chauffe-eau à basse pression tels que les
chauffe-eau pour bains à bois ou à charbon, les
chauffe-eau pour bains à mazout ou à gaz, les
fourneaux électriques à accumulation ouverts.
En cas de doute, demandez l'avis d'un plombier
ou d'un chauffagiste. Toute utilisation autre que
celle décrite ici ou toute modification du produit
est interdite et peut entraîner des dommages
corporels ou matériels. Cela peut en outre
conduire à des risques mortels ou des blessures.
Ce produit est uniquement destiné à un usage
domestique, il n’est pas prévu pour une utilisation
médicale ou commerciale. Le fabricant décline
toute responsabilité quant aux dommages
survenant suite à une utilisation non conforme à
l’usage prévu.
Liste des pièces
[1] 1 corps du robinet
[2] 1 socle
[3] 1 joint torique
[4] 1 rondelle en plastique
[5] 1 rondelle en métal
[6] 1 tige métallique
[7] 1 écrou en plastique
[8] 2 tuyaux flexibles
(1 x l’eau chaude, 1 x l’eau froide)
[9] 1 clé pour vis à six pans creux
[] 1 bonde
[] 1 partie supérieure d’excentrique
[] 1 joint supérieur d’excentrique (mousse)
[] 1 joint inférieur d’excentrique (plastique)
[] 1 partie inférieure de l’excentrique
[] 1 écrou d’excentrique
[] 1 barre à boule
[] 1 raccord d’excentrique
[] 1 tige de traction (partie 2)
[] 1 tige de traction (partie 1)
[] 1 poignée de réglage
[] 1 vis de verrouillage
[] 1 cache
[] 1 bague de recouvrement de cartouche
[] 1 circlip de cartouche
[] 1 bague de réglage
[] 1 cartouche
[] 1 buse de mélange
[] 1 clé pour buse de mélange
Caractéristiques techniques
Raccords: G3⁄8" (env.17mm)
Écrou (raccord d’eau): env. 19mm
Instructions de sécurité
générales
AVERTISSEMENT!
DANGER DE MORT OU
D’ACCIDENT POUR LES
ENFANTS EN BAS ÂGE ET
LES ENFANTS!
La page est en cours de chargement...
La page est en cours de chargement...
La page est en cours de chargement...
La page est en cours de chargement...
La page est en cours de chargement...
La page est en cours de chargement...
La page est en cours de chargement...
La page est en cours de chargement...
La page est en cours de chargement...
La page est en cours de chargement...
La page est en cours de chargement...
La page est en cours de chargement...
La page est en cours de chargement...
La page est en cours de chargement...
La page est en cours de chargement...
La page est en cours de chargement...
La page est en cours de chargement...
La page est en cours de chargement...
La page est en cours de chargement...
La page est en cours de chargement...
La page est en cours de chargement...
La page est en cours de chargement...
La page est en cours de chargement...
La page est en cours de chargement...
La page est en cours de chargement...
La page est en cours de chargement...
La page est en cours de chargement...
La page est en cours de chargement...
La page est en cours de chargement...
La page est en cours de chargement...
La page est en cours de chargement...
La page est en cours de chargement...
La page est en cours de chargement...
La page est en cours de chargement...
La page est en cours de chargement...
La page est en cours de chargement...
La page est en cours de chargement...
La page est en cours de chargement...
La page est en cours de chargement...
La page est en cours de chargement...
La page est en cours de chargement...
La page est en cours de chargement...
La page est en cours de chargement...
La page est en cours de chargement...
La page est en cours de chargement...
La page est en cours de chargement...
La page est en cours de chargement...
La page est en cours de chargement...
La page est en cours de chargement...
La page est en cours de chargement...
La page est en cours de chargement...
La page est en cours de chargement...
La page est en cours de chargement...
La page est en cours de chargement...
La page est en cours de chargement...
La page est en cours de chargement...
La page est en cours de chargement...
La page est en cours de chargement...
La page est en cours de chargement...
La page est en cours de chargement...
La page est en cours de chargement...
La page est en cours de chargement...
La page est en cours de chargement...
La page est en cours de chargement...
La page est en cours de chargement...
La page est en cours de chargement...
La page est en cours de chargement...
La page est en cours de chargement...
La page est en cours de chargement...
La page est en cours de chargement...
La page est en cours de chargement...
La page est en cours de chargement...
La page est en cours de chargement...
La page est en cours de chargement...
La page est en cours de chargement...
La page est en cours de chargement...
La page est en cours de chargement...
La page est en cours de chargement...
La page est en cours de chargement...
La page est en cours de chargement...
La page est en cours de chargement...
La page est en cours de chargement...
La page est en cours de chargement...
La page est en cours de chargement...
La page est en cours de chargement...
La page est en cours de chargement...
La page est en cours de chargement...
La page est en cours de chargement...
-
 1
1
-
 2
2
-
 3
3
-
 4
4
-
 5
5
-
 6
6
-
 7
7
-
 8
8
-
 9
9
-
 10
10
-
 11
11
-
 12
12
-
 13
13
-
 14
14
-
 15
15
-
 16
16
-
 17
17
-
 18
18
-
 19
19
-
 20
20
-
 21
21
-
 22
22
-
 23
23
-
 24
24
-
 25
25
-
 26
26
-
 27
27
-
 28
28
-
 29
29
-
 30
30
-
 31
31
-
 32
32
-
 33
33
-
 34
34
-
 35
35
-
 36
36
-
 37
37
-
 38
38
-
 39
39
-
 40
40
-
 41
41
-
 42
42
-
 43
43
-
 44
44
-
 45
45
-
 46
46
-
 47
47
-
 48
48
-
 49
49
-
 50
50
-
 51
51
-
 52
52
-
 53
53
-
 54
54
-
 55
55
-
 56
56
-
 57
57
-
 58
58
-
 59
59
-
 60
60
-
 61
61
-
 62
62
-
 63
63
-
 64
64
-
 65
65
-
 66
66
-
 67
67
-
 68
68
-
 69
69
-
 70
70
-
 71
71
-
 72
72
-
 73
73
-
 74
74
-
 75
75
-
 76
76
-
 77
77
-
 78
78
-
 79
79
-
 80
80
-
 81
81
-
 82
82
-
 83
83
-
 84
84
-
 85
85
-
 86
86
-
 87
87
-
 88
88
-
 89
89
-
 90
90
-
 91
91
-
 92
92
-
 93
93
-
 94
94
-
 95
95
-
 96
96
-
 97
97
-
 98
98
-
 99
99
-
 100
100
-
 101
101
-
 102
102
-
 103
103
-
 104
104
-
 105
105
-
 106
106
-
 107
107
-
 108
108


LIVARNO 416203 Le manuel du propriétaire
- Taper
- Le manuel du propriétaire
dans d''autres langues
- italiano: LIVARNO 416203 Manuale del proprietario
- slovenčina: LIVARNO 416203 Návod na obsluhu
- română: LIVARNO 416203 Manualul proprietarului
Documents connexes
-
LIVARNO 377402 Le manuel du propriétaire
-
-
-
-
-
-
-
-
-
Autres documents
-
 Welltime Connection Kit Manuel utilisateur
-
 LIVARNO home Shower Manuel utilisateur
-
 Schütte Single lever bathroom faucets Manuel utilisateur
-
 Schütte Mitigeur MAGNA Chromé Mode d'emploi
-
STIEBEL ELTRON MEW MEWC MES Operation Instruction
-
-
Brita 01 1042464-03 3-Way Water Filter Tap Manuel utilisateur
-
Bossini E89600 Mode d'emploi
-
-
Delabie TEMPOMATIC MIX 4 electronic mixer Guide d'installation


