La page est en cours de chargement...

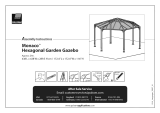
Footprint Products Limited
Corporate Headquarters
1700 Courtneypark Dr. East, Unit 2
Mississauga, ON L5T 1W1
Canada
Phone / Téléphone : 905-564-6007
Fax / Télécopieur : 905-564-0059
E-mail: Support@footprintproducts.com
In the case of missing or damaged parts, do not return product to store . Please contact:
En cas de pièces manquantes ou endommagées, ne pas retourner le produit au magasin. Veuillez communiquer avec :
En caso de que falten piezas o alguna esté dañada, no devuelva el producto a la tienda. Por favor, contacte con:
For All Customer Services Please Call:
Pour le service à la clientèle, veuillez composer le :
1-800-866-5749
18.05_86543
After Sales Service
Toll Free: (877) 627-8476
M-F 8-4:30 Central Time
E-mail: [email protected]
For Sales And Other Questions
E-mail: customer.ser[email protected]
USA
* Technical Questions
* Missing Parts
* Assembly Questions
Or Scan
CANADA
www.palramapplications.com

[Palermo'"
3000
Approx. Dim.
295L x 295W x 276H cm / 116.1"L x 116.1"W x 108.7"H
Wind Resistance
CCp
90 km/hr
55m1/hr
*Snow Load
1204/m2
25ibsift2
:eit Light Transmission
Bronze-15%
on x2
'.--'
c0
dr,
II
1
...."" .101
--> ;
.1
5mm
3/16"
s'"Vi
--" I
.1110mm
25/64"
CC
EN 14963:2006
Year of affix: 16

IMPORTANT
Please read these instructions
carefully before you start to assemble this product.
Please carry out the steps in
the order set out in these instructions.
Keep these instructions in a
safe place for future reference.
Care and Safety advice
Please follow the instructions
as listed in this manual.
Sort the parts and check
against the contents list.
For safety purposes we
strongly recommend the product to be assembled by at
least two people.
Some parts have metal edges.
Please be careful when handling components.
Always wear gloves, shoes and
safety goggles during assembly.
Do not attempt to assemble
the Gazebo in windy or wet conditions.
Dispose of all plastic bags
safely - keep them away from children's reach.
Keep children away from the
assembly area.
Do not attempt to assemble
the Gazebo if you are tired, have taken drugs,
medications or alcohol, or if
you are prone to dizzy spells.
When using a stepladder or
power tools, make sure that you are following the
manufacturer's safety advice.
Do not climb or stand on the
roof.
Heavy articles should not be
leaned against the poles.
Keep roof and gutters clear of
snow, dirt & leaves.
Heavy snow load on roof can
damage the Gazebo making it unsafe to
stand below or nearby.
This product was designed to
be used mainly as a Gazebo.
If color was scratched during
assembly it can be fixed.
» Cleaning instructions
In order to clean the Gazebo, use
a mild detergent solution and rinse with
cold clean water.
Do not use acetone, abrasive
cleaners, or other special detergents to clean the panels.
»Tools & Equipment
T001 (Supplied)
A
Attention
Please make sure you install the panels with the
UV protected side
out (marked with "THIS SIDE OUT") and peel the
film strip covering
the panels.
Please tighten all screws when completing
assembly.
Anchoring this product to the ground is
essential to its stability and rigidity.
It is required to complete this stage in order for
your warranty to be valid.
When encountering the information
icon, please refer to the relevant
assembly step for additional comments
and assistance.
During Assembly
During assembly use a soft surface below the
parts to avoid scratches
and damages.
Steps 3-12:
It is recommended to use a carton or other soft
material under the lowered
corner in order to avoid scratches and peeling
of paint.
Step 10:
Optional - if you wish to add Palram's
curtains/netting - Please thread 16 of the
plastic clips through the rail in each of the four
profiles in order to hang the
curtains/netting (not supplied).
Steps 10a+12a:
Please note that threading of the screws should
be done from the outside
Steps 12+14:
Please note that threading of the screws should
be made from the bottom up.
Step 15b:
Please add silicone on the inner area of part
#8327 as illustrated
Step 21a:
Please drill holes in the panels to be located
precisely parallel to the holes in
profile #7663.
Step 22:
Please level the profile's legs and adapt screws
and plugs to your specific
ground type.

Pavement Stone
OR
Asphalt / Soil
290 cm /115"
40 cm/15.7"-----
290 cm / 115"
40 cm /15.7"
40 cm /15.7"

IMPORTANT
Lire attentivement ces instructions avant de commencer ('assemblage de cette ton-
nelle. Merci de suivre les etapes en respectant I'ordre mentionne sur cette notice.
Conserver cette notice dans un endroit sur pour toute reference ulterieure.
i
» Conseils d'entretien et de securite
Suivez les instructions telles qu'elles sont mentionnees sur cette notice.
Verifiez que le paquet contient bien toutes les pieces.
Pour des raisons de securite, it est fortement recommande qu'au moins 2 personnes
participent au montage.
Certaines pieces peuvent etre coupantes. Merci de manipuler les pieces avec
precaution.
Toujours porter des gants, des chaussures et des lunettes de protection durant tout
l'assemblage.
Ne pas essayer de monter cette tonnelle par temps venteux ou pluvieux.
Assurez-vous d'avoir bien jete tous les emballages en plastique - Les mettre hors de
la portee des enfants.
Eloignez les enfants du site de montage.
N'essayez pas de monter la tonnelle si vous etes fatigue, si vous avez pris des
medicaments ayant un effet sur votre etat d'eveil, des drogues ou si vous avez
consomme de l'alcool, ou si vous etes sujet aux vertiges.
Assurez-vous de bien suivre les conseils de securite du fabricant lorsque vous utilisez
une echelle ou des outils electriques.
Ne pas grimper ni s'accrocher au toit.
Les articles lourds ne doivent pas etre poses sur les poteaux.
Veillez a ce que le toit et les gouttieres soient toujours propres en retirant la neige,
les feuilles mortes et la poussiere.
Le produit pourrait subir des dommages en cas de grosses chutes de neige sur le
toit, it serait alors dangereux de vous tenir sous le toit ou a proximite.
Ce produit a ete concu pour etre principalement utilise comme Gazebo.
Si la peinture a ete rayee pendant ('assemblage, elle peut etre reparee
II est imperatif de monter cette tonnelle sur un sol beton (plat et de niveau)
Instructions de nettoyage
Pour nettoyer votre tonnelle, utilisez un detergent doux et rincez avec de l'eau
propre et froide.
Ne pas utiliser d'acetone, de produits abrasifs ni tout autre detergent special
pour nettoyer les panneaux.
»Vous aurez besoin de
TO01(Fourni)
-
A
Attention
Veuillez vous assurer d'avoir installe les panneaux avec le cote
anti-UV vers l'exterieur (indique par ('inscription «THIS SIDE OUT»)
et de decoller le film recouvrant les panneaux.
Veuillez serrer toutes les vis a la fin du montage.
--....-
Cette etape d'ancrage du produit au sol est essentielle a sa stabilite et a sa rigidite,
elle est de plus necessaire pour assurer la validite de votre garantie.
» Pendant ('assemblage
Positionnez les pieces sur une surface souple pour eviter toute rayure ou degat.
o
Lorsque vous rencontrez !lame information, merci de vous referer a l'etape
d'assemblage appropriee pour toute remarque et assistance additionnelle.
Etape 3-12:
Afin d'eviter toute egratignure ou ecaillement de la peinture, II est
recommande d'utiliser un carton ou un autre materiel souple sous ('angle
inferieur.
*Cette note se refere egalement aux Mapes 7,9,10.
Etape 10:
Optionnel - si vous souhaitez ajouter des rideaux/voilages Palram, veuillez
enfiler 16 des clips en plastique a travers le rail dans chacun des quatre profils
afin d'accrocher les rideaux/voilages (non fournis).
Etape 10a+12a:
Notez s'il vous plait que l'enfilage des vis doit etre fait de l'exterieur.
Etape 12+14:
Notez s'il vous plait que l'enfilage des vis doit etre de bas en haut.
Etape 15b:
. Ajoutez s'il vous plait du silicone a l'interieur de la piece #8327 comme illustre.
Etape 21a:
Percez s'il vous plait des trous dans les panneaux paralleles aux trous qui se
trouvent dans les profiles #7663.
Etape 22: Nivelez le sol et adaptez les vis et chevilles au type de sol
*Notez s'il vous plait: les vis et chevilles ne sont pas fournies.

Dalles et paves beton
0
U
Asphalte

WICHTIG
Bitte lesen Sie diese Anweisungen sorgfaltig durch, bevor Sie mit dem Aufbau des
Pavilions beginnen. Fiihren Sie den Aufbau in der in den Gebrauchsanweisungen
aufgefiihrten Reihenfolge Schritt per Schritt aus.
Heben Sie diese Anweisungen an einem sicheren Ort auf, urn spater auf sie
zuruckgreifen zu !carmen.
» Pflege und Sicherheitshinweise
Bitte folgen Sie die in diesem Handbuch aufgefuhrten Anweisungen.
Sortieren Sie die Teile und uberprufen Sie die Inhaltsliste.
Aus Sicherheitsgrunden empfehlen wir dringend, dass das Produkt von
mindestens zwei Menschen zusammengebaut wird.
Einige Teile haben Metallkanten. Bitte seien Sie vorsichtig beim Umgang mit den
Komponenten.
Tragen Sie immer Handschuhe, Schuhe und Schutzbrille bei der Montage.
Versuchen Sie nicht, das Produkt bei windigen oder nassen Bedingungen zu
montieren.
Entsorgen Sie alle Plastiktuten sicherheitsgemaB - bewahren Sie sie auBerhalb
der Reichweite von kleinen Kindern auf.
Halten Sie Kinder vom Montagebereich fern.
Versuchen Sie nicht ein Produkt zusammen zu bauen, wenn Sie made sind,
Drogen, Medikamente oder Alkohol genommen haben, oder wenn Sie zu
Schwindelanfallen neigen.
Bei Verwendung einer Stehleiter oder Elektrowerkzeugen, stellen Sie sicher,
dass Sie die Sicherheitshinweise und Anweisungen des Herstellers befolgen.
Steigen oder stehen Sie nicht auf dem Dach.
Schwere Gegenstande darfen nicht an den Pfosten angelehnt werden.
Halten Sie Dach und Dachrinne frei von Schnee, Schmutz und Blattern.
Extreme Mengen von Schnee auf dem Dach kannen das Gazebo schadigenund
zu unsicheren Bedingungen in der Umgebung fahren
Dieses Produkt wurde gestaltet, urn hauptsachlich als Pavillon benutzt zu
werden.
Wenn die Farbe wahrend der Montage zerkratzt wurde, kann sie repariert werden.
» Pflegeanleitung
Urn das Produkt zu reinigen, verwenden Sie ein mildes Reinigungsmittel und
reinigen Sie mit kaltem Wasser. Verwenden Sie kein Aceton, Scheuermittel oder
andere spezielle Reinigungsmittel urn das Paneel zu reinigen.
» Sie werden brauchen
Tool (Sind inbegriffen)
Achtung:
Bitte achten Sie darauf, die Panele mit der UV- geschutzten Seite nach
auBen (Kennzeichnung «THIS SIDE OUT») zu montieren und den
Schutzfilm von den Panelen abzuziehen.
Bitte ziehen Sie alle Schrauben am Ende des Aufbaus fest.
Die Verankerung dieses Produkts im Untergrund ist wesentlich fur seine Stabilitat
und Festigkeit. Sie ist unablasslich, urn diesen Arbeitsschritt zu beenden, damit Ihre
Garantie gultig bleibt.
Bei der Montage
Bei der Montage nehmen Sie eine weiche Plattform und stellen Sie diese unterhalb
der Teile, urn Kratzer und Beschadigungen zu vermeiden.
cdi. Beim Aufbau wird Ihnen das Informationssymbol begegnen.
1 Fur zusatzliche Kommentare und Unterstatzung beziehen Sie sich bitte auf
die entsprechende Aufbaustufe.
Schritte 3-12:
Es wird empfohlen, einen Karton oder ein anderes weiches Material unter der
abgesenkten Ecke zu stellen, urn Kratzer und Abblattern der Farbe zu vermeiden.
Schritt 10:
Optional, wenn Sie PalramsVorhange/Netze hinzufagen mochten Fadeln Sie 16
der Plastikclips durch die Schiene in jedem der vier Profile, urn die Vorhange/Netze
aufzuhangen (nicht im Lieferumfang enthalten).
Schritte 10a +12 a:
Bitte beachten Sie, dass das Einschrauben der Schrauben von auBen durchgefahrt
werden sollte.
Schritte 12 +14:
Bitte beachten Sie, dass das Einschrauben der Schrauben von unten nach oben
erfolgen sollte.
Schritt 15b:
Bitte fugen Sie Silikon auf dem Innenbereich des Teils #8327 hinzu, wie dargestellt.
Schritt 21a:
Bitte bohren Sie die Locher in den Platten genau parallel zu den Lochern in Profilen
#7663.
Schritt 22: Bitte ebenen Sie die Beine der Profile und passen Sie die Schrauben und
Dabeln an Ihren spezifischen Boden-Typ an.

Pflastersteine Asphalt/Erdreich

IMPORTANTE
Por favor, lea estas instrucciones detenidamente antes de empezar a montar este
producto. Por favor, siga los pasos en el orden establecido en estas instrucciones.
Guarde estas instrucciones en un lugar seguro para futuras consultas.
» Consejos de mantenimiento y seguridad
Por favor, siga las instrucciones tal como se enumeran en este manual.
Clasifique las piezas y comparelas con la lista de contenidos.
Por razones de seguridad, recomendamos encarecidamente que este producto se
monte entre al menos dos personas.
Algunas piezas tienen bordes metalicos. Por favor, tenga cuidado al manejar
los componentes. Pongase siempre guantes, zapatos y gafas de seguridad
durante el montaje.
No intente montar el Cenador cuando hace viento o bajo la Iluvia.
Deshagase de todas las bolsas de plastic° con seguridad. Mantengalas fuera del
alcance de los ninos.
Aleje a los ninos de la zona de montaje.
No intente montar el Cenador si esta cansado o ha tomado drogas,
medicinas o alcohol, o bien si es propenso a sufrir desvanecimientos.
Cuando utilice una escalera de mano o herramientas electricas,
asegUrese de seguir los consejos de seguridad del fabricante.
No se suba al tejado ni se ponga de pie sobre este.
Los objetos pesados no deben apoyarse sobre los postes.
Mantenga el tejado y los canalones libres de nieve, lodo y hojas.
Una carga pesada de nieve en el tejado puede clanar el Cenador, por lo cual sena
peligroso quedarse debajo o cerca de este.
Este producto fue disenado para ser utilizado principalmente como un mirador.
Si el color se raya durante el montaje, podria arreglarse.
» Instrucciones de limpieza
Para limpiar el Cenador, utilice una solucion de detergente suave y enjuaguelo
con agua limpia fria.
No use acetona, productos de limpieza abrasivos u otros detergentes especiales
para limpiar los paneles.
» Necesitara
Tool (Suministrado(s))
Atenci6n:
AsegUrese de que instala los paneles con la cara que protege de los
rayos UV hacia afuera (marcado con "ESTE LADO HACIA AFUERA")
y tenga en cuenta que tiene que guitar la cinta que recubre los paneles.
Apriete todas las tuercas al final del montaje.
Por favor, tenga en cuenta: Anclar este producto al suelo es esencial para su
estabilidad y rigidez. Es necesario completar esta fase para que su garantia sea
valida.
» Durante el montaje
Durante el montaje utilice una superficie suave por debajo de las piezas para evitar
aranazos y otros danos.
Cuando yea el icono de informacion, por favor consulte el paso de montaje
pertinente para disponer de mas comentarios y ayuda.
Pasos 3-12: Se recomienda usar carton u otro material blando bajo la esquina
situada en una posicion mas baja para evitar aranazos y peladuras en la pintura.
Pasos 10: Optativo: si desea anadir unas cortinas/mallas de Palram, ensarte, por
favor, 16 de los ganchos de plastic° en el riel en cada uno de los cuatro perfiles con
el fin de colgar las cortinas/mallas (no se suministra).
Pasos 10a+12a: Pasos Por favor, tenga en cuenta que debe enroscar los tornillos
desde el exterior.
Pasos 12+14: Por favor, tenga en cuenta que debe enroscar los tornillos de abajo
arriba.
Paso 15b: Por favor, anada silicona a la zona interior de la pieza #8327 tal como se
ilustra.
Paso 21a: Por favor, taladre orificios en los paneles para que se sitilen de forma
precisa en paralelo a los orificios de los perfiles #7663.
Paso 22: Por favor, nivele las patas de los perfiles y adapte los tornillos y tacos a su
tipo de suelo especifico.

Empedrado Asfalto / tierra

IMPORTANTE
Si prega di leggere attentamente le istruzioni prima di iniziare a montare questo
prodotto. Si prega di andare passo passo nelbordine indicato in queste istruzioni.
Conservare le istruzioni in un luogo sicuro per un futuro riferimento.
» Consigli di cura e sicurezza
Please follow the instructions as listed in this manual.
Seguire le istruzioni riportate in questo manuale.
Ordinare i componenti e verificare con l'elenco contenuto.
Per motivi di sicurezza si consiglia vivamente che il prodotto sia assemblato da
almeno due persone.
Alcuni componenti hanno dei bordi in metallo. Si prega di prestare attenzione
quando si maneggiano questi componenti. Indossare sempre guanti, scarpe e
occhiali di protezione durante il montaggio.
Non cercare di montare il Gazebo in presenza di vento o pioggia.
Smaltire tutti i sacchetti di plastica in modo sicuro - tenerli lontani dalla portata
dei bambini.
Tenere i bambini lontani dalla zona di assemblaggio.
Non tentare di montare il Gazebo se siete stanchi, avete preso droghe, farmaci o
alcool, o se siete inclini a vertigini.
Quando utilizzate una scala o strumenti di potenza, assicuratevi di seguire i
consigli di prudenza del produttore.
Non salite o rimanete in piedi sul tetto.
Gli articoli pesanti non devono essere appoggiati contro i pali.
Tenere tetto e grondaie pulite da neve, sporco e foglie.
Un carico pesante di neve sul tetto pub danneggiare il Gazebo, rendendolo
pericoloso da stazionarci sotto o nelle vicinanze.
Prodotto progettato per use prevalente come gazebo.
Se il colore e stato graffiato durante Fassemblaggio, potrebbe essere corretto.
>> Istruzioni per la pulizia
Per pulire il Gazebo, utilizzare un detergente delicato e risciacquare con acqua
pulita fredda.
Non utilizzare acetone, detergenti abrasivi o altri detergenti speciali per la pulizia
dei pannelli.
» Strumenti ed Equipaggiamento
Tool (Fornitura)
Attenzione:
Ti preghiamo di notare che i pannelli vanno installati con il lato
protezione raggi UV verso l'esterno (segnato con la scritta
"LATO ESTERNO") e che la pellicola che copre i pannelli va tolta.
Si prega di serrare tutte le viti al termine del montaggio.
Nota bene: il fissaggio di questo prodotto a terra 6 essenziale per ottenere
stability e rigidita. Affinche la garanzia sia valida 6 necessario completare questo
passaggio.
» Durante I'assemblaggio
Durante l'assemblaggio utilizzare una superficie morbida sotto i componenti per
evitare abrasioni e danneggiamenti.
Quando si trova l'icona d'informazione, si prega di riferirsi alla fase di
assemblaggio rilevante per assistenza e informazioni aggiuntive.
Fase 3-12:
Si consiglia di utilizzare un cartone o altro materiale morbido al di sotto degli
angoli bassi per evitare che la pittura si danneggi o si raschi via.
*Questa nota si riferisce anche alle fasi 7,9 e 10
Fase 10:
Opzionale - se vuoi aggiungere le tende /la rete di Palram - cortesemente metti
16 delle clip di plastica sulla guida in ciascuno dei quattro profili per appendere
le tende / la rete (non in dotazione).
Fasi 10a e 12a:
Si prega di notare che le viti vanno infilate dalle esterno
Fasi 12+14:
Si prega di notare che le viti vanno infilate dal basso verso ('alto.
Fase 15b:
Si prega di aggiungere del silicone nella parte interna del pezzo #8327 come
illustrato"
Fase 20a:
Si prega di praticare dei fori nei pannelli da collocare precisamente in
corrispondenza dei fori nelle sezioni #7663.
Fase 21a:
Si prega di praticare dei fori nei pannelli da collocare precisamente in
corrispondenza dei fori nei sezioni #7744 + #7743

Pavimentazione di pietra Asfalto / Sterrato
Calcestruzzo
zzo
Calce11611.
Calcestruzzo

DOLE2ITE
Prosim pred tym ako zat'nete s montaZou si starostlivo preatajte tento navod.
Prosim vykonavajte jednotlive kroky podia poradia v tomto navode.
Uchovajte si tento navod na bezpet'nom mieste pre budUcu potrebu.
Odr 2ba a bezpk-nostne pokyny
Prosim postupujte podia inStrukcif v navode.
Rortried'te si jednotlive t'asti a skontrolujte ich podia zoznamu komponentov.
Z bezpet'nostnych clovodov odporkame, aby bola monta2 zabezpet'ena najmenej
dvoma rud'mi.
Niektore t'asti majil kovove rohy. Prosim bud'te opatrny pri zaobchadzanf s nimi.
Pot'as montane vkly pouZivajte rukavice, topanky a bezpet'nostne okuliare.
NepokilSajte sa o monta2 Altanku vo veternych alebo vlhkych podmienkach.
Bezpet'ne odstrante vSetky plastove obaly - drZte ich mimo dosahu deti.
Uistite sa, Ze deti s i pot'as montane v dostatot'nej vzdialenosti
NepokilSajte sa o monta2 altanku ak ste unaveny, uZili ste drogy, lieky alebo alkohol,
alebo ak ste nachylny na zavraty.
Ak pouZivate rebrik alebo elektricke naradie, uistite sa, Ze postupujete podia
bezpet'nostnych pokynov vyrobcu.
Nelezte ani nestojte na streche.
Neopierajte tazke predmety o konStrukciu.
UdrZujte strechu a odkvap t'iste od snehu, Spiny & Iistov.
TaZky sneh na streche mote altanok poSkodif a stale pod nim alebo v jeho blizkosti
mote byf nebezpkne.
Tento vyrobok navrhnuty tak, aby sa pouZival predovSetkym ako altanok.
Ak bola pot'as montane farba poSkriabana, mohla by byf opravena.
» Nayod na Udr2bu
Na t'istenie altanku pouZite Setrny cistiaci prostriedok a oplachnite t'istou studenou
vodou. Na t'istenie bot'nych stien nepouZivajte riedidlo, abrazivny cistic, alebo ine
Specialne t'istiace prostriedky.
» Budete potreboyat
Tool (Dodane)
Pozor:
Panely inStalujte s UV chranenou stranou smerom von (oznat'enie
SMEROM VON") a ochranny obal pred inStalaciou odstrante.
Na konci montane, prosim, dotiahnite vSetky skrutky.
Po ukont'eni montane dotiahnite vSetky zavity.
Po&s montane
Pot'as montane umiestnite vSetky komponenty na makky povrch, aby ste prediSli
poSkriabaniu a poSkodeniu.
1
ku ktoremu sa piktogram vzfahuje pre dopinujilce informacie a pomoc.
Ked' narazite na informat'ny piktogram, prosim skontrolujte montaZny krok,
Krok 3-12:
Odporka sa pouZif kaftan alebo my makky material pod zniZeny roh,
aby ste prediSli poSriabaniu a olupovaniu farby.
Krok 10:
Voliterne - ak si prajete pridaf zaclony/siefovinu Palram - Prosim navlefte 16
plastovych svoriek cez vedenie v kaZdom zo Styroch profilov, aby ste zavesili
zaclony/siefovinu (nie je skasfou doclayky).
Krok 10a+12a:
Upozornujeme, Ze skrutky sa ufahujil zvonku
Krok 12+14:
Upozornujeme, Ze skrutky sa ufahujil od spodu nahor.
Krok 15b:
Prosim naneste silikon na vniltornil stranu t'asti #8327 ako na obrazku
Krok 21a:
Prosim vyvrtajte diery do bot'nych stien tak, aby boli umiestnene presne
paralelne k dieram v profiloch #7663.
Krok 22:
Prosim zarovnajte spodnil cast stlpikov na rovnakil Uroven a prisposobte
skrutky a hmoklinky konkretnemu typu povrchu.

Pavement Stone
ALEBO
Asphalt / Soil

1
L
IMPORTANT
Va rugam sa cititi cu atentie aceste instructiuni inainte de a incepe sa montati
acest produs. Va rugam sa respectati pasii descrisi in aceste instructiuni.
Pastrati instructiunile la loc sigur pentru a fi consultate ulterior.
» Instructiuni de Ingrijire si siguranta
Va rugam sa respectati instructiunile descrise in acest manual
Sortati piesele si confruntati cu lista de componente.
Din motive de siguranta, recomandam cu tarie ca produsul sa fie asamblat de cel
putin doua persoane
Unele componente au muchii din metal. Va rugam sa aveti grija cand exploatati
componentele. Purtati intotdeauna manusi, pantofi si ochelari de protectie in timpul
asamblarii.
Nu incercati sa asamblati Foisorul in conditiile in care bate vantul sau sunt intemperii
Aruncati in conditii de siguranta toate pungile de plastic nu le lasati la indemana
copiilor mici.
Nu lasati copiii in zona de asamblare.
Nu incercati sa asamblati Foisorul daca sunteti obositi, daca ati luat droguri,
medicamente sau ati consumat alcool sau daca sunteti predispusi la stari de ameteala.
Cand folositi o scara sau instrumente de putere, asigurati-va ca respectati
instructiunile de siguranta ale producatorului acestora.
Nu va urcati si nu stati pe acoperis.
Articolele grele nu ar trebui rezemate de stalpi.
Eliberati acoperisul si rigola de zapada, murdarie si frunze.
Volumele marl de zapada de pe acoperis pot sa deterioreze Foisorul si nu se poate sta
sub sau in apropierea acestuia in conditii de siguranta.
Ten produktzostaizaprojektowany do wykorzystania glownie jako chiosc.
Daca culoarea a fost zgariata in timpul montarii, ar putea fi fixata.
» Instructiuni de curatare
Pentru a curata Foisorul, folositi o solutie detergent necoroziva si clatiti cu apa rece curata.
Nu folositi acetona, agenti de curatare abrazivi, sau alti detergenti speciali, pentru a curata
panourile
» Instrumente si echipamente
T001 (furnizat)
A
Atentie:
Va rugam sa retineti ca trebuie sa instalati panourile cu partea
protejata UV in afara (marcata cuACEASTA PARTE IN AFARA") si sa
desprindeti banda de folie ce protejeaza panourile.
La finalizarea asamblarii, strangeti toate suruburile.
4.-00
Ancorarea acestui produs de sol este esentiala pentru stabilitatea si rigiditatea lui.
Este necesar sa duceti la bun sfarsit acest pas pentru ca garantia dvs. sa fie valabila.
»In timpul asamblarii
In timpul asamblarii, puneti o suprafata moale sub componente, pentru a evita
zgarierea si deteriorarea.
Cand identificati pictograma de informare, va rugam sa consultati etapa de
asamblare relevanta, pentru comentarii si asistenta suplimentare.
Etapele 3-12:
Se recomanda sa folositi un carton sau alt material moale sub coltul coborat,
pentru a se evita zgarierea si decojirea vopselei.
Etapa 10:
Optional - daca doriti sa adaugati draperiile / plasa Palram - va rugam sa
prindeti 16 cleme de plastic pe fiecare sina a celor patru profile pentru a agata
draperiile / plasa (nu este inclusa).
Etapele 10a+12a:
Va rugam sa retineti ca suruburile ar trebui filetate dinspre exterior.
Etapele 12+14:
Va rugam sa retineti ca suruburile ar trebui filetate dinspre partea inferioara.
Etapa 15b:
Va rugam sa adaugati silicon pe partea inferioara a componentei nr. 8327,
astfel cum este ilustrat.
Etapa 21a:
Va rugam sa gauriti panourile, care trebuie amplasate exact paralel cu gaurile
din profilele nr. 7663.
Etapa 22:
Va rugam sa aduceti la nivel picioarele profilelor si adaptati suruburile si
obturatoarele la conditiile solului respectiv.

Pavement Stone
1
Asphalt / Soil

FONTOS
A term& osszeallitasa elott kerjuk, olvassa at alaposan ezeket az utasitasokat.
A lepeseket az Utmutatonak megfeleI6 sorrendben vegezze el.
Tartsa meg ezt az Utmutatot egy biztonsagos helyen, hogy kesobb is hasznalhassa.
» Kezelesi es biztonsagi tanacsok
Kerjuk, kovesse az Utmutatoban felsorolt utasitasokat.
Ellenorizze az alkatreszeket a tartalomjegyzeket alapjan.
Biztonsagi okokbol javasoljuk, hogy a termeket legalabb ket ember szerelje ossze.
Egyes reszek femszegelyekkel rendelkeznek. Kerjuk, legyen ovatos az
alkatreszekkel yak') munka soran. Mindig viseljen kesztyCit, clip& es
vecloszemOveget az osszeszereles soran.
Ne kfserelje meg a kocsibeallot szeles, vagy nedves korulmenyek kozott
osszeszerelni.
Az osszes mCianyag zacskot ovatosan tavolftsa el - tartsa ezeket tavol a
kisgyermekekt61.
Tartsa tavol a gyermekeket az osszeszerelesi terulettol.
Ne probalja meg osszeszerelni a kocsibeallot, ha faradt, ha kabitoszert fogyasztott,
ha gyogyszert vett be, vagy alkoholt fogyasztott, vagy ha hajlamos a szedulesre.
Ha letrat, vagy elektromos keziszerszamokat hasznal, ugyeljen arra, hogy mindig
kovesse azon gyartok biztonsagi eloirasait.
Ne masszon fel, vagy alljon a tetore.
Nell& targyakat nem szabad a pillereknek tamasztani.
Kerjuk, forduljon a helyi hatosaghoz, ha engedelykoteles az autobeallo felepftese.
Tartsa tisztan a tetot es az ereszcsatornakat tisztitsa meg a hate)l es levelekt61.
Ha a teton nagy mennyisegii gyCilik ossze, az karosithatja az autobeallot, tovabloa
ez esetben nem biztonsagos alatta, vagy a kozeleben
Ez a term& elsosorban kulteri pavilonhoz keszult
Ha az osszeszereles soran megkarcolodik a festes, az a kesolobiekben javithato.
»Tisztitasi UtmutatO
Amikor a term& tisztitasra szorul, hasznaljon enyhe tisztitoszeres oldatot,
majd oblitse le hideg, tiszta vizzel.
A panelek tisztitasahoz ne hasznaljon acetont, sUroloszereket, vagy egyeb specialis
tisztitoszereket.
» Szerszamok es felszereles
L
Tool (szallitva)
Figyelem
Gyozodjon meg rola, hogy a paneleket az UV vedett oldalaval felfele
helyezze el (mely a "THIS SIDE OUT"jelzessel lett ellatva), es tavolftsa
el a paneleket borito foliat.
Az osszeszereles vegen szoritson meg minden csavart meg egyszer.
A term& rogzitese a talajhoz elengedhetetlen annak stabilitasahoz es
merevsegehez.
Ezt a jotallas ervenyesitese erdekeben is el kell vegezni.
Ha az informacios ikont latja, keresse ki a ra vonatkozo osszeszerelesi lepest
a tovabbi megjegyzesek vagy segitseg megtekintesehez.
» Az osszeszereles kozben
Az osszeszereles soran hasznaljon valamilyen puha boritast a talajon, hogy
elkerulje az alkatreszek megkarcolodasat, vagy egyeb karokat.
3--12. Leposek:
Ajanlatos egy kartonlapot elhelyezni leeresztett sarok alatt, hogy elkerulje
azok megkarcolodasat, vagy a festek lehorzsolasat.
10. lopes:
Opvionalis - Ha fuggonyet hal& kivan felszerelni - Kerjuk csavarjon be 16
mCianyag csatot, a negy profilon belul a sinre, melyre fuggonyoket halokat
akaszthat (nem mellekelt tartozek).
A 10a +12a leposek:
Kerjuk, ugyeljen rá, hogy a csavarokat kivulrol hajtsa be.
12 +14. Leposek:
Kerjuk, vegye figyelembe, hogy a csavarokat alulrol felfele hajtsa be.
15b. Lopes:
Kerjuk, hogy a 8327-es szamil elem belso feluletere tegyen szilikontornitest,
mint ahogy
21a. Lopes:
Kerjuk Ugy fUrjon lyukakat a panelekbe, hogy azok precizen, es parhuzamosan
fussanak a 7663-as szamil profilon lev6 lyukakkal.
22. lopes:
Kerjuk, allitsa be pontosan a profit !abaft, majd a talaj tfpusanak megfeleI6
csavarokkal es tiplikkel rogzitse.

Pavement Stone Asphalt / Soil
va
g
y
290 cm /115"
40 cm/15.7"-----
290 cm / 115"
40 cm /15.7"
40 cm /15.7"

WAZNA INFORMACJA
Przed przystqpieniem do montazu produktu prosimy o uwa2ne zapoznanie sie z instrukcjq.
Poszczegolne etapy montazu nale2y przeprowadza6 w kolejnoki okrelonej w niniejszej
instrukcji. Nale2y zachowa6 niniejszq instrukcje na przyszlok.
Uwagi dotyczace bezpieczenstwa i pielegnacji
Nale2y postepowa6 zgodnie ze wskazowkami zawartymi w niniejszej instrukcji.
U162 czeki i zweryfikuj ich kompletnok na podstawie dostarczonej listy.
Ze wzgledow bezpieczenstwa zalecamy wykonanie montazu produktu przez co
najmniej dwie osoby.
Niektore czeki posiadak metalowe krawedzie. Nale2y zachowa6 ostro2nok podczas
montazu. Podczas montazu nale2y zawsze nosic rekawice, buty oraz okulary ochronne.
Nie nale2y wykonywa6 montazu altany podczas wystepowania niekorzystnych
warunkow atmosferycznych, takich jak deszcz lub wiatr.
Nale2y w bezpieczny spos6b pozby6 sic wszystkich plastikowych toreb - trzyma6 je z
dala od dzieci.
Trzyma6 dzieci z dala od miejsca wykonywania montazu.
Nie nale2y wykonywa6 montazu altany w przypadku zmeczenia, znajdowania sic pod
wplywem Srodkow odurzakcych, lekow, alkoholu lub w przypadku podatnoki na
zawroty glowy.
Podczas korzystania z drabiny lub elektronarzedzi, upewnij sic, ze postepujesz zgodnie
z zaleceniami bezpieczenstwa producenta.
Nie wspinaj sic ani nie stoj na dachu.
Nie opieraj cie2kich przedmiotow o slupki.
Chron dach i rynny przed zalegakcym Sniegiem, ziemiq oraz
Zalegakcy Snieg mote spowodowa6 uszkodzenie altany, przez co mote on stanowi6
zagro2enie dla ()sob znajdukcych sic wewnqtrz lub w pobli2u.
Ten produkt zostal zaprojektowany do wykorzystania glownie jako altanka.
Je0 kolor zostal zadrapany podczas montazu, mozna go naprawi6.
»Instrukcje czyszczenia
Aby wyczyki6 altany, uzyj lagodnego detergentu i splucz zimna czysta woda.
Do czyszczenia paneli nie nale2y u2ywa6 acetonu, Sciernych Srodkow czyszczqcych ani
innych specjalnych detergentow.
rNarzedzia i wyposaZenie
Tool (W zestawie)
Uwaga
Panele instaluje sie strong z warstwq ochronnq UV na
zewnqtrz (oznaczonq «TA STRONP NA ZEWNATRZ») i zdejmuje sie
folic pokrywakcq panele.
Po zakonczeniu montazu nale2y dokreci6 wszystkie Sruby.
Przymocowanie altany do ziemi jest kluczowe dla zapewnienia stabilnoki i
solidnoki konstrukcji.
Aby zachowa6 wa2nok gwarancji, nale2y zakonczy6 ten etap montazu.
» W trakcie montazu
Podczas montazu nale2y podlo2y6 pod czeki miekki material w celu unikniecia
zarysowan i uszkodzen.
Ikona informacyjna wskazuje na koniecznok zapoznania sic
dodatkowymi informacjami dotyczqcymi danego etapu montazu.
Kroki 3-12:
W celu unikniecia zarysowan i luszczenia sic farby zaleca sic podlo2enie
kartonu lub innego miekkiego materialu pod obni2ony rog altany.
Krok 10:
opcjonalnie -Je0 chcq Panstwo doda6 zaslony/firanki Palram, nale2y nalo2y6
16 plastikowych zawieszek, na ka2cly z czterech drq2kow, aby mac powiesi6 na
nich zaslony/firanki (nie dolqczone).
Kroki 10a+12a:
Sruby nale2y wkreca6 od zewnqtrz
Kroki 12+14:
Sruby nale2y wkreca6 od dolu.
Krok 15b:
Na wewnetrznq powierzchnie czeki #8327 nale2y nalo2y6 silikon jak pokazano
Krok 21a:
Nale2y wywierci6 otwory w panelach w taki sposob, aby pokrywaly sic z
otworami w profilach #7663.
Krok 22:
Nale2y wyrowna6 nogi profilu oraz dostosowa6 wkrety i kolki do rodzaju
podlo2a.

Kamienny bruk
1
Asfalt / Gleba
/