LG LGM470 Le manuel du propriétaire
- Catégorie
- Les smartphones
- Taper
- Le manuel du propriétaire
Ce manuel convient également à


1
About this user guide
Thank you for choosing this LG product. Please carefully read this user
guide before using the device for the first time to ensure safe and proper
use.
Ţ Always use genuine LG accessories. The supplied items are designed
only for this device and may not be compatible with other devices.
Ţ This device is not suitable for people who have a visual impairment due
to the touchscr
een keyboard.
Ţ Descriptions are based on the device default settings.
Ţ Default apps on the device are subject to updates, and support for
these apps may be withdrawn without prior notice. If you have any
questions about an app provided with the device, please contact an
LG Service Centre. For user-installed apps, please contact the relevant
service provider.
Ţ Modifying the device’s operating system or installing software from
unofficial sources may damage the device and lead to data corruption
or data loss. Such actions will violate your LG licence agreement and
avoid your warranty.
Ţ Some content and illustrations may differ from your device, depending
on the area, service provider, software version, or OS version, and are
subject to change without prior notice.
Ţ Software, audio, wallpaper, images, and other media supplied with
your device are licenced for limited use. If you extract and use these
materials for commercial or other purposes, you may be infringing
copyright laws. As a user, you are fully responsible for the illegal use of
media.
Ţ Additional charges may incur for data services, such as messaging,
uploading, downloading, auto-syncing and location services. To avoid
additional charges, select a data plan suitable to your needs. Contact
your service provider to obtain additional details.
ENGLISH

2
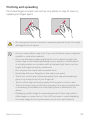
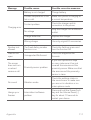
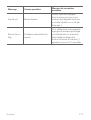
Instructional notices
WARNING: Situations that could cause injury to the user and third
parties.
CAUTION: Situations that may cause minor injury or damage to the
device.
NOTE: Notices or additional information.

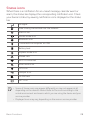
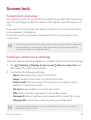
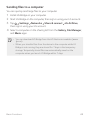
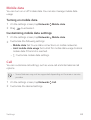
3
36 Memory card encryption
37 Taking screenshots
38 Entering text
43 Content sharing
46 Do not disturb
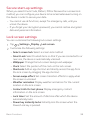
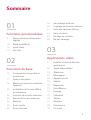
03
Useful Apps
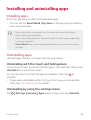
48 Installing and uninstalling
apps
49 Uninstalled apps
50 Phone
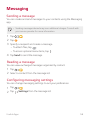
54 Messaging
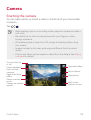
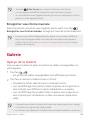
55 Camera
63 Gallery
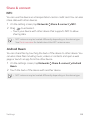
66 Contacts
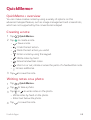
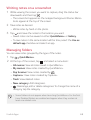
68 QuickMemo+
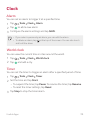
70 Clock
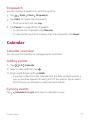
71 Calendar
72 Tasks
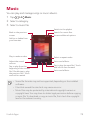
73 Music
74 Calculator
74 E-mail
75 FM Radio
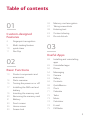
Table of contents
01
Custom-designed
Features
6 Fingerprint recognition
9 Multi-tasking feature
10 quick share
11 Pen Pop
02
Basic Functions
13 Product components and
accessories
14 Parts overview
16 Turning the power on or off
17 Installing the SIM card and
battery
19 Inserting the memory card
20 Removing the memory card
21 Battery
23 Touch screen
26 Home screen
33 Screen lock

4Table of contents
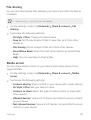
76 File Manager
76 LG Backup
77 Downloads
77 LG SmartWorld
78 Facebook
78 Instagram
78 Evernote
78 Chrome
79 Google apps
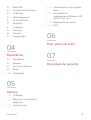
04
Settings
82 Settings
82 Networks
93 Sound & notification
94 Display
95 General
05
Appendix
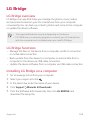
105 LG Bridge
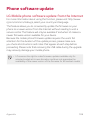
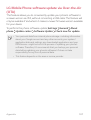
106 Phone software update
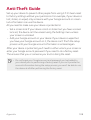
108 Anti-Theft Guide
109 Open Source Software Notice
Information
109 Regulatory information (FCC/
IC ID number, etc.)
109 Trademarks
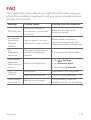
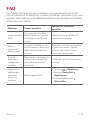
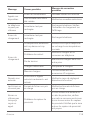
110 FAQ
06
For Your Safety
07
Safety Guidelines

Custom-designed
Features
01

Custom-designed Features 6
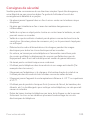
Fingerprint recognition
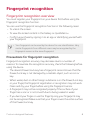
Fingerprint recognition overview
You must register your fingerprint on your device first before using the
fingerprint recognition function.
You can use the fingerprint recognition function in the following cases:
Ţ To unlock the screen.
Ţ To view the locked content in the Gallery or QuickMemo+.
Ţ Confirm a purchase by signing in to an app or identifying yourself with
your finger
print.
Ţ Your fingerprint can be used by the device for user identification. Very
similar fingerprints from different users may be recognized by the
fingerprint sensor as the same fingerprint.
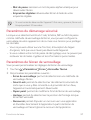
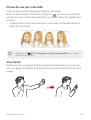
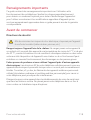
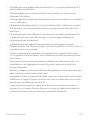
Precautions for fingerprint recognition
Fingerprint recognition accuracy may decrease due to a number of
reasons. To maximize the recognition accuracy, check the following before
using the device.
Ţ The device’s Power/Lock key has a fingerprint sensor. Ensure that the
Power/Lock key is not damaged by a metallic object, such as coin or
key.
Ţ When water, dust or other foreign substance is on the Power/Lock key
or your finger, the fingerprint registration or recognition may not work.
Clean and dry your finger before using the fingerprint sensor.
Ţ A fingerprint may not be recognized properly if the surface of your
finger has a scar or is not smooth due to being soaked in water.
Ţ If you bend your finger or use the fingertip only, your fingerprint may
not be recognized. Make sure that your finger covers the entire surface
of the Power/Lock key.

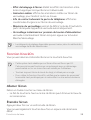
Custom-designed Features 7
Ţ Scan only one finger for each registration. Scanning more than one
finger may affect fingerprint registration and recognition.
Ţ The device may generate static electricity if the surrounding air is dry.
If the surrounding air is dry, avoid scanning fingerprints, or touch a
metallic object, such as coin or key, to remove static electricity before
scanning fingerprints.
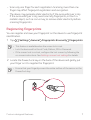
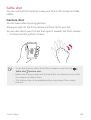
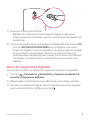
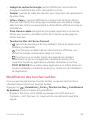
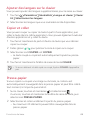
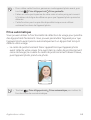
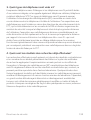
Registering fingerprints
You can register and save your fingerprint on the device to use fingerprint
identification.
1
Tap Settings General Fingerprints & security Fingerprints.
Ţ This feature is available when the screen lock is set.
Ţ Lock the device with a Knock Code, Pattern, PIN or Password.
Ţ If the screen lock is not set, configure the lock screen by following the
on-screen instructions. See
Setting a screen lock settings
for details.
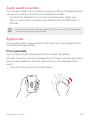
2
Locate the Power/Lock key on the back of the device and gently put
your finger on it to register the fingerprint.
Ţ Ensure that your fingertip covers the entire surface of the sensor on the
Power/Lock key.

Custom-designed Features 8
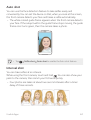
3
Follow the on-screen instructions.
Ţ Repeat scanning the fingerprint by moving your finger little by little
until the fingerprint registers.
4
When the fingerprint registration is done, tap OK.
Ţ Tap ADD MORE to register another fingerprint. If you register
only one fingerprint and the corresponding finger is not in a good
condition, the fingerprint recognition may not work well. As the
preventive measure against this kind of situation, register multiple
fingerprints.
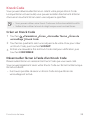
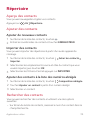
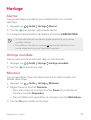
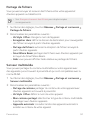
Managing fingerprints
You can edit or delete registered fingerprints.
1
Tap Settings General Fingerprints & security Fingerprints.
2
Unlock according to the specified lock method.
3
From the fingerprint list, tap a fingerprint to rename it. To delete it, tap
.
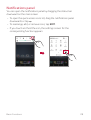
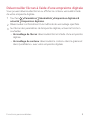
Unlocking the screen with a fingerprint
You can unlock the screen or view the locked content by using your
fingerprint.
1
Tap Settings General Fingerprints & security Fingerprints.
2
Unlock according to the specified lock method.
3
On the fingerprint settings screen, activate the desired function:
Ţ Screen lock: Unlock the screen with a fingerprint.
Ţ Content lock: Unlock content in the Gallery and QuickMemo+ with
a fingerprint.

Custom-designed Features 9
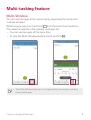
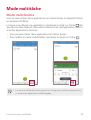
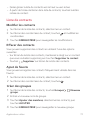
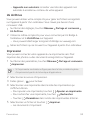
Multi-tasking feature
Multi-Window
You can use two apps at the same time by separating the screen into
multiple windows.
While using an app, touch and hold
from the Home touch buttons,
then select an app from the recently-used apps list.
Ţ You can use two apps at the same time.
Ţ To stop the Multi-Window feature, touch and hold
.
Ţ The Multi-Window feature is not supported by some apps, including
downloaded apps.

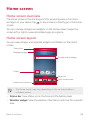
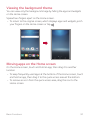
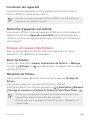
Custom-designed Features 10
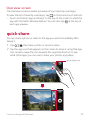
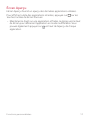
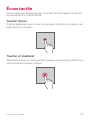
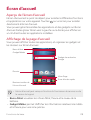
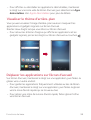
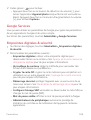
Overview screen
The Overview screen provides a preview of your recently-used apps.
To view the list of recently-used apps, tap
on the Home touch buttons.
Ţ Touch and hold an app and drag it to the top of the screen to start the
app with the Multi-Window feature. You can also tap
at the top of
each app preview.
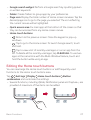
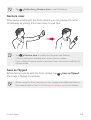
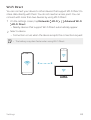
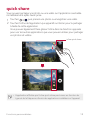
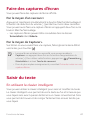
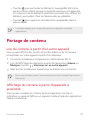
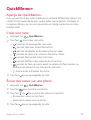
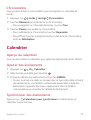
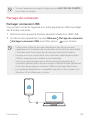
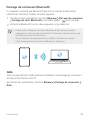
quick share
You can share a photo or video to the app you want immediately after
taking it.
1
Tap , then take a photo or record a video.
2
Tap the app icon that appears on the screen to share it using that app.
You can also swipe the icon towards the opposite direction to see
what other apps you can use to share your photos and videos.
quick share icon

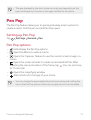
Custom-designed Features 11
Ţ The app displayed by the quick share icon may vary, depending on the
type and frequency of access to the apps installed on the device.
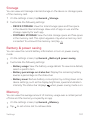
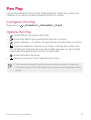
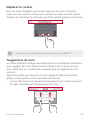
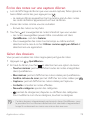
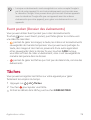
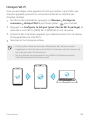
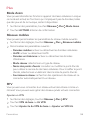
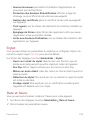
Pen Pop
The Pen Pop feature allows you to quickly and easily access options to
create a memo. Pull the pen out and Pen Pop opens.
Setting up Pen Pop
Tap Settings General Pen.
Pen Pop options
Ţ : Hide/display the Pen Pop options.
Ţ
: Open Pop Memo to write a memo.
Ţ
: Opens the Capture+ feature to use the current screen image in a
memo.
Ţ
: Opens the screen recorder to create an animated GIF file. After
adjusting the size and location of the frame, tap
. You can record up
to 15 seconds.
Ţ
: Opens the magnifying window.
Ţ
: Add a shortcut to the app of your choice.
Ţ You can change the personalized shortcut by touching and holding the
icon in the Pen Pop options. Note only one app shortcut can be added.

Basic Functions
02

Basic Functions 13
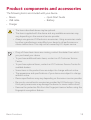
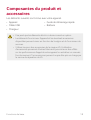
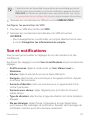
Product components and accessories
The following items are included with your device.
Ţ Device
Ţ USB cable
Ţ Charger
Ţ Quick Start Guide
Ţ Battery
Ţ The items described above may be optional.
Ţ The items supplied with the device and any available accessories may
vary depending on the area and service provider.
Ţ Always use genuine LG Electronics accessories. Using accessories made
by other manufacturers may affect your device's call performance or
cause malfunctions. This may not be covered by LG's repair service.
Ţ If any of these basic items are missing, contact the dealer from which
you purchased your device.
Ţ To purchase additional basic items, contact an LG Customer Service
Centre.
Ţ To purchase optional items, contact an LG Customer Service Centre for
available dealers.
Ţ Some items in the product box are subject to change without notice.
Ţ The appearance and specifications of your device are subject to change
without notice.
Ţ Device specifications may vary depending on the area or service provider.
Ţ Be sure to use authentic accessories provided by LG Electronics. Using
third-party accessories may damage the device or cause malfunctions.
Ţ Remove the protective film from the Fingerprint sensor before using the
fingerprint recognition feature.

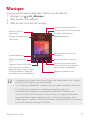
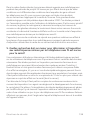
Basic Functions 14
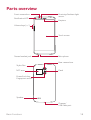
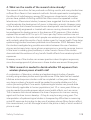
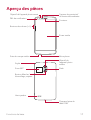
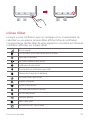
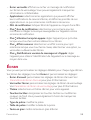
Parts overview
Proximity/Ambient light
sensor
Front camera lens
Stereo headset jack
Notification LED
Volume keys (+/-)
Earpiece
Touch screen
Microphone
Rear camera lens
Stylus Pen
NFC area
Speaker
Flash
Power/Lock key,
Fingerprint sensor
Charger/
USB cable port

Basic Functions 15
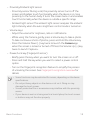
Ţ Proximity/Ambient light sensor
- Proximity sensor: During a call, the proximity sensor turns off the
screen and disables touch functionality when the device is in close
proximity to the human body. It turns the screen back on and enables
touch functionality when the device is outside a specific range.
- Ambient light sensor: The ambient light sensor analyzes the ambient
light intensity when the auto-brightness control mode is turned on.
Ţ Volume keys
-
Adjust the volume for ringtones, calls or notifications.
- While using the Camera, gently press a Volume key to take a photo.
To take continuous shots of photos, press and hold the Volume key.
- Press the Volume Down (-) key twice to launch the Camera app
when the screen is locked or turned off. Press the Volume Up (+) key
twice to launch Capture+.
Ţ Power/Lock key (Fingerprint sensor)
- Briefly press the key when you want to turn the screen on or off.
- Press and hold the key when you want to select a power control
option.
- Turn on the fingerprint recognition feature to simplify the process
of unlocking the screen. See
Fingerprint recognition overview
for
details.
Ţ Some functions may be restricted for access, depending on the device
specifications.
Ţ Do not put heavy objects on the device or sit on it. Doing so may
damage the touch screen.
Ţ Screen-protective film or accessories may interfere with the proximity
sensor.
Ţ If your device is wet or is being used in a humid place, the touch screen
or buttons may not function properly.

Basic Functions 16
Turning the power on or off
Turning the power on
When the power is turned off, press and hold the Power/Lock key.
Ţ When the device is turned on for the first time, initial configuration
takes place. The first booting time for the smart phone may be longer
than usual.
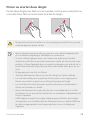
Turning the power off
Press and hold the Power/Lock key, then select Power off.
Power control options
Press and hold the Power/Lock key, then select an option.
Ţ Power off: Turn off the device.
Ţ Power off and restart: Restart the device.
Ţ Turn on Airplane mode: Block telecommunication-related functions,
including making phone calls, messaging and browsing the Internet.
Other functions remain available.

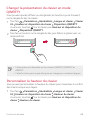
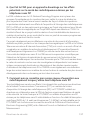
Basic Functions 17
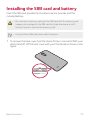
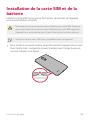
Installing the SIM card and battery
Insert the SIM card provided by the device service provider, and the
included battery.
Ţ Do not insert a memory card into the SIM card slot. If a memory card
happens to be lodged in the SIM card slot, take the device to a LG
Service Centre to remove the memory card.
Ţ Only the Nano SIM cards work with the device.
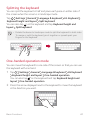
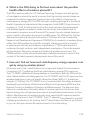
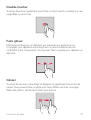
1
To remove the back cover, hold the device firmly in one hand. With your
other hand, lift off the back cover with your thumbnail as shown in the
figure.

Basic Functions 18
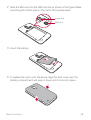
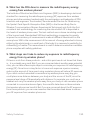
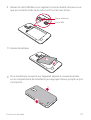
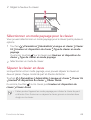
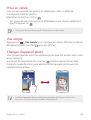
2
Slide the SIM card into the SIM card slot as shown in the figure. Make
sure the gold contact area on the card is facing downward.
Lower slot
SIM card
3
Insert the battery.
4
To replace the cover onto the device, align the back cover over the
battery compartment and press it down until it clicks into place.

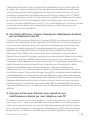
Basic Functions 19
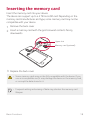
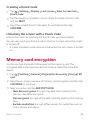
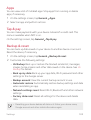
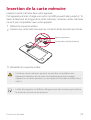
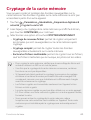
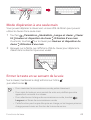
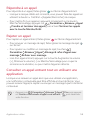
Inserting the memory card
Insert the memory card into your device.
The device can support up to a 2 TB microSD card. Depending on the
memory card manufacturer and type, some memory card may not be
compatible with your device.
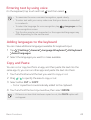
1
Remove the back cover.
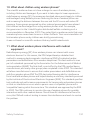
2
Insert a memory card with the gold coloured contacts facing
downwards.
Upper slot
Memory card (optional)
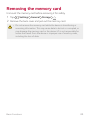
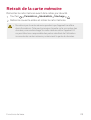
3
Replace the back cover.
Ţ Some memory cards may not be fully compatible with the device. If you
use an incompatible card, it may damage the device or the memory card,
or corrupt the data stored in it.
Ţ Frequent writing and erasing of data may shorten the memory card
lifespan.
La page charge ...
La page charge ...
La page charge ...
La page charge ...
La page charge ...
La page charge ...
La page charge ...
La page charge ...
La page charge ...
La page charge ...
La page charge ...
La page charge ...
La page charge ...
La page charge ...
La page charge ...
La page charge ...
La page charge ...
La page charge ...
La page charge ...
La page charge ...
La page charge ...
La page charge ...
La page charge ...
La page charge ...
La page charge ...
La page charge ...
La page charge ...
La page charge ...
La page charge ...
La page charge ...
La page charge ...
La page charge ...
La page charge ...
La page charge ...
La page charge ...
La page charge ...
La page charge ...
La page charge ...
La page charge ...
La page charge ...
La page charge ...
La page charge ...
La page charge ...
La page charge ...
La page charge ...
La page charge ...
La page charge ...
La page charge ...
La page charge ...
La page charge ...
La page charge ...
La page charge ...
La page charge ...
La page charge ...
La page charge ...
La page charge ...
La page charge ...
La page charge ...
La page charge ...
La page charge ...
La page charge ...
La page charge ...
La page charge ...
La page charge ...
La page charge ...
La page charge ...
La page charge ...
La page charge ...
La page charge ...
La page charge ...
La page charge ...
La page charge ...
La page charge ...
La page charge ...
La page charge ...
La page charge ...
La page charge ...
La page charge ...
La page charge ...
La page charge ...
La page charge ...
La page charge ...
La page charge ...
La page charge ...
La page charge ...
La page charge ...
La page charge ...
La page charge ...
La page charge ...
La page charge ...
La page charge ...
La page charge ...
La page charge ...
La page charge ...
La page charge ...
La page charge ...
La page charge ...
La page charge ...
La page charge ...
La page charge ...
La page charge ...
La page charge ...
La page charge ...
La page charge ...
La page charge ...
La page charge ...
La page charge ...
La page charge ...
La page charge ...
La page charge ...
La page charge ...
La page charge ...
La page charge ...
La page charge ...
La page charge ...
La page charge ...
La page charge ...
La page charge ...
La page charge ...
La page charge ...
La page charge ...
La page charge ...
La page charge ...
La page charge ...
La page charge ...
La page charge ...
La page charge ...
La page charge ...
La page charge ...
La page charge ...
La page charge ...
La page charge ...
La page charge ...
La page charge ...
La page charge ...
La page charge ...
La page charge ...
La page charge ...
La page charge ...
La page charge ...
La page charge ...
La page charge ...
La page charge ...
La page charge ...
La page charge ...
La page charge ...
La page charge ...
La page charge ...
La page charge ...
La page charge ...
La page charge ...
La page charge ...
La page charge ...
La page charge ...
La page charge ...
La page charge ...
La page charge ...
La page charge ...
La page charge ...
La page charge ...
La page charge ...
La page charge ...
La page charge ...
La page charge ...
La page charge ...
La page charge ...
La page charge ...
La page charge ...
La page charge ...
La page charge ...
La page charge ...
La page charge ...
La page charge ...
La page charge ...
La page charge ...
La page charge ...
La page charge ...
La page charge ...
La page charge ...
La page charge ...
La page charge ...
La page charge ...
La page charge ...
La page charge ...
La page charge ...
La page charge ...
La page charge ...
La page charge ...
La page charge ...
La page charge ...
La page charge ...
La page charge ...
La page charge ...
La page charge ...
La page charge ...
La page charge ...
La page charge ...
La page charge ...
La page charge ...
La page charge ...
La page charge ...
La page charge ...
La page charge ...
La page charge ...
La page charge ...
La page charge ...
La page charge ...
La page charge ...
La page charge ...
La page charge ...
La page charge ...
La page charge ...
La page charge ...
La page charge ...
La page charge ...
La page charge ...
La page charge ...
La page charge ...
La page charge ...
La page charge ...
La page charge ...
La page charge ...
La page charge ...
La page charge ...
La page charge ...
La page charge ...
La page charge ...
La page charge ...
La page charge ...
La page charge ...
La page charge ...
La page charge ...
La page charge ...
La page charge ...
La page charge ...
La page charge ...
La page charge ...
La page charge ...
La page charge ...
La page charge ...
La page charge ...
La page charge ...
La page charge ...
La page charge ...
La page charge ...
La page charge ...
La page charge ...
La page charge ...
La page charge ...
La page charge ...
La page charge ...
La page charge ...
La page charge ...
La page charge ...
La page charge ...
La page charge ...
La page charge ...
La page charge ...
La page charge ...
La page charge ...
La page charge ...
La page charge ...
La page charge ...
La page charge ...
La page charge ...
La page charge ...
La page charge ...
-
 1
1
-
 2
2
-
 3
3
-
 4
4
-
 5
5
-
 6
6
-
 7
7
-
 8
8
-
 9
9
-
 10
10
-
 11
11
-
 12
12
-
 13
13
-
 14
14
-
 15
15
-
 16
16
-
 17
17
-
 18
18
-
 19
19
-
 20
20
-
 21
21
-
 22
22
-
 23
23
-
 24
24
-
 25
25
-
 26
26
-
 27
27
-
 28
28
-
 29
29
-
 30
30
-
 31
31
-
 32
32
-
 33
33
-
 34
34
-
 35
35
-
 36
36
-
 37
37
-
 38
38
-
 39
39
-
 40
40
-
 41
41
-
 42
42
-
 43
43
-
 44
44
-
 45
45
-
 46
46
-
 47
47
-
 48
48
-
 49
49
-
 50
50
-
 51
51
-
 52
52
-
 53
53
-
 54
54
-
 55
55
-
 56
56
-
 57
57
-
 58
58
-
 59
59
-
 60
60
-
 61
61
-
 62
62
-
 63
63
-
 64
64
-
 65
65
-
 66
66
-
 67
67
-
 68
68
-
 69
69
-
 70
70
-
 71
71
-
 72
72
-
 73
73
-
 74
74
-
 75
75
-
 76
76
-
 77
77
-
 78
78
-
 79
79
-
 80
80
-
 81
81
-
 82
82
-
 83
83
-
 84
84
-
 85
85
-
 86
86
-
 87
87
-
 88
88
-
 89
89
-
 90
90
-
 91
91
-
 92
92
-
 93
93
-
 94
94
-
 95
95
-
 96
96
-
 97
97
-
 98
98
-
 99
99
-
 100
100
-
 101
101
-
 102
102
-
 103
103
-
 104
104
-
 105
105
-
 106
106
-
 107
107
-
 108
108
-
 109
109
-
 110
110
-
 111
111
-
 112
112
-
 113
113
-
 114
114
-
 115
115
-
 116
116
-
 117
117
-
 118
118
-
 119
119
-
 120
120
-
 121
121
-
 122
122
-
 123
123
-
 124
124
-
 125
125
-
 126
126
-
 127
127
-
 128
128
-
 129
129
-
 130
130
-
 131
131
-
 132
132
-
 133
133
-
 134
134
-
 135
135
-
 136
136
-
 137
137
-
 138
138
-
 139
139
-
 140
140
-
 141
141
-
 142
142
-
 143
143
-
 144
144
-
 145
145
-
 146
146
-
 147
147
-
 148
148
-
 149
149
-
 150
150
-
 151
151
-
 152
152
-
 153
153
-
 154
154
-
 155
155
-
 156
156
-
 157
157
-
 158
158
-
 159
159
-
 160
160
-
 161
161
-
 162
162
-
 163
163
-
 164
164
-
 165
165
-
 166
166
-
 167
167
-
 168
168
-
 169
169
-
 170
170
-
 171
171
-
 172
172
-
 173
173
-
 174
174
-
 175
175
-
 176
176
-
 177
177
-
 178
178
-
 179
179
-
 180
180
-
 181
181
-
 182
182
-
 183
183
-
 184
184
-
 185
185
-
 186
186
-
 187
187
-
 188
188
-
 189
189
-
 190
190
-
 191
191
-
 192
192
-
 193
193
-
 194
194
-
 195
195
-
 196
196
-
 197
197
-
 198
198
-
 199
199
-
 200
200
-
 201
201
-
 202
202
-
 203
203
-
 204
204
-
 205
205
-
 206
206
-
 207
207
-
 208
208
-
 209
209
-
 210
210
-
 211
211
-
 212
212
-
 213
213
-
 214
214
-
 215
215
-
 216
216
-
 217
217
-
 218
218
-
 219
219
-
 220
220
-
 221
221
-
 222
222
-
 223
223
-
 224
224
-
 225
225
-
 226
226
-
 227
227
-
 228
228
-
 229
229
-
 230
230
-
 231
231
-
 232
232
-
 233
233
-
 234
234
-
 235
235
-
 236
236
-
 237
237
-
 238
238
-
 239
239
-
 240
240
-
 241
241
-
 242
242
-
 243
243
-
 244
244
-
 245
245
-
 246
246
-
 247
247
-
 248
248
-
 249
249
-
 250
250
-
 251
251
-
 252
252
-
 253
253
-
 254
254
-
 255
255
-
 256
256
-
 257
257
-
 258
258
-
 259
259
-
 260
260
-
 261
261
-
 262
262
-
 263
263
-
 264
264
-
 265
265
-
 266
266
-
 267
267
-
 268
268
-
 269
269
-
 270
270
-
 271
271
-
 272
272
-
 273
273
-
 274
274
-
 275
275
-
 276
276
-
 277
277
-
 278
278
-
 279
279
-
 280
280
-
 281
281
-
 282
282
-
 283
283
-
 284
284
-
 285
285
-
 286
286
-
 287
287


LG LGM470 Le manuel du propriétaire
- Catégorie
- Les smartphones
- Taper
- Le manuel du propriétaire
- Ce manuel convient également à
dans d''autres langues
- English: LG LGM470 Owner's manual
Documents connexes
-
LG LGK210.AAVCTK Le manuel du propriétaire
-
-
LG LGM320N.ADECKU Manuel utilisateur
-
-
-
-
-
-
-

