KitchenAid KMT233ME0 Le manuel du propriétaire
- Catégorie
- Grille-pain
- Taper
- Le manuel du propriétaire

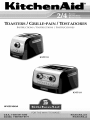
TOASTERS / GRILLE-PAIN /TOSTADORES
INSTRUCTIONS / INSTRUCTIONS / INSTRUCCIONES
KMT233
KMT433
W10321645A

TABLE OF CONTENTS
TOASTER SAFETY ............................................... 3
ELECTRICAL REQUIREMENTS ......................... 4
KITCHENAID ®TOASTER FEATURES ................ 5
Special Toasting Functions ............................... 6
KITCHENAID ®TOASTER USE ............................ 7
Special Toasting Functions Use ....................... 8
TOASTER CARE ................................................. 10
TROUBLESHOOTING ........................................ 10
PROOF OF PURCHASE AND PRODUCT
REGISTRATION .................................................. 11
WARRANTY ........................................................ 11
Hassle-Free Replacement Warranty -
50 United States and District of Columbia .....12
Hassle-Free Replacement Warranty -
Canada ............................................................ 12
How to Arrange for Warranty Service
in Puerto Rico .................................................. 12
How to Arrange for Service after the
Warranty Expires - All Locations .................... 13
How to Arrange for Service Outside these
Locations ......................................................... 13
How to Order Accessories and
Replacement Parts .......................................... 13
TABLE DES MATIERES
CONSIGNES DE SleCURITle DU
GRILLE-PAIN ...................................................... 14
SPleCIFICATIONS leLECTRIQUES ................... 15
CARACTleRISTIQUES DU GRILLE-PAIN
KITCH ENAI D®..................................................... 16
Fonctions speciales de grillage ....................... 17
UTILISATION DU GRILLE-PAIN
KITCH ENAI D®..................................................... 18
Utilisation des fonctions speciales
de grillage ........................................................ 19
ENTRETIEN DU GRILLE-PAIN ......................... 21
DlePANNAGE ...................................................... 21
PREUVE D'ACHAT ET ENREGISTREMENT
DU PRODUlT ...................................................... 22
GARANTI E .......................................................... 22
Garantie de [emplacement sans difficult_ -
pour les 50 Etats des Etats-Unis et le district
federal de Columbia ........................................ 23
Garantie de remplacement sans
difficult6 - Canada ........................................... 23
Dispositions necessaires pour un
service sous garantie &Porto Rico ................. 23
Dispositions necessaires pour une
intervention de depannage apres
expiration de la garantie -Tousles pays ........ 24
Dispositions necessaires pour un service en
dehors de ces pays ......................................... 24
Commander des accessoires et des
pieces de rechange ......................................... 24
INDICE
SEGURIDAD DEL TOSTADOR ......................... 25
REQUlSITOS ELleCTRICOS .............................. 26
CARACTERJSTICAS DEL TOSTADOR
KITCH ENAI D®..................................................... 27
Funciones especiales de tostado ................... 28
USO DEL TOSTADOR KITCHENAID ®.............. 29
Uso de las funciones especiales de
tostado ............................................................ 30
CUlDADO DEL TOSTADOR .............................. 32
SOLUCION DE PROBLEMAS ........................... 32
PRUEBA DE COMPRA Y REGISTRO DEL
PRODUCTO ........................................................ 33
GARANTIA .......................................................... 33
Garantia de reemplazo sin dificultades -
en los 50 estados de Estados Unidos y el
Distrito de Columbia ....................................... 34
Garantia de reemplazo sin dificultades -
en Canada ....................................................... 34
C6mo obtener servicio bajo la garantia
en Puerto Rico ................................................. 34
C6mo obtener servicio despues de que expire
la garantia - Entodas las ubicaciones ............ 35
C6mo obtener servicio en otros lugares ........35
C6mo pedir accesorios y piezas
de repuesto ..................................................... 35

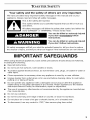
TOASTER SAFETY
Your safety and the safety of others are very important.
We have provided many important safety messages in this manual and on your
appliance. Always read and obey all safety messages.
This is the safety alert symbol.
This symbol alerts you to potential hazards that can kill or hurt you
and others.
All safety messages will follow the safety alert symbol and either the
word "DANGER" or "WARNING." These words mean:
You can be killed or seriously injured
if you don't immediately follow
instructions.
You can be killed or seriously injured
ifyou don't follow instructions.
All safety messages will tell you what the potential hazard is, tell you how to reduce
the chance of injury, and tell you what can happen if the instructions are not followed.
IMPORTANT SAFEGUARDS
When using electrical appliances, basic safety precautions should always be followed,
including the following:
• Read all instructions.
• Do not touch hot surfaces. Use handles or knobs.
• To protect against electrical shock, do not immerse cord, plugs, or toaster in water or
other liquid.
• Close supervision is necessary when any appliance is used by or near children.
• Unplug toaster from outlet when not in use and before cleaning. Allow to cool before
putting on or taking off parts.
• Do not operate any appliance with a damaged cord or plug or after the appliance
malfunctions or has been damaged in any manner. Return appliance to the nearest
Authorized Service Facility for examination, repair or adjustment.
• The use of accessory attachments not recommended by the appliance manufacturer
may cause injuries.
• Do not use outdoors.
• Do not let cord hang over edge of table or counter, or touch hot surfaces.
• Do not place on or near a hot gas or electric burner, or in a heated oven.
• To disconnect, turn any control to "OFF," then remove plug from outlet.

• Donotuseapplianceforotherthanintendeduse.
• Oversizefoods,metalfoilpackages,orutensilsmustnotbeinsertedintoasterasthey
mayinvolveariskoffireorelectricshock.
• Afiremayoccuriftoasteriscoveredwithortouchingflammablematerial,including
curtains,draperies,wallsandthelike,wheninoperation.
• Donotattempttodislodgefoodwhentoasterispluggedin.
• Thisproductisdesignedforhouseholduseonly.
SAVE THESE INSTRUCTIONS
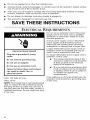
ELECTRICAL REQUIREMENTS
Do not use an extension cord. If the power
supply cord is too short, have a qualified
electrician or serviceman install an outlet
near the appliance.
%__ A short power supply cord (or detachable
power supply cord) should be used to
reduce the risk resulting from becoming
entangled in or tripping over a longer cord.
Longer detachable power supply cords or
extension cords are available and may be
used if care is exercised in their use.
Electrical Shock Hazard
Plug into a grounded 3 prong
outlet.
Do not remove ground prong.
Do not use an adapter.
Do not use an extension cord.
Failure to follow these instructions
can result in death, fire, or
electrical shock.
If a longer detachable power supply cord or
extension cord is used:
The marked electrical rating of the
cord set or extension cord should be
at least as great as the electrical
rating of the appliance.
The cord should be arranged so that
it will not drape over the countertop
or tabletop where it can be pulled on
by children or tripped over
unintentionally.
Volts: 120 Volts AC only.
Hertz: 60 Hz
NOTE: Your toaster has a3-prong grounded
plug. To reduce the risk of electrical shock,
this plug will fit in an outlet only one way. If
the plug does not fit in the outlet, contact a
qualified electrician. Do not modify the plug
in any way.
If the appliance is of the grounded type, the
extension cord should be a grounding-type
3-wire cord.
4

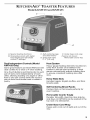
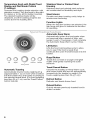
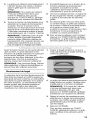
KITCHENAID ®TOASTER FEATURES
Models KMT233 and KMT433
A. Special toasting functions
B. Temperature knob with digital
toast display and dial shade
control (7 settings)
C. Self-centering cage
and steel interior
D. Extra-wide slots
(1.5" [3.8 cm])
Dual Independent Controls (Model
KMT433 Only)
Same great features as Model KMT233 with
dual cavities for 2-slice or 4-slice toasting.
One-Touch Buttons and Dial Knobs for each
pair of slots work independently of each
other, allowing toasting of a bagel or other
item in one pair of slots while the second
pair of slots could make toast or reheat a
pastry.
E. Under base cord wrap
Feature not shown:
Removable crumb tray
Heat System
Heavy gauge heating elements mounted on
extra-thick boards are installed in the
toaster to ensure even browning. A heat
sensor automatically adjusts toasting time
to ensure consistent toasting slice after
slice.
Extra-Wide Slots
Handles bagels, English muffins, and thick
breads easily.
Self-Centering Bread Racks
Centers thick or thin breads perfectly for
even toasting.
Removable Crumb Tray(s)
Durable, full-width, steel tray (two side-by-
side trays on KMT433) can be washed in the
top rack of a dishwasher.
Under Base Cord Wrap
Keeps extra cord out of sight and out of the
way.

Temperature Knob with Digital Toast
Display and Dial Shade Control
(7 settings)
Operates the toasting shade selection with
precision control. Turn the knob to the right
for darker or to the left for lighter toasting.
The desired toasting shade will be
displayed, and the toasting progress bar
counts down the toasting time.
Stainless Steel or Painted Steel
Housing
Stainless steel and painted steel surfaces
are constructed for durability and style.
Steel Interior
Durable and deep toasting cavity helps to
ensure even browning.
Function Lights
When the function buttons are selected, the
light rings will glow to indicate the function
is operating.
li....
Automatic Keep Warm
Automatically lowers the food again when
not removed after a period of time, and
keeps it warm. If necessary, it will complete
the Automatic Keep Warm cycle 2 times.
Lift Button
Lifts the food mid-toasting cycle to allow
you to see if the food is ready then
continues the cycle if lowered back into the
toaster.
Toast [ Cancel
Automatic Toasting
Automatically lowers foods weighing 25 g
(approximately 1 oz) or more when inserted
into the toaster slot, and toasts according to
the selected shade level. (For food weighing
less than 25 g (1 oz), use the Toast/Cancel
button feature.)
Bagel Button
Toasts the cut-side of a bagel or English
muffin while gently warming the outer
surfaces.
Toast/Cancel Button
Cancels the toasting or Keep Warm cycle
and lowers foods that are not automatically
lowered into the toaster by weight. (For
foods weighing less than 25 g [1 oz].)
Defrost Button
Defrostsand toasts frozen food.
Reheat Button
Quickly reheats previously toasted food in
under a minute.
6

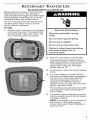
KITCHENAID ®TOASTER USE
Models KMT233 and KMT433
Before using your toaster, check the Extra-
Wide Slots and remove any packing or
printed material that might have fallen inside
during shipping or handling. Do not probe
inside the toaster with a metal object.
You may see light smoke the first time you
use the toaster. This is normal, and the
smoke will soon disappear.
TO USE:
1.
Shorten cord, if necessary, by wrapping
cord under the base. The toaster's feet
are tall enough to allow the cord to exit
from under any side of the toaster.
Electrical Shock Hazard
Plug into a grounded 3 prong
outlet.
Do not remove ground prong.
Do not use an adapter.
Do not use an extension cord.
Failure to follow these instructions
can result in death, fire, or
electrical shock.
2.
3.
4.
5.
Plug into a grounded 3-prong outlet.
The special function buttons and the
digital toast display on the temperature
knob will light up. If no buttons are
pressed for 10 minutes, the digital
display will turn off.
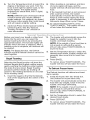
Insert bread or other food to be toasted
in slot.
For even toasting on model KMT233,
toast only one bread type and thickness
at a time. For 4-slot model KMT433,
with Dual Independent Controls, if
toasting of two different breads is
desired, be sure to toast only one bread
type in each pair of slots.
The centering racks will adjust slot width
automatically to hold food upright for
even toasting.
The toaster will automatically sense the
food (by weight), lower it into the toaster,
and begin toasting.
NOTE: Ifthe weight of your food item is
not enough to activate the sensor
(25 g [1 oz]), press TOAST/CANCEL to
lower the food.

6=
7.
Turn the Temperature Knob to select the
degree of darkness you want. Turn the
knob to the right for darker toast, to the
left for lighter. The digital display
indicates the shade level, from 1 (light)
to 7 (dark).
NOTE: Different types of bread and their
moisture levels may require different
shade settings. For example, dry bread
will brown more rapidly than moist bread
and will require a lighter setting.
(Optional) Press desired special toasting
function button. See the "Special
Toasting Functions Use" section for
more information.
8=
When toasting is completed, and End-
of-Cycle signal will beep, and the
toaster will shut off and raise the toasted
food.
9. If the toasted food item is not removed
after a period of time, the toaster
automatically re-lowers the food and
keeps it warm before raising the food
again. If necessary, it will complete the
Automatic Keep Warm cycle 2 times.
10. To cancel toasting anytime, press
TOAST/CANCEL. The toaster will shut
off and raise the toasted food.
C ¸, _ _, _7"< _ v _ _ _ _ _b_
Before you insert your bread or other food
items into the slot, you can select the
special toasting functions by pressing the
appropriate button. The function lights will
indicate which function is selected. After a
toasting cycle is complete, all functions will
be cleared.
NOTE: The Bagel function, the Defrost
function and the Reheat function cannot be
used together.
Bagel Toasting
Selecting the Bagel function will toast the
thickest bagels and English muffins evenly,
gently warming the bottoms while toasting
the sides that are sliced. Bagel Toasting
produces perfect results by shutting off
power to the heating elements on one side
of the toasting cavity.
1. Insert the bagel so that the flat (sliced)
side of the bagel faces the center of the
toaster.
2=
The toaster will automatically sense the
bagel (by weight), lower it into the
toaster, and begin toasting.
NOTE: Ifthe weight of your food item is
not enough to activate the sensor
(25 g [1 oz]), press TOAST/CANCEL to
lower the food.
3. Set the Temperature Knob to select the
desired toast shade. English muffins will
generally take more time to toast than
bagels.
4. Press BAGEL.
To cancel, press TOAST/CANCEL The
toaster will shut off and raise the food.
To Defrost Frozen Items
The Defrost function will defrost and toast
items quickly.
1. Insert the frozen item into bread slot.
Use Defrost for frozen items only.
2. The toaster will automatically sense the
food item (by weight), lower it into the
toaster, and begin defrosting.
NOTE: Ifthe weight of your food item is
not enough to activate the sensor
(25 g [1 oz]), press TOAST/CANCEL to
lower the food.
3. Set the Temperature Knob to select the
desired toast shade.
4. Press DEFROST.
To cancel, press TOAST/CANCEL The
toaster will shut off and raise the food.
8

ToReheatToastedItems
The Reheat function will warm toast and
other items quickly.
1. Insert the previously toasted item into
bread slot. Do not place bread with
butter or any other topping in the
toaster. Use Reheat for dry bread and
bagels only.
2. The toaster will automatically sense the
food item (by weight), lower it into the
toaster, and begin reheating.
NOTE: If the weight of your food item is
not enough to activate the sensor
(approximately 1 oz [25 g]), press
TOAST/CANCEL to lower the food.
3. No Shade adjustment is necessary- the
Reheat function overrides whatever
Shade level you have set.
4. Press REHEAT.
To cancel, press TOAST/CANCEL. The
toaster will shut off and raise the food.
To View Toasted Items Mid-Cycle
The Lift function lifts the food mid-toasting
cycle and allows you to see if the food is
ready.
1. Press LIFT during a toasting cycle.
2. The toaster will lift the food. If the food is
ready, remove the food or press TOAST/
CANCEL. The toaster will shut off.
If no action is taken for 15 seconds, the
toaster will shut off.
3. To continue the toasting cycle, press
LIFT again within 15 seconds.
To Keep Toasted Items Warm
The Automatic Keep Warm function will
keep your food items warm after a toast
cycle.
1. If the toasted food item is not removed
after a period of time once the toasting
cycle is complete, the toaster will
automatically re-lower the food and
keep it warm.
2. The toast will be raised again.
3. If necessary, the toaster will complete
the Automatic Keep Warm cycle
2 times.
4. To cancel the Automatic Keep Warm
cycle, press TOAST/CANCEL The
toaster will shut off and raise the food.

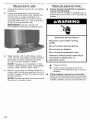
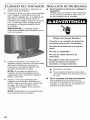
TOASTER CARE
1.
2.
Unplug the toaster and let it cool before
cleaning.
Press and release the center of the
crumb tray then slide it out. Shake the
crumbs into a waste container. It is
recommended that the crumb tray be
emptied after each use. The crumb tray
is top rack dishwasher safe.
IMPORTANT: The tray will be hot
immediately following a toasting cycle.
3.
4.
Wipe toaster with a soft, damp cotton
cloth. Do not use paper towels, abrasive
cleansers or liquid cleaning products.
Do not immerse toaster in water.
NOTE: If grease or oil splatters on the
toaster, wipe splatters away immediately
using a clean, damp cotton cloth.
Return crumb tray to toaster. Press it in
firmly until it clicks into position. Do not
use the toaster without the crumb tray in
proper position.
NOTE: KitchenAid does not recommend
the use of a toaster cover.
TROUBLESHOOTING
If your toaster should fail to operate,
check the following:
Check that the toaster is plugged into a
proper electrical outlet. If it is, unplug the
toaster.
Electrical Shock Hazard
Plug into a grounded 3 prong
outlet.
Do not remove ground prong.
Do not use an adapter.
Do not use an extension cord.
Failure to follow these instructions
can result in death, fire, or
electrical shock.
Plug in toaster.
If the toaster still does not work,
check the household fuse or circuit
breaker.
If the problem cannot be corrected:
See the KitchenAid warranty and service
sections. Do not return the toaster to the
retailer; retailers do not provide service.
10

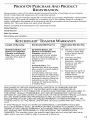
PROOF OF PURCHASE AND PRODUCT
REGISTRATION
Always keep a copy of the sales receipt showing the date of purchase of your toaster.
Proof of purchase will assure you of in-warranty service.
Before you use your toaster, please fill out and mail your product registration card packed
with the unit. This card will enable us to contact you in the unlikely event of a product
safety notification and assist us in complying with the provisions of the Consumer Product
Safety Act. This card does not verify your warranty.
Please complete the following for your personal records:
Model Number
Serial Number
Date Purchased
Store Name and Location
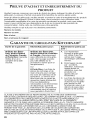
KITCHENAID ®TOASTER WARRANTY
Length of Warranty: KitchenAid Will Pay For: KitchenAid Will Not Pay
For:
A.
50 United States, the
District of Columbia,
Canada, and Puerto
Rico: One-year limited
warranty from date of
purchase.
50 United States, the
District of Columbia and
Canada: Hassle-free
replacement of your toaster.
See the following page for
details on how to arrange for
replacement.
OR
In Puerto Rico: The
replacement parts and repair
labor costs to correct defects
in materials and
workmanship. Service must
be provided by an Authorized
KitchenAid Service Center. To
arrange for service, follow the
instructions in the "How to
Arrange for Warranty Service
in Puerto Rico."
B,
C,
Repairs when toaster
is used in other than
normal single family
home use.
Damage resulting
from accident,
alteration, misuse or
abuse or use with
products not
approved by
KitchenAid.
Replacement parts or
repair labor costs for
toaster when
operated outside the
country of purchase.
DISCLAIMER OF IMPLIED WARRANTIES; LIMITATION OF REMEDIES IMPLIED
WARRANTIES, INCLUDING TO THE EXTENT APPLICABLE WARRANTIES OF
MERCHANTABILITY OR FITNESS FOR A PARTICULAR PURPOSE, ARE EXCLUDED TO
THE EXTENT LEGALLY PERMISSIBLE. ANY IMPLIED WARRANTIES THAT MAY BE
IMPOSED BY LAW ARE LIMITED TO ONE YEAR, OR THE SHORTEST PERIOD ALLOWED
BY LAW. SOME STATES AND PROVINCES DO NOT ALLOW LIMITATIONS OR
EXCLUSIONS ON HOW LONG AN IMPLIED WARRANTY OF MERCHANTABILITY OR
FITNESS LASTS, SO THE ABOVE LIMITATIONS OR EXCLUSIONS MAY NOT APPLY TO
YOU.
IF THIS PRODUCT FAILS TO WORK AS WARRANTED, CUSTOMER'S SOLE AND
EXCLUSIVE REMEDY SHALL BE REPAIR OR REPLACEMENT ACCORDING TO THE
TERMS OF THIS LIMITED WARRANTY. KITCHENAID AND KITCHENAID CANADA DO
NOT ASSUME ANY RESPONSIBILITY FOR INCIDENTAL OR CONSEQUENTIAL
DAMAGES. This warranty gives you specific legal rights and you may also have other
rights which vary from state to state or province to province.
11

56) 'o, "
We're so confident the quality of our
products meets the exacting standards of
KitchenAid that, if your toaster should fail
within the first year of ownership, KitchenAid
will arrange to deliver an identical or
comparable replacement to your door free
of charge and arrange to have your original
toaster returned to us. Your replacement
unit will also be covered by our one year
limited warranty. Please follow these
instructions to receive this high-quality
service.
Ifyour KitchenAid ®toaster should fail within
the first year of ownership, simply call our
toll-free Customer Satisfaction Center at
1-800-541-6390 Monday through Friday,
8 a.m. to 8 p.m. (Eastern Time), or Saturday,
10 a.m. to 5 p.m. Give the consultant your
complete shipping address. (No RO. Box
numbers, please.)
When you receive your replacement toaster,
use the carton and packing materials to
pack up your original toaster. In the carton,
include your name and address on a sheet
of paper along with a copy of the proof of
purchase (register receipt, credit card slip,
etc.).
t%}',1}_ace :_}e _ %'v}::_a_;Iv,,-- <.a: _:?di
We're ' ®
so confident the quality of our Ifyour KitchenAid toaster should fail within
products meets the exacting standards of
the KitchenAid ®brand that, if your toaster
should fail within the first year of ownership,
KitchenAid Canada will replace your toaster
with an identical or comparable
replacement. Your replacement unit will also
be covered by our one year limited warranty.
Please follow these instructions to receive
this high-quality service.
the first year of ownership, take the toaster
or ship collect to an Authorized KitchenAid
Service Centre. In the carton include your
name and complete shipping address along
with a copy of the proof of purchase
(register receipt, credit card slip, etc.). Your
replacement toaster will be returned prepaid
and insured. If you are unable to obtain
satisfactory service in this manner, call our
toll-free Customer eXperience Centre at
1-800-807-6777.
Or write to us at:
Customer eXperience Centre
KitchenAid Canada
200 - 6750 Century Ave.
Mississauga, ON L5N 0B7
}:low Io A_a 's;,!e o W% 'd:v So "vi_,e i:_ i¢I,i)
Your ®
KitchenAid toaster is covered by a Take the toaster or ship prepaid and insured
one-year limited warranty from the date of to an Authorized KitchenAid Service Center.
purchase. KitchenAid will pay for Your repaired toaster will be returned
replacement parts and labor costs to correct prepaid and insured. If you are unable to
defects in materials and workmanship, obtain satisfactory service in this manner,
Service must be provided by an Authorized call toll-free 1-800-541-6390 to learn the
KitchenAid Service Center. location of a Service Center near you.
12

I:IOW 0 i:01 S;_ I=_,i :>" .....'_'_* .................. '_ .....
......;=Ii._;,. RIII.I*I {11_¢ II_; I <III{W Ii)_'l")i[:=i--,l _I
Before calling for service, please review the For service information in Canada,
"Troubleshooting" section, call toll-free 1-800-807-6777.
For service information in the 50 United
States, District of Columbia, and Puerto
Rico,
call toll-free 1-800-541-6390.
Or write to:
Customer Satisfaction Center
KitchenAid Portable Appliances
RO. Box 218, St. Joseph, MI 49085-0218
Or contact an Authorized Service Center
near you.
Or write to:
Customer eXperience Centre
KitchenAid Canada
200 - 6750 Century Ave.
Mississauga, ON L5N 0B7
............... i] ..................
Consult your local KitchenAid dealer or the For service information in Mexico,
store where you purchased the toaster for call the KitchenAid ®line 01-800-002-2767
information on how to obtain service.
I I ° 11 . R .+, ,_,. ....
To order accessories or replacement
parts for your toaster in the 50 United
States, District of Columbia, and Puerto
Rico,
call toll-free 1-800-541-6390 Monday
through Friday, 8 a.m. to 8 p.m. (Eastern
Time), or Saturday, 10 a.m. to 5 p.m.
Or write to:
Customer Satisfaction Center
KitchenAid Portable Appliances
RO. Box 218
St. Joseph, MI 49085-0218
To order accessories or replacement
parts for your toaster in Canada,
call toll-free 1-800-807-6777.
Or write to:
Customer eXperience Centre
KitchenAid Canada
200 - 6750 Century Ave.
Mississauga, ON L5N 0B7
To order accessories or replacement
parts for your toaster in Mexico,
call the KitchenAid ®line 01-800-002-2767
13

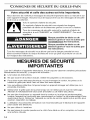
CONSIGNES DE SI CURITI DU GRILLE-PAIN
Votre securite et celle des autres est trbs importante.
Nous donnons de nombreux messages de s_curit_ importants dans ce manuel et sur
votre appareil m_nager. Assurez-vous de toujours lire tousles messages de s_curit_
et de vous y conformer.
Voici le symbole d'alerte de s_curit&
Ce symbole d'alerte de s_curit_ vous signale les dangers
potentiels de d_c_s et de blessures graves & vous et & d'autres.
Tousles messages de s_curit_ suivront le symbole d'alerte de
s_curit_ et le mot "DANGER" ou "AVERTISSEMENT". Ces mots
signifient :
Risque possible de d6c_s ou de
blessure grave si vous ne suivez pas
imm6diatement les instructions.
Risque possible de d6c_s ou de
blessure grave si vous ne suivez pas
les instructions.
Tousles messages de s_curit6 vous diront quel est le danger potentiel et vous
disent comment r_duire le risque de blessure et ce qui peut se produire en cas de
non-respect des instructions.
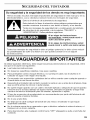
MESURES DE SECURITE
IMPORTANTES
Lors de I'utilisation d'appareils electriques, il faut toujours observer certaines precautions
el6mentaires de securit6, y compris les suivantes •
• Lire toutes les instructions.
Ne pas toucher de surface chaude. Utiliser les poignees ou les boutons.
Pour eviter toute decharge electrique, ne pas immerger le cordon, les prises ou la
totalite du grille-pain dans I'eau ou dans tout autre liquide.
Une surveillance attentive s'impose Iorsqu'un appareil menager est utilise par ou &
proximite d'enfants.
Debrancher le grille-pain de la prise Iorsqu'on ne I'utilise pas et avant le nettoyage.
Attendre le refroidissement total avant d'installer ou de retirer des pieces.
Ne pas faire fonctionner un appareil dont le cordon ou la prise est endommage(e),
Iorsque I'appareil ne fonctionne pas correctement ou Iorsqu'il a et6 endommage d'une
quelconque fagon. Retourner I'appareil au centre de service agre6 le plus proche pour
examen, reparation ou reglage.
L'utilisation d'accessoires de fixation non recommandes par le fabricant de I'appareil
peut causer des blessures.
Ne pas utiliser & I'exterieur.
Ne pas laisser le cordon pendre sur le c6te d'une table ou d'un comptoir, ou toucher
une surface chaude.
14

Ne pas placer sur ou pros d'un brQleur electrique ou & gaz chaud, ou dans un four
chaud.
Pour deconnecter, tourner toutes les commandes a "OFF", puis debrancher la fiche de
la prise.
Ne pas utiliser I'appareil pour un autre usage que celui auquel il est destin&
On ne dolt inserer ni aliments surdimensionnes, ni emballages en aluminium ou
ustensiles dans le grille-pain car ils peuvent presenter un risque d'incendie ou de
decharge electrique.
Lorsque le grille-pain est en cours de fonctionnement, un incendie peut se produire si le
grille-pain est recouvert par un materiau inflammable ou en contact avec celui-ci,
notamment des rideaux, draperies, parois et autres objets assimiles.
Ne pas essayer de deloger les aliments Iorsque le grille-pain est branch&
Ce produit est con£;u uniquement pour un usage domestique.
CONSERVER CES INSTRUCTIONS
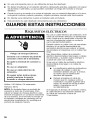
SPI CIFICATIONS I LECTRIQUES
Risque de choc 6iectrique
Brancher sur une prise & 3 alv_oles
reli_e & la terre.
Ne pas enlever la broche de liaison
la terre.
Ne pas utiliser un adaptateur.
Ne pas utiliser un c&ble de
rallonge.
Le non-respect de ces instructions
peut causer un d6c_s, un incendie
ou un choc 61ectrique.
Volts • 120 volts C.A. uniquement.
Hertz •60 Hz
REMARQUE :Votre grille-pain possede une
prise de raise & la terre & 3 broches. Pour
reduire le risque de choc electrique, cette
fiche ne peut _tre ins6ree dans une prise
que dans un seul sens. Si cette fiche ne
convient pas & la prise, contacter un
electricien qualifi& Ne pas modifier la prise
de quelque maniere que ce soit.
Ne pas utiliser de c&ble de rallonge. Si le
cordon d'alimentation electrique est trop
court, faire installer une prise pres de
I'appareil electrom6nager par un electricien
ou un technicien de service qualifi&
On dolt utiliser un cordon d'alimentation
court (ou detachable) afin de reduire le
risque qu'une personne s'emm_le dans un
cordon d'alimentation qui serait plus long ou
trebuche dessus.
Des cordons d'alimentation detachables ou
de rallonge plus longs sont disponibles et
peuvent _tre utilises s'ils sont employes
avec precaution.
Si on utilise un cordon d'alimentation
detachable ou de rallonge plus long :
• Les caracteristiques electriques
indiquees de I'ensemble de cordon
ou de rallonge doivent _tre au loins
aussi elev6es que les
caracteristiques electriques de
I'appareil.
Le cordon dolt _tre dispose de sorte
qu'il ne pende pas par dessus le
plan de travail ou la table de cuisine,
oQ des enfants pourraient tirer
dessus ou trebucher dessus
involontairement.
Si I'appareil comporte une raise &la terre, la
rallonge dolt _tre un cordon de type raise
la terre a 3 conducteurs.
15

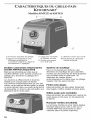
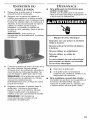
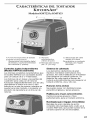
CARACTI RISTIQUES DU GRILLE-PAIN
KITCHENAID ®
Modbles KMT233 et KMT433
C • D
A. Fonctions sp_ciales de grillage
B. Bouton de temperature avec
affichage num6rique et
commande rotative du degr_ de
brunissement (7 r_glages)
C. Cage auto-centrable
et int_rieur en acier
D. Fentes extra larges
(1,5" [3,8 cm])
E.Attache-cordon sous socle
Article dissimul_ : Ramasse-
miettes amovible
Doubles commandes ind6pendantes
(modUle KMT433 uniquement)
M_mes caracteristiques utiles que le
modele KMT233 avec double cavite pour
grillage de 2 tranches ou grillage de 4
tranches.
Les boutons & effleurement et boutons
rotatifs pour chaque paire de fentes
fonctionnent independamment les uns des
autres, ce qui permet de faire griller un bagel
ou autre aliment dans une paire de fentes et
de faire griller un toast ou de rechauffer une
p&tisserie dans I'autre paire.
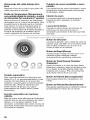
Syst_me de chauffage
Pour un brunissement uniforme, des
el6ments de chauffage de gros diametre,
montes sur des planches de forte epaisseur
sont installes dans le grille-pain. Un
detecteur de chaleur ajuste
automatiquement la duree pour un grillage
regulier, tranche apres tranche.
Fentes extra larges
Elles permettent de faire griller facilement
des bagels, muffins anglais et pains epais.
Grilles _ pain auto-centrables
Elles permettent de parfaitement centrer les
pains epais ou fins pour un brunissement
uniforme.
Ramasse-miettes amovible(s)
Le ramasse-miettes en acier pleine largeur
resistant (deux tiroirs c6te & c6te sur le
modele KMT433) peut passer au lave-
vaisselle (dans le panier superieur).
16

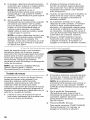
Attache-cordon sous socle
II permet de tenir le cordon hors de la vue et
de ne pas g6ner.
Bouton de temp6rature avec affichage
num6rique de grillage et commande
rotative de degr6 de brunissement
(7 r6glages)
Commande le fonctionnement du degre de
brunissement choisi avec un contr61e de
precision. Tourner le bouton vers la droite
pour un brunissement plus prononce ou
vers la gauche pour un brunissement moins
prononc& Le degre de brunissement
souhaite s'affiche et la barre de progression
entame le decompte de la duree de grillage.
Logement en acier peint ou en acier
inoxydable
Les surfaces en acier inoxydables et les
surfaces en acier peintes offrent & la fois
style et durabilit&
Int_rieur en acier
La cavite de grillage profonde et durable
facilite I'obtention d'un brunissement
uniforme.
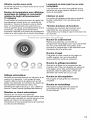
T6moins lumineux de fonctions
Lorsque les boutons de fonction sont
selectionn6s, les anneaux lumineux
s'allument pour indiquer que la fonction est
en marche.
Bouton de soul_vement
Releve les aliments &la moitie du
programme de grillage pour vous permettre
de voir si les aliments sont pr6ts, puis
poursuit le programme si les aliments sont
reins6r6s dans le grille-pain.
Bouton _ bagel
Fait griller le c6t6 coupe d'un bagel ou
muffin anglais tout en rechauffant
doucement les surfaces externes.
q i!ii!!!i!_!!!i_j_i_Yq i!iii!!_i!,_!!i__'¸¸ ii_!!!!,,,ii_/iii_'_ ....._ _j_,
Lift Bagel Defrost Reheat
Toast I Cancel
Grillage automatique
Abaisse automatiquement les aliments d'au
moins 25 g (environ 1 oz) Iorsqu'ils sont
inser6s dans la fente du grille-pain et fait
griller ces aliments en fonction du degre de
brunissement s61ectionn& (Pour les
aliments de moins de 25 g (1 oz), utiliser le
bouton Toast/Cancel [grillage/annulation]).
Maintien au chaud automatique
Abaisse de nouveau les aliments
automatiquement Iorsqu'ils sont restes dans
le grille-pain pendant un certain temps et les
garde au chaud. Si necessaire, il fait
fonctionner 2 fois le programme de maintien
au chaud automatique.
Bouton de grillage/annulation
Annule le grillage ou le programme de
maintien au chaud et abaisse les aliments
trop legers pour 6tre automatiquement
abaisses dans le grille-pain. (Pour les
aliments de moins de 25 g [1 oz]).
Bouton de d6cong61ation
Decongele et fait griller les aliments
surgeles.
Bouton de r6chauffage
Rechauffe rapidement les aliments
prec6demment grilles en moins
d'une minute.
17

UTILISATION DU GRILLE-PAIN KITCHENAID ®
Modbles KMT233 et KMT433
Avant d'utiliser le grille-pain, inspecter les
fentes extra larges et retirer tout emballage
ou document imprime pouvant _tre tombe
I'interieur Iors de I'expedition ou de la
manipulation. Ne pas inserer d'objet
metallique dans le grille-pain.
Vous verrez peut-_tre une legere fumee Iors
de la premiere utilisation du grille-pain. Ceci
est normal, et la fumee disparaitra
rapidement.
UTILISATION :
1, Raccourcir le cordon si necessaire en
I'enroulant sous le socle. Les pieds du
grille-pain sont suffisamment grands
pour permettre de sortir le cordon sous
n'importe quel c6te du grille-pain.
Risque de choc _lectrique
Brancher sur une prise _ 3 alv_oles
relJ_e _ la terre.
hie pas enlever la broche de liaison
la terre.
hie pas utiJiser un adaptateur.
hie pas utiliser un c_ble de
rallonge.
Le non-respect de ces instructions
peut causer un d_c_s, un incendie
ou un choc _lectrique.
2.
3.
4.
Brancher I'appareil dans une prise
3 alveoles reliee a la terre.
Les boutons de fonction speciaux et
I'affichage numerique de grillage sur le
bouton de temperature s'allument. Si
I'on n'appuie sur aucun bouton pendant
10 minutes, I'affichage numerique
s'eteint.
Inserer du pain ou un autre aliment
faire griller dans la fente.
Pour un brunissement uniforme sur le
modele KMT233, ne faire griller qu'un
seul type de pain de m_me epaisseur
la fois. Sur le modele & 4 fentes KMT433
avec les doubles commandes
independantes, si I'on souhaite faire
griller deux pains differents, veiller & ne
faire griller qu'un seul type de pain dans
chaque paire de fentes.
Les grilles auto-centrables ajusteront
automatiquement la largeur des fentes
pour que les aliments soient bien droits
et grillent de fagon uniforme.
18

5=
6=
Le grille-pain detecte automatiquement
I'aliment (evalue son poids), I'abaisse
dans le grille-pain et commence le
grillage.
REMARQUE • Si le poids de I'aliment
n'est pas suffisamment 61evepour
activer le detecteur, (25 g [1 oz]),
appuyer sur TOAST/CANCEL (grillage/
annulation) pour abaisser les aliments.
Tourner le bouton de temperature pour
selectionner le degre de brunissement
souhaite. Tourner le bouton vers la
droite pour un toast plus fonce et vers la
gauche pour un brunissement plus clair.
L'affichage numerique indique le degre
de brunissement, de 1 (clair) a 7 (fonce).
REMARQUE • Differents types de pain
et leurs degres d'humidite respectifs
peuvent exiger differents reglages de
brunissement. Par exemple, du pain sec
grillera plus rapidement que du pain
frais et exigera un reglage plus faible.
7. (Facultatif) Appuyer sur le bouton de la
fonction speciale de brunissement
souhaitee. Consulter la section
,<Utilisation des fonctions speciales de
brunissement- pour en savoir plus.
8. Une fois le grillage termine, un signal de
fin de programme retentit, legrille-pain
s'arr6te et fait remonter les aliments
grilles.
9. Si I'aliment grille n'est pas retire apr_s
un certain temps, le grille-pain abaisse
de nouveau I'aliment automatiquement
et le garde au chaud avant de le
soulever & nouveau. Si necessaire, il fera
fonctionner 2 fois le programme de
maintien au chaud automatique.
10. Pour annuler le grillage & tout moment,
appuyer sur TOAST/CANCEL (grillage/
annulation). Le grille-pain s'arr6te et les
aliments grilles sont souleves.
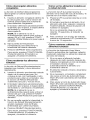
Avant d'inserer le pain ou tout autre aliment
dans la fente, on peut selectionner les
fonctions de grillage speciales en appuyant
sur le bouton adequat. Les temoins
lumineux de fonctions indiquent la fonction
selectionn6e. Une fois le programme
termin6, toutes les fonctions s'effaceront.
REMARQUE • Les fonctions Bagel, Defrost
(d6congelation) et Reheat (rechauffage) ne
peuvent pas 6tre utilisees ensemble.
Brunissement de bagel
La selection de la fonction Bagel permet de
faire griller les bagels et muffins anglais les
plus epais de fagon uniforme, en rechauffant
doucement la partie inferieure et en grillant
les c6tes tranches. Le brunissement des
bagels produit des resultats parfaits en
coupant I'alimentation des el6ments
chauffants d'un c6te de la cavite a griller.
1=
2,
Inserer le bagel de fagon & ce que le
c6te plat (tranche) du bagel soit face au
centre du grille-pain.
Le grille-pain detecte automatiquement le
bagel (evalue son poids), I'abaisse dans
le grille-pain et commence le grillage.
REMARQUE • Si le poids de I'aliment
n'est pas suffisamment elev6 pour
activer le detecteur, (25 g [1 oz]),
appuyer sur TOAST/CANCEL (grillage/
annulation) pour abaisser les aliments.
3. Regler le bouton de temperature pour
selectionner le degre de brunissement
souhaite. Les muffins anglais mettront
g6neralement plus de temps a griller
que les bagels.
4. Appuyer sur BAGEL.
Pour annuler, appuyer sur TOAST/
CANCEL (grillage/annulation). Le grille-
pain s'arr6tera et les aliments seront
releves.
19

Pour d_congeler des aliments
surgel_s
La fonction de decong61ation permet de
decongeler et de faire griller rapidement des
aliments.
1=
2=
3=
4=
Inserer I'aliment surgele dans la fente &
pain. Utiliser cette fonction uniquement
pour les aliments surgeles.
Le grille-pain detecte automatiquement
I'aliment (evalue son poids), I'abaisse
dans le grille-pain et commence la
d6congelation.
REMARQUE • Si le poids de I'aliment
n'est pas suffisamment elev6 pour
activer le detecteur, (25 g [1 oz]),
appuyer sur TOAST/CANCEL (grillage/
annulation) pour abaisser les aliments.
Regler le bouton de temperature pour
selectionner le degre de brunissement
souhait&
Appuyer sur DEFROST (d6congelation).
Pour annuler, appuyer sur TOAST/
CANCEL (grillage/annulation). Le grille-
pain s'arr_tera et les aliments seront
releves.
Pour r6chauffer des aliments grill6s
La fonction de rechauffage permet de
rechauffer des toasts et autres aliments
rapidement.
1. Inserer I'aliment prec6demment grille
dans la fente & pain. Ne pas placer de
pain beurre ou garni dans le grille-pain.
Utiliser la fonction Reheat (rechauffage)
uniquement pour le pain et les bagels
secs.
2=
Le grille-pain detecte automatiquement
I'aliment (evalue son poids), I'abaisse
dans le grille-pain et commence le
rechauffage.
REMARQUE • Si le poids de I'aliment
n'est pas suffisamment elev6 pour
activer le detecteur, (environ 25 g [1 oz]),
appuyer sur TOAST/CANCEL (grillage/
annulation) pour abaisser les aliments.
3. Aucun reglage du degre de
brunissement n'est necessaire - la
fonction de rechauffage remplace le
degre selectionn&
4. Appuyer sur REHEAT (rechauffage).
Pour annuler, appuyer sur TOAST/
CANCEL (grillage/annulation). Le grille-
pain s'arr_tera et les aliments seront
releves.
20
Pour voir les aliments grill_s & mi-
programme
La fonction de soulevement souleve les
aliments au milieu du programme de grillage
et permet 6 I'utilisateur de voir si les
aliments sont pr_ts.
1. Appuyer sur LIFT(soulevement) pendant
un programme de grillage.
2. Le grille-pain souleve les aliments. Si les
aliments sont pr_ts, retirer les aliments
ou appuyer sur TOAST/CANCEL
(grillage/annulation). Le grille-pain
s'eteint.
3=
Si I'on ne fait rien pendant 15 secondes,
le grille-pain s'eteint.
Pour poursuivre le programme de
grillage, appuyer de nouveau sur LIFT
(soulevement) dans les 15 secondes qui
suivent.
Pour garder les aliments grill_s au
chaud
La fonction de maintien au chaud
automatique garde les aliments au chaud
apres un programme de grillage.
1. Si I'aliment grille n'est pas retire apres
un certain temps une fois le programme
de grillage termine, le grille-pain abaisse
de nouveau I'aliment automatiquement
et le maintient au chaud.
2. Le toast est de nouveau soulev&
3. Si necessaire, le grille-pain fait
fonctionner 2 fois le programme de
maintien au chaud automatique.
4. Pour annuler le programme de maintien
au chaud automatique, appuyer sur
TOAST/CANCEL (grillage/annulation).
Le grille-pain s'arr_tera et les aliments
seront releves.
La page charge ...
La page charge ...
La page charge ...
La page charge ...
La page charge ...
La page charge ...
La page charge ...
La page charge ...
La page charge ...
La page charge ...
La page charge ...
La page charge ...
La page charge ...
La page charge ...
La page charge ...
La page charge ...
-
 1
1
-
 2
2
-
 3
3
-
 4
4
-
 5
5
-
 6
6
-
 7
7
-
 8
8
-
 9
9
-
 10
10
-
 11
11
-
 12
12
-
 13
13
-
 14
14
-
 15
15
-
 16
16
-
 17
17
-
 18
18
-
 19
19
-
 20
20
-
 21
21
-
 22
22
-
 23
23
-
 24
24
-
 25
25
-
 26
26
-
 27
27
-
 28
28
-
 29
29
-
 30
30
-
 31
31
-
 32
32
-
 33
33
-
 34
34
-
 35
35
-
 36
36


KitchenAid KMT233ME0 Le manuel du propriétaire
- Catégorie
- Grille-pain
- Taper
- Le manuel du propriétaire
dans d''autres langues
Documents connexes
-
KitchenAid KMT223OB0 Le manuel du propriétaire
-
KitchenAid 4-Slice with One-Touch Lift/Lower and Digital Display Manuel utilisateur
-
-
KitchenAid KMT3115BM Mode d'emploi
-
KitchenAid KMT4116OB Manuel utilisateur
-
-
-
KitchenAid KMT4115CU Manuel utilisateur
-
KitchenAid KMT2115 Manuel utilisateur
-